Blog

  • Review: Interfit Honey Badger Studio Strobe and Universal Remote

    Right now is a great time to be a studio photographer. Never before has there been such a multitude of options available to you in terms of photographic lighting. It seems that the recent surge in new photographers has lit a fire in the industries that create photographic gear. Lighting is a sector that has seen a huge influx of new options and new innovations.

    Interfit has been one of those companies that constantly add to the mix for a while now. Not only do they make affordable studio strobes and continuous lights, they also make a ton of lighting modifiers and an indescribable amount of other studio accessories. If you need something for your studio, chances are that Interfit makes it.

    Review: Interfit Honey Badger and Interfit Universal Remote

    Stylish design is usually absent from studio lighting, but the Interfit Honey Badger aims to remedy that.

    The newest light in Interfit’s range is the Honey Badger. A small, mid-powered studio strobe that fits into the low-middle pricing range. the light itself is in a stylish, bright yellow casing which adds a bit of a flourish to the monolight (the sort of product which is usually lacking in any sort of aesthetic design). I had chance to spend some time with and review the Honey Badger as well as the Interfit Universal Remote. Here are my thoughts.

    amzn_assoc_tracking_id = “dpsgeneral-20”;
    amzn_assoc_ad_mode = “manual”;
    amzn_assoc_ad_type = “smart”;
    amzn_assoc_marketplace = “amazon”;
    amzn_assoc_region = “US”;
    amzn_assoc_design = “enhanced_links”;
    amzn_assoc_asins = “B075GVFXR7”;
    amzn_assoc_placement = “adunit”;
    amzn_assoc_linkid = “e644907a41a59013d380e1b2156daf51”;

    What Exactly is a Honey Badger?

    If you’re not familiar with the light’s namesake, a honey badger is a medium-sized mammal found in Africa and Asia. At first glance, they’re adorable. However, honey badgers are infamous for being unstoppable murder machines that maim, mutilate and maul everything in their path. You’ll often find them near the top of lists of the world’s most dangerous animals.

    Knowing that you can probably figure out what Interfit are going for with their branding. You have a small, stylish light that’s cute to look at, but packs a punch when set loose in the studio.

    So did they achieve that? The short answer is – yes, quite well.

    The Strobe

    As per the Interfit website, the specifications for the Honey Badger are as follows:

    Review: Interfit Honey Badger and Interfit Universal Remote

    The biggest takeaways here are the seven stops of power range up to 320ws (which is pretty decent for a strobe in this price range), the S-mount, and the built-in receiver.

    No HSS or TTL

    Before I get into anything else, let’s address the elephant in the room. Announcements of new studio strobes these days always seem to include the wonderful features of High-Speed Sync (HSS) and Through the Lens metering (TTL), both relatively new features in the world of studio strobes as they have been previously limited to flashguns (speedlights). The Honey Badger does not have these features. Then again, its price point reflects their absence.

    Price

    The Honey Badger sells in the US for $ 299.99 and the UK for £259.99, putting it squarely in the low-middle range of the market. For this price range, it packs a decent punch and pulls its weight easily.

    The Interfit Universal Remote is sold separately at a more than reasonable $ 79.99 USD and £39.99 UK.

    Built-in Receiver

    What the Honey Badger does include, which surprised me a little, is a built-in receiver. This means that you can fire the strobe with a transmitter on your camera without having to worry about extra receivers, errant sync cables, and dead batteries. Interfit sells a Universal Manual Remote (covered by this review) that works with the Honey Badger and a selection of other Interfit lights.

    Power

    Review: Interfit Honey Badger and Interfit Universal Remote

    While 320ws is a long way from the power output you can get from some strobes, it is more than enough in most everyday situations. As long as you bring your lights in close to your subject like I do, you should have no problem obtaining apertures of f/8 and f/11 for portraits and f/16 and beyond for tabletop set-ups.

    If you’re working out of a home studio or another small space, the power output of the Honey Badger is likely going to be enough for you.

    Size

    Review: Interfit Honey Badger and Interfit Universal Remote

    As far as strobes go, the Honey Badger is quite small and highly portable.

    The size of the Honey Badger was far more noticeable than the color when I first took it out of the box. This light is small. For comparison, above is a photo of it next to a Bowens light with similar specifications and a Canon 580 EX II Speedlite.

    I can speculate on both the advantages and the disadvantages of the size of the Honey Badger.

    I have no way of testing it, but I imagine that fitting three or four of these lights into a carry-on sized Pelican case would be pretty easy. If you’re a traveling photographer, being able to easily transport that many studio strobes might be a huge bonus.

    When I attached one of my own modifiers, a large Interfit Strip-box, the small size of the strobe and the narrowness of the strip-box allowed me to point the light straight down. This isn’t usually possible without a boom arm and it got me pretty excited about the possibilities. (That said, one of the kits that Interfit offer with the Honey Badger includes a stand with a boom arm.)

    Review: Interfit Honey Badger and Interfit Universal Remote

    The shape of the Honey Badger may allow you more configurations with some modifiers.

    On the other hand, we live in a world where appearances matter. Between the size and the color, the Honey Badger does look a little bit like a toy. Throughout the rest of this review, I will try to assure you that the Honey Badger does perform well, but if you have clients that like to see big productions with big lights everywhere, they may be less than impressed.

    The Softbox

    Review: Interfit Honey Badger and Interfit Universal Remote

    The Honey Badger kit I tested included a 24” popup softbox. It’s a small softbox; I can’t say much more than that about it. In fact, it’s identical to a Neewer branded one that I bought a few months ago for use with my speedlights. The only difference is the Interfit branding. It is of good quality, fits snugly on the Honey Badger and has no apparent effect on the color temperature of the light that passes through it.

    If your intent is to shoot portraits, especially in a fixed studio environment, you’re going to want a bigger light modifier. The softbox is useful and you will be able to get results from it, but you will want to find something much larger.

    If you purchase this kit, be forewarned. The softbox comes in a pouch much smaller than its actual size. When it comes out of that bag, it opens itself with quite a lot of force. Don’t do what I did and please, please hold it away from your face.

    S-Mount

    Review: Interfit Honey Badger and Interfit Universal Remote

    With a Bowens S-mount, the Honey Badger gives you access to a vast range of modifiers.

    The fact that the Honey Badger has a Bowens S-Mount on it is a major advantage in my opinion. There is a vast range of modifiers available that fit the S-mount, ranging from cheap imports to high quality, but far more pricey, proprietary modifiers from brands like Interfit and Bowens. I may be a bit biased as I am a Bowens user, but if I were to invest in the Honey Badger system, that S-mount would make my life so much easier.

    As an aside, Bowens has gone out of business. That doesn’t mean you should forsake the S-mount. As mentioned, there are hundreds of products and dozens of other lighting systems that use the S-mount. Bowens might be going, but modifiers that fit the S-mount are going to be around for a long while yet.

    White Balance

    The Honey Badger has a color temperature of 5600k. This means it’s a touch warmer than the flash White Balance setting in Lightroom. If you like warmer tones in your images, this is not a problem. However, if you would prefer a more neutral look, remember that you will need to dial your White Balance back a hundred degrees. Bear in mind, if you’re using cheaper modifiers, they tend to have a significant effect on your color temperature which renders this point moot anyway.

    Diffusion Dome

    Review: Interfit Honey Badger and Interfit Universal Remote

    The frosted diffusion dome covering the flashbulb gives an extra layer of diffusion behind your modifier.

    Unlike most strobes, the Honey Badger has a frosted dome over the flashbulb. This adds a tiny amount of diffusion to the bare bulb. In most cases, you’re never going to want to shoot with a bare strobe, but I tried it anyway. The light is as hard as you would expect, but it is possible to use it to creative effect.

    Modeling light

    When I first turned the Honey Badger on, I didn’t expect an LED modeling light. This is a plus as it means that your subjects aren’t going to boil under hot lights. In fact, I used the Honey Badger nearly constantly in four studio sessions and it never even got warm, never mind overheating.

    The Interfit Universal Remote

    Review: Interfit Honey Badger and Interfit Universal Remote

    The Interfit Universal Remote allows you to control the Honey Badger (and other Interfit strobes) from the top of your camera.

    I will admit that using the Universal Remote to control the Honey Badger from the top of the camera is an absolute pleasure. I tend to work in confined spaces anyway, but not having to actually walk to the light to change the power output was fantastic. The remote is easy to use as well, and all the functions are labelled clearly. When I’m next in the market for new strobes, this remote may very well play into my considerations. I imagine a scenario where I don’t have to dodge behind a subject to the back of a studio to change the power output on a pair of rim lights. I can dream right?!

    That said, the remote was the only problem I had while testing the Honey Badger. For the first 20 minutes or so, I couldn’t figure out why the modeling light was turning itself off. I was convinced there was a problem with the light itself, but it turns out that for whatever reason, on the unit I tested, the modeling light shuts off any time you change the power output via the Universal Remote. I don’t know why this would be and I am unaware if it was a problem isolated to the unit I used, but it did not do the same when you change the power output on the actual strobe.

    With a price tag of $ 79.99 USD (£39.99), if you are interested in the Honey Badger, or other Interfit lights, this remote is a no brainer.

    The Test

    For the first test, I set up the Honey Badger straight out of the box with everything included (24” softbox and the Universal Remote). I had the whole thing set up in no time and once the batteries went into the remote, all the channel settings were sorted out in seconds. (It really is that easy.)

    Pop-up Softbox

    Review: Interfit Honey Badger and Interfit Universal Remote

    To start with, I placed the light at 45 degrees in a basic Rembrandt setup. Because the softbox is so small, I brought it in really close to the subject (about a foot away).

    Review: Interfit Honey Badger and Interfit Universal Remote

    Review: Interfit Honey Badger and Interfit Universal Remote

    From here, I moved the soft box away a short and distance and further to the subject’s left. I wanted to take advantage of the harder light from the smaller softbox and try to create some images with deep, defined shadows.

    Review: Interfit Honey Badger and Interfit Universal Remote

    Strip-Box

    Review: Interfit Honey Badger and Interfit Universal Remote

    I happen to own a large Interfit strip softbox (which I adore), so that was the next modifier to go on the Honey Badger. At first, I was overcome with glee as I realized I could point it straight down thanks to the Honey Badger’s small size; however, I chose not to keep it that way as it’s not the most flattering light for human subjects.

    Instead, I put it straight in front of my subject, slightly above and pointed straight at her nose for a basic butterfly lighting set-up.

    Review: Interfit Honey Badger and Interfit Universal Remote

    Review: Interfit Honey Badger and Interfit Universal Remote

    Bare-bulb

    Review: Interfit Honey Badger and Interfit Universal Remote

    As mentioned, I felt inclined to see what the light from Honey Badger looked like as a bare bulb. The diffusion dome got the better of my curiosity. In my opinion, it’s perfectly usable. You won’t want to use it a lot, however, but the hard light might suit some high fashion portraits quite well.

    Review: Interfit Honey Badger and Interfit Universal Remote


    7’ Parabolic Umbrella with Diffusion

    Review: Interfit Honey Badger and Interfit Universal Remote

    This is where I started to see some possible limitations with the Honey Badger. I wanted to see if the Honey Badger could cope with a giant parabolic umbrella. The answer is yes, but not without extra pieces of equipment. The light itself does have a hole for an umbrella, but I wasn’t willing to see if it would hold that much weight. Instead, I placed a Bowens umbrella reflector on it and attached the modifier.

    Because the light is so small, I had to bring the umbrella really close to the light before it would support the umbrella’s weight. With the light so close to the umbrella, it was not able to use the full surface area of the modifier. The 7’ umbrella effectively became a 4.5’ umbrella. This is not the end of the world, but it was annoying. There are plenty of options for umbrella holders and mounts on the market that would solve this problem, I just don’t happen to own any of them.

    Review: Interfit Honey Badger and Interfit Universal Remote

    Beauty Dish with Grid & Diffusion Sock

    The final variation I tried was using a 24″ beauty dish with both a grid and a diffusion sock. For this setup, the light was placed about 10 feet in front of the subject for a harder light and to reduce the speed of the light fall off so that more light hit the background.

    Extra images

    Below are other photos taken using the Interfit Honey Badger and the included pop-up softbox.


    Pros and Cons

    Having used it for a while, I can tell you that the Honey Badger has more pros than it does cons (and a few of the cons are hyperbolic).

    Pros of the Honey Badger

    • Reasonably priced
    • Small
    • Reasonably powered
    • Bright LED modeling light
    • Bowens S-mount
    • Fast recycling times (I never had to wait for it)
    • Built-in receiver
    • The Universal Remote works like a charm
    • Doesn’t overheat easily
    • Good build quality
    • Stylish in appearance

    Cons

    • The light might be too small in some situations
    • 24” softbox is too small for many studio situations, albeit perfectly functional
    • Modeling light turns itself off (on the unit I tested) when the power is adjusted via the Universal Remote
    • No HSS or TTL
    • May have issues supporting the weight of large modifiers like an 8’ Octabox

    Overall

    In the end, I enjoyed using the Honey Badger. It is a good quality, competent light that would suit any photographer working a studio environment, especially for those setting up a home studio. The Universal Remote really adds to the experience as well, making power adjustments from the top of the camera a breeze.

    amzn_assoc_tracking_id = “dpsgeneral-20”;
    amzn_assoc_ad_mode = “manual”;
    amzn_assoc_ad_type = “smart”;
    amzn_assoc_marketplace = “amazon”;
    amzn_assoc_region = “US”;
    amzn_assoc_design = “enhanced_links”;
    amzn_assoc_asins = “B075GVFXR7”;
    amzn_assoc_placement = “adunit”;
    amzn_assoc_linkid = “e644907a41a59013d380e1b2156daf51”;

    If you’re looking for HSS or TTL functionality, or a light with a self-contained battery, no, the Honey Badger is not for you. For anything else, the Honey Badger is absolutely worth your consideration.

    Disclaimer: Interfit provided the product on loan to our dPS author so he could test and do this review. However, all reviews on dPS are 100% the author’s unbiased opinion. 

    The post Review: Interfit Honey Badger Studio Strobe and Universal Remote by John McIntire appeared first on Digital Photography School.


    Digital Photography School

  • The Yashica Y35 digiFilm camera raised over $1.25M in crowdfunding

    Despite a decidedly lukewarm reception in our community—and much mockery from the pro and semi-pro photographers out there—the Yashica Y35 camera and its digital ‘film’ cartridges has become an Internet sensation, raising many, many times more than the required funding to make it to market.

    The company’s Kickstarter campaign was backed by 6,935 funders who together contributed HK$ 10,035,296 (about US$ 1.286M). And now, in case you missed the Kickstarter round, Yashica has put the Y35 on Indiegogo as well, to ensure that the project not only goes ahead, but that it comes with a few upgrades too.

    In case you’re not familiar, the Yashica Y35 digiFilm project aimed to create a digital camera that acts more like a film camera—complete with film winder and ‘film’ cartridges with different ISO ratings and alternative image characteristics. While many found this idea silly on the face of it, thousands more disagreed and poured their money into Yashica’s crowdfunding campaign, allowing the company to upgrade the camera’s specs a little bit.

    Originally, the Y35 was intended to feature a 1/3.2in sensor, but that has been upgraded to a 1/ 2.5in sensor (still with the original 14MP pixel-count). The 35mm lens has also had a positive change in specification, going from f/2.8 to a four-element f/2.0 lens with a wider diameter and what the company promises is better image quality.

    There is a gallery of sample shots captured with a pre-production version of the Y35 camera—with its bigger sensor and faster lens—on the Kickstarter and Indiegogo pages if you’re curious. As for the production model, the camera is due to be delivered to crowdfunding backers in May of 2018.

    Articles: Digital Photography Review (dpreview.com)

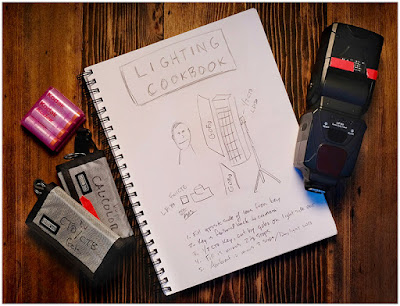
  • Strobist Lighting Cookbook

    Introducing the Strobist Lighting Cookbook. Read more »
    Strobist

  • Photographer sues Bruno Mars for posting childhood photo of himself on Instagram

    Photo by Brothers Le, CC-BY-2.0

    Singer Bruno Mars recently shared a childhood photo of himself from 1989, and now the photographer behind the photo, Catherine McGann, is suing him for copyright infringement. The image was shared by Mars back in June on Instagram, Twitter, and Facebook, amassing more than a million ‘likes’ and thousands of comments.

    As of this writing, it’s still live on the pop star’s Instagram account:

    A post shared by Bruno Mars (@brunomars) on

    The lawsuit, which was first surfaced via TMZ, is being leveled against both Mars and record label Warner Music. According to McGann, Mars never asked for permission to share the image on his social media accounts, and the lawsuit seeks any and all profits made from the image’s use, plus damages.

    A look at McGann’s Instagram page shows that she posted a version of the image with a copyright notice on November 3rd, 2016.

    Articles: Digital Photography Review (dpreview.com)

  • Sony a7R III ties Nikon D850: Best mirrorless full-frame camera DxOMark has ever tested

    DxOMark has just published their review of the Sony a7RIII’s sensor, and no surprises here: it ties the Nikon D850 as the best full-frame camera they’ve ever tested with a score of 100. This also makes it the best mirrorless full-frame camera DxOMark has ever tested, besting the former king, the Sony a7R II, which scored a 98.

    From the moment Sony debuted the a7R III, it became clear there was only one competitor for this mirrorless beast: The Nikon D850. And as DxO makes clear in their review headline, the D850 has now met “its mirrorless match.” In fact, it would be a stretch to call one of the cameras better overall than the other. Here’s how their scores break down:

    As DxOMark makes clear in its conclusion, which camera you prefer (or should prefer) has to do with your own use case:

    Comparing the A7R III sensor to the Nikon D850’s reveals the advantage that the Nikon camera’s lower minimum sensitivity (ISO) value brings. Photographers who predominantly shoot in bright light or capture motionless subjects with the camera on a tripod will record the most information, be it color, tone, or detail with the Nikon D850 set to ISO 32. However, if they require values above that, the Sony A7R III sensor produces marginally better images.

    By now it should be obvious why the Sony a7RIII tied with the Nikon D850 for our best camera above $ 2,000: it’s next to impossible to pick one over the other unless you have a specific use case in mind. Check out DxOMark’s full review for a deeper dive on this particular camera sensor, and if you want even more you can read our full review as well.

    Articles: Digital Photography Review (dpreview.com)

  • OnePlus 5T first impressions review

    The brand new OnePlus 5T is the Chinese manufacturer’s latest flagship model. Like its predecessors, offers high-end specifications, materials and design at a price point that is noticeably lower than the more established competition.

    The 5T is in most respects pretty much identical to its predecessor, the OnePlus 5. However, there are two important changes: the AMOLED display now comes with an 18:9 aspect ratio, covering the entire front of the device, and the dual-camera has done away with the tele-module and replaced it with a secondary sensor that has been optimized for low light performance.

    The camera switches to this sensor when light levels drop below 10 Lux and merges four pixels into one for improved image quality. Despite the lack of a tele lens, OnePlus says the new dual-camera setup offers a similar zoom performance to the OnePlus.

    We’ve had the OnePlus 5T in our hands for a few days now and used its camera in a wide range of light conditions. Here are our first impressions.

    Key specifications:

    • Dual-camera
    • Main camera: Sony IMX 398 1/2.8″ 16MP sensor, F1.7,
    • Secondary camera: Sony IMX 376K 1/2.78″ 20MP sensor, F1.7
    • 27.22mm equivalent focal length
    • Dual-LED flash
    • 4K video at 30 fps
    • 720p slow-motion at 120 fps
    • Manual mode and Raw capture
    • 16MP / F2.0 front camera
    • 6″ 1080p AMOLED display, 18:9 aspect ratio
    • Qualcomm Snapdragon 835 chipset
    • 64/128GB storage, 6/8GB RAM
    • 3,300 mAh battery

    Image quality

    In bright light the 5T captures images with pleasant colors. Auto HDR kicks in for high-contrast scenes, ensuring decent dynamic range and good highlight detail. Lens sharpness is good across the frame but if you zoom in to a 100% view, low-contrast detail, such as distant foliage or other fine textures, can look a little mushy. There’s also more luminance noise in the sky than we would like at base ISO.

    ISO 125, 1/490 sec

    When shooting against the light the 5T occasionally captures slightly too dark exposures to protect the highlights, but despite some shadow noise the shot below looks quite pleasant. Occasionally low-contrast detail in the shadows can be very mushy, though.

    ISO 250, 1/1525 sec

    The 5T camera deals much better with higher-contrast scenes, even when overall light levels are lower. The shot below was captured at ISO 640 indoors and shows very good edge definition. There is some luminance noise but it is very finely grained and not too intrusive. Overall detail is still good, despite shooting in low light.

    ISO 640, 1/50 sec

    Noise reduction and smearing of fine detail are more noticeable in this ISO 1000 shot but overall detail is still good considering the light conditions. However, skin tones on the subject are a little warm and just a touch underexposed. It appears the camera was aiming to protect highlights in the brighter background. Overall, the 5T does pretty well in this scene, though.

    ISO 1000, 1/33 sec

    Detail becomes noticeably softer in night shots, as the one below, but exposure is very good and noise well controlled. The OnePlus 5T tends to do a good job in static night scenes.

    ISO 3200, 1/17 sec

    The camera app doesn’t tell you when it switches to the more low-light efficient secondary sensor with its ‘Intelligent Pixel Technology’. But a look at the EXIF data reveals that images taken in very low light have a 20MP resolution, as opposed to the 16MP of the main camera. This also indicates that, if there is some pixel-binning going on, the images are then upscaled to full sensor resolution again.

    Looking at the two samples below, the mode is capable of achieving good exposure and color in low light situations. However, level of detail is very low and images have an almost pixelated appearance when viewed at a 100% magnification.

    We have also noticed that two images taken in quick succession can look quite different in terms of both exposure and detail rendition. If you click through to the full-size versions of the samples below you’ll see that the image on the left is pretty grainy, while the one on the right has an almost water-color like smeared look. The levels of detail are equally low on both images, though.

    ISO 2000, 1/20 sec ISO 5000, 1/17 sec

    Zoom

    OnePlus says that, despite the omission of a dedicated tele camera, the 5T’s 2x zoom produces similar image quality to the OnePlus 5. Looking at the sample scene below, this is true. Viewed at a 100% magnification the 2x zoom image shows noticeably lower levels of detail than the standard image, but the tele-lens on the OnePlus 5 did not produce much better results. Zoom images are not ideal for display at larger sizes but look nice at typical social media or web use resolution.

    ISO 250, 1/553 sec
    ISO 160, 1/504 sec

    The same is true for zoom images captured in low light. The 2x zoom image below was taken in a dimly lit club. Fine detail is not great but the shot is perfectly usable at web size and the zoom function allowed me to get the framing I wanted, even when shooting from the back of the crowd.

    ISO 1600, 1/20 sec

    Bokeh

    OnePlus says the 5T’s bokeh mode has been improved over the version used by its predecessor and our initial tests confirm that. There are still some minor artifacts around foreground subjects but overall subject separation from the background is pretty good, even in lower light and with human subjects.

    In addition, the amount blur applied to the background is not too strong, resulting in a fairly natural bokeh rendition.

    ISO 320, 1/464 sec, Depth mode

    Video

    We also shot a few videos with the OnePlus 5T and the results are pretty good, with decent detail, nice color and good exposure. Stabilization is pretty good when hand-holding the camera, but things get a little shaky while panning, as you can see in the clip below.

    The video mode delivers decent image quality in this artificially lit indoor shot. Video stabilization keeps things nice and steady during handheld recording.

    You can also record video using the 2x zoom settings. The results in the low light clip below aren’t quite broadcast quality but definitely usable, with good stabilization.

    Conclusion

    With its new 18:9 display and powerful processing components the OnePlus 5T is a great smartphone in general use. However, there’s a lot to like about its camera as well. Images show good exposure and color across all light levels, the bokeh mode captures images that look more natural than on many competitors and the zoom function produces usable results, even in very low light.

    Like on the 5T’s predecessor, pixel level image quality is a bit of a weakness, though. The Auto HDR function produces some ghosting artifacts and mushy textures, and we also found more luminance noise in base ISO images than we’d like to see.

    Low light image quality is decent but not up with the very best, and with the current software version OnePlus’ ‘Intelligent Pixel Technology’ doesn’t really offer any noticeable low light benefits over a fine-tuned conventional camera.

    That said, OnePlus is known as a manufacturer that is frequently pushing software updates and improving the performance of its products. If the engineers are able to fine-tune image processing and video stabilization a touch more, the OnePlus could easily jump up a few spots in the smartphone image quality rankings.

    Sample Gallery

    There are 10 images in our OnePlus 5T samples gallery. Please do not reproduce any of these images on a website or any newsletter / magazine without prior permission (see our copyright page). We make the originals available for private users to download to their own machines for personal examination or printing (in conjunction with this review), we do so in good faith, please don’t abuse it.

    Unless otherwise noted images taken with no particular settings at full resolution.

    $ (document).ready(function() { SampleGalleryV2({“containerId”:”embeddedSampleGallery_6913569890″,”galleryId”:”6913569890″,”isEmbeddedWidget”:true,”standalone”:false,”selectedImageIndex”:0,”startInCommentsView”:false,”isMobile”:false}) });

    You can also still have a look at our OnePlus 5 review gallery from June.

    $ (document).ready(function() { SampleGalleryV2({“containerId”:”embeddedSampleGallery_6343385400″,”galleryId”:”6343385400″,”isEmbeddedWidget”:true,”standalone”:false,”selectedImageIndex”:0,”startInCommentsView”:false,”isMobile”:false}) });
    Articles: Digital Photography Review (dpreview.com)

  • How to Apply Creativity to Your Images with Texture Overlays Using Luminar

    How to Apply Creativity to Your Images with Texture Overlays Using Luminar

    Layers of fun

    One advantage that Luminar has over the average Raw processor is the ability to work with Layers. “What is a layer?” I hear you ask.

    Well, your basic image is a single layer, like a sheet of paper on a table. Adding another layer is akin to adding another sheet of paper on top. With layers, you get the benefit of being able to control the layer opacity (the transparency effectively) as well as what parts of the layer are shown – a bit like choosing tracing paper or cutting holes out of the paper.

    How to Apply Creativity to Your Images with Texture Overlays Using Luminar

    Think of layers like a stack of paper. By cutting out parts of the sheet you can see the one below, or like with tracing paper, you can see through to the layer before.

    Originally you’d need to erase the bits of the layer you didn’t want showing, which could be messy if you made a mistake erasing. These days you’d use a layer mask instead. A layer mask is a greyscale map running from white, where everything is visible, to black, where everything on the layer is hidden. Varying shades of gray indicate how visible a part of the layer is or the mask opacity. Lighter is more visible.

    There’s a mantra I learned many years ago that helps you remember. “White reveals, and black conceals”.

    The beauty of Luminar (by Macphun, soon to be Skylum) is that it hides some of the mechanics of this because rather than painting in black or white, you have a brush that either paints in, or erases the mask. It’s really great!

    When you have a few layers together, the combined set of layers is called the layer stack. Working in layers allows you to apply effects to only certain parts of your photo, or to combine more than one photo into a more interesting composition.

    Beginning

    Let’s open Luminar and choose a photo. Click Open Image to begin.

    How to Apply Creativity to Your Images with Texture Overlays Using Luminar

    Luminar opening screen.

    Navigate to your photo and select it. This process will be easier when the new DAM (Digital Asset Management) module for Luminar 2018 comes next year. I’m going to work with this shot of an old cottage.

    How to Apply Creativity to Your Images with Texture Overlays Using Luminar

    Original image.

    Making a Layer

    Luminar provides a few options for creating new layers. In the right panel, you have the Layers panel. To make a new layer, click the + icon in the panel header and select one of the following options:

    How to Apply Creativity to Your Images with Texture Overlays Using Luminar

    Layers: click the plus symbol to make a new layer.

    • New Adjustment layer; which creates a layer that contains only the filters that you add.
    • Create Stamped Visible Layer; which copies the results of all the underlying layers (combining them) to a new flattened layer.
    • New Original Layer; which copies the base layer on top of the currently selected layer.
    • Add New Image Layer; which allows you to add any other image to the layer stack. This is the one that allows you to add texture and other files!

    Add a texture file

    Luminar doesn’t store textures, but you can use any texture file you like. Personally, I keep my favorite textures in a folder on Dropbox for easy access from anywhere, but you can use any cloud service you like for this.

    From the Layer options, choose Add New Image Layer and navigate to your textures folder. Choose the texture you want to add to the current photo. Viola. It’s loaded.

    How to Apply Creativity to Your Images with Texture Overlays Using Luminar

    Texture image.

    Now obviously the texture file will load over your original image. This is fine, you’ll fix this shortly. But first, you should check that the file fits how you like. By default, Luminar will make it fit over the layer below, but you’re not stuck with it.

    You have three options in the Layers menu for this. Right-click on the layer and from the Image Mapping option in the menu, choose from Fill, Scale to Fit, or Fit (as seen below). If you don’t like how these look, you have another option:  the Transform tool.

    How to Apply Creativity to Your Images with Texture Overlays Using Luminar

    You can pull and drag your textures file into shape as required. It doesn’t have to retain its original aspect ratio as it’s adding to your original image and isn’t the actual focus of the final composition. In my case, the texture looks fine for now in regards to size.

    Blending Modes

    The next step is to go through the different blending modes to find one that suits the images best. Different ones work for different images, so it’s best to experiment. Overlay and Soft Light tend to get used a lot, but often Multiply or Screen can work too. Even Hard Light can be perfect sometimes.

    How to Apply Creativity to Your Images with Texture Overlays Using Luminar

    Overlay Blend Mode.

    How to Apply Creativity to Your Images with Texture Overlays Using Luminar

    Soft Light Blend Mode.

    Whichever one you use, you’ll probably find that the effect is really strong. That’s fine because you’re working with layers, you can just reduce the opacity until the texture looks good.

    For this image, I thought both Multiply and Color Burn looked great. I loved the saturation that Color Burn gave to the photo, but reducing the opacity to bring back some shadow detail removed too much of that. For that reason, I went with Multiply.

    How to Apply Creativity to Your Images with Texture Overlays Using Luminar

    Multiply Blend Mode.

    How to Apply Creativity to Your Images with Texture Overlays Using Luminar

    Color Burn Blend Mode.

    Masking

    You may not want the texture to appear on all parts of the photo. So you’ve got two options. Paint in the texture, or just paint out where you don’t want it. To access the masking functions, click on the brush icon on your texture layer. This opens a menu allowing you to choose the type of local adjustment you want to apply. Your options are Brush, Radial Mask, or Gradient Mask. You can also go with a Luminosity mask. For this image, the brush is the best option.

    How to Apply Creativity to Your Images with Texture Overlays Using Luminar

    Access the masking tools.

    Once the brush is selected, the options appear at the top. I’m going to remove the texture from the house. If you want to remove (hide) part of a layer, click the Erase option on the Brush settings menu. Set Size, Softness and Opacity to taste as you paint.

    How to Apply Creativity to Your Images with Texture Overlays Using Luminar

    You will see this menu at the top of your screen when you active the Brush tool. Choose Erase to paint away effects, choose Paint to add it in. This allows you to make corrections if you go too far with your painting as well.

    Once you’re finished, click Done on the end of the brush options bar.

    How to Apply Creativity to Your Images with Texture Overlays Using Luminar

    Adjusting the Texture

    One good thing about Add Image is that the layer you’ve created has full access to all the Filters in Luminar. Let’s say you’re using either the Overlay or Soft Light blend mode. Any part of the image that’s mid-grey will be unaffected by the texture.

    If your texture is dark, or light, the image will reflect this. You can easily change this by adding a Tone filter and adjusting the exposure. If the color from the texture is too strong, you can use Saturation to reduce this or use Hue Shift to change it.

    How to Apply Creativity to Your Images with Texture Overlays Using Luminar

    Apply filters to the texture layer to fine tune it.

    Finishing the image

    Of course, you can also apply filters to the original image. Being a landscape, this would be a good time for you to try the Landscape workspace. When you click on the original image, layer Luminar hides the layers above it. To get to the workspaces, click on Clear Workspace and choose Landscape from the menu.

    How to Apply Creativity to Your Images with Texture Overlays Using Luminar

    Landscape workspace.

    Using the suggested filters in the workspace, it’s easy to add back the saturation I saw when I used Color Burn blending mode on the texture.

    How to Apply Creativity to Your Images with Texture Overlays Using Luminar

    To activate the texture again, simply click on the texture layer.

    How to Apply Creativity to Your Images with Texture Overlays Using Luminar

    Saving the file

    Once you’re done, you’ve got a few options for saving your image. Using Save will create a .lmnr file, which is Luminar’s native editing file format – this will retain all layers and filters you’ve applied (similar to a PSD file in Photoshop).

    By using Export instead, you can choose a range of other options, like JPEG, PSD or TIFF.

    How to Apply Creativity to Your Images with Texture Overlays Using Luminar

    Export options.

    Using Filters to add Texture

    You’re not forced to use a layer to add textures with Luminar though. They also have a handy new filter called Texture Overlay. Pretty much everything you can do on a layer can be done with this filter. The only thing you can’t really do is rotate the texture at a random angle via Transform, but it’s very rare that you’d ever need to do this.

    Start with the image you want the texture on again. Click the blue Add Filter button. Use the Search Bar in the Filters Catalog menu that appears to find the “Texture Overlay” filter. Click to add it.

    The Texture Overlay filter added. These are the options and sliders for this filter.

    To add your texture file, click “Load Texture…” This will open your file on top of the background photo. The default amount of 50, means you can see the mix of the original image and the texture at 50% opacity; it’s also in Normal blend mode.

    The texture added at the defaults – 50% and Normal blend mode.

    The Amount control can also run to negative figures, so you can add an inverse version of the texture, which is a cool feature. Here’s how -20 on the Amount slider looks.

    If your texture is a different aspect ratio to your original image, you can use Keep Aspect Ratio to force it to fit the image. The two buttons below this allow you to flip the texture file horizontally, or vertically, or both (they appear blue when applied so you know if it’s been flipped).

    Zoom will let you scale the texture file to fit the features of your underlying photo. Below Zoom is the Blend mode menu. From here choose the blend mode that suits in the same way as with our first method. Again Color Burn looks great at 100 Amount.

    The effect is still a little strong, so you could pull it back by reducing the Filters Amount slider. Here 67 looks great.

    Amount = 100, Filters amount = 67

    Masking the Filter

    Filter masking is really straightforward with this method too. You simply hover over the panel header to reveal the brush icon. Click on this to choose the mask type: Brush, Radial or Gradient. Choose Brush to apply your mask in a specific area.

    Filter masks are useful and are applied the same way as a layer mask.

    If you’re only looking to remove a small area of texture, switch to the Erase Brush in the brush toolbar that appears above the photo.

    In this photo, I’ve brushed the texture away from the cottage.

    You can add as many texture overlay filters as you like, just remember that the Filters Amount affects the whole filter set.

    Getting Texture files

    You can get plenty of commercial texture packs to get you started, but there are free ones out there too. When you’re out and about, consider capturing any textures you find interesting to try out yourself!

    Please share your finished textured masterpieces created with Luminar in the comments below. We’d love to see what you make.

    Disclaimer: Macphun is a dPS advertising partner.

    The post How to Apply Creativity to Your Images with Texture Overlays Using Luminar by Sean McCormack appeared first on Digital Photography School.

    Digital Photography School

  • Photo Mate Raw conversion app for Android goes freemium

    Photo Mate, arguably the most comprehensive image viewer and Raw-developer application for Android devices, has been updated to version R3 3.2. But that’s not the exciting part: the best part is that it’s now available as a free ad-supported version.

    The new version still offers most of the features available in the full app—such as decoding and basic editing of raw files, cropping, exporting, rating and image stacking. The workflow has just been augmented with ads, which will be visible in the gallery, and users have to watch a video ad before switching to editing mode.

    Users who already own the app continue to get the full feature set and ad-free experience, while new users can decide between the ad-supported version or upgrade to the full version via an in-app purchase that removes ads and gets you access to the following extra-features:

    • Luminance and Sharpening
    • Layer editing
    • Custom export presets
    • Organizing and filtering of images in a library
    • Batch renaming and export
    • Custom watermarks
    • Display calibration
    • Side-by-side image comparison
    • Display of geo-tagged images on map

    An upgrade to the full version will cost you $ 6.50 on Google Play, and more information is available on the Photo Mate website. You can also still read our comprehensive review of the app below:

    Review of Photo Mate R2

    Articles: Digital Photography Review (dpreview.com)

  • Researcher says he was threatened after finding major DJI security flaw

    Drone maker DJI has been criticized roundly this weekend over its alleged response to security researcher Kevin Finisterre’s discovery of a significant security issue involving the company’s system. According to Finisterre, he began hunting for bugs in DJI’s system under its recently established bug bounty program. In the process, Finisterre says he discovered a major security issue, but rather than rewarding him for his effort, DJI accused him of hacking and threatened to report him to the authorities.

    DJI announced its bug bounty program in August following a report that claimed the U.S. Army had banned use of the maker’s drones over security concerns. As part of its announcement, DJI had stated:

    The DJI Threat Identification Reward Program aims to gather insights from researchers and others who discover issues that may create threats to the integrity of our users’ private data, such as their personal information or details of the photos, videos and flight logs they create.

    According to a long report on the matter published by Finisterre, he spent many weeks communicating with DJI through email about the scope of its bug bounty program, which hadn’t yet been publicly defined. After receiving confirmation that it included the company’s servers, Finisterre went to work in writing up a report disclosing his discoveries. Speaking of which…

    Due to multiple security issues, including publicly available AWS private keys for DJI’s photo-sharing service SkyPixel, Finisterre reports that he was able to get access to highly sensitive user data, including: identification cards and passports, flight logs, and drivers licenses. Once he found this flaw, he claims that he alerted DJI to this vulnerability, and that the company acknowledged it.

    After more than 130 emails back and forth between DJI and Finisterre, he states in his report that DJI said he would be rewarded with $ 30,000 under the bug bounty program (the maximum award). However, Finisterre reports that weeks later he received an agreement for his particular bug bounty that was “literally not sign-able.” As he goes on to explain in his report:

    I won’t go into too much detail, but the agreement that was put in front of me by DJI in essence did not offer researchers any sort of protection. For me personally the wording put my right to work at risk, and posed a direct conflicts of interest to many things including my freedom of speech. It almost seemed like a joke. It was pretty clear the entire ‘Bug Bounty’ program was rushed based on this alone.

    Efforts to alter the agreement didn’t pan out as hoped, says Finisterre, who goes on to claim that several different lawyers advised him that DJI’s final offer was, “likely crafted in bad faith,” and that it was “extremely risky” for him to sign it. It was about this time that Finisterre also receive a legal demand from DJI ordering him to delete/destroy the data he had gathered during his investigation, while appearing to threaten Finisterre with the Computer Fraud and Abuse Act.

    In a statement to Ars Technica, who was the first to cover this spat between DJI and Finisterre, the Chinese drone giant referred to Finisterre as a “hacker,” claiming that he had accessed one of the company’s servers without permission and that he had tried to claim it under the company’s bug bounty program without following “standard terms for bug bounty programs.” The statement goes on to claim that Finisterre “refused to agree to these terms, despite DJI’s continued attempts to negotiate with him, and threatened DJI if his terms were not met.”

    For his part, Finisterre says that he ultimately turned down the $ 30,000 in favor of going public with what he sees as an unsettling and unacceptable experience, concluding with the following statement:

    If you that are wondering if DJI even bothered to respond after I got offended over the CFAA threat, you should be happy to know it was flat out radio silence from there on out. All Twitter DM’s stopped, SMS messages went unanswered, etc. Cold blooded silence.

    Articles: Digital Photography Review (dpreview.com)

  • Moment counterweights let you use add on lenses with DJI Osmo Mobile

    Moment has launched 50g and 100g counterweights for DJI’s Osmo Mobile, making it possible to use Moment’s add-on lenses with the handheld gimbal stabilizer for your smartphone. This also ostensibly makes the Osmo Mobile the first smartphone gimbal that supports add-on lenses.

    Normally, if you try to use an add on lens with your smartphone gimbal, the added weight throws the stabilizer off. The counterweight compensates for that weight, enabling users with large and small smartphones to use them, the lenses, and the gimbal together. As demonstrated in the video above, Moment’s counterweights clip onto the Osmo Mobile’s arm and can be easily removed when the add-on lens isn’t in use.

    Interested Osmo Mobile owners can pre-order the counterweights now for a discounted $ 32, with shipping expected to start on December 11th.

    Articles: Digital Photography Review (dpreview.com)