Blog

  • Thingyfy launches Pinhole Pro S: The widest modern professional pinhole lens ever

    Thingyfy is back with another Kickstarter campaign, and this time they’re trying to fund the Pinhole Pro S-Series lenses. As with the original Pinhole Pro campaign launched this past summer, the new Pinhole Pro S seeks funding for a modern pinhole lens. Unlike the original, however, the latest campaign is for a model that Thingyfy calls the widest pro-tier pinhole lens in the world.

    Pinhole Pro S comes in two varieties: the Pinhole Pro S11, an 11mm lens with a 120 degree FOV, and the Pinhole Pro S37, a 37mm lens with a 60 degree FOV. Both lenses feature a fully aluminum body. The S11 version is designed for mirrorless cameras with Micro Four Thirds, Sony E, and Fuji X mounts; the S37 is designed for SLR/DSLR cameras with Sony A, Nikon F, Canon EF, and Pentax K mounts.

    The wide-angle S-Series weighs less while being wider and nine times sharper than the original Pinhole Pro lens, according to Thingyfy. The company explains that its Pinhole Pro lenses offer a very precise pinhole aperture due to the use of a micro-drill that is robotically controlled. The drill produces a “perfectly round” and smooth hole, says Thingyfy, whereas alternatives like chemical etching and laser etching have downsides, such as corroded or burnt, fuzzy edges.

    Thingyfy is funding its new Pinhole Pro S lenses on Kickstarter, where an early bird unit of any camera mount is offered for $ 59 CAD / $ 46 USD with an estimated shipping date of April 2018.

    Articles: Digital Photography Review (dpreview.com)

  • Lytro has officially killed off its online sharing platform for light-field images

    Lytro, the pioneers in the area of light field photography, decided to abandon the consumer market and focus on Light Field video solutions more than two years ago. But it wasn’t until this month that Lytro took the inevitable step early adopters of the company’s cameras had been fearing: the company has now discontinued the pictures.lytro.com platform, which allowed Lytro users to share their refocusable ‘living’ light-field images with others online and through Facebook.

    This means the Lytro desktop application is now the only remaining tool for users of the original Lytro and the Lytro ILLUM cameras to view their image results off-camera. In fact, if you visit our original Lytro 16GB Review, you’ll see the living pictures no longer appear because it is now impossible to share native light field images online.

    The app only allows you to adjust and animate light field images and export them in .jpg, .mov, .gif and other conventional formats for viewing without their trademark ‘living picture’ ability to refocus.

    Unfortunately, the closure of pictures.lytro.com likely represents the final chapter in Lytro’s failure in the consumer photography market. Though Lytro cameras are no doubt a part of imaging history, and we hope the company does better in its new ventures.

    You can still read our review of the original Lytro (minus the embedded light field images) and I’ll always fondly remember the Lytro photo walk at CES 2012. You’ll find Lytro’s full announcement on its website.

    Articles: Digital Photography Review (dpreview.com)

  • Lifeprint unveils larger, WiFi-enabled version of its AR-equipped mobile printer

    Lifeprint, the company behind the mobile photo printers with embedded augmented reality technology, today announced its second model, which produces larger prints than the original version and offers Wi-Fi connectivity as well.

    The new printer can print images that are 3 by 4.5 inches in size—compared to the original model’s minuscule 2 by 3 inch prints—and thanks to the new Wi-Fi feature you can remotely send an image for printing to a Lifeprint printer from anywhere, or send photos to printers owned by friends and family. For local printing, a Bluetooth connection is available as well.

    As with the original Lifeprint, you can print video stills or a frame of an iPhone Live Photo and then view the full version via the Lifeprint app, merging physical print with digital display technology and offering a novel way of sharing videos with friends and family.

    Like most mobile printers on the market, the Lifeprint prints on Polaroid’s ZINK paper, which does away with the need for ink cartridges and comes with an adhesive backside. Inside the app you can add stickers, captions and filters before printing. At more than $ 1 per photo, the luxury is not cheap, so select your images and videos wisely.

    Lifeprint’s new larger printer is available exclusively through Apple Stores and on Apple.com for $ 150. A film pack of 20 is $ 30; $ 50 will get you a pack of 40.

    Articles: Digital Photography Review (dpreview.com)

  • How to Choose Your First Camera Drone and Skyrocket Your Photography

    Maybe you are in love with photography and in the process of turning it into a passion. You might be a professional photographer who’s always searching to improve, or you might just like capturing those beautiful trips like no other. If you’re in any of these categories, you might want to consider buying yourself a drone.

    How to pick your first camera drone

    This guide is all you need to help you make a choice. I have experimented with most of the drones on the market so you don’t have to.

    How useful is a drone for photography?

    I think you already imagine how cool it could be to reach those places you always wanted. No more climbing trees for great panoramas. And best of all, you can literally fly your camera wherever you like (within the law, of course).

    Drone picture through the wood

    Bonus: You’ll be able to take unbelievable videos as well.

    Maybe, you always thought taking pictures is where you’ll stop, but don’t tell me you’ve never been fascinated by one of those cool drone videos on YouTube.

    The great thing about a drone is that most of the time, it comes with an included gimbal that stabilizes the image perfectly. That feat alone makes both video and photography easy to do and cinematic almost straight away.

    Will you be able to afford it?

    Drones

    Gone are the days where only blockbuster movies had the budget to record and shoot photos from the air. Today, thanks to less expensive technology and increasing popularity of quad-copters, almost everyone can afford a drone. And the results are absolutely fascinating.

    These are my general recommendations when it comes to pricing for a good camera drone:

    • If it’s a drone that comes with a camera, you will need to spend over $ 400 if you want to have image stabilization.
    • You can also pick a cheaper drone with GPS and stabilization that comes with no camera. That might be a good option if you already have a GoPro or action-camera and a tight budget.
    • If you want a beginner drone just to learn how to fly, don’t spend more than $ 50.

    How to pick your first camera drone

    So you decided to get into drones and skyrocket your photography/videography. I have created an infographic explaining the main things you should look for in a camera drone. Now you have two paths you can choose from:

    1. Get a small beginner drone (under $ 50) to learn the basics of piloting it, and only after that buy a more expensive one.
    2. Get a more expensive drone with GPS, which is stable enough when flying and can return to home automatically if you mess up.

    What are the best inexpensive beginner drones?

    Beginner drone

    Ways you can go about buying your first beginner drone:

    • Get two or more VERY cheap drones (at $ 15 each) and simply learn the basics of flying in the house, while having a backup.
    • Get one cheap beginner drone (around $ 50), that usually comes with a low-quality camera (I don’t recommend this because it’s nothing like the more expensive ones).
    • Choose a cheap beginner drone and the more expensive one at the same time, if you want to just try it a few times and then jump into the action.

    Here are my top beginner drones you can start with:

    • JJRC H36 – A super resilient drone that works great inside. This is what I would recommend any friend. About $ 18.99 on Amazon
    • Cheerson CX-10 – A very small drone that’s around $ 20 and can do flips. About $ 18.99 on Amazon.
    • Hubsan x4 – A very sturdy and well-made drone with a camera. About $ 32 on Amazon.

    What are my top choices for a camera drone?

    This is my top three list of recommendations I have for different types of consumers, ranging from $ 500 to $ 1500 USD.

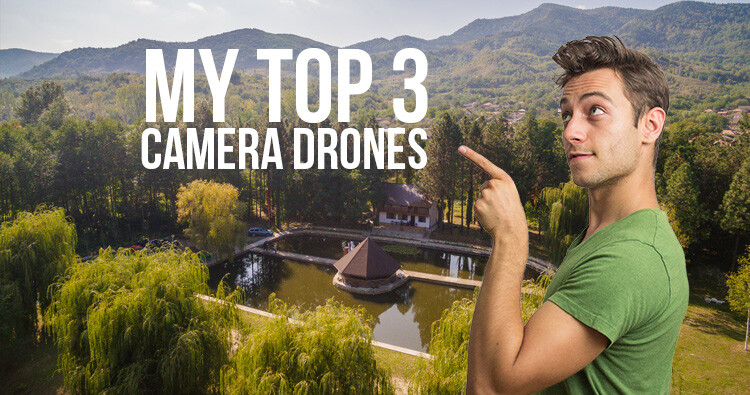
    Top 3 camera drones

    I’ll underline the main features you should look for in each drone, while also spotting the drawbacks of each.

    #1 – DJI Mavic Pro Platinum – My overall winner

    This quad-copter is one of the most popular right now, for some really good reasons. The DJI Mavic Pro Platinum is the newer version of the Mavic, but it is quieter and has a longer battery life. This is why I would recommend it.

    Dji mavic

    I’d recommend it to anyone from travel enthusiast to the professional photographer and so on. It has its limitations, but for the price of about $ 1000, here’s why it rocks:

    • It comes with a stellar gimbal (a motorized system that stabilizes the camera while in the air).
    • Has a 4K camera with a fixed aperture of f/2.2 – This makes it pretty good even in low light conditions.
    • You can take amazing photos in 12mp resolution.
    • It’s foldable – This makes it the most portable high-quality camera on my list, and pretty much on the market. You can simply take it in a small bag and go on your vacation, no problem.
    • Long range – it can go up to 7 km in perfect conditions, which is more than enough for anyone.
    • Long battery life – it promises about 30 minutes of flight time, but in real life conditions, 26 minutes is more likely.
    • Has great GPS and return to home features.
    • Has front sensors for detecting obstacles and stopping in time.

    Dji mavic folded front sensors

    Disadvantages: Can’t really think of anything. It’s amazing for the price.

    #2 – Xiaomi MI 4K drone – The cheapest, yet still amazing

    Xiaomi drone

    The Xiaomi MI 4K drone costs about $ 500 and comes with all you need for great photo/video results.

    • Just as the Mavic before, it comes with an amazing gimbal and camera attached to it, in order to keep the image steady in the air.
    • Again, you can shoot 4K photos (12.4 mp) and video or go lower in resolution so you can record in more frames, and do slow-motion.
    • The range is over 3 km, which is absolutely fantastic.
    • Battery life is said to be 27 minutes, but in real life, I got a maximum of 24.
    • It comes with very good GPS and returns to home when the battery is low and also when the signal is lost (just like the Mavic)

    Xiaomi drone camera

    Disadvantages of the Xiaomi 4k drone

    • It’s not nearly as portable as the Mavic.
    • It is louder.
    • It doesn’t have the front facing sensors to stop before impact that the Mavic does.

    Consider how much these drawbacks mean to you when you take into account the super cheap price. Don’t get fooled thinking a smaller price means lower quality. Xiaomi, just like DJI, is a Chinese company with a focus on creating high-quality hardware, that’s impressive even by western standards.

    #3 – DJI Phantom 4 Professional – the pro choice at a small price

    You have probably heard of drones like Phantom 3 or 4 by now, and they were all amazing, but the DJI Phantom 4 Professional is on the next level.

    Phantom4pro

    If the DJI Mavic Pro Platinum is not enough for you in terms of camera capability and you want more professional freedom in your work, this is the best way to go.

    Here’s what this $ 1500 drone comes with:

    • The 4K camera we’ve been used to has a 1-inch sensor now. This means nighttime photos will be considerably better and less noisy compared to any of the previous drones.
    • The 20mp sensor also delivers amazing quality photos and video.
    • It can shoot 4K in 60fps and Full HD in 120FPS and comes with a mechanical shutter (just like your DSLR), so you get a smooth video image and no rolling shutter effect.
    • It’s super secure with obstacle sensing in 5 directions: 2 front sensing cameras, 2 side infrared detectors, Sonar and cameras on the bottom (to land precisely), And even one in the back!
    • Just like the Mavic Pro Platinum, it comes with 30-minute flight time, 3-axis gimbal stabilization and 7 km range (but, this time, it’s dual-band transmission, so the signal is more secure).

    What are a few disadvantages: It’s bulky and loud. It can’t fold up, so if you want to take it on vacation, it will be harder to carry.

    Scenery1

    I recommend this drone for the more professional bunch of people, who want to use it more intensely for professional projects and don’t mind the bigger form size. This drone is great for people who want to have more control over their images, and it’s perfect if you want to shoot at high ISO in lower light.

    Over to you

    I only gave you three choices because I believe these are the best of each price category. So, depending on your budget, you can confidently choose one of these, as there’s simply no competition on the market right now.

    Don’t forget to fly safe and check the regulation in your area!

    Scenery2

    The post How to Choose Your First Camera Drone and Skyrocket Your Photography by Paul Archer appeared first on Digital Photography School.


    Digital Photography School

  • How to Make Food Photos Look Tastier with Luminar

    When it comes to food photography, photo editing is at least half of the battle. Sure, there’s an art to styling and shooting food so that it looks yummy right out of the camera. But more often than not, it pays to spend a little time sprucing up that photo in post-production. There are lots of popular photo editing tools out there, but lately, I’ve been preferring Luminar by Macphun, soon to be Skylum.

    Simple and straightforward to use, you can enhance any food photo in Luminar right out of the box. Here’s how to get started. I should be clear that this is my personal food photography editing workflow. Feel free to make adjustments and edits to your own taste (pun intended) and preferences.

    How to Make Food Photos Look Tastier with Luminar

    The final image, edited in Luminar.

    Get Started

    First, open a photo in Luminar. You can open an image three ways; by clicking the blue Open Image button on the welcome screen, by going to File > Open, or by dragging and dropping an image on the welcome screen.After your image is open, take a look around at the software’s interface.

    The top bar contains a variety of useful tools such as crop, transform, and undo, plus unique features like clone and stamp, erase, and a handy history menu which lets you scroll back through every edit you’ve made to an image. There’s also a button to give a quick preview of changes made to your image, and even a compare slider showing the image before and after editing.

    1. Apply a Luminar Preset

    On the bottom row of Luminar, you’ll find a menu of presets, which are essentially filters, with predetermined settings. (Note: if the presets are not showing click the icon third from the right in the top toolbar.) There are dozens of presets to choose from and they’re sorted by category. In the default version of the software, there’s not a specific category for food photos, but the Basic presets will do just fine (and as you go, you can create your own custom presets).

    Selecting a preset automatically applies the edits intended by the designer of the preset. In the sandwich image below, the Fix Dark Photos preset has been applied. Directly over the preset is a slider that allows you to adjust the intensity of that preset. On the right side, a panel opens up showing what aspects of the photo have been edited. You can go in and fine-tune the adjustments to taste using the sliders.

    Luminar Apply Preset - How to Make Food Photos Look Tastier with Luminar

    2. Open up the Filters Catalog

    Applying a preset will get your photo off to a great start, but you’ll often need to make a few micro adjustments to your image.

    To do this, click on the Add Filters button in the right-hand corner. This will open up the Filters Catalog, offering you tons more editing tools. Hovering your mouse over a filter will result in a pop-up window that explains the filter’s effect and shows an example thumbnail image (as seen below).

    Luminar Add Filters - How to Make Food Photos Look Tastier with Luminar

    Here I’m adding the Dodge & Burn Filter.

    Finding and Sorting Filters

    There several tools in the catalog that will help you find the filters you need. First is the search bar where you can type in a filter name. Below that is a drop-down menu that lets you see filters according to their usage, such as Issue Fixers, Essential, and Creative. Finally, you can star or favorite your most-used filters to make them easier to find. For food photos, I stick to pretty basic filters that add minor adjustments.

    Below, I’ve applied a Dodge and Burn filter to darken (burn) some of the sandwich bread. I also added a Denoise filter to reduce some of the grain in the black background.

    Luminar Dodge and Burn - How to Make Food Photos Look Tastier with Luminar

    3. Crop the Image

    After applying a preset and fine-tuning with filters, I’m feeling pretty good about the color and lighting of my image. All that remains is cropping the image. To do this, click on the Tools menu in the top bar and select Crop. This will reveal a cropping interface with guidelines, a collection of crop preset,s and the ability to rotate the image if you like.

    In this case, I cropped in just a bit to put more emphasis on the sandwich and remove the bit of food on the right.

    Luminar Crop - How to Make Food Photos Look Tastier with Luminar

    The Crop tool in Luminar.

    4. Clone and Stamp

    Almost there! Now that I’ve cropped the image to my liking, there are a few messy spots that I want to erase. Time to clone and stamp! This feature is also in the Tools drop-down menu where you found Crop.

    In this workspace, Clone & Stamp works very similarly to other image editors such as Photoshop and Lightroom. Simply hold down the Option key and click on an area you want to copy pixels from. Then click (paint) over the object you want to remove or replace. In the photo below, a few messy spots on the bread have been clone stamped, as well as part of the black shirt background.

    Luminar Clone Stamp food editing - How to Make Food Photos Look Tastier with Luminar

    Clone tool for fixing a few messy bits.

    5. Save, Export, Share, or Open Image in another platform

    When you’re done editing your food photos in Luminar, you have several options for saving and sharing images.

    One option is to go to File –> Save As. Just note that this will save your image in a Luminar 2018 native format (.lmnr) so that you can continue to fully edit and adjust the same image later. If you choose you can save all the layers and the history for this image in the .lmnr file.

    Luminar Save As - How to Make Food Photos Look Tastier with Luminar

    Saving as a .lmnr file.

    If you want to save in another file format such as a JPG, you’ll have to Export. This brings up a dialogue box where you can specify file size, format, quality, and the location of the saved image.

    Luminar Save - How to Make Food Photos Look Tastier with Luminar

    Your final option for saving images is to share them directly to online platforms such as Facebook or 500px. It’s necessary to sign into your individual accounts to connect them to Luminar, but once you do so, sharing them directly to other websites is a snap.

    You can also open the image in another image editing platform such as one of Macphun’s many other programs (i.e. Aurora HDR).

    Luminar Social Media - How to Make Food Photos Look Tastier with Luminar

    In Conclusion

    Whether you’re trying to fix or spruce up a food photo, Luminar by Macphun, soon to be Skylum, is a great photo editing platform. Not only does it have a wide range of adjustable presets, but it also has basic and advanced tools that both amateur and pro photographers will appreciate.

    Download a free trial of Luminar and give it a go! Post your food photo results in the comments below.

    Luminar Food Photo Editing - edited

    Final, edited photo.

    Disclaimer: Macphun, soon to be Skylum, is a dPS advertising partner.

    The post How to Make Food Photos Look Tastier with Luminar by Suzi Pratt appeared first on Digital Photography School.


    Digital Photography School

  • Nikon D850 vs Sony a7R III: Which is best?

    Intro

    2017 has seen the release of some interesting cameras, but the two that have generated the most buzz, the most traffic and the most questions are Nikon’s D850 and the Sony a7R III. They’re both rather exotic creatures, not quite as other-worldly as D5s and a9s, but hardly the sorts of cameras we’re all going to rush out and buy. So why the excitement?

    Both high res models are among the fastest in
    their line-ups

    What’s interesting about both is just how much better they are than their predecessors, despite superficially looking like subtle re-shuffles of the specifications. The give-away of this leap forward is hidden in plain sight: they may both be updates of their makers’ high-res models, but both are also promoted to being among the fastest-shooting models in their respective line-ups.

    That makes them much more appealing, well-rounded cameras than their predecessors, which is perhaps why they’ve generated so much interest. And why everybody wants to know which is best…

    It’s not about the mirror (or lack of it)

    We ended our D850 review by calling it “the best DSLR on the market today” and summed up the Sony by saying it was “the most well-rounded mirrorless camera on the market,” but you should take that to mean it’s simply a question of whether you prefer a mirror in your camera or not. Mainly because, when you use them, it really doesn’t make much difference.

    Closer to a sports camera than anything with 46 megapixels has the right to feel

    Long gone are the days when you could say ‘DSLRs are better at autofocus’ or ‘Mirrorless are smaller, and more convenient.’ No-one who’s held a Sony a7 series with a GM lens on is likely to find the words ‘small’ or ‘lightweight’ springing into their minds. Equally though, I doubt many people who’ve used an a7R III in a tight spot are going to think ‘I’d have got that shot with an SLR.’

    Similarly though, the D850 is the kind of DSLR that could make mirrorless stalwarts consider changing their minds. It’s not quite D5-level good but the D850 feels closer to a sports camera than anything with 46 megapixels has the right to. All those ‘you have to imagine you’re shooting medium format’ reservations that we’ve had about previous high-res DSLRs start to evaporate. With a recent Nikon VR lens on the front, you can shoot the D850 without too much thought and it’ll simply get the job done.

    Image Quality

    It should go without saying that both cameras produce spectacular image quality. Their sensors both offer tremendous resolution and dynamic range. They’re among the best sensors we’ve ever shot with, putting them within the same realm as the Hasselblad X1D, Pentax 645Z and Fujifilm GFX 50S: company that suddenly makes both cameras seem unexpectedly good value.

    Among the best sensors we’ve ever shot with

    The Sony demands you shoot uncompressed Raw to get at its full capability, whereas the Nikon has some of the smartest Raw compression on the market (even its ‘lossy’ compression is essentially only throwing away spurious data), but that ends up being a question of storage and workflow, not of the photographic process itself. The pictures themselves are similarly good.

    Anyone who’s shot them side-by-side won’t be at all surprised to find that DxO has given their sensors the same score: there’s virtually nothing to choose between them. Slight differences in dynamic range and high ISO performance are just that: slight. If anyone tells you that one camera is better than the other, for any particular activity based on image quality, you should laugh at them. In their face, if possible.

    Verdict: no clear winner

    Video

    Unsurprisingly perhaps, the a7R III is the better video camera. Its video quality is higher, its range of features and supporting tools is wider and its video autofocus, while still frustratingly inconsistent with the behavior in stills mode, is actually useable for all but the most demanding of projects. Realistically, if video is one of your primary needs, the Sony is the clear choice, even before you consider its ability to accept, via adapter, just about every dedicated cinema lens you might chance across.

    However, the D850 isn’t utterly left for dead. Its video quality isn’t half bad and, so long as you have some experience of focusing and exposing video, it’s pretty adept at quickly jumping back and forth between stills and video shooting. In fact, because it retains separate exposure settings for stills and video mode, it can actually be easier to switch between the two than it is on the Sony. To match this behavior, you need to configure one or more of the Sony’s Memory Recall modes, to ensure you don’t find yourself with a card full of stop-motion-like video clips shot at your ‘freeze the action’ shutter speed.

    Verdict: Sony a7R III wins

    Autofocus – Action

    The D850 3D Tracking performance doesn’t quite match the D5, but it’s still capable of a very impressive performance. 3D Tracking will generally do a good job of recognizing the subject you initially point it at, then track it around the scene, using whichever AF point is closest to your subject’s current position. It’ll occasionally fall off the precise point you chose, and you’re limited to the camera’s comparatively small focus sensor region, but it’ll generally do a great job and offers enough configuration options to cope even with complex action.

    The Sony does a great job of keeping things in focus if you can keep the AF point over them, but its subject tracking isn’t as surefooted as the D850’s. Worse still, unlike Nikon’s system, you can’t specify which part of the subject you wish to track: the camera tries to identify the subject and then tracks all of it. This usually means focusing on whatever element is closest. Depending on your subject, that may not be good enough.

    Verdict: Nikon D850 wins

    Autofocus – People

    Wedding photographers and just about anyone needing to shoot pictures of people will find the a7R III’s Eye AF feature is a huge advantage. Sony wasn’t the first to offer an AF mode that detects the subject’s eyes but the implementation is pretty clever: in single AF mode Face Priority will focus on your subject’s eye, but the clever stuff happens in C-AF mode. Here, you hold down a configured button and the camera focuses on your subject’s eye, regardless of what AF area mode you were in.

    This means that you can compose your image without having to perfectly position your AF, knowing that hammering down the Eye AF button will all-but ensure perfectly focused images on whichever eye is nearest your AF point.

    Anyone needing to shoot pictures of people will find the a7R III’s Eye AF feature a huge advantage

    The above shot was achieved while holding a video camera to the a7R III’s viewfinder, waving both devices around to show the degree to which Eye AF works, and where it fails. Despite all attention being on shooting this demonstration, rather than any photos, a handful of the resultant shots proved to be of a high enough standard to include in our samples galleries. Each of them pin sharp.

    The D850 has no option to find eyes in the scene and its 3D Tracking, while good, can’t be relied on to follow the subject’s eye even if you point the camera to it. Beyond this, even when working with calibrated lenses, we simply wouldn’t expect an off-center DSLR AF point to match the focus precision that the Sony will effortlessly achieve.

    Verdict: Sony a7R III wins

    Configuration and operation

    Perhaps because the a7R III has such an extensive video and stills feature set, it absolutely demands that you spend time learning and configuring the camera. It’s a complaint we’ve regularly leveled at Olympus, over the years, and it’s just as true here. The a7R III can do so much that you really need to decide how you want to shoot, which tools you want access to, then carefully consider how to set the camera up to give easiest access to all these things. But taking this time is worth it, since there are some very powerful customization options available.

    Even simple things like having a physical AF/MF switch count in the Nikon’s favor. But, while its ability to change all key functions by holding a button and turning a dial is a highly efficient and effective way of working (once you’ve become familiar with it), it’s a system that, for now, works primarily for stills. Not having things like a Log profile, much less a mode to offer a corrected preview mean there are fewer functions the Nikon needs to give quick access to.

    Verdict: no clear winner

    Lenses

    Both makers have spent the past few years going all-out to flesh-out their lens lineups. Nikon has an inherent advantage, of course, offering at least some degree of compatibility with a decades-deep back-catalog of lenses, the vast majority designed to be useful on full frame.

    This advantage remains even if you limit yourself to the lenses Nikon says are well suited to the demands of 46MP, but Sony has an increasing number of the ‘essential’ bases covered. The new 24-105mm F4, for instance, seems great (though there’s a hefty price tag associated with this apparent excellence), and we’ve been impressed by the 85mm F1.8.

    And, while we wouldn’t recommend buying an a7R III if you plan only to shoot with adapted lenses (tilt-shifts aside, perhaps), it’s true that the Sony can at least make use of just about any lens you care to mount on it. So while you significantly reduce the camera’s maximum shooting speed, you do at least retain functions like Eye AF.

    Verdict: no clear winner

    Operational speed

    The D850 still has a slight edge in terms of operational speed over the a7R III. Sony has made great strides to remove the lags and delays from its menus and operation, but the D850 just feels like a more responsive camera. It could be a matter of perception, and I very much doubt the difference is within the realms of practical measurement, but what feels like the cumulative effect of fractions of a second here and there make me think of the D850’s operation being near-instantaneous in a way that I don’t get with the Sony.

    Verdict: Nikon D850 (just)

    The tiniest of margins

    As we said earlier in this slideshow, you can no longer summarily decide which camera is going to be better for a given situation, based simply on whether it’s Mirrorless or a DSLR. But with these two cameras it’s near impossible to find any situation in which one definitively outshines the other.

    You can no longer summarily decide which camera is going to be better for a given situation, based simply on whether it’s Mirrorless or a DSLR

    Landscapes? the DR differences are small enough that it comes down to a question of whether the weight difference or the built-in intervalometer swings it for you. The Sony is better at video in several respects, but if video isn’t your primary concern, the D850 makes it so easy (out of the box) to jump from stills to video to stills that even that’s not going to be a decisive victory for those just shooting the odd clip.

    What’s most striking about both cameras is how good they are across a range of subjects and shooting types, making them very hard to tease apart. The differences in video and in the areas of autofocus in which each excels (the Nikon for action, the Sony for pictures of people), apart there’s no clear winner. This isn’t fence-sitting on our part: they’re genuinely two of the best cameras the world has ever seen.

    Overall verdict: No clear winner

    Articles: Digital Photography Review (dpreview.com)

  • 2017 Buying Guide: Best cameras over $2000

    The very best digital cameras on the market will cost you at least $ 2000. That’s a lot of money, but generally speaking these cameras offer serious enthusiasts and working pros the highest resolution, best build quality and most advanced video specs out there. Here are our picks in the group.

    Articles: Digital Photography Review (dpreview.com)

  • The CamFi Pro promises blazing-fast wireless photo transfer

    CamFi has launched the CamFi Pro, a souped-up version of its wireless remote controller that can allegedly transfer your photos at a rate of up to 10Mbps between the camera and a secondary device such as a laptop or smartphone. This, according to CamFi, will make the Pro “the fastest wireless camera controller in the world.”

    The new device uses 5.8GHz communications to move data more quickly than usual, making it possible to stream video in addition to sending larger files and sequences far more quickly. The idea is that users can transfer images directly to a computer or tablet as they are shot without tethering or relying on the slow transfer rates of most cameras’ built-in Wi-Fi systems.

    The CamFi Pro will work with a range of Nikon, Canon and Sony cameras, and will allow users the choice to transmit Raw and JPEG files simultaneously, or send one type over Wi-Fi and save the other to the camera’s memory card.

    Additional features include the ability to control the settings of a single camera while simultaneously triggering multiple cameras in sequence to create ‘time slice’ effects; support for HDR image capture (read: bracketing), focus stacking, and timelapse videos; and an Auto Print mode that lets the photographer send files straight to a printer via the CamFi Matrix software—ideal for providing high-quality prints on the fly while shooting events.

    The company is raising funding via Indiegogo, and needs $ 5,000 to make the project viable. Prices start from $ 200 for backers, after which the cost is expected to raise to $ 300, so supporters of the campaign get a pretty sizable discount.

    For more information, check out the video below, visit the CamFi website, or see the CamFi Pro Indiegogo page.

    Press Release

    CamFi will launch the fastest wireless camera controller in the world

    GUANGDONG , China – November 30, 2017 – CamFi, maker of wireless controllers for digital cameras, today announced the launch of a crowdfunding campaign on Indiegogo for the fastest wireless camera controller, CamFi Pro. CamFi Pro uses the 802.11ac protocol to transfer the photo from the camera. It can offer Wi-Fi transfer speeds up to 866Mbps. Tests show it can reach speeds of 10M bytes per second in reality, two to three times faster than most built-in Wi-Fi cameras and 2.4G Hz wireless camera controllers.

    CamFi Pro supports most of Canon, Nikon and Sony cameras. And it will be the only 5.8G wireless tether solution for Sony cameras in current market.

    “Speed is a big problem for current Wi-Fi products. It limits the productivity of the professional photographers.” Said Mark Ma, CEO of CamFi. “CamFi Pro is going to use new technology to solve this challenge.”

    CamFi Pro takes two to three seconds to transfer a raw photo with a size of 20 megabytes. It supports auto view mode, which enables the client device to receive the photos in real time when the photographer is taking the photo. Selective transfer is also supported. The photographer can send only JPEGs to the client device and keep the raw photos on SD card.

    By using 5.8G band, the device effectively avoids Wi-Fi interference. This is suitable for professional photographers covering events and meetings. The live view works smoothly for high transfer speed, making it effective for recording the video as well.

    CamFi Pro also supports timelapse, HDR, focus stacking and multiple camera control. The photographer can use one computer to control multiple cameras to shoot and transfer the photos back. It can be applied for bullet – time effect and 3D modelling.

    It can be controlled from Android and iOS mobile devices as well as PCs and Apple computers. Backers of CamFi Pro will be the first to receive the product. Delivery is expected for February, 2018. More information, including a full list of compatible cameras, can be found on the Indiegogo crowdfunding site: https://www.indiegogo.com/projects/camfi-pro-the-fastest-wireless-camera-controller#/

    Articles: Digital Photography Review (dpreview.com)

  • DJI adds ‘voluntary identification’ for drone pilots who want to broadcast their credentials

    DJI has updated its AeroScope drone tracking and identification system to include an optional self-identification feature for drone operators who choose to broadcast the info. With this update, operators can now “voluntarily identify their flight operations to authorities,” DJI explained in a press release. That info will join the serial number and telemetry data DJI drones broadcast to AeroScope receivers used by authorities.

    AeroScope was created as a solution for airport officials and law enforcement who need to identify drones operated in ways that violate regulations, such as near an airport. The system picks up on the telemetry data and serial number of a drone using the communications link between the drone and its remote controller. This localized data broadcasting limits surveillance potential by avoiding the Internet altogether.

    You can see the tech in action in this video.

    Via updates to both the DJI GO 4 app and DJI drones, operators will now have the option of broadcasting their Unique User Identification Code (UUIC), which is connected to their DJI pilot account, as well as providing Identification & Flight Information. With that latter option, drone operators can choose to share information about their flight with authorities who may be nearby with an AeroScope receiver.

    Though AeroScope remains a point of contention for many DJI owners, the added ability to voluntarily provide information about a flight could prove beneficial for pilots, enabling them to directly provide law enforcement or other authorities with details about the nature of flight and why it is taking place.

    The feature started rolling out late last week, first arriving via an update for the DJI Mavic Pro.

    Articles: Digital Photography Review (dpreview.com)

  • Video: Incredible 1,000fps slow-motion 4K lightning footage

    If you need something to get your week off to an ‘epic’ start, look no further than DP Dustin Farrell’s incredible storm chasing video he just released yesterday. Captured mostly with a Phantom Flex4K slow-motion camera at 1,000fps, it’s a slow-motion masterpiece with lightning footage that left this writer’s jaw slack.

    The video, titled Transient, is a compilation of Farrell’s best storm chasing shots from the 2017 season. Over the course of 30 days he says he drove over 20,000 miles—developing a deeper “respect and admiration for storm chasers” all the while. He also shared some technical details in the video’s description:

    Most of the lightning footage was captured in uncompressed raw at 1000 frames per second with our Phantom Flex4K.

    […]

    The Phantom Flex4K is a camera that must be post triggered while shooting high speed. This works out well for capturing lightning because the camera is always recording and rewriting to internal ram. As soon as a bolt appears in my view finder I trigger the camera to save what has been stored in the ram. Shooting at high frame rates requires a lot of light. Therefore, I mostly used my Zeiss Otus 28, 55, and 85mm lenses wide open at f1.4. In all, I captured 10TB of data during this production.

    But don’t let the plethora of awesome footage fool you, this was an incredibly challenging project:

    This is one of the most difficult projects I have ever attempted in my career […] Chasing storms with a Phantom Flex4K is stressful even when things are going well. There were at least 10 days where I returned home with my tail between my legs and nothing to show after a ten hour chase and 500 miles. There were also a couple of days that I drove home with an ear to ear smile that lasted for hours.

    Check out the results for yourself above, but don’t forget to do it right: shades drawn, headphones on, volume up, and resolution set to 4K. It is 100% worth it. And if you like what you see, definitely head over to Farrell’s website or give him a follow on Facebook and Instagram.

    Articles: Digital Photography Review (dpreview.com)