Blog

  • Photography Equipment Tips for an Africa Photo Safari

    The post Photography Equipment Tips for an Africa Photo Safari appeared first on Digital Photography School. It was authored by Andrew Sproule.

    There’s no doubt that booking and planning for an Africa photo safari is an exciting time, especially if it’s your very first venture. As a photo safari tour leader, I’m used to the process. Nevertheless, I still behave very much like a child in anticipation of what Christmas brings. As your departure date draws nearer, your thoughts move to packing for your trip. Although the appropriate clothing is essential, these trips are really about amazing wildlife encounters, shared experiences and capturing memories. It’s time to think about your photography equipment, – your gear.

    It’s time to pack your camera bag!

    Author’s Note

    Before I dive in, I would like to state that this article represents my tips for maximizing your experience while on an Africa photo safari. It’s a guide with a mix of opinion and facts based on my on-location, in-the-field experience. It’s a summary, an introduction and not a laboratory review and therefore should be treated as such.

    Secondly, I always recommend photography enthusiasts choose a safari designed explicitly with photographers in mind. General ‘tourist’ safaris have their place, but they’re much more likely to be governed by a species timetable. Lion, check. Move on. Buffalo, check. Move on. You get the picture. On a dedicated Africa photo safari trip, not only will you share a vehicle (often customized for photographers) with liked minded people, you’ll also benefit from being able to spend much more time with an individual animal or group of animals. You’ll be able to witness unusual behaviors and explore different angles and lighting situations. Explicit and invaluable guidance and advice are also on tap.

    Thirdly, you’ll notice that I’ve included my camera settings below a number of the images. These settings worked for me in those particular situations, under certain conditions to produce the type of image I was after. I suggest you use these posted settings as a guide only. Instead, think about how these images might look if you were to adjust the shutter speed, aperture or ISO. Then, take that information into the field with you. The relationship between these elements can create widely different outcomes and also help you to define your style.

    Leopard, Botswana. Canon 1DX, Canon 70-200mm(at 105mm), f/2.8, ISO 400, 1/125th sec handheld. Image © Andrew Sproule

    Cameras for an Africa Photo Safari

    Notice I have stated ‘cameras’ in the title and not ‘camera.’ I recommend you take at least two camera bodies with you. On the surface, this may seem like overkill or even a touch extravagant, but there are valid reasons why.

    Firstly, it’s peace of mind. Imagine the heart-sinking moment if your camera fails. That emotion is tenfold if it happens on day one of a two-week photo safari! Whether you take two DSLRs, two mirrorless cameras, a combination of both, or an alternative solution, possessing a backup prevents any unnecessary anxiety. Before I purchased a second camera body, I used to hire one for my Africa trips. I still do this on occasion. It’s a great way of testing and trialing gear in the field beforehand and working out what works best for you.

    Secondly, Africa is an extraordinarily harsh and dusty environment. Sand and dust particles are the enemies of sensitive camera sensors. Consequently, eliminating the need to swap lenses while on location can be a huge plus.

    Furthermore, having two cameras armed with different lenses (for example a telephoto lens and a mid-range zoom), you’ll find it easy to switch between them. Switching between them is useful when wildlife comes too close, or if you are pulling away for a wide shot of wildlife in context of its habitat. Being able to adapt to shifting conditions can mean the difference between capturing, or not capturing the shot.

    Not everyone is in a position to take two cameras. It also doesn’t matter whether your camera is full-frame, crop-sensor or another type, as there are pros and cons to all. What is fundamental is that you know your camera intimately. Practice on your dog, your cat or deer in a local park. Whatever you can. The more familiar you are with your camera’s features, the quicker you’ll be able to adjust to conditions that unfold in front of you with confidence.

    Lenses for an Africa Photo Safari

    Super-telephoto lenses with a focal length of 300mm plus are the staple for most Africa photo safaris. For crop-sensor cameras, 300mm should be ideal. If you intend to photograph birds as well as large game, the longer the focal length, the better. Full-frame cameras usually need lenses of 400m+.

    Wild dog, Botswana. Canon 1DX, Canon 500mm, f/5.6, ISO 200, +2/3 EV, 1/160th sec, monopod. Image © Andrew Sproule

    Although my go-to lens is a 500mm, I believe the versatility of zoom lenses make them ideal for African safaris. There’s such a wide variety of birds and mammals of a degree of varying sizes and distances that a good lens option would be something like the 100-400mm.

    A short-zoom lens in the range of 24-70mm is also a great option as it provides the flexibility to pull away to present wildlife within its environment, adding real context to an image. Because I’m also a landscape photographer, I also favor super-wide lenses in the range of 16-35mm or 14-24mm.

    Much of Africa’s wildlife is active in the early mornings and late evenings meaning you’ll be battling low levels of light. Lenses with larger apertures, such as f/2.8, allow more available light into the camera, so you’ll be able to use a reasonably high shutter speed for much longer. These lenses are a luxury item though, so an alternative solution is to increase the ISO. Doing so most certainly increases noise, but most photographers would rather have a sharp shot with an acceptable amount of noise than an out of focus shot with no noise. In many cases, you can eradicate most noise in post-production.

    Filters for an Africa Photo Safari

    I often use filters when composing landscape images, and on an Africa photo safari there are most certainly circumstances when the use of a filter is advantageous. For filters that reduce glare, saturate colors and darken skies, I recommend using a polariser filter.
    If you need help to correctly expose bright skies, while preserving exposure detail in the foreground, then I recommend an ND filter.

    Camera Support on an Africa Photo Safari

    Burchell’s Zebra, Kenya. Canon 1DX, Canon 500mm, f/4, ISO 200, 1/50th sec, bean bag. Image © Andrew Sproule

    Bean Bags

    Bean bags are my go-to support, especially in East Africa. They are a simple, yet extremely effective support for your camera. Bean bags can be used to rest your lens on a vehicle’s doorsills, window frames, roof rails and the actual roof itself. Also, wildlife is often on the move, so you’re not limited to one position within the vehicle. Many reputable Africa photo safari tour operators provide beanbags. However, that said, it is always worthwhile double-checking beforehand. Bean bags can pack light and get filled with rice or beans on arrival. Some photographers prefer to fill their beanbags with lightweight polystyrene balls before they leave. It’s bulkier but a lightweight alternative. I’ve been using a couple of Kinesis SafariSacks 4.2™ for a while. As well as being a great support, the quick release straps secure the bags in place, so you never lose them in the bush.

    A typical East Africa safari vehicle. Image courtesy of Governors Camp, Maasai Mara, Kenya

    Unfortunately, bean bags are not a universal solution, contrary to what you may have read in certain books or magazine articles. Although they’re a fantastic solution in East Africa, they’re not as useful in Southern Africa (including South Africa, Botswana, Zambia, and Zimbabwe). The reason is that the vehicles there are radically different. Safaris in Southern Africa use open Land Rovers and Land Cruisers with no sides at all – often there isn’t even a windshield! So, there is nothing on which to rest the beanbag. In Namibia, both open Land Rovers and closed vehicles are in common use.

    A typical Southern Africa safari vehicle. Image courtesy of Motswari Private Game Reserve, South Africa

    Monopod

    If a bean bag is not an option, a monopod offers a lightweight and more practical alternative to use within the confines of a safari vehicle. Especially in Southern Africa. You don’t need to extend it entirely, and it takes the strain from your arms and shoulders while seated. It’s surprising how effective it can be. I have tested many monopods over the years and have found that Gitzo Monopods™ best suit my needs. I also use a Really Right Stuff™ lever-style, quick release that makes the process of taking lenses on and off the monopod very fast.

    Tripod

    A tripod is useful or even an essential piece of kit for evening photography, longer exposures or for around the camp. Although, the wide-spread tripod legs make them impractical and ill-advised for most safari vehicles. However, if you’re in an open vehicle on your own, or perhaps with one other, a tripod can be rigged to provide an excellent platform for larger lenses. To avoid badly damaging your camera from vehicle shake, always remove your camera from the tripod while on the move.

    Some airlines take a dim view of tripods, and you may find it difficult to persuade them to let you take it in the cabin as part of your hand luggage. If it’s going in the hold, it can take up more of your baggage weight allowance.

    Clamp

    I often use a ball head or gimbal head on a Manfrotto® Superclamp that can be bolted almost anywhere, including a vehicle’s roof bars. If I’m on my own, or part of a tiny group, I may even have several of these clamps placed in strategic points around the vehicle making it extremely easy to switch from side to side and back to front.

    Manfrotto 035 Superclamp. Image courtesy of Manfrotto®

    Storing Images while on an Africa Photo Safari

    Laptop

    You could easily take 300-500 images a day. Trigger-happy photographers may even have over 1,000, so a small laptop with external hard drives are useful for securely backing up your photographs. If weight restrictions allow, two hard drives that mirror each other is a great solution. Remember to pack essential items such as connecting cables, chargers and memory card readers.

    Memory Cards

    An alternative solution to external hard drives is to bring extra memory cards. You can file these away at the end of each day. That way, you are safe in the knowledge that your data remains untouched until you arrive home. If you don’t like the idea of swapping out memory cards too often, go for larger capacity ones such as 32GB. That said, I don’t like to put all my eggs in one basket, and therefore I opt for 2 or 3 smaller cards in favor of one larger one.

    Accessories for an Africa Photo Safari

    Batteries

    Get to know what you can expect out of your camera with regards to battery life and take enough spares to get you through each day. Cold is a battery’s nemesis, so make sure they’re not getting too cold overnight. I have two spare batteries for each camera body, and that’s always been more than adequate for my purposes.

    Lens Cleaning Cloth

    Remember lens cleaning cloths. I would also recommend a camera and lens cover that helps protect your camera in the event of a rain shower and for protecting your gear against the dust mentioned above.

    Others

    Don’t forget your smartphone, binoculars, head torch, notepad and pen, personal medication, malaria medication, toiletries, money, your passport, and visa.

    For detailed, up-to-date information on vaccinations and more, you are best to consult an official website.

    Packing for an Africa Photo Safari

    I recommend packing high-value items like cameras, lenses, and laptops in your hand luggage. Some airline safety requirements require you to pack batteries in your hand luggage, so ensure you charge your items, as airport security often requires you to demonstrate that laptops and cameras are all in full working order. A simple rule of thumb is to pack items essential to your photography, travel, and health in your hand luggage.

    Pack your gear very carefully with disruption in mind. Some Africa photo tours can consist of two or three successive flights to get to various destinations in Africa. There may be two or even three layers of airport security on each of these flights. You may be required to unpack large cameras, lenses, and laptops. If you can, avoid placing smaller accessories on top of larger items that you may need to take out repeatedly and re-pack. Pack cables and batteries together in small pouches rather than loose in your bag.

    Your camera bag should be large enough for your gear but small and light enough for all cabin limits. When packed you should be able to safely lift your bag in and out of the overhead lockers without assistance. Check the maximum sizes and weights for all the airlines and be aware that different flights often have different rules.

    For small internal charter flights within Africa, total baggage allowance (hand luggage plus hold luggage) can be as little as 20kg and bags must be soft and pliable.
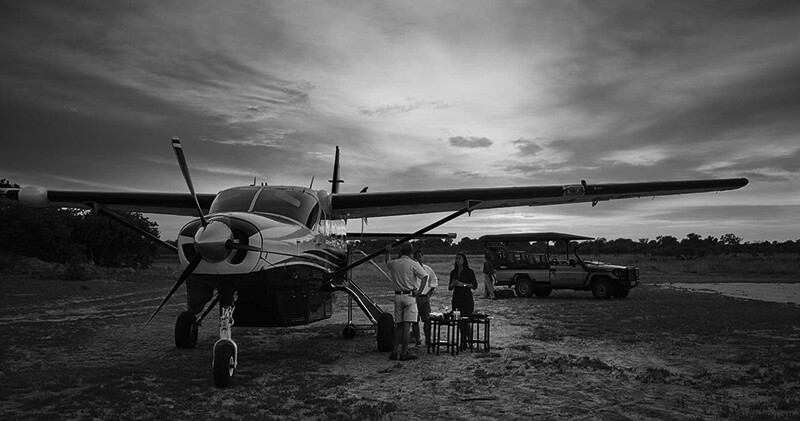
    Typical Southern Africa internal charter flight. Image courtesy of Moremi Game Reserve, Botswana

    Final Thoughts on an Africa Photo Safari

    An Africa Photo Safari is an incredible experience. For many, it is a-once-in-a-lifetime opportunity both to experience incredible scenery and wildlife and to take amazing photographs.

    There’s no doubt that it can be a daunting experience packing expensive and essential photography equipment for a safari. Even for seasoned photographers. Just remember to seek out advice. If you are booked on a photographer-specific tour, you can request support from your guides and or Africa safari tour facilitator. They have the experience and knowledge to help you make it the through this process with as little stress as possible.

    The post Photography Equipment Tips for an Africa Photo Safari appeared first on Digital Photography School. It was authored by Andrew Sproule.


    Digital Photography School

  • 4 Tips for Building a Photography Portfolio and Business

    The post 4 Tips for Building a Photography Portfolio and Business appeared first on Digital Photography School. It was authored by Lily Sawyer.

    dps-Building a Photography Portfolio and Business

    For some of us, a photography business springs from a hobby and grows into a paid endeavor, and so we feel it just landed in our laps. To others, it was more of a dream that was kept close and dear and planned to make a reality for a long time. For others, doors of opportunity open at the right time and place, and they’ve grabbed it.

    Regardless of how your photography business has come about, for your business to take shape and grow, there are necessary steps to take. These steps require many initiatives and work and do not depend on luck or open doors of opportunity.

    Let me share with you a few tips for building a photography portfolio and business. This article is of benefit if you are building your business from scratch or have been in operation but have relocated, requiring you to start afresh in a new location.

    2-dps-Building a Photography Portfolio and Business

    1. Build a Strong Portfolio

    Now, don’t get me wrong – I don’t expect that you have a massive pile of photoshoots under your belt in the beginning (although that would be great.) All you need is a handful of carefully curated photos for your portfolio. If you have any images from practices or hobby shoots, choose your very best images. The best of the best, even if you only end up with a handful. If you are brave enough to do so, choose one genre and focus on that!

    Usually the more niched, the stronger the portfolio.

    3-dps-Building a Photography Portfolio and Business

    2. Call for Models

    If you don’t have any images to use or you feel your images are not good enough yet, plan a model call-out. Shoot new images that are more focused and consistent – your portfolio benefits from more consistent images. The goal down the line is that you are the one people think of when they need a photo shoot of a particular type.

    You’re the expert in that field, and therefore you can also command decent prices. Having this in mind at the very start of your portfolio-building helps you streamline your model call plans in regards to age group, style, outfits location, and set-up. Branding is vital, especially at this stage. One could go as far as saying branding is everything.

    3-dps-Building a Photography Portfolio and Business

    You have two choices for model calls:

    1. You can ask friends or friends of friends. You can do a public call on your social media platforms. If going the friends’ route, you may decide not to charge as you may feel they are doing you a favor. That is your call. However, money doesn’t grow on trees in business. Money comes from clients or investors who want a return on their investment.

    Therefore, don’t be quick to offer your services for free, especially if you want to start charging decent fees or market rate. It’s hard for a potential paying client to start paying good money after initially being offered a freebie.

    2. There are other options far better than offering freebies. You can do a barter of some sort. Think of something that either party finds beneficial with relatively equal values. You can also charge a fair rate for portfolio building that is lower than the market rate. You can offer the session at no charge in exchange for the model call but sell the prints. That way it’s not a total freebie.

    Right off the bat, learn to accept money from clients without feeling guilty or feeling that you don’t deserve it. Also, don’t be embarrassed about it!

    4-dps-Building a Photography Portfolio and Business

    3. Have a Web Presence

    Nowadays, if you are not on the web, you are not on the map. You don’t need a super-fancy website either if you feel that is out of reach at the moment. Although, it is easy enough to start a website using readily adaptable templates. More importantly, use social media platforms that are free and easy to set up such as Facebook and Instagram.

    If possible, have both. However, if you are only doing one, a top tip is to think about your audience. What platform is your target market using? Parents with children are usually on Facebook. Younger age groups, like seniors, early 20s and 30s, are on Instagram. If you are after more real-time conversations and engagement with your followers, you could also link your accounts on Twitter.

    5-dps-Building a Photography Portfolio and Business

    A Web Presence is Your Virtual Office

    Having a web presence is like having a virtual office. People can contact you and view your strongest images in your portfolio. This tool can be leveraged to reach more people, especially friends of friends. You can tag friends, share on their page, and ask them to share. All of these methods help to spread the word about you.

    By tapping into your contacts’ friends, you are starting from a position of trust. You are no longer a stranger to a potential client but a referral. Use that to your advantage. By being reached easily on social media channels, you become more of a real person than just a webshop.

    6-dps-Building a Photography Portfolio and Business

    4. Print Some Business Cards and Stationery

    While they may seem old-fashioned, business cards are useful because some people expect them, and they are great if you are networking in-person. If you want to be memorable, make your cards into a magnet, so you stay on people’s fridges! Think of something quirky, or at least different, so that you stand out more.

    Having some printed promotional materials like mini-brochures and vouchers are invaluable. They come in handy if you want to collaborate with other small businesses in your area, such as your local health clinics for baby and maternity shoots, or boutique shops that sell outfits that fit with your branding.
    6-dps-Building a Photography Portfolio and Business

    I hope the tips in this article will help you in some way as you start your photography business. If you have any other tips, please share them in the comments below.

    You may also find this article helpful.

    The post 4 Tips for Building a Photography Portfolio and Business appeared first on Digital Photography School. It was authored by Lily Sawyer.


    Digital Photography School

  • Buying Guide: The best camera bargains of 2018

    Last updated: December 4, 2018

    If you’re looking for a high-quality camera, you don’t need to spend a ton of cash, nor do you need to buy the latest and greatest new product on the market. If you’re willing to miss out on some features, you can save a lot of cash by picking up a last-generation model or shopping around for deals on refurbished or older, but still current, cameras.

    In this buying guide we want to direct your attention to some great-value cameras, which are still available. We’ll start with the least expensive options and go up in price from there.

    Street prices listed below are current as of December 4th, 2018.

    • Sony Cyber-shot DSC-RX100 $ 369
    • Nikon D3400 w/18-55 lens $ 399
    • Canon PowerShot G9 X II $ 399
    • Canon EOS M100 w/15-45mm lens $ 399
    • Sony a5100 w/16-50mm lens $ 449
    • Sony a6000 w/16-50mm lens $ 499
    • Panasonic Lumix DMC-ZS100 $ 499
    • Fujifilm X-E3 $ 799
    • Nikon D7200 $ 799
    • Sony a7 II $ 899
    • Nikon D750 $ 1399

    Sony Cyber-shot DSC-RX100
    $ 449 MSRP, $ 369 street

    While not as capable as later models, Sony’s original Cyber-shot RX100 is an inexpensive way to snag a genuinely compact camera with a 1″ sensor. It has a 28-100mm equivalent lens that will do well in low light at the wide end of the lens, but not-so-great at telephoto. You miss out on the faster lenses, electronic viewfinders and improvements in autofocus and JPEG image quality that arrive in the latest models.

    The camera fits in a pocket with ease, though the body is slippery and some may find the controls a bit clunky. The RX100 has a 3″ non-touch LCD but lacks a viewfinder. Photo quality is excellent and the same can be said for its Full HD video. It focuses quickly and can shoot continuously at 10 fps. Wi-Fi is built-in for photo sharing.

    More info | Check prices


    Nikon D3400 w/18-55mm lens
    $ 499 MSRP, $ 399 street

    While it’s since been replaced by the D3500, the Nikon D3400 is essentially the same camera but in a slightly different (but still very compact) body. Like other Nikons, the D3400’s 24MP APS-C sensor has excellent resolution and dynamic range. Its autofocus system is dated and it can’t take many photos in a burst, so a sports camera it is not.

    What makes the D3400 so appealing is that it’s great for beginners, with its ‘Guide mode’, selecting the correct settings for you based on use case, and tells you which of them were actually changed so you learn. The camera also features Full HD video capture (though AF is essentially unusable) and Bluetooth for easy photo sharing.

    More info | Check prices


    Canon PowerShot G9 X Mark II
    $ 529 MSRP, $ 399 street

    The Canon PowerShot G9 X Mark II is one of the cheapest and smallest compact cameras with 1″ sensor that you can buy. The larger-than-average sensor will produce better-looking images than your typical compact, though the slow-ish lens will reduce that advantage in low light.

    The lens has a small 28-84mm equiv. focal range, which isn’t as versatile as most of its peers. Despite that, the G9 X II has a well-designed touch interface, snappy performance, Full HD video capture and the latest wireless features.

    More info | Check prices


    Canon EOS M100 w/15-45mm lens
    $ 599 MSRP, $ 399 street

    The Canon EOS M100 is one of least-expensive mirrorless cameras you’ll find. It’s packed with Canon’s latest features, including its excellent Dual Pixel autofocus system and also has a flip-up touchscreen display. It’s not as good at shooting action as the newer M50 model, which can also capture 4K video.

    The M100 features Full HD video capture and Wi-Fi with Bluetooth. While there aren’t many native EF-M lenses available, the M100 is compatible with Canon’s enormous selection of EF and EF-S glass with an optional adapter.

    More info | Check prices


    Sony a5100 w/16-50mm lens
    $ 549 MSRP, $ 449 street

    It’s hard to believe but, five years after its introduction, Sony is still making its a5100 mirrorless camera. The compact Sony a5100 is a good choice for those on a tight budget seeking a point-and-shoot experience, but with interchangeable lenses. It hasn’t seen the improvements in video, autofocus or JPEG color that have arrived in newer Sonys, meaning you don’t get the excellent Eye AF feature.

    The a5100 uses a 24MP APS-C-size sensor and has a hybrid AF system that’s still responsive today. There’s a selfie-friendly flip-up touchscreen LCD on the a5100, but no viewfinder. It can capture Full HD video and has Wi-Fi with apps you can download to the camera.

    More info | Check prices


    Sony a6000 w/16-50mm lens
    $ 649 MSRP, $ 499 street

    The Sony a6000 is one of the best-selling interchangeable lens cameras of all time, and for good reason. It has excellent image quality, a reliable autofocus system, 11 fps burst shooting and a sharp OLED viewfinder. The a6000 is targeted a bit more toward enthusiasts than the a5100, with dual control dials but (disappointingly) no touchscreen. It pre-dates features such as 4K video and Sony’s excellent Eye AF feature, and improvements in interface and JPEG color.

    It captures Full HD video, offers Wi-Fi and can download feature-adding apps into the camera. It’s worth pointing out that Sony’s APS-C lens collection is relatively small and expensive compared to other mirrorless brands.


    Panasonic Lumix DMC-ZS100
    $ 699 MSRP, $ 499 street

    The Panasonic Lumix DMC-ZS100 (TZ100 in some regions) is a compact camera with a 1″ sensor and 25-250mm equiv. lens. It fits easily in your pocket, making it an ideal camera for travel. Its lens has a relatively slow maximum aperture, so it won’t perform terribly well in low light, though it will still out-do compacts with smaller sensors. It doesn’t get the nicer JPEG colors of newer Panasonic models.

    The ZS100 has a fixed touchscreen display and a ‘better than nothing’ electronic viewfinder. In addition to taking 4K video, the ZS100 also has genuinely useful features like ‘Post Focus’ and ‘4K Photo’. For those looking for a portable, versatile travel camera, the ZS100 is a bargain.


    Fujifilm X-E3
    $ 899 MSRP, $ 799 street (body only)

    The Fujifilm X-E3 is a rangefinder-style mirrorless camera that produces excellent images straight out of the camera courtesy of its modern 24MP X-Trans APS-C sensor. Its well-built body has direct controls for shutter speed and exposure compensation, and most buttons are customizable.

    A high-resolution EVF and touchscreen await users on the rear plate. It also offers Wi-Fi and Bluetooth. The X-E3 captures 4K video but not nearly to the high standard or newer models.While it doesn’t have a built-in flash, with a small external one included in the box. The excellent 18-55mm F2.8-4 lens adds just $ 300 to the cost of the camera and is well worth the money.

    More info | Check prices


    Nikon D7200
    $ 1099 MSRP, $ 799 street (body only)

    The Nikon D7200 is a midrange DSLR with a 24MP APS-C sensor that produces sharp images with excellent dynamic range and solid high ISO performance. It’s reasonably small and light and is sealed against the elements. The D7200 has a large optical viewfinder and a fixed 3.2″ (non-touch) LCD.

    Autofocus performance is superb, whether you’re tracking subjects or shooting in low light. While the D7200 can record Full HD video, quality isn’t as good as other midrange cameras and autofocus is effectively unusable. The D7200 has built-in Wi-Fi, but the aging smartphone app is unreliable.

    More info | Check prices


    Sony a7 II
    $ 1399 MSRP, $ 899 street (body only)

    The Sony a7 II is a solid full-frame mirrorless camera that currently sells for a remarkably low price. It has built-in 5-axis image stabilization, a 24MP sensor, fast hybrid autofocus system and Full HD video capture. The camera has a relatively rugged, with some weather-sealing, high resolution EVF and tilting (non-touch) LCD. It misses out on the further improvements Sony has made in terms of JPEG color, autofocus and user interface in its latest models.

    Photos have great resolution and excellent Raw dynamic range, though the a7 II struggles a bit at high ISOs. Some users might find the buttons and dials to be too small, so it’s worth trying one in person before you buy.

    More info | Check prices


    Nikon D750
    $ 1999 MSRP, $ 1399 street (body only)

    Despite being released way back in 2014, the D750 is still one of the most attractive full-frame DSLRs on the market and an incredible bargain as it approaches its fifth year of production. The D750’s 24MP sensor produces beautiful photos with low noise at high ISOs and plenty of dynamic range. Its autofocus system tracks subjects with ease, though the camera’s buffer fills quickly when shooting bursts.

    The D750’s body is compact for a full-frame DSLR and it has a giant optical viewfinder, a 3.2″ tilting (non-touch) LCD, built-in flash, dual SD card slots and Wi-Fi. It can shoot good quality Full HD video, though autofocus performance in video and live view is for static subjects only. Battery life, on the other hand, is exceptional.

    More info | Check prices

    Articles: Digital Photography Review (dpreview.com)

  • Hipstamatic harnesses iPhone X TrueDepth data to improve TinType app

    Camera app developer Hipstamatic says it has found a way to use the depth data generated by the iPhone X to improve the way its TinType app works out which areas of a picture to render out of focus. The depth information the new camera phone creates has allowed Hipstamatic’s developers to identify a genuine plane of focus instead of having to guess and simulate the effect just with software blurring.

    A portrait taken with the new app showing a map that demonstrates the area of the image the camera takes to be the subject and where the plane of sharp focus should be

    Hipstamatic founder Ryan Dorshorst says that the TrueDepth feature of the new iPhone X provides information at every pixel about how far away the subject is, so with a subject identified it is a much easier job to determine what is background as well as what is in front of and behind the subject – and to blur only those areas. This allows the developers not so much to improve the impression of a tin type’s characteristics but the extremely shallow depth of field that we associate most with large format cameras.

    In previous versions of the app a ring of blur was placed around the subject based on where the camera was focused, but it was only really effective when the subject was a person and they were in the right part of the frame. The new v2.1 version bases the decision about where the blur should go on real depth data, so the effect can be applied in a convincing way in a much wider range of situations.

    The app is only available for iPhone users, and can be downloaded from the Apple App Store. For more information on the TinType app see Hipstamatic’s TinType page.

    Articles: Digital Photography Review (dpreview.com)

  • Xiaomi details DeepExposure, an AI that automatically fixes image exposure and detail

    Chinese company Xiaomi’s AI Lab has published a new paper detailing an AI network called “DeepExposure” that improves low-quality images through machine learning. “Comparing with other methods,” the researchers explained in their paper, “our algorithm can restore most of the details and styles in original images while enhancing brightness and colors.”

    DeepExposure utilizes generative adversarial networks and asynchronous adversarial learning to split low-quality images into segments called sub-images. The system computes both local and global exposures for these sub-images, then evaluates their quality before blending them with the original image.

    The end result is an image with improved exposure and detail, opening the door for future solutions that may automatically enhance low-quality photos. It’s possible that Xiaomi may one day offer this technology on its smartphones, which already offer other AI capabilities.

    The researchers point out in their paper, “Due to the requirement of expertise of photography, photo quality enhancement is beyond the capability of non-professional users, thus leading to the new trend of automatic techniques of image retouching.”

    The study indicates that DeepExposure could also be adjusted in the future to improve image tone and contrast.

    Xiaomi isn’t the only company using artificial intelligence to automatically improve images. Earlier this year, researchers with Intel and the University of Illinois Urbana-Champaign detailed a deep neural network able to brighten low-light images without reducing their quality. Similarly, a technology called Deep Image Prior was unveiled last year with the ability to recreate damaged parts of an image based on the image’s existing elements.

    Articles: Digital Photography Review (dpreview.com)

  • Black and White in the Outdoors: Learning to see in Monochrome

    The post Black and White in the Outdoors: Learning to see in Monochrome appeared first on Digital Photography School. It was authored by David Shaw.

    1 - Black and White in the Outdoors

    To determine when black and white is the best option in nature photography, you need to learn to see your scene in black and white. Most beginner photographers arrive at their monochrome images by experimenting with post-processing. While this occasionally works, shooting with black and white in mind results in far better images.

    In other words, you need to SEE in black and white.

    Look for Contrast

    Highlights

    In color photography, there are almost unlimited options to juxtapose contrasting and complementary colors or to provide an attention-getting subject in a flashy tone. But in black and white, you lose the ability to use color in the traditional way and are instead left with shades of gray. Contrast, rather than color, is our compositional tool.

    Most of us see the world in rich color and there is no saturation slider in our eyes or brains with which we can switch color on and off. But we can train ourselves to see contrasts.

    As I’m writing this, I’m looking out my window onto the spruce trees in my front yard. The sun is shining on a layer of fresh snow which fell over the past few days. The limbs of the spruces are draped in white. Looking south, toward the low sun, I can see flashes of perfect white where the sunlight is illuminating fresh snow. Those bright highlights contrast sharply with the dark, shaded trunks and exposed branches of the trees. In fact, even in the shaded areas, the difference between the snow and the dark needles is remarkable. With little color in the scene to begin with, it doesn’t take much to “see” this scene in black and white.

    Because I can “see” this scene clearly in black and white, I can recognize that images like this will translate well from color. Here, let me step outside for a few minutes and make a few photos, to show you what I mean.

    (A few minutes later…)

    I’m back. I’ve pulled a few images and did a quick black and white conversion in Lightroom. Here are a couple of shots; first color, and then black and white.

    2 - Black and White in the Outdoors

    3 - Black and White in the Outdoors

    4 - Black and White in the Outdoors5 - Black and White in the Outdoors

    This is a straightforward example. As most people can see, lacking many colors, the snowy trees were a likely subject for black and white. However, the next step is harder.

    Color Contrast

    I had another black and white shooting session a few months back when “seeing” in black and white was much more difficult.

    Each fall, I make a pilgrimage from my home in Alaska’s interior to the Kenai Peninsula. This year, I spent a day exploring the forest and mountains of Kachemak Bay State Wilderness Park, across the bay from the town of Homer. I hiked for several miles through the wet forest making images of the rising autumn colors, and the fog-draped mountains. It was a sea of greens and yellows, red highlights, grays, and browns. Some images were perfect for color, others not so much. Telling the difference in the field was a game I played as I walked.

    6 - Black and White in the Outdoors

    Some black and white images were clear in the gloomy forest. The dull yellow, jagged leaves of Devil’s Club against the muted greens and browns of the forest floor were an obvious contrast that I knew would translate well into black and white.

    Others, like the pale green of fern fronds, were less contrasty in the field, and yet translated beautifully into shades of gray.

    7 - Black and White in the Outdoors

    These ferns were dying back at the end of the season and were largely a dull brown. Kind of ugly really. However, the color doesn’t matter in black and white, and the contrast between the pale brown fronds, and the deeply shaded background worked.

    8 - Black and White in the Outdoors

    This patch of ferns was pale green and popped against the darker green background. This is my favorite image of the series. It was a shot that took me a moment to “see” in black and white.

    Another shot of an autumn stalk of bright red fireweed, I thought would look good in black and white when I first made the image, but upon examination of the back of my camera in the field. There was actually little contrast in brightness between the greens and red. That image didn’t work quite as well.

    9 - Black and White in the Outdoors

    10 - Black and White in the Outdoors

    Lighting Contrast

    Later that same afternoon, bright sunlight started to filter through increasingly thin clouds. It wasn’t yet hard light, but it was bright enough to be directional. The sun came through the forest canopy in patches, illuminating and shading different areas.

    And this brought about a third option for black and white: lighting contrast. In the differing light, even similar colors will contrast in black and white.

    11 - Black and White in the Outdoors

    Beyond Details

    12 - Black and White in the Outdoors

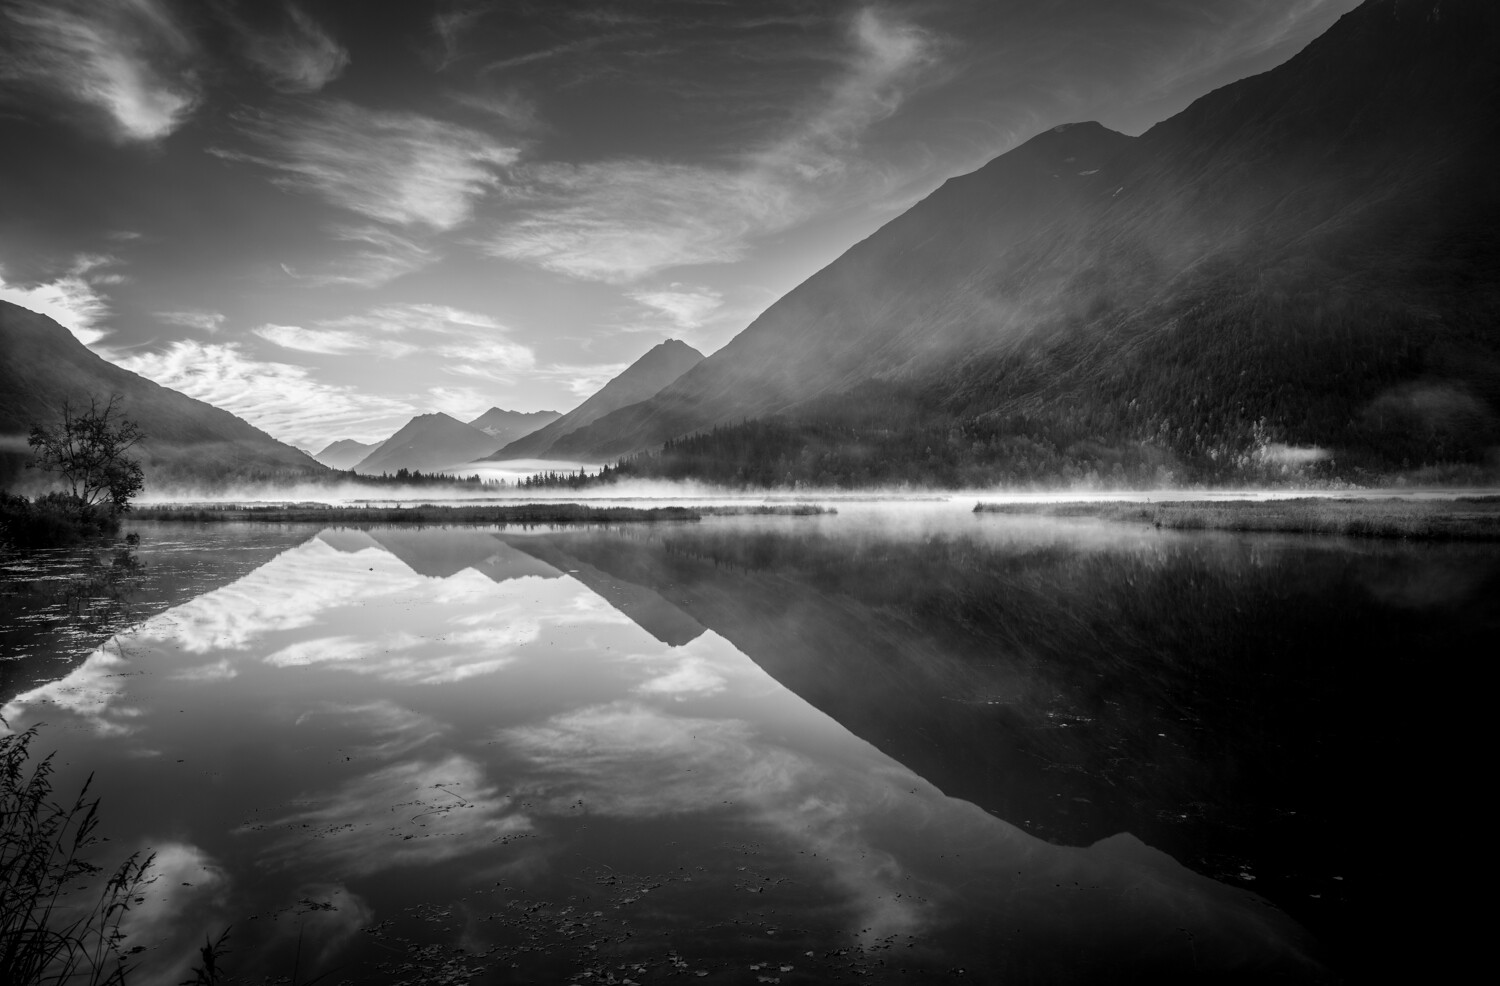
    Seeing a large scene in black and white is the next step. I was photographing by a lake this fall. It was early in the day, the sun not yet far above the horizon, but any lingering sunrise color had faded. Most of the lake, some rising fog, and the surrounding mountains were in shadow. Aside from the sky, there wasn’t a lot of contrast. I was about to pack it in for the morning when the sun got high enough to illuminate a patch of fog, which flashed white in this scene of muted blues. Not much for color, I thought, but in black and white? That, I realized, would work.

    13 - Black and White in the Outdoors

    Terrible Light

    At times, when photographing in harsh light, black and white can also salvage an otherwise impossible situation. A number of years ago, I was shooting in the altiplano of Bolivia. I arrived at mid-day at the spectacular and weird Laguna Colorado. It was savagely bright; cloudless skies, high elevation, middle of the day, and within a few degrees of the equator. Lighting conditions couldn’t have been worse.

    While the landscape was uniformly drenched in harsh, ugly light, there was contrast in the colors of the desert. A polarizer darkened the sky and removed the worst of the glare. The resulting black and white conversion, was if not perfect, at least the best of a very bad situation.

    14 - Black and White in the Outdoors

    15 - Black and White in the Outdoors

    Frequently traveling photographers find themselves in beautiful locations at bad times, and we don’t always have the freedom to return when the light is better. In such situations, consider black and white. It’s not a cure-all, by any means, but nasty light will often translate better into monochrome than full color.

    The situation I described above was not unique on my trip through Bolivia. The sweet light of morning and evening lasted only minutes in the high desert, quickly replaced by glaring light. And yet contrasts in the landscape salvaged many a scene for me.

    16 - Black and White in the Outdoors

    Conclusion

    If you can recognize a black and white subject in the field, it will open up your eyes to new compositions you may have previously ignored. Black and white photography is not simply the removal of color, it is a way of seeing.

    When next you venture outdoors with your camera, look at the way colors and even shades contrast with one another. Look for lighting conditions that cause contrast to appear and embrace those situations in the form of black and white photography. Even on those days with rotten, bright light, consider how removing those washed out colors might help your final image, sometimes black and white can salvage an otherwise desperate moment.

    Give it a try and then share your results in the comments below.

    The post Black and White in the Outdoors: Learning to see in Monochrome appeared first on Digital Photography School. It was authored by David Shaw.


    Digital Photography School

  • Qualcomm’s new Snapdragon 855 chipset offers faster depth sensing, 4K HDR video at 60fps

    Qualcomm has announced its new flagship mobile chipset that we should expect to see in most 2019 high-end Android smartphones, including the Samsung Galaxy S10.

    From an imaging point of view the most interesting news is an upgraded Spectra image signal processor (ISP) that is taking over some tasks that previously have been performed by CPU, GPU and DSP in conjunction. For example, the ISP can process depth mapping at a frequency of 60 frames per second. This should be useful for real-time object attenuation applications but could also help improve simulated bokeh effects in video footage.

    In addition the new ISP enables 4K HDR video capture at 60 fps and Qualcomm also claims the processor generally needs only about 25 percent of the power for the same task than previous variants.

    For general computing the new chipset’s 7nm process is expected to deliver improved performance while yielding noticeably better battery life then the current Snapdragon 845. The Snapdragon 855 should also bring performance improvements to AI-applications. Qualcomm says the new chipset delivers “up to three times the AI performance compared to the previous generation mobile platform”.

    In terms of connectivity the 855 won’t come with 5G but instead use Qualcomm’s new X24 LTE modem which is capable of theoretical download speeds up of to 2Gbps. However, device manufacturers will have the option to add an X50 5G modem to their packages if they they want to include 5G connectivity in their Snapdragon 855-powered products.

    Articles: Digital Photography Review (dpreview.com)

  • Tumblr will remove and ban all ‘adult content’ from its platform starting December 17th

    In a controversial move, social media website Tumblr has announced it will start removing all pornography and explicit content on December 17th, 2018 and subsequently ban adult content going forward.

    The ban comes three weeks after Apple removed the Tumblr app from its iOS app store after it was discovered underaged content was slipping through an ‘industry database of child sexual abuse material,’ but it’s unclear if the move to ban all adult content is due to Apple’s decision.

    For context of how much adult content there is on Tumblr, former Tumblr CEO David Karp said in June 2012 that roughly two to four percent of the content on Tumblr was related to pornography. A year later, in May 2013, web analytics firm SimilarGroup came out with its own analysis claiming 22,775 of the 200,000 most-visited Tumblr domains were pornographic in nature — roughly 11.4 percent. The discrepancies between those two statistics is stark, but regardless of how it’s looked at, there’s a great deal of adult content floating around the social network with more than 100-million blogs.

    ‘Posts that contain adult content will no longer be allowed on Tumblr, and we’ve updated our Community Guidelines to reflect this policy change,’ says Tumblr CEO Jeff D’Onofrio in a blog post on the Staff Tumblr. He goes on to say ‘Bottom line: There are no shortage of sites on the internet that feature adult content […] We will leave it to them and focus our efforts on creating the most welcoming environment possible for our community.’

    Where things get interesting is how Tumblr is defining adult content. On Tumblr’s Help Center page, it defines it as follows:

    Adult content primarily includes photos, videos, or GIFs that show real-life human genitals or female-presenting nipples, and any content—including photos, videos, GIFs and illustrations—that depicts sex acts.

    Tumblr goes on to say on the same page what is allowed, which reads as follows:

    Examples of exceptions that are still permitted are exposed female-presenting nipples in connection with breastfeeding, birth or after-birth moments, and health-related situations, such as post-mastectomy or gender confirmation surgery. Written content such as erotica, nudity related to political or newsworthy speech, and nudity found in art, such as sculptures and illustrations, are also stuff that can be freely posted on Tumblr.

    In terms of photography, it appears as though nearly all nude photography will be removed and banned, regardless of how tasteful it is or isn’t. That is, unless it’s a male nipple or pertains to the other exceptions mentioned above.

    Tumblr has started flagging content as inappropriate already and will continue to do so. In the event a piece of content was flagged unnecessarily, something that’s already happening, Tumblr has an appeal button alongside the post that can be used to protest the flag.

    Articles: Digital Photography Review (dpreview.com)

  • How to Create a Lithography Effect Using Photoshop

    The post How to Create a Lithography Effect Using Photoshop appeared first on Digital Photography School. It was authored by Ana Mireles.

    1- How to Create a Lithography Effect Using Photoshop

    I love getting inspiration from darkroom techniques and applying original effects to digital photos. If you’re like me and want to give your images a vintage look, this tutorial is for you. I’ll show you how to get a beautiful creamy-caramel tone that mimics Lithography (or Lith for short) printing.

    Lith printing is a monochrome technique that consists of overexposing the paper and then underdeveloping it. By doing this, your photograph gets warm colors with strong shadows but with aerial highlights. That explained, now let’s get into Photoshop.

    1.  Choose Your Image and Create a Black and White Adjustment Layer

    To create a Lithography Effect Using Photoshop, choose the image you want to work with and open it in Photoshop. There’s no need to duplicate it or save an extra copy as you’re not going to touch this original image. Everything is done using layers and adjustment layers. Working this way not only protects your original image, but it also allows you to go back and adjust or modify every step if you wish to.

    2 -How to Create a Lithography Effect Using Photoshop


    The first step is to create an adjustment Black and White Adjustment layer. To do this, click on the ‘Add Adjustment Layer’ button from the bottom of the layers panel. It’s the one with the symbol of a half dark – half light circle. A pop-up menu appears with all your choices. Choose the Black and White one. Now the properties panel allows you to adjust it through the use of sliders. You can move the green and the yellow sliders to lighten it a little bit like I’m doing. However, this depends on the photo you’re using.

    3 - How to Create a Lithography Effect Using Photoshop

    2. Create a Hue/Saturation Adjustment Layer

    Next, add another adjustment layer. This time choose ‘Hue/Saturation’ from the menu to achieve the tones you want. Ensure the ‘Colorize’ box is checked and move the ‘Hue’ slider. In the original technique, the tone depended on the type of paper, the specific blend of developer and the time you left it to process, so you can also be flexible here. In any case aim for a soft brown or caramel, For my taste, something between 20 or 30 on the slider works well.

    4 - How to Create a Lithography Effect Using Photoshop

    3. Create a Brightness/Contrast Adjustment Layer

    Create another adjustment layer and choose ‘Brightness/Contrast’ from the menu. Click the ‘Legacy’ box and drag the contrast slider to the left to flatten your mid-tones.

    5 - How to Create a Lithography Effect Using Photoshop

    4. Create a Curves Adjustment Layer

    The last adjustment layer is meant to adjust the shadows. Add a ‘Curves’ adjustment layer and anchor the lightest part by clicking on the top right corner. Drag the darkest one (on the bottom left) to the right until you reach the first quadrant. Finally, create an anchor point in the middle and drag it upwards for the mid-tones. It may sound complicated, but you can see it in the screenshot below. There is also no need to replicate exactly. It also depends on your image and your liking.

    6 - How to Create a Lithography Effect Using Photoshop

    5. Create a New Layer

    That is all for the adjustment layers. Now create a new layer. This button is also on the bottom of the panel; however, the symbol is a square with one corner bent. Color this layer by going to Menu -> Edit -> Fill, choose 50% Gray and apply. This layer should completely cover your image but don’t worry; you’ll fix that later.

    7 - How to Create a Lithography Effect Using Photoshop

    6. Add Noise

    While still in this layer, go to Menu -> Filter -> Noise -> Add Noise. In the pop-up window, choose ‘Monochrome’ and slide up to about 140% because you need to distress the image.

    8 - How to Create a Lithography Effect Using Photoshop

    6. Add Blur and Soft Light

    Next, go to Menu -> Filter -> Blur -> Gaussian Blur and set it to ‘4.’ This softens the noise.

    9 - How to Create a Lithography Effect Using Photoshop

    Now change the Blending Mode from the drop-down menu that you’ll see on the top of the panel, and choose ‘Soft Light.’

    10 - How to Create a Lithography Effect Using Photoshop

    7. Add a Layer Mask

    Now your image is distressed as desired, but the effect needs to be contained only into the darkest areas because Lithography prints are characteristic for their grittiness within the shadows. To achieve this effect, you need to add a layer mask to it. Go to Menu -> Select -> Color Range and sample the darkest areas by clicking on one of them. You can fine-tune this selection by dragging the fuzziness slider.

    11 - How to Create a Lithography Effect Using Photoshop

    Now click on the Layer Mask button and see the results or your finished digital Lith. Please give it a try and share your results in the comment section.

    12 - How to Create a Lithography Effect Using Photoshop

    The post How to Create a Lithography Effect Using Photoshop appeared first on Digital Photography School. It was authored by Ana Mireles.


    Digital Photography School

  • Officials say Apple’s claim of ‘studio quality’ portraits on iPhone X, Xs isn’t misleading

    Two challenges to Apple’s claim that its iPhone X can shoot studio quality portraits have been turned down by the UK’s Advertising Standards Authority (ASA). The complainants took issue with Apple’s advertising line that the phone could deliver ‘Studio-quality portraits […] Without the studio’ and believed consumers would misled, but after an investigation the ASA found that the statement was fair.

    The basis of the findings is that there isn’t clear definition of what ‘studio quality’ means, and that there is a wide variety of talent in the studio photography industry that meant that the term didn’t necessarily indicate that a ‘studio quality’ portrait was a good one. Rather, the ASA agreed with Apple that the Portrait Lighting effects, the depth-of-field mimicking software and the inclusion of a standard, instead of a wide, focal length meant that the characteristics of a ‘studio’ portrait could be achieved. The investigation also found that the effects shown in the Apple adverts could indeed be produced with the phone at the time of shooting or post capture.

    The ruling might seem a smack in the face to the portrait business and to undermine respect for the profession, but photographers are perhaps becoming victims of our own well-worn stock phrases such as ‘the best camera is the one you have with you’. While there is no clear measure of what ‘studio quality’ means, skill and vison are required to create a good portrait and as we all know ‘it’s the archer not the arrow’ – though Apple forgot to mention that bit.

    The fact is that smart phones are genuinely becoming better and better at taking pictures, and their developers are devising features and functions well ahead of those traditional camera makers offer. These features often exist to compensate for the physical limitations of the tiny camera units, but they also put incredible flexibility into the hands of the user. At every turn in history the advances of smaller formats have been opposed by ‘proper’ photographers, but that has done nothing to prevent the inevitable progress of the convenience and popularisation of photography. You would be mad to buy an iPhone X to start your portrait business however, as a decent interchangeable lens camera can be had for less than the same price – with change to use a pay phone.

    For more information on the complaint, the investigation and the ruling see the Advertising Standards Authority website.

    Articles: Digital Photography Review (dpreview.com)