Blog

  • Moment Pro Camera app gets focus peaking, zebra striping and more

    App and mobile lens maker Moment has launched a substantial update to its Pro Camera app for Android and iOS devices.

    Both the Android and iOS versions now come with Focus Peaking and the new Zebra Stripes feature. Just like on standalone-cameras with the same features, sharp edges will be highlighted in the preview image when focusing manually. Additionally over or underexposed areas in the preview image are indicated using an overlaid stripe pattern.

    The Android app has received a few additional goodies and now comes with Split Focus and Exposure. This offers better control over challenging lighting situations by allowing you to set exposure and focus points to different areas of the scene.

    A new live RGB Histogram helps dialing in color, balance, and exposure when shooting video and you can now capture both a RAW and JPG image at the same time. Moment says this also speeds up the image preview in Raw mode.

    Other improvements include a redesign of the camera roll and improved support for OnePlus devices as well as the Samsung Galaxy S10.

    In terms of pricing the iOS app has been changed from a ‘freemium’ model to a paid download and will set you back $ 5.99 in the App Store. The Android version remains a paid download and is $ 3.99 on Google Play.

    Articles: Digital Photography Review (dpreview.com)

  • Storm chaser captures incredible tornado footage with a drone

    You don’t need to watch the classic 1996 film Twister to understand that storm chasing is risky, life-threatening work; but that didn’t prevent WXChasing’s Brandon Clement from honing in on a tornado located near Sulphur, Oklahoma, and capturing some epic 4k footage with a drone.

    ‘I’ve been working on getting that shot for about three years now,’ said Clement to the Washington Post. Clement has been chasing storms since childhood. ‘I’ve probably done a half-million miles chasing across the country by now. But this one is pretty special.’

    According to reports from AccuWeather, at least 25 tornadoes were reported across southern and central United States on Tuesday including Texas, Oklahoma, Kansas, Missouri, and Arkansas. Clement happened to be in the path of the non-destructive occurrence in Oklahoma and expertly maneuvered the drone to capture a perspective that impressed meteorologists.

    FStoppers pointed out that the last time such poignant footage was captured, it came from the perspective of a helicopter over three decades ago. KARE helicopter pilot Max Messmer, along with photographer Tom Empey, stumbled upon a forming tornado and broadcast the entire phenomenon live during the 5 o’clock news.

    While tornadoes have been captured from the perspective of a drone before, this is the first time a remote pilot has created something that transcends the typical, static imagery taken from a distance.

    Articles: Digital Photography Review (dpreview.com)

  • Timelapse+ Studio makes it easier than ever to create timelapses directly in Lightroom

    Timelapse+ has introduced a new plug-in for Adobe Lightroom that promises to make editing and constructing timelapse videos significantly easier. Timelapse+ Studio can identify timelapse sequences in your library and form them into collections. It will then automatically mark what it thinks are key frames in the sequence and allow users to edit those key frames in Lightroom as normal. Users can add more key frames and then have the software blend transitions to balance for adjustments across all the images in the sequence.

    The software also allows users to zoom in to areas of the scene and to pan across the frame to create a sense of camera movement even in situations in which the camera and lens were stationary during recording.

    Exposure differences between frames, or different parts of the sequence, can be ironed out to avoid abrupt changes, and the result can be previewed in a window within Lightroom once the sequence is complete. The company says all the automated tasks the software performs can be undone and redone by those that need manual control of the way the timelapse is created.

    The astro timelapse below was created by Adrien Mauduit using Timelapse+ Studio.

    Timelapse+ Studio is available now and costs $ 49. For more information see the Timelapse+ website.

    Articles: Digital Photography Review (dpreview.com)

  • Gaining Confidence to Charge Properly for Your Photography

    The post Gaining Confidence to Charge Properly for Your Photography appeared first on Digital Photography School. It was authored by Mat Coker.

    Alexander Mils

    So many of us are awkward about money – especially asking for it. A few years ago I was just starting out as a “professional” photographer. I did a free session just for the experience. The family insisted on paying me something even though I kept declining. They gave me $ 20. I couldn’t help but think, “is that all I’m worth?” I was happy to do it for free, yet $ 20 felt like an insult.

    There were a lot of questions tangled up in that $ 20 session. Are my photos good enough to charge money? What is the right price to charge? How do I tell them my price when I feel so dirty about money? Why don’t they value me more?

    I knew that I had to work through these questions or just forget about charging money at all.

    Let me share with you how to:

    • Know what to sell (a service, prints, or digital)
    • Set your prices (to fund your hobby or go full time)
    • Get over the dirty feeling you have when talking about money
    Photo session pricing

    This was one of my first and cheapest photo sessions, but also one of my most memorable. It rained the whole time and we had to keep ducking back into our vehicles to stay dry.

    A riddle

    When I first started out and my prices were low, people would tell me that my prices were too high. And now that my prices are five times higher, people keep telling me my prices are too low. Why is that? I’ll tell you at the end.

    First, the truth about prices

    You will set your prices based on assumptions you have. Many of those assumptions are wrong, which leads to wrong pricing.

    I promise you that:

    • The market is not over-saturated with photographers.
    • Cheap photographers have not driven down prices for the rest of us.
    • People do value photography and will spend good money on it.
    Family photo session prices

    I charged this family four times more for their next session and they gladly paid because they loved their first set of photos so much. I even got a call from the dad saying how much he liked the photos. And dad’s never want to pay for photos!

    What do you really want?

    There is little use in discussing pricing if you don’t have an end goal in mind. You need to begin by asking yourself what you really want.

    Do you even want money? If so, do you want a little money to fund your photography hobby? Or, do you want enough money to count as income?

    Money is a tool to get other things. So the question is, what do you want?

    Don’t charge anything at all

    Don’t feel as though you must charge for your photography. You might get sucked into the idea of making money with your photography just because so many other photographers do.

    If you love photography for it’s own sake, you don’t necessarily need to make money doing it.

    Keep your life simple and chase photography for it’s own sake. Go ahead and share your photography as a gift with no concern about money.

    photography pricing

    Figure out what you’re selling

    If you do want to earn money with your photography, you need to decide what you’re selling and why.

    You could sell sessions, digital files or prints (or any combination of these).

    Don’t let anybody tell you what you must offer. Make your own decision.

    Here are some examples of what you could sell.

    • Photograph events and then sell digital files or prints.
    • Do photography sessions (newborn, family, etc) and then sell digital files or prints.
    • Take photographs of your own ideas and then sell fine art prints or digital stock photography.

    Create a price list for whatever you offer and then you’re ready when people ask how much you charge.

    How to set your prices

    I prefer to keep everything as simple as possible, so here is my model for how to set your prices.

    1. What do you want to make per month?
    2. How many sessions would you like to do per month? Or, how many prints or digital photos would you like to be selling per month?

    Suppose you would like to earn $ 1000 per month and you would like to do four sessions per month. You’ll have to charge $ 250 per session (but also consider your expenses).

    Perhaps you want to earn $ 500 per month by photographing one event and selling digital images. If you price your digital photos at $ 10 each, you’ll have to sell 50 of them.

    How about full-time income? Suppose you would like to earn $ 4000 per month. You could do 8 photo sessions at $ 500. Or, you could do a couple of weddings per month.

    Play with the numbers based on how much you would like to make and how much work you want to put out.

    Earning money on the side

    Hovering on the line between amateur and professional, I just loved the fact that I could take pictures and make a little money doing it.

    What should amateurs charge?

    Don’t assume that because you are an amateur you should charge less. You could be as fine a photographer as the pros – maybe better.

    Just keep in mind how much you would like to make and how much work you want to put out.

    Some amateurs like to photograph sporting events and then sell digital files or prints through an online gallery. Others like to do photo sessions for their friends. Some sell a few of their prints here and there. It’s often just a way to make a little extra money to spend on new lenses and camera bags.

    Consider how much money you would like to make and set your prices accordingly.

    How to get over the dirty feeling you have when talking about money

    There are many reasons you might feel awkward about money.

    If you haven’t set your prices in advance you’ll feel thrown off when somebody asks you. You’ll feel hesitant or doubt yourself. So set your prices and be ready to tell people what they are.

    Confidence plays a role in setting your prices.

    Are you ready to charge?

    A lot of people just need to know if they are ready to charge money for their photography.

    If you take good photos then you are ready. If you don’t take good photos then you’re not.

    Get feedback from other photographers about whether your photos are good. Ask them how you could improve. When you get to the point that you feel confident, or almost confident, then offer your services with a price tag.

    Photograph an event and sell digital photos. Or offer family photo sessions. Whatever it is, see if people are willing to pay. You’ll know you’re ready when your photos are good and people begin paying.

    At this point you may know you’re a good photographer and how much money you would like to make, but deep inside something tells you you’re not worth it.

    Are you worth it?

    I often see photographers charging low prices for their incredible photography because they don’t feel worthy of charging more. They have many reasons for their low prices, but they’re mostly just excuses. Underneath is a sense of inferiority – a sense that they themselves are no good. If this is you, then you need to get out of your own head and prove yourself wrong.

    There are countless photographers doing the work they want and charging what they want. Why not you?

    confident photography pricing

    Get out of your comfort zone and make trying new things a part of your lifestyle. You’ll gain confidence more quickly and overcome those voices that put you down.

    But will people really pay?

    Yes, people will pay. A lot.

    You’ll hear a lot of people saying that everybody is running to cheap photographers and it’s putting the higher priced photographers out of business. But it’s not true.

    Yes, a lot of people go to cheap photographers. It’s natural to seek out lower prices when we can. But that doesn’t mean that people never spend lots of money.

    Have you ever noticed that people have two polar reactions to the money they spend? People love to brag that they got a great deal. But they also love to brag about how expensive something was. People are funny creatures and you’ll learn a lot about us by paying attention to what we do with our money.

    photography pricing

    My family is even willing to pay more for apples, just for the experience of picking our own.

    Cheap commodity or something meaningful?

    Remember that curious thing I told you in the beginning? When I first started out and my prices were low, people would tell me that my prices were too high. But now that my prices are five times higher, people keep telling me my prices are too low. Why is that?

    In the beginning, I priced my photography as a cheap commodity. Nobody wants to pay a high price for a commodity. We all want the price of things like food, insurance and fuel to go down, not up! I priced my photography to be the sort of thing that is cheap and is found anywhere.

    But later on, when my prices were higher, my photography began to appeal to people who thought differently about photography. They valued it as something truly meaningful to them – not as a cheap commodity like toothpaste. They valued it like a fine bottle of wine and were happy to pay more for it.

    Some people don’t value photography, and it’s just a commodity to them. However, others do value it and are proud to seek out a talented photographer and pay good money for their work.

    The subject of my photography, and the words I use to talk about my photos, speak of meaning rather than cheapness. My prices have come to reflect the true value of my photography.

    From a purely business perspective, my prices are probably still too low. Even some of the people who hire me say that I should charge more than I do (and they prove it by giving me generous gratuities).

    So why don’t I charge even more? Because, like many of you, I struggle with that voice inside that says, “are you crazy? Nobody will pay that price.” However, the people who hire you and I will keep proving that voice wrong.


    The post Gaining Confidence to Charge Properly for Your Photography appeared first on Digital Photography School. It was authored by Mat Coker.


    Digital Photography School

  • Video: How to create an ‘anamorfake’ from old, inexpensive lenses

    Shutterstock Tutorials, the YouTube channel of stock image company Shutterstock, has published a new video featuring Todd Blankenship with instructions on how to create ‘anamorfake’ lenses. The DIY anamorphic tutorial features inexpensive lenses sourced from eBay that are taken apart, fully modified, and reassembled.

    The 13-minute tutorial is designed to equip budget filmmakers with the cinematic look of anamorphic lenses at a lower price. According to Blankenship, Shutterstock’s new tutorial was inspired by content found on Tito Ferradans’ YouTube channel, and it primarily revolves around adding the iconic flat line lens flare and oval-shaped aperture to an inexpensive lens.

    The tutorial requires easily acquired components, including sandpaper, metal polish, fishing line, acetone, spray paint, gloves, and cotton pads. As well, DIYers will need oval aperture disks and a lens wrench. In addition to the video, which provides all the steps, Blankenship details a few notable points and a list of the required tools in a related blog post.

    Articles: Digital Photography Review (dpreview.com)

  • 6 Ways to Plan a Photography Road Trip

    The post 6 Ways to Plan a Photography Road Trip appeared first on Digital Photography School. It was authored by Jeremy Flint.

    photography road trip 01

    Monument Valley, USA

    Going on a road trip can be an exciting prospect for any budding photographer. There is usually a great sense of anticipation and adventure associated with any road trips where you embark on a journey across familiar or unfamiliar lands.

    If you are planning a road trip to a particular travel destination, here are 5 ways to help you plan your getaway.

    1. Choose a destination

    photography road trip 02

    Arizona, USA

    One of the first and most fundamental things to do is to decide where you want to go. You can choose a destination based on a photographic interest you may have such as landscapes or select a location based on somewhere you would like to visit. For example, the Scottish highlands in England are a great place to take a road trip where nature is bountiful and beautiful.

    You may prefer a road trip that follows a famous route such as Route 66 in the USA.

    2. Do your research

    Planning your journey can be a challenging prospect if you have never been to the place you will be visiting. The fear of the unknown surrounding the location can hold you back and even put you off doing any groundwork.

    I suggest to just choose a route, research it and go. Researching an area will help alleviate any anxieties about going to a new area. Then it’s simply a case of putting your plan into practice.

    photography road trip 03

    Arizona, USA

    You need to decide if you will take your own vehicle or hire one depending on your budget and where you are planning to visit. Obviously, if you are going somewhere abroad that is too far away to take your own vehicle, consider which vehicle you will hire. A campervan may be a financially viable option if you would like wheels and accommodation in one.

    Alternatively, you may opt to rent a car and stay in local accommodation at your chosen destinations The advantage of a campervan or car and tent is that you can stay overnight near to a place you want to photograph such as beside a river, lake or landscape.

    3. Plan time for photography

    Plan your trip for the time you have. Figure out which location you want to visit and factor in some time for picture taking. You will also want to allow some time for sightseeing and relaxation. Don’t forget to stop the car during your road adventure to soak in the views.

    photography road trip 04

    Namibia

    4. Consider your travel partners

    A key factor to consider when planning time for photography during your road trip is who you do your grand tour with. Consider who your travel partners will be whether you decide to go with a friend, your spouse or family. Make a clear plan to factor in some photography. Tell the people you are with that you intend to do some photography at a specific time and ask if they want to come with you on your photographic pursuits.

    If they decide to join you, advise them to take to take a good book or puzzle to entertain them. These plans will help keep everyone happy and prevent you from falling out with your travel companions.

    On the contrary, if your tour is a solo road trip, you will have all the time you need. It will just be a case of choosing where and when to go and which travel destinations to photograph.

    5. Plan the gear to take with you

    photography road trip 05

    Bryce Canyon, USA

    Have you ever been on a photography excursion only to find out when you get there that a vital piece of kit is missing? This could be anything from a piece of equipment to a lens cleaning cloth.

    As simple as it may seem, I recommend making a list of things to take before you pack to ensure nothing is forgotten. Your packing list may include a camera, lenses, cleaning cloths, spare batteries and memory cards, tripod, waterproof coat, hat and gloves, walking shoes, map and a guidebook.

    6. Consider electricity

    photography road trip 06

    Desert road, namibia

    Charging your batteries is an essential part of your trip so make sure that wherever you are going has sufficient supplies to charge your batteries. Electricity points are available at most types of accommodation including hotels, B&B’s, hostels and even campsites.

    If you’re traveling in a campervan or vehicle specifically set up for road trips, it may already be well equipped with electricity points for charging devices. A solar powered or fully-charged battery charging device will provide additional battery charge capabilities.

    Conclusion

    When embarking on a road trip, make sure to plan your trip well and be prepared for any potential photographic challenges such as lack of electricity when away from connectivity spots for a certain duration of time.

    Choose and research your location. Plan time for photography and make a checklist of the gear you intend to take with you. That way, you ensure nothing is forgotten when packing for your adventure.

    The post 6 Ways to Plan a Photography Road Trip appeared first on Digital Photography School. It was authored by Jeremy Flint.


    Digital Photography School

  • Sony a6400 review

    Introduction

    $ (document).ready(function() { SampleGalleryStripV2({“galleryId”:”7539777292″,”isMobile”:false}) })

    Sample photoSample photoSample photoSample photoSample photo
    Gold Award

    85%
    Overall score

    Sony’s a6400 is a compact 24MP mirrorless interchangeable lens camera with an APS-C sensor that will serve plenty of photographers from family documentarians to pro shooters looking for a lightweight second body. The big news is that it has a new processor based on that used in Sony’s sports-shooting flagship a9 which enables ‘Real-Time Tracking’ autofocus, which is one of the most effective autofocus implementations we’ve yet seen. It’s also among the easiest to use, once you’ve gotten it set up.

    Key specifications:

    • 24MP APS-C sensor
    • 425-pt phase detection AF system with Real-Time Tracking
    • Tilting screen, 180° up, 90° down
    • 2.36M-dot electronic viewfinder
    • New Bionz X processor
    • ISO range from 100-32000
    • 11fps burst shooting (8fps with silent shutter)
    • Interval shooting option added
    • 4K/30p video capture
    • Mic input, no headphone output
    • 410 shots per battery charge (per CIPA)
    • Wi-Fi with NFC and Bluetooth

    The Sony a6400 officially replaces the older a6300: it uses the same sensor but comes with some subtle enhancements aside from the impressive autofocus capabilities. It arrives in an increasingly crowded field, though, with cameras like the X-T30 from Fujifilm and the EOS M50 from Canon being similarly priced and with similar sized sensors. Do the enhancements make the a6400 the standout in this crowd? Find out its strengths – and weaknesses – in the pages to follow.

    The a6400 is available now for $ 899 (€1049) body-only, $ 999 (€1149) with a 16-50mm F3.5-5.6 Power Zoom kit lens and $ 1299 (€1449) with an 18-135mm F3.5-5.6 zoom.


    What’s new and how it compares

    Sony’s a6400 has an awful lot of refinements on the inside – take a look.

    Read more

    Body, handling and controls

    For better or for worse, the a6400 handles just like the a6300 before it. And the a6000 before that.

    Read more

    Image quality

    The a6400 takes some fantastic photographs, and in particular, has some welcome tweaks to its JPEG engine.

    Read more

    First impressions

    Sony’s new Real-Time Tracking is really impressive, but my goodness, can’t we get a front control dial?

    Read more

    Autofocus and performance

    Let’s dive deep into the a6400’s revamped autofocus system, plus we’ll show you exactly how to set it up.

    Read more

    Video

    The a6400 is pitched as a vlogging camera, but it has some video capture shortcomings.

    Read more

    Is the a6400 right for you?

    We look at common photographic use-cases and see how the a6400 measures up.

    Read more

    Conclusion

    The a6400 is easily one of the most capable cameras at its price point.

    Read more

    Sample gallery

    Check out our extensive samples gallery from the Sony a6400.

    Read more

    Specifications

    Want the full list of specifications for the a6400? We have you covered.

    Read more

    Articles: Digital Photography Review (dpreview.com)

  • Appeals court upholds photographers’ rights on ‘fair use’ online image thefts

    The US Court of Appeal has reversed a controversial decision that allowed a company promoting a film festival to use a copyrighted photograph on its website without having to pay the photographer that took it. In the original ruling the District Judge of the Eastern District of Virginia allowed the fee-free grab of the image under the rules of ‘fair use,’ thus signaling it’s okay to lift pictures from a photographer’s website.

    An exhibit provided in the appeal showing Brammer’s photo as it was seen on his Flickr profile. Note the clear ‘All rights reserved’ icon in the lower-right-hand corner.

    Fortunately, in a new ruling, the Appeals Court has determined that the use of the picture was not acceptable ‘fair use’ and that Violent Hues Productions did indeed infringe the copyright of stock photographer Russell Brammer. In a test using four criteria the court found that Violent Hues Productions’ use of the image failed on all counts to pass as ‘fair use’. The court set out the criteria for fair use as being that the image shouldn’t be used for commercial purposes, whether the image had been transformed by the copier, how much of the image that was used and whether its use had an effect on its market value.

    An exhibit provided in the appeal showing Brammer’s photo as it was seen on the Violent Hues’ website.

    The image, showing a placed called Adams Morgan at night, was downloaded from photographer Brammer’s Flickr site and used by Violent Hues Productions to illustrate a ‘Plan Your Visit’ page on the website of the Northern Virginia International Film and Music Festival. The company initially claimed it didn’t know the image was copyrighted, despite Brammer using the words ‘All rights reserved’ beneath it. Violent Hues Productions also claimed the image was transformed by its cropping of it, and that the use was informational and of benefit to festival goers. The court ruled though that the cropping was done only to make the proportions of the image match others on the same page and that it didn’t constitute a ‘new expression, meaning or message’. The court also found that had the company paid Brammer for the picture its ability to inform festival goers would not have been hindered.

    It was also ruled that ‘if Violent Hues’ behavior became common and acceptable, the licensing market for Brammer’s work specifically, and professional photography more broadly, might well be dampened.’

    It was also ruled that ‘if Violent Hues’ behavior became common and acceptable, the licensing market for Brammer’s work specifically, and professional photography more broadly, might well be dampened’ and the court went on to state ‘If the ordinary commercial use of stock photography constituted fair use, professional photographers would have little financial incentive to produce their work’.

    In its conclusion the court said ‘What Violent Hues did was publish a tourism guide for a commercial event and include the photo to make the end product more visually interesting. Such a use would not constitute fair use when done in print, and it does not constitute fair use on the Internet. Violent Hues’ affirmative defense thus fails as a matter of law. For the foregoing reasons, we reverse the judgment of the district court and remand the case for further proceedings consistent with this opinion.’

    The ruling is especially important as it underlines that commercial bodies do not have the right to lift images from the Internet to use for their own ends without paying the photographer, and that photographers do have protection from those that seek to behave in this way. The court specifically acknowledged that ‘the Internet has made copying as easy as a few clicks of a button’.

    Articles: Digital Photography Review (dpreview.com)

  • Godox AD200: An Amazing Flash— If You Tweak it a Little

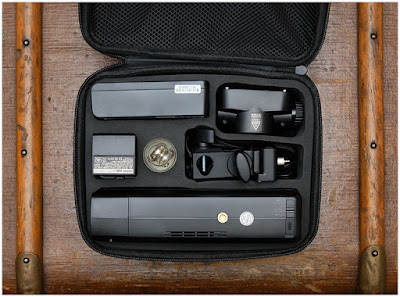
    The Godox AD200 has been much written about (and fawned over) for good reason: it's a legit 200ws flash in a near-speedlight form factor that has a lot going for it.

    At $ 299, as packaged, it's a near-miss. But at $ 366 (including two specific accessories) it's a home run.Read more »


    Strobist

  • RIP: Apple Aperture will no longer work after macOS Mojave

    Apple ceased support for its professional photo organization and editing application Aperture back in June 2014 and removed it from the Mac App Store in April 2015. Despite the lack of updates, the app still exists and continues to operate as it did at the time development ceased, but it appears that won’t be the case for much longer.

    MacRumors has discovered, hidden away on a new Apple support page, that Aperture will no longer operate on macOS after Apple’s latest operating system, macOS 10.4 Mojave.

    The support page shares how users can move their Aperture libraries to Apple’s Photo app, which Apple pitched as a replacement back in 2015, as well as Adobe Lightroom Classic. For those still clinging on to Aperture, it’ll either be a matter of not updating past macOS 10.4 Mojave or getting everything transitioned over to another app by September 2019, when Apple is expected to release the next version of macOS.

    Articles: Digital Photography Review (dpreview.com)