Blog

  • Nikon offer lets you trade up any camera to a Nikon Z5 with a special $100 bonus offer

    Nikon has announced an introductory trade-in offer for photographers interested in Nikon’s new entry-level full-frame mirrorless Z5 camera. From now through one month following the Z5’s August 27, 2020 release date, customers will be able to trade-in any working camera from any brand and save $ 100 USD on the Z5, in addition to the trade-in value of their camera. This deal is available retroactively as well, ensuring that those who already preordered through Nikon directly or through an authorized reseller can still get in on this new deal.

    The basics of the deal are as follows. You visit Nikon’s dedicated trade-in website to get a quote for your camera. You then purchase a new Z5 (or Z50, Z6 or Z7, albeit without the $ 100 USD bonus). Next, you send Nikon your old camera, with Nikon covering the cost of ground shipping. Once the camera has been received and checked over, Nikon will send you a refund.

    As an example, let’s consider the (plausible) case of a Nikon D750 owner wishing to trade-up to a new mirrorless camera, while still being able to use their existing full-frame F-mount lenses via Nikon’s FTZ adapter. Further, let’s assume that the camera is in excellent condition, meaning it shows minimal wear and functions properly. In this case, Nikon will offer $ 495 trade-in value, plus an additional $ 100 with the ongoing promotion. ‘Good’ and ‘poor’ conditions are also available to select, although all three conditions require the camera to function properly. You cannot trade-in a camera that is not functional.

    If Nikon determines that the quality of the camera is less than you stated during the trade-in quote process, you will be eligible to return the Z5. However, you will otherwise forfeit the $ 100 bonus if you, for any other reason, return the camera. As expected, there additional terms and conditions to consider, the full list of which can be viewed here.

    To participate in the trade-in program, you must have the Z camera shipped to a valid US address. You can trade-in multiple cameras when purchasing multiple Z cameras, but only a single trade-in can be applied per camera, so there is no way to combine $ 100 bonuses on a single Z5 purchase.

    Nikon has published a Frequently Asked Questions list for their Z camera trade-in program as well. Before participating in the program, it is highly recommended reading. There is included information worth highlighting.

    You can trade in any camera in working condition, not just a digital camera nor only an interchangeable lens camera. Cameras not listed as trade-in options are eligible and Nikon will send a quote within 1-2 business days of receiving your submitted information, in most cases. You cannot trade standalone lenses in as part of the promotion, however, some kit lenses are included in the promotion, such as a Nikon D3000 and accompanying 18-55mm VR kit lens, for example. If you are worried about being without a camera, fret not as Nikon will ship your new Z camera with free two-day shipping and you aren’t required to send in your trade-in camera until your new Z camera has arrived.

    If you would like to learn more about the Nikon Z5, which was recently announced on July 21, you can read our detailed overview here. If you’d like a quick hit piece on what you need to know about the Nikon Z5, we have that too. New cameras aren’t released in a vacuum; click here to learn how the Z5 compares to the Sony A7 II and Canon EOS RP.

    Articles: Digital Photography Review (dpreview.com)

  • Canon EOS R5 and R6 overheating claims tested: cameras work as promised – but that’s not enough

    Testing conducted in Seattle by our Technical Editor Richard Butler. Real-world production experiences by Jordan Drake: the director and editor of many of our ‘DPRTV’ videos.

    If you have any interest in cameras, you may have witnessed the heated discussions lately around the new Canon EOS R5 and R6’s tendency to overheat when capturing video internally. The Internet tends to amplify the most extreme version of any story or phenomenon, which might have lead to you getting the impression that the cameras are unusable.

    Jordan’s EOS R5 experience

    We shot for 10 hours at a variety of locations, which I thought would give the camera ample opportunity to cool down. I planned to shoot the episode in the 4K HQ mode, with occasional 4K/120P and 8K shots peppered throughout. Quickly I realized that setting up a shot and menu-diving would reduce the amount of record time I had for HQ, so I found myself spending far less time previewing the shot before rolling, adding a layer of stress.

    Eventually, I realized couldn’t record all the talking points in 4K HQ, and settled on using 4K HQ for wide shots and standard, line-skipped 4K for closeups. This made shooting sustainable, though I found myself avoiding trying to capture any spontaneous establishing shots or cutaways, lest I drop the dreaded overheating clock a bit lower. While our host Chris took it in his stride, I can only imagine how frustrating it would be for the talent to not know if the camera will last until the end of a take.

    I also found myself heavily rationing the 4K/120P as it really chews up your remaining shooting minutes. I spent two minutes capturing the seagull footage in the episode: beforehand I the camera said it would shoot 15 minutes of 4K HQ, when I returned I had only five minutes remaining!

    If the quality difference between 4K HQ and standard 4K capture were not so dramatic, this would bother me less. However, once you start viewing and editing the gorgeous 4K HQ footage, it makes it that much harder to go back to inferior line skipped 4K, and that’s a type of disappointment I don’t want to be dealing with on a shoot.

    After extensive testing of both cameras, our conclusions with regards internal recording are:

    • Both the EOS R5 and R6 appear capable of working as promised
    • Lack of dependability makes them a poor choice for much professional video work

    We tested a pair of R5s and an R6 in a variety of warm conditions and found they consistently performed in line with the limitations that Canon acknowledged at the point of launch. However, the practical implications are that the cameras are prone to overheating if you shoot for extended periods and if you have crew or talent waiting to re-start shooting, they may take too long to recover.

    It should be noted that Canon did not design either the EOS R5 or R6 to be professional video tools, nor does it primarily market them as such. But based on our testing and real-world usage we would caution against using them as a substitute.

    So why is YouTube saying the sky is falling?

    Our testing suggests that the cameras perform in exactly the way that Canon said they would. However, there is an important caveat that Canon’s figures don’t address: although the cameras can repeatedly deliver the amount of video promised, they may not always do so in real-world usage.

    Even set to the mode designed to limit pre-recording temperature build-up, the clock is essentially running from the moment you turn the camera on. Video recording is the most processor-intensive (and hence most heat generating) thing you can do, but any use of the camera will start to warm it up, and start chipping away at your recording times. Consequently, any time spent setting up a shot, setting white balance, setting focus or waiting for your talent to get ready (or shooting still images) will all cut into your available recording time, and you won’t reliably get the full amount Canon advises.

    Not only does this make R5 a poor fit for many professional video shoots, it also means that you can’t depend on the cameras when shooting video alongside stills at, say, a wedding, which is a situation that the EOS R5 clearly is intended for.

    Even when left in direct sunshine, the cameras continued to record for the duration Canon promised. However, this is only true when you’re not using the camera for anything else.

    The one piece of good news is that the camera’s estimates appear to be on the conservative side: every time the camera said it would deliver X minutes of footage, it delivered what it’d promised. You can also record for much longer if you can use an external recorder but again, this probably isn’t going to suit photographers or video crews looking for a self-contained, do-everything device.

    Click here if you want to see our test methods and results.

    EOS R5 suggestions:

    • Expect to shoot line-skipped 30p for the bulk of your footage
    • Only use 8K or oversampled HQ 4K for occasional B-Roll
    • 4K/120 and 8K will cut into your shooting time quickest of all
    • Be aware of your setup time and cumulative usage (including stills shooting)

    EOS R6 suggestions:

    • Don’t expect to be able to shoot for extended periods
    • Be aware of the need for extensive cooling periods between bursts of shooting

    Analysis: Why hadn’t Canon thought about this?

    It’s easy to fall into the trap of thinking this means Canon didn’t put enough thought into thermal management for these cameras. Our testing suggests this isn’t the case, but that the cameras’ specs are rather over-ambitious.

    Jordan’s EOS R6 experience

    I had done some testing prior to my shoot, and was comfortable that overheating wouldn’t be a problem if I stuck to 4K/24p. Unfortunately, my experience on a warm day was quite different to that room-temperature test. There’s no line-skipped 4K mode on the R6, so if the camera overheats, you’re back to 1080P, which will be a jarring transition for viewers watching on larger screens.

    While I was able to record much longer with the R6 before encountering the overheat warning, once it appears the camera takes far longer to cool down again than the R5. Our regular drives in an air conditioned car allowed Chris and Levi’s R5 to function throughout the day, but at one point I was left sitting in the car, babysitting a hot R6 while they went out to shoot. During a one hour lunch, the R5 had returned back to normal, but the R6 had a twenty minute warning still on.

    This was hugely disappointing as, rolling shutter aside, the R6 video quality is excellent, and I’d be perfectly happy using it over the R5. However, the longer cool down times would probably lead me to use the R5, dropping to line-skipped 4K from time to time.

    While I enjoyed most aspects of using these two cameras, I have no intention of using either of them as a primary video camera. They would be great for grabbing occasional, very high quality video clips, but I’d never want to rely on them for paid work.

    With the exception of specialist video models, most cameras that shoot 4K are prone to overheating, regardless of the brand. Some companies let you extend the recording time by ignoring overheat warnings (and risk ‘low-temperature burns’ if you handhold the camera), while others simply stop when they get too hot. This should make it clear that shooting 4K for an extended period is difficult. For instance, Sony says the a7 III will shoot around 29 minutes of 4K video with the temperature warnings set to ‘Std,’ while the Fujifilm X-T4 promises 30 minutes of 4K/30 and 20 minutes of 4K/60.

    The cumulative heat is constantly counting against you

    8K is four times as much data as natively-sampled 4K and seventeen times more than the 1080 footage that older cameras used to capture so effortlessly. Perfect 2:1 oversampled 4K (downsampled 8K) requires this same amount of data, which is still 1.7x more data than is used to create 4K oversampled video from a 24MP sensor. Data means processing, which means heat.

    The fact that the EOS R5 can shoot two hours of 4K/30p footage (in line-skipping mode) when sitting in direct sunshine suggests it’s pretty good at dissipating heat. But it seems trying to do so with 1.7x more data than the a7 III and X-T4 is a step too far: it’ll match them for promised recording duration but only just. This leaves it much more sensitive to any other use when not recording.

    The EOS R6 is a slightly different matter. It can shoot 40 minutes of 4K taken from 5.1K capture, which is a pretty good performance and may be enough that you won’t often hit its temperature limits. However even after a 30 minute cooling period, it has only recovered enough to deliver around half of its maximum record time, whereas the EOS R5 recovered nearly its full capability. The metal rear plate of the R5 clearly allows it to manage heat better than the R6 can.

    And, as Jordan’s experiences show: if you don’t have time to let the cameras cool, that cumulative heat is constantly counting against you.

    Articles: Digital Photography Review (dpreview.com)

  • TTArtisan announces limited-edition 35mm F1.4 M-mount lens wrapped in 24K gold

    TTArtisan lenses tend to be more basic and budget-friendly than larger third-party or first-party lens manufacturers, but its latest lens eschews that mentality and puts an emphasis on luxury. The Chinese optics manufacturer has revealed a limited-edition version of its 35mm F1.4 lens for Leica M-mount cameras that’s covered in 24K gold.

    Aside from the fancy exterior, the basic specs of the fully-manual lens remain the same as its less-flashy black and silver counterparts. It’s constructed of eight elements in seven groups, features an aperture range of F1.4 through F16, uses a 10-blade aperture diaphragm, has a 49mm front filter thread and offers a minimum focusing distance of 70cm.

    TTArtisan doesn’t elaborate on whether the ‘Gold Skin’ lens constructed of gold-plated or gold-filled metal, but based on the price, it’s safe to assume the former. TTArtisan will also engrave a custom image onto the lens cap and lens barrel for buyers at no extra cost.

    TTArtisan is making just 200 of these lenses. You can pre-order the lens now for $ 1,150, a $ 750 premium over the black and silver editions of the lens. The first units are expected to ship next week.

    Articles: Digital Photography Review (dpreview.com)

  • Canon image hosting platform, image.canon, temporarily shut down after loss of users content

    Over the weekend, Canon’s cloud media hosting platform, image.canon, suffered an outage that left users unable to login and use the service. No specific information was provided over the weekend, but we now know what went wrong.

    In a statement shared on the image.canon homepage, Canon confirmed there’s been an issue with its long-term storage on image.canon that’s resulted in the loss of original image and video uploads. The full notice reads as follows:

    Important Notice
    Thank you for using image.canon.
    On the 30th of July, we identified an issue within the 10GB long term storage on image.canon. Some of the original photo and video data files have been lost. We have confirmed that the still image thumbnails of the affected files have not been affected.
    In order to conduct further review, we have temporarily suspended both the mobile app and web browser service of image.canon.
    Information regarding the resumption of service and contact information for customer support will be made available soon.
    There has been no leak of image data.
    We apologize for any inconvenience.

    To prevent any further issues, Canon has temporarily shut down both the mobile and web app versions of image.canon. Per the notice, we should have further updates ‘soon.’ We will update this article when further updates are provided.

    Articles: Digital Photography Review (dpreview.com)

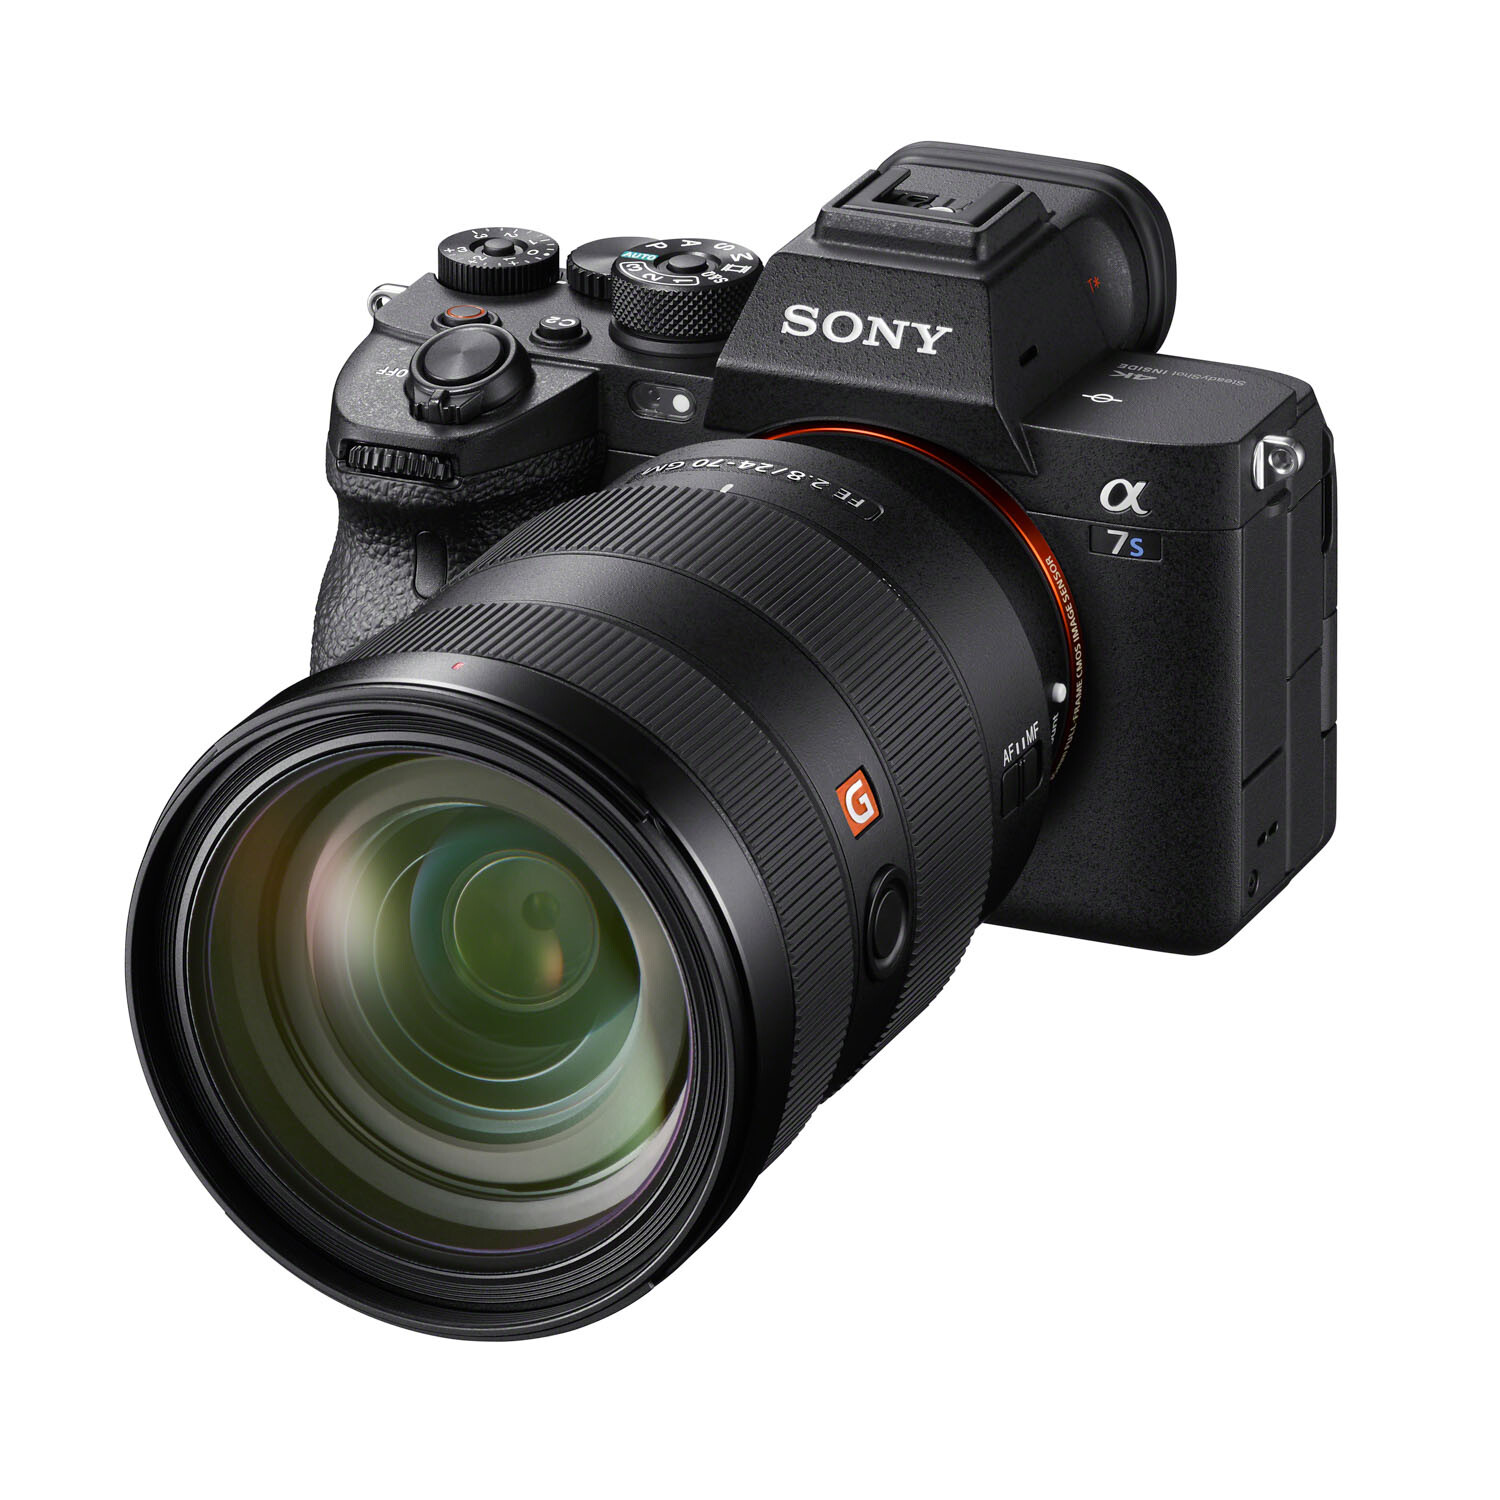
  • Sony Announces the a7S III, With 4K/120p and a 9.44M-dot EVF

    The post Sony Announces the a7S III, With 4K/120p and a 9.44M-dot EVF appeared first on Digital Photography School. It was authored by Jaymes Dempsey.

    sony a7s iii announcement

    After months of rumors, it’s finally official:

    The Sony a7S III will hit the shelves in September, offering a whole host of brand new features, including a stellar autofocus system, a class-leading electronic viewfinder, pro-level video recording capabilities, and much more.

    Let’s take a closer look.

    What is the Sony a7S III?

    The a7S III is Sony’s latest video/stills hybrid camera, which replaces the a7S II (a camera that debuted way back in 2015 and was long overdue for an upgrade).

    The a7S III is a full-frame mirrorless model and technically designed to excel at both video and still shooting. But there’s a clear lean toward videographers, thanks to advanced recording capabilities such as:

    • 4K/120p video (with a 1.1x crop)
    • Internally recorded, uncropped 4K/60p video (with a recording limit of 1 hour)
    • Internally recorded, uncropped 4K/30p video (with no time limit)
    • 10 bit 4:2:2 recording
    • S-Log

    As you can see, there’s quite a lot to satisfy serious videographers, such as the internal 4K/120p (for high-quality slow-motion footage), as well as unlimited 4K/30p shooting (for projects that require longer recording times).

    You also get in-body image stabilization, as well as impressive high-ISO performance and at least 15 stops of dynamic range (according to Sony, anyway).

    But while the a7S III is an impressive video contender, how does it look when arranged against more still-centric cameras? Can it hold its own?

    Can the a7S III work for still photography?

    At first glance, the a7S III is an extraordinarily capable camera for still photographers.

    I mentioned the in-body image stabilization above, and that’s a boon for videographers and still photographers alike. You also get dual card slots, important for a select crowd of professional photographers, and a fully-articulating LCD for capturing images (or video) from awkward angles.

    And the a7S III packs a 9.44M-dot electronic viewfinder, which is by far the highest resolution EVF currently available in a mirrorless camera (the former EVF champions sit at a still-respectable 5.76M-dot resolution). This should put to rest any claims by photographers that mirrorless EVFs just can’t compete with OVFs, because a near 10M-dot EVF is going to look insanely good.

    The a7S III also features a new AF system, offering 759 phase-detection points, as well as 10 frames-per-second continuous shooting with a buffer of 1000+ RAW images.

    All this seems extremely impressive, but for one major feature:

    Resolution.

    The a7S III only packs 12 MP, which is perfect for video but deeply disappointing for still photographers, especially in the current resolution-hungry market. These days, full-frame cameras offer a resolution of at least 20 MP, but often push higher, from 24 MP in the Sony a7 III to 61 MP in the Sony a7R IV.

    Of course, there are photographers out there who aren’t caught up in the megapixel craze, and those folks might be willing to use the a7S III for still shooting, assuming they also have significant video needs. But megapixels aren’t just about marketing; a 12 MP camera does offer serious limitations in terms of high-resolution printing, as well as cropping in post-processing.

    So while the a7S III is a truly impressive video camera, it (like its predecessors) sacrifices too much to be a serious still photography option for most shooters.

    The a7S III will hit the shelves in September for an MSRP of $ 3500 USD, and is currently available for preorder here.

    Now over to you:

    What do you think about the a7S III? Are you pleased? Disappointed? And would you use it for still photography? Share your thoughts in the comments!

    The post Sony Announces the a7S III, With 4K/120p and a 9.44M-dot EVF appeared first on Digital Photography School. It was authored by Jaymes Dempsey.


    Digital Photography School

  • Sigma 100-400mm F5-6.3 DG DN OS sample gallery

    $ (document).ready(function() { SampleGalleryV2({“containerId”:”embeddedSampleGallery_3022925854″,”galleryId”:”3022925854″,”isEmbeddedWidget”:true,”selectedImageIndex”:0,”isMobile”:false}) });

    Sigma’s 100-400mm F5-6.3 for full-frame Sony mirrorless (and L-mount cameras) offers quite a bit of reach for under $ 1000. It’s a bit slower than some of Sony’s own E-mount telephoto zooms, but it’s a comparably light and affordable alternative for FE shooters looking to add a telezoom to their kits. Take a look at our gallery and see what it’s capable of.

    Articles: Digital Photography Review (dpreview.com)

  • Step-by-step Guide to Long Exposure Photography

    The post Step-by-step Guide to Long Exposure Photography appeared first on Digital Photography School. It was authored by Francesco Gola.

    In the past few years, thanks to the diffusion of useful accessories and photographic filters with good quality and low prices, the technique of long exposure has become increasingly popular among photography enthusiasts. Even if this technique can be used both in the studio and in an urban environment, the perfect playground for long exposures is landscape photography.

    Unfortunately, it often happens that the result we get is far from our expectations, and we end up classifying the long exposure as an impossible technique. However, following this step-by-step guide to long exposure photography, you’ll see how easy it is to get a good result on the first attempt (or almost!).

    Picture 1

    Step One: Study the weather

    A day with a cloudless sky is a good day to drink a beer with friends, not to make long exposures. Likewise, it cannot rain forever, so do not resign yourself to an afternoon with your PlayStation. You should study satellite images rather than the meteorological sites, trying to figure out if there is an incoming storm, or if the downpour is about to end.

    Step Two: Visit the location well in advance

    Scout the location ahead of time, as you need a lot of time to find the perfect composition, or at least more than the time needed for a “short exposure”. In fact, in a long exposure, the world is completely different from how you see it with your own eyes. You have to try to see it with your mind, looking for a harmonious composition that includes moving subjects, trying to predict the direction of the clouds or the force of the sea.

    Try not to put the sun into the composition, because its movement will ruin the shot and it will create an area of overexposure that is not recoverable. If you cannot avoid the sun, wait for it to hide behind a cloud.

    Picture 2

    Step Three: Use a tripod

    Mount your camera on a tripod and install all the accessories such as the remote shutter release and the filter holder (if you are using drop-in filters). However, wait to actually install the filters. This is very important!

    Step Four: Compose the image and lock focus

    Refine your composition, focus on the subject, and lock the focus. If you are using manual focus, go ahead and turn the lens’s focus ring.

    If you are using your camera’s autofocus mode, you should focus by half-pressing the shutter button, and once the focus has been made, while still holding down the shutter button halfway, push the lever from Auto Focus to Manual. In this way, your camera will maintain the focus (alternately, you could use back-button focus).

    Picture 3

    Step Five: Set the exposure

    Now set your camera to Manual (M) mode or Aperture Priority (A/Av) mode. Then set the aperture to an appropriate value for the scene (for landscapes I suggest between f/8 and f/11) and take a “test shot.”

    The test is complete when you get a correct exposure. To determine if the exposure is correct, check the histogram (do not trust your display, it is too bright). It is true that there is no universally correct result on the histogram, but there are histograms that are universally incorrect, namely moved completely to the right or left side (the image is respectively overexposed or underexposed).

    Once the test shot is successful, write down the shutter speed you used for that shot.

    Step Six: Add your filter

    Now add your Neutral Density (ND) filter. If the filter is very strong (10 stops, for example), you will not be able to see through the viewfinder or the Live View. Do not worry, because if you have followed the guide up to this point you will notice that we have already made the composition and the focus too. You are blind, but your camera will see everything perfectly.

    Picture 4

    Step Seven: Change to Bulb mode

    Set the shooting mode to Bulb (B) in order to discard the thirty-second limit of the camera. Do not change any of the other settings (ISO and aperture) used in the test shot.

    Step Eight: Take your long exposure shot

    It is finally time to take our long exposure shot.

    But how long will you need to leave the shutter open? It is less difficult than you might expect. First of all, recollect the shutter speed that you noted down from the “test shot” you did in Step Five above. Now you must compensate by the number of stops introduced by the filter.

    For example, if your test shot was 1/15th of a second, adding 10 stops will get a shutter speed of approximately 60 seconds. Now you have your shutter speed!

    (No need to get stuck in the mathematics: On the internet you can easily find conversion tables and applications for your smartphone that will do the conversion for you.)

    Picture 5

    Step Nine: Check the histogram again

    Once you’ve taken the shot with the calculated shutter speed, check the histogram. If the new histogram is approximately equal to the histogram of the test shot, mission accomplished. If it is shifted too far to the right or to the left, repeat the shot again correcting the shutter speed.

    Easy, isn’t it? Now fill your backpack with your camera and filters and go to practice in the field!

    The post Step-by-step Guide to Long Exposure Photography appeared first on Digital Photography School. It was authored by Francesco Gola.


    Digital Photography School

  • Study: smartphone camera use on the rise among pro photographers

    Your average consumers use — almost exclusively — the cameras inside their smartphones for picture taking these days. Professionals use big black cameras with even bigger lenses. Or, at least that’s the perception most us have when thinking about camera use. But is this actually true?

    The analysts at Suite48Analytics have conducted a survey among a total of 881 professional photographers from North America and Europe to find out and published the results in a report titled Pro Photographers and their Camera Use’.

    The report covers camera use in general but puts some emphasis on ‘stand-alone cameras’ versus smartphones. The results aren’t entirely surprising. Most photographs for business purposes are still captured with a dedicated camera of some sorts. However, 11 percent of the surveyed photographers use a smartphone camera for approximately 50 percent of their pro images. Smartphone use for professional images is also on the rise, with 31 percent saying they use the smartphone more now than they did 12 months ago.

    As one would assume, smartphone use is higher for personal photography. 29 percent take 50 percent of their non-work photos with a smartphone. 36 percent take even more than half of their personal pictures with a phone.

    Despite Android phone makers putting a lot of emphasis on their devices’ camera capabilities, the iPhone is still the clear favorite among pro professionals, with 86 percent using an Apple model.

    So for what type of work do pro photographers use their smartphone camera? Interestingly smartphones are mostly used in situations that don’t involve a client present at the scene. 58 percent use the smartphone to take photos that support their own business, for example, website photos or social media posts. 20 percent use phones for behind the scenes type of work.

    In those situations when professional photographers do use a dedicated camera the trusty DSLR is still the most popular choice with 53 percent, but at 30 percent mirrorless full-frame cameras are getting closer. Medium format cameras get some use, too, but all other types of cameras are represented in a fairly minor way.

    Professionals who use smartphones do so predominantly because they have less gear to carry and the phone allows you to ‘catch moments’ because it is always within reach. On the other hand, phone use is still much lower than it could otherwise be because professional photographers have concerns about the optical quality of smartphone cameras, even those on high-end models, but also client perception. It seems in some people’s minds it’s still the camera that makes the pro and that also has an impact on gear choice among professionals.

    You can find a summary and the full (paid) report for download on the Suite48Analytics website.

    Articles: Digital Photography Review (dpreview.com)

  • Canon EOS R5 sample gallery (DPReview TV)

    $ (document).ready(function() { SampleGalleryV2({“containerId”:”embeddedSampleGallery_8198842835″,”galleryId”:”8198842835″,”isEmbeddedWidget”:true,”selectedImageIndex”:0,”isMobile”:false}) });

    Much of the early attention surrounding the Canon EOS R5 focused on video specs, but it’s a mean photo machine as well. Check out this new gallery from DPReview TV, complete with Raw images.

    View the Canon EOS R5 sample gallery

    Articles: Digital Photography Review (dpreview.com)