Blog

  • Brutalist Wonders or Blunders? Architecture by Marcel Breuer

    [ By Steph in Architecture & Public & Institutional. ]
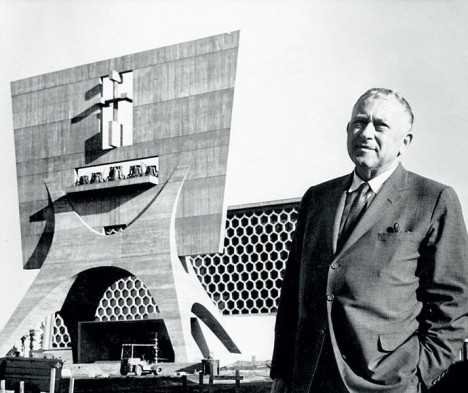
    breuer main crop

    A master of Modernism whose architectural legacy includes a range of monumental concrete structures around the world, Marcel Breuer remains divisive among Brutalism’s admirers and detractors decades after his death. From the Whitney Museum of American Art in New York to the vaguely dystopian IBM headquarters in Paris, Breuer’s work is alternately described as majestic and depressing; cold and clinical to some, and peacefully minimalist to others. Regardless of how you feel about concrete architecture in general and Brutalism in particular, Breuer’s buildings are emblematic of this architectural style. Here are 14 of his most notable creations, as preserved by Syracuse University’s Marcel Breuer Digital Archive.

    St. John’s Abbey, Minnesota

    breuer st johns 1

    breuer st johns 3

    breuer st johns 2

    breuer st johns prep

    After completing a series of modernist residential projects in the 1930s and ‘40s, Breuer moved on to work on a far more ambitious and awe-inspiring scale, starting with the stunning St. John’s Abbey and University in Minnesota. The cast-in-place concrete wonder features a towering bell banner shielding the church’s honeycombed facade. Breuer also designed a number of buildings on the St. John’s University campus, including a dormitory hall (bottom photo.)

    Whitney Art Museum, New York City

    breuer whitney 3

    breuer whitney

    breuer whitney 2

    One critic of Breuer’s 1966 building on the genteel Upper East Side of Manhattan called it “one of the most aggressive, arrogant buildings in New York.” An inverted ziggurat, the structure is undeniably bold. The Hungarian-born, Bauhaus-trained architect “believed that modern architecture needed to reintroduce monumentality and symbolism, age-old characteristics that had been disregarded by modernists earlier in the 20th century.”

    UNESCO Headquarters, Paris
    breuer UNESCO

    breuer unesco stairs

    breuer unesco paris 3

    breuer unesco interior

    breuer unesco paris

    As far as surviving Brutalist structures go, the UNESCO headquarters are nothing short of spectacular. Completed in 1958, the Y-shaped administrative building features a sculptural canopy and spiraling fire escape stairs that reach all the way to the roof. The whole building stands on 72 concrete piles.

    The Lost El Parador Ariston, Argentina

    breuer ariston 1

    breuer ariston 2

    Among Breuer’s classics is the Ariston Hotel in Argentina, a curving clover-shaped building that has been abandoned and left to deteriorate despite its status as one of Argentina’s modern architectural landmarks. Architecture faculty and students at the University of Buenos Aires are currently flighting to preserve and restore it.

    The Pirelli Tire Building, New Haven, Connecticut

    breuer tire building

    breuer pirelli 2

    breuer armstrong rubber

    Originally built as the headquarters for Armstrong Rubber, what’s now known as the Pirelli Tire Building in New Haven, Connecticut stands out as one of America’s foremost surviving Brutalist structures. Testing of the tires on the ground floor research and development facility would be noisy, so Breuer elevated the administrative spaces. The result is imposing and authoritative; it’s easy to imagine it standing in as the headquarters of a villainous corporation or classified government agency in a movie.

    Next Page – Click Below to Read More:
    Brutalist Wonders Or Blunders Architecture By Marcel Breuer

    Share on Facebook


    [ By Steph in Architecture & Public & Institutional. ]

    [ WebUrbanist | Archives | Galleries | Privacy | TOS ]

    WebUrbanist

  • Photograph Close to Home to Improve Your Photography

    Think about the most interesting place that you could possibly go to take an incredible photograph. What comes to mind?

    Maybe it’s Machu Picchu, New Zealand, Yosemite, a safari in Africa, a city like New York or Paris, or wherever is featured in the latest National Geographic Magazine. These locations are very special occasions for travel and photography. However, they are usually once in a lifetime trips, and once you are there, you often have a very limited amount of time for photographing, along with everything else planned.

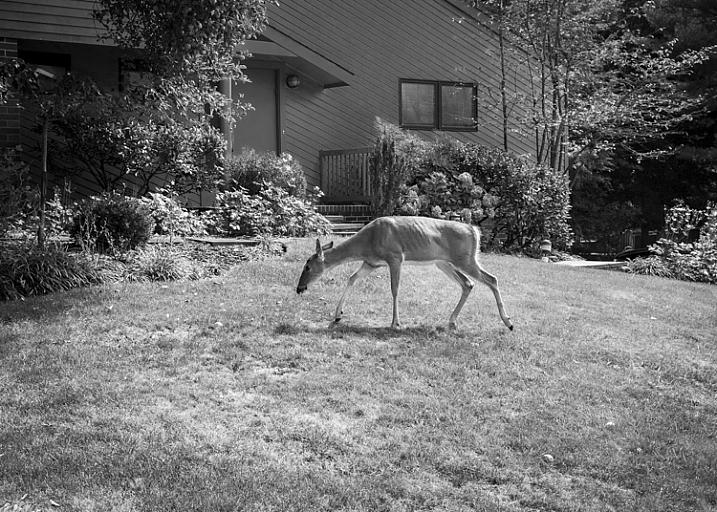
    Deer, Backyard, New Jersey by Neil Persh

    All images in this article courtesy of my student, Neil Persh. Here is his backyard.

    So what if I told you that the most interesting place you could photograph is much easier to get to? It’s in your own neighborhood, and its surrounding locations.

    I am told fairly frequently by photographers and students that they cannot, or do not feel like, photographing where they live. “It’s too boring” they say, or “There’s nothing interesting to photograph. I only do my photography when I travel.”

    This is great of course, as passion for travel and photography go hand in hand, and it’s often when people do their best work. But, thinking that way can also make you miss the whole point of photography.

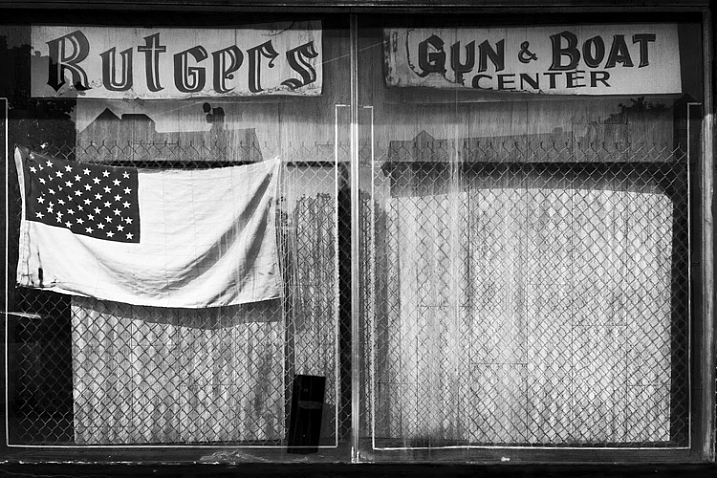
    Shop Window, Rutgers, New Jersey by Neil Persh

    Shop Window, Rutgers, New Jersey by Neil Persh.

    When students mention this to me, I get them to do a specific exercise, I suggest that you try it as well. Spend a few weeks photographing areas within close proximity to your house. Leave your home and go for a long walk in any random direction. Take it even further by thinking about the most uninteresting area that you can imagine photographing, and go there. Maybe it’s a mall parking lot, an empty street corner, or behind a convenience store. Stay there, and figure out how to take an interesting photograph.

    Many people tend to take their own location for granted. Your surroundings may seem routine and banal to you, but they’re not. If you were to take someone from a different part of the world, or from a different time period, and park them right where you are – they would probably find things very weird and fascinating. They would probably photograph so many things that you may currently be overlooking.

    Step outside, and try to see these areas in that way. What makes this area interesting? How are these scenes going to look as the world changes? How can you make these everyday things beautiful and interesting? Figure out why you might find an area uninspiring, and then photograph that. That is an fascinating idea in itself.

    Road, New Jersey by Neil Persh

    Road, New Jersey by Neil Persh.

    The most experienced photographers have learned how to take unique and interesting photographs anywhere. They usually do not take anything for granted. I think this is a skill that you can practice and learn, and it goes to the heart of what being a good photographer is all about. On a practical note, these areas are right outside your door, so you don’t have to pack up all your equipment and plan a lengthy trip. You can walk outside three times a week for 30 minutes with your camera, altering the times of day and the route. If you are a once or twice a month photographer, this will have you practicing much more often. This alone will make you a much better photographer, over the longterm.

    Photography is an exciting past-time. I first got into it for the simple fact that I liked to walk and daydream. As you improve and learn more about photography, as you eye better gear, as you think about creating grander images, and as you look at the work of well-traveled photographers on a daily basis, it can pull you away from this simple idea. One of most powerful aspects of photography is that it is a reason in itself to go and take an enjoyable walk. It is a reason to relax and daydream; it is an excuse to wander. It is also a great ice-breaker for meeting other people.

    Subdivision, New Jersey by Neil Persh

    Subdivision, New Jersey by Neil Persh.

    Take a look at the work of William Eggleston, Lee Friedlander, or Alec Soth. Look at some of the areas where they photographed. The places probably did not feel that special, or inspiring, to the photographers on the surface. But these photographers were able to see past it, and show in their images how the areas were unique.

    Any time that doubt creeps in, and you think that it is impossible to take a good photograph somewhere, I want you to stop yourself and slowly look around. Figure out how to take the best possible image that you can right there, and then go explore another block. Something new will be around the corner.

    New Jersey by Neil Persh

    New Jersey by Neil Persh.

    The work of one of my students, Neil Persh is shown throughout this article. Neil frequently takes day trips into New York City, along with traveling to many interesting places to capture wonderful images. His work in these areas has gotten very good, and he clearly has an enthusiasm and passion for photography that is contagious. However, when he had to go photograph his neighborhood for an assignment, he struggled with the idea for a while. Then, when he finally commit to it, he began to get over his trepidation, and started to photograph his area more frequently. I was blown away by the images. The work shown here was taken over months, not years, and I find them to be much different from what you normally see.

    You can do the same. Go for a walk this week!

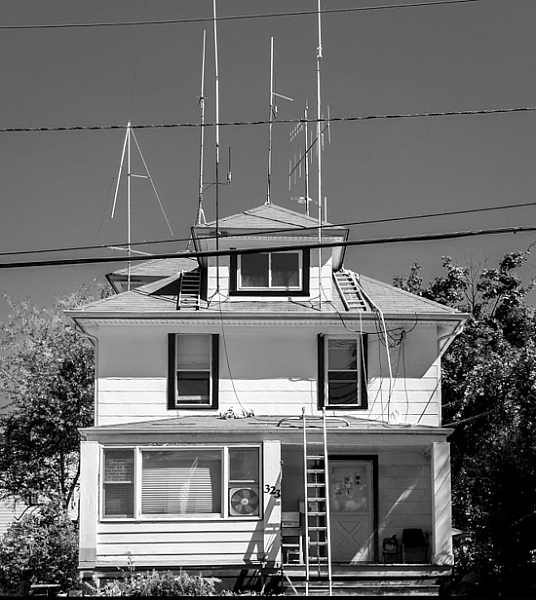
    Ham Radio Operator's House, New Jersey by Neil Persh

    Ham Radio Operator’s House, New Jersey by Neil Persh.

    googletag.cmd.push(function() {
    tablet_slots.push( googletag.defineSlot( “/1005424/_dPSv4_tab-all-article-bottom_(300×250)”, [300, 250], “pb-ad-78623” ).addService( googletag.pubads() ) ); } );

    googletag.cmd.push(function() {
    mobile_slots.push( googletag.defineSlot( “/1005424/_dPSv4_mob-all-article-bottom_(300×250)”, [300, 250], “pb-ad-78158” ).addService( googletag.pubads() ) ); } );

    The post Photograph Close to Home to Improve Your Photography by James Maher appeared first on Digital Photography School.


    Digital Photography School

  • 6 Tips for Doing a Successful 365 Photo Project

    Happy 2016, welcome to the start of a new year. This is a great time to start new projects – be it losing weight, getting fit by regularly exercising, committing to eating right, or improving and growing your photography knowledge and skill.

    We all have many different goals when it comes to our passion for photography. A great way to get started is by working on personal and professional photography projects. One simple yet effective way to work on your photography skills is to participate in a 365 Photo Project. Quite simply, a 365, as it is most often called, is a commitment to take a photo a day for 365 days straight. You can get as specific or as general as you like in terms of what you photograph, when you photograph, or even how you photograph. There are no set rules – the only requirement being you must take at least one photo each day, that counts towards your 365.

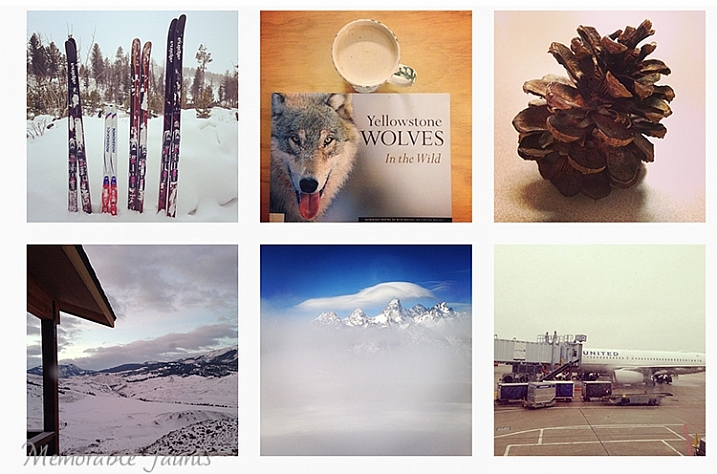
    365 Photo Collage

    A small collage from my 365 project done in 2014.

    That being said, there are some basic guidelines to successfully complete a 365 – a sort of dos and don’ts list, if you will.

    #1 Be honest about why you want to do a 365

    Talk to anyone, and you are bound to hear many different reasons why you should do a 365 photo project. Some people feel it improves your photography because you are consistently taking at least one picture a day. Others feel it is a fun way to document and record a year in your life. It is also a great way to experiment and learn about light, composition, subject, equipment, and develop and hone in on your observation skills.

    Since you know you have to take at least one photo every day, you are constantly looking for good photo opportunities everywhere, and tend to become more observant of your environment. No matter what your reason, be very clear on exactly why you want to start a 365, and document that as part of the process. This will help clarify your goals, and make the process more enjoyable.

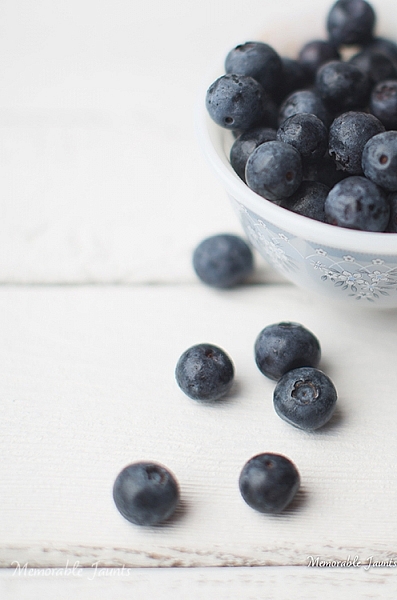
    Processed with VSCOcam with t1 preset Memorable Jaunts DPS Article 365 Photo a day article 03

    #2 Create a routine for your 365

    Just like anything else in life, having a routine provides a sense of organization. Figure out when is your best time to photograph, and stick to that routine. For me, the best time is around 9:00-10:30 a.m. It is early enough in the morning when my brain is quite active, there are no distractions, and the morning light is quite clean and bright. Of course that is not to say that I don’t photograph at other times of the day, but when I am working on a project, or an assignment, that’s my go-to time. And yes, I do treat my 365 as an assignment. The only difference is that I am my own client!

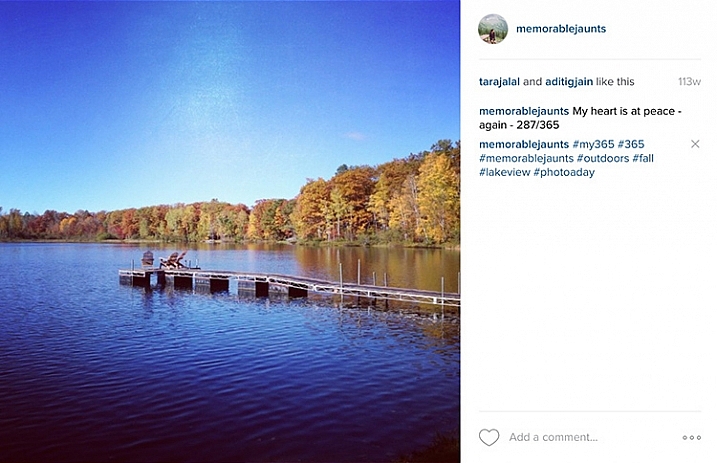
    Memorable-Jaunts-365-Example

    My general task list for my 365 -generally, all it takes is 10 minutes of my time:

    • Shoot 365 photo – five minutes
    • Edit photo – two minutes
    • Load to Dropbox – 30 seconds
    • Post on Instagram – 30 seconds
    • Write a caption and one line description for the image – one minute
    • Add hashtags – one minute
    • Total – 10 minutes approximately

    #3 Set your own prompts or join a 365 group

    In my opinion, this is the hardest part of doing a 365. The proverbial, “What do I photograph?”. Luckily there are so many of us doing 365 projects, that there are online groups you can join to get daily or weekly prompts sent to your inbox. Here are a few:

    • Project 365 Flickr group
    • 365 Project website
    • The 365 Make 1 shot per day, for 1 year – Flickr group

    The other option is to completely customize the project, and work from your own prompts, or inspirational triggers. You might only want to photograph your breakfast, your pet, or your children. You may want to focus on modes of transportation. No matter what the prompt, I recommend creating a list or a journal to document them. That way you know what you have already photographed, and what comes next.

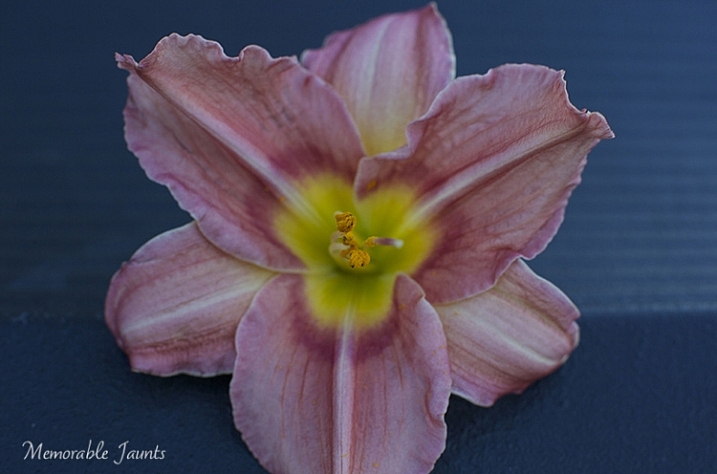
    Memorable Jaunts DPS Article 365 Photo a day article 07

    I try to follow this general prompt weekly for my 365. Sometimes, I deviate from it, and for me that’s okay!

    • Monday – Inspire
    • Tuesday – Food
    • Wednesday – Nature of the outdoors
    • Thursday – Indoors
    • Friday – Family
    • Saturday – Personal
    • Sunday – Fun day (anything goes)

    Memorable Jaunts DPS Article on 365 photo series 05

    #4 Choose the tools of the trade

    Choose a camera – any camera! If you want to improve on your mobile camera skills go for it. Did you get a new camera for Christmas? Use a 365 photo project as a great way to learn the workings of your new toy. After all, practice makes perfect, and there is nothing like practicing everyday to get you comfortable with using that new camera.

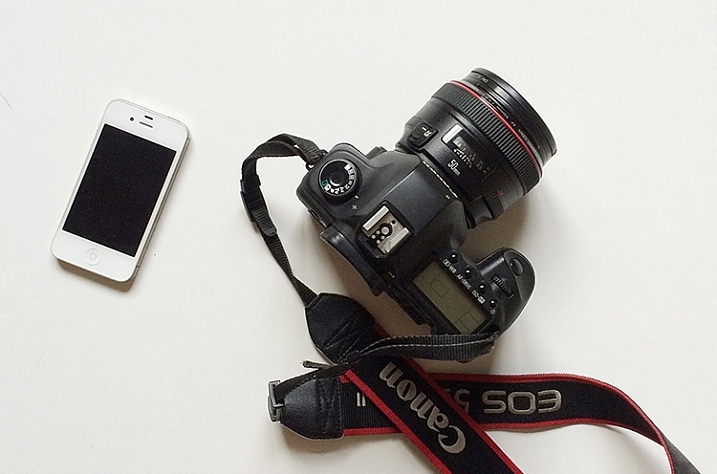
    Regardless of what tool you use, makes sure that it is something achievable. I find my DSLR to be cumbersome at times, and not easy to carry around with me for smaller errands in town. So instead, for my 365 photo project, I use a combination of iPhone and DSLR, which gives me the flexibility I need.

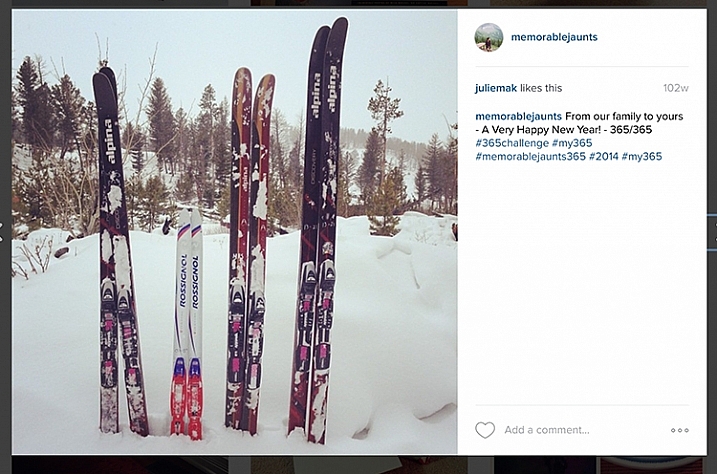
    The other common question that most people want to know is how to document the project. My 365 medium of choice is Instagram. I love this platform, as it brings forth a great sense of community and creativity. By posting my images, and using the #365 hashtag, I am instantly part of a large group of people who are in the same project. It keeps me motivated and on track. I know a lot of people who post a collage of images on their social media channels, rather than a picture a day. This does not mean they don’t photograph one picture a day, but rather they just share their images once a week, or a month at a time.

    Memorable Jaunts Gear for executing a 365 photo a day series article for DPS

    These are the only two tools I use for my 365. When an image is from my DSLR, I can use the #dslr365 in Instagram to separate the two (not a required step but I like to do it just for my reference).

    #5 Learn to forgive and move on

    Who knew that doing a 365 can also be a great way to learn basic life lessons! The age old adage to forgive and forget is very relevant while participating in a 365. Sometimes things happen and you end up missing a day, or several days in a row. It is not the end of the world. Acknowledge it, accept it and move on. Either you can catch up, and post more than one picture the next day, or just mark it off as missed and go forward. The key here is to keep moving forward. Otherwise days turn into weeks, that turn into months, and before you know it, the 365 has long been forgotten and abandoned.

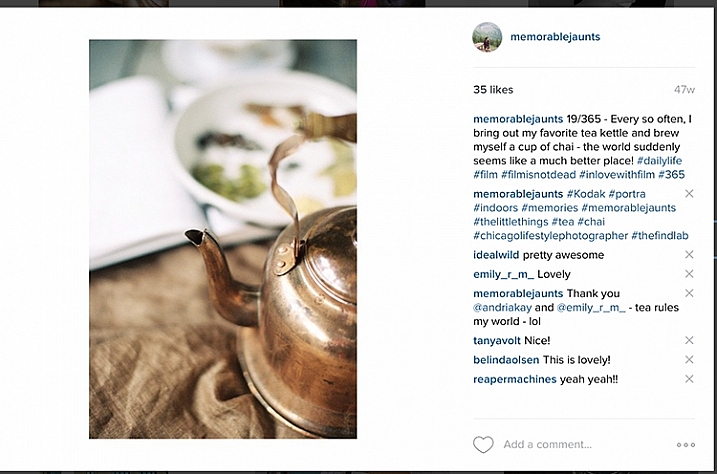
    Memorable Jaunts Photo a day 365 example article for DPS

    One of my favorites from my last 365. I did miss a few days here and there but the memories that I was able to capture still make me smile to this day!

    #6 Success, completion, and what’s next

    A 365 photo project is definitely a commitment. One that takes time and effort on your part, but the rewards are quite satisfying. To me, completing a 365 photo project provides a sense of achievement and accomplishment. In my mind it’s not an easy task, and I do celebrate my success!

    Print all, or some of your best images, and create a collage of photos. Create a photo book specific to your 365. The possibilities are endless. My 365 photo project lives on my Instagram feed only, and I like printing my favorites. There are several companies that also provide the option of printing Instagram images. I have used Artifact Uprising in the past, but Blurb and Shutterfly are a few other companies that come to mind.

    Memorable Jaunts DPS Article 365 Photo a day article 08 Memorable Jaunts DPS Article 365 Photo a day article 05

    Note: If you use Lightroom you can create a Blurb book and order it directly from within the software, all right from your original camera files.

    Once you have completed your 365 photo series, my recommendation would be to take a break. Jumping right in to another 365 can be a bit much. That’s not to say that people don’t do it, and be successful. Many people absolutely love doing 365 photo projects, and have consistently done it for several years at a stretch.

    Personally, I like a variety of challenges in my photographic journey. After completing a 365 photo project in 2014, I took a break and focused on other things. Now I am ready to get back into the game and will be starting a 365 photo series in 2016 on my Instagram. Join me if you want to and lets motivate each other to take a photo a day for 365 days!

    googletag.cmd.push(function() {
    tablet_slots.push( googletag.defineSlot( “/1005424/_dPSv4_tab-all-article-bottom_(300×250)”, [300, 250], “pb-ad-78623” ).addService( googletag.pubads() ) ); } );

    googletag.cmd.push(function() {
    mobile_slots.push( googletag.defineSlot( “/1005424/_dPSv4_mob-all-article-bottom_(300×250)”, [300, 250], “pb-ad-78158” ).addService( googletag.pubads() ) ); } );

    The post 6 Tips for Doing a Successful 365 Photo Project by Karthika Gupta appeared first on Digital Photography School.


    Digital Photography School

  • 50 Photoshop & Lightroom Photo Editing Tutorials to Enhance Your Images

    Photoshop and Lightroom are awesome tools for photographers, professionals and amateurs alike. While Lightroom is considered the most comprehensive tool to do some basic image editing, such as fixing exposure, white balance, and contrast, Photoshop is often chosen by photographers for further creative processing. Without a doubt, Photoshop is a powerful program with huge possibilities. However, once you really dig Continue Reading

    The post 50 Photoshop & Lightroom Photo Editing Tutorials to Enhance Your Images appeared first on Photodoto.


    Photodoto

  • 6 Simple Resolutions for a More Photogenic 2016

    It’s a new year, which means a fresh start on some new goals.

    If you’re anything like us (and we know you are!) you’re already thinking about making major photography strides in 2016.

    So join us in some challenges this year, we promise to keep ’em simple and fun!
    (…)
    Read the rest of 6 Simple Resolutions for a More Photogenic 2016 (442 words)


    © Erin for Photojojo, 2016. |
    Permalink |
    No comment |
    Add to
    del.icio.us

    Post tags:


    Photojojo

  • Phase One launches 100MP medium format back with Sony co-developed sensor

    Phase One has announced a 100MP back for its modular XF medium format camera system, with a CMOS sensor co-developed with Sony. Despite being described as ‘full frame’ the sensor is 53.7 x 40.4mm, making it two and a half times larger than the 135 format to which the term is most often applied. The ‘full frame’ MF sensor guarantees that the full field-of-view of MF lenses can be realized, compared to the cropped fields-of-view a number of previous MF backs, such as the IQ250, yielded. The Phase One XF 100MP camera system offers 16-bit color output and a claimed 15 stops of dynamic range, presumably at the base (native) ISO setting of 50. The camera body, back and 80mm Schneider Kreuznach lens (~50mm equiv.) will set you back around $ 49,000.


    Press Release:

    Phase One Expands the XF Camera System to 100MP

    The Ultimate Camera System has arrived

    COPENHAGEN, January 4, 2016 — Phase One today announced that in collaboration with Sony it has designed a new 100MP CMOS full-frame sensor for the Phase One XF 100MP Camera System. Engineered to perform well beyond 100MP imaging, the modular Phase One XF Camera System platform was designed for expansion – offering hard-working professional photographers tangible investment value.

    The XF 100MP Camera System with this new full-frame, medium format 100MP CMOS sensor combines high resolution with high dynamic range and exceptional wide angular response. The Phase One XF 100MP offers photographers unprecedented power to realize their visions. It delivers true 16-bit color, 15 f-stops of dynamic range, live view capturing with HDMI output, ISO flexibility from 50 to 12800 and exposure times of up to 60 minutes.

    “For more than 20 years, we at Phase One have been pushing the limits of digital image quality to help top photographers stand out,” said Niels Knudsen, Vice President of Innovation and Phase One’s ‘Image Quality Professor.’ “With the XF 100MP Camera System, everything we have been working toward for our customers comes together in one system: ultimate image quality and ultimate creative freedom.”

    “The XF 100MP Camera System delivers unparalleled dynamic range, retaining unmatched detail in both highlights and shadows, packing 101,082,464 active high quality pixels,” said Henrik Håkonsson, Phase One’s CEO. “This is the highest performing system that we have ever created, benefitting from a multitude of Phase One exclusive innovations developed to support our amazing customers in creating the ultimate images.”  

    Introduced in June, 2015, the Phase One XF Camera System has been built with optimal 100MP performance in mind. As such, features like the Honeybee Auto Focus, Vibration Tracking, Electronic First Curtain Shutter, and Vibration Detection technology have all been developed to ensure the ultimate 100MP performance. The Phase One XF Camera System was also designed for future growth with regular feature upgrades, incorporating new features and unique customizations. Coupled with new Schneider Kreuznach Leaf Shutter lenses, interchangeable Prism Viewfinder and Waist Level Finder, the Phase One XF 100MP Camera System is sure to set the standard for professional photography for many years to come.

    High-resolution files produced by the new Phase One XF 100MP Camera System, when processed with Capture One 9, benefit from the software’s advanced algorithms that have been fine-tuned over decades of engineering investment, rendering superior image quality and superior results.

    Availability and Pricing
    Shipping immediately, the XF 100MP Camera System is available through Phase One photography partners worldwide: www.phaseone.com/partners.

    The XF 100MP Camera System comes with Phase One’s unique 5-year warranty and uptime guarantee including personalized 24/7 support and assistance.

    The price of the Phase One XF 100MP Camera System (with Schneider Kreuznach 80mm LS lens) is 48,990 USD.

    Attractive camera system upgrade offers are available for all Phase One photographers. Please contact our Phase One photography partners for further details: www.phaseone.com/partners.

    For a demo of the Phase One XF 100 MP Camera System, please sign up here: www.phaseone.com/demo

    Articles: Digital Photography Review (dpreview.com)

  • How to Build an LED Light and Make an Orb

    Orb15

    This article will tell you all about the what, where and when of orbs. Let’s start by defining them.

    What’s an orb?

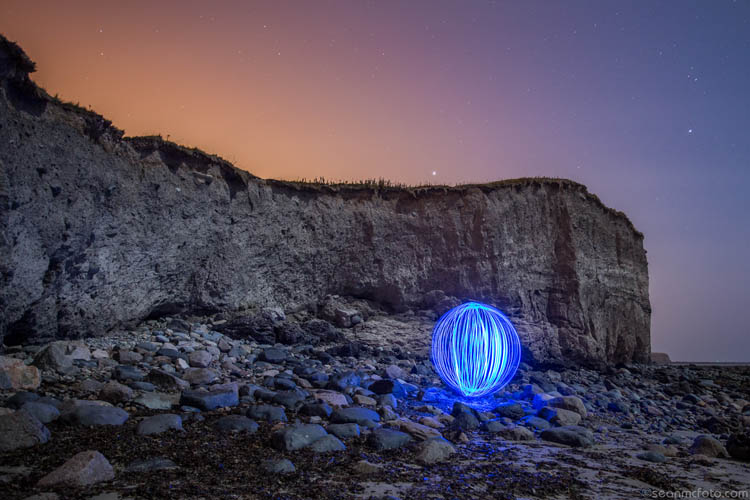
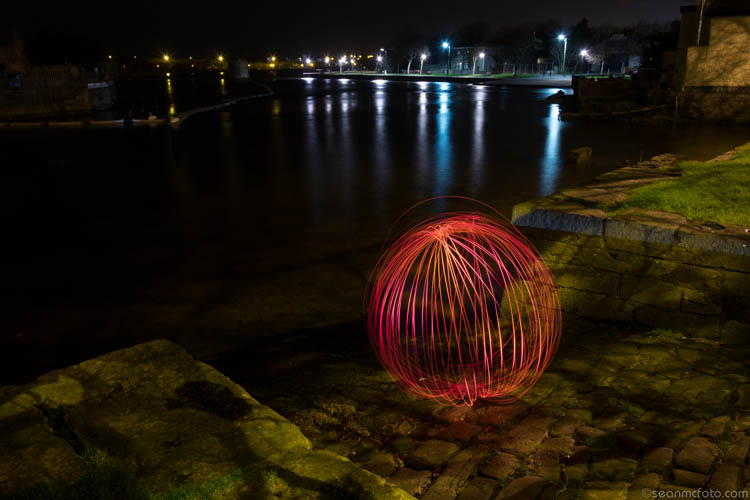
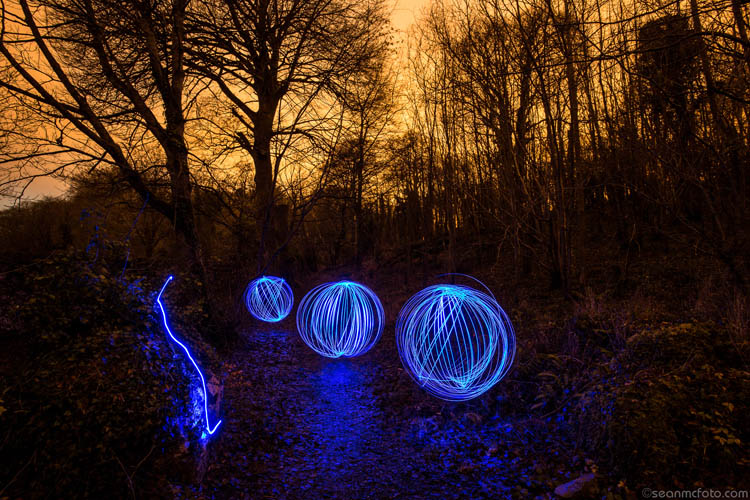
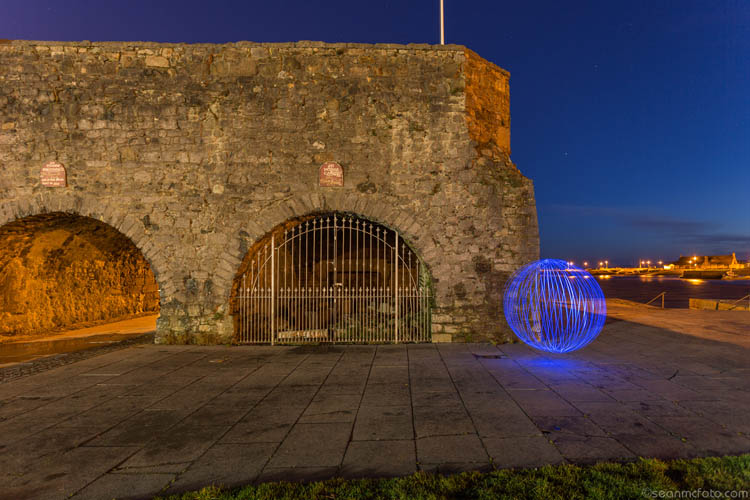
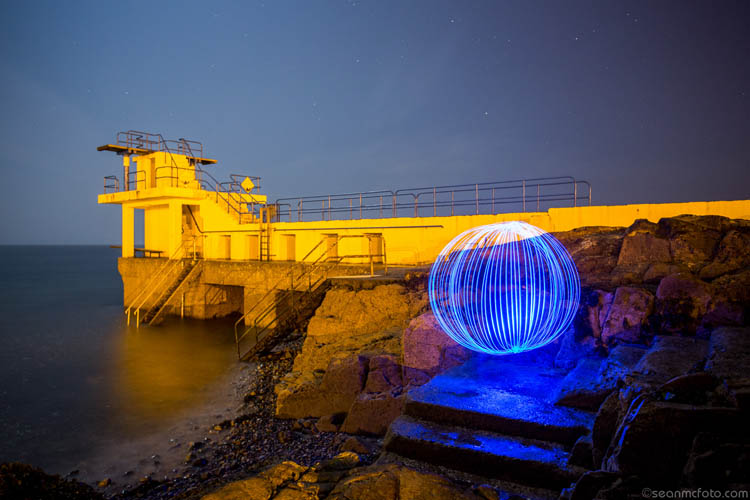
    Well it’s both a cool, and fun, method of light painting that anyone can do. Basically you make a circuit with some LEDs (light emitting diodes), a battery, some wire, and a switch. You weight the LEDs, and then spin these in a circle as you move around a fixed point. Shot outside in the evening using a long exposure, this spinning creates a really cool looking sphere. By using different LEDs, you can make these spheres (called orbs) in different colors. There’s a small bit of tech involved in building them, but it’s not super hard. It’s also a project you can very definitely do with your preteen or early teen child.

    Orb01

    Equipment needed

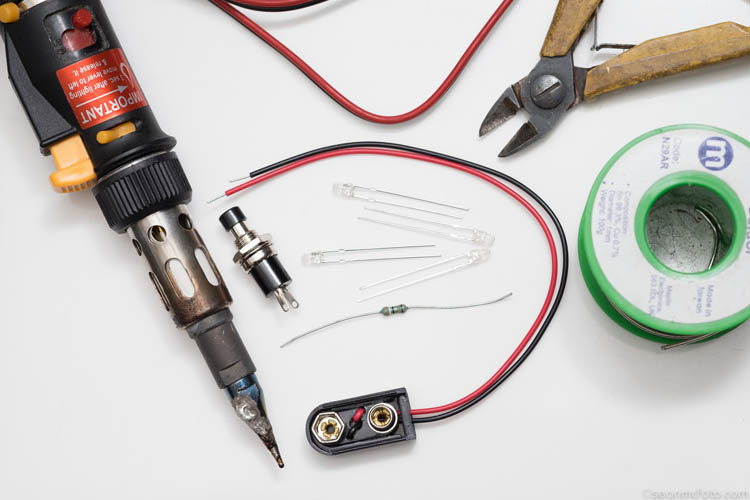
    The minimum you need to make an orb is:

    • An LED (or a few LEDs to make it brighter)
    • Battery
    • Battery Clip
    • Push button to make a switch
    • Wire
    • A weight: literally anything to make the LED at the end of the wire heavy, so it spins easily
    • Resistor(s): The value depends on the type and number of LEDs you use
    • Soldering iron, solder, wire cutters, and PVC tape

    Orb02

    Building your LED light

    Note from the Editor: Please take extreme safety precautions if you attempt this yourself. If you are not familiar with electronics get help from a friend or someone who is an expert.

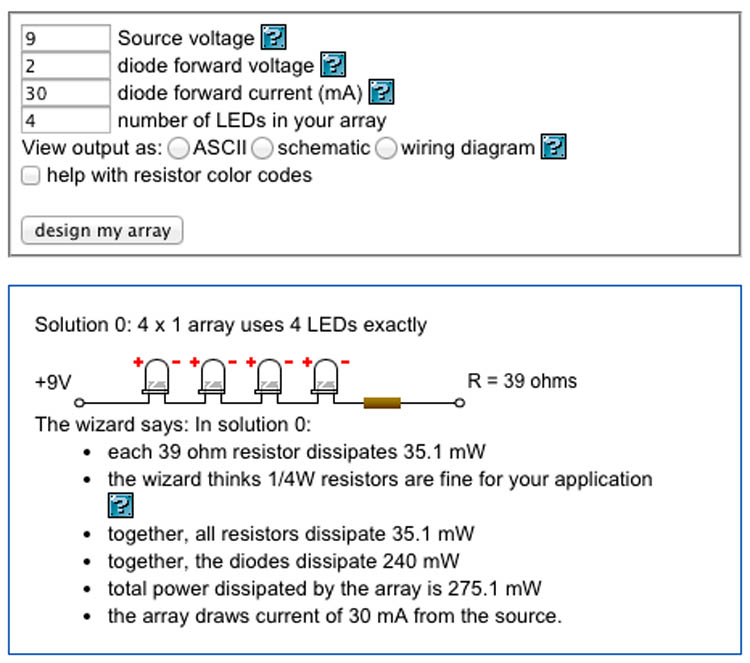
    Now for the tech bit. Attaching an LED to a battery can fry the LED. So to protect it, you need to use a resistor. You may need more than one if you use an array of LEDs. Use this LED Array Wizard, and finding the values is painless. You can enter in information about the LEDs into the wizard and get both the circuit, and the resistor values.

    I bought the parts for this orb locally from a Maplin store (UK based), but you can get them from any electronics components store . Make sure to find the LED Forward Voltage (often 2-3.3 volts) and the current (often 20-30mA) for the LED Array. For this project I got four orange super-bright LEDs, with a forward voltage of 2v and current of 30mA. The wizard suggested I wire them in series and use a 39ohm resistor. (As it turned out, I had two red and two orange LEDs).

    Orb03

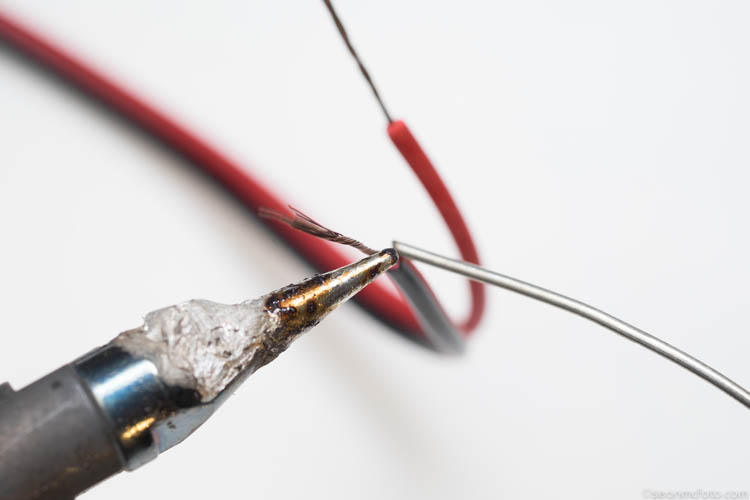
    Soldering this together takes a little skill. The trick is to tin the wires, LED Legs, etc., before bringing them together to solder the connection. Pay attention to the connections.

    Orb04

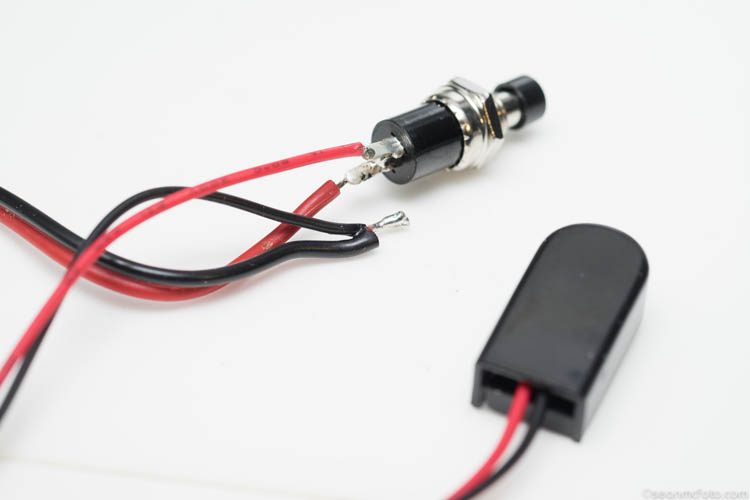
    The red wire from the battery clip should go to the switch, and the black wire should go (via the other wire) to the negative legs of the LED Array (or resistor in this case). From the other side of the switch, the wire should go the the positive side of the LED Array.

    Orb05

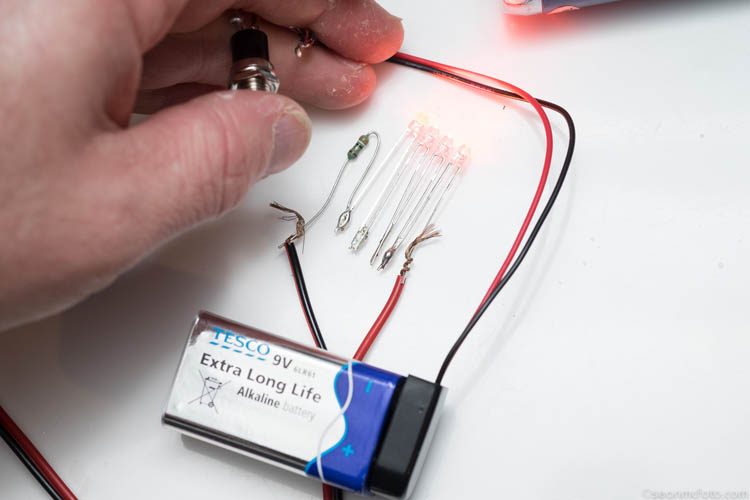
    For the array, make sure to connect the LEDs correctly, as they only work in one direction. Generally one leg is longer than the other, indicating the positive terminal. Follow the wizard circuit to be safe. The resistor can be wired in any direction. Wire the array, then connect the wires from the switch, and test the circuit before committing to the final solder.

    Orb06

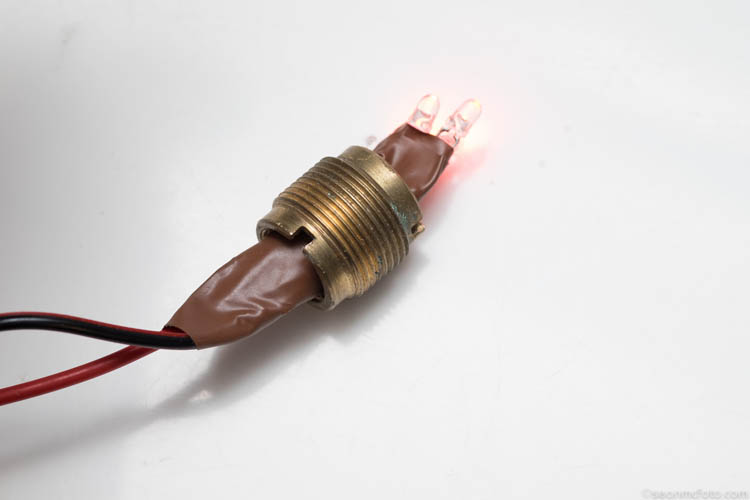
    I’ve used an old adaptor nut as a weight. Even if your weight might fit over the LEDs, put it on the cable before the final solder, just in case. Once you’ve done the soldering, test again, and then use insulation tape (PVC tape) to wrap around each LED leg and the resistors, making sure none of them can touch any other. A short here could prevent the orb from working.

    Orb07

    Use the tape to secure your weight. Give it a test spin. You should be able to hold the battery and switch in one hand, and spin with the other. Practice getting the spin right, before pressing the switch.

    Spinning technique to make the orb

    You’re nearly ready for the real deal, your first orb shot! But first, you need to master a key technique – centering the orb. The first thought is to spin the orb around yourself, but this won’t actually make an orb, it just makes a mess. I mean it looks okay, but it’s not an orb. To get an orb, the center of the spin must be static. Essentially you need to shuffle around your spinning hand to make it work. A great tip is to put something on the ground – a coin helps because you can see the light hit it – and spin above it.

    It takes practice to get perfect, and plenty of my orbs are not perfect, but they still look okay. They are loads of fun either way! Some people shuffle forwards, I tend to shuffle backwards. See which one suits you best.

    Camera settings

    Next you need to know how to set the camera. Here’s the exact setting to use: er… there is none. It depends on what you want in the photo. You need the exposure to capture the LEDs, and your surrounding area, at night or somewhere dark usually. This means a minimum of 30 seconds, but generally longer. So, you need to use Bulb mode on your camera, along with a remote cable. It may be obvious, but you’ll need a tripod to hold the camera steady during the exposure.

    Bulb mode means the camera will record the image, as long as the shutter button is held down. If you use a remote cable with a button lock, you can set the remote, walk off, do your orb, come back to the camera, and then release the lock to end the exposure. As long as the button is held, the camera will continue exposing.

    Orb08

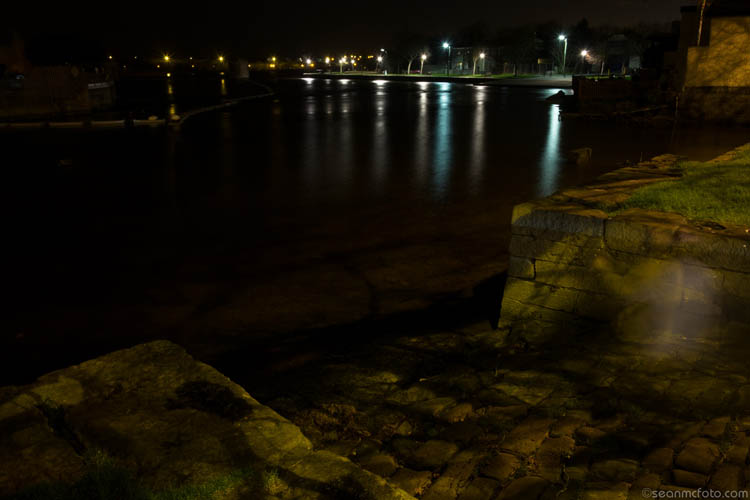
    Take an initial test shot of your location with settings of about 30 seconds at f/8, ISO 100 (see image above). You’re checking that the location will expose correctly first. Change the settings to get the exposure you need. If you’re on your own, use the 10 second timer on the camera to allow yourself enough time to get to your start position. Swing the orb, and once it’s moving, press the switch to light it up. Spin around a fixed point as recommended. That’s it. Go check your camera at the end and then refine your exposure.

    Orb09

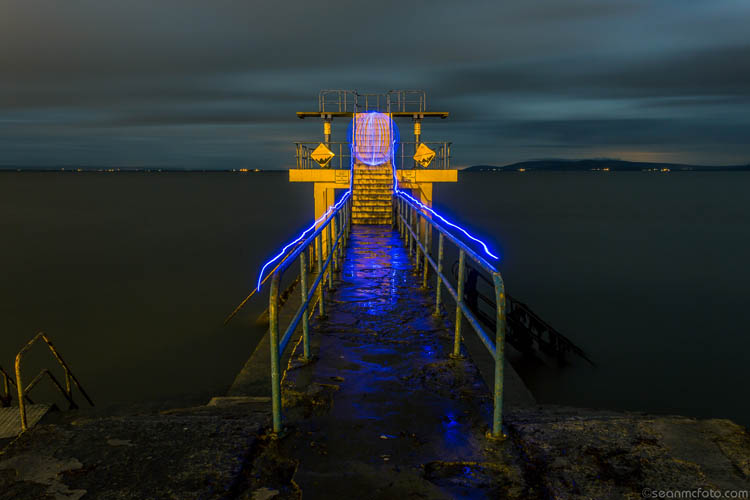
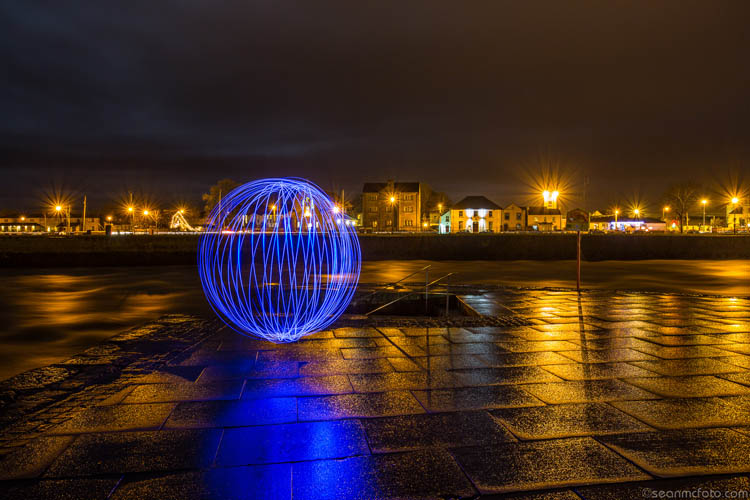
    Anywhere that the orb looks out of place makes for a great shot. Also wet ground or still water is great, as you get reflections of the orb as well.

    Orb10

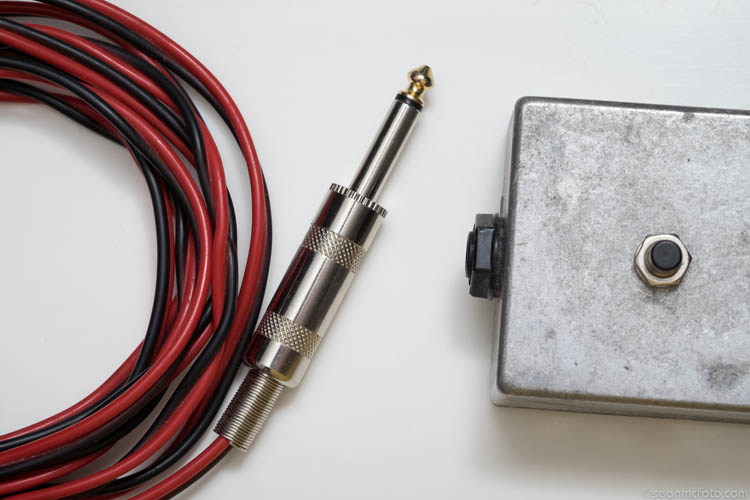
    Once you’ve gotten the bug, you’ll realize that the battery area is a bit flimsy and needs something more solid. For my own orbs, I put the battery and switch into a metal box with a 1/4 inch jack socket. I added a matching jack plug to the cable, replacing the battery and switch. That way I can use one box with a number of different coloured orbs. That’s a project for another day. Have fun making your orbs!

    Orb11

    Orb12

    Orb13

    Orb14

    Have you ever tried this technique before? Or are you itching to try this? If you do – please share your images, and any questions, in the comments below.

    googletag.cmd.push(function() {
    tablet_slots.push( googletag.defineSlot( “/1005424/_dPSv4_tab-all-article-bottom_(300×250)”, [300, 250], “pb-ad-78623” ).addService( googletag.pubads() ) ); } );

    googletag.cmd.push(function() {
    mobile_slots.push( googletag.defineSlot( “/1005424/_dPSv4_mob-all-article-bottom_(300×250)”, [300, 250], “pb-ad-78158” ).addService( googletag.pubads() ) ); } );

    The post How to Build an LED Light and Make an Orb by Sean McCormack appeared first on Digital Photography School.


    Digital Photography School

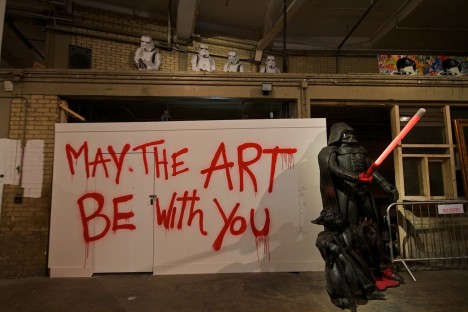
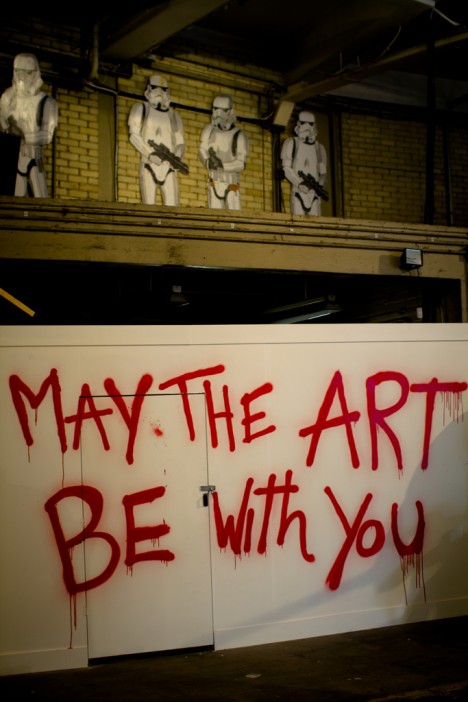
  • May The Art Be With You: Star Wars Stormtrooper Graffiti

    [ By Steve in Art & Street Art & Graffiti. ]

    stormtrooper-graffiti-1a
    White-armored stormtroopers of the Star Wars universe may be the true face of the franchise if their stenciled images on walls worldwide is any indication.

    stormtrooper-graffiti-1b

    Sure their aim is lousy and low door frames are their nemesis but the stormtroopers of Star Wars have done a decent job of conquering pop culture since their 1977 debut. Just ask Los Angeles-based street artist Thierry Guetta – aka “Mr. Brainwash” – who employed them in his “Better to Dream Big” art exhibition in 2012. A gentle top o’ the cap to Artc. and Flickr user Jonas Bengtsson (Jonas B) for posting the above images.

    Start the Revolution Without Me

    stormtrooper-graffiti-4

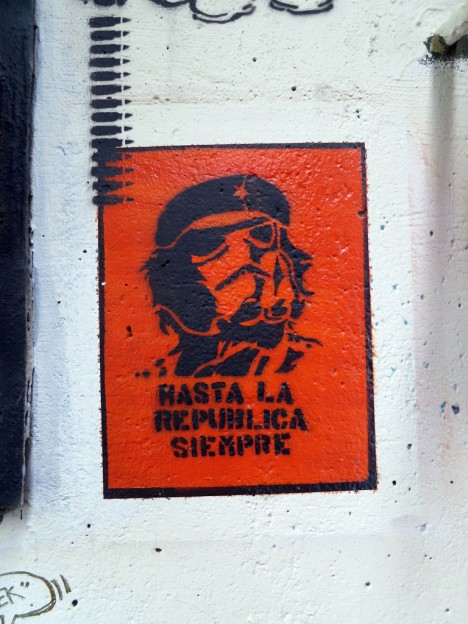
    “Hasta la republica siempre” (“To the republic always”) states this subversive stormtrooper stencil snapped by Flickr user Daniel Lobo (Daquella manera) at Washington DC’s Garfield Skatepark on July 28th, 2013. Did this red renegade deliberately disobey Order 66 or merely read it upside-down as 99 reprO?

    Go Home Stormtroopers, You’re Trunk

    stormtrooper-graffiti-2a

    stormtrooper-graffiti-2b

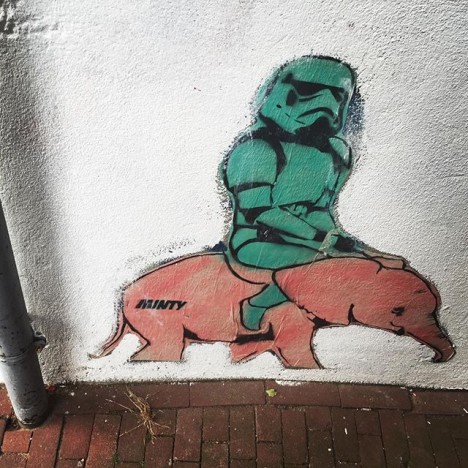
    If you start seeing pink elephants after leaving a Brighton, UK pub, maybe you’ve had a pint too many. If larger-than-life stormtroopers are riding those elephants, on the other hand, fear not – it’s just the local street art. Credit presumed street artist “MINTY”, Flickr user Quick HR (quickhr) and Instagram user @gallie23 for the above mildly hallucinogenic scenes. Right then, back to the pub!

    Fashion Fighter

    stormtrooper-graffiti-5

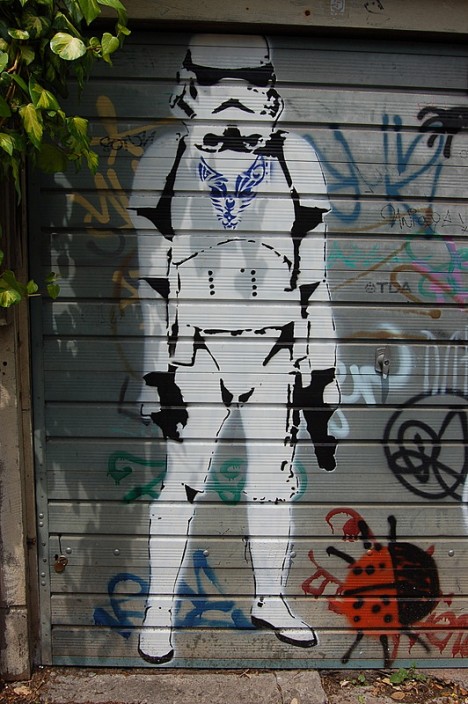
    “I love Star Wars and in particular Stormtroopers when used in Graffiti or Stenciling,” states Flickr user Walt Jabsco, who captured this fashionable film fighter on a sunny May 30th afternoon in 2008. “I don’t like the fact someone has given this one a blue pendant or Chest Logo but it’s still cool,” adds Jabsco, and with or without the blue bling we have to agree.

    The Best Bad Thing

    stormtrooper-graffiti-3

    stormtrooper-graffiti-3b

    May the Foco be with you, amigos! All things considered, prolific graffiti artist Foco’s colorful mural is the highlight of this run-down district in Itagüí, Colombia. Featuring a cute c’thulu-esque stormtrooper, the mural is captioned “Buena compañía, buenos consejos, las mejores cosa mala” by Flickr user Foco Graffiti, translated as “Good company, good advice, the best bad thing.” Make of that what you will.

    City of Lightsaber

    stormtrooper-graffiti-19

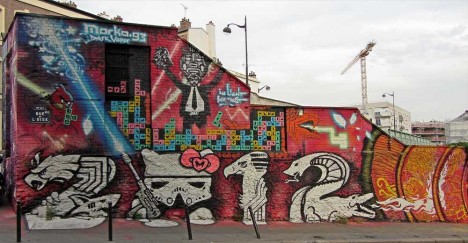
    It’s been over three years since Flickr user Geoffroy65 captured the stunning tableau above, located near the Bassin de la Villette in Paris’ 19th arrondissement. Let it be said that street art this good deserves to be preserved for posterity. The piece is signed “Marko93″ though it’s indeterminable whether the numeral denotes the artist’s age or the year he composed this piece.

    Rooster Trooper

    stormtrooper-graffiti-17

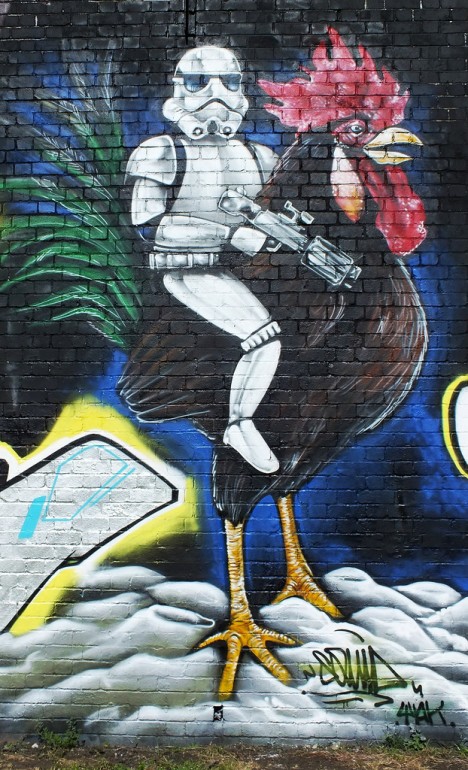
    Strange goings-on in Cardiff, Wales, where Flickr user Squid…Mk recorded this rooster-riding stormtrooper on August 3rd of 2012. Will we ever see such a sight in some yet-to-be-made Star Wars flick? At the rate they’re being planned & produced, it might not take as long as you think!

    Next Page – Click Below to Read More:
    May The Art Be With You Star Wars Stormtrooper Graffiti

    Share on Facebook


    [ By Steve in Art & Street Art & Graffiti. ]

    [ WebUrbanist | Archives | Galleries | Privacy | TOS ]

    WebUrbanist

  • Overview of Several New Sony Cameras

    Sony has released several new cameras over the last few months including:

    • The Sony Cyber-shot RX10 Mark II all-in-one camera
    • The Sony A7RII mirrorless camera
    • The Sony A7SII mirrorless camera
    • The Sony Cyber-shot RX1R Mark II full frame fixed lens camera

    In these two videos you can get an overview of these cameras’ features and get an idea of which one might be right for you if you’re in the market for a camera:

    First up the Cyber-shot RX10 Mark II:

    B&H Photo does a good job going over the features of this camera and some of its strengths, including 4K video.

    More Sony options – by Adorama TV

    Adorama interviews Sony rep, Mike, about some of their A7 line-up.

    Have you tried any of these cameras? Still want more info?  Try this pages:

    • The 19 Most Popular Compact System and Mirrorless Cameras with Our Readers
    • The 20 Most Popular DSLRs Among our Readers

    Add your comments below if you’ve given any of these a test drive.

    googletag.cmd.push(function() {
    tablet_slots.push( googletag.defineSlot( “/1005424/_dPSv4_tab-all-article-bottom_(300×250)”, [300, 250], “pb-ad-78623” ).addService( googletag.pubads() ) ); } );

    googletag.cmd.push(function() {
    mobile_slots.push( googletag.defineSlot( “/1005424/_dPSv4_mob-all-article-bottom_(300×250)”, [300, 250], “pb-ad-78158” ).addService( googletag.pubads() ) ); } );

    The post Overview of Several New Sony Cameras by Darlene Hildebrandt appeared first on Digital Photography School.


    Digital Photography School

  • Buildings in Bottles: Crafty Test-Tube Architectural Models

    [ By WebUrbanist in Art & Sculpture & Craft. ]

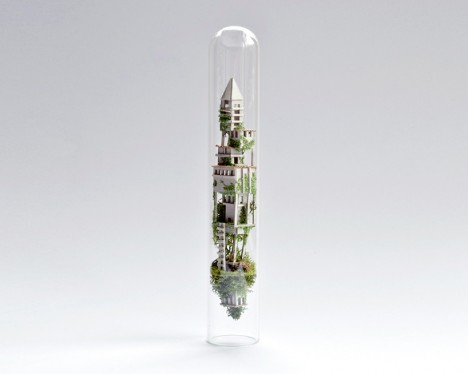
    test tube architecture

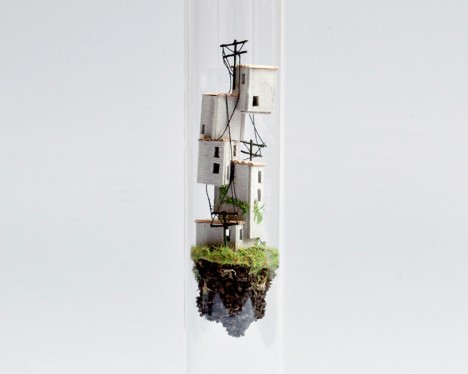
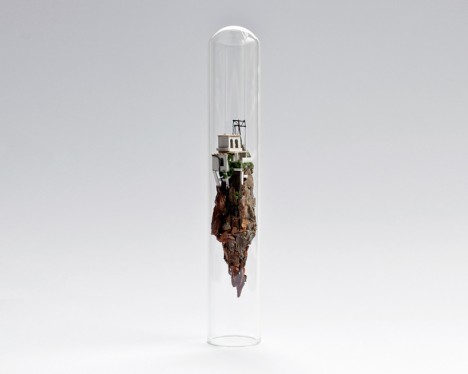
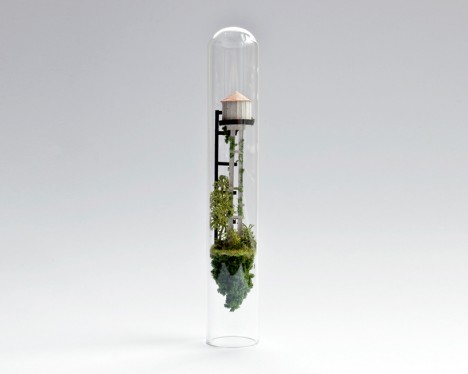
    A tiny twist on miniature architecture turns simply-crafted models into hovering micro-habitats, suspended in test tubes like the science experiment of some mad architect.

    test tube stack buildings

    test tube environment

    Micro Matter is an ongoing project series by Rosa de Jong, an artist and designer from Amsterdam who uses both manufactured materials (paper and cardboard) as well as natural ones (sticks and moss) to shape small worlds enclosed in glass.

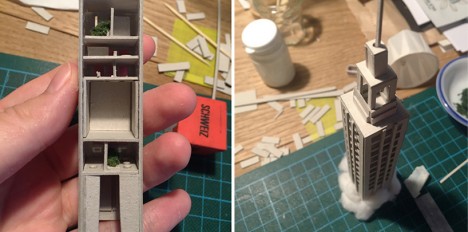
    test tube crafting

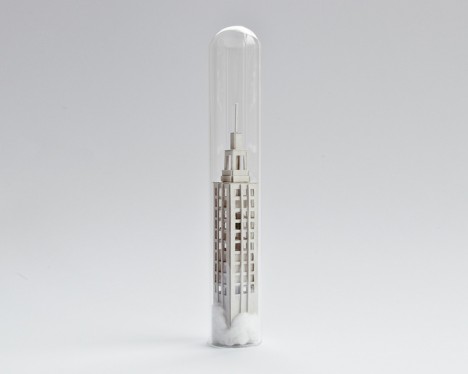
    test tube skyscraper

    The scenarios range from partial (the tops of skyscrapers poking above the clouds) to complete (homes resting on floating mountaintops), and vary in structural plausibility as well, bringing to mind less-controlled urban environments in places like Mexico, where ingenuity often trumps order.

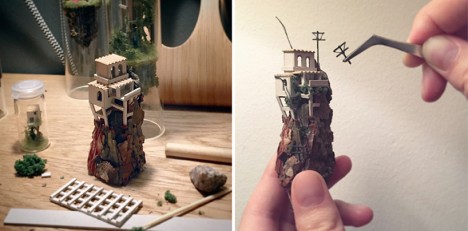
    test tube miniature mountain

    test tube floating

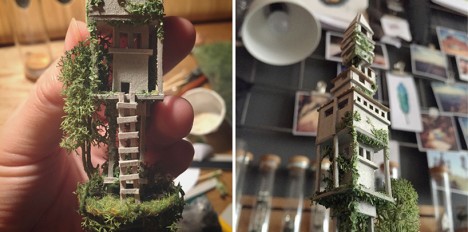
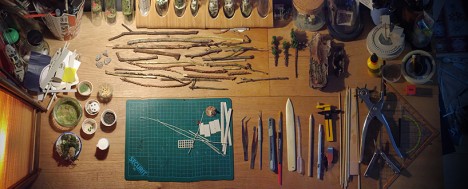
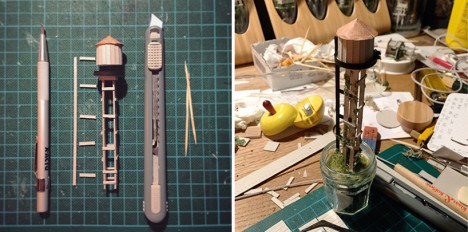
    Each creation also comes with a behind-the-scenes look at its construction, including both the materials employed and the tools used to cut the pieces apart and assemble them into new forms.

    test tube workspace

    test tube water tower

    test tube glass sculpture

    The results strike a balance between everyday believability – crooked walls and as-needed staircases – and utter fantasy, combining the rigor of a ship-in-a-bottle with the imagination of a science fiction artist.

    Share on Facebook


    [ By WebUrbanist in Art & Sculpture & Craft. ]

    [ WebUrbanist | Archives | Galleries | Privacy | TOS ]

    WebUrbanist