Looking at a new Apple patent that has recently surfaced, it appears we might see a dual-camera setup in future iPhone generations. The design uses two camera modules, one with a wide-angle lens and another with a longer focal length. Throw some Apple software wizardry into the mix and you get yourself a smartphone zoom lens that should get close in quality to fully optical zooms and much better than existing digital zooms. Read more
Blog
-
A Beginner’s Guide to Doing Black and White Photography
If you’ve never tried black and white photography before, you may be wondering what the appeal is. After all, isn’t it a little like black and white television or silent movies – an anachronism in our modern, high-tech age?

The answer is no, definitely not. In the photography world, black and white is considered an art form. Some would even say only the best photographers work in monochrome. It’s a medium with a rich history, (look at the work of Ansel Adams, Edward Weston or Henri Cartier-Bresson for examples) and a bright future.
Just as importantly, working in black and white can help you become a better photographer. How? It’s all to do with composition.
Colour is very powerful, and tends to dominate the photo so much that it’s difficult to see other elements like tonal contrast, texture, shape, form and quality of light. Experienced photographers instinctively see these things, regardless of whether they work predominantly in colour or black and white. But if you’re just starting out, you may need some assistance to do so, and working in black and white photography will help you.
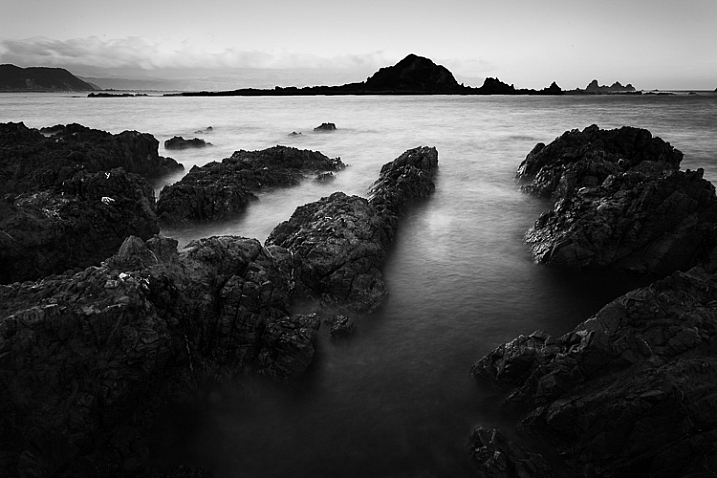
Black and white emphasizes the textures of the rocks and sea in this landscape photo.
Naturally, there are certain subjects that tend to work better than others in black and white; two in particular are landscapes and portraits. If this is your first time shooting in black and white, then these are great subjects to try out.
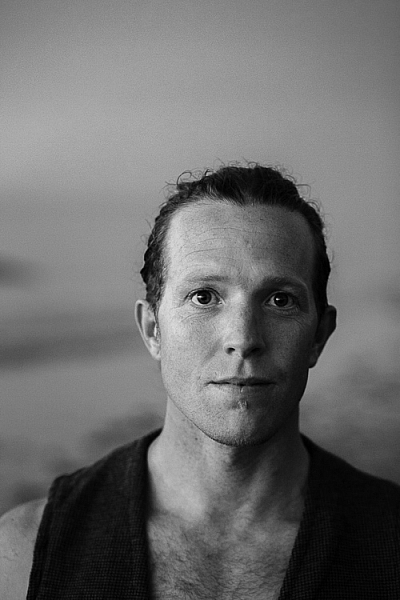
Black and white portraits emphasize expression and quality of light.
Black and white on your camera
Before digital photography the only way to work in black and white was to use black and white film. Thankfully, now it’s much easier to work in black and white, just by switching your camera to Monochrome Mode (check your camera’s manual if you are unsure how to do so, look for Picture Styles settings).
Cameras with electronic viewfinders automatically display the image in black and white, helping you see how the image will look, before you press the shutter. If you have a digital SLR you will get the same effect in Live View. This may be useful if you are working with your camera on a tripod (for instance, taking a landscape photo).
Usually at this point I advise you to use the Raw format. In the long run it’s easier than using JPEG, and gives you better image quality. But I appreciate that if you’re new to photography you may still be working exclusively in JPEG. The rest of this article works on this basis.
Working in Monochrome Mode
Once in monochrome mode you will see some extra options. They help you set your camera up to produce the best results. Again, check your manual if you are not sure where to find them.
Colour filters
The colour filter settings are left over from the days of film photography. Photographers would buy coloured filters, and use them to alter the tones in black and white photos. For example, if your scene includes a blue sky, then using a yellow filter will make the sky a little darker, an orange filter makes it even darker, and a red filter darker still.
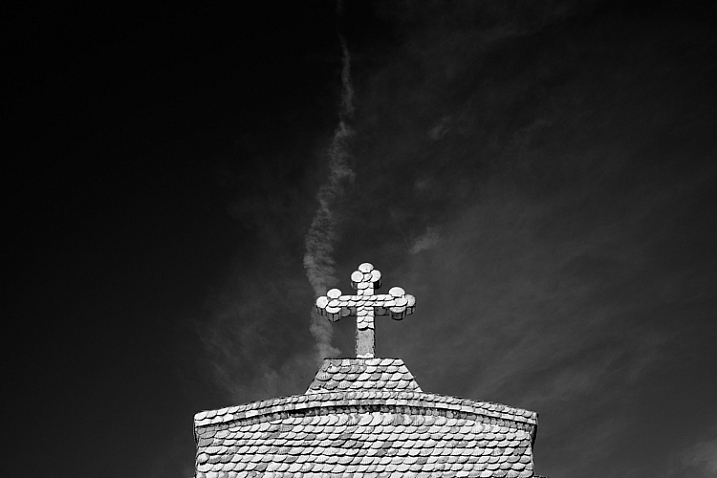
This scene works quite well in black and white, but it’s not nearly as dramatic as it could be.
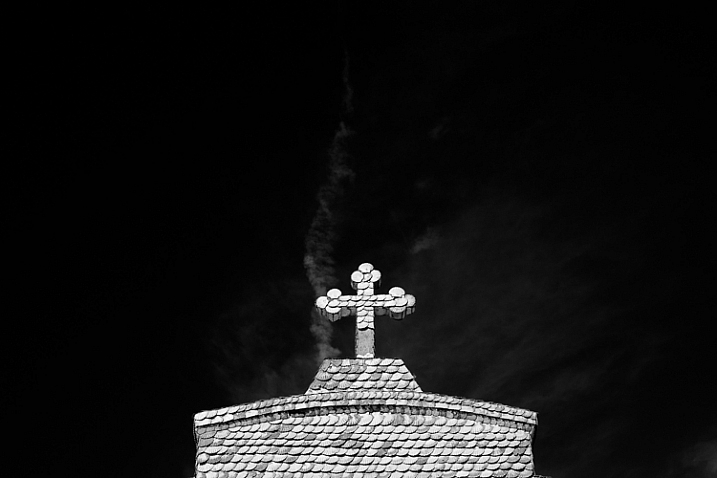
Applying the Red filter setting makes the blue sky go much darker, creating a much more dramatic version of the same scene.
There is also a place for green filters, which can bring out more detail in green subjects like leafy forests. Those four coloured filters (red, orange, yellow and green) have made their way onto most digital cameras as black and white settings.
Contrast
If you take a photo in flat light (for example, a portrait of somebody standing in the shade) the photo may look flat (two dimensional). So, you need to compensate by increasing the contrast. You can either do this in Photoshop or Lightroom after the photo has been taken, or you can do it in-camera with the contrast setting.
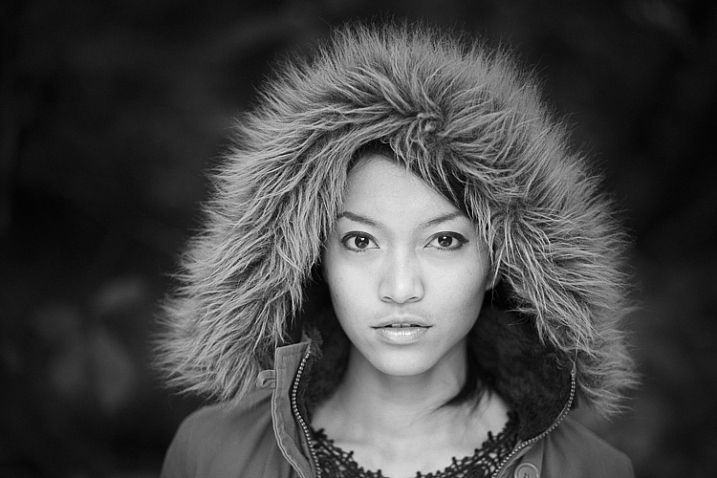
The model was standing in the shade when I took this photo. The light lacks contrast, and the black and white photo is flat.
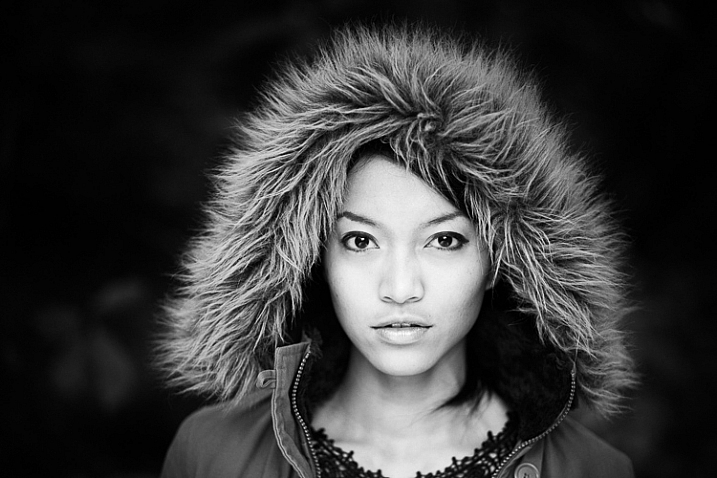
Increasing contrast creates a much stronger image.
Cropping and the square format
Most modern cameras let you change the aspect ratio. The reasons why you might want to do that are a little complex, but the main one is that it lets you shoot in the square format, something you may already be used to if you use an app like Instagram on your smartphone. If your camera has an electronic viewfinder, it will display a square image for you, making composition much easier.
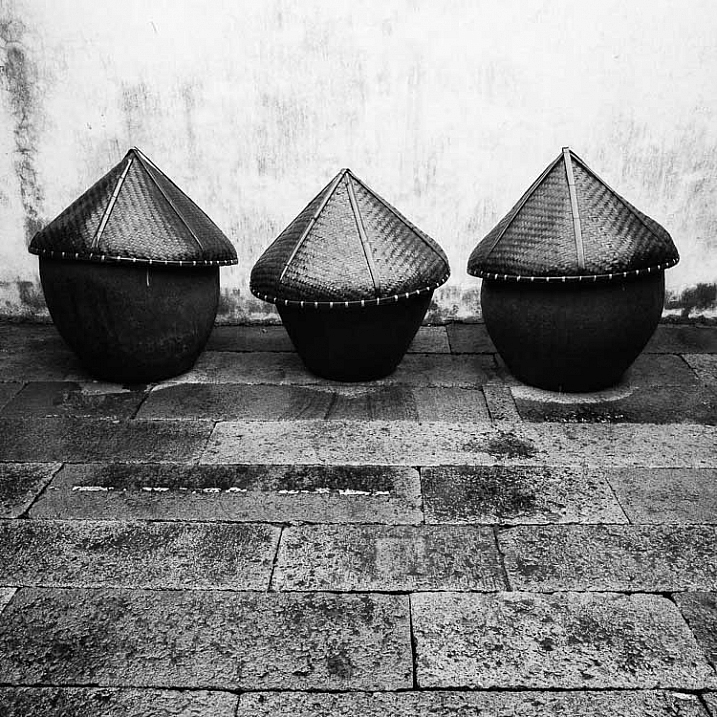
Cropping to the square format emphasizes the shapes of the three pots.
Toning
Finally, you may have the option to tone your images. To be honest, unless your camera lets you apply toning affects subtly, I wouldn’t bother with these, as the effect is usually too strong.
Have fun!
Black and white is a beautiful medium to work in, one which you will appreciate the more you practice. In the meantime – have fun and enjoy yourself. You are following a path trodden by some of the most famous names in photography. And of course, if you have any questions about working in black and white, please let us know in the comments.
Mastering Lightroom: Book Three – Black & White
My ebook Mastering Lightroom: Book Three – Black & White goes into the topic of black and white in depth. It explains everything you need to know to make dramatic and beautiful monochrome conversions in Lightroom, including how to use the most popular black and white plug-ins. Click the link to visit my website and learn more.
googletag.cmd.push(function() {
tablet_slots.push( googletag.defineSlot( “/1005424/_dPSv4_tab-all-article-bottom_(300×250)”, [300, 250], “pb-ad-78623” ).addService( googletag.pubads() ) ); } );googletag.cmd.push(function() {
mobile_slots.push( googletag.defineSlot( “/1005424/_dPSv4_mob-all-article-bottom_(300×250)”, [300, 250], “pb-ad-78158” ).addService( googletag.pubads() ) ); } );The post A Beginner’s Guide to Doing Black and White Photography by Andrew S. Gibson appeared first on Digital Photography School.
-
Driving on Auto-Pilot: 13 Future Visions of Cars & Commuting
[ By Steph in Technology & Vehicles & Mods. ]

Within fifteen years we could be zooming around in flying passenger drones and self-driving luxury pods, and claiming packages from driverless delivery trucks that verify our identities by scanning our faces. At least, that’s what Mercedes-Benz, BMW and other automakers and designers seem to be hoping with these optimistically futuristic concept car designs – and while it might realistically take a lot longer than that to see real, functioning flying cars, some seemingly far-out ideas are already on their way.Passenger Drone

As if the idea of self-driving cars on the roads weren’t already nerve-wracking enough, soon passengers might be able to take to the skies without a pilot onboard. A Chinese startup called Ehang unveiled the world’s first passenger done, an Autonomous Aerial Vehicle that can carry one person and a single backpack for about twenty minutes from one location to another, with the destination set via tablet before takeoff. The 440-pound drone folds up its propellers to fit within a standard parking spot. What happens if something malfunctions? The company says the drone can still fly with a propeller out, and will land in the nearest possible area if anything goes wrong.
Self-Driving Chevrolet-FNR


A world away from Google’s dorky self-driving bubble car, the Chevrolet-FNR by GM envisions the autonomous commuting future circa 2030. The front seats rotate to face the rear, and the interior is packed full of touch-screens, with iris-recognition entry, crystal laser lights and “magnetic hubbies wheel electric motors.” The “dragonfly dual-wing doors” are so sharp, they look dangerous.
Mercedes-Benz F 015


While the FNR isn’t exactly ready to actually hit the road, the similarly driverless Mercedes-Benz F 015 is already roaming San Francisco. This sleek and shiny luxury pod is part of Mercedes’ vision for a safer future in which all cars are unmanned, automatically stop to let pedestrians cross the road, and let all passengers read, text, surf the web or whatever it is humans will be doing on gadgets in 2030. The company still has a long way to go in ironing out the tech involved in this project, but the proof of concept is impressive.
Self-Driving IDEO

The first of three self-driving vehicle concepts by global design company IDEO interacts with your email, calendar and text messages to set your route and senses when you’re 200 feet away, firing up and preparing for your ride. As you head down the freeway, your car will link up with other cars moving in the same direction, joining a ‘platoon’ of tailgating vehicles for speed and safety.
WorkOnWheels Commuting Workspace Pod

IDEO’s second concept is WorkOnWheels, a transparent mobile office pod that zooms around the city, either acting as an automated place to complete tasks while you’re on your way to your workplace or zooming to the scenic setting of your choice. You can take your team on a brainstorming session by the sea, park in a bustling urban spot to observe city life or whatever else you can dream up. The pods are rentable by the hour and drive themselves back to their home base to recharge when you’re done.
Next Page – Click Below to Read More:
Driving On Auto Pilot 13 Future Visions Of Cars Commuting
Want More? Click for Great Related Content on WebUrbanist:
Back To The Future: 29 Thrilling Concept Cars & Designs
Concept cars are some of the coolest and popular manifestations of futurism today. Some are actually built, but most don’t make it off the computer screen.
Click Here to Read More »»
Future Shocks: 5 Incredible Concept Cars & Cool Prototypes
From two-and-three-wheeled concept cars to real-life transformers for land, sea and air, the idea of all-terrain vehicle is starting to take on new meaning …
Click Here to Read More »»

Design Visions of the Future: We’re Not (Quite) There Yet
We don’t have a colony on Mars or even the Moon, we don’t fly to work, and we’re still using combustion engines… what’s the deal? Where did the future go?
Click Here to Read More »»


[ By Steph in Technology & Vehicles & Mods. ]
[ WebUrbanist | Archives | Galleries | Privacy | TOS ]
-
New York Public Library releases thousands of images into public domain

The New York Public Library has released more than 180,000 digitized items into the public domain, making them freely available for anyone to use for any purpose. These items include scans of manuscripts from well-known authors, copies of sheet music, more than 40,000 stereoscopic photographs and more than 20,000 atlases and maps.
The NYPL announced the release last week, saying it “represents both a simplification and an enhancement of digital access to a trove of unique and rare materials.” The materials are available as high-resolution downloads through the library’s public domain remix. As of this latest release, there are 672,186 digitizations available in the NYPL Digital Collections.
Via: NYPL
-
246 Shades of Grey: Leica M Monochrom Typ 246 real-world and studio samples

The sensor in the Leica M Monochrom (Typ 246) is an interesting one. Without a color filter array, the 24MP CMOS sensor doesn’t lose sharpness through interpolation, much like a first-generation Foveon sensor or Pentax’s pixel shift mode found in the K-3 II. The catch is, of course, no color. However, it also means the sensor is more… well… sensitive at base ISO, making this ones’ base ISO 320 instead of 200 like its Bayer counterparts.
There is another issue, however. Even without a mirror flipping out of the way in this rangefinder, the shutter causes blur at speeds near 1/125sec when using the 90mm F2 Summicron. To see the true sharpness of the camera at base ISO, we recommend switching over to low-light mode where the shutter’s effect isn’t present.
You’ll notice that the M Monochrom is marked as non-standard. Keeping true to its rangefinder roots, it can only change shutter speed in half-stop increments, whereas our standardized Raw exposures are based off of third-stop increments. However, the M does do exposure compensation in third-stops, even though it will only report half-stops. Therefore we shot the M in aperture priority and bracketed +-1 stop EV. We then, since it didn’t report accurate shutter speeds in its metadata, chose the Raw exposure that was closest to Lab 50 without adjustments. JPEG images still follow our normal procedure.
See the M Monochrom Typ 246 in our Studio Scene
See our Leica M Monochrom Typ 246 real-world sample gallery
-
Brazil Nots: Abandoned Buildings Of Utopian Brasilia
[ By Steve in Abandoned Places & Architecture. ]
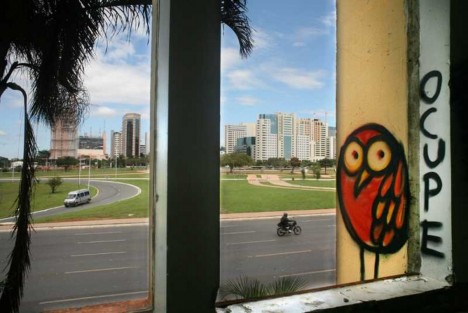
Brasilia was designed by visionary architects as a utopian city of tomorrow. Now that tomorrow’s arrived, it appears those plans haven’t panned out.


It took just 41 months to build Brasilia, which was officially inaugurated on April 21st of 1960. The original plans called for a resident population of 500,000 but as of 2011, five times that number lived in the city and its surrounding metropolitan area. Over 50 years of unplanned urban sprawl has resulted in dysfunctional neighborhoods blighted by abandoned structures of all shapes and sizes.
Typical of Brasilia’s dark side is the Torre Palace Hotel. Built in 1973 and boasting 14 stories with a total 140 rooms, the hotel closed in 2013 – a victim of unsolvable financial disagreements among the original builder’s heirs.


Photographer Ricardo Padue and Flickr user -Paulo -Bragga (collspooky) document the current sorry state of the once-swanky former hotel now taken over by looters, squatters and the homeless.
Theater of Pain


Designed (like many of Brasilia’s iconic structures) by Oscar Niemeyer, the Claudio Santoro National Theater has spent a significant percentage of its lifespan closed for “repairs”. Lack of funds for operations and maintenance is the culprit here, a situation exacerbated by the world financial crisis of 2008-09. When not hosting theatrical troupes, this strikingly futuristic building shelters drug addicts and the homeless.
Sloppy Cop Shop


In some ways Brasilia is the victim of its own design: built as a beacon of enlightenment smack dab in the middle of an historically poor region, the city acted as a magnet for central Brazil’s unemployed, disenfranchised and opportunistic citizens. Unfortunately, opportunities are limited in a city whose raison d’être was to house government ministries, foreign embassies and federal employees.


One might expect the city’s police to have their hands full; yet the above Brasilia police station snapped by Flickr user Lúcio Costi Ribeiro is as abandoned as the day is long.
Next Page – Click Below to Read More:
Brazil Nots Abandoned Buildings Of Utopian Brasilia
Want More? Click for Great Related Content on WebUrbanist:

Deserted Europe: 20 Hauntingly Abandoned Buildings
From houses and estates to factories, mines, military buildings and prisons here are the explorations of twenty buildings by one daring European urban explorer.
Click Here to Read More »»

Blue Lights Out: 10 Closed & Abandoned Kmart Stores
Attention Kmart shoppers… would the last one out the door please turn off the blue lights? These 10 abandoned Kmart stores have rung up their last receipt.
Click Here to Read More »»

Failed Jungle Utopia: 7 Abandoned Wonders of Brazil
The remains of Henry Ford’s failed rubber-producing city, two rusting theme parks, intricate colonial facades and a railroad that set the scene for 7,000 …
Click Here to Read More »»
[ By Steve in Abandoned Places & Architecture. ]
[ WebUrbanist | Archives | Galleries | Privacy | TOS ]
-
How to be a Better Photographer: Camera User Manual University
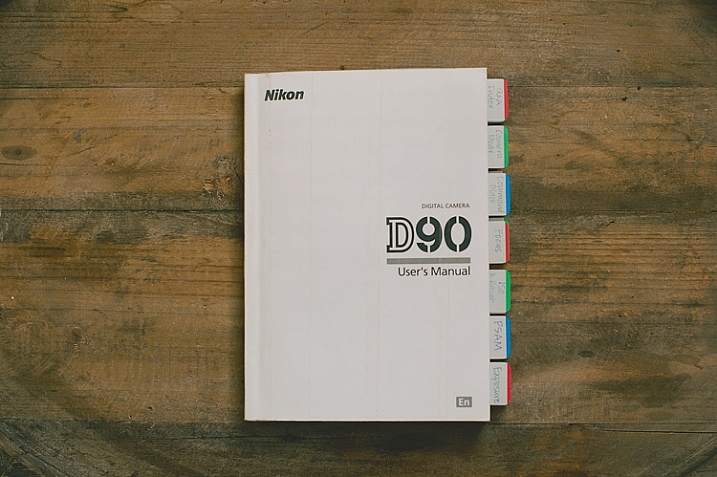
Let me guess; you got a brand new camera, you don’t know how to use it, and you have no idea where to start – about right? Let me introduce you to one of the best ways to get to know your camera inside and out, backward and forward. It’s included with your camera, so there is no extra cost! It’s at your fingertips 24 hours a day. It’s patient, and never gets frustrated if you ask it the same questions over and over again. Welcome to:
Camera User Manual University!
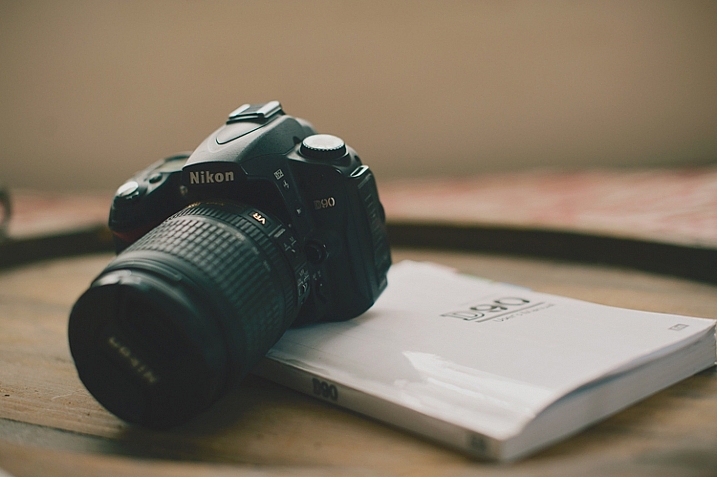
For many of us, getting a brand new camera is beyond exciting. We start trying to use it right away, throwing the manual back in the box, forgotten forever. The problem is, we soon run into frustrations and questions, and end up just putting the camera aside, or searching and asking for the answers one at a time, learning slowly and with difficulty. Or maybe we have even had our camera for ages, and just barely discovered something amazing that it can do.
If I can convince you to actually USE that camera manual, you will start out with much more knowledge than the average camera owner, and you will discover lots of cool stuff that your camera can do, that your seasoned photographer friends may not even know!
I am going to share my first camera manual and how I made it useful for me. These tips might help you transform your boring manual, into something that can actually help you become a better photographer.
Protect Your Manual
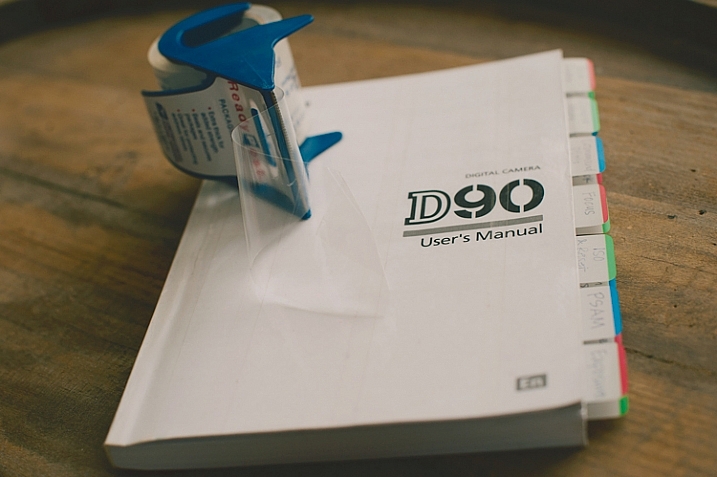
The covers on camera manuals are usually very flimsy, and easily torn or bent. The first thing to do is laminate your cover, so it’s more durable and stays nicer. I did this by simply covering the front and back covers with packaging tape. I made the pieces of tape slightly bigger than the book, and folded them under so the edges were protected also. Take your time with this, and make sure you use a clean surface to avoid bubbles and dirt stuck underneath the tape.
Add Divider Tabs
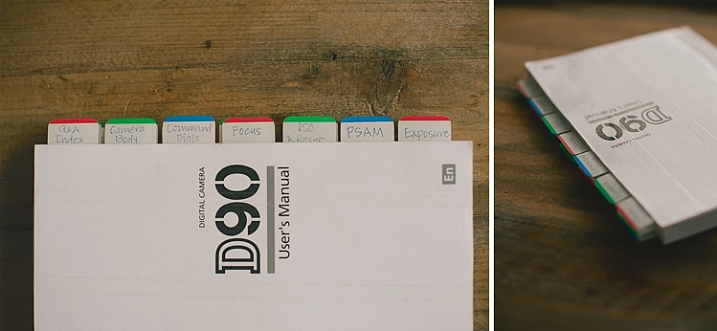
I went through the book and labeled and divided each section, so I could find them at a glance. Not only does this make finding things easier later on, but labelling the tabs and sticking them in each section, gets you familiar with the manual even before you start digging in deeper. You will know what your manual has to offer, and what kind of things you are going to be learning very soon.
I used removable tabs that I bought from an office supply store. They have a slight plastic feel to them, and are very sturdy. I like using removable ones, because you can move them later if you don’t need one of the labels in there.
Start at the Beginning
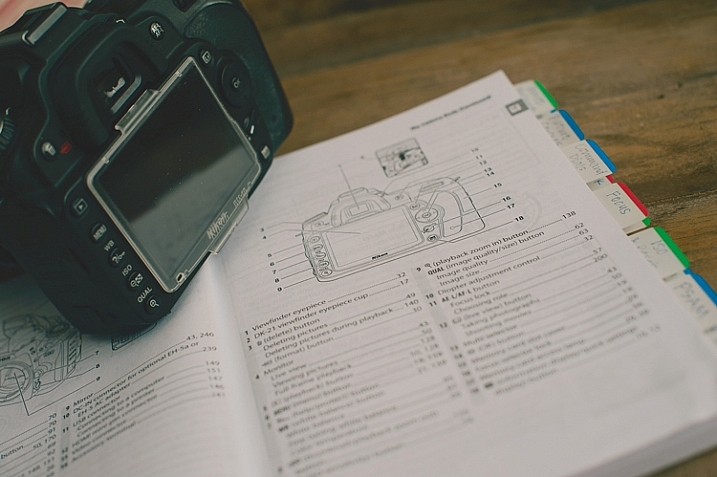
With your camera in your hands, go through the manual from the very beginning. Look at the diagrams, and find each item on your camera body. Even if you don’t understand what something is yet, find it on your camera. Later, as you read more detail, everything will start to come together. Read every page, even if it doesn’t make sense at first. Getting a nice camera is a big investment, so wouldn’t you want to know what it can do?
Camera manuals usually have very basic instructions near the beginning of the manual to get you shooting, almost right out of the box. Feel free to read that part, and begin using your camera right away, but don’t stop there! As you work your way through the manual, you will discover the reason you wanted a DSLR in the first place.
Try Everything
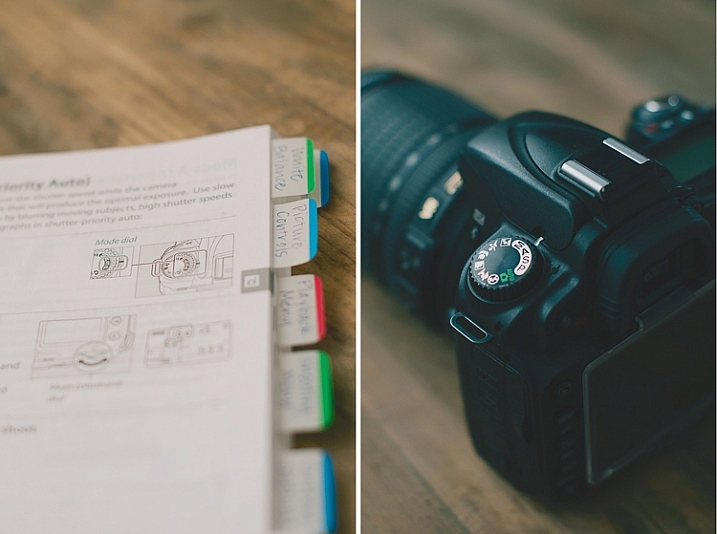
As you read and find each dial, button, and menu item on your own camera, give everything a try. If the manual is talking about different shooting modes, dial your camera in to each one, follow the instructions, and try a few test shots. Reading about things is good, but reading and then getting hands-on experience is infinitely better. You will understand what the manual is talking about with more clarity if you try things out for yourself.
Keep in mind that not everything will make sense the first time through, that’s okay. After you’ve practiced awhile, try going back through the manual page by page again. You’ll find that much of what confused you initially, has now become clear.
Once you’ve tried something, you may realize that it isn’t a feature that you will ever use. If that’s the case, just move on, and know that you at least tried it. You may end up wanting to use that feature in the future, and now you know that it exists.
Underline the Key Words
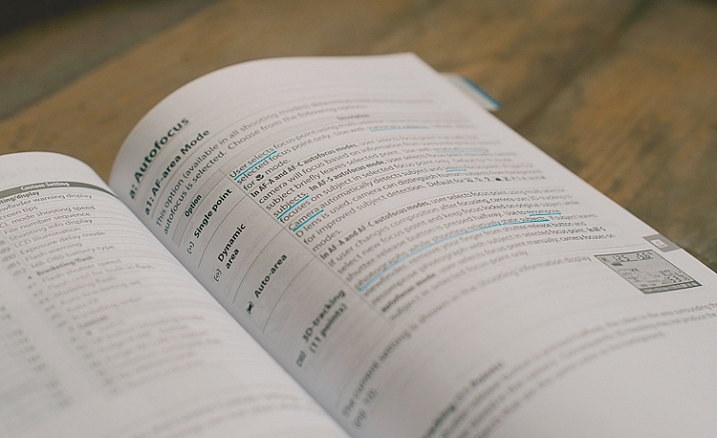
As you are reading through and learning, have a pen handy. Underline (or highlight if that’s your thing) key words that will help you focus on what is most important. Sometimes manuals can be wordy, and hard to understand. If you can zone in on the most important words, it will become more clear. Later, when you are trying to find something, those underlined words will pop out and make it easier to find.
Take notes in the margins if you try something, love it, and know that you will want to remember that in the future. Add an extra tab or sticky note there, or put a star next to it. It’s hard to remember everything you read after one read-through, but if you can quickly go back to your starred items and practice those often, you’ll be well on your way to mastering your camera.
All of this might seem a little obsessive, and maybe it is for some. However, I have taught many photography classes, and had many one-on-one mentoring sessions with new photographers, and almost every question they ask me about their camera can be found in the manual. Some people learn better from a live teacher, but the great thing about the manual is that you can refer back to it as many times as you need to, and you don’t have to pay anything extra to learn.
Have you attended Camera Manual University? Do you have any tips for making your camera user manual easier to use? I’d love to hear them in the comments.
googletag.cmd.push(function() {
tablet_slots.push( googletag.defineSlot( “/1005424/_dPSv4_tab-all-article-bottom_(300×250)”, [300, 250], “pb-ad-78623” ).addService( googletag.pubads() ) ); } );googletag.cmd.push(function() {
mobile_slots.push( googletag.defineSlot( “/1005424/_dPSv4_mob-all-article-bottom_(300×250)”, [300, 250], “pb-ad-78158” ).addService( googletag.pubads() ) ); } );The post How to be a Better Photographer: Camera User Manual University by Melinda Smith appeared first on Digital Photography School.
-
Readers’ Showcase: Scott Matthews
Readers’ Showcase: Scott Matthews

Astoria Station Sunrise, 2013. Photo by Scott Matthews
DPR reader Scott Matthews is an early riser, which is a lucky thing to be if you also have access to sweeping views of the New York skyline. He captures the colors of sunrise, sunset and the night lights of the city all using adapted manual focus lenses with his mirrorless camera body. Find out why he prefers this combination and see a selection of his work.
See more of his portfolio on his website. Would you like to be featured in an upcoming Readers’ Showcase? Let us know! Be sure to include your DPR user name and a link to your online portfolio.
Readers’ Showcase: Scott Matthews

When You Get Caught Between the Moon and New York City, 2015. Photo by Scott Matthews
Where are you from, and what’s your history with photography?
I live in New York City, became a dad in 2004. When my daughter was about three or four, my mother gave me my first digital point-and-shoot. Her agenda was clear: send more photos of her first grandchild! But I never got the hang of the thing, and didn’t use it much. Then in 2010 we were on a family vacation, and I decided to share photos from our trip while we were still on the road. Something about sharing in near-real-time made it click for me. But just as I was starting to get into it, the New Mexico dust totally jammed up my camera. I then decided I would research and purchase a replacement. I settled on a Sony NEX 5, because the mirrorless concept appealed to me.
Now I’d describe myself as something between avid amateur and semi-professional. I’ve had a travel set published in the New York Times, and I’m a regular contributor to a few local NYC papers. I’ve also had a few covers of Contexts magazine and I’ve sold several prints, the largest being a 60″x40″ that was produced for me by Duggal Visual Solutions here in NYC.
Readers’ Showcase: Scott Matthews
Reflected Sunrise, 2016. Photo by Scott Matthews
What do you shoot with?
I shoot with a Sony A7 II and I currently use four adapted manual-focus lenses: an M-mount Voigtlander 35mm F1.2, an M-mount Leica Elmarit 90mm F2.8, an M-mount Voigtlander 21mm F1.8, and an R-mount Leica Telyt 180mm F3.4 (all except the 35mm were purchased used). Of them, I use the 35mm and 90mm the most.
The first manual I purchased was the Voigtlander 35mm, when I was still using an NEX (APS-C). My thinking was: “I really want to try working with a fast manual prime, this one would give me a roughly 50mm field-of-view on the NEX, and if Sony ever comes out with a full-frame camera, I’ll still be able to use it.” If the question is really about what I use to ‘make’ my photos, I also certainly consider Lightroom to be an important part of my photo-making process.
Readers’ Showcase: Scott Matthews

Dusk on the Upper West Side, 2016. Photo by Scott Matthews
What do you like about using adapted lenses and manually focusing?
There is actually quite a lot I like about my decision to use adapted manual lenses.
First, I find manual focus makes it more natural for me to remain in charge of what I’m actually focusing on — rather than letting the camera do it, and then having to decide, “no, camera, you chose wrong, and now I must override your decision.” I suppose it’s similar to how the people talk about prime lenses make you think more. Manual focus just makes it easier (for me) to think more. There are certain kinds of shots I’m more likely to miss, and other types of shots I’m more likely to catch — as I see it, the tradeoff results in photos that have a bit more of my spirit in them.
I also like the ‘immediate, physically coupled’ feeling of a metal and glass lens that was designed to be focused manually. (By comparison, focus-by-wire — common on E-mount — always felt kind of detached and delayed to me). I also like the compact size of the rangefinder lenses. With the combination of a mirrorless back and an adapted rangefinder lens, people don’t feel intimidated in the way they might with a honking big camera and lens pointing at them.
I also like the long-term trajectory of my “lens-centered” rather than “camera-system-centered” orientation. By that I mean: if other manufacturers wind up offering bodies, I’m perfectly open to using my adapted lenses on other systems. All I would need is a new adapter. And if I ever do switch to a different system, I can keep on working with the same lenses I’ve grown accustomed to.
Readers’ Showcase: Scott Matthews

Frederick Douglass Housing Project at Night, 2014. Photo by Scott Matthews
What’s your favorite focal length?
I tend to go out with one lens, so I’ll just pick whichever seems it’ll be the most useful for wherever I’ll happen to be. I don’t really have a favorite length; it really boils do to where I happen to be, and where my subject happens to be. Of the lenses I have, I use the 35mm and 90mm the most.
Readers’ Showcase: Scott Matthews

Gotham Sunrise, 2015. Photo by Scott Matthews
Most of the images in your portfolio are taken close to home. What makes New York so photogenic in your opinion?
I wake up early — too early! — and my view is to the east. So part of my regular morning routine is to look out to see if it’s an *interesting* morning. For that reason, I’ve come to understand which mornings are special. I’ve also started to recognize the rhythm of the Sun rising increasingly northward or southward as the seasons progress (for example, I know that the Sun rises aligned with the Cathedral of St. John the Divine in mid-May and late-July every year, as seen from my apartment). I’ve also seen all sorts of random unexpected rooftop activity, from a kind kiss to a game of badminton.
Readers’ Showcase: Scott Matthews

Star Trails with LaGuardia Airport, 2015. Photo by Scott Matthews
Is there anywhere you’d like to travel to photograph?
I had the opportunity to provide photos from a trip to Costa Rica for publication in the New York Times. The complication was that I was anxious the whole trip about whether I would capture decent-enough photos! I think I mostly enjoy the challenge of ‘noticing things’ wherever I happen to be, and in some ways it’s actually *harder* to notice meaningful things when you’re in a breathtaking new place.
Readers’ Showcase: Scott Matthews

Striated Sunrise, 2015. Photo by Scott Matthews
What’s the best piece of advice you received when you were a beginner?
The DPReview forums have been tremendously helpful in getting me up to speed, and I continue to learn here every day.
In the very beginning it was useful to understand the relationship between shutter speed, aperture, ISO — and how they relate to focal length/field-of-view. It was also super-useful to start shooting RAW (I initially wrongly thought RAW was simply like an uncompressed JPG) — and to use an application to manage and batch process photos (I wound up using Lightroom).
Also, as much as there is to learn from more-experienced people, you also have to trust your own instinct — sometimes your instinct will be at odds with what other people are telling you. Some established ‘rules’ are there for good reason, but plenty of great work comes from setting aside established rules. Ultimately, trust your gut.
Readers’ Showcase: Scott Matthews

Stepped Nighttime Long Exposure, 2013. Photo by Scott Matthews
Are there any photo projects or challenges you’re looking to tackle in the new year?
I’m going to keep waking up way too early — so one challenge I face is how to keep the routine of looking out the same windows day-after-day interesting. For example, recently I’ve become interested in reflected light. So one challenge will be to keep finding something new and special within the mundane.
Another thing I think about: apart from the pleasure I get from making and sharing photos, what is the long-term point of all this effort? What happens to all this work? Can it remain useful? So I also want to get a bit closer to having a plan — perhaps simply making a box of prints for my daughter — or perhaps finding local institutions to submit photos to. Overall, to keep having fun!
-
How to Create a Lightsaber in Photoshop Video Tutorial
With all the recent hype and talk about the newest installation in the Star Wars movie empire (The Force Awakens), I thought this might be a fun project to do.
If you’ve followed along with the saga you know about lightsabers, the weapon of choice for the Jedi knights. Even if you aren’t a fan, you’ve likely heard of it, or had your kids or grandchildren request a toy version for themselves. So how fun would it be to add one to your photos.
Here are two videos that take slightly different approaches to creating a lightsaber in Photoshop. You can learn some new techniques and see which method you prefer.
This one by Adam from Photoshop Tutorials:
And another with Andrew from Creative Edge Studios:
If you give this a try, please share your images in the comments below. See how creative you can be, and how realistic you can make your lightsaber look. Have fun!
googletag.cmd.push(function() {
tablet_slots.push( googletag.defineSlot( “/1005424/_dPSv4_tab-all-article-bottom_(300×250)”, [300, 250], “pb-ad-78623” ).addService( googletag.pubads() ) ); } );googletag.cmd.push(function() {
mobile_slots.push( googletag.defineSlot( “/1005424/_dPSv4_mob-all-article-bottom_(300×250)”, [300, 250], “pb-ad-78158” ).addService( googletag.pubads() ) ); } );The post How to Create a Lightsaber in Photoshop Video Tutorial by Darlene Hildebrandt appeared first on Digital Photography School.
-
26 Elongated Panoramic Vistas
Sometimes using a format other than the standard proportions works better for an image. One of those times is shooting landscapes of sweeping wide vistas.
A great way to do that is to create a panoramic image. Here are a few photos that take advantage of that format to create stunning results.
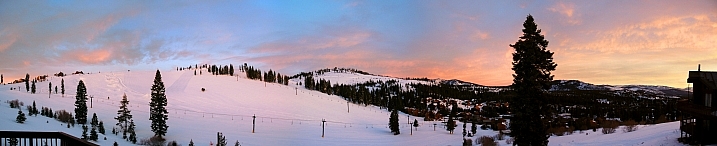
By John Watson
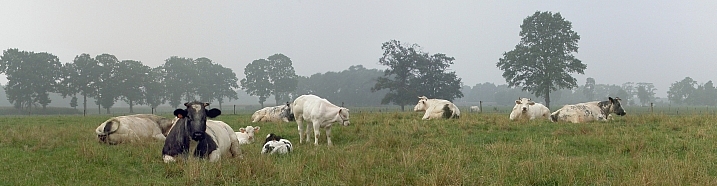
By Geert Orye
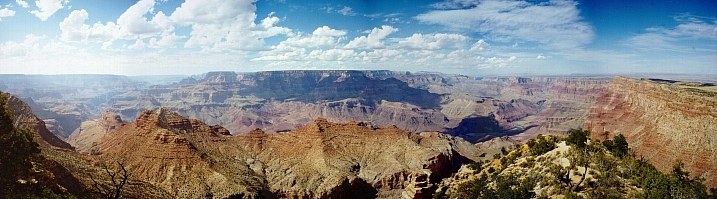
By Geert Orye
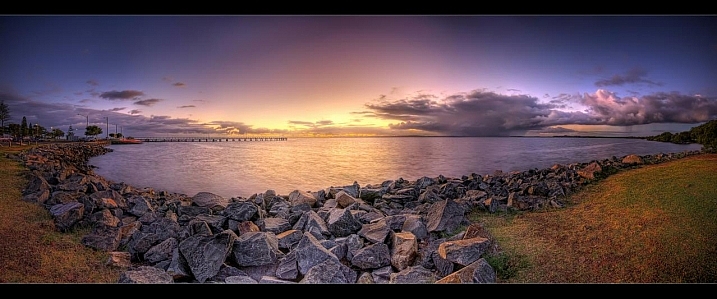
By Chris Lofqvist
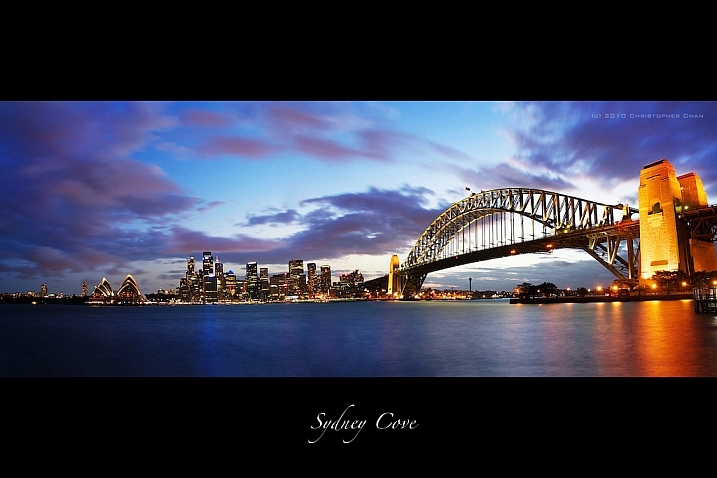
By Christopher Chan
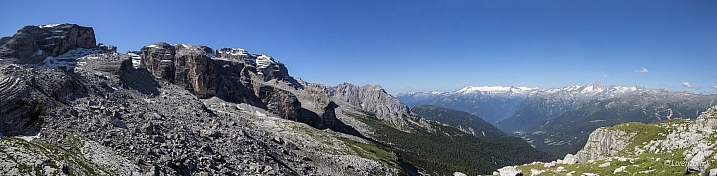
By Lorenzoclick
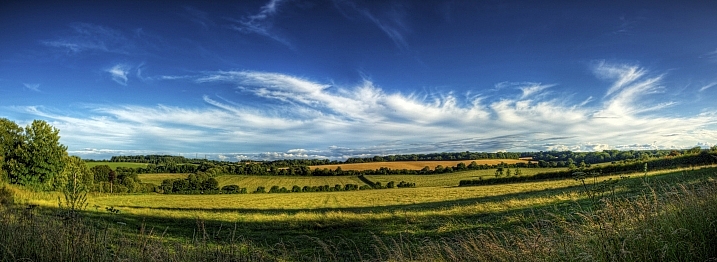
By Neil Howard
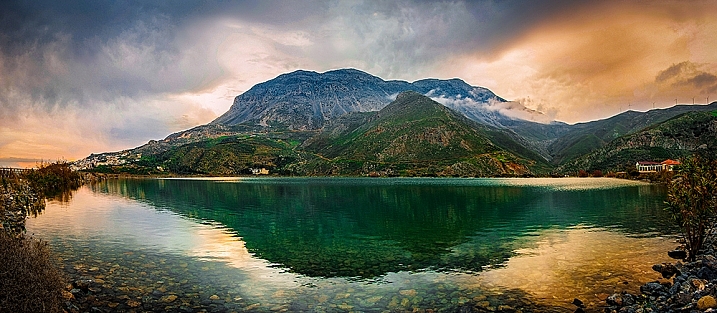
By Christos Tsoumplekas
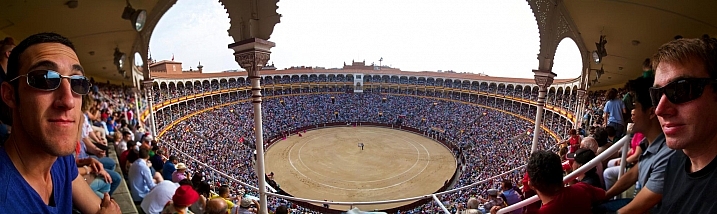
By Zach Dischner
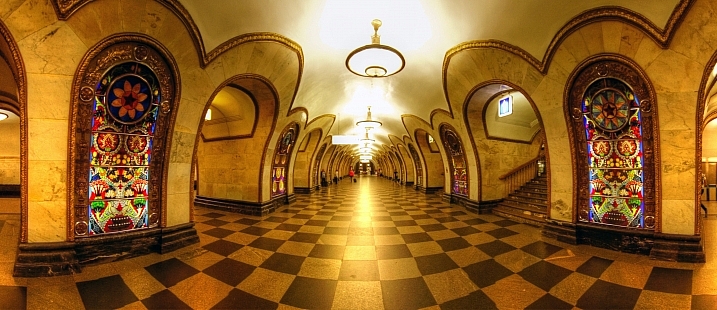
By mariusz kluzniak
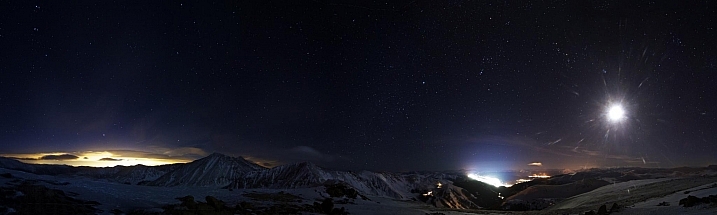
By Zach Dischner
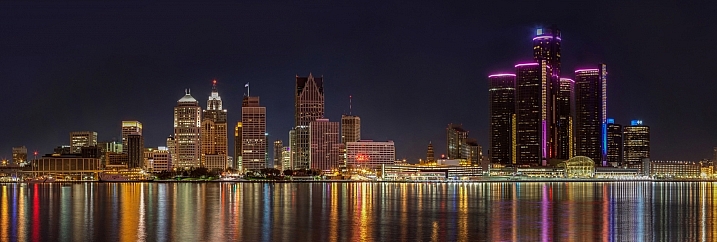
By Jason Mrachina

By Christopher A. Dominic
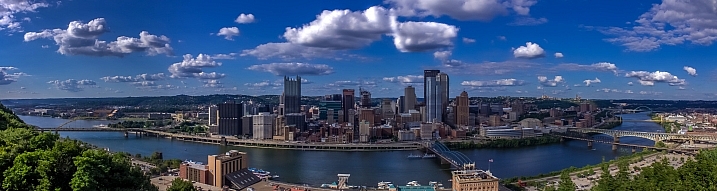
By Always Shooting

By mariusz kluzniak
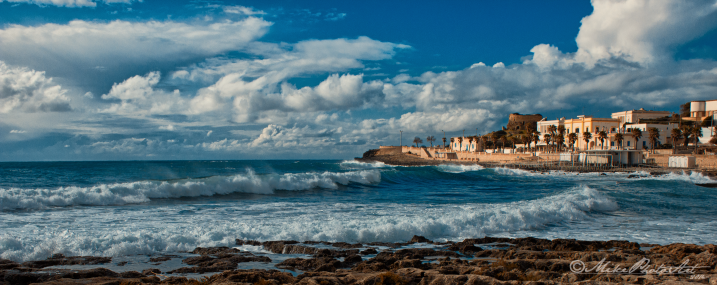
By ©Mike Photo Art
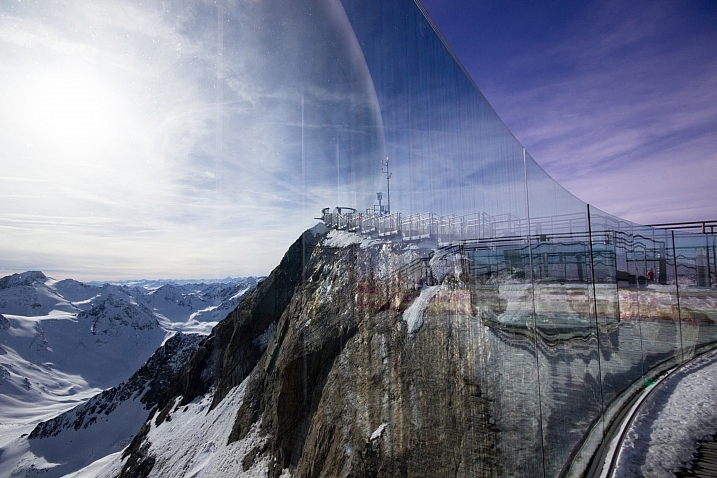
By Massmo Relsig
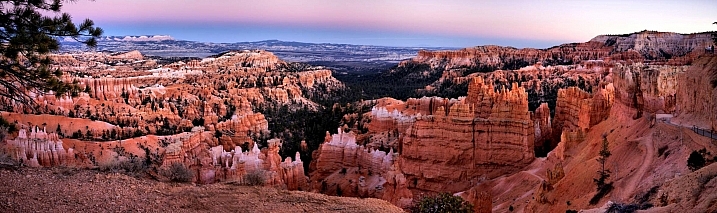
By Tim Hamilton
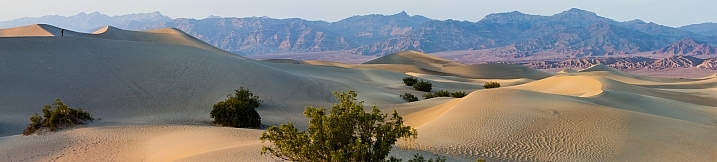
By Vadim Kurland

By Davide D’Amico
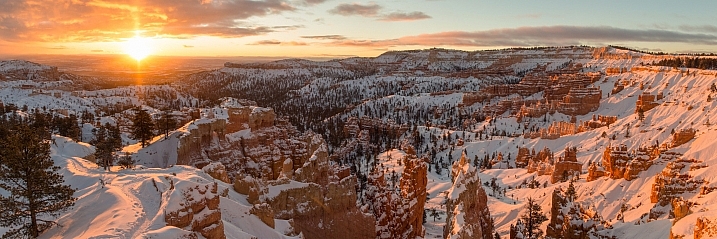
By Wenjie Qiao
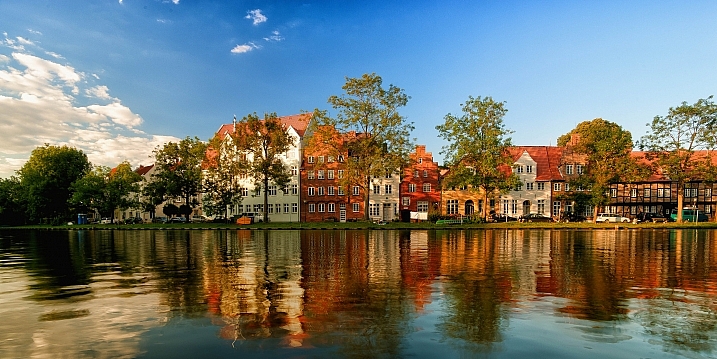
By Arne Bornheim
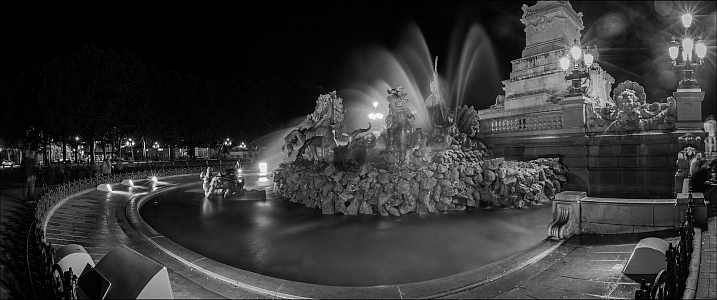
By Adrien Sifre

By Chris Toe Pher
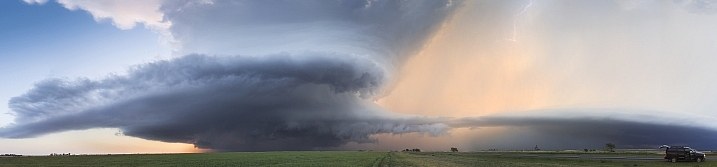
By Kelly DeLay
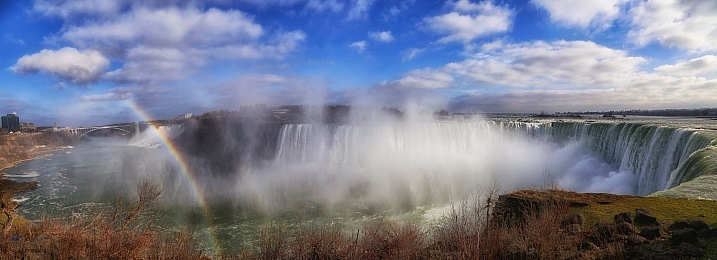
By Daniel Gillaspia
googletag.cmd.push(function() {
tablet_slots.push( googletag.defineSlot( “/1005424/_dPSv4_tab-all-article-bottom_(300×250)”, [300, 250], “pb-ad-78623” ).addService( googletag.pubads() ) ); } );googletag.cmd.push(function() {
mobile_slots.push( googletag.defineSlot( “/1005424/_dPSv4_mob-all-article-bottom_(300×250)”, [300, 250], “pb-ad-78158” ).addService( googletag.pubads() ) ); } );The post 26 Elongated Panoramic Vistas by Darlene Hildebrandt appeared first on Digital Photography School.