Blog

  • Macphun Aurora HDR version 1.2 update released

    Macphun has released Aurora HDR Pro version 1.2, adding a few new features and several improvements to its image editing software. The update includes support for .EXR and .HDR image files, compatibility with Leica M Monochrom (Typ 246) Raw files, and support for Photos for Mac editing extensions.

    In addition to the new features, Aurora HDR 1.2 brings several improvements to the application. Macphun claims that the user interface has been improved for 11-inch and 13-inch laptop displays, chromatic aberration reduction has been improved, and the application’s overall performance has been boosted as tools like HDR Merging are now faster.

    Improvements:

    • Better Raw file handling for images created by Panasonic, Olympus and Fuji
    • Updates to Adobe Lightroom and Photoshop plug-ins for enhanced support to keywords, metadata, and “F” Screen mode
    • Enhanced masking brush for better smoothing on edges
    • Improved clipping results for overall HDR effect in shadows and highlights
    • Chromatic aberration reduction has been significantly improved
    • Better UI support for 11″ and 13″ displays at multiple resolutions
    • Improved performance and various bug fixes. Faster HDR Merging, faster Deghosting, enhanced Chromatic Aberration Reduction

    Existing Aurora HDR users can update to version 1.2 within the application for free, while new users will need to buy a license for $ 39.99 USD.

    Via: Macphun Blog

    Articles: Digital Photography Review (dpreview.com)

  • Manfrotto introduces next generation of on-camera LED panels

    Left: CROMA2, Right: MICROPRO2

    Italian accessory manufacturer Manfrotto has introduced three improved LED panels that are designed to be used by professional and serious enthusiasts in the hot shoes of their cameras. The new panels, which are powered by Litepanels, are the CROMA2, MICROPRO2 and the SPECTRA2. Each of the new models features surface-mounted LEDs, with new lenses that improve the intensity of illumination in the light path thus delivering better efficiency and less fall-off. The company also says the new technology benefits the accuracy of color rendition. 

    The CROMA2 and MICROPRO2 panels are very similar, except that the CROMA2 offers variable color temperature so that it can work in both tungsten and daylight situations – as well as those in between. Using a mixture of daylight and tungsten LEDs, the dominance of colors can be controlled via a continuous dial between 3100K to 5600K. The CROMA2 has a maximum output of 900lux, while the MICROPRO2 can manage 940lux. 

    The SPECTRA2

    The SPECTRA2 is a smaller panel with a maximum output of 650lux, and is daylight only. A dimmer switch allows its power to be reduced to 50%. 

    There is a range of diffusers and colored filters available for each of the panels, and they all run from 6 AA type cells, an AC adapter or an L-Type Li-ion battery. They all have a ball and socket tripod head included, and the larger panels come with AC adapters and a bracket for an L-Type battery. For the SPECTRA2 these are optional extras.

    The SPECTRA2 costs $ 219.99/£154.95, the MICROPRO2 $ 349.99/£259.95 and the CROMA2 is $ 418.99/£329.95. 

    For more information visit the Manfrotto website.


    Press release: 

    Manfrotto, world leader in the photography, imaging equipment and accessories industry, announces the new generation compact LED lights for professional and advanced hobbyist videographers and photographers. 

    CROMA2, MICROPRO2 and SPECTRA2 offer the latest LED technology available (SMT – Surface Mount Technology) in a portable size, which guarantees images with perfect color rendition and improved optical efficiency.

    These on-camera LED panels, powered by Litepanels, are part of the new ready to use Manfrotto LED lights. 

    CROMA2 AND MICROPRO2: COMPACT NEW LED TECHNOLOGY

    A new range with the same design, the SMT LED panels embed innovative lenses, which have been specifically created for high efficiency and CRI (Colour Rendering Index).

    The intensity of the LED devices can be controlled by the user – CROMA2 up to 900lux and MICROPRO2 up to 940lux. The colour temperature in CROMA2 can be regulated from 3100K to 5600K, which makes this device the perfect versatile LED panel to match the existing ambient lighting. MICROPRO2 is Daylight 5600K and permits the colour correction thanks to the diffuser and gel filter included in the pack.

    CROMA2 and MICROPRO2 operate on six AA standard batteries, from mains through the included AC adaptor or on L-Type Li-ion batteries through the included battery adaptor.

    Compact and powerful, thanks to the included ball head they can be used for both on camera as well as off camera use.

    SPECTRA2: MINI BUT POWERFUL

    The most compact LED Panel in the professional range – high efficiency in the palm of your hand. SPECTRA2 features the state-of-the-art LED SMT technology, which guarantees images with perfect colour rendition and flicker-free functionality.

    SPECTRA2 is perfect for on camera use with the included new ball-head, as well as for off camera use.

    The LED device is dimmable, capable of emitting 650lux, and provides a further increase in the light output thanks to the boost mode (+50%). The colour temperature of the LED Panel is Daylight 5600K but it can be changed thanks to diffusers and filter gels.

    SPECTRA2 can operate on six AA standard batteries and offers, as optional, AC or L-Type Li-ion batteries adaptors.

    These new powerful and compact Manfrotto LED lights guarantee best performance with a high quality light. CROMA2, MICROPRO2 and SPECTRA2 represent the top range of on-camera units.

    Articles: Digital Photography Review (dpreview.com)

  • MaxCurve curve editing tool for iOS connects with Photoshop on a desktop

    MaxCurve is an app for iPhone and iPad that, as the name suggests, relies predominantly on curves for image editing. Overall, there are 20 curve adjustments available which are grouped into so-called kits. Another key feature of MaxCurve is its ability to connect, via Wi-Fi, to a desktop version of Photoshop that is running on a Windows PC or Mac. Read more

    Articles: Digital Photography Review (dpreview.com)

  • How To Photograph With Meaning

    DSCF0798web dps

    There comes a point, or a plateau, as in every photographer’s career (whether you are an intermediate or professional photographer) where you hit a wall. It’s a crisis of self that you are faced with when you have reached a certain point of technical proficiency. Well, basically you hit a plateau because you already know all the elements of photography from composition, to technical skills, to editing images, but somehow something is missing — substance, meaning, emotional connection, and finding your own style.

    So I invite you to forget what you know for a second, and take a look at your photography in a different light. Composition and technical prowess are certainly important factors in creating good photographs, but how do you create great photographs with meaning?

    To realize that there is more behind a photograph than just a visual representation of time, place, and subject, and it can be much more rewarding when you challenge yourself to find your voice, your perspective, and create an emotional connection for the viewer.

    Your photographs show your viewpoint and perspective of how you see the world. For example, if you put six photographers in a room and asked them to create a unique image, each photograph would turn out different. You already photograph with meaning, you just haven’t realized how much your subconscious adds your perspective onto your images.

    Meaning in action

    DSCF0867 dps

    Now that you’ve realized that photography is more than a GAS (Gear Acquisition Syndrome) stage, where you’re buying up the latest and greatest cameras, lenses, software, and miscellaneous items for photography, it’s time to evolve into a better photographer — one with purpose.

    “The real question is not what you look at but what you see.” – Henry David Thoreau

    So how do you separate yourself from the technical nature of photography? The skills you have inherited through tutorials, articles, classes, workshops, online videos, etc., are still there in the back of your mind. You are finally comfortable shooting in different lighting, setting up different lighting schemes, knowing your way around your camera, and all this will come in handy when you are cooking up your own voice or style of shooting.

    By setting those aside, you need to learn a new way of photographing, and that will take dedication and hard work, but ultimately it will be the most rewarding endeavor, especially if this is what you want to do for a living.

    Mimicry is the greatest form of flattery
    DSCF0966 dps

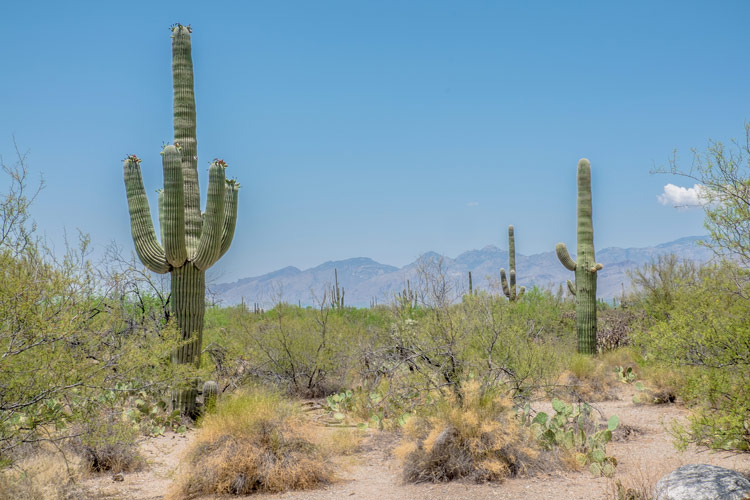
    Step one is to try to shoot in the style of your favorite photographer. By learning how they craft their images, you will be clued into their vision, which will inspire your own creative insights. You don’t have to exactly recreate an image perfectly like them, but just try to understand what they are doing, then try to recreate it.

    Step two is to take photo challenges. A photo challenge or assignment is a way to test out your technical, and artistic sides, combined to create a homework assignment that others will judge. Being peer reviewed by other photographers will not only give you helpful advice, but provide you with thick skin for future critique of your work.

    You may have a certain style of shooting that you are drawn to, like landscapes or street photography. But what if someone challenges you to do some macro shots, architectural, portraits, or anything different from what you’re used to? It takes you out of your comfort zone, and challenges your knowledge as a photographer, while also providing you with ideas to incorporate into your own work.

    20150315 DSCF0491 dps

    You are now using all your technical photography education, and putting it into practice. It finally makes sense that you need to know these technical skills to create something with more meaning. It’s just like a doctor fresh out their residency, learning how to become a surgeon. Would you trust this person to cut you open without learning from other, more experienced surgeons? It’s the same with photography, it’s on the job training.

    You need to learn it all, test it all, and learn different styles. Then, you can start to see your style peeping through, because you’ve slowly learned how to create your own vision, by studying those whose work you have a connection.

    Meditative composition

    I realized early on, my method was to find a subject, compose, take in the atmosphere, and wait patiently. While waiting, I absorbed all the things going on around me, without any sort of preconceived notions, but instead, just letting the world happen around me without trying to control it. It was a meditative state, where I had set up my easel (camera on a tripod) and waited for the decisive moment to shoot (putting the brush to the canvas).
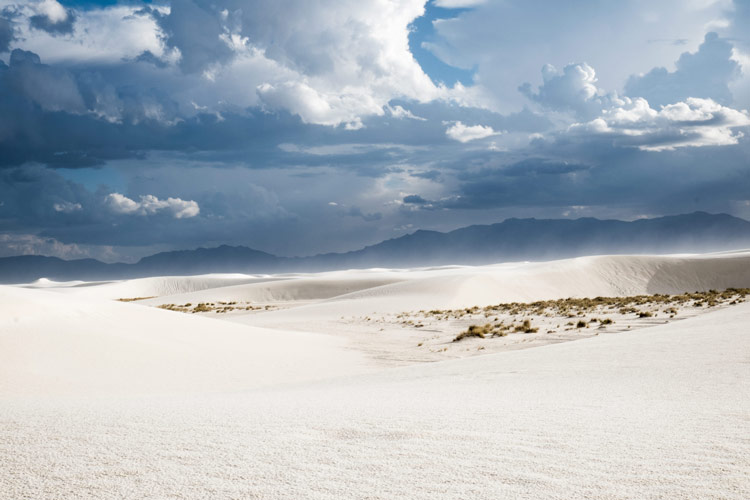
    DSCF0902 dps

    I was in the White Sands National Monument near Alamogordo, New Mexico this past summer, sitting on a white sand hill, watching the sky turn from a deep hue of blue, to a dark sky, forming into a lightning storm. The winds began to pick up and the white sands began blowing. In my frame I saw the sky change into this deep magenta, and the sands moving almost in a tornado like swirl. I knew at the moment I must click the shutter, and was able to capture a special moment by composing and waiting.

    “But there is more to a fine photograph than information. We are also seeking to present an image that arouses the curiosity of the viewer or that, best of all, provokes the viewer to think – to ask a question or simply to gaze in thoughtful wonder. We know that photographs inform people. We also know that photographs move people. The photograph that does both is the one we want to see and make. It is the kind of picture that makes you want to pick up your own camera again and go to work.” – Sam Abell

    Equivalence
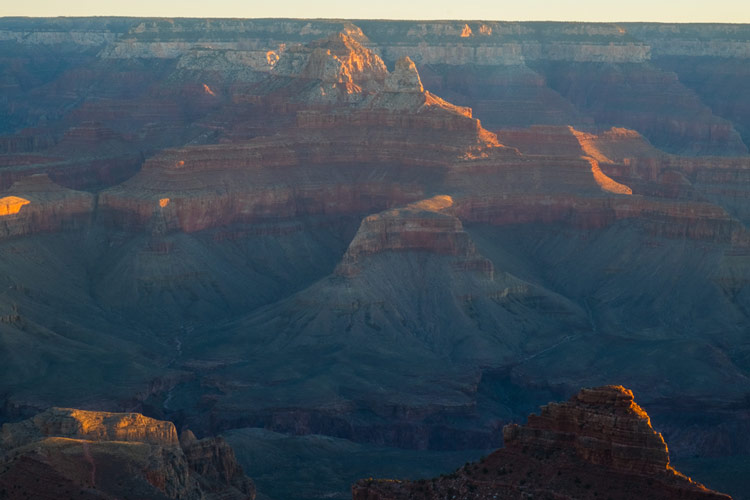
    DSCF2084 dps

    Equivalence is a term that has been used since Alfred Stieglitz first started expressing his work as more than just a capture of reality, but instead the things he captured were emotionally connected to him, whether they were geometric patterns, people, etc.

    The term equivalence comes from the abstract painter, Wassily Kandinsky. His mission was to create more emotion with his painting, so that the audience who viewed his work could find, and feel, an emotional connection to his work. It was Stieglitz, who during a time where photography was simply documentation, incorporated the idea of equivalence into his photographic process. Boiled down to its simplest form, equivalence is the belief that colors, shapes, and geometric lines reflect one’s inner emotions. By studying Kandinsky he found meaning in his own work.

    So what does that mean for you, a photographer trying to create photographs with meaning? Photographic meaning isn’t a literal translation of an image. Instead, it is a way in which you use your voice or perspective, to create a work that doesn’t need to be explained, which also evokes something/anything in the viewer.

    This equivalence is what many great photographers have found, and when we see Dorothea Lange’s “Migrant Mother” or Robert Capa’s “The Falling Soldier” photographs we are instantly affected by them, and we don’t have to understand what is going on. We see the horror of war, and the look of uncertainty in a mother’s eyes as she holds her children.

    Connect the dots
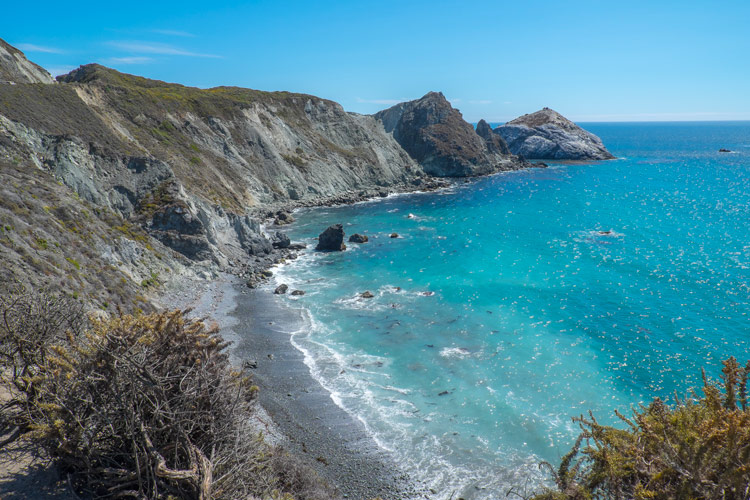
    Bigsur dps

    The beauty of photography is that a single image can tell an entire story, or a photographic essay can piece together an important narrative. A story worth telling, is the same as photographing with meaning. Photographs are your way of showing your point-of-view, or that of your subjects, to an audience.

    We capture the human experience, whether that be a genocide, or the coming home of soldiers from war. It can be pain, beauty, grace, disgust, but photographs are visual storytellers, and those who understand how to make a story with their images become the most successful.

    “As far as I am concerned, taking photographs is a means of understanding which cannot be separated from other means of visual expression. It is a way of shouting, of freeing oneself, not of proving or asserting one’s own originality. It is a way of life.” — Henri Cartier-Bresson

    Each great photographer’s work was influenced by those who came before them. Some of us have a natural eye for composition and great timing, but does that mean that hard work won’t help those who lack these skills, to gain them?

    To photograph with meaning, there is a literal route to find this discovery. To hurry up that process it takes hard work, dedication, and humility. You need to burn up your memory cards, and take a look at each of your frames to see what works and doesn’t. You need to look at photo books of the masters to see their vision, to help cultivate your own, by recreating their works.

    DSCF2117 dps

    You need to be patient, reflective, and willing to subject yourself into uncomfortable, and sometimes even dangerous situations, to really push yourself toward to becoming a better photographer.

    Creating an emotional connection with your work is finding the equivalence that will speak volumes to your audience, without you even having to explain yourself. So, to make it clear, to find meaning in your photographs you must be willing to study, try, fail, and explore other genres of photography to find your place, your vision, and to take a deeper look inside yourself and the work you intend to create.

    By studying the forefathers of photography you can create something new that was influenced by powerful, meaningful photographs. It’s not plagiarism to combine techniques or processes of others. Besides that would be like telling someone who never read a book, and doesn’t understand plot, to write the great American novel.

    You must learn to walk before you can run.

    googletag.cmd.push(function() {
    tablet_slots.push( googletag.defineSlot( “/1005424/_dPSv4_tab-all-article-bottom_(300×250)”, [300, 250], “pb-ad-78623” ).addService( googletag.pubads() ) ); } );

    googletag.cmd.push(function() {
    mobile_slots.push( googletag.defineSlot( “/1005424/_dPSv4_mob-all-article-bottom_(300×250)”, [300, 250], “pb-ad-78158” ).addService( googletag.pubads() ) ); } );

    The post How To Photograph With Meaning by Adam T Crawford appeared first on Digital Photography School.


    Digital Photography School

  • 5 Steps to Creative Storytelling in Pictures with Your Kids

    image

    Creative storytelling in pictures need not be daunting nor time-consuming. You can easily set up something really simple at home to take pictures of and at the same time make new memories with your kids.

    The actual shoot must be kept really short, so as not to exasperate your kids too much, especially if they are very young, and therefore have relatively short attention spans. The real work is in the planning and thinking ahead.

    image

    The first rule to telling a good short story in pictures, is to keep it simple. Think of a singular plot: beginning, middle, and end. You can then fill in the gaps with interesting takes and angles. The biggest, and best, tip I give to anyone before taking on any creative project, is to imagine the emotion and feeling you want to evoke at the end of the project. Then work your way backward.

    Start planning and decide on a theme. Take for example a simple back to school theme.

    image

    Step 1. Plan ahead

    Think through the story you want to tell; decide on the details, picture the sequences in your head, and feel the story. Think through the items and characters that play a major role in the shoot. Half the battle is won by good meticulous planning, even if it’s just in your head.

    What is the overarching emotion, look, feel, and colour of the shoot that you want to achieve? Pare everything back that doesn’t fit in with that look and feel. This shoot below had three requirements: golden, sentimental, and rich in bokeh (background blur). So I planned everything to achieve those three specific requirements.

    image

    To get rich bokeh, you need to shoot with a wide aperture, between f/1.2 to f/3.2, if you have normal shorter focal length lenses. For longer lenses like 85mm upwards, you can stop down a bit more, as the longer the lens, the more compression there is in the background. Using a 200mm lens, for example, would still give you nice background bokeh even at f/5.6.

    To get golden images, use a gold reflector, and wait for the golden hour when you can get soft diffused yellow light. Golden hour usually happens about 1-2 hours after sunrise and before sunset depending on where you are in the world.

    image

    Step 2. Coordinate colours and props

    Reign in the colour palette, go for a family of colours like blues and greens, or reds and purples, or warm yellows and oranges. You can add a splash of contrasting colour for focus. But it is always good to reign in the colour palette keeping it to 3 or 4 colours maximum.

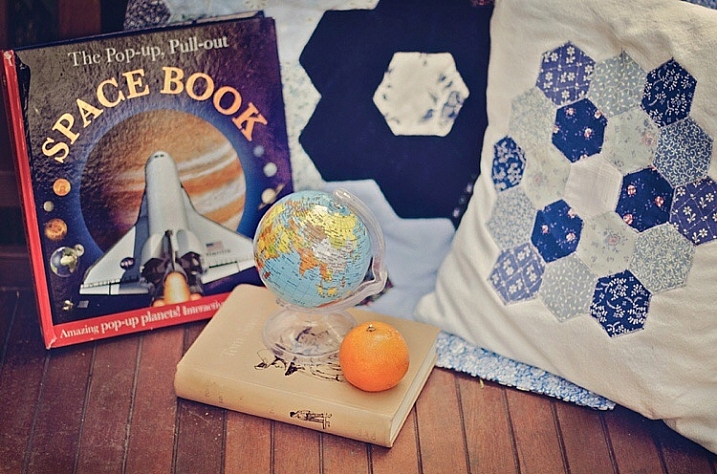
    Props need not be bought, or expensive. Use what you have at home; fruit, books, toys, cushions, quilts, etc. Just make sure they are colours that complement your chosen theme.

    image

    Step 3. Don’t be over ambitious

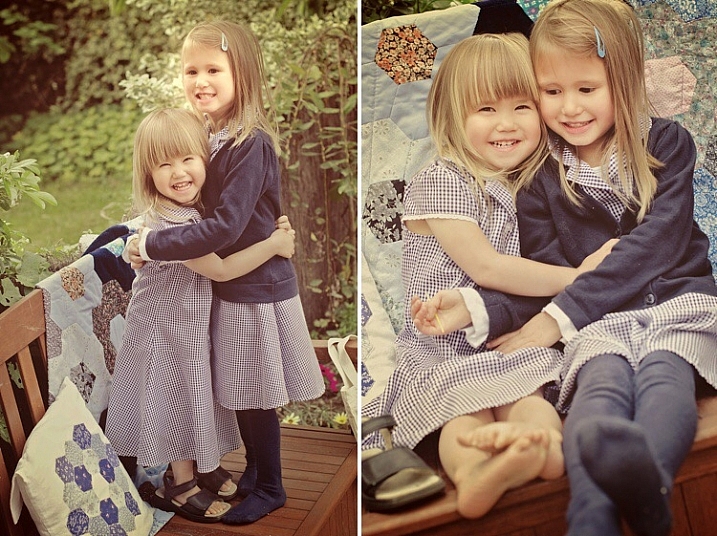
    Keep goals simple when it comes to photographing kids, especially if they are your own. It’s one of the most difficult things to do. Keep it short and sweet by focusing on one or two actions or scenarios, and make them super easy like reading a book, hugging, or laughing at a silly joke.

    A plot is not always necessary, you can even just aim for capturing some interactions between your kids. The props are to create some new context for them, hold their attention for a few short minutes, and keep them engaged during that time.

    image

    Step 4: Plan a beginning and end shot

    The beginning and the end are crucial to a story because they bring the theme together. Make sure you have an establishing first shot, and a feel good last shot. Details are always a good idea for a contextual or establishing shot. They not only enrich emotion, and reinforce a story, but also strengthen memories. Interesting close-ups, and expressions or unusual crops are also good for closing shots, and stay in the viewer’s memory for a second longer.

    image

    image

    Step 5: Edit your images with a plan

    If you edit your photos, edit them according to your vision. there is no one else to please but yourself. The photoshoot you planned is for you and your family, so be true to your original vision and be brave, then sit back and enjoy your creative story in pictures.

    image

    Have you taken images that tell a creative story of your kids at home or more tips to add? Share them in the comments below.

    googletag.cmd.push(function() {
    tablet_slots.push( googletag.defineSlot( “/1005424/_dPSv4_tab-all-article-bottom_(300×250)”, [300, 250], “pb-ad-78623” ).addService( googletag.pubads() ) ); } );

    googletag.cmd.push(function() {
    mobile_slots.push( googletag.defineSlot( “/1005424/_dPSv4_mob-all-article-bottom_(300×250)”, [300, 250], “pb-ad-78158” ).addService( googletag.pubads() ) ); } );

    The post 5 Steps to Creative Storytelling in Pictures with Your Kids by Lily Sawyer appeared first on Digital Photography School.


    Digital Photography School

  • Architecture as Art: 13 Unusually Sculptural Buildings

    [ By Steph in Architecture & Public & Institutional. ]

    artistic architecture alpine hotel 1

    When fine art and architecture intersect, especially in our modern era of parametric modeling and 3D printing, the results can be strikingly different from the structures that surround them, in some instances seeming like sculptures were given growth serum and expanded to mind-boggling proportions. Eschewing the ordinary, these buildings feel like a chance for architects to flex their creativity and bring some interesting colors and proportions to their settings.

    Melbourne Theater Company
    artistic architecture melbourne 1

    artistic architecture melbourne 2

    artistic architecture melbourne 3

    artistic architecture melbourne 4

    Abstract shapes glow against a solid black mass on the exterior of this striking complex by Ashton Raggat McDougall, making the Melbourne Recital Centre and MTC Theater some of the most visually unique buildings in the city. The black and white color palette is accented by a vibrant red, with the geometric pattern continuing into the interior, looking three-dimensional when viewed from certain angles.

    Tschuggen Grand Hotel
    artistic architecture alpine hotel 2

    artistic architecture alpine hotel 3

    artistic architecture alpine hotel 4

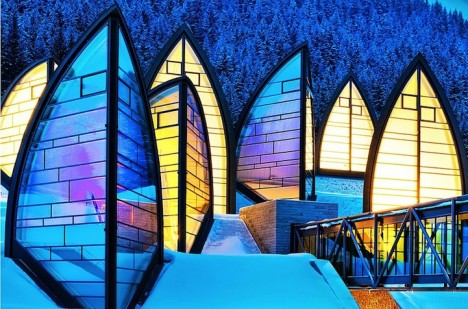
    Rising from the Swiss mountainside like shards of ice, architect Mario Botta’s Berg Oase is a sculptural extension of the Tschuggen Grand Hotel. Serving as a wellness center and spa, the arrangement of towering glass wedges bring light streaming into the interior spaces and almost seem like natural structures themselves among the trees and rocks when viewed from afar.

    Cloud House
    artistic architecture cloud house 1

    artistic architecture cloud house 2

    artistic architecture cloud house 3

    A house shaped like a cloud? Why not? It may look like the occupants would be severely lacking in privacy, considering the two glazed facades, but this building by Australian firm McBride Charles Ryan is actually an extension to a more conventional street-facing home, and is shielded from neighbors’ views by the curved cloud-mimicking sides.

    Suzhou Science & Cultural Arts Centre Facade
    artistic architecture suzhou 2

    artistic architecture suzhou 3

    artistic architecture suzhou 1

    One way to give a building a dramatic makeover (or just ensure that it stand out from the very start) is to add a parametric facade, like the intricate screen covering the massive Suzhou Science and Cultural Arts Centre in China. Developed by Studio 505, the curving screen is shaped like a parabolic moon crescent and consists of a weatherproofing layer and an outer ornamental mesh screen that provides shading.

    Palais Bulles
    artistic architecture palais bulles

    artistic architecture palais bulles 2

    artistic architecture palais bulles 3

    artistic architecture palais bulles 4

    A classic example of sculptural housing with an aesthetic that’s so outside the norm, it’s almost alien, is Palais Bulles (“Palace of Bubbles.”) Created by architect Antti Lovag in 1989, the curvilinear house is set into a rocky hillside overlooking the Mediterranean Sea in Cannes, France. It’s often used for film festival parties and fashion editorials.

    Next Page – Click Below to Read More:
    Architecture As Art 13 Unusually Sculptural Buildings

    Share on Facebook


    [ By Steph in Architecture & Public & Institutional. ]

    [ WebUrbanist | Archives | Galleries | Privacy | TOS ]


    WebUrbanist

  • Two views on the X-Pro2: Hitting the streets with Fujifilm’s flagship

    You probably know all about the X-Pro2’s specs by now, but what’s it like to shoot with? Sam and Richard hit the streets of Georgetown, Seattle with the camera to see how it handles different types of shooting. What did they like? What came up short? Follow them and find out…

    For the specs and more detail about the camera, read our Fujifilm X-Pro2 First Impressions Review.

    Articles: Digital Photography Review (dpreview.com)

  • Fujifilm’s budget FinePix XP90 rugged camera makes a splash

    $ (document).ready(function() { SampleGalleryV2({“targetContainerClass”:”sampleGalleryImageViewerContainer”,”galleryId”:”1687256184″,”isEmbeddedWidget”:true,”selectedImageIndex”:0,”startInCommentsView”:false,”isMobile”:false}) });

    Fujifilm has released the FinePix XP90, a relatively minor update to last year’s XP80 rugged camera. As with its predecessor, the XP90 is waterproof to 15m/50ft, shockproof from 1.8m/5.8ft, freezeproof and dustproof. The only major new feature is the LCD, which received a bump in both size and resolution (3″ vs 2.7″ and 920k vs 460k-dot).

    It sports a 16MP BSI CMOS sensor and F3.9-4.9, 28-140mm equivalent lens with image stabilization. The camera has numerous special effects modes and can take HDR and panoramic photos. Video can be captured at 1080/60p or at frame rates of up to 480 fps (at lower resolutions). Naturally, Wi-Fi is also built in.

    The XP90 can also serve as an action cam, with support for standard mounts and a dedicated mode which turns off the LCD for extended battery life. An optional 18mm equivalent wide-angle conversion lens is also available.

    The FinePix XP90 will available in yellow, blue, orange and green for $ 229.95.

    FUJIFILM ANNOUNCES NEW ADDITIONS TO THE X-SERIES LINE OF CAMERAS AND LENSES

    X-Pro2, X-E2S, X70 and XF100-400mmF4.5-5.6 R LM OIS WR join the X-Series; all-weather FinePix XP90 gets the shot from sand to slopes

    Valhalla, N.Y., January 14, 2016 – FUJIFILM North America Corporation, a leader in digital imaging, today announced new additions to the award-winning X-Series line of premium fixed and mirrorless cameras, and ultra-high quality lenses, including: the FUJIFILM X-Pro2, FUJIFILM X-E2S, FUJIFILM X70 and FUJINON XF100-400mmF4.5-5.6 R LM OIS WR.  Fujifilm also introduced the new rugged and waterproof FinePix XP90, perfect for capturing amazing images everywhere, from underwater to mountain tops.

    FUJIFILM X-Pro2

    The FUJIFILM X-Pro2 is the new flagship range-finder style camera in the award-winning X-Series line. The X-Pro2 is the pinnacle of X-Series photography, and gives professional photographers an innovative Advanced Hybrid Multi Viewfinder capable of instantly switching between optical and electronic finders, a new 24.3MP X-Trans CMOS III sensor for truly remarkable image resolution, and a new X-Processor Pro that delivers dramatically improved response times for unmatched performance.

    By combining these features with the ultra-high image quality of FUJINON X-Mount lenses and the world-renowned color reproduction technology refined over more than 80 years as a photographic film leader, the FUJIFILM X-Pro2 delivers the best ever results from an X-Series camera.

    FUJIFILM X-Pro2 key features:

    • World’s first Advanced Hybrid Multi Viewfinder with 2.36 million dots and maximum speed of 85 frames per second
      • Diopter correction mechanism with an eye point of 16mm and a telephoto bright frame with enlarged focal length of 140mm
    • 24.3MP APS-C X-Trans CMOS III Sensor
      • Fast AF of up to 0.08 seconds
      • Phase detection AF and motion predictive AF for continuous shooting up to 8 frames per second
      • Start-up time of 0.4 seconds
      • Shutter time lag of 0.05 seconds
      • Shooting interval of 0.25 seconds
      • Focal plane shutter top speed of 1/8000 second
      • Flash sync speed up to 1/250 second
    • Dust and splash-resistant body with more than 61 points of weather sealing and freeze resistance to 14°F
    • High-precision 3” rear display with 1.62 million dots
    • Dual memory card slots (Slot 1 compatible with UHS-II Standards)
    • New monochrome  ACROS film simulation for smooth tones, deep blacks and rich textures
    • New Grain Effect mode for images reminiscent of old film photos, especially when printed
    • Maximum ISO performance up to 12800 sensitivity; Extended ISO ISO100, 25600, 51200
    • Improved electric charge transfer rate for ultra-fast readout speeds
    • Interval timer for shooting time-lapse sequences of one second to 24 hours, up to 999 frames
    • Free FUJIFILM Camera Remote application and Wireless Communication function allows users to remotely shoot images from smartphones and tablets via WiFi
    • Photos can be sent to the INSTAX Share Printer using the free INSTAX Share App (iOS and Android) SHARE Smartphone Printer
    • Full HD video 1080p at 60fps; bit rate of 36Mbps for clear capture of delicate movements; frame rates of 60 fps, 50fps, 30fps, 25fps and 24fps, supporting worldwide motion picture formats
    • Advanced creative filters
    • Optional accessories:
      • Hand Grip MHG-Xpro2 – improves grip and retains access to battery and SD card, and compatible with an Arca Swiss plate
      • Leather Case BLC-XPRO2 – genuine leather bottom case elegantly shows off the X-Pro2’s classic design while protecting the camera body with battery access


    FinePix XP90

    The new FinePix XP90 rugged digital camera is waterproof to 50ft./15m, shockproof from 5.8ft./1.75m., freezeproof to 14°F/-10°C and dustproof*,**. It features a 16.4MP CMOS sensor with a 28-140mm 5x optical zoom lens, Wi-Fi® connectivity for one touch transfers to smartphones and tablets, and captures full HD movies at 1080p, even underwater.

    FinePix XP90 key features:

    • 16.4MP 1/2.3” CMOS sensor
    • Waterproof to 50ft./15m, Shockproof from 5.8ft./1.75m, Freezeproof to 14°F/-10°C and Dustproof
    • Complies with IP68 standards
    • 5x optical zoom with 28mm wide-angle setting
    • 3” LCD with anti-reflection coating
    • Wireless connectivity for instant image and movie sharing
    • Action Camera mode
    • Optical Image Stabilization
    • Full HD movie capture at up to 60 frames per second
    • Interval Timer Shooting and Time-Lapse Movie function
    • 480 frames per second slow motion mode
    • 11 Advanced Creative Filters
    • High Dynamic Range (HDR) capture
    • Motion Panorama 360°
    • Available in Blue, Yellow, Graphite with green, and Graphite with orange

    The FinePix XP90 will be available in February 2016 for USD $ 229.95 \ CAD $ 239.99.

    * Waterproof and dustproof protection standards of products, stipulated by IEC (International Electrotechnical Commission)

    ** Measurement method of MIL-Standard 810F Method5 16.5-Shock of the “MIL Standard”, a standard stipulating the durability of supplies procured by the American military, set by the United States Department of Defense

    FinePix XP90 specifications

    Price
    MSRP $ 229
    Body type
    Body type Compact
    Body material Metal, composite
    Sensor
    Max resolution 4608 x 3456
    Other resolutions 4:3 (3264 x 2448, 2048 x 1536), 3:2 (4608 x 3072, 3264 x 2176, 2304 x 1536), 16:9 (4608 x 2592, 3264 x 1840, 1920 x 1080), 1:1 (3456 x 3546, 2432 x 2432, 1728 x 1728)
    Image ratio w:h 1:1, 4:3, 3:2, 16:9
    Effective pixels 16 megapixels
    Sensor photo detectors 17 megapixels
    Sensor size 1/2.3" (6.17 x 4.55 mm)
    Sensor type BSI-CMOS
    Color space sRGB
    Color filter array Primary color filter
    Image
    ISO Auto, 100-3200, 6400 available at lower resolutions
    White balance presets 7
    Custom white balance No
    Image stabilization Sensor-shift
    Uncompressed format No
    File format
    • JPEG (Exif v2.3)
    Optics & Focus
    Focal length (equiv.) 28–140 mm
    Optical zoom 5×
    Maximum aperture F3.9 – F4.9
    Autofocus
    • Contrast Detect (sensor)
    • Multi-area
    • Center
    • Tracking
    • Single
    • Continuous
    • Face Detection
    • Live View
    Autofocus assist lamp Yes
    Digital zoom Yes (2X)
    Manual focus No
    Normal focus range 60 cm (23.62″)
    Macro focus range 9 cm (3.54″)
    Screen / viewfinder
    Articulated LCD Fixed
    Screen size 3″
    Screen dots 920,000
    Touch screen No
    Screen type TFT LCD
    Live view Yes
    Viewfinder type None
    Photography features
    Minimum shutter speed 4 sec
    Maximum shutter speed 1/2000 sec
    Exposure modes
    • SR Auto
    • Program
    Scene modes
    • Portrait
    • Landscape
    • Sport
    • Night
    • Night (Tripod)
    • Sunset
    • Snow
    • Beach
    • Underwater
    • Underwater (Macro)
    • Party
    • Flower
    • Text
    Built-in flash Yes
    Flash range 4.40 m (with Auto ISO)
    External flash No
    Flash modes Auto, flash on, flash off, slow synchro
    Drive modes
    • Single
    • Continuous Top
    • Continuous Last
    • Self-timer
    Continuous drive 10.0 fps
    Self-timer Yes (2 or 10 sec, group)
    Metering modes
    • Multi
    Exposure compensation ±2 (at 1/3 EV steps)
    WB Bracketing No
    Videography features
    Resolutions 1920 x 1080 (60p, 30p), 1280 x 720 (60p), 640 x 480 (30p)
    Format MPEG-4, H.264
    Microphone Mono
    Speaker Mono
    Storage
    Storage types SD/SDHC/SDXC, Internal
    Storage included 96MB
    Connectivity
    USB USB 2.0 (480 Mbit/sec)
    HDMI Yes (micro-HDMI)
    Microphone port No
    Headphone port No
    Wireless Built-In
    Wireless notes 802.11/b/g/n
    Remote control Yes (via smartphone)
    Physical
    Environmentally sealed Yes (waterproof to 15m/50ft, shockproof to 1.8m/5.8ft, freezeproof to -10C/+14F, dustproof)
    Battery Battery Pack
    Battery description NP-45S lithium-ion battery & charger
    Battery Life (CIPA) 210
    Weight (inc. batteries) 203 g (0.45 lb / 7.16 oz)
    Dimensions 110 x 71 x 28 mm (4.33 x 2.8 x 1.1″)
    Other features
    Orientation sensor Yes
    GPS None

    Articles: Digital Photography Review (dpreview.com)

  • Pavement Bowie: 20 Street Art Tributes to David Bowie

    [ By Steve in Art & Street Art & Graffiti. ]

    bowie-street-art-1a
    Ashes to ashes, Stardust to dust: having left life’s stage, cultural icon David Bowie also leaves behind a global imprint through street art and graffiti.

    bowie-street-art-2a

    David Bowie was a multidimensional performer – “Sound and Vision” succinctly sums up his ability to impress in a range of senses. Though primarily a musician, the late Londoner’s enormous impact is discernible even when presented silently as street art and/or graffiti in locations as culturally diverse as Iceland and Brazil.

    Aladdin Seen

    bowie-street-art-3a

    That’s gonna leave a mark. This small stenciled image on Ghent, Belgium’s Werregarenstraat (Graffiti Street) stands out amongst the more complex and colorful works all around. Flickr user Oriol Salvador zoomed right in on March 23rd of 2014.

    Face The Change

    bowie-street-art-20

    Adding some non-local color to a Tel Aviv, Israel side street, these stenciled faces of Bowie aka Ziggy Stardust were snapped on November 24th, 2011 by Flickr user Fatemeh. One would hope the homeowner (a) approves of the art and (b) resists the urge to remove it.

    Sticker Shock

    bowie-street-art-16

    Captured by Flickr user Openhammer on June 11th of 2008, this sticker references the cover photo from RCA Records’ 1972 worldwide release of Bowie’s 1970 album, “The Man Who Sold the World”. Due to their inherent fragility, it’s unknown whether the sticker has survived to date – one would have to scour Winn Street in Brisbane, Australia to know for certain.

    They’re Jammin’

    bowie-street-art-4aa

    bowie-street-art-4b

    bowie-street-art-4c

    David Bowie and Bob Marley share space in a Toronto, Canada alleyway in this image from Flickr user Aviva West (letsgoeverywhere) taken on April 29th, 2011. Could this be love?

    Londrina Calling

    Londrina, Brazil was named for London, England so the above street art image of London-born David Bowie is right at home. Flickr user Marco Gomes snapped this sharp-edged stencil from the southern Brazilian city on March 3rd, 2008.

    Next Page – Click Below to Read More:
    Pavement Bowie 20 Street Art Tributes To David Bowie

    Share on Facebook


    [ By Steve in Art & Street Art & Graffiti. ]

    [ WebUrbanist | Archives | Galleries | Privacy | TOS ]


    WebUrbanist

  • Fujifilm XF 100-400mm F4.5-5.6 OIS WR lens moves from roadmap to reality

    Fujifilm has officially announced its Fujinon XF 100-400mm F4.5-5.6 R LM OIS WR lens, which has been on the company’s roadmap since early 2015.

    This weather-sealed lens, equivalent to 152-609mm (F6.8-8.4 equivalent) when mounted on an X-series body, has nine rounded aperture blades, 5 ED and 1 Super ED elements, and a fluorine coating. It also features a 5-stop image stabilization system and twin linear motors for fast, responsive focusing performance.

    The lens is compatible with Fujifilm’s 1.4X teleconverter, giving users an equivalent focal length of 213-853mm.

    You’ll be able to pick up the 100-400mm F4.5-5.6 lens in February for $ 1899.95.

    FUJIFILM ANNOUNCES NEW ADDITIONS TO THE X-SERIES LINE OF CAMERAS AND LENSES

    X-Pro2, X-E2S, X70 and XF100-400mmF4.5-5.6 R LM OIS WR join the X-Series; all-weather FinePix XP90 gets the shot from sand to slopes

    Valhalla, N.Y., January 14, 2016 – FUJIFILM North America Corporation, a leader in digital imaging, today announced new additions to the award-winning X-Series line of premium fixed and mirrorless cameras, and ultra-high quality lenses, including: the FUJIFILM X-Pro2, FUJIFILM X-E2S, FUJIFILM X70 and FUJINON XF100-400mmF4.5-5.6 R LM OIS WR.  Fujifilm also introduced the new rugged and waterproof FinePix XP90, perfect for capturing amazing images everywhere, from underwater to mountain tops.

    FUJINON XF100-400mmF4.5-5.6 R LM OIS WR

    The new FUJINON XF100-400mmF4.5-5.6 R LM OIS WR is a weather-sealed, superior telephoto lens that gives photographers exceptionally sharp images with a 152mm-609mm equivalent in 35mm format. The high-performance XF100-400mmF4.5-5.6 R LM OIS WR has an optical construction of 21 elements in 14 groups, and includes five ED lenses and one Super ED lens to help reduce chromatic aberration that often occurs in telephoto lenses. As a result, it delivers the highest image quality in its class.

    The XF100-400mmF4.5-5.6 R LM OIS WR has been designed for handheld shooting with a 5.0-stop image stabilization system and twin linear motors for speedy autofocus that makes it perfect for shooting fast-moving subjects. The lens is also water and dust resistant and can operate in temperatures as low as 14°F, making it suitable for use in a wide range of outdoor shooting conditions. A fluorine coating has also been applied to the front lens element to repel water and dirt, further improving the toughness and functionality of the lens.

    FUJINON XF100-400mmF4.5-5.6 R LM OIS WR key features:

    • Uses  21 elements in 14 groups, and 5 extra-low dispersion elements and 1 super extra low dispersion elements
      • Rounded 9 blade aperture
      • 1/3 EV (15 steps)
      • Water-repellent fluorine coating
    • Weather-sealed with 13 water and dust resistant seals at 12 points
    • Included lens hoods features a sliding window for accessing a polarizing filter and locking mechanism
    • Compatible the XF1.4X TC WR teleconverter (140-560mm F6.3-8 or 213-853mm in 35mm equivalent)
    •  Compatible with optional lens plate (MLP-75XF) and optional ARCA SWISS tripods


    The FUJINON XF100-400mmF4.5-5.6 R LM OIS WR will be available in February 2016 for USD $ 1,899.95 and CAD $ 2,149.99.

    FinePix XF 100-400mm F4.5-5.6 R LM OIS WR lens specifications

    Principal specifications
    Lens type Zoom lens
    Max Format size APS-C / DX
    Focal length 100–400 mm
    Image stabilisation Yes (5 stops)
    Lens mount Fujifilm X
    Aperture
    Maximum aperture F4.5 – F5.6
    Aperture ring No
    Number of diaphragm blades 9
    Optics
    Elements 21
    Groups 14
    Special elements / coatings Five ED and 1 Super ED element + fluorine coating
    Focus
    Minimum focus 1.75 m (68.9″)
    Maximum magnification 0.19×
    Autofocus Yes
    Motor type Linear Motor
    Full time manual Yes
    Focus method Extending front
    Distance scale No
    DoF scale No
    Focus distance limiter Yes
    Physical
    Weight 1375 g (3.03 lb)
    Diameter 95 mm (3.73″)
    Length 211 mm (8.29″)
    Sealing Yes
    Zoom method Rotary (extending)
    Power zoom No
    Zoom lock Yes
    Filter thread 82.0 mm
    Hood supplied Yes
    Tripod collar Yes

    Articles: Digital Photography Review (dpreview.com)