Blog

  • 9 Tips that Make Couples Happy During a Portrait Session

    Whenever a camera appears, you can bet your caboose that there are emotions swirling for 99% of the human population. From fear and disdain, to reverting to the classic Chandler Bing smile, people tend to exaggerate or warp their behaviour in front of the camera in endlessly inventive ways. But unless you’re going for a Sears portrait look, your job as a photographer is to not only deliver an end-product that thrills your clients, it’s to make the shoot an awesome experience as well.

    Here are nine of my favorite, tried-and-true strategies for helping clients forget about the camera, and have a good old time on their shoot.

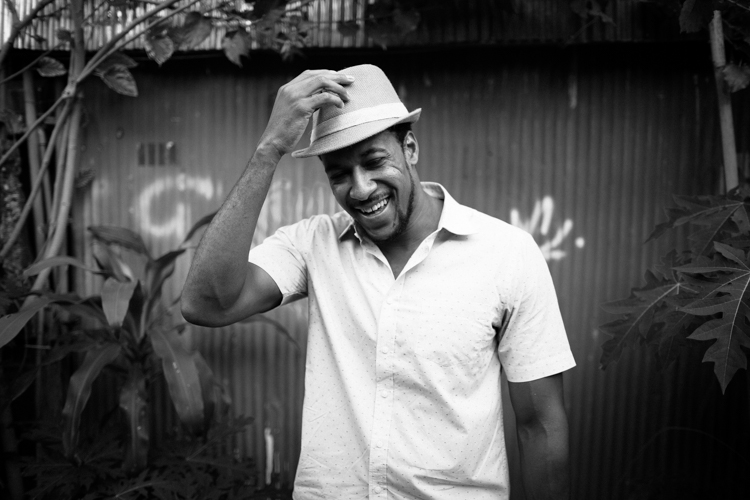
    DpsCouplesimage1

    1 – Model the behaviour you want

    A shoot can be fraught with stress, so for the love of Annie Leibowitz, don’t add to it. When people arrive at a shoot, they are almost invariably nervous, and will be looking to you for all their cues. Take the lead in creating the atmosphere you’re hoping for, and your clients will follow suit almost subconsciously. You have a huge opportunity to model the relaxed, joyful, behaviour you want to capture, simply by setting the tone and mood of the shoot from the get-go!

    This is so simple, but laugh. Crack jokes, if that’s your thing. Show them you’re willing to get weird, and it’ll liberate them to fall into a relaxed zone that brings out great images. It’s not about putting on a performance, but about being so yourself and comfortable in your own skin, that your clients can’t help but do the same.

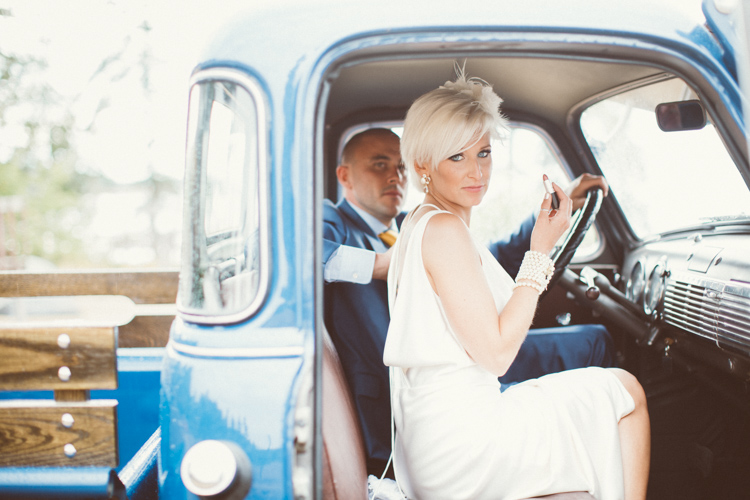
    DpsCouplesimage2

    2 – Learn to read people

    On that note, hone in your ability to read your clients so they really feel seen as individuals, and not two-dimensional subjects, and adapt to their specific personality. In many ways you have to be a chameleon, ready to provide to whatever the client might need from you to make them comfortable. We usually talk a lot throughout our shoots, and have found that most people react well to constant positive feedback, but not everyone wants a running commentary. There’s a fun balancing act to figure out what your client will respond to, and this is a good life skill as well.

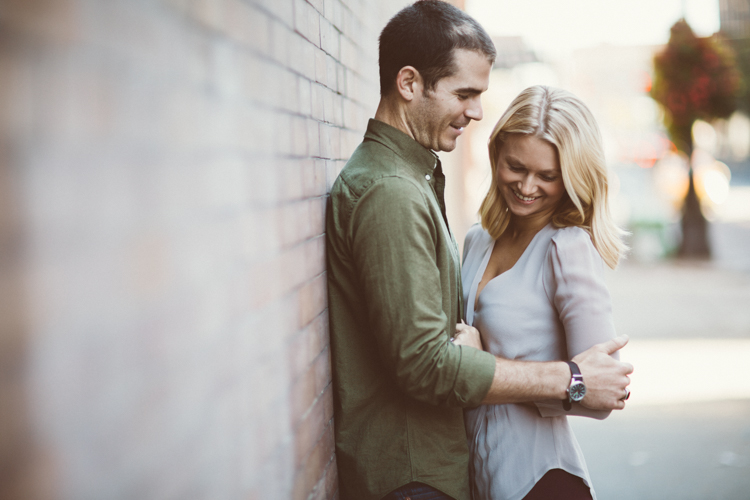
    DpsCouplesimage3

    3 – Find an in

    Whether it’s talking baseball, vintage cars, or Japanese flower arranging, finding some common ground can put even the stiffest of the stiff more at ease. They’ll loosen up, see you as a teammate, and get more invested in following whatever direction you have for them. We’ve established trust with clients by talking with them about everything from beers in Thailand, to Tom Brady’s throwing motion. Chat it out, listen for non-sequiturs and when you find an in, go for it.

    4 – Treat your camera like a commonplace object

    By treating your camera like it ain’t no thang, with no more emotion connected to it than a chair or a mailbox, you can help couples forget that it’s there (well, almost). When starting a shoot, spend as much time as possible chatting, and relaxing with the couple before you ever lift the camera. Hold it in your hand as if it’s no more consequential than a cup of coffee. This action may seem subtle, but your clients are looking to you for their behavioural cues, and treating the camera like something to not think twice about, will allow them to consider it equally as casually.

    DpsCouplesimage4

    5 – Have the subject help you design the shoot

    Giving your clients plenty of say in the terms of how the shoot goes, is a huge key to making them relaxed. Doing extra legwork ahead of time, like guiding them with their outfits and locations, allows them to show up already feeling invested and in control over much of their experience. The old relationship advice that “communication is key” could not be more apt. Spending time before the shoot helping people feel like their voice is being heard, is central to great images.

    DpsCouplesimage5

    6 – Tell a better story

    We’ve all been that novice photographer who, in a desperate attempt to capture a mirthful photo of unrehearsed laughter, says something panicked like “okay, now make each other laugh”. That’s not funny, y’all! You gotta be more creative than that. If you’re photographing a couple, ask one of them to tell the other about their most embarrassing childhood moment, using only interpretive dance. Tell them to reenact their first meeting, using emotive eye contact, instead of words. Get detailed and ridiculous in these requests, because then you’ll be able to fully leap into #7.

    DpsCouplesimage6

    7 – Shoot between the lines

    You likely won’t keep the image of the poor guy interpretive dancing, but you’ll probably keep the one of the couple cracking up together in between moves. Here’s the real secret to natural looking photos – the in-between photos ARE the photos. The unposed, unrehearsed, laughing at fart jokes, or because your photographer told you they were “just going to test the light” but really you’re capturing them enjoying life together. Those are the images that end up being keepers. Keep that camera at the ready and shoot between the lines to get the good stuff.

    DpsCouplesimage7

    8 – Keep those hands moving

    Every once in a while, we’ll leave the open-ended coaching behind and give a people a very specific pose to try. And no matter what the pose is, no matter how natural it felt when they first tried it, it’s going to get clunky-looking if you make them hold it for long enough. There are a few reasons why someone might need to keep a general pose for a bit — if you’re grabbing different angles, shooting with unique lenses, etc. — but our big piece of advice for them is to always keep their hands moving. With the free-reign to move their hands in whatever way feels natural to them, they’ll avoid the stiff prom-pose look, while still keeping the general idea of the pose you gave them. It sounds silly, but this one seriously works.

    9 – Get your own photo taken – often

    If you are amongst the hordes of photographers and humans who hate having their own photo taken, this piece of advice goes double for you. You MUST MUST MUST put yourself in your clients’ shoes! Be uncomfortable! Learn what strange tics you have. Know how to comfortably have your photo taken, so you know firsthand how to coach your clients. Standing in their shoes is our number one piece of advice, because as you teach yourself to be in photos comfortably, it’ll become ever-easier to coach your clients to do the same. Get thee in front of a lens. You’ll be a better photographer for it.

    So while you may not be able to alleviate someone’s multiple decade love/hate relationship with having their photo taken, focusing on making each client’s shoot experience stellar is the first step on the road to the beautiful, natural, photos you and your client are aiming for. Because if you aren’t having fun, why bother?

    googletag.cmd.push(function() {
    tablet_slots.push( googletag.defineSlot( “/1005424/_dPSv4_tab-all-article-bottom_(300×250)”, [300, 250], “pb-ad-78623” ).addService( googletag.pubads() ) ); } );

    googletag.cmd.push(function() {
    mobile_slots.push( googletag.defineSlot( “/1005424/_dPSv4_mob-all-article-bottom_(300×250)”, [300, 250], “pb-ad-78158” ).addService( googletag.pubads() ) ); } );

    The post 9 Tips that Make Couples Happy During a Portrait Session by Tim Sullivan appeared first on Digital Photography School.


    Digital Photography School

  • Dyslexic Designer Creates Custom Typeface Addressing Disorder

    [ By WebUrbanist in Design & Graphics & Branding. ]

    dyslexic typeface

    Designed to address the visual processing problems associated with dyslexia, this font uses a set of tailored strategies to make reading easier for those with the disability.

    dyslexie bold letters bottoms

    Christian Boer developed Dyslexie from first-hand knowledge of its effects. “When they’re reading, people with dyslexia often unconsciously switch, rotate and mirror letters in their minds,” he explains.

    dyslexie regular design lines

    “Traditional typefaces make this worse, because they base some letter designs on others, inadvertently creating ‘twin letters’ for people with dyslexia.”

    dyslexie mirroring dislexic address

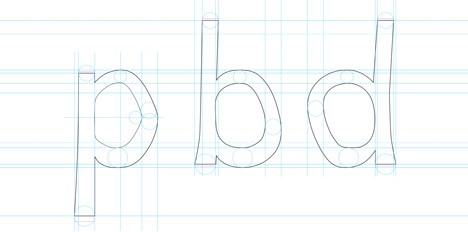
    dyslexic p b q

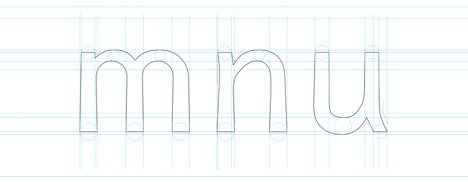
    For simplicity, clarity and consistency, most typefaces involve numerous mirrored letters, such as an ‘m’ that is a doubled ‘n’ which in turn is an upside-down ‘u’, or ‘b’ flipped to become ‘p’s and ‘q’s.

    dyslexie design principles

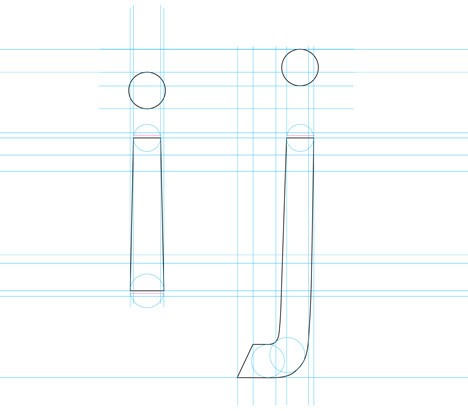
    To address this, Boer thickened the bottom portions of letters, making it more clear which end is up and creating clearer distinctions between different characters in the process. Larger spaces and punctuation are also made to make everything more legible.

    dyslexie design strategy

    “By changing the shape of the characters so that each is distinctly unique, the letters will no longer match one another when rotated, flipped or mirrored,” Boer said. “Bolder capitals and punctuation will ensure that users don’t accidentally read into the beginning of the next sentence.”

    Share on Facebook


    [ By WebUrbanist in Design & Graphics & Branding. ]

    [ WebUrbanist | Archives | Galleries | Privacy | TOS ]


    WebUrbanist

  • Understanding Natural Light Part 3: Direction of Light

    Light has different qualities, and by understanding those differences and using them in your favour, you can become a better image maker.

    In two previous articles I covered:

    • Understanding Natural Light Part 1: Quality of Light
    • Understanding Natural Light Part 2: Color of Light

    Mix1
    In this third chapter, you will learn:

    • How to control the direction of natural light in the field.
    • How to understand the different effects the direction of light will have on your portraits. How to mix light colors to create depth.
    • A few advanced techniques, like using reflectors or flags.
    • How to practice using exercises.

    Please note that as a portrait photographer, I will be discussing portraits, and using them as examples. However, this knowledge applies to any kind of photography.

    Working with natural light does not mean compromising

    Most people will tell you that while working with artificial lighting will allow you to fully control the lighting situation in your shooting, working exclusively with natural light will limit your ability to control the lighting to almost zero. In my opinion, this false assumption is leading many photographers to mediocre images. Stating that the lighting is poor, because “that’s how it was” when they made the photo, is not acceptable.

    So, the first step in controlling natural light is to carefully plan your time of the shoot. In the preview articles, we have discussed how the quality and color of light are affected by time, and weather, during the day. Now, let’s understand how the direction of light will change throughout the day, and how it will affect the lighting situation in our portraits.

    Frontal lighting

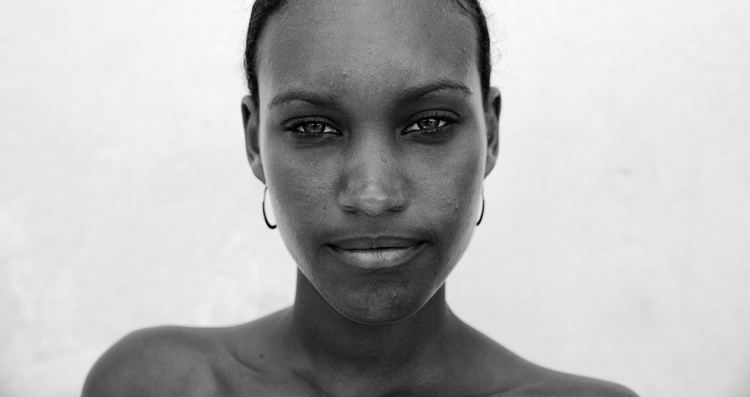
    Frontal lighting refers to light which comes directly in front of your subject (the light source is behind you and the camera). The situation is possible or when your subject is facing the light source (for example face directed to a setting or a rising sun). Another possibility is with reflected light. Like in this image, Dialsiz was standing in the shade, but in front of her was a bright sunny wall, reflecting the sunlight directly on her face.

    1b

    Pros: Frontal lighting will usually illuminate your subject’s face evenly, without any shadows. It will create an aesthetic and balanced look, which is why this setup is very popular in fashion and beauty shoots.

    Cons: The lack of shadows will create a lack and depth and drama.

    45 degree lighting

    As the name suggests, this refers to a situation where the light comes from an angle of 45 degrees from the nose of your subject. This is extremely popular lighting setup in portrait photography, which is sometimes called Rembrandt lighting. It can be easily achievable with side light coming from a rising or setting sun, or by positioning your subject at a 45 degree angle to a window.

    26b

    Pros: in this lighting setup, you will note how the light illuminates your subject’s face gradually. Creating a gradual shadow, and in our two dimensional art form, shadows usually mean depth and volume. That is the reason this setup is so appealing in the eyes of most viewers.

    Cons: The dramatic effect of shadowing parts of the subject’s face might not be suitable for your visual story.

    90 degree lighting

    As the name suggests, this refers to a situation where the light comes from an angle of 90 degrees from the nose of your subject. It can be achievable with side light coming from a rising or a setting sun or by positioning your subject at a 90 degree angle to a window.

    F11A1636

    42


    Pros: Extremely dramatic effect, which is almost impossible to ignore.

    Cons: This dramatic lighting setup can be a little over dramatic, and with the right subject, this lighting can be scary! It all depends of course, on what you want to evoke in your visual story.

    Backlighting

    This refers to a situation where the light comes from behind your subject, and in front of you.

    IMG 9185b

    Pros: Backlight will create highlights in the contours of your subject, and unlike with frontal lighting, this will create a sense of depth, and a clear separation between the subject and the background. Unless the light source is very dim and fully covered by your subject’s body, working with backlight will force you to be creating with your photography, as it will make the exposure a bit more difficult. This is where switching from the automatic mode can be handy. While overexposing can be good for creating a burned out background or a lens flare, underexposure will usually result in a nice silhouette (as above)

    Cons: As mentioned, this one is a bit more advanced to handle, and will mostly require switching out of your camera’s automatic mode, but again, a great opportunity for some creative photography.

    Light from above

    This refers to a situation where the light comes from directly above your subject, like during midday.

    F11A0035b


    Pros: This interrogation room style lighting setup will not be flattering to most faces. Light coming from above will result in deep shadows on your subject’s face, making the forehead shadow the eyes, and making the nose shadow the chin. However, it can be used as a way of creating a very dramatic image. Oscar-winning Cinematographer Gordon Hugh Willis, did a groundbreaking work in Francis Ford Coppola’s movie, The Godfather, with the combination of underexposing and positioning the lighting source above the actors’ faces. He managed to support the dark and mysterious sense of this movie, with the audience was unable to see most eyes throughout the movie.

    Cons: As mentioned, when handled right, this lighting setup, can lead to great and creative results. Otherwise, you subject will look like he or she is going to answer some tough questions.

    Controlling natural light

    Basic: in the simplest form, controlling natural light is first in the planning. Choose the right time to be outside, or take your subject indoors to use the soft light coming from a window.

    Advanced: You can control natural light almost like controlling artificial lighting, with the help of reflectors or/and flags.

    Reflectors are used to bounce light into the subject’s face. For example, if you are dealing with light coming from above, you can overcome the problem of dark eyes by illumining them using a reflector. It can also lighten the dark side of the face, if needed, in the case of lighting from a 45 or 90 degree angle.

    F11A1258b 1

    2
    You can see the reflection of the reflector used to bounce light back into this man’s face.

    A flag is usually a piece of black fabric that can be used to block unwanted light and create shadows (shadows mean a sense of depth remember?) on the subject’s face. To use a flag properly, you will need somebody or something that can hold it. That is the way I use all kind of flags in the field. I have used my hat (which I was holding in my left hand) to shadow an overexposed forehead numerous times, or using the help of an innocent bystander that was asked to stand in one spot for a moment, to create a shadow when needed.

    Exercise #1:

    Christmas (or just after it) is the best time to ask for a favor. Bring your favorite friend, family member, or pet, and position it in front of a window. While moving your subject, practice the concepts of frontal, back, 90 degree and 45 degree lighting setups. Examine the images, and get a deeper understating of how light direction will affect your portrait.

    Exercise #2:

    Reflectors are effective and fun to use. You can buy yourself a reflector, or prepare one with a small piece of cardboard and a simple aluminum foil.

    googletag.cmd.push(function() {
    tablet_slots.push( googletag.defineSlot( “/1005424/_dPSv4_tab-all-article-bottom_(300×250)”, [300, 250], “pb-ad-78623” ).addService( googletag.pubads() ) ); } );

    googletag.cmd.push(function() {
    mobile_slots.push( googletag.defineSlot( “/1005424/_dPSv4_mob-all-article-bottom_(300×250)”, [300, 250], “pb-ad-78158” ).addService( googletag.pubads() ) ); } );

    The post Understanding Natural Light Part 3: Direction of Light by Oded Wagenstein appeared first on Digital Photography School.


    Digital Photography School

  • Otherworldly? Lomography introduces Jupiter 3+ lens

    $ (document).ready(function() { SampleGalleryV2({“containerId”:”embeddedSampleGallery_6385885616″,”galleryId”:”6385885616″,”isEmbeddedWidget”:true,”selectedImageIndex”:0,”startInCommentsView”:false,”isMobile”:false}) });

    Lomography has resurrected another classic Russian lens to sit next to its Petzval 85mm and 58mm lenses. This time, the company has revived one of the Jupiter designs that are so popular in our Adapted Lens Talk forum. The 50mm F1.7 lens is offered in L39 mount with an included M-mount adapter. See the press release below for all of the details.

    Press Release:

    NEW JUPITER 3+ LENS (1.5/50 L39/M)

    A BOLD, BEAUTIFUL & BRIMMING-WITH-BOKEH RESURRECTION FROM
    THE ZENITH OF RUSSIAN OPTICAL DESIGN

    • A Resurrection of Planetary Proportions from the glory days of rangefinder photography
    • Unsurpassed Character with super-fast performance and incredible low light ability
    • Handcrafted Construction of solid chrome-plated brass and Russian glass optics
    • Rich Russian Heritage based on the iconic Jupiter lens

    A RESURRECTION OF PLANETARY PROPORTIONS

    Designed by the highly experienced Lomography team and manufactured by the expert technicians at the exact same Zenit factory in Russia as the original lens, the New Jupiter 3+ Art Lens retains the strong character and Soviet spirit of its forbearer — crisp sharpness, smooth, natural colors and lush, dreamy bokeh — while transcending it in many ways. With substantial improvements on design and compatibility, Lomography is extremely proud to introduce the New Jupiter 3+ Art Lens to their line of exquisitely handcrafted Lomography Art Lenses over half a century since the original Jupiter 3 lens was released.

    UNSURPASSED CHARACTER

    Equipped with a versatile 50mm focal length and fast f/1.5 maximum aperture, the New Jupiter 3+ Art Lens allows you to effortlessly capture every moment from portraits to everyday life. It has an outstandingly shallow depth of field at large apertures and yields stunning results in all kinds of settings, whether you’re shooting in low light or bright sunshine. Subjects will pop out from the frame while the defocused areas will be drenched in beautiful bokeh, resulting in an extremely unique image quality that makes this lens incredibly special and gives a character entirely its own!

    HANDCRAFTED CONSTRUCTION

    With years of knowledge and experience, the skilled and dedicated team of technicians at the Zenit Factory in Russia has produced the lens to the highest quality. In addition to having a modified 0.7m closest focusing distance (an improvement from 1m on the original lens), the New Jupiter 3+ Art Lens is directly compatible with L39 and M mount rangefinder and mirrorless digital cameras, as well as many more using adapter mounts.

    Constructed from chrome-plated solid brass, the New Jupiter 3+ Art Lens is much more durable than the original Jupiter 3 lens, which was made out of aluminum, so it will last for many, many years to come.

    RICH RUSSIAN HERITAGE

    First developed in Soviet Russia in the late 1940’s, the original Jupiter lens was crafted by the optical pioneers at the Zenit factory in the suburbs of Moscow and came to be loved for the incredible character it gave to
    the images captured with it. Since then, it’s been used to capture millions of photographs around the world. But
    production of the Jupiter 3 was halted in 1988 and the option to find one has become more difficult as time goes on. Lomography is proud to bring this lens back into the spotlight and make it available once again to
    a new generation of photographers. The New Jupiter 3+ Art Lens is being produced in small batches and thus will be available on a very limited first-come, first-
    served basis in the Lomography Online Shop.

    TECHNICAL INFORMATION

    • Focal Length: 50mm
    • Aperture: f/1.5 – 1/22
    • Lens Mount: L39, includes Leica M-mount adapter
    • M-mount Adapter Frame Line 
    • Triggering: 50mm frame line
    • Rangefinder Coupling: Yes
    • Minimum image circle: 44mm
    • Field of view : 46 degrees
    • Flange distance: 28.8mm (L39 mount) 27.8mm (M mount)
    • Closest Focusing Distance: 0.7m
    • Filter Thread Requirement: 40.5mm
    • Lens Construction: 7 elements in 3 groups

    Order the New Jupiter 3+ Art Lens

    http://shop.lomography.com/jupiter-3-plus

    Visit the New Jupiter 3+ Art Lens Microsite

    http://www.lomography.com/jupiter

    Articles: Digital Photography Review (dpreview.com)

  • 1.4 and More: Canon EF 35mm F1.4L II comparison

    Canon is making some big claims about the development put into its 35mm F1.4L II. Its new Blue Spectrum Refractive optical element is claimed to minimize longitudinal chromatic aberration, and a new 9-blade aperture promises smoother bokeh. Initial MTF charts provided by Canon showed improvements in resolution and sharpness over the old 35 F1.4, and the Sigma 35 F1.4 Art as well. Once a copy landed in our hands, we decided to test these claims.

    Sharpness

    These shots were all focused wide-open in Live View on the bottom of the Space Needle, and shot within a few minutes of each other with the cameras white balance setting on ‘Daylight.’ They were then processed with no exposure corrections or WB corrections in ACR using the ‘Adobe Standard’ camera profile.

    $ (document).ready(function() { ImageComparisonWidget({“containerId”:”reviewImageComparisonWidget-63332475″,”widgetId”:296,”initialStateId”:null}) })

    When used wide-open, the differences between these three 35mm F1.4 lenses seem fairly significant. The new Canon shows little to no chromatic aberration on the tower of the Space Needle, an area where the other two struggle. It also shows better performance wide-open in the extremes$ (document).ready(function() { $ (“span#imageComparisonLink-1864”).click(function() { ImageComparisonWidgetLink(1864); }); }) of the image$ (document).ready(function() { $ (“span#imageComparisonLink-1865”).click(function() { ImageComparisonWidgetLink(1865); }); }). At F2$ (document).ready(function() { $ (“span#imageComparisonLink-1872”).click(function() { ImageComparisonWidgetLink(1872); }); }) the Sigma starts to catch up in overall IQ towards the center, and the first version of the Canon starts to narrow the gap at F2.8$ (document).ready(function() { $ (“span#imageComparisonLink-1869”).click(function() { ImageComparisonWidgetLink(1869); }); }), although in this specific area it never quite catches up. There are areas where there is a similar amount of sharpness$ (document).ready(function() { $ (“span#imageComparisonLink-1870”).click(function() { ImageComparisonWidgetLink(1870); }); }) behind the Mark I’s aberrations, and there are places where it is far behind$ (document).ready(function() { $ (“span#imageComparisonLink-1873”).click(function() { ImageComparisonWidgetLink(1873); }); }) the Mark II version. These inconsistencies are part of the wonderful world of copy variation, and these lenses are by no means hand-selected examples. Overall, the Canon EF 35mm F1.4 L II does perform a step above the competition.

    Copy Variation

    After shooting this comparison on the Canon EOS 5DS R, we were concerned with how poorly the EF-mount Sigma 35mm F1.4 performed off-center. While we didn’t have access to more EF-mount versions at the time, we did have a Nikon F-mount Sigma 35mm F1.4 in the office, which we adapted to a Sony a7R II with a Metabones adapter to re-shoot the comparison. While we were at it, we also threw in the Sigma 24-35mm F2 zoom, to see how it stacks up against two of the best 35 primes in the business. We adapted both the EF-mount Canon 35/1.4L II and EF-mount Sigma 24-35mm F2 to the same Sony a7R II via a Metabones Smart Adapter IV for a fair comparison. Result of this comparison are below. Please keep in mind the general caveats surrounding adapters and adapted lenses, especially around compounded mount tolerances affecting off-axis performance (which we see little evidence of). 

    $ (document).ready(function() { ImageComparisonWidget({“containerId”:”reviewImageComparisonWidget-51449040″,”widgetId”:300,”initialStateId”:null}) })

    Immediately, we see that a better copy of the Sigma 35mm F1.4 Art performs admirably against the new Canon 35L II, at least matching, if not slightly exceeding, center sharpness wide open$ (document).ready(function() { $ (“span#imageComparisonLink-1926”).click(function() { ImageComparisonWidgetLink(1926); }); }) and even at F2$ (document).ready(function() { $ (“span#imageComparisonLink-1927”).click(function() { ImageComparisonWidgetLink(1927); }); }). The story is a little different at the extremes$ (document).ready(function() { $ (“span#imageComparisonLink-1924”).click(function() { ImageComparisonWidgetLink(1924); }); }) of the scene$ (document).ready(function() { $ (“span#imageComparisonLink-1922”).click(function() { ImageComparisonWidgetLink(1922); }); }): although we see a great improvement in this copy of the Sigma 35mm, it still does fall behind the Canon wide-open with a hint more coma at the extremes. At F2.8$ (document).ready(function() { $ (“span#imageComparisonLink-1925”).click(function() { ImageComparisonWidgetLink(1925); }); }) we see the gap between the Sigma 35mm and the Canon 35mm close, while the 24-35 F2 trails slightly behind.

    The Canon 35L II continues to perform better with respect to chromatic aberration, though. The extreme variance in performance from copy-to-copy of the Sigma 35mm F1.4 is certainly concerning, and is a good reminder that discerning buyers should test their copy. Interestingly, Roger Cicala has actually found greater copy-to-copy variation with the Sigma 35mm Art in comparison to the Canon 35L II (see Conclusion of this article). This is also a reminder that any internet shootout (save for Roger’s work) is generally prone to only being valid for the copies tested. We hope to circumvent this issue by – in the future – performing these sorts of shootouts with a copy that represents the performance of the average of a population.

    Longitudinal CA

    Method

    Here we look for longitudinal chromatic aberration (CA), which manifests itself as green or magenta fringing behind or in front of the plane of focus. This is particularly an issue with fast primes, and isn’t as easy to remove in post as one would like. Low amounts of longitudinal CA (LoCA) are, therefore, extremely welcome in fast primes that photographers are prone to shoot wide open, and Canon makes some bold claims in this department with the 35L II.

    For this test we used our Lens Align tool, which shows green and magenta fringing quite easily in the horizontal black lines around the plane of focus.* The slight differences in lens size, optical center, and focal length meant moving the camera slightly to hold magnification constant. Focus was set wide-open on the center target in LiveView, then locked in place for the sequence.

    $ (document).ready(function() { ImageComparisonWidget({“containerId”:”reviewImageComparisonWidget-20031416″,”widgetId”:295,”initialStateId”:null}) })

    Results

    It looks like the Blue Spectrum Refractive optical element does what Canon developed it for. The 35L II has the best control of LoCA of them all, and is far ahead of the original 35L which, frankly, really didn’t impress in this arena. While the Sigma Art does hold its own, it still falls behind the new Canon, with the magenta fringing even more obvious in our infinity shots of the Space Needle above. And even at F2$ (document).ready(function() { $ (“span#imageComparisonLink-1874”).click(function() { ImageComparisonWidgetLink(1874); }); }) in our Lens Align chart above, the Sigma hasn’t quite caught up to the 35L II. This, combined with the better across-the-frame sharpness, potentially makes the new Canon the better choice for photographers looking to shoot wide-open.**

    Bokeh Comparison

    While shooting the Longitudinal CA test, we put a net of Christmas lights a few feet behind our Lens Align tool to create beautiful balls of bokeh, giving us a way to visualize differences between the three lenses’ out of focus characteristics. Hover your mouse over any given aperture of any given lens to have the main image switch to a full-frame view of the resulting shot.

    Canon 35 F1.4L 1.4 2 2.8 4 5.6 8 11 16
    Canon 35 F1.4L II 1.4 2 2.8 4 5.6 8 11 16
    Sigma 35 F1.4 Art 1.4 2 2.8 4 5.6 8 11

    16

    Comparing the new Canon to the old Canon, we can see the effect of the new 9-bladed aperture. Stopped down, the ‘bokeh balls’ have points to them on the older lens, whereas the new lens produces smooth out of focus areas. The odd number of aperture blades also ensures that the new 35 produces brilliant, multi-pointed sunstars.

    It’s important to note that all lenses show relatively similar-sized ‘bokeh balls’, suggesting that subject isolation characteristics should be relatively similar between all these lenses. That said, because bokeh and sharpness fall-off is complex, we can’t make sweeping judgements about overall bokeh characteristics at any given plane; simply that, overall, it’s unlikely that there are drastic difference between these lenses in terms of ability to isolate subjects and throw backgrounds out of focus.

    All in all, what theses tests show is that the $ 1799 sticker price of the new Canon EF 35mm F1.4 L II does offer some significant advantages over its predecessor, but only a slight advantage over the Sigma that only high-megapixel bodies can really expose the differences in. The biggest advantage it provides is usable wide-open results with nearly no corrections required, which is getting tougher to achieve as resolution goes up. Hats off to Canon for the achievement, but hats off to Sigma for still remaining competitive at a much lower price.


    * The rulers on the top and bottom of the chart are NOT part of the tool and are there for framing purposes only. These rulers are not parallel with the focus plane, and should not be used to judge sharpness in any way.

    ** We should mention that there are limits to the utility of infinity tests focused at the center for prime lenses typically used to shoot wide aperture portraiture. A photographer is likely to focus on non-central human subjects using a non-central AF point, which may yield different sharpness result compared to our centrally-focused infinity shots (especially for lenses demonstrating significant field curvature). In future lens tests using charts, we’re considering providing results from two different focusing methods: centrally focused vs. focused at each measurement point on the chart. The latter may give a better idea of sharpness for non-central, closer-up human subjects.

    Articles: Digital Photography Review (dpreview.com)

  • Leica launches its first rugged camera with the X-U (Typ 113) underwater compact

    $ (document).ready(function() { SampleGalleryV2({“targetContainerClass”:”sampleGalleryImageViewerContainer”,”galleryId”:”5760715033″,”isEmbeddedWidget”:true,”selectedImageIndex”:0,”startInCommentsView”:false,”isMobile”:false}) });

    German camera manufacturer Leica has announced it has produced a waterproof, shock-proof and dust-proof compact camera that uses an APS-C sensor. The Leica X-U (Typ 113) joins the X family of compacts, but offers waterproofing to 15m / 50ft and a body that is designed to be used both beneath and above the waves.

    The camera uses a 16.3MP CMOS sensor like the other models in the X series, but sports a 23mm F1.7 Summilux ASPH lens that delivers the same angle of view as a 35mm lens would on a full-frame camera. The lens can focus down to 20cm and features a flash housing directly above the axis of the front element that reduces the distance between the flash and the subject – which will be useful underwater, as illumination drops off quickly. The flash has a guide number of only 5m at ISO 100, and according to Leica has an operating range of 0.3-2m at that ISO setting. 

    The camera shoots both Raw and JPEG files, and has a movie mode that records at 30 fps in 1080 HD resolution. When used underwater a press of the UW button activates Underwater mode, which adjusts the white balance accordingly and sets distortion correction to suit the conditions.

    Leica says the camera was designed in collaboration with Audi Design, and that the top plate is made from high grade aluminum and the body coated in ‘high-grip TPE armoring’. 

    The camera is available now, and costs £2400 / $ 2,950. A floating neck strap is available for £50 / $ 95 and a wrist strap for £32 / $ 65. Correct me if I’m wrong, but I think this is Leica’s first ever commercially available underwater camera.

    For more information see the Leica website. 


    Press release:

    Built for the challenge – born for adventure: Introducing the Leica X-U

    New outdoor camera from Leica delivers outstanding picture quality in the harshest conditions   

    Leica Camera has unveiled its first camera designed specifically for outdoor and underwater photography – the Leica X-U (Typ 113).  

    Incorporating a fast Leica Summilux 23mm f/1.7 ASPH. lens (equivalent to 35mm in 35mm format) with underwater protection filter, and a large APS-C CMOS sensor, this fully waterproofed member of the Leica X family delivers images with exceptional brightness and clarity, even in the harshest of conditions.  

    Created for the adventurous photographer, the Leica X-U allows the user to capture breathtaking underwater moments in perfect detail, at depths of up to 15 metres. Shock-resistant, dust-sealed and shatter-proof, this rugged camera is the ideal companion for any outdoor expedition or adventure – whether it’s action or underwater shooting, extreme sports, travel, architectural or landscape photography – and also offers video capture in full HD quality.  

    Optimum picture performance is guaranteed, thanks to the cutting-edge technology the X-U shares with all models in the Leica X range. Combined with its professional 16.5 MP (16.2 MP effective) APSC CMOS sensor, the Leica X-U’s premium Summilux 23 mm f/1.7 ASPH. lens ensures natural colour reproduction and outstanding resolution, even at the closest focusing distance of 20 centimetres. Its fast f/1.7 maximum aperture also offers the freedom to explore the creativity of selective focusing. In addition, due to the camera’s excellent resistance to stray light and flare, the Leica X-U is the perfect choice for an extensive range of indoor and outdoor lighting conditions – at any time of day or night.  

    Made in Germany in collaboration with Audi Design, the stylish yet minimal Leica X-U focuses on the essential features: simple and intuitive operation, as well as ultimate precision. With a top plate made from premium aluminium and high-grip TPE armouring, the body ensures exceptional usability, handling and durability, as well as water resistance to a depth of up to 15 metres.  

    Designed to embrace the elements, and for the most ambitious photography projects, the Leica X-U incorporates a non-slip body, a toughened monitor screen cover, and a failsafe double locking system for the battery compartment and memory card slot. These robust protective features ensure that photographers can concentrate fully on their subject, with full confidence in the camera’s durability.  

    Furthermore, the minimal, intuitive design of the Leica X-U puts the most important creative tools directly at the photographer’s fingertips. Aperture and shutter speed can be set quickly and easily using the straightforward, typical ’Leica-style’ dials, while a practical underwater snapshot button ensures the camera is ready to capture the wonders of the underwater world immediately – without the need to search through menus. Thanks to the camera’s high resolution three inch screen and a wide range of useful automatic features, it takes just seconds to find the precise settings the photographer requires to capture their decisive moment.

    Additionally, with its anodised aluminium control dials and an integrated flash above the lens, the Leica X-U is a perfect example of exceptional quality and attention to detail.

    For those on a challenging professional assignment or a magical holiday of a lifetime, important moments can also be recorded in full HD, cinema-quality video – with a choice of 1920×1080 or 1280×720 pixel resolution, at 30 full frames per second in MP4 format. And whether the footage is intended for a professional production or a home movie to share with friends and family, the Leica X-U delivers high quality results that perfectly capture that special adventure.

    Leica X-U (Typ 113) specifications

    Price
    MSRP $ 2950
    Body type
    Body type Large sensor compact
    Body material Aluminum
    Sensor
    Max resolution 4928 x 3264
    Image ratio w:h 3:2
    Effective pixels 16 megapixels
    Sensor photo detectors 17 megapixels
    Sensor size APS-C (23.6 x 15.7 mm)
    Sensor type CMOS
    Color space sRGB
    Color filter array Primary color filter
    Image
    ISO Auto, 100-12500
    White balance presets 5
    Custom white balance Yes (2 spots)
    Image stabilization No
    Uncompressed format RAW
    JPEG quality levels Super fine, fine
    File format
    • JPEG (Exif v2.3)
    • Raw (DNG)
    Optics & Focus
    Focal length (equiv.) 35 mm
    Optical zoom 1×
    Maximum aperture F1.7 – F16.0
    Autofocus
    • Contrast Detect (sensor)
    • Multi-area
    • Center
    • Selective single-point
    • Single
    • Continuous
    • Live View
    Autofocus assist lamp Yes
    Normal focus range 20 cm (7.87″)
    Number of focus points 11
    Screen / viewfinder
    Articulated LCD Fully articulated
    Screen size 3″
    Screen dots 920,000
    Touch screen No
    Screen type TFT LCD
    Live view Yes
    Viewfinder type None
    Photography features
    Minimum shutter speed 30 sec
    Maximum shutter speed 1/2000 sec
    Exposure modes
    • Program
    • Aperture priority
    • Shutter priority
    • Manual
    Built-in flash Yes
    Flash range 2.00 m (at ISO 100)
    External flash Yes
    Flash modes Automatic, automatic/red eye reduction, on, on/red eye reduction, long-term synchronization/red eye reduction, off
    Drive modes
    • Single
    • Continuous
    Continuous drive 5.0 fps
    Self-timer Yes
    Metering modes
    • Multi
    • Center-weighted
    • Spot
    Exposure compensation ±3 (at 1/3 EV steps)
    AE Bracketing ±3 (3 frames at 1/3 EV steps)
    Videography features
    Resolutions 1920 x 1080 (30p), 1280 x 720 (30p)
    Format MPEG-4
    Microphone Stereo
    Speaker Mono
    Storage
    Storage types SD/SDHC/SDXC
    Connectivity
    USB USB 2.0 (480 Mbit/sec)
    HDMI No
    Microphone port No
    Headphone port No
    Remote control No
    Physical
    Environmentally sealed Yes
    Battery Battery Pack
    Battery description BP-DC8 lithium-ion battery & charger
    Battery Life (CIPA) 450
    Weight (inc. batteries) 635 g (1.40 lb / 22.40 oz)
    Dimensions 140 x 79 x 88 mm (5.51 x 3.11 x 3.46″)
    Other features
    Orientation sensor Yes
    GPS None

    Articles: Digital Photography Review (dpreview.com)

  • Masterpiece Mashup: Genre-Crossing Digital Art Compositions

    [ By Steph in Art & Drawing & Digital. ]

    masterpiece mashup 2

    Diverse artistic disciplines from graphic design to architecture come together, crossing boundaries and merging eras, to bring the likes of Marina Abramovic and Marcel Duchamp together in this series of digital compositions. Italian architecture student Davide Trabucco diagonally bisects square-shaped sections of classic paintings, film stills, ad campaigns and photos of buildings and installations, putting them together in unexpected ways.

    masterpiece mashup 9

    masterpiece mashup 11

    masterpiece mashup 4

    The series, entitled Confórmi, has artists, designers and architects stepping into each other’s work, juxtaposing mediums and genres that you’d never imagine seeing in one image. These seemingly disparate masterpieces seamlessly meld together, revealing the basic elements of design that they all have in common, like composition, color, lines, tones and textures.

    masterpiece mashup 3

    masterpiece mashup 5

    masterpiece mashup 6

    masterpiece mashup 12

    The Nike swoosh (designed by Carolyn Davidson in 1971) merges into the rooftop terrace of Curzio Malaparte in Italy. Architect Ludwig Mies Van Der Rohe steps in for the bartender in Manet’s famous 1882 painting of the Folies-Bergéres. Darth Vader’s light saber becomes an illuminated gallery installation by Dan Flavin.

    masterpiece mashup 7

    masterpiece mashup 8

    masterpiece mashup 1

    masterpiece mashup 13

    Says the artist (translated from Italian), “I created this ‘archive’ to manage my ‘heritage’ of knowledge and references in art and architecture. The new images, then are born like this: at the very moment in which a painting, a facade, a sculpture I remember another. The subtitle of the work then, the forms belong to no one, aims to highlight that the artist and his products are independent… most forms are often already present in nature, and only need us to process them and give them new meaning.”

    Share on Facebook


    [ By Steph in Art & Drawing & Digital. ]

    [ WebUrbanist | Archives | Galleries | Privacy | TOS ]


    WebUrbanist

  • Going Pro: We interview Fujifilm execs in Tokyo

    Toru Takahashi, (l) Director, Senior Vice President and General Manager of Fujifilm’s Optical Device & Electronic Imaging Products Divison and Toshihisa Iida, (r) General Manager of the Sales and Marketing Group of Fujifilm’s Optical Device & Electronic Imaging Products Division.

    Both men are pictured at Fujifilm’s Tokyo headquarters at the launch of the X-Pro2 and X70.

    Last week, Fujifilm announced several new products including two major new cameras – the X-Pro2 and X70. DPReview was at the launch event in Tokyo where we made time to sit down with two senior Fujifilm executives – Mr. Toru Takahashi and Toshihisa Iida. As well as the new cameras, we also spoke about Fujifilm’s long-term ambitions, which cameras sell best in which countries and Samsung’s apparent exit from the camera market.

    The following transcript has been edited slightly for clarity.


    The X-Pro2 clearly replaces the X-Pro1 but is it the new flagship? Or does it sit alongside the X-T1?

    Toru Takahashi (TT): We have two flagships. The X-T1 and the X-Pro2. [Even after] the launch of the X-T1 the X-Pro1 still had a function. We have two different kinds of photographers to cater for.

    Can you explain more about these different kinds of photographers as you see them?

    TT: When we started the X-series with the X100 we were aiming at street photographers. And the X-Pro1 and now the X-Pro2 are extensions [of that concept]. The X-T1 is for those photographers who like to photograph sports, nature and wildlife. What they like to shoot is different, so we need to provide for two different kinds of photographers.

    It has been four years since the X-Pro1 was announced – did you always intend to replace it with the X-Pro2?

    TT: Of course. The X-Pro1 was our first mirrorless interchangeable lens camera. We knew it wasn’t perfect. And we’re always pursuing the perfect camera, so we always knew we’d have to improve on the X-Pro1. And now the time has come.

    So why did it take so long?

    TT: It’s not easy to improve this kind of camera! That’s one reason. The biggest element is the processor. The speed [of the X-Pro2] is much faster, in every respect. So that’s one reason it’s taken so long.

    Fujifilm’s X-Pro2 brings several updates compared to the original X-Pro1, including an improved hybrid viewfinder, better autofocus and significantly increased resolution.

    Can you tell me approximately how long it took to create the X-Pro2 from the original design concept?

    Toshihisa Iida (TI): Since we produced the original X-Pro1 we got a lot of feedback from photographers, and we tried to improve it with various firmware upgrades. After receiving all that feedback we started designing [what became] the X-Pro2. Also we asked for feedback on operability. For example, it’s a small change but all the buttons on the back of the X-Pro1 are on the right side of the LCD, not the left side. This research took one year or so, and then we decided ‘OK this will be the right product’. Of course at the same time we were developing the sensor and the processor. So maybe two years, in total.

    Mr. Takahashi – you mentioned in your presentation at the press conference that Fujifilm is not interested in becoming involved in a ‘pointless technical race’. What did you mean by that?

    TT: We think that the most important thing is overall image quality. So for example just increasing [pixel count] won’t make a better picture. We [also] need better high ISO image quality. It’s always a tradeoff, and to find the optimal point is very difficult. That’s the reason we why we picked the APS-C image format. A 35mm full-frame sensor is bigger, but it’s difficult to handle and will make the camera bigger. So we’re trying to pursue the optimal [combination of qualities] for photographers.

    A lot of photographers still regard full-frame as a better format – do you think in the future that Fujifilm will create a full-frame camera?

    TT: First of all, I think you need to understand their thinking. Because of 35mm film, they’re convinced that sensors should be [this format]. But it’s not true. Now, you can shoot detailed images [on the X-Pro2] at ISO 3200. In the film age, the maximum ISO was 400-800. So things are changing, and innovations have occurred but [some photographers’] mentality has not changed. I think we can offer the best picture quality by using the APS-C format.

    TI: If we could create a camera of this [X-T1 / X-Pro2] kind of size with a larger format sensor, that would be good, but the lens is analog technology so a bigger format means a bigger size, and weight.

    Is there anything that Fujifilm will never compromise on?

    TT: As I mentioned before, picture quality. And because we picked the APS-C format, also size and operability.

    Historically I know it has been a little more difficult in America to sell cameras which are smaller. There seems to have been a feeling that bigger cameras are more professional. Is this still true, or is this changing?

    TT: I think that kind of mentality is gone. Remember at the beginning of the home video age, people had huge cameras for shooting their family occasions, but that was ten, twenty years ago. The mentality has changed – even though [Americans] still have big cars!

    TI: I think that the American consumer is very smart. I respect them a lot. Their number one priority I think is actually performance, not size and weight. Asian consumers care more about [smaller] size but for Americans the quality and performance are the priorities. So if big cameras offer much better results, they’ll pick them. But when small camera systems [achieve parity] they’ll start to buy into smaller systems.

    Fujifilm’s X-A2 is a budget X-series model aimed at beginners and compact camera upgraders. Although it has not sold well in the USA, we’re told that thousands are sold every month in Thailand, where they are popular with young female photographers.

    I learned yesterday that the X-A2 is very successful in some countries – specifically Thailand. Can you give me some idea of how your sales differ globally, from country to country?

    TI: At the professional level – so cameras like the X-Pro1, X-T1 and hopefully the X-Pro2 as well – we can sell them across the world. They’re very popular in Japan, Germany and in the USA. But cameras like the X-A2, while they haven’t done as well in the USA, they’re popular in Asian countries.

    Young women are buying these cameras, and the primary reason they like them is for their rendition of skin tones. Mirrorless sales are now double compared to DSLRs [in these countries] and we’ve captured a large market share. The latest market data from Thailand for example shows that Fujifilm is number one in terms of value within the total interchangeable lens system.

    What are the essential ingredients of the Fujifilm X-series?

    TT: Product design is a key point of differentiation. We do this by ourselves. So sensor design, although we don’t make the sensors by ourselves. We design our processors, but of course we do not manufacturer them so we require other companies. But [whether we manufacturer a component or not] we stick to designs that we’ve come up with [in house]. So [the sensor in the X-Pro2] is a good example. This is a 24MP sensor that can produce something like 30-36MP equivalent resolution. Design is our strength I think. And lenses. We have very strong lens design capabilities. Lenses, we have our own technologies, we make lenses by ourselves.

    I was pleased to see that apparently, video quality in the X-Pro2 has been improved. Is this a consequence simply of the higher resolution sensor and a difference in sampling, or has the processing been improved?

    TT: It’s due to processing.

    TI: It’s also due to the sensor readout speed. Because of the copper circuitry the sensor reads out very quickly and the camera’s sensor is powerful enough to process all of this information.

    Previous generations of X-Trans had a lot of moiré – what was the cause of that?

    TT: It was because of the X-Trans filter pattern. They bayer-pattern is very simple, but we chose X-Trans, which is complicated. And I won’t say that video quality was the number two priority, but the number one priority was still imaging. So we needed to focus on movie image quality, and now thanks to the faster sensor and faster processor [in the X-Pro2] even with the complicated filter pattern we’re able to improve the quality of the video a lot.

    In the past you’ve primarily focused on the needs of stills photographers – are you moving into trying to appeal to video shooters too?

    TI: Also we have a lot of customers who use Fujinon cine lenses and they’ve made specific requests for these lenses to be useful on our X-series cameras. They want one set of lenses for everything. So we’re listening to feedback from these customers and from our X photographers.

    TT: And as you know, still imaging and video are merging anyway…

    In your opinion, what is the perfect sensor resolution for all purposes?

    TT: We should separate commercial photographers [in this discussion]. I think we can satisfy [most] photographers with the APS-C format, but commercial photography is different. Excluding commercial usage I think 24MP is good enough and more than this I think would require a larger sensor format than APS-C.

    TI: The megapixel race means much less in [cameras like the X-series]. Output quality is everything. So at the moment we think that 24MP is maybe not the maximum resolution, but certainly the best. Considering lens resolution, it is the best resolution for APS-C. If we increased to 28 or 30MP there would be more disadvantages than advantages. Of course technology changes and I can’t predict the future, but at the moment 24MP is the best.

    The only manufacturer to go above 24MP in the APS-C format is Samsung, which has recently apparently retreated from the mirrorless camera market. How do you react to that?

    TT: I am not surprised. I think that their cameras are mechanically good, but something is missing. Heart, or emotion. That’s just my personal opinion.

    TI: Samsung’s processing engines are so powerful, as in the NX1. But a camera is more than just a processor. It’s a lens, sensor, processor, ergonomics and operability and also [customer] service and everything.

    The slimline X70 boasts a 16MP APS-C sensor and a fixed 28mm equivalent F2.8 lens.

    A lot of the X70’s features are taken from the X100T. Do you anticipate the customer base being different for the X70 versus the X100T?

    TT: I like both cameras very much. But for me, the X70 is the perfect camera to carry around, and if someone asked me to pick up either camera I’d pick up the X70. It’s more flexible for picture-taking. It is 28mm, and [although] F2.8 is a little dark, it is bright enough. For me, 28mm [is perfect] and it’s smaller than the X100T. Someone who already owns an X100 might buy an X70.

    TI: I had a discussion with one photographer who specifically said that he was going to buy the X70 in addition to his X100T. Two cameras, both small cameras, one with a 35mm lens and one with a 28mm. More flexibility.

    TT: This is just my personal opinion but 24mm would be even better, but we couldn’t make [the X70] this size if it had a 24mm lens.

    Something we’re interested in at DPReview is the emergence of virtual reality imaging. Is this something Fujfilm is looking into?

    TT: For the moment we want to work on the basics. Products like GoPro are popular, but the cameras are nothing special. We like to provide our customers with something special and unique so for now, that area is not an are we’re [interested in] pursuing.

    What kind of company will Fujifilm’s camera division be in five years’ time?

    TT: We’d like to be at least in the top three companies in the camera business by market share.

    And how will you achieve that?

    TT: As you know, mirrorless cameras have many advantages over DSLRs. That is a fundamental fact. So we pursue this approach, while the other two manufacturers [Canon and Nikon] stay with DSLR. But I don’t think they will stay there forever!

    So you think that Canon and Nikon will be forced to move into mirrorless?

    TT: They will. For sure. But the question is just how soon.

    And the other company of course is Sony…

    TT: Sony has a big advantage, they make their own sensors. That is a very big advantage for them, but they are weak in lenses.

    TI: And they are weakened by having so many formats. APS-C, full-frame, [across both] DSLR and mirrorless. So their lens division must be under a lot of pressure!

    Where are the remaining gaps in the X-series lens lineup?

    TT: Customers are requesting more compact lenses. Our 35mm F2 is one example. So we may need to supplement this lens [with others of this kind].

    TI: And also photographers are challenging us to make more telephoto primes. And astrophotographers want fisheyes, and also [we have requests] for tilting lenses. So although the volume [of those products] might not be as big, photographers are asking us.

    Fujifilm’s new 100-400mm telezoom, pictured under assembly in Fujifilm’s factory in Sendai, northern Japan.

    We talk a lot about digital imaging, but Instax is still very popular. Why is that, in your opinion?

    TT: Instax is being used by the younger generation. They have never seen prints! So a print popping out the side of a camera is a [novelty] for them. And physical pictures. Exchanging pictures has become a new mode of communication.

    Do you think film in general will have a resurgence?

    TT: No, I don’t think so. The infrastructure [is no longer in place]. We have to continue to supply film and maintain our labs for another 10-20 years, maybe but I don’t think we can change the [downward] trend.

    You mentioned in your presentation that demand for film peaked in 2000. Can you give me a current idea of how that compares to demand today?

    TT: We sell less than 1% of that amount now. Across all formats. But we have to supply film to photo enthusiasts. They demand it of us, so we do.


    Editor’s note: Barnaby Britton

    I’ve spoken to Mr. Iida many times over the past few years, both in interviews and privately. As always, he was candid and thoughtful when I spoke to him in Tokyo most recently. I have not met Mr. Takahashi before, but he impressed me with his candor, humor and obvious enthusiasm for photography. A keen amateur photographer before taking on his current role, Mr. Takahashi is very obviously someone with a clear idea of what makes Fujifilm unique, and a vision for how the company will develop in the future.

    It was clear during our conversation that both Mr. Iida and Mr. Takahashi are proud of and pleased with the X-Pro2, and for good reason. As the successor to the original X-series interchangeable lens model it is perhaps the purest expression yet of the original concept behind the system. Fujifilm has yet to convince us that it can truly cater to the modern sports or wildlife photographer (the X-T1 is certainly no slouch but its autofocus system cannot compete with the likes of Nikon’s 3D tracking and as Fujifilm admits, the X-series lacks much in the way of serious long glass) but the X-Pro2 is an easier camera to get right and its appeal is obvious. It’s not too big, it’s not too small, its viewfinder is excellent and let’s be honest – it looks great. In short, it has precisely the same appeal as the original X-Pro1 and X100 but improves upon those models with significantly more resolution, better ergonomics (I love the AF joystick) and – after the passage of four years – a much more mature lens lineup.

    And of course, better video. Although we haven’t yet tested the X-Pro2’s video mode in any depth, it certainly seems that the worst of the issues that afflicted previous X-Trans models are gone. Fujifilm’s focus is still primarily on stills shooters but we’re optimistic that the X-Pro2 is at least usable for video, if not entirely optimized for it. I get the feeling that the poor quality video of previous models in the X-series was something of an embarrassment for Fujifilm and it’s good to see the company making an effort to improve this feature. Part of the reason for this improvement is processing, and part of it might also be the increased resolution of the new sensor and a change in how the data is sampled to create a video signal. Regardless, both the new sensor and upgraded processor are good news for stills photographers, too. With significantly more resolution than the previous generation this new 24MP sensor is a big step up for the X-series and our first impressions of image quality are very positive.

    I agree with Mr. Iida when he says that for now, pixel counts much beyond 24MP are of limited usefulness on APS-C format sensors, and I very much doubt that Fujifilm will ever create a full-frame camera built around the 35mm film format. However, I would not rule out a move into medium format. Fujifilm has a long history of creating cameras and lenses built around medium format film (and, it is rumored, also around medium format sensors) and with the X-series reaching maturity, I would not be at all surprised if Fujifilm unveiled a new medium format digital system at some point. And don’t forget: 2016 is a Photokina year…

    Speculation aside, it is interesting to note that it was me, not Mr. Iida nor Mr. Takahashi that brought up Sony. Mr. Takahashi told me that he wanted Fujifilm to be in the top three camera manufacturers, but it was obvious that he was imagining Canon and Nikon to be the other two brands in that trio. Perhaps he was thinking in terms of competition in the APS-C space (representatives from more than one manufacturer have suggested to me privately that they doubt whether Sony is serious about sub full-frame formats in the long term) or maybe – to Mr. Iida’s point – he thinks that Sony will flounder as a consequence of supporting too many systems.

    My personal opinion is that Sony will be fine, and will continue to concentrate on the full-frame space alongside Canon and Nikon, but that Fujifilm will side-step them all by focusing on APS-C and (in the longer term) medium format platforms. What do you think? Let us know in the comments.

    Articles: Digital Photography Review (dpreview.com)

  • Sony offers free inspection and service for RX1R II ‘light leak’ issue

    Sony has posted an advisory on its support website for owners of the Cyber-shot DSC-RX1R II regarding reported ‘light leak’ issues. Those who have experienced photos with ‘unwanted light’ can send the camera to Sony for free inspection and repair if needed.

    Only a certain set of cameras are affected, with serial numbers falling between 6310198 and 6311127. If that’s you, Sony can be contacted at 1-239-245-6360 in the US. The company says that this inspection service will be offered through the end of March 2018.

    Articles: Digital Photography Review (dpreview.com)

  • The Droids You’re Looking For? 10 Amazing DARPA Robots

    [ By Steph in Conceptual & Futuristic & Technology. ]

    darpa cheetah gif

    No need to get too concerned about a robot uprising just yet, if the finalists at last year’s DARPA Robotics Challenge are any indication, but that doesn’t mean the field hasn’t made some impressive advances. Typically developed by Boston Dynamics with funding from the US Defense Advanced Research Projects Agency, most recent robotic creations were created to someday take the place of humans in dangerous scenarios like disaster response and war. We may still be a long way away from robot soldiers (which are, frankly, kind of terrifying), but DARPA and the teams that participated in the challenge have still produced some impressive results.

    Challenger: DRC-Hubo
    darpa hubo 3

    darpa hubo 2

    darpa hubo 1

    darpa tasks

    Held from 2012 to 2015, the DARPA Robotics Challenge was a bit underwhelming for robot fans, resulting in more funny GIFs of robots falling than amazing feats of robotic technological prowess. The entrants used the tall and gangly ‘ATLAS’ humanoid robot technology developed by Boston Dynamics as a base, and then made their own improvements. The goal was to develop semiautonomous ground robots that can complete “complex tasks in dangerous, degraded, human-engineered environments.” South Korea’s Team KAIST won with its DRC-HUBO, beating 23 other teams from around the world. The robots were tasked with opening doors, operating valves, driving cars and climbing flights of stairs. By the final challenge, where the robots had to take more risks, there was a lot more toppling, including one that fell so hard it lost its head.

    Challenger: Running Man
    darpa running man

    darpa running man 2

    darpa running man 3

    Crowd favorite Running Man, by Team IHMC, was particularly adept at walking and balancing “in a complete whole-body control algorithm,’ hence its name. This guy took the lead early on and was only edged out by DRC-Hubo during the final challenge. Running Man successfully drove a Polaris off-road vehicle all the way down a dirt track, got out, walked to a door and opened it before successfully completing several more drills, but then fell and couldn’t right itself twice in a row. While the bots were being remotely controlled by their human operators for part of the time, they generally had to figure things out on their own.

    Challenger: Tartan Rescue CHIMP
    darpa tartan 1

    darpa tartan 2

    darpa tartan 4

    Looking significantly less humanoid than the other challengers, Carnegie Mellon’s CHIMP dominated the challenges early in the competition, completing all eight tasks and picking itself up after falling. Designed to go virtually anywhere, the all-terrain bot moves on all four of its limbs, which is pretty cool to watch when it’s scaling vertical surfaces on ladders or working itself up to a full run. None of these robots move at lightning speed (one DARPA official likened the pace of observing the competition to watching a round of golf) but they’re doing some pretty cool things nonetheless.

    Challenger: LEO
    darpa trooper gif

    Lockheed Martin’s Team Trooper produced the ‘Leo’ robot, named for Leonardo da Vinci. This bot stumbled when it started to close an open valve but then stopped midway through, requiring human intervention. Lockheed focused on the ability for a human operator to assist Leo at varying levels of autonomy, from sending commands to pick up tools to planning arm and finger trajectories manually if the robot was required to use an entirely new type of tool. It’s easy to see how this ability could translate into real life, helping robots carry out life-saving tasks like shutting valves at a malfunctioning nuclear power plant.

    Next Page – Click Below to Read More:
    The Droids Youre Looking For 10 Amazing Darpa Robots

    Share on Facebook


    [ By Steph in Conceptual & Futuristic & Technology. ]

    [ WebUrbanist | Archives | Galleries | Privacy | TOS ]


    WebUrbanist