Blog

  • World’s First Floating Underwater Tunnels to Span Fjords in Norway

    [ By WebUrbanist in Architecture & Cities & Urbanism. ]

    subsurface bridge

    Norway is working to create the world’s first “submerged floating bridges,” suspended from surface pontoons and engineered to span its vast network of wide and deep fjords. A system of truss-framed tubes hung 100 feet below the surface will be wide enough for two traffic lanes. They will also be easier, faster and cheaper to construct than underground tunnels or over-water bridges, at least in the complex sites for which they are being planned.

    underwater bridge norway

    Norway already has over a 1,000 traffic tunnels (including a few dozen subsurface ones), but anchoring these to the ground in deep fjords is impractical. Also, long spans mean more complex engineering (and higher costs) for surface bridges. The nation currently relies heavily on a system of less-efficient ferry routes that can be unpredictable and impacted by weather.

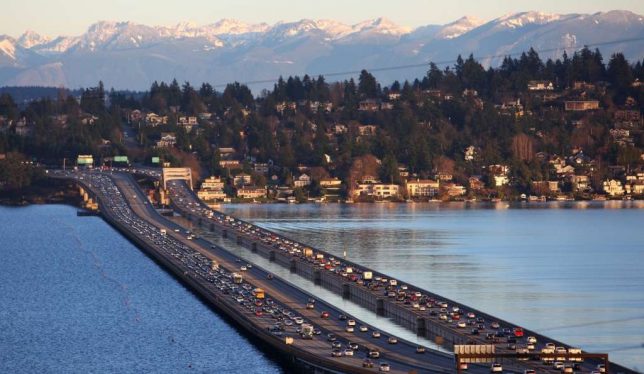
    floating bridge seattle

    Floating bridges on the surfaces of water bodies are common in places like Seattle, where a combination of length and depth makes traditional bridges more difficult and less cost-effective. Essentially, underwater tunnel bridges would work the same way, except the pontoon supports will reside above rather than below the roadways.

    nautical underwater first bridge

    Underwater bridges also have advantages for nautical traffic, allowing ships to pass over them and between surface buoys. Normal bridges (unless they can be raised and lowered) create long-term height caps for the kinds of sea vessels that can pass below them.

    So far, the country has committed $ 25 billion to pursuing this project, stating with an analysis of wind and waves to determine how best to stabilize this new type of subsurface bridge. Initial plans call for a first tunnel to span the 4,300-feet deep, 3,300-feet wide Sognefjord.

    Share on Facebook


    [ By WebUrbanist in Architecture & Cities & Urbanism. ]

    [ WebUrbanist | Archives | Galleries | Privacy | TOS ]


    WebUrbanist

  • Using Lightroom’s Transform and Crop Tools to Improve Composition

    Everybody loves to get it right in camera. But if you don’t, you have plenty of tools to help you make it right. Lightroom is one of the best available, and the easiest to use. In this article I’ll show you how you can use Lightroom’s Transform and Crop Tools to improve your composition.

    The Transform Tab

    First, let’s talk about the Transform tab, in the Develop module. Transform is relatively new to Lightroom. It’s an improved version, split-off of the Lens Correction tab. Essentially, Transform helps you straighten crooked or skewed images.
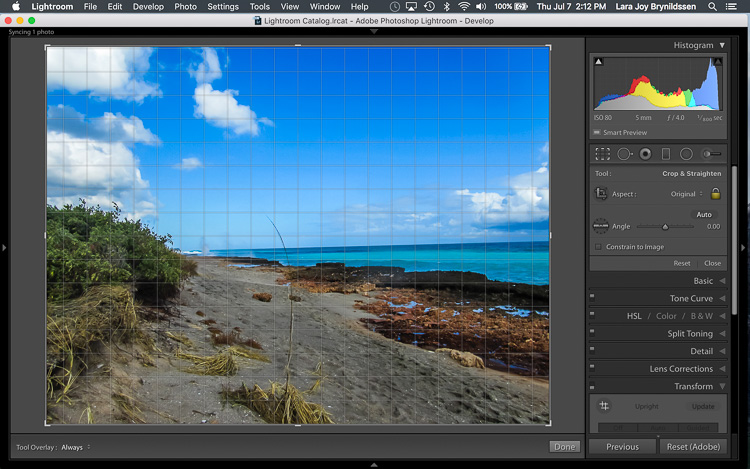
    IMAGE 1

    Here, in the first example above – a lovely seascape – there is a crooked horizon. Before opening the Transform tab, press the R key to activate the Crop Tool. Now press the O key (letter not number) to toggle the Grid overlay. With the Crop Tool still activated, click on the Transform tab in Lightroom and choose Level.
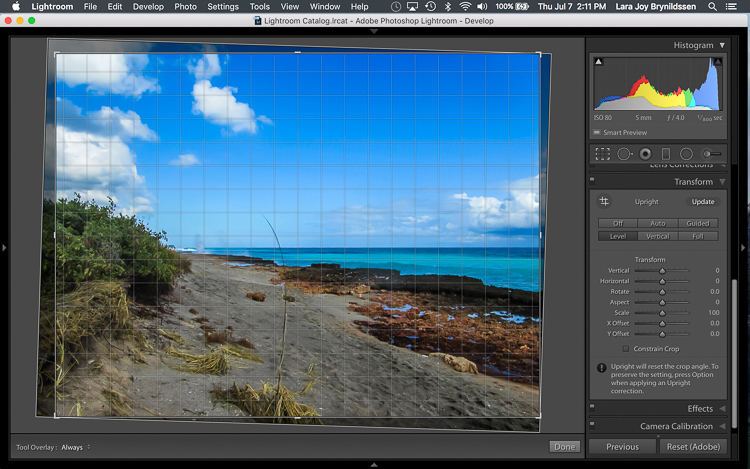
    IMAGE 2

    The Level option is perfect for images like this, when there are no strong vertical lines that need correction. It simply straightens the horizon so it no longer slopes crookedly. With the Grid overlay turned on, it’s easy to verify that the horizon is now straight. Here’s the image after the crop is applied.

    IMAGE 3

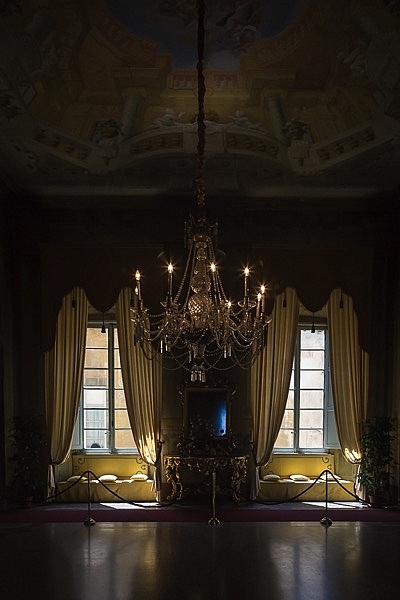
    In this next example (below) – an interior image of an old Italian mansion – the windows are falling over backwards.
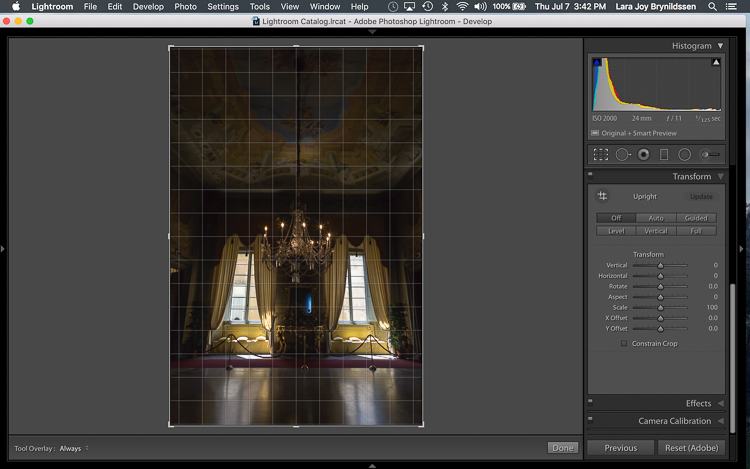
    IMAGE 4

    Here the Vertical option in the Transform tab does a great job of straightening the perspective. The windows align perfectly with the horizontal and vertical lines of the Grid overlay.
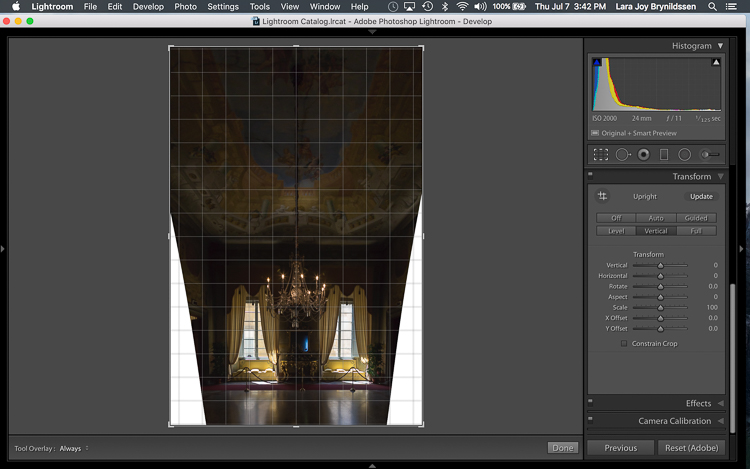
    IMAGE 5

    But as you can see, straightening the image has created a few problems. The image was so crooked (perspective distortion) that now there is a lot of white space to crop out. The good news is that when fixing these issues, composition can be improved too.

    Composing with the Crop Tool in Lightroom

    The white space can be eliminated, and the composition strengthened, by creatively using the Crop Tool in Lightroom. The next step is to adjust the composition with the Crop Tool by moving it around the image.
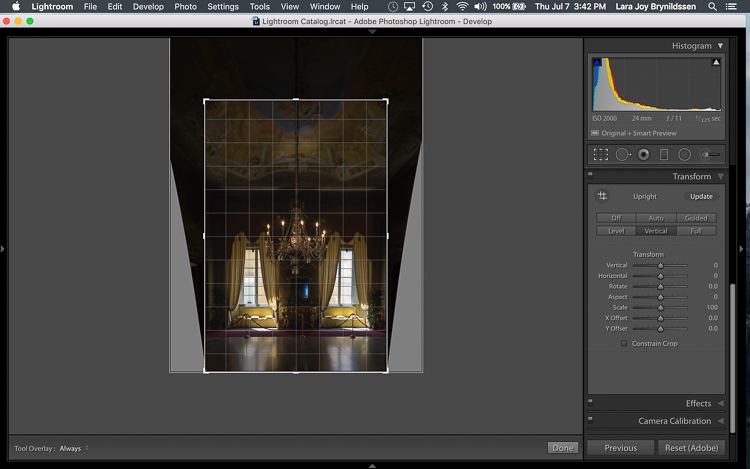
    IMAGE 6

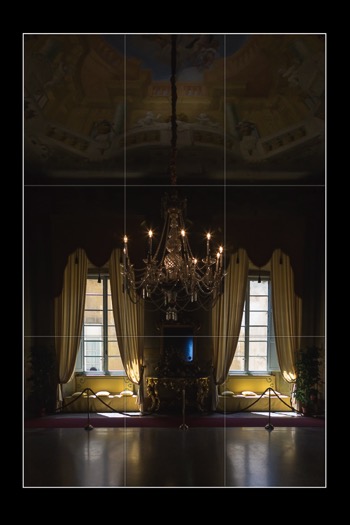
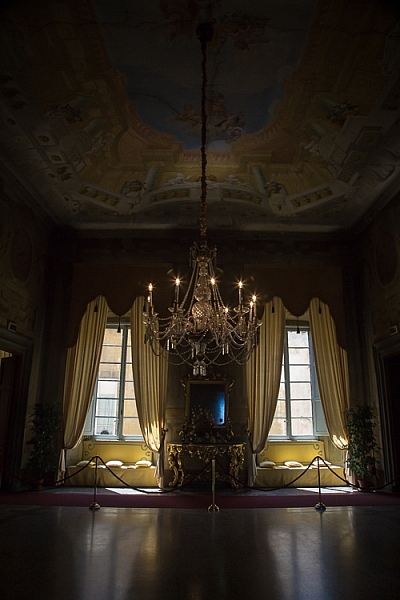
    In this image, to eliminate all of the white space and direct the viewer’s focus to the chandelier and windows, grab the Crop Tool at the top centre point, and draw down. This eliminates both the unnecessary ceiling, and the white spaces on either side of the image.

    Now that the image is starting to look better, scroll through the Crop Tool overlays and review the newly cropped image to see which ones work. By reviewing your images with different Crop Tool overlays, you can strengthen your intuitive sense of strong composition.

    To review each of the overlays, press the O (oh not zero)) key. You’ll toggle through the following:

    • Rule of Thirds (below left)
    • Diagonal (below right)
    • Golden Triangle
    • Golden Ratio (similar to the Rule of Thirds overlay)
    • Golden Spiral
    • Aspect Ratios
    • Grid
    IMAGE 7 IMAGE 8

    In the example images above, both the Rule of Thirds and the Diagonal overlays clearly show that the composition is strong.
    Before

    Before

    IMAGE-9.jpg

    Final image.


    Here’s the final image (before correction is above left, after is on the right). Now let’s take a quick peek at one more image, and one more feature in Lightroom.

    Flipping the Golden Spiral and Golden Triangle Overlays

    You’ve probably toggled through the overlays and disregarded both the Golden Triangle and the Golden Spiral because they just never work. Unlike most of the overlays, neither the Golden Spiral nor the Golden Triangle is symmetrical. That means that you need to flip the overlays around a few times to find the orientation that aligns with your image. By pressing the Shift key and the O key at the same time, you can change the orientation of both the Golden Spiral and the Golden Triangle. Changing the orientation makes those overlays a lot more useful.

    Here, in this image of a wild stallion (below), before flipping the Golden Triangle orientation, this overlay doesn’t work at all. Looking at it you might question whether or not the image had a strong enough composition to start with.
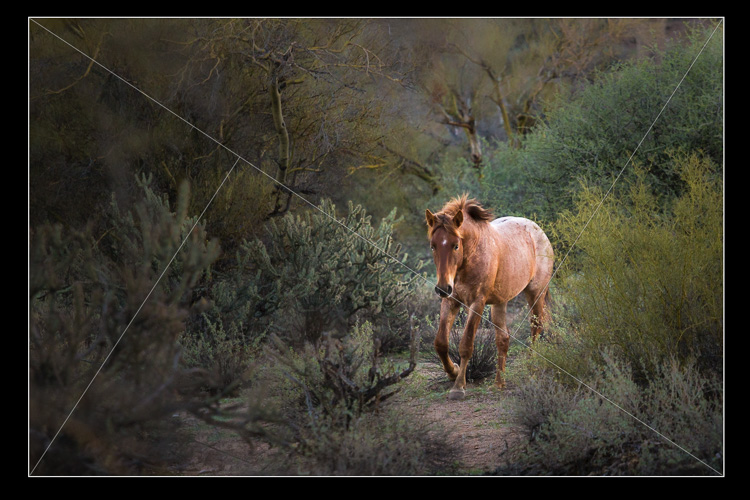
    IMAGE 11

    By pressing Shift plus the O key, and flipping the overlay orientation, the stallion fits neatly into his own triangle. His legs and nose are also no longer bisected by one of the diagonals. In addition, he’s positioned towards the back of the triangle. The top diagonal edge of the triangle that contains the stallion shows us that he is moving forward into the composition, towards the viewer, which is naturally pleasing to the eye. The other triangles neatly organize the foliage surrounding the stallion. Even the beam of sunlight highlighting the stallion falls within the main triangle, further confirming that this image is well composed.
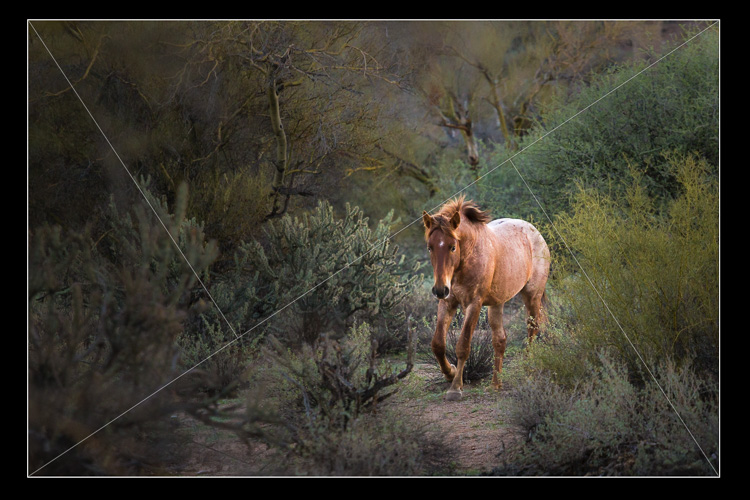
    IMAGE 12

    With a little practice, some judicious use of the Transform tab and Crop Tool, you’ll master composition in no time. How do you use these tools to help you? Please share in the comments below.

    googletag.cmd.push(function() {
    tablet_slots.push( googletag.defineSlot( “/1005424/_dPSv4_tab-all-article-bottom_(300×250)”, [300, 250], “pb-ad-78623” ).addService( googletag.pubads() ) ); } );

    googletag.cmd.push(function() {
    mobile_slots.push( googletag.defineSlot( “/1005424/_dPSv4_mob-all-article-bottom_(300×250)”, [300, 250], “pb-ad-78158” ).addService( googletag.pubads() ) ); } );

    The post Using Lightroom’s Transform and Crop Tools to Improve Composition by Lara Joy Brynildssen appeared first on Digital Photography School.


    Digital Photography School

  • 8 creative tips for shooting waterfalls

    8 Tips For Shooting Waterfalls

    Photographing waterfalls can be a tricky endeavor – especially when shooting in conditions where the light can change drastically depending upon the weather conditions. If you’ve ever struggled to get the waterfall shot you envisioned, you’ve come to the right place. This article will cover everything from basic tips to more advanced techniques to make shooting waterfalls a breeze.

    Choose the Right Gear for the Job

    The most important piece of gear that you will need beyond a camera and lens is a sturdy tripod. This is an absolute must when shooting longer exposures. Here’s a list of a few more important pieces of gear that will come in handy in the field:

    • Tripod: Any time you’re shooting long exposures a tripod is a must
    • Selection of lenses: I generally try to cover a focal range of 16mm to 300mm to give myself a number of options in the field
    • ND filter: I typically don’t use ND filters as I generally shoot fairly short exposures, but they can come in handy depending upon the lighting conditions and the type of water texture you hope to achieve
    • CPL: I always use a circular polarizer when shooting waterfalls as it can really help give the vegetation more ‘pop’ – the above image is an example of where a CPL can make big difference in terms of how the foliage appears in your photo and it can also help enhance the appearance of wet rocks and reflections in the water
    • Remote Shutter Release: This isn’t a necessity but it certainly can make shooting waterfalls a bit easier
    • Rocket Air Blaster and Lens Cleaning Cloths: Let’s face it; you’re going to get wet. Using these two products, plus a waterproof housing (or zip lock baggies) can help to keep your lens and camera dry while shooting
    • Bag of Rice: You never know when disaster may strike, so I always bring a large bag or canister of rice with me in the event that my camera decides to take a dip  

    Shoot in Diffused Light

    If you’ve ever tried to shoot a waterfall in direct sunlight then you’ll know how difficult it can be. Shooting with an ND filter can help to resolve some of these issues but shooting in diffused light is the best solution to the problem. When planning a waterfall shooting trip I always take a look at the weather forecast and check sunrise/sunset times before heading out to a location.

    In general, I’ve found that shooting during the hours just after sunrise offers the best results as morning light can provide some impressive shooting conditions. The image you see here was shot about 3 hours after sunrise at Metlako Falls in the Columbia River Gorge, OR.

    Choose the Shutter Speed

    It seems like it was only a few years ago that using extremely slow shutter speeds while shooting waterfalls was all the rage, but lately I find myself using shorter shutter speeds to really capture the texture in the water. The rate at which the water is falling dictates how quick or slow of a shutter speed you will need to use when shooting in lower light conditions. To give you an idea, the above image (Panther Creek Falls, WA) was shot at a shutter speed of 1/4 second to freeze the water and capture some of the texture as it cascaded down the rock face.

    Choosing a longer shutter speed will soften up the water a great deal and in some cases that’s just what the scene calls for. It really all comes down to personal taste. Experiment with the shutter speed while you’re out in the field – the more options you have the better!

    Save the Foliage

    If you’ve ever shot a waterfall on a breezy day you know that it’s nearly impossible to utilize slower shutter speeds while simultaneously ‘freezing’ the foliage in the frame. You almost always see motion blur in the vegetation surrounding the waterfall.

    To solve this problem I always take at least two exposures: one for the waterfall at your favorite shutter speed to obtain the right amount of water texture, and an additional exposure taken at a much faster shutter speed to freeze the foliage in place. In the above example I blended two exposures together to get sharp foliage along with the amount of water movement I was trying to achieve with the longer exposure.

    Choose Your Composition Carefully

    Choosing a strong composition can be challenging when shooting waterfalls. Here are a few of the key guidelines that I follow when shooting images like the one you see above:

    • Find a leading line or an ‘S’ to work with in your composition
    • Let the water flow guide you to the focal point
    • Shoot downstream of the waterfall to add depth
    • Utilize rocks and other elements in the scene to guide your eye to the focal point
    • Don’t be afraid to try out several variations – I always shoot at least 3 or 4 compositions at any given location

    Think Outside of the Box

    One of my favorite things to do while shooting waterfalls is to think outside of the box in regards to composition. Taking an abstract approach to shooting a waterfall can lead to some really fun results. Use different focal lengths and experiment with tighter compositions that may only show a small portion of the waterfall.

    I always try to shoot at least a handful of abstract shots while I’m in the field because let’s face it: it’s just plain fun to get the creative juices flowing!

    Adjust Your Exposure

    Getting the exposure right can be a tricky business when shooting waterfalls. When using longer shutter speeds it’s very important to constantly meter your exposure to make sure that you aren’t losing detail in the water by clipping your highlights. Check the histogram to make sure that you are staying to the left or dead center in your exposure. As the light changes you will have to do this quite often so definitely keep an eye on it!

    Provide a Sense of Scale

    Waterfalls come in all shapes and sizes, but it’s often difficult to provide a sense of scale while shooting them. Adding a human element to your photo can really bring a whole new sense of wonder and scale to your image. Special thanks to Max Foster for snapping this photo of me at Spirit Falls, WA.  

    Save

    Articles: Digital Photography Review (dpreview.com)

  • Dazzling images from the Astronomy Photographer of the Year 2016 shortlist

    Astronomy Photographer of the Year 2016 shortlist

    Flash Point © Brad Goldpaint (USA)

    The Perseid Meteor Shower shoots across the sky in the early hours of August 13, 2015, appearing to cascade from Mount Shasta in California, USA. The composite image features roughly 65 meteors captured by the photographer between 12:30am and 4:30am.

    The Royal Museums Greenwich has announced the shortlist for its eighth annual Insight Astronomy Photographer of the Year competition. More than 4500 entries were received from over 80 countries; winners will be announced on September 15, with winning images going into a free exhibition at the Royal Observatory. One overall winner will walk away with £10,000, and runners-up will take home £500 each. 

    Here are just a handful of the more than 130 images that made the shortlist – head to the Royal Museums Greenwich site to learn more about the competition.

    Astronomy Photographer of the Year 2016 shortlist

    Seven Magic Points © Rune Engebø (Norway)

    The rusty red swirls of the circular, iron sculpture Seven Magic Points in Brattebergan, Norway mirror the rippling aurora above.

    Astronomy Photographer of the Year 2016 shortlist

    Frozen Giant © Nicholas Roemmelt (Germany)

    The celestial curve of the Milky Way joins with the light of a stargazer’s headlamp to form a monumental arch over the Cimon della Pella in the heart of the Dolomites mountain range in northeastern Italy.

    Astronomy Photographer of the Year 2016 shortlist

    M8: Lagoon Nebula © Ivan Eder (Hungary)

    New stars are formed in the undulating clouds of M8, also commonly referred to as the Lagoon Nebula, situated some 5,000 light years from our planet.

    Astronomy Photographer of the Year 2016 shortlist

    Parallel Mountains © Sean Goebel (USA)

    The shadow of Manua Kea, the highest peak in the state of Hawaii, is projected by the rising sun over the volcano, Hualalai, whilst the Full Moon soars above them, higher again.

    Astronomy Photographer of the Year 2016 shortlist

    Northern Lights over Jokulsarlon, Iceland © Giles Rocholl (UK)

    A couple takes in the awe-inspiring sight of the Northern Lights streaking across the night sky over the lagoon at Jokulsarlon, Iceland on Valentine’s night of 2016.

    Astronomy Photographer of the Year 2016 shortlist

    Just Missed the Bullseye © Scott Carnie-Bronca (Australia)

    The International Space Station (ISS) appears to pierce a path across the radiant, concentric star trails seemingly spinning over the silhouettes of the trees in Harrogate, South Australia.

    Astronomy Photographer of the Year 2016 shortlist

    Painted Hills © Nicholas Roemmelt (Germany)

    With very little light pollution, the glimmering stars of the Milky Way bathe the colourful layers of the Painted Hills of Oregon in a natural glow.

    Astronomy Photographer of the Year 2016 shortlist

    Antarctic Space Station © Richard Inman (UK)

    A view of the Halley 6 Research Station situated on the Brunt Ice Shelf, Antarctica, which is believed to be the closest thing you can get to living in space without leaving Earth, making it perfect to be used for research by the European Space Agency. As the Sun’s light dissipates into the horizon, the aurora can be seen swirling overhead.

    Articles: Digital Photography Review (dpreview.com)

  • Weekly Photography Challenge – Speed

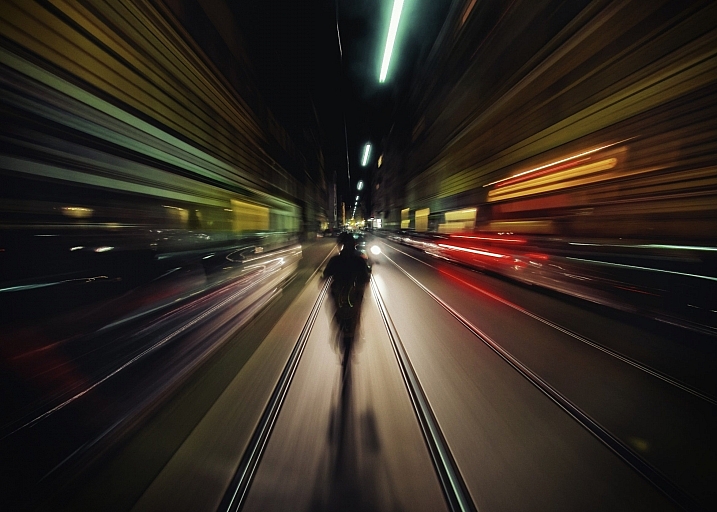
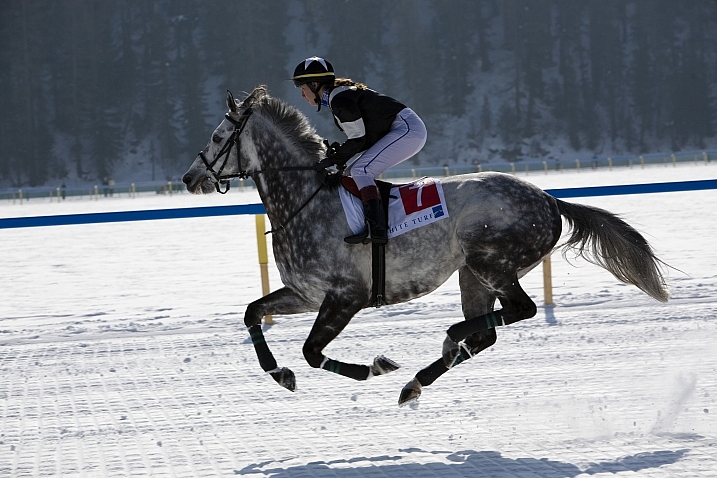
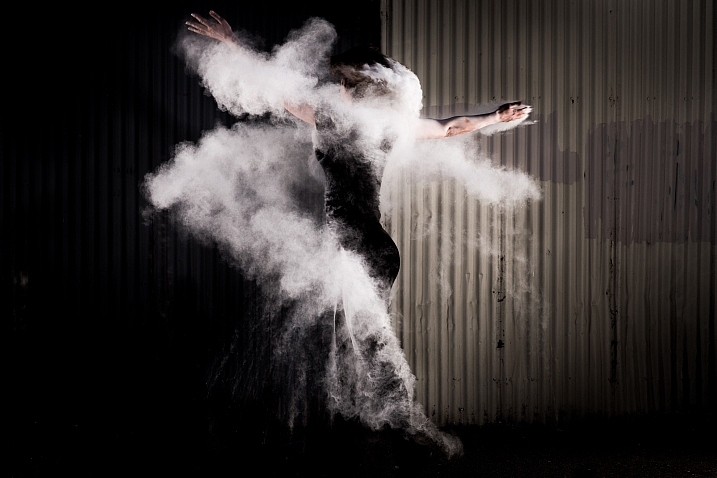
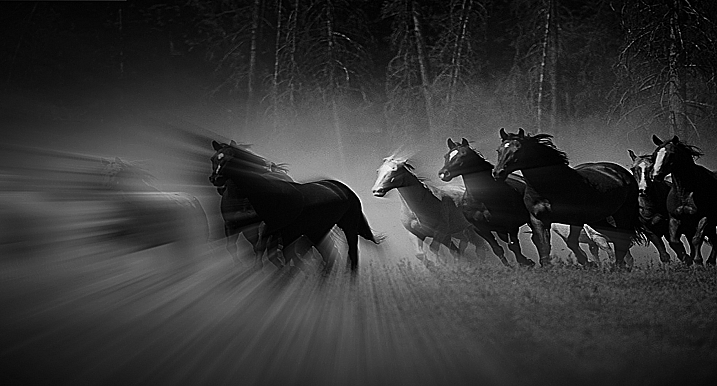
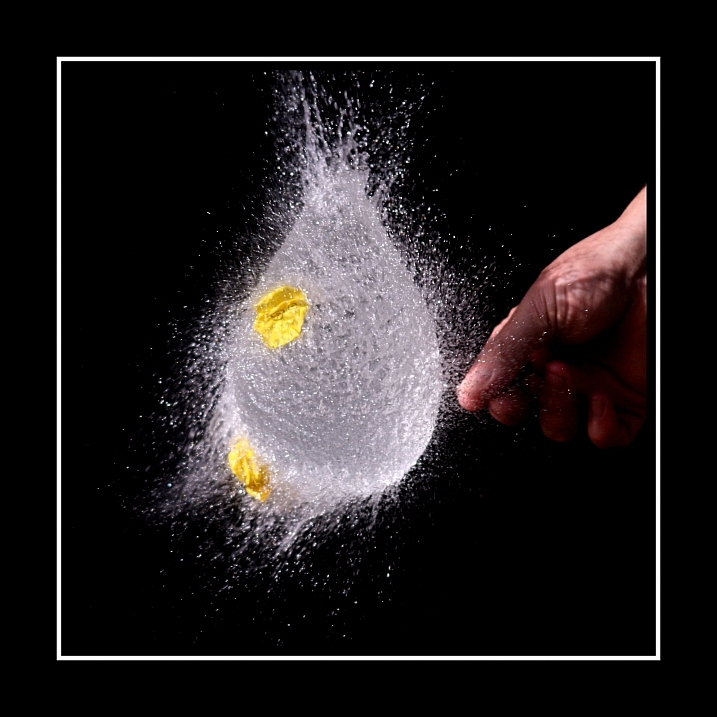
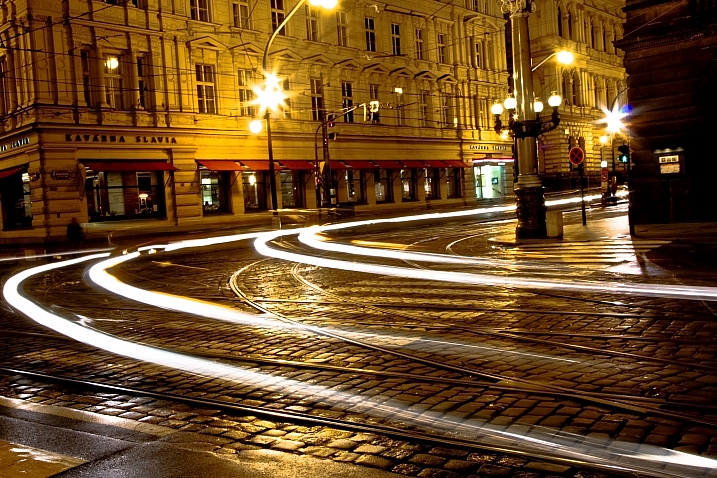
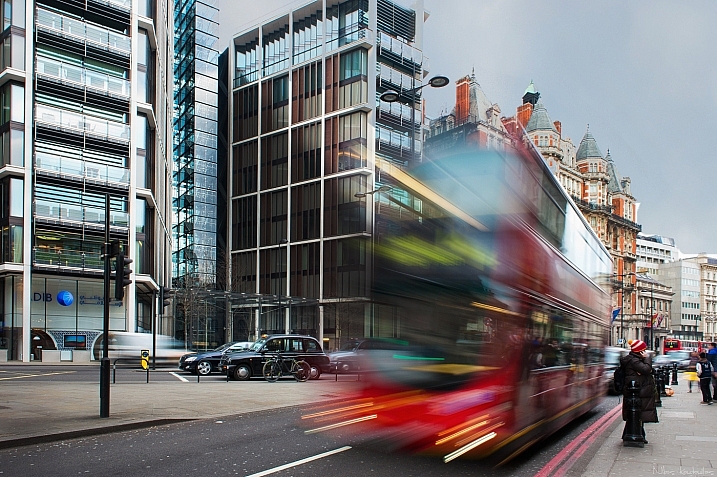
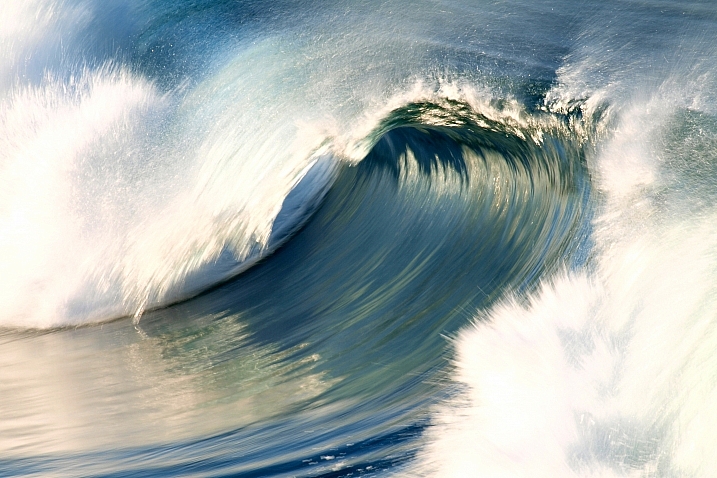
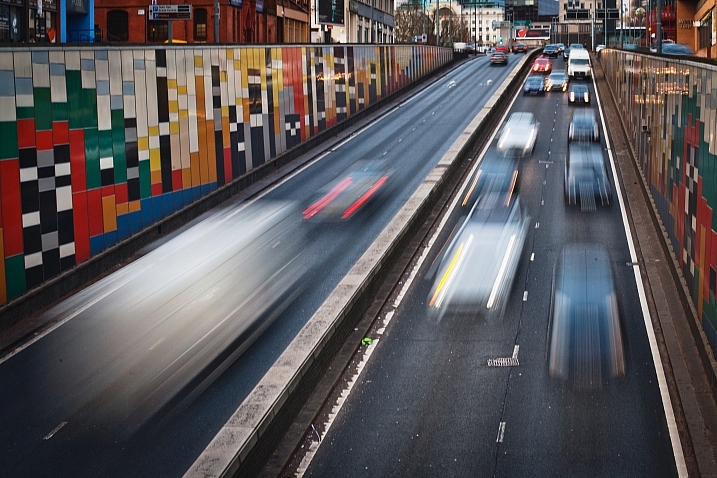
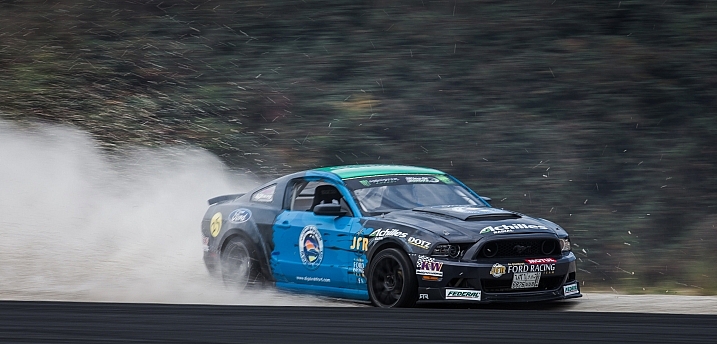
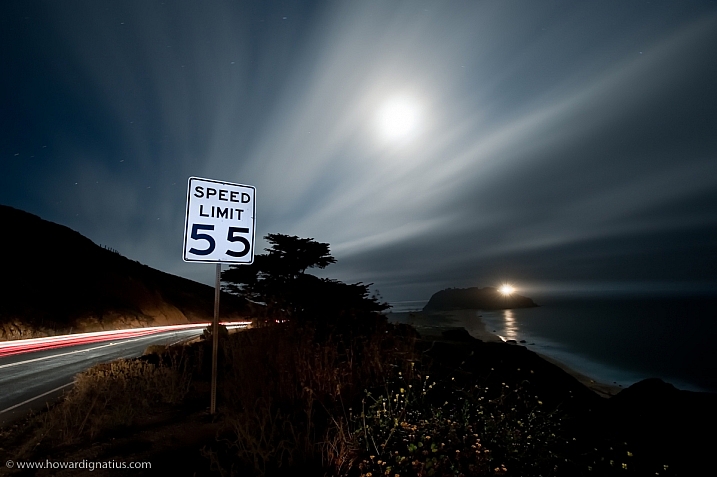
    Earlier I shared a collection of images that show speedy subjects.

    Weekly Photography Challenge – Speed

    Dave Young

    By Dave Young

    Chester Lam

    By Chester Lam

    Your job this week is to find and photograph a subject that is fast. Try and capture speed in whichever way you want – freeze it or blur it. Remember shutter speed controls motion in your image.

    Share your images below:

    Simply upload your shot into the comment field (look for the little camera icon in the Disqus comments section) and they’ll get embedded for us all to see or if you’d prefer upload them to your favourite photo sharing site and leave the link to them. Show me your best images in this week’s challenge. Sometimes it takes a while for an image to appear so be patient and try not to post the same image twice.

    Fred Dawson

    By Fred Dawson

    Nuno Sousa

    By Nuno Sousa

    Moyan Brenn

    By Moyan Brenn

    Derek Raugh

    By derek raugh

    googletag.cmd.push(function() {
    tablet_slots.push( googletag.defineSlot( “/1005424/_dPSv4_tab-all-article-bottom_(300×250)”, [300, 250], “pb-ad-78623” ).addService( googletag.pubads() ) ); } );

    googletag.cmd.push(function() {
    mobile_slots.push( googletag.defineSlot( “/1005424/_dPSv4_mob-all-article-bottom_(300×250)”, [300, 250], “pb-ad-78158” ).addService( googletag.pubads() ) ); } );

    The post Weekly Photography Challenge – Speed by Darlene Hildebrandt appeared first on Digital Photography School.


    Digital Photography School

  • Ricoh releases THETA+ Video app for Android

    Ricoh’s Theta series S 360° cameras come with several accompanying apps. While the Theta S app is used for shooting and reviewing 360° images and video, the Theta+ and Theta+ Video apps were developed for editing images and video respectively. The Theta+ Video app for iPhone was released last year, now Ricoh has launched an Android version as well.

    Like the iPhone variant, Theta+ Video for Android allows you to edit 360° standard and time-lapse videos. Functions include trimming, color adjustment, cropping and the insertion of music tracks. Users can also select from from four types of view formats: Mirror Ball, Little Planet, Equirectangular, and Rectilinear.

    As usual, edited videos can be shared to a range of social networks. On Facebook and YouTube they can be viewed in their full 360° glory while on some other platforms cropping is required. Theta + Video for Android is available as a free download from the Google Play Store now. 

    Articles: Digital Photography Review (dpreview.com)

  • LensRentals details its top ten favorite products from the past decade

    Ten years have passed since our friends at LensRentals first launched as a small business operating out of a garage. The company has seen many changes over those years, both in its own operation and in the spheres of photography and videography, and it has highlighted some of those changes in a new blog post. The LensRentals team has detailed their top ten favorite products from the last decade.

    ‘What we’ve found, is that there is no right piece of gear for everyone,’ they say, ‘and we all have varying tastes and expectations when it comes to gear.’

    The products, which aren’t listed in any particular order, run the gamut from cameras to lenses and a few different accessories. Most notably, Canon products took four of the ten slots, with both the 5D Mark II and 5D Mark III making the list, as well as its EF 400mm F4 DO IS II and 11-24mm F4L lenses. 

    Pentax, Leica, Freefly, Profoto, Sony, and Sigma products fill out the remaining six slots, though as LensRentals notes: ‘the photography and videography industries have changed faster than ever before, so some pieces of gear had to be left out on our list.’ It’s a somewhat long read, but the LensRentals team takes the time to explain why each product earned it place on the list, and it’s well worth giving it a look.

    Articles: Digital Photography Review (dpreview.com)

  • Video explains Kubrick’s use of innovative camera tech when shooting Barry Lyndon

    Legendary director Stanley Kubrick was known to be obsessed with cameras and pushing the limits of cinematic technology, with much of his technical awareness stemming from his days as a stills photographer. A new video essay by the British Film Institute now explains his use of different lenses to create the movie Barry Lyndon, which won an Oscar for its cinematography.

    We’ve written before about the famous Carl Zeiss Planar 50mm F0.7 lens (originally developed for NASA) that he used, but the BFI essay also discusses how he used it. It also looks at his use of zoom shots and the meanings he hoped to convey with them.

    Many scenes in the movie were shot in natural light and very dim candlelight to authentically portray the look and feel of the 18th century. In the very low light conditions Kubrick had to shoot with the superfast F0.7 lens’ aperture fully open, resulting in an extremely shallow depth-of-field. This required re-thinking the way such scenes were staged and demanded reduced actor movement, to avoid mis-focus, but the director felt this helped convey the stilted 18th century atmosphere.

    The video essay can be viewed on the British Film Institute’s Facebook page.

    Articles: Digital Photography Review (dpreview.com)

  • Unfold Your Getaway: Canoe for City Dwellers Packs Down to a Suitcase

    [ By SA Rogers in Design & Products & Packaging. ]

    onak fold up canoe 4

    You can’t exactly fit a canoe through a narrow staircase in an apartment building, let alone take it on the metro, so for many sporty city dwellers, owning one may seem out of reach. Many canoes are so bulky, you can barely find enough space for them in a suburban garage. Playing with an origami canoe made of paper one day, Ghent-based designer Otto Van De Steene wondered whether a similar folding method translated to a sturdy, seaworthy material could help him get out onto the water more often. The result is ‘ONAK,’ a portable canoe that folds down to the size of a suitcase.

    fold up canoe 1

    Working at an outdoor recreation store, Van De Steene had seen plenty of other portable canoe designs that he found lacking. “You have the canoes that have really good performance on the water – they’re fast, but they’re quite heavy and take an hour to assemble. Nothing to do in an evening after work.”

    onak fold up canoe 5

    The Oru folding kayak had recently debuted, offering an intriguing possible solution, but Van De Steene thought its corrugated plastic construction could use an upgrade, and chose a custom-made polypropylene for his own design, explaining that it’s lighter and stiffer, improving the boat’s performance. About ten times as strong as standard polypropylene, the honeycomb-core composite material is also highly durable and fully recyclable.

    onak fold up canoe 2

    onak fold up canoe 3

    “By making hundreds of paper models and fifteen real prototypes, we also refined the design of our patent pending hull. This was a huge challenge due to the limitations of origami. We opted for a narrow and fast canoe design that keeps its momentum very well, while still being delightfully easy and stable to maneuver for beginners.”

    onak fold up canoe 6

    The Onak may not fold down quite as small as Oru, but putting it on wheels makes it easier to haul around. From its compact 47”x15.7”x10” roller case, it expands to 183” long by 33.5” wide, and can carry about 440 pounds. There’s enough room inside for two adults, a child and gear. The process of assembling or packing up the portable canoe takes about ten minutes.

    onak fold up canoe 8

    With just a couple days left on its Kickstarter campaign, the Onak has met its goal, but you can still snag one for significantly less than retail cost if you back the project in time. It’ll sell for about $ 1450 with two paddles once it hits the market.

    Share on Facebook


    [ By SA Rogers in Design & Products & Packaging. ]

    [ WebUrbanist | Archives | Galleries | Privacy | TOS ]


    WebUrbanist

  • 25 Speedy Images That May Leave You in the Dust

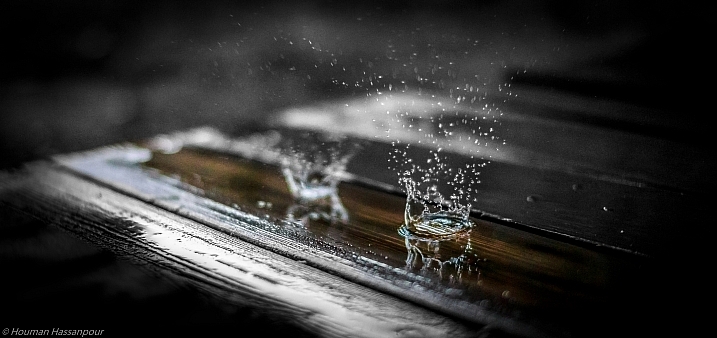
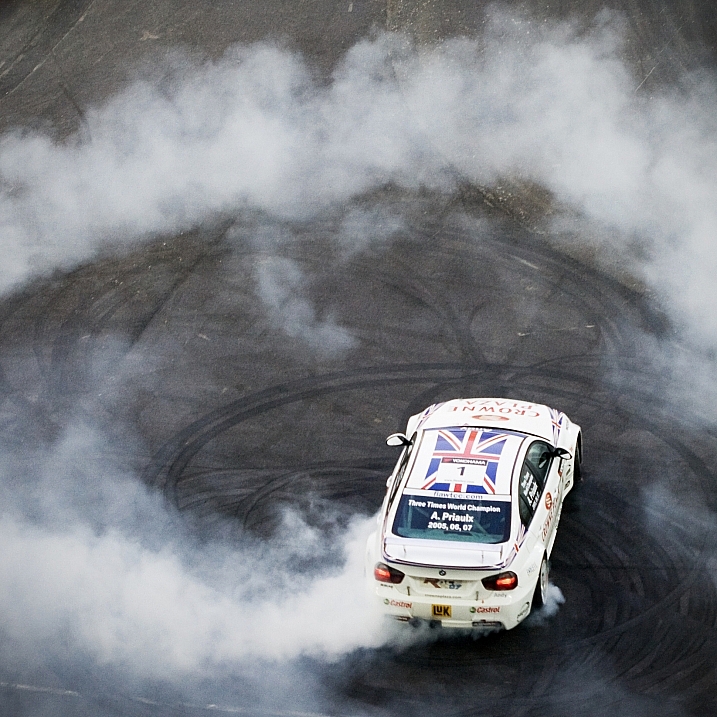
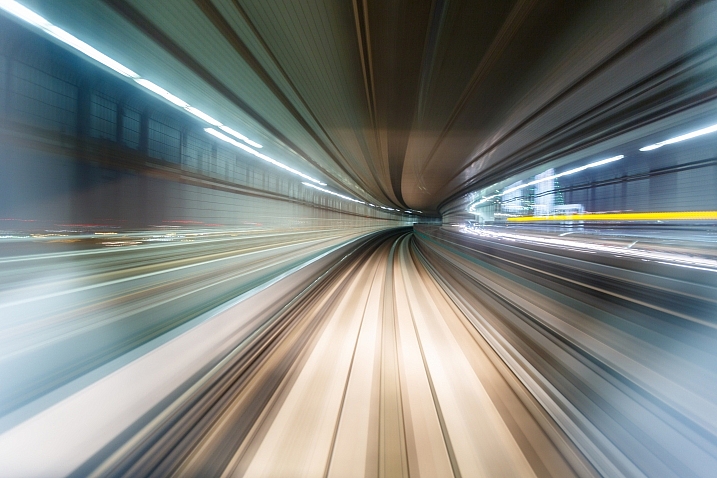
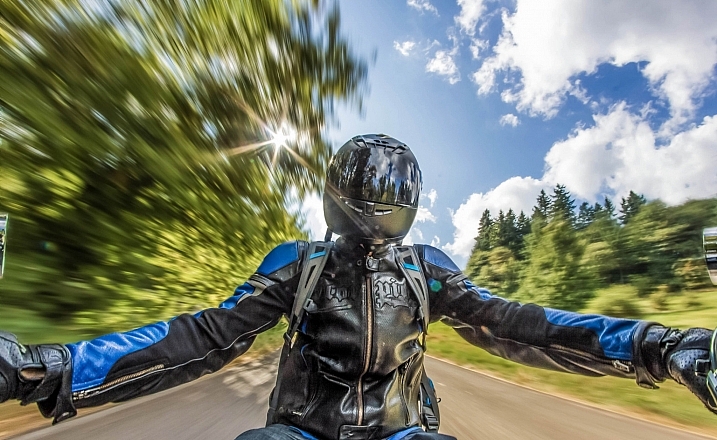
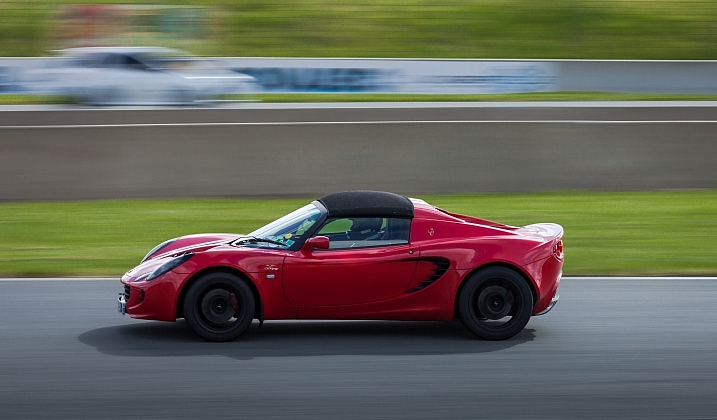
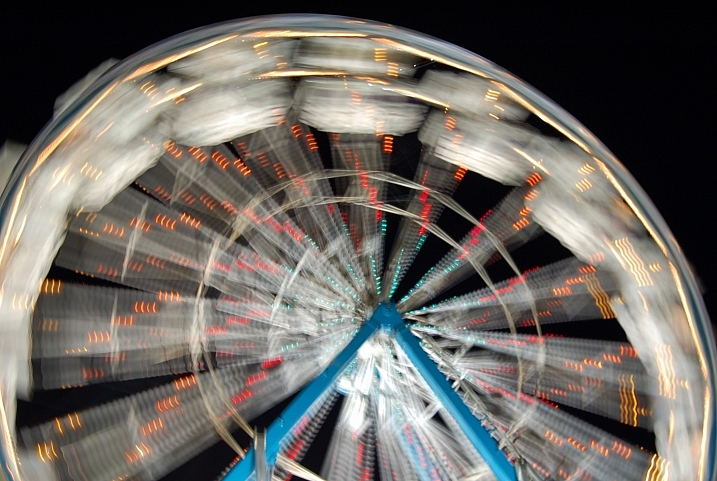
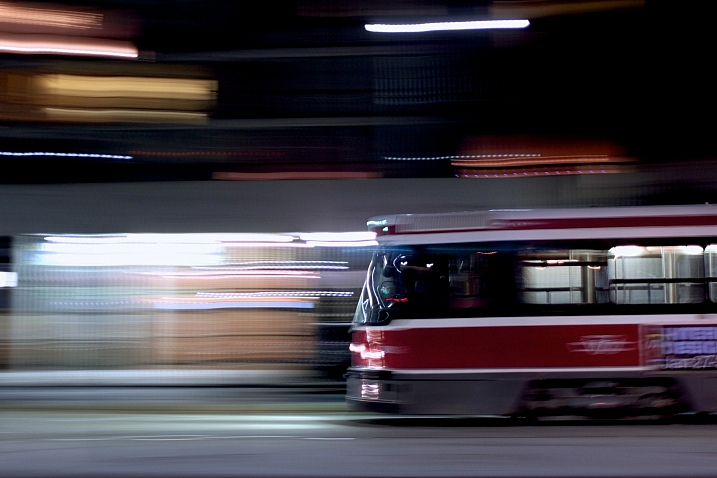
    How you photograph a moving subject really depends on two things:

    1. Your intentions (to blur or freeze it)
    2. The lighting conditions (it may be low light)

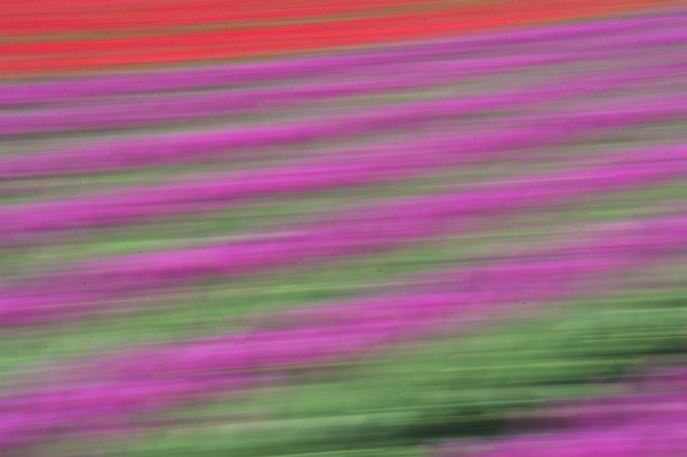
    You could decide to blur the object, adding a sense of motion to your image. Or make a complete abstract.

    Diana Robinson

    By Diana Robinson

    Manfred Majer

    By manfred majer

    Or you could freeze motion using a fast shutter speed.

    René Something Something

    By René something something

    Chris Chabot

    By Chris Chabot

    Here are 21 more images that show speed:

    CLAUDIA DEA

    By CLAUDIA DEA

    Jasper Nance

    By Jasper Nance

    Marc Forrest

    By Marc Forrest

    Pierre Anquet

    By Pierre Anquet

    Elvin

    By Elvin

    Nikos Koutoulas

    By Nikos Koutoulas

    Curtis John

    By Curtis John

    Bryce Bradford

    By Bryce Bradford

    Houman_thebrave

    By houman_thebrave

    E01

    By E01

    Damianos  Chronakis

    By Damianos Chronakis

    Loïc Lagarde

    By Loïc Lagarde

    Sama093

    By sama093

    Lena Vasiljeva

    By Lena Vasiljeva

    SuperCar-RoadTrip.fr

    By SuperCar-RoadTrip.fr

    Howard Ignatius

    By Howard Ignatius

    Renato Carvalho

    By Renato Carvalho

    Photophilde

    By photophilde

    SuperCar-RoadTrip.fr

    By SuperCar-RoadTrip.fr

    Stephanie Wallace

    By Stephanie Wallace

    Greg Heo

    By Greg Heo

    googletag.cmd.push(function() {
    tablet_slots.push( googletag.defineSlot( “/1005424/_dPSv4_tab-all-article-bottom_(300×250)”, [300, 250], “pb-ad-78623” ).addService( googletag.pubads() ) ); } );

    googletag.cmd.push(function() {
    mobile_slots.push( googletag.defineSlot( “/1005424/_dPSv4_mob-all-article-bottom_(300×250)”, [300, 250], “pb-ad-78158” ).addService( googletag.pubads() ) ); } );

    The post 25 Speedy Images That May Leave You in the Dust by Darlene Hildebrandt appeared first on Digital Photography School.


    Digital Photography School