Blog

  • Sony a7R II versus a7 II: Eight key differences

    Sony a7R II versus a7 II: Eight key differences

    Sony’s a7-series marked the debut of full-frame mirrorless, and Sony still dominates this market with its a7S II, a7 II and a7R II. Sony has developed a reputation for rapid development cycles, and since they all look basically the same, it can be hard to figure out the differences between its current a7-series offerings.

    The higher resolution a7R II costs almost twice as much as the a7 II, and in this article we’ll be explaining why. So join us, as we take a detailed look at the major differences between the Sony a7 II and the a7R II.

    Resolution

    The a7R II was the first camera to offer a BSI-CMOS full-frame sensor, when it was released last year. The additional resolution compared to the a7 II makes it possible to print significantly larger images, and of course there’s lots of scope for cropping.


    Like all of the cameras in Sony’s a7-series, the a7 II and a7R II are both built around full-frame CMOS sensors, and the a7 II uses the same 24MP as its predecessor, the first-generation a7. The a7 II’s sensor is perfectly capable, and can deliver excellent image quality, but it’s not a patch on the 42MP sensor in the a7R II.

    The increase in resolution isn’t the only reason we say that. The flagship a7R II features a back side illuminated (BSI) CMOS sensor, which offers significantly greater dynamic range, far better low light performance, and features 399 phase detection autofocus points (more on that later).

    Dynamic range

    The Sony a7R II boasts a significantly higher base ISO dynamic range than the a7 II, and this relationship is maintained until the two camera’s highest ISO settings. Both are superior to Canon’s EOS 5D III. Source: Bill Claff


    The a7 II’s older 24MP sensor lags behind the newer a7R II in terms of dynamic range at all ISO sensitivity settings. At the all-important base ISO (ISO 100 in both cameras) the difference is a little under one stop. The gap closes a touch from ISO 200-400 but widens again thereafter.

    Very few things ignite (or should that be ignorate…?) quite as much argument on DPReview forums and comment sections as dynamic range, but the basic fact is this: greater dynamic range, especially at base ISO, means greater latitude for exposure adjustment in Raw mode. In cameras that offer very good dynamic range, like the a7R II and Nikon D810 (just to take two examples) this effectively negates the requirement for graduated neutral density filters, and greatly expands a photographer’s ability to capture a full tonal range in a single exposure.

    The a7R II is better than the a7 II in this regard, but both are better than full-frame DSLRs in this class (we’ve plotted the EOS 5D III in this graph, from Bill Claff), which are also limited by relatively high levels of noise in shadow areas. This can become problematic when Raw files are manipulated too heavily.

    ISO sensitivity / low light

    Even at ISO 12,800, the a7R II’s Raw files contain bags of detail, and more dynamic range than the a7 II. When normalised at 24MP, the higher-resolution a7R II also offers superior perceptual detail and lower noise levels than the a7 II. As well as image quality, the a7R II scores over the older camera again in terms of low-light AF performance.


    In the good old days, it was generally believed that the more pixels you packed onto a sensor, the noisier the images you’d get out the other end. These days of course we’re much more enlightened, and as we all know, the idea that more pixels = more noise isn’t necessarily true. And everybody is happy now because we all understand that pixel-level noise isn’t the whole story, and the time we used to spend arguing about such things on the Internet we now spend with our families, when we’re not out in the sunshine taking photographs.

    Only some of that last sentence is true, but what is true is that despite having almost twice as many photo-sites as the a7 II, the 42MP a7R II offers superior high ISO image quality. When files are normalized to 24MP and viewed side-by-side, the a7R II offers at least one stop better perceptual image quality in terms of Raw noise levels, and in terms of detail retention it’s more like two stops better than its 24MP cousin.

    Part of the reason for this performance gap is simply the fact that the a7R II’s sensor is a couple of years newer than a7 II’s, and sensor technology (especially at Sony) moves quickly. But fundamentally, the sensor in the a7R II is of a very different design. BSI-CMOS sensors move a lot of per-pixel electronics to the back of the sensors, out of the way, so they’re more efficient when it comes to converting photons into usable signal. As such, the a7R II isn’t just better than the a7 II, it’s better than almost every other full-frame camera we’ve ever tested. Up to around ISO 25,600 it even holds its own (when files are normalized at 20MP) against the Nikon D5.

    Shutter

    Another benefit of BSI-CMOS sensors is the extra room afforded for more sophisticated circuitry – in the case of the a7R II that means faster readout circuitry. This allows the camera to record high frame-rate video (more on this shortly), autofocus faster than any comparable full-frame mirrorless camera (again, more shortly), and also to offer a fully electronic shutter.

    Shutter-induced vibrations plagued our experience of using the original a7R, and have proved a serious headache in several other high-resolution cameras, including the Nikon D800-series. The a7 II and a7R II mitigate these issues with an electronic first-curtain shutter feature, but the a7R II also offers a totally electronic shutter option that comes with an almost negligible penalty in terms of additional noise (a traditional side-effect of electronic shutters).

    We don’t recommend shooting with the fully electronic shutter option all the time, because there is the risk of some rolling-shutter distortion (i.e. if you’re panning to follow a fast-moving subject). But it is extremely handy for situations where you want to be discreet, like a performance space or a wedding ceremony.

    Video

    The a7R II is a 4K-capable camera with a raft of high-end features, intended to appeal to professional videographers just as much as stills shooters. 


    The a7 II is increasingly looking like the odd one out in Sony’s current a7-series lineup, due to its lack of a 4K video capture. Of the two cameras, the a7R II is significantly more capable for shooting video, thanks not only to the addition of 4K, but numerous other features aimed specifically at the needs of professional filmmakers.

    These include an oversampled Super 35mm (~APS-C) crop mode for 4K, internal recording in both HD and 4K modes and the super flat S-Log2 profile, for additional flexibility when it comes to grading footage.

    The quality of the a7R II’s footage blows away the a7 II. Not only can the older camera not record 4K video, but its HD footage is softer and less detailed than the full-frame 1080 output of the a7R II. Interestingly, while the a7R II delivers superior quality 4K footage in its oversampled Super 35mm crop mode (notwithstanding a higher risk of rolling shutter), it gives much more detailed 1080 video when using its entire sensor. But the basic takeaway here is that regardless of the resolution or crop mode, the a7R II delivers better-looking video than the a7 II.

    Autofocus

    When combined with continuous focus, Eye-AF is a great feature for capturing portraits – especially of kids that won’t stay still.


    The a7 II uses the same AF hardware as its predecessor the first-generation a7, but Sony claims that autofocus performance has been improved by around 30%. In our testing we have no reason to dispute this figure, and in everyday use the a7 II’s AF is more than capable of keeping up in most situations.

    The a7 II’s autofocus might be perfectly acceptable, but the a7R II is in another league. Both cameras use a ‘hybrid’ system which combines on-sensor phase-detection pixels with conventional contrast-detection but with more than twice as many phase-detection AF points as the a7 II, and the ability to focus third-party lenses (later added to a more limited extent to the a7 II via firmware) the a7R II’s AF specification impressed us greatly when it was first announced.

    While it can’t keep up with the action as well as the market-leading 3D AF Tracking system found in Nikon’s current DSLRs, the a7R II’s ability to find and track an eye in Eye-AF mode for example is incredibly useful for wide-aperture portraits, and low-light AF reliability with fast lenses is almost a match for the best DSLRs.

    That’s the good news – the bad news is that there’s still no way to position AF point by touch on either camera, and the a7RII and a7 II’s control and menu ergonomics make it annoyingly tricky to find, set and master their extensive autofocus settings.

    Performance

    In terms of autofocus, the a7R II roundly outperforms the a7 II but when it comes to general operational speed it is markedly more sluggish in some ways. Image review especially can be very frustrating, as the a7R II’s huge files (made even larger if you select uncompressed Raw) can take several seconds to become available to review and zoom to check focus after they’ve been shot. When capturing sequences of images, the a7R II gives the kind of buffer-clearing times that we’ve not been used to since the early days of digital DSLRs. And we don’t say that in a nostalgic way.

    The a7 II isn’t exactly a speed champion when it comes to processing speed, but it’s a little more nimble than its 42MP cousin.

    Battery life

    Although both the a7 II and a7R II have relatively poor rated battery life, it is possible to charge the cameras over USB, and you can continue shooting while they’re charging.


    With a CIPA-rated battery life of 350 shots, the a7 II offers greater endurance than the a7R II, which clocks in at a mere 290 shots per charge. But it’s a bit of a stretch to call 60 hypothetical exposures a ‘key difference’ in battery life. Honestly, they’re about in the same ballpark, and both are pretty poor. Both the a7 II and a7R II offer significantly less endurance than equivalently-priced DSLRs at 350 shots and 290 shots per charge, respectively (CIPA standard in both cases).

    The a7 II has a better CIPA-rated battery life than the a7R II, but endurance in heavy real-world from either camera varies from just ok-ish to downright terrible, depending on things like the ambient temperature and the amount of video you end up shooting. We’d strongly recommend taking at least one spare battery out with you when working with either camera, but if possible, take a couple. Ideally, take several. Pop round and borrow a couple of ours. We trust you.

    The somewhat lower quoted battery life of the a7R II can be explained by its more power-intensive 4K capture mode, but even if you’re mostly shooting stills and keeping image review to a minimum, don’t expect to get through a busy day’s shooting with either camera without changing your battery at least once. The good news is that both cameras feature in-camera USB charging and can still be used while charging. This might not help much if you find yourself in the middle of nowhere, but could be a life-saver when shooting at an event or in a studio.

    In summary

    It should be obvious if you’ve read this far that the Sony a7R II is a significantly more capable camera than its stablemate the a7 II. They might look identical, but a quick run-down of just the major feature differences makes the distinction obvious enough: more pixels, 4K video, a vastly more capable autofocus system, fully electronic shutter, and more complete support for third-party lenses.

    Whether these differences justify the enormous increase in price over the more basic a7 II is of course something that you have to decide for yourself. If you’re primarily or exclusively a stills shooter and you don’t have much need for continuous autofocus, the a7 II might suit you just fine. Its 24MP sensor isn’t the best around, but it’s not bad, and its 5-axis image stabilization system is very useful when shooting hand-held in poor light or at long focal lengths.

    All this being said, if you’re new to the Sony a7 system, the a7 II doesn’t bring much to the table that you can’t find duplicated or outmatched in other, competitive DSLR models. The a7R II, on the other hand, offers some unique features that we suspect will make it distinct from competitive DSLRs for some time yet.

    • Read our full Sony a7 II review
    • Read our full Sony a7R II review

    Did we miss anything? Let us know in the comments.
    Articles: Digital Photography Review (dpreview.com)

  • Solving the Biggest Newbie Confusions with Lightroom by Phil Steele

    Photography educator Phil Steele has taught Lightroom to tens of thousands of people. In this video tutorial he helps clear up the biggest confusion around using Lightroom that most beginners have – understanding how Lightroom and the catalogue work.

    Watch this video to get a better understanding of how Lightroom works behind the scenes. If you’ve been using it for a while you can either confirm that you’ve got it right, or clear up some things that you may still not be 100% clear on.

    Learn about several common sources of confusion when using Lightroom including:

    • The Lightroom database or catalog, what it is and how the “mind” of Lightroom works
    • Where Lightroom stores your images
    • How to get the edited versions out of Lightroom

    If you enjoyed that video, and want to learn even more about Lightroom you can check out Phil’s course: Lightroom Made Easy.

    googletag.cmd.push(function() {
    tablet_slots.push( googletag.defineSlot( “/1005424/_dPSv4_tab-all-article-bottom_(300×250)”, [300, 250], “pb-ad-78623” ).addService( googletag.pubads() ) ); } );

    googletag.cmd.push(function() {
    mobile_slots.push( googletag.defineSlot( “/1005424/_dPSv4_mob-all-article-bottom_(300×250)”, [300, 250], “pb-ad-78158” ).addService( googletag.pubads() ) ); } );

    The post Solving the Biggest Newbie Confusions with Lightroom by Phil Steele by Darlene Hildebrandt appeared first on Digital Photography School.


    Digital Photography School

  • Tips and Tricks to Help You Take Better Youth Sports Photos

    A favorite photography subject of any parent is their child’s sporting activities. But, sports photography can be challenging for the beginning photographer. It requires a robust understanding of camera settings and how they relate to one another. It can also be hugely rewarding to capture exhilarating moments that will be cherished for years to come.

    Here are a few tips and Tricks I’ve learned for getting awesome sports photos.

    _88J6306

    1 – Know the Sport

    Every sport has the picture perfect moment. You know the one – the horse with its leg tucked just so, or the peak of the handstand. The moments captured on trading cards, or those that appear on the front covers of sporting magazines are good examples.

    Chances are that because you’ve sat on the same bleachers week after week, that you know your child’s sport inside-out. A good sports photographer can anticipate the play, and is ready to capture the shot. For sports that are routine based – gymnastics, figure skating, equestrian, and the like – be sure to watch the practice so you’ll know when and where the picture perfect moments will occur, and where you need to position yourself to capture them.

    Sports 2

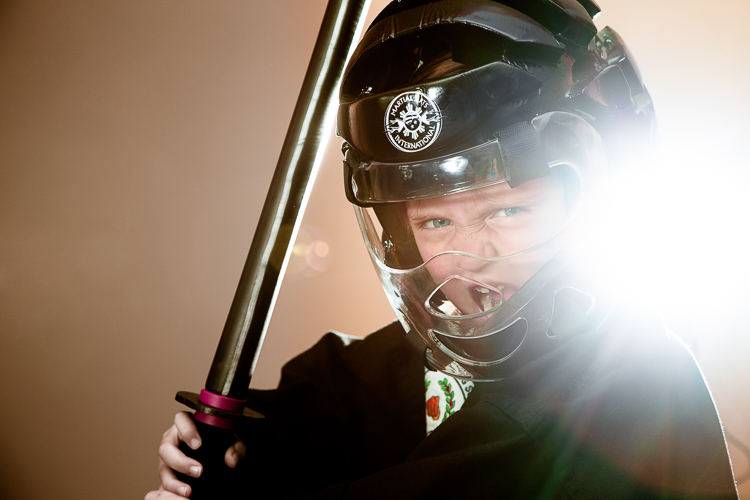
    Capturing the passion of the athlete. The flare from the flash in the background was a happy accident. Exposure info: 85mm, f/6.3, 1/160th, ISO 500.

    2 – Be Courteous

    Before the game, have a chat with your child’s coach and make sure it’s okay for you to photograph the game – some sporting organizations have special rules for photographers which you’ll need to be aware of beforehand. During the game, be courteous to the other parents who are watching their own children. Please don’t be “that guy”, taking up half the bleachers with mountains of gear, or the one standing at the front, blocking the view of others.

    3 – Choose your Lens

    Generally speaking, longer lenses are better for sports photography, as the action is occurring some distance from you (and it’s uncool for a parent photographer to be on the field during play). A lens around 200mm is a good place to start. If you’ve just won the lotto, I’m well informed that professional 400mm and 600mm lenses are awesome (they can also be rented if you really want to try them out, and don’t have a winning lotto ticket in your back pocket).

    Sports 6 Sports 7

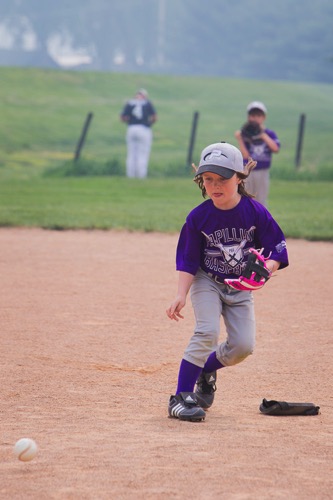
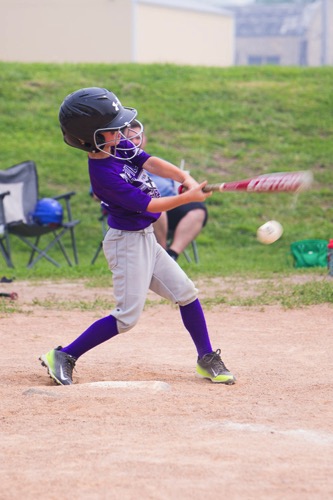
    Exposure info on above images: 200mm lens, ISO 200, f/5.6, 1/320th of a second.

    4 – Get the Camera off Auto

    Yes, I know your camera has a sports/action mode. It might even have a cute little picture of someone running. But shooting sports in manual mode (or at least shutter priority) is a perfect way for you to learn how the exposure triangle works. It will also be a lesson in compromise because I can pretty much guarantee that unless you’re shooting in bright sunlight, something will have to give. Do you accept high ISO noise but stop the action, or do you accept some motion blur for less noise?

    Sports 1

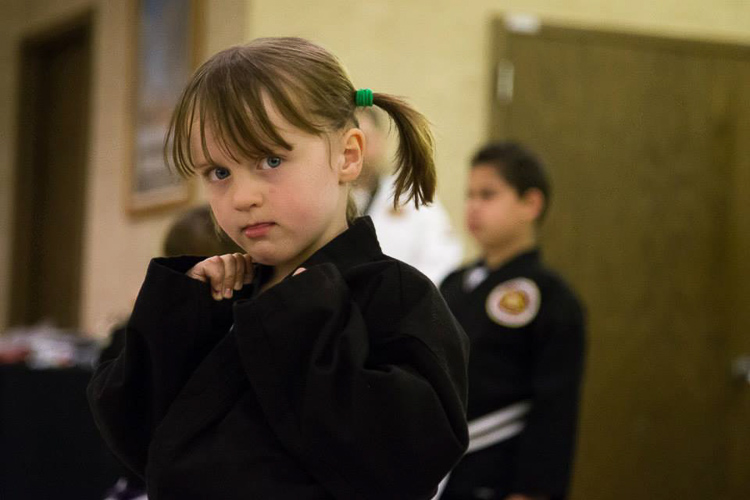
    Shooting the pause moments. Note the ridiculously high ISO needed for this dimly lit indoor venue. Exposure info: 105mm, f/4, 1/160th, ISO 10,000.

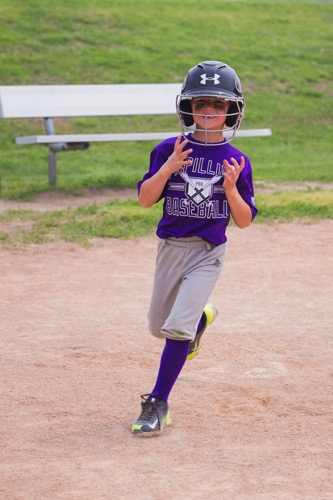
    Shutter Speed – Sports shooting is one occasion where the age old adage of “minimum shutter speed = 1/focal length” doesn’t work. In reality, you’ll need to go much faster if you want blur-free images. To stop action at walking speed, try at least 1/250th of a second. For running, you’ll need 1/500th or faster. If these shutter speeds aren’t possible (most likely due to low light), try to anticipate and shoot the posed moments – those times when the athlete pauses for a microsecond (image above). It might be landing a trick, a look before throwing the ball, the moment before throwing a punch.

    Sports 10 Sports 4

    Exposure info on above images: 200mm lens, ISO 200, f/5.6, 1/320th of a second.

    Aperture – Shoot with the largest aperture your lens allows. Professional lenses will generally open up to f/2.8. This will have two benefits – you’ll minimize depth of field (throwing the background out of focus and drawing more attention to your subject), plus you’ll be letting more light in (thus allowing a faster shutter speed).

    Sports 9 Sports 8

    Exposure info on above images: 200mm lens, ISO 200, f/5.6, 1/320th of a second.

    ISO – You’ll often have to shoot at a high ISO to get enough light, especially if you’re shooting indoors. Trial and error will tell you how high your camera can go while still achieving an acceptable image. If you end up having to shoot at ISO 6400 and end up with a noisy image, just turn it black and white and tell people (in your best British accent), “It’s art, dah’ling!”

    Focus mode – Check that your focusing mode is set to Continuous or Servo mode. This will ensure that the camera is constantly recalculating focus as you track a moving subject in your viewfinder. Every camera will handle this slightly differently, so it’s worth thumbing through your camera manual to understand how your particular model works.

    5 – Get Down Low

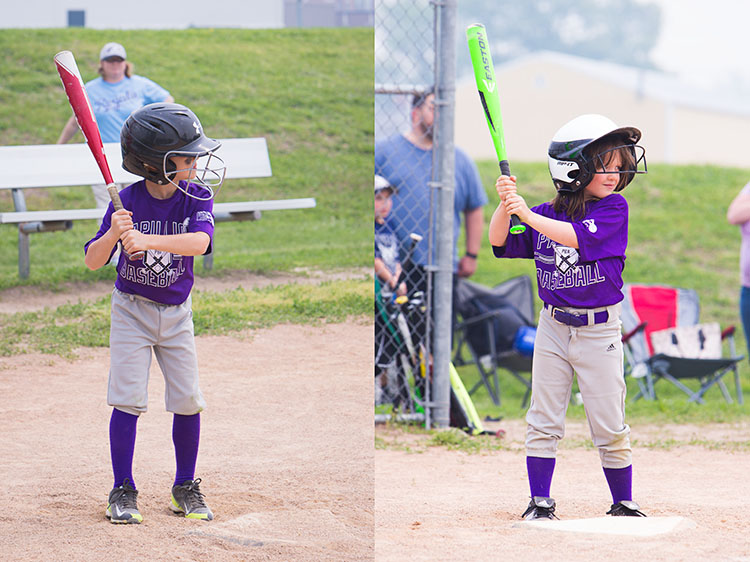
    Many beginner photographers make the mistake of shooting from a standing position. For youth sports, this means that they are generally shooting down on the athlete – not a very flattering angle. Instead, try kneeling on the ground for a better perspective.

    These two images, taken from different camera angles, show how shooting from a lower angle can make all the difference.

    These two images, taken from different camera angles, really show how shooting from a lower angle can make all the difference. Notice you can see more of her face in the image on the right, taken from a lower camera position.

    Exposure info on above images: 200mm lens, ISO 200, f/5.6, 1/320th of a second.

    6 – Practice

    As with all genres of photography, practice makes perfect. Try different angles or shooting from different positions around the field to see what works best. I guarantee you’ll see improvement as you keep shooting.

    7 – Beware the Light Cycle

    If your sport is being played in a large indoor venue (or outdoors at night), more than likely it will be lit by cyclic lights (mercury vapor, sodium vapor, fluorescent, etc). These cheap and efficient lights are a sports photographer’s worst nightmare. Unlike natural sources, these lights emit certain frequencies, and completely miss others, resulting in a unique color temperature that is difficult, if not impossible, to properly white balance in camera.

    In addition – and completely undetectable to the naked eye – these lights have distinctive cyclic patterns, varying in both light intensity, and color temperature, multiple times per second. Shooting under them can be very much a hit-and-miss affair. Sometimes you’ll catch the light in a blue phase of the cycle; a millisecond later you’ll get magenta. You might get slightly darker, or brighter. Sometimes neighboring lights will be on different cycles, so part of your photograph will be dark and part will be light, each with a different color temperature. (Don’t believe me? Try this test: under a fluorescent light, set your camera to manual with a fast shutter speed like 1/250th, take a series of identical images in rapid succession, then compare the frames. The faster the shutter speed you pick, the more the effect will be visible.)

    The lights here cycled yellow.

    This image was shot under sodium vapor lights and shows the intense yellow frequencies emitted by this type of light, even with the camera color balanced for the white uniforms. Exposure info: 150mm, f/3.2, 1/320, ISO 5000.

    Commercial architecture photographers combat this problem by lowering the shutter speed to allow more than one full cycle of light to be read by the sensor. However as we’ve already discussed, slow speed doesn’t usually work for action sports photography. Worse, many sports in these type of venues (equestrian, figure skating, gymnastics) don’t allow flash for player safety reasons, so you’re stuck using available light.

    There is nothing you can really do about cyclic lights, other than to simply take more photos, and pray that you hit the cycle right. For odd colors, you could play with the individual channels in Photoshop, or convert the entire thing to black and white (this will be the only time you’ll ever hear me say “fix it in post-production”).  Regardless, it is something that you should be aware of so you don’t make yourself crazy trying to figure out why you got the results you did.

    8 – Have Fun

    Sports 5 Sports 3

    Exposure info on above images: 200mm lens, ISO 200, f/5.6, 1/320th of a second.

    Youth sports are all about participating and having fun. Photographing them is no different. If your cherub is playing in the sand or picking her nose instead of chasing the ball, capture it! These are the memories you’ll treasure one day (or so they tell me). And remember that it’s okay to put the camera down sometimes and just enjoy the game too.

    googletag.cmd.push(function() {
    tablet_slots.push( googletag.defineSlot( “/1005424/_dPSv4_tab-all-article-bottom_(300×250)”, [300, 250], “pb-ad-78623” ).addService( googletag.pubads() ) ); } );

    googletag.cmd.push(function() {
    mobile_slots.push( googletag.defineSlot( “/1005424/_dPSv4_mob-all-article-bottom_(300×250)”, [300, 250], “pb-ad-78158” ).addService( googletag.pubads() ) ); } );

    The post Tips and Tricks to Help You Take Better Youth Sports Photos by Rebecca Olsen appeared first on Digital Photography School.


    Digital Photography School

  • Traffic-Proof Transit: Real Car-Straddling Bus Rolls Out in China

    [ By WebUrbanist in Technology & Vehicles & Mods. ]

    lanebusfeature

    Initial plans to develop a lane-spanning bus in China were met with great enthusiasm but some skepticism, the latter of which is now being addressed versus a real-life, full-sized prototype.

    The idea is simple: a bus that arches over traffic, neither hindered by nor hindering other vehicles on the road. Its mass and reduced need to start and stop also make the bus more sustainable than most transit options.

    lanebus2

    The mega-vehicle is spacious and vast, 72 feet long, 25 feet wide and 16 feet tall. With seven feet of clearance, leaves plenty of room below for ordinary road vehicles.

    lanebustest

    The bus runs on specialized tracks on either side of two-lane traffic roadways and can carry up to 300 passengers at top speeds of up to 60 miles per hour.

    Since the concept has been demonstrated, countries including Brazil, France, India and Indonesia have expressed interest in the TEB-1 system, hoping to deploy it on their own congested urban roadways.

    Share on Facebook


    [ By WebUrbanist in Technology & Vehicles & Mods. ]

    [ WebUrbanist | Archives | Galleries | Privacy | TOS ]


    WebUrbanist

  • 19 tips for better live music photography

    Tips for better live music photos

    There is no one-size-fits-all approach to shooting live music. Depending on the genre of music, the size of the venue, the quality of the house lighting, the rowdiness of the crowd and any photographic regulations imposed by the band or venue, your approach to getting the shot can vary greatly.

    It is for all these reasons I find live music photography irresistible; no matter how much you prep, you simply never know what the rock and roll gods will throw at you. And the combination of difficult lighting, fast moving musicians and a mass of people competing for sight lines makes getting the shot all that more sweet. Especially when your shot conveys the pure, unfiltered energy of a live performance.

    I’ve been shooting live for about seven years, in both stadiums and basements, dive bars and dance halls (I currently run a site called NWSoundExchange.com, which seeks to visualize Seattle’s DIY music culture), and I’ve picked up on some general tips and principles that help me feel a little more prepared each time I walk into a new venue. Some of these tips come from advice given to me by more seasoned music photographers I’ve bumped into over the years, like Mick Rock, others come from shooting hundreds of shows and learning from my own mistakes.

    Of course, these tips alone won’t guarantee you the next cover of Rolling Stone. After all, excelling at live music photography requires on-the-fly thinking and problem solving, creativity, as well a mastery of photographic principles. But hopefully these tips will at the very least inspire you to bring a camera long to the next concert you attend.

    By the way, the most important tip of all for shooting rock and roll is this: showing up with your camera to the show is half the battle. If you can make it that far, well, the rest should be pretty easy.

    Do your homework

    The Screaming Females are a very high-energy band. The lead singer/guitarist Marissa is known for her epic guitar solos. Knowing this going in gave me the foresight to position myself directly in front of her. 

    I’m not trying to sound like your mother, but seriously, do your homework before shooting a show! Fifteen minutes spent watching Youtube videos can clue you in to how a band sets up on stage and who in the band you might want to keep your camera pointed at. This way, when you arrive at the venue, you can position yourself perfectly to get the most high-energy images.

    Leave the extra gear at home

    This image was shot during a very crowded and rowdy show in the basement of a dive bar. Bringing only one camera rig and an extra lens (kept in my pocket) meant I did not have to worry about stashing my bag anywhere and could easily move around within the crowd to make my shots.

    Roll light! Being able to move around is crucial for getting good shoots. Also no one likes the guy in the crowd wearing the massive camera backpack.

    I used to shoot live music with far too much gear: two bodies, a flash and a few extra lenses. These days I keep it much more simple: a full-frame camera, 35mm F2 lens and a flash. I do occasionally bring a wider or more telephoto lens, depending on where I’m shooting. But at the end of the day, the less I’m worried about switching gear, the more I’m tuned into the music that is happening in front of me.

    If you must use a flash, bounce it

    Shooting a show under a highway underpass was a unique experience. This was a show where I had no choice but to use a flash. Still, I used it sparingly, waiting for the most decisive of moments to pop a frame.

    No matter what, I always go into a concert planning on shooting available light only. Of course this can be wholly impractical if the venue you’re shooting in is literally beneath a highway overpass with no light of any kind. It’s in situations like these that I’ll bring out the on-camera strobe.

    Flashes should always be used sparingly in a live music environment. The whole point of a concert is for the crowd to experience and enjoy the music happening in front of them, and constant pops of bright light can detract from that enjoyment. Don’t make the concert about you. Be there to document the experience, not take away from it.

    I also bounce my flash off the ceiling whenever possible. This results in the light falling back down on your subjects nicely. If you shoot direct flash, not only will you blind your subjects, but the lighting will look much less natural.

    Fast glass is your friend

    This images was shot at ISO 12,800 1/500 sec at F2.2 using the Nikon 35mm F2 D lens.

    Zooms are great, but they are often not fast enough for shooting live music without flash (which should always be your goal going into a concert). Many photographers show up to concerts with a full-frame camera and a 24-70mm F2.8 lens, which can be fine. But I prefer to use primes with faster apertures. I’m not talking expensive glass, but rather lenses like Canon and Nikon’s 50mm F1.8.

    When shooting using only the venue’s lights, my ISO is usually cranked all the way to 12,800 (I shoot with a D750) and my shutter speed hovers around 1/200 – 1/320 sec, the slowest speed I feel comfortable using in such an environment. This gives me little wiggle room for a slow aperture. Thankfully, the Nikon 50mm F1.8 D is pretty sharp by F2 and even better by F2.2. The point is, given the choice, always opt to bring along your fastest glass. Also don’t forget to micro adjust your lenses!

    Avoid eye level composition

    This image would probably have been a total snooze-fest had it been shot at eye-level.

    Shooting images at eye-level is lazy and boring. So get super low, get high up; if you have an articulating screen, put it to use! But whatever you do, avoid eye-level. Your composition will thank you.

    Try to shoot in full manual

    This one is not set in stone, but generally speaking, you’ll learn more and have a better understanding of light and how you camera works if you shoot in full manual mode. Shutter Priority and Aperture Priority can both be useful in some live music shooting scenarios, but if you’re serious about getting better, keep it on the big ‘M’.

    Whenever I walk into a new venue, I always try to guess and dial in the exposure without looking at my camera’s meter (advice given to me by a good friend). The more I do this, the better I’ve gotten at ‘reading a room’s light.’ Try it yourself! You’ll probably find that over time your intuition about exposure will improve.

    Know when to use AF-C, AF-S (and know your camera’s AF system)

    Focusing and recomposing using AF-S can be a good method to achieve creative compositions, just as long as the subject doesn’t move too much from the time you acquire focus to the time you take the shot. Of course, this image was taken using a manual focus lens. 

    Continuous autofocus is generally your best bet for live music photography. It goes without saying that if you’re shooting a moving subject, AF-C makes more sense than AF-S. However, there are times when switching to AF-S can be useful, especially when trying to get creative with a composition.

    When shooting live music in a dark environment, even the best cameras will likely struggle with subject tracking, meaning you are left with either using AF-C and keeping your focus point over the subject (which restricts your composition) or focusing and recomposing (if the subject is not changing depth from the camera). The latter is a method best used when the subject is relatively still.

    Also, many modern cameras have central AF points with increased sensitivity for low light and low contrast scenarios. Knowing whether or not this is the case with your own cameras is definitely worth investigating.

    Photograph the crowd

    Live music is about more than just the band on stage.

    Don’t forget to turn around and snap some photos of the crowd. An image that conveys the flavor of the environment and the energy of the crowd is a great addition to any set of live music photographs.

    I’ve found the best time to turn around and get this shot is toward the end of any high-energy song, but not after. This ensures those in the frame are still sucked into the music, allowing you to go largely unnoticed. The last thing you want is folks staring at the camera like a deer in the headlight. One person blatantly acknowledging the camera can ruin the overall feel of a good crowd shot.

    Look for interesting light

    We already talked about how you should avoid using a flash whenever possible. Assuming you’ve followed that advice, you’ll largely be at the mercy of the venue lighting, which is not necessarily a bad thing!

    Look for interesting beams of light and reflections to incorporate into your image. Using the venue lighting creatively can help you to better convey the mood of the performance. Also, be sure to be patient. One of the advantages of not shooting with a flash is that you can fire as many frames as you like, without bothering anyone. This means you can experiment to your heart’s delight.

    In general, the rule of thumb with gelled lighting is this: avoid shooting skin tones lit by red lights as they tend to blow out all detail (unless you’re planning to convert to b/w in post). Wait instead for the lighting to switch to any other hue before taking a shot.

    Find the details

    A cowboy hat at a punk show?

    Most live music imagery revolves around one of two subjects: the band and/or the crowd. Obviously, making photographs of said subjects is what shooting rock and roll photography is all about, but don’t forget to look for interesting or unusual details in and around the venue.

    Even the most subtle details, like a pair of bare feet on stage, or a strangely out-of-place man in a cowboy hat, can add a new layer of intrigue to a set of already interesting live music photographs.

    Be ready for the action

    The last thing you want to do is get caught fumbling with controls when something epic is happening. I’ve certainly been there, missing excellent shots because I was too busy staring at my camera settings. It’s a terrible feeling.

    To avoid this, try your best to be very in tuned to what is happening in front of you at all times. Change settings with your eye to the finder and only look at the back of you camera in between sets. Oh, and above all, don’t chimp during a set!

    Keep one eye open

    Shooting with both eyes open allows you to better predict when something visually interesting might occur.

    This one also goes along with the previous point. Practice keeping both eyes open at all times when shooting live music. Better yet, try to keep your non-shooting eye honed in on the drummer. I’ve found that if you’re in tune with the drummer, you can often use their body language to predict when something interesting might happen.

    Try the ‘pop and drag’

    It can be a bit cliche, but it can also convey a band’s energy really well if executed correctly.

    The old ‘pop and drag’ goes a little something like this: Mount a flash on your camera and point it at the ceiling, drop your shutter speed down to somewhere between 1/15 and 1/50 sec, while keeping your ISO reasonably high (it’s OK to stop down a little using this method). The general idea is to ‘pop’ the light from the flash, which bounces off the ceiling and falls back down on the band that you’re photographing while ‘dragging’ your shutter. Because of your slow shutter speed, the flash won’t completely freeze your subjects, causing blurring and glow.

    The most important thing to remember when trying the ‘pop and drag’ is to experiment with your settings. Depending on the height of the ceiling and color of the ceiling, your flash output may vary greatly. If you’d like to use this method, I advise getting to the venue early to dial in your settings before anyone arrives.

    Back up from the band, use the crowd

    This one is pretty simple: While it makes sense to try and shoot a show as close to the band as possible, its also nice to change up your perspective and pull back a little. Moving back will allow you to get more creative with your framing. It also can help to convey the energy of the room better.

    It’s OK to underexpose (shoot Raw)

    I often underexpose by two stops to get a faster shutter speed, then push in post.

    This one is dependent on the camera you are shooting, but Raw files from most modern full-frame cameras can hold up just fine being pushed a stop or two in post (much further if you’re converting to b/w). When you’re shooting in an environment where your settings are maxed out but your images are still too dark despite being at the maximum native ISO, it van be very reassuring knowing you can still push two stops when you get home.

    Just make sure you’re shooting Raw.

    Use creative aides

    Everyone knows star filters are played out, which is why just about no one uses them. All the more reason to pick one up and make photos that look a little different. Just don’t rely on creative aides as a crutch!

    Everyone’s a photographer these days, and rock and roll photos are a dime a dozen. So if you’re serious about setting your images apart from others, what do you do? Try experimenting with creative aides, like gels, star filters, prisms etc. to give your shots a slightly different look.

    Star filters have not been cool for a very long time, but used selectively, they can be really effective. Take a look through this article, how many star filter photos can you find? More than you realized now that you’re looking for them? The point is, being subtle is important when employing creative aides. Don’t be a one-trick-pony and don’t rely on them too much. But used selectively, they can give some really cool results.

    Shoot with heart, edit with brain

    This phrase is my religion when it comes to shooting live music.

    What exactly does this mean? For me it means, go to the show, have fun, be polite, dance and take photos without overthinking. Let the music envelope you, feel the energy, interact with the crowd, chat with the band, be a part of what’s happening. Doing so will allow you to subconsciously be more connected to the whole situation. Also, don’t be afraid to shoot ‘too much, ‘ (so long as you aren’t using a flash).

    I used to be upset with myself when I came home from a show with 1000 images to shuffle through. But as I’ve gotten better at editing, I’ve gotten better at quickly pin-pointing the good stuff from the bad after the fact. And at the end of the day, if you got one killer image from a show, but shot 100 or 10000 images, no one will know but you.

    B/W is your friend when editing

    This image looked terrible in color. A conversion to black and white saved it.

    B/W is the little yellow pill of the music photography world. A quick conversion can turn a noisy, ugly image into something much more attractive. Or, in the case of the image above, in which most of the detail in Dave’s face was blown out due to bad colored lighting, a quick conversion turned an ugly duckling into a tattooed rock and roll swan.

    Have fun and be nice to everyone

    When shooting a show it is important to remember that you are very unimportant in the grand scheme of the event. Please, please don’t be that photographer ruining everyone’s good time by constantly popping flashes and blocking people’s view of the band.

    Live music is a lot of fun. Photography is a lot of fun. When combined, well, you get the point. At the end of the day, don’t take away from that inherent fun. Be polite to everyone in the crowd, ask before you step in front of someone to take a shot and don’t stand in their way too long. Use your flash sparingly. Don’t bring a massive bag and definitely do not wear a bag while shooting in the crowd. Respect gets respect and the golden rule certainly applies to live music photography.

    Add your tips below!

    Got a solid tip for live music photography? Please share it in the comments below!

    Articles: Digital Photography Review (dpreview.com)

  • CamFi DSLR controller now offers real-time upload to Dropbox

    The makers of the CamFi wireless DSLR controller have launched a new version of their iOS app. It now allows the user to transfer photos to Dropbox in real-time while shooting. The new feature is aimed at photojournalists who want to send images to news desks as quickly as possible but can arguably be useful in other scenarios as well.

    To make the system work, photographers need a so-called MiFi, a portable broadband device that allows multiple mobile devices to share a 3G or 4G mobile broadband Internet connection, or a second phone that is acting as a mobile hot-spot. Both the CamFi that is attached to the DSLR via a USB-cable and the phone that is running the CamFi app are then connected to the MiFi. This way, the CamFi can be controlled via the app and access the Internet at the same time.

    As images are captured they are sent from the CamFi to the control phone via Wi-Fi and uploaded from the phone to Dropbox via the MiFi’s internet connection. This works for both Raw and JPEG files. The same system can be setup when controlling CamFi from a Windows PC. The developers say Mac and Android versions will be released very soon.

    Articles: Digital Photography Review (dpreview.com)

  • Casio launches rugged EX-FR200 camera with detachable lens unit

    Casio has announced a 360° camera that features a detachable lens unit and a mode that allows the body to control two cameras at the same time. The Casio EX-FR200 is equipped with a 1.35mm lens that offers a fisheye capture with the angle of view we’d expect from a 13.4mm lens on a 35mm film camera.

    The lens can be used in four different modes to either capture a 180° 3888 x 3888 pixel fisheye spherical view, an unwrapped 360° 7456×1864 panorama, a super-wide 208° image or when combined with a second camera it can join two images shot in opposite directions to create a 360° ‘omni-directional’ image.

    The camera consists of a body unit and a detachable lens/camera unit that can be used separated from the body, or folded for ‘normal’ shooting or selfie shooting while connected to the body.

    Casio has also produced an accessory that mounts a pair of FR200 or FR100 lens units back-to-back so that they can shoot in both directions simultaneously to create images that can be merged in Casio’s Exilim Album app or Exilim 360 Viewer desktop software to form a navigable YouTube 360 Video file. The camera can also control dual lens units in sequence from different perspectives while pointed in the same direction.

    The FR200 is waterproof, freeze-proof and drop resistant for use in tough environments, and communicates via Bluetooth 2.1 and Wi-Fi. The camera also has a 4K video function.

    Beyond Japan it isn’t clear where the camera will be sold, but the company plans to make 5000 a month from the time it is released in mid-September.

    For more information see the Casio press release (translated version).

    Articles: Digital Photography Review (dpreview.com)

  • Liquid Shard: Fluttering Silver Cloud Hovers Over Los Angeles Square

    [ By SA Rogers in Art & Installation & Sound. ]

    Screen Shot 2016-08-05 at 9.49.32 AM

    A “universally despised” postmodern public square in Los Angeles is getting a second look this week with the addition of a surreal glittering silver cloud that undulates in the air above the concrete, seemingly floating without any supports. Tethered from a 10-story purple bell tower to a lower corner of the park, the latticework installation is made of thousands of holographic mylar strips that flutter in the breeze. The work is a collaboration between patrick Shearn of Poetic Kinetics and the AA Visiting School of Los Angeles, a week-long design program for art students.

    What an amazing sight in Pershing Square!!

    A video posted by Lori Erhardt (@poopsienyc) on

    Due for a makeover in 2019 that will replace much of the concrete with grass and create shade canopies, Pershing Square tends to be empty and quiet despite renewed vitality in other areas of downtown L.A. It’s one of the city’s oldest public spaces, but had its trees and grass ripped out in 1951 so a parking garage could be installed beneath it.

    Screen Shot 2016-08-05 at 9.49.41 AM

    ??????? MAGICAL!!! 'Liquid Shard' installation by @aavsla @poetickinetics Thank you for bringing such a beautiful piece into Downtown! ?? #liquidshard

    A video posted by d a n i e l l e g a r z a (@ellierex) on

    Poetic Kinetics is known for creating many of the massive, colorful creations that appear at Burning Man each year. Sharon says he was inspired by nature and “the feeling that we are only aware on a very surface level of what is really going on around us. We feel the currents of air on our skin but do not see the larger movements.”

    Find yourself beneath a new installation, "Liquid Shard" by @aavsla and @poetickinetics, up and flowing now at Pershing Square. (?: @coleoptera.bijoux) #dtla #historiccore

    A photo posted by Historic Core DTLA (@historiccore) on

    Day 6: Assembling! —————————- #architect #design #archstudent #designstudent #artist #art #imagine #create #build #music #musicfestival #la #dtla #losangeles #california #dream #discoverla #losangelesart #archilovers #artlife #workshop #summer #architecturelovers #college #arquitectura #diseño #superarchitects #ilovela #southerncalifornia #aaschool

    A photo posted by AA Visiting School Los Angeles (@aavsla) on

    The Los Angeles Times captured 360-degree views of the installation, which billows like a school of fish when it catches the wind just right. Measuring 15,000 square feet, ‘Liquid Shard’ will remain in place through August 11th, so stop by and experience it in person if you can.

    Share on Facebook


    [ By SA Rogers in Art & Installation & Sound. ]

    [ WebUrbanist | Archives | Galleries | Privacy | TOS ]


    WebUrbanist

  • Lensbaby Twist 60 real-world sample gallery

    Lensbaby’s Twist 60 is all about the bokeh. It promises appealing subject/background separation with Petzval-like swirly bokeh, offering an F2.5 maximum aperture. The Twist 60 is part of Lensbaby’s Optic Swap system and is currently offered for Canon, Nikon and Sony E mounts. We just couldn’t resist taking it out for a spin  — and we have to confess that we stuck mostly to wide open apertures in order to get the full swirly effect.  Take a look at our samples below, and stay tuned for more thoughts on swirly bokeh!

    Articles: Digital Photography Review (dpreview.com)

  • Weekly Photography Challenge – Roads

    Paths and roadways make great photographic subjects. This is your chance to go find some and photograph them.

    Moyan Brenn

    By Moyan Brenn

    Weekly Photography Challenge – Roads

    What draws you to a road to photograph it? Look deeper than just the road. Check out the scenery around the road, where does it lead, what’s in the distance? How can you photograph the road to make it interesting?

    How about a low camera angle? Or a motorbike or car on the road? This week it’s your challenge to photograph roads.

    HD_Vision

    By HD_Vision

    CONCAVO WHEELS

    By CONCAVO WHEELS

    Murat Livaneli

    By Murat Livaneli

    Share your images below:

    Simply upload your shot into the comment field (look for the little camera icon in the Disqus comments section) and they’ll get embedded for us all to see or if you’d prefer upload them to your favourite photo sharing site and leave the link to them. Show me your best images in this week’s challenge. Sometimes it takes a while for an image to appear so be patient and try not to post the same image twice.

    Share in the dPS Facebook Group

    You can also share your images on the dPS Facebook group as the challenge is posted there each week as well.

    Geoffrey Froment

    By Geoffrey Froment

    Billy Woodford

    By Billy Woodford

    Taylor Robinson

    By Taylor Robinson

    Kevin Dooley

    By Kevin Dooley

    googletag.cmd.push(function() {
    tablet_slots.push( googletag.defineSlot( “/1005424/_dPSv4_tab-all-article-bottom_(300×250)”, [300, 250], “pb-ad-78623” ).addService( googletag.pubads() ) ); } );

    googletag.cmd.push(function() {
    mobile_slots.push( googletag.defineSlot( “/1005424/_dPSv4_mob-all-article-bottom_(300×250)”, [300, 250], “pb-ad-78158” ).addService( googletag.pubads() ) ); } );

    The post Weekly Photography Challenge – Roads by Darlene Hildebrandt appeared first on Digital Photography School.


    Digital Photography School