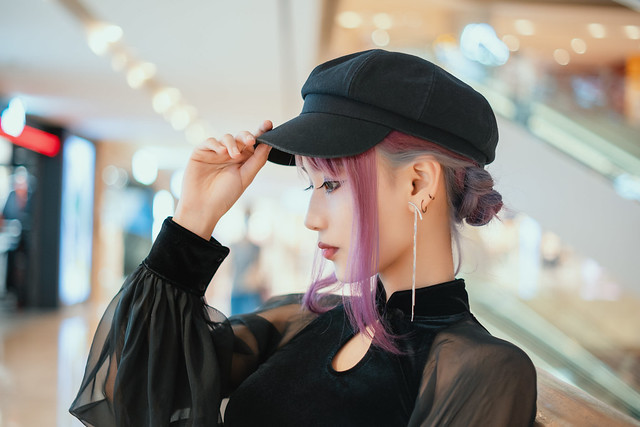
TTartisan is back with its latest lens, an ultra-affordable 35mm F1.4 lens for APS-C mirrorless camera systems.
The fully-manual TTartisan 35mm F1.4 lens retails for just $ 80 and is available for Canon EOS M, Fuji X, Micro Four Thirds and Sony E mount camera systems. It’s constructed of seven elements in six groups, has an aperture range of F1.4-F16, uses a ten-blade aperture diaphragm and has a minimum focusing distance of 28cm (11”).
The front filter thread is 39mm and the lens measures in at 44mm (1.73”) long, 56mm (2.2”) diameter and weighs just 180g. Below is a sample gallery of images captured with the lens, provided by Photo Rumors, an authorized retailer of TTartisan gear.
You can purchase the lens over on Photo Rumors’ online shop or any other authorized TTartisan retailer.
Today, at its ‘Launch Night In’ event, Google unveiled the details of its new Pixel 4a 5G and Pixel 5 devices.
Pixel 4a 5G
The Pixel 4a 5G is, as its name suggests, a 5G variant of the budget-friendly phone released last autumn. But it’s not just an improved cellular modem that’s been added to the 5G variant.
The Pixel 4A now has a larger OLED screen — 6.2” over the 5.8” on the 4a — as well as a slightly faster Qualcomm Snapdragon 765G processor (compared to the 730g found in the 4a). All of these upgrades together have increased the starting price of the 5G variant to $ 499, $ 150 more expensive than the base Pixel 4a at launch.
Pixel 5
Compared to the improvements the Pixel 4 brought over the Pixel 3, the Pixel 5 feels like a much smaller update. While the specifications haven’t improved dramatically, Google has added a number of new and improved features, particularly in regards to the camera software.
Starting with internals, the Pixel 5 is powered by a Qualcomm Snapdragon 765G processor with an X52 5G modem that supports both sub-6GHz and mmWave 5G. This is a bit of an interesting move as more flagship devices are beginning to use the Snapdragon 865 or 865 Plus, but using a slightly older chipset means the price of the Pixel can keep it below more top-tier Android devices.
The Pixel 5 features 8GB of RAM, starts with 128GB of internal storage, uses a 4080mAh battery. Other notable details include reverse wireless charging, IPX8 water-resistance and the newest version of Corning Gorilla Glass.
The 6” screen is a 2340 x 1080 OLED display with a 90Hz refresh rate and 19.5:9 aspect ratio. Although it retains the 8MP hole-punch front-facing camera, the lack of the Motion Sense array means the screen now stretches the full width of the device.
As for cameras, the Pixel 5 has an optically-stabilized 12.2MP main camera with a 77-degree field-of-view (FOV) as well as a 16MP ultrawide that covers a 107-degree FOV. To make the most of the humble hardware, Google is, as it has for years, relying on its software to get the best image quality possible.
New shooting modes include the inclusion of a Night Sight Portrait mode, improved HDR+ capture and a new AI-powered Portrait Lighting mode that will automatically adjust the lighting on subjects captured in Portrait mode. Also new are three new image stabilization modes: Locked, Active and Cinematic Pan. The new Cinematic Pan setting is designed specifically for capturing gimbal-like footage, complete with slow-motion capture.
The Pixel 5 will be available on October 15 through Google Fi, Verizon and unlocked starting at $ 699 for the 128GB version — a $ 100 drop from the $ 799 the Pixel 4 retailed for at launch. AT&T will also offer the Pixel 5 later this autumn. Pre-orders are available starting today.
Astropad successfully funded Luna Display for Mac on Kickstarter in late 2019. The company is back with another project, Luna Display for Windows. The new project was fully funded in its first hour on Kickstarter. Luna Display for Windows allows iPad owners to turn their Apple device into a wireless PC display.
Astropad states that Luna Display for Windows is the only hardware solution available to turn any modern iPad into a wireless second display for a PC or Mac. You can connect your iPad via Wi-Fi or with a wired connection. For a physical connection, you can select between USB-C or HDMI Luna Display units. Astropad promises ‘lag-free lightning-fast speeds’ and compatibility with any Windows or Mac application
Luna Display for Windows boasts many features, including support for iPad touch gestures. Image credit: Astropad
Luna Display for Windows is fully compatible with external keyboard and mouse peripherals, full iPad touch gestures and supports Apple Pencil pressure sensitivity. Astropad promises low latency and a ‘crystal clear’ display.
When working on a single display, especially a smaller notebook display, it can be difficult to fit your entire workspace. With a second display, you can instantly and easily expand your workspace, allowing additional flexibility when working. If you don’t need a second display but would like to be untethered from a desktop computer, you can use Luna Display wirelessly to work on your iPad anywhere you can connect to your Wi-Fi network, such as in a more comfortable room in your home or maybe even outside.
In order to ensure a low-latency and clear wireless image, Luna leverages its own custom video compression technology, LIQUID. The rendering system adjusts in real-time to prevailing network conditions to ensure fast performance. Luna Display promises latency as low as 16 milliseconds, which is considerably faster than the 204ms of Windows Connect and 64ms performance when using Apple’s Airplay technology. Further, LIQUID uses GPU acceleration when available to ensure stable performance.
Luna Display requires the use of a small device, which you can plug into an HDMI port (Windows compatibility only) or USB-C (compatible with Windows and Mac). The device’s size varies slightly with the selected port type, but in either case, it weighs a little over an ounce.
Once your Luna Display is inserted into your computer, you will need to open a dedicated Luna Display app on your computer and your iPad. As soon as the applications are running, you’re good to go.
Luna Display for Windows requires Microsoft Windows 10 64-bit, Build 1809 or later. It requires an Intel or AMD processor with 64-bit support that is 2 GHz or faster. As for RAM, Luna Display requires at least 4 GB. Luna Display for Windows is compatible with Intel HD Graphics 520, AMD Radeon RX Vega 3, NVIDIA GeForce 820m or later; or an equivalent DirectX 11 compatible GPU. On the iPad side of the equation, nearly any iPad will work. Luna Display is compatible with iPad Mini 2 (2013 or later), iPad Pro (2016 or later), iPad 5th generation (2017 or later) and iPad Air (2013 or later). Your iPad must be running iOS 9.1 or later and 32-bit devices are not supported.
Image credit: Astropad
You can pledge $ 49 USD to support Luna Display for Windows and save up to $ 31 off retail price. Luna Display for Windows is scheduled to begin shipping in May 2021. For additional information and full pledge details, head to Luna Display for Windows Kickstarter project page.
Disclaimer: Remember to do your research with any crowdfunding project. DPReview does its best to share only the projects that look legitimate and come from reliable creators, but as with any crowdfunded campaign, there’s always the risk of the product or service never coming to fruition.
The Nikon Z5 is an entry-level full-frame mirrorless camera that looks and handles almost exactly like its higher-end Z-mount siblings, the Z6 and Z7. It’s built around a stabilized non-BSI 24MP CMOS sensor, which is likely more closely related to the generation of chip found in Nikon’s D750 DSLR, rather than the newer BSI sensor in the Z6.
Slightly stripped down and more stills-focused, the Z5 shares the same 273-point hybrid AF system, Expeed 6 processor and 3.69M-dot OLED viewfinder as the Z6. But niceties like a top plate display are absent. Likewise, the Z5’s max burst rate and video capabilities are considerably less than that of the Z6: 4.5 fps vs. 12 fps and heavily cropped 4K vs. un-cropped, oversampled 4K. But from an image quality and handling standpoint, the two cameras are quite similar.
Key Specifications:
24MP full-frame CMOS sensor (not BSI)
Hybrid AF system with 273 phase-detect points covering 90% of the frame
4.5 fps continuous shooting with AF
5-axis in-body image stabilization
3.69M-dot OLED viewfinder
Dual UHS-II SD cards
4K/30p video capture (with 1.7x crop)
1080/60p video capture (no crop)
Headphone and microphone ports
Dust and moisture sealed
The Nikon Z5 sells for $ 1399 body-only, $ 1699 kitted with the new 24-50mm F4-6.3 lens and $ 2199 kitted with the 24-200 F4-6.3 VR.
What’s new and how it compares
The Z5 is essentially a stripped down Z6. Here’s what Nikon changed in the camera to keep the price down.
Read more
Body, handling and controls
The Z5 is the same exact size, weight and shape as the Z6. But there are a few small differences between the two bodies.
Read more
First impressions
DPR’s Dan Bracaglia has been busy shooting with the Z5. Here’s why he thinks it’s such a tempting camera – and why he may buy one in 12 months’ time.
Read more
Image quality
How does the Z5’s 24MP sensor stack up against the latest BSI chips? Quite well, in fact.
Read more
Autofocus & Video
Autofocus performance from the Z5 is quite good, whether shooting moving or static subjects. But video performance is not the camera’s strong suit.
Read more
Conclusion
The Nikon Z5 is arguably the best bang-for-your-buck stills-oriented camera on the market, which is why it’s earns our gold award.
Read more
Sample gallery
Pups, mountains and summertime vibes. Check out our initial Z5 sample gallery.
In a press release shared today, Olympus has confirmed it’s come to a finalized agreement with Japan Industrial Partners Inc. [JIP] to transfer the Olympus Imaging business at the beginning of 2021.
In the announcement, Olympus says it’s transferring its Imaging business to a new wholly-owned subsidiary called the ‘New Imaging Company.’ On January 2, 2021, 95% of this company will be transferred to OJ Holdings, Ltd., a company created by JIP specifically for this transfer.
The acquisition includes all of Olympus’ global Imaging business, including all research and development, as well as manufacturing facilities. Sales, marketing and R&D operations will be relocated to a new headquarters located in Hachioji, Tokyo, Japan, while production will continue at Olympus’ Vietnamese factories in the Dong Nai province.
Olympus says the ‘New Imaging Company will continue to provide high-quality, highly reliable products’ and notes the ‘Zuiko and OM brands, which are grounded in optics and digital imaging technologies cultivated by Olympus over many years […] will be appropriately positioned to further pursue new developments.’
Once the deal is complete, Olympus will focus on its Medical and Scientific Solutions with a mission to ‘making people’s lives healthier, safer and more fulfilling.’
Press release:
Olympus Agreed on Transfer of Imaging Business with JIP
Tokyo, September 30, 2020 – Olympus Corporation (“Olympus”) today concluded a definitive agreement with Japan Industrial Partners Inc. (“JIP”) regarding the transfer of the Olympus Imaging business. Under the agreement, Olympus will transfer its Imaging business to a newly established wholly-owned subsidiary of Olympus (the “New Imaging Company”), through an absorption-type split. This is to be followed by transferring 95% of the shares of the New Imaging Company on January 1, 2021, to OJ Holdings, Ltd., a special purpose company established by JIP.
Olympus began the manufacture and sale of cameras using the Zuiko lens in 1936 and became one of the world’s leading camera makers. Olympus was among the first companies to make small, lightweight compact cameras with professional quality, such as the award-winning Olympus ‘OM’ and ‘Pen’ series. Driven by the desire to make people’s lives more fulfilling around the world, the company applied innovative technology and unique product development to distinguish itself in a highly competitive industry.
In recent years, however, the market has shrunk rapidly due to the evolution of smartphones, leading to a significant downturn for the digital camera market globally. Despite taking various steps to improve its cost structure and efficiency, Olympus’ Imaging business recorded operating losses for three consecutive fiscal years up to March 2020.
Under such circumstances, Olympus concluded that, by carving-out the Imaging business and operating the business under JIP, its business structure would become more compact, efficient, and agile, and it is the most appropriate way to realize self-sustainable and continuous growth. With a loyal following and long history of innovative products, the New Imaging Company would be committed to building on Olympus’ accumulated expertise and to continue providing customers with innovative, high quality cameras under the new business structure.
“I would like to express my heartfelt gratitude to all our customers for their patronage and support of Olympus products, and for their passion devoted to photography. I have the utmost confidence that this transfer is the correct step forward in sustaining the value of our products and services,” said Yasuo Takeuchi, President and CEO of Olympus Corporation.
“At the same time, I am certain that this opportunity is the best choice for our long-time patrons, new customers and photography enthusiasts. Under the new company, the development, manufacturing, sales and service functions will continue tight collaboration to introduce new products that will satisfy customers,” Takeuchi added.
The agreement applies to Olympus’ global Imaging business, which includes all R&D and manufacturing facilities currently dedicated to its Imaging business. The New Imaging Company will continue to provide high-quality, highly reliable products. Built on a solid foundation, including the Zuiko and OM brands, which are grounded in optics and digital imaging technologies cultivated by Olympus over many years, the New Imaging Company will be appropriately positioned to further pursue new developments.
Head of sales and marketing, R&D and designing departments for imaging products will be relocated to the headquarters of the New Imaging Company in Hachioji, Tokyo. Production will continue at the location in Dong Nai province, Vietnam, where imaging products are currently manufactured. The New Imaging Company will continue to provide customer support for the imaging products which have been manufactured and sold by Olympus.
Following the transfer of the Imaging business, Olympus will concentrate on Medical and Scientific Solutions, in our ongoing efforts toward making people’s lives healthier, safer and more fulfilling.
Information on the New Imaging Company is as follows. Company name: OM Digital Solutions Corporation Location: Hachioji, Tokyo Representative Director: Shigemi Sugimoto Business operations: Operations involving the manufacture and sale of digital cameras (primarily mirrorless interchangeable lens cameras), interchangeable lenses, IC recorders, and other audio products Capital: Not fixed
For the details about the company split and the transfer of shares, please refer our corporate disclosure “Signing of Definitive Agreement for Divestiture of Imaging Business.” (https://www.olympus-global.com/news/ir/2020/)
The post Tips for Culling Images for Better Results and More Efficiency appeared first on Digital Photography School. It was authored by John McIntire.
When it comes to a photographer’s workflow, there is one stage that might be more important than any other. It is the image selection process, also known as the culling stage. This critical stage is the point where you get your images into Lightroom (or other software) and start choosing which to work on.
But while this is the stage where you choose the photos that ultimately end up representing your work as a photographer, without systems in place it can turn into a huge time sink.
So focusing on the process of culling images can help speed up image selection significantly.
Being able to quickly whittle down a set of photos is an important skill for any photographer. At 36 images, this is a small set of photos, but the principles are the same whether it’s 36 images or 360.
This article aims to show you why having a good system for image selection can be beneficial to your photography and your portfolio. It will also provide an overview of a basic system that you can start to use in your workflow right away, and it will provide tips on how to use Lightroom’s built-in functionality for this purpose.
Note: My examples here are portraits, but the system applies to just about any genre in photography. There are instances where you might not be able to apply some of these principles and the criteria you apply in different genres will be different, but they are exceptions.
The forest for the trees
Take a moment to imagine that you’ve just finished a big session and imported all the images into Lightroom. Now you may have hundreds of images that you have to sift through to find the ones that you want to work on.
When you have hundreds of photos from a shoot all in one place, and test shots, outtakes, and misfires are still included, it can feel like a chore to go through them all.
Without a system for culling images in place, it’s all too easy to find yourself continually scrolling through the same set of images and reviewing the same ones multiple times. This may not be a problem if you only have a handful of frames, but once you get into larger shoots, you can waste a lot of time doing things this way.
Additionally, after going through the same images over and over again, it can also become discouraging. This makes it easy to give up and leave some gems unspotted, which are ultimately relegated to obscurity on your hard drive.
By using Collection Sets to divide a large shoot into ten outfit changes, the images become much easier to manage.
So what type of system can you create?
Using Collection Sets to divide up large shoots into smaller, more manageable chunks is a good place to start.
This is just a small reason why you should consider developing a system for your editing process.
Editing
The image selection process is also known as editing. Now, I know that the word edit (and editing) has come to mean something else in everyday vernacular for photographers. You can call it whatever you want, as I am not one to dictate or prescribe. But as you will be going about image editing in the future, consider thinking about your post-processing workflow in terms of these two job descriptions:
Photo (Picture) Editor: Someone whose job it is to select photos appropriate for the use in question.
Retoucher: Someone whose job it is to alter the appearance of photos and manipulate photos to achieve a final result.
Tools
Lightroom has a huge variety of tools that makes culling images easier. While this is not an exhaustive list, here are a few features that I use regularly:
Fullscreen Mode
Using Fullscreen Mode during the image selection process will help to remove any distractions from your screen. You’ll see the photo that you are evaluating and nothing else.
Being able to view a single image at a time makes this whole process go more smoothly. It also takes away the distraction of Lightroom’s standard interface on the screen. To enter Fullscreen Mode, select any single image in the Library Module and press the “F” key.
Compare
If you want to look at two similar images side by side, use the Compare feature in Lightroom.
The Compare feature allows you to look at two images side by side. Although you won’t use this until later in the selection process, it becomes very useful when you are trying to choose between two similar images with minor differences.
To use the Compare feature, select any two images in the Library Module and press the “C” key. To get back to your normal view, press “G.”
Reject
When you reject a photo in Lightroom, the image will be grayed out and marked by a black flag with an “X.” Any images you mark in this way should be recognizable at a glance.
If you follow my process, you are going to use this tool a lot. When you press the “X” key while any image is selected, you flag that image as a reject. This marks the image with a black flag with an “X” in the upper left-hand corner, and it grays the image out in the Library Module. This makes it very easy to see which images you have already reviewed and marked as unsuitable.
Pick
Marking an image as a Pick will annotate it with a highly-visible white flag.
When you are going through your images, you will eventually come across a photo that you love. You’ll know that you want to work on it no matter what.
In this instance, press the “P” key; the image will be flagged as a Pick. A little white flag icon will appear at the top left of the image in Lightroom.
Star ratings
Using the star ratings in Lightroom is another quick and useful way to annotate images that you want to review again later.
Because you will be going through your images multiple times, you can use the star ratings in Lightroom to mark any images you are unsure of or aren’t able to make a final decision on yet. You can mark them with one to five stars by using the corresponding number key. This makes them clearly labeled when you return to them in the future.
On being ruthless
Before we get into the actual steps of the editing process, there is one thing to discuss. Most everything outlined in this article can be changed up as required, but there is one thing that will be important for you to follow no matter what.
To make this process faster and more efficient, and to ensure that you are only left with your best images, you have to be ruthless. If something is not right about an image, reject it. If you have to think about it for more than a few seconds, reject it. If you have even so much as a niggling doubt, reject it.
Being able to quickly recognize obvious faults will allow you to reject images quickly. Overexposure, outtakes, reflections in glasses, cropped body parts, and awkward arm placements are some of the reasons these images were rejected at first glance.
A lot of the wasted time in this part of the workflow comes from hemming and hawing over an image for a length of time when the image doesn’t wind up getting used anyway. Make decisions fast. Be ruthless.
The system
Keeping the images you are working on separate from the rest will make this process go much more smoothly.
Now that you know the desired end result, you can get started with the actual process of image selection.
The first step is to isolate the set of images you are working on from everything else. There should be no distractions. If you are working on a set from a portrait session where there were multiple outfit changes, separate each outfit into its own folder.
In Lightroom, this is easy. You can create a Collection Set for your shoot, and then create a Collection for every outfit change inside that set. This will keep all of the images from a session in one place, but separated by things like outfit changes or lighting changes.
Criteria
Chances are that you already have preconceived notions of what you don’t like in photos. Whether these ideas come from things you’ve heard from other photographers or opinions you’ve developed yourself, it doesn’t matter. Knowing what these things are is going to help you speed through the process much, much faster.
Technical: Things that fall on the technical side are relatively easy to identify. What you are evaluating for here are things like focus, exposure, the absence of motion blur, etc. When you are going through your images, learn to identify technical faults at a glance.
Technical faults, like reflections in glasses, are easy to spot and make quick decisions on.
Aesthetic: This one is all down to your personal tastes. If you can figure out what you don’t like, then you can spot those things in an instant and rule the photos out of the selection process.
Don’t like when portrait subjects bring their hands to their face? That rules out any photos fitting that description. Don’t like it when catchlights appear in the whites of the eyes? You get where I’m going with this.
Aesthetic faults come down to personal preference and taste. Here, the eyes are dark and the pose isn’t the best.
The first pass
The goal of your first pass is to reject as many images as possible as fast as possible. If you can identify a reject at a glance and mark it as such, you won’t waste any time later going over that image multiple times.
Once you’ve isolated the images that you’re working on, you can begin the first pass of the culling process.
The only goal here is culling images as fast as possible. Select the first photo in your folder and enter Fullscreen Mode in Lightroom (press “F”). Use the right arrow key to scroll through your images one at a time.
You should have an idea of what isn’t a good photo in your mind. You’re looking for things that fall into that category. Did the flash misfire? Are the eyes partly closed? Is the facial expression not flattering? Is the lighting not quite right? Is the focus off?
If there’s a fault in the image, find it and press “X.”
The second pass
Now that you have completed the first run through your images, you should find that you’ve rejected most of them. The next step is to isolate the images that you haven’t culled from the ones you need to review again.
There are a few ways you can do this. You can create a new Collection and add the images that are to be reviewed. Or you could remove the rejected images from the Collection you are working in.
Using the sorting options on the bottom toolbar, you can sort by Pick. This will put all of your rejects at the bottom of the catalog, making it easy to go through for the second pass.
You could also use the sorting options on the bottom toolbar in the Library Module. This will put any rejected images at the end of the gallery. From there, you can select all of the unflagged images and enter Fullscreen Mode again. As you cycle through the images a second time, you’ll first see the shots you have selected.
For this pass, you are trying to achieve the same thing as the first: to reject as many images as possible. This time it will take longer, as these are images that you have already decided don’t have any immediate faults. Feel free to take extra time and have a careful look over the images. Just remember that you are still not picking any photos yet, merely getting rid of the ones that aren’t suitable.
You can repeat this stage as many times as you need in order to narrow down your Collection to the few best images. For the sake of brevity, we’ll move directly on to the next stage and assume you’ve narrowed your images down as much as possible.
The third pass
Using this method, I was able to narrow down this set to three images in a little over ten minutes.
At this point, you should have a much smaller group of images to work with.
(If you still have a lot of photos, go back and be more ruthless.)
You can now go through and start making your final selections. It should be a lot easier now that you have a much smaller pool to go through. Use the Pick flags or star ratings to indicate the photos you want to work on and reject any photos that still need rejecting.
At the end of your culling sessions, you should have a concise selection of images that reflect the best shots from a particular set.
How many should you aim for?
If you’re wondering how many images you should aim to have left once this is all over, the answer is: it depends.
The number of final images is going to vary wildly depending on how you shoot and what you are shooting for. For example, if I am shooting for myself, I will be looking for one or two images per set. That set may start with 10 photos in it. It may start with 100. I am still only looking for one or two.
If I’m doing a short portrait session for a client, I might end up with 15-20 proofs to present. If I was photographing an event, I would go through and get rid of the obvious rejects and keep everything that was left.
Canon 5D Mark III | Canon EF 85mm f/1.8 | 85mm | 1/2000 sec | f/2.8 | ISO 200
There is no right answer. Only you can answer how many images you need in the end. This whole process of culling images is there to get you to those final photos faster, rather than get you to a certain number.
Keeping it basic
The tools and the process outlined in this article are very basic. It’s how I do it and it’s like that for a reason. The process is uncomfortable and forces you, for a little while, to focus on your mistakes.
When I am culling images, I want it completed as soon as possible, and I don’t want my tools to get in the way of the process. That said, Lightroom has a whole host of other features that could be used in the culling process. By all means, use them if they suit you. It doesn’t matter how you get the job done as long as you get it done.
Conclusion
I know that this can be a difficult process. You have a catalog of images on the screen that you created and poured all kinds of effort into. You just want to look through them and feel good about the photos you’ve made. You don’t want to jump in and start finding faults with 90% of them. I understand. I’m the same.
However, as disheartening as it feels at first, once you start culling images and the best images from a shoot start showing themselves (usually after a short while), that allows you to focus only on the best.
Trust me: The images that you cut get quickly forgotten, anyway. It’s best to be done with them fast; that way you can focus the rest of your time and effort on the images that will benefit you and your portfolio.
The post Tips for Culling Images for Better Results and More Efficiency appeared first on Digital Photography School. It was authored by John McIntire.
Sigma’s all-new 105mm F2.8 macro offers 1:1 reproduction and has been designed from scratch for L-mount and full-frame E-mount mirrorless cameras. Fall weather brings out plenty of detailed subjects for a lens of this kind, and coupled with the 60MP Sony a7R IV, well, let’s just say we’ve seen things we can’t unsee.
Winners of the 2020 Drone Photo Awards from Siena Awards
Winners for the 6th edition of the Drone Photo Awards competition, affiliated with the Siena International Photo Awards competition (you can view winners of the Creative Photo Awards here), were recently announced. Entries were sent in by drone photographers from 126 countries. ‘Love Heart of Nature’ by Australian photographer Jim Picôt, which depicts a shark swimming inside a heart–shaped salmon school, was recognized as the Overall Winner.
The awards are divided into 9 categories: Abstract, Empty Cities: Life during COVID-19, Nature, People, Sports, Series, Urban Architecture, Wedding, and Animals. All 45 winning images will be displayed at the ‘Above Us Only Sky’ exhibition, scheduled from October 24th to November 29th at the ‘Accademia dei Fisiocritici’ museum in Siena, Italy.
Overall Winner: ‘Love Heart of Nature’ by Jim Picôt
Location: Avoca Beach, NSW, Australia
Description: In winter, a shark is inside a salmon school when, chasing the baitfish, the shape became a heart shape.
Winner, Wedding: ‘Tropical Bride’ by Mohamed Azmeel
Location: (Not given)
Description: I used the flowers and the leaves leftover from the decoration of a wedding, to make something creative.
Winner, Abstract: ‘Swirl’ by Boyan Orste
Location: Pink Lake, Australia
Description: An abstract shot of a Pink lake chemical reaction in Western Australia.
Winner, Nature: ‘Coffee or Tea’ by Yi Sun
Location: Brazil
Description: (Not given)
Winner, Wildlife: ‘Outer Space Flamingos’ by Paul McKenzie
Location: Lake Natron, Tanzania
Description: (Not given)
Winner, Life Under COVID-19: ‘Black Flag’ by Tomer Appelbaum
Location: Israel
Description: Thousands of Israelis maintain social distancing due to Covid-19 restrictions while protesting against Israeli Prime Minister Benjamin Netanyahu in Rabin Square on 19 April 2020.
Winner, Sport: ‘On the Sea’ by Roberto Corinaldesi
Location: Cornwall, United Kingdom
Description: An aerial view of swimmers, where the sea becomes the place to take refuge, between the blue carpet and the white foam of the waves.
Winner, People: ‘Frozen Land’ by Alessandra Meniconzi
Location: Eurasian Steppe
Description: With temperatures of minus 30°C, winters in the Eurasian steppe can be brutal. But life doesn’t stop, and local people move from one village to another with a sledge, crossing icy rivers and lakes.
Winner, Urban: ‘Alien Structure on Earth’ by Tomasz Kowalski
Location: Kuala Lumpur, Malaysia
Description: Sometimes we need to change the perspective to feel the strength of the structure stronger than we’ve ever thought. The Petronas Towers, also known as the Petronas Twin Towers, are twin skyscrapers in Kuala Lumpur.
Winner, Wedding: ‘The Wedding Crashers’ by David Gallardo
Location: Turks & Caicos Islands
Description: (Not given)
Winner, Life Under COVID-19: ‘Lonely Guardian’ by Mauro Pagliai
Location: Siena, Italy
Description: (Not given)
Winner, Sport: ‘Ball Up’ by Brad Walls
Location: Sydney, Australia
Description: The physical motions of the tennis player against the clean abstract lineage of the court created a harmonious effect to the eye.
Winner, Abstract: ‘Fishing At Jamuna River’ by MD Tanveer Hassan Rohan
Location: Bogra, Bangladesh
Description: (Not given)
Winner, Urban: ‘Sunrise on the Top’ by Rex Zou
Location: Shanghai, China
Description: At 4:30 in the morning, mysteriously shrouded in clouds, this is what the second tallest building in Shanghai looks like.
Winner, People: ‘Mountains of Salt’ by Igor Altuna
Location: Thi Xa Ninh Hoa, Vietnam
Description: An aerial picture taken on a saltern near a small town on central Vietnam’s coast.
Meyer Optik Görlitz has released the Trioplan 50mm F2.8 II, its third lens of the year, following the Lydith 30mm F3.5 II and Trioplan 100mm F2.8 II. Like both of the previous lenses, the 50mm F2.8 II isn’t just an incremental update—it’s entirely new, designed from the ground up.
The lens has a slightly faster maximum aperture of F2.8 compared to its predecessor, which maxed out at F2.9. The lens also features the signature ‘soap bubble bokeh,’ has a 52mm front filter thread and a minimum focusing distance of 40cm (15.75”).
Below are a number of sample photos captured with the Trioplan 50mm F2.8 II, provided by Meyer Optik Görlitz:
The Trioplan 50mm F2.8 II is available in the following mounts: Canon EF, Nikon F, Fuji X, Sony E, Pentax K, M42, Micro Four Thirds, Leica M and Leica L. It’s currently available to purchase on the Meyer Optik Görlitz website for €876.34 (approximately $ 1,020), not including shipping.
OPC Optics, the new owners of the Meyer Optik Görlitz brand, says it has two more classic lens designs on the horizon: a Primoplan 75mm F1.9 II and a Primoplan 58mm F1.9. OPC Optics says the lenses are nearing completion and ‘will be released shortly.’
The Allen Institute for AI (AI2) created by Paul Allen, best known as co-founder of Microsoft, has published new research on a type of artificial intelligence that is able to generate basic (though obviously nonsensical) images based on a concept presented to the machine as a caption. The technology hints at an evolution in machine learning that may pave the way for smarter, more capable AI.
The research institute’s newly published study, which was recent highlighted by MIT, builds upon the technology demonstrated by OpenAI with its GPT-3 system. With GPT-3, the machine learning algorithm was trained using vast amounts of text-based data, something that itself builds upon the masking technique introduced by Google’s BERT.
Put simply, BERT’s masking technique trains machine learning algorithms by presenting natural language sentences that have a word missing, thus requiring the machine to replace the word. Training the AI in this way teaches it to recognize language patterns and word usage, the result being a machine that can fairly effectively understand natural language and interpret its meaning.
Building upon this, the training evolved to include an image with a caption that has a missing word, such as an image of an animal with a caption describing the animal and the environment — only the word for the animal was missing, forcing the AI to figure out the right answer based on the sentence and related image. This taught the machine to recognize the patterns in how visual content related to the words in the captions.
This is where the AI2 research comes in, with the study posing the question: ‘Do vision-and-language BERT models know how to paint?‘
Experts with the research institute build upon the visual-text technique described above to teach AI how to generate images based on its understanding of text captions. To make this possible, the researchers introduced a twist on the masking technique, this time masking certain parts of images paired with captions to train a model called X-LXMERT, an extension of the LXMERT model family that uses multiple encoders to learn connections between language and visual data.
The researchers explain in the study [PDF]:
Interestingly, our analysis leads us to the conclusion that LXMERT in its current form does not possess the ability to paint – it produces images that have little resemblance to natural images …
We introduce X-LXMERT that builds upon LXMERT and enables it to effectively perform discriminative as well as generative tasks … When coupled with our proposed image generator, X-LXMERT is able to generate rich imagery that is semantically consistent with the input captions. Importantly, X-LXMERT’s image generation capabilities rival state-of-the-art image generation models (designed only for generation), while its question-answering capabilities show little degradation compared to LXMERT.
By adding the visual masking technique, the machine had to learn to predict what parts of the images were masked based on the captions, slowly teaching the machine to understand the logical and conceptual framework of the visual world in addition to connecting visual data with language. For example, a clock tower located in a town is likely surrounded by smaller buildings, something a human can infer based on the text description.
An AI-generated image based on the caption, ‘A large painted clock tower in the middle of town.’
Using this visual masking technique, the AI2 researchers were able to impart the same general understanding to a machine given the caption, ‘A large clock tower in the middle of a town.’ Though the resulting image (above) isn’t realistic and wouldn’t be mistaken for an actual photo, it does demonstrate the machine’s general understanding of the meaning of the phrase and the type of elements that may be found in a real-world clocktower setting.
The images demonstrate the machine’s ability to understand both the visual world and written text and to make logical assumptions based on the limited data provided. This mirrors the way a human understands the world and written text describing it.
For example, a human, when given a caption, could sketch a concept drawing that presents a logical interpretation of how the captioned scene may look in the real world, such as computer monitors likely sitting on a desk, a skier likely being on snow and bicycles likely being located on pavement.
This development in AI research represents a type of simple, child-like abstract thinking that hints at a future in which machines may be capable of far more sophisticated understandings of the world and, perhaps, any other concepts they are trained to understand as related to each other. The next step in this evolution is likely an improved ability to generate images, resulting in more realistic content.
Using artificial intelligence to generate photo-realistic images is already a thing, though generating highly specific photo-realistic images based on a text description is, as shown above, still a work in progress. Machine learning technology has also been used to demonstrate other potential applications for AI, such as a study Google published last month that demonstrates using crowdsourced 2D images to generate high-quality 3D models of popular structures.