Blog

  • DxO releases major firmware update and accessories for DxO One camera

    DxO has released a significant firmware update and an expanded range of accessories for its DxO One camera. The improvements include remote operation over Wi-Fi, while the accessories include a waterproof case.

    The firmware update finally enables the camera’s Wi-Fi, making it possible to use it remotely. The camera can either create and ad hoc connection to an iOS device or can join an existing Wi-Fi network.

    The Wi-Fi system uses the Apple Lightning connector to establish the communication between the two devices. These ad hoc connections should have a range of 10-15m, depending on how much radio traffic there is. Connections across existing Wi-Fi networks work over a greater range but use a slower transfer protocol.

    The firmware update also improves both the camera’s battery management and the battery level reporting, meaning you should be able to shoot for longer with the camera and have a clearer idea of how much battery life remains.

    Accessories

    DxO has also launched a series of accessories that considerably extend the One’s capabilities.

    These include a footplate/tripod mount, that allows the camera to sit upright and includes both a standard tripod thread and Arca-Swiss-style flanges. These are closer together than usual, though, so it may not be compatible with all Arca-Swiss heads.

    There’s also a rugged case. This comes with two clip-on backs, one of which provides environmental sealing and allows the continued use of the touchscreen and a second that provides full water proofing (to a depth of 45m). The case includes a hinge attachment, making it compatible with many mounts and accessories designed for GoPros.

    With the waterproof back attached, the camera’s shooting mode can be changed by holding your hand over the lens for 3 seconds – allowing a degree of control without having to remove the camera from its case.

    There’s also a set of adapters to allow 30.5mm filters to be clipped onto the front of the camera. This makes it possible to add diopter lenses or optical filters to the camera easily.

    The firmware update and associated iOS app will be free. The tripod stand will cost around $ 24.99/£19.99/€24,90, while the ‘outdoor case’ has a recommended price of $ 59.99/£49.99/€59,90.

    Press Release

    The DxO ONE award winning camera takes it one step further with two new state-of-the-art features

    PARIS and SAN FRANCISCO—August 31, 2016—Camera manufacturer DxO announces major updates to the DxO ONE Miniaturized DSLR-quality Camera for iPhone, including Wi-Fi remote control and a new waterproof Outdoor Shell designed to further extend its elds of use. Upholding their promise to make the camera even better after you’ve bought it, Wi-Fi Remote Control will be available to all existing users free of charge via a forthcoming 2.0 software update. DxO’s accessories ecosystem also introduces an ultra-compact Stand and a snap-on Optical Adapter, enhancing creative possibilities for the DxO ONE which captures pro-quality photos and videos that you can share instantly to Facebook, Instagram, YouTube and more.

    DxO’s new Wi-Fi Remote Control implementation is remarkable in that it completely eliminates the cumbersome and altogether frustrating Wi-Fi con guration process that plagues every other Wi-Fi-equipped camera on the market. When attached via DxO’s patented Lightning connector, Apple iOS can seamlessly pass its Wi-Fi authentication credentials from the iPhone to the DxO ONE. In-house or in-of ce, users can take advantage of this unique DxO innovation that lets the camera immediately tap into the Wi-Fi network that your iPhone is already logged onto. And when traveling about, or out in the wilderness, your DxO ONE can just as easily create a direct Wi-Fi connection to your iPhone. By enabling remote connectivity between the DxO ONE camera and your iPhone, photographers are free to explore every conceivable photographic angle, while still having control over every capture setting, and the ability to easily view, edit and share their content to social media sites such as Facebook, Instagram, and YouTube.

    “Last year, we revolutionized mobile photography by packing DSLR-quality into a camera design so incredibly small that it could always be available in our pocket,” said DxO CEO and founder, Jérôme Ménière. “And now, thanks to Wi-Fi Remote Control and our new accessories ecosystem, all our users can take the DxO ONE with them absolutely anywhere, without restrictions, and extend their creativity even further.”

    The Outdoor Shell, compatible with all existing DxO ONE cameras, is extremely rugged and yet quick and easy to attach. The shell can be equipped with either of two waterproof back doors, one of which is splash proof (IP67), perfect for sailing or walks in the rain. The other is fully submersible and immersion proof to depths of 45m (150 ft) for scuba diving in a reef or just swimming in your pool. The design features a dual clamping system that snaps securely into place to protect your DxO ONE camera from water, dust and shock, while providing access to power switching and multiple capture modes without having to open the shell. Built to stand up to the elements, the Outdoor Shell is made from durable high end polymers and stainless steel. The shell accepts 30.5mm thread optical add-ons, features a 1?4-20 thread for tripod mounting, and can even be attached to popular Action Cam xtures and harnesses. Available in seven exciting colors including yellow, coral, lime, olive, black, white and lagoon, the waterproof Outdoor Shell is the perfect way to protect and personalize your DxO ONE.

    The 2.0 software update also introduces Mobile Smart Lighting, a lighter-weight variant of the famed Smart Lighting feature in DxO OpticsPro, which automatically analyzes each scene and applies an intelligent and customizable global tone map—in this instance, to every photo you take with your DxO ONE. The overall effect is similar to having added a ll light to the picture, which dramatically enhances the dynamic range of your images. The automatic 2.0 update also includes signi cant enhancements to battery management and power consumption including an on-demand auto- focus mode similar to that of DSLRs, and an innovative underwater white balance that automatically compensates for the blue cast to achieve a more pleasant rendering in your underwater images.

    “It seems every few months the team in Paris automatically updates my DxO ONE with cool new features,” said celebrated motorsports photographer, John Thawley. “Now, with remote Wi-Fi control I’m totally untethered. Combined with the protective shell, I’m free to place the camera in all sorts of new and discreet scenarios. This means I can capture high resolution images that just weren’t possible before… not with any camera!”

    An e-store, accessible right from the DxO ONE app, allows you to easily order any of the new accessories including an ultra-compact Stand that uses an ingenious combination of clamps to let you balance your camera on almost any surface or mount it to a tripod. Also accessible via the e-store is a snap-on Optical Adapter that allows standard ND and creative lters, macro lenses, and hoods to be mounted in front of the lens of your DxO ONE camera. And of course, the accessories store also provides one stop access to the waterproof Outdoor Shell that lets you take your DxO ONE miniaturized camera where no DSLR or smartphone can go.

    Pricing & Availability

    The DxO ONE Miniaturized DSLR-quality Camera for iPhone and iPad is available now for pre-order at dxo.com and Amazon, and other respected retailers for £399 / 499 €. First customer availability is expected second half of September.

    Also available in the same timeframe from select retailers, as well as via the new in-app e-store, are genuine DxO accessories designed to enhance the DxO ONE user experience. These include the waterproof Outdoor Shell for £49.99 / 59,90 €, the ultra- compact Stand for £19.99 / 24,90 €, the snap-on Optical Adapter for £19.99 / 24,90 €, and a protective quick-draw Zipped Pouch for £15.99 / 19,90 €.

    The DxO ONE 2.0 iOS app and companion Apple Watch app will be made available as free software updates via the iTunes App Store, also available the second half of September. Every DxO ONE user is invited to download DxO Connect for Mac/PC, or on Mac DxO OpticsPro for Photos – DxO ONE camera only, both of which harness the power of the DxO OpticsPro photo engine to make your best DxO ONE photos look even better.
    Articles: Digital Photography Review (dpreview.com)

  • Discover the Secrets of Lightroom: 48 Hours Left to Save 50% Off Our Lightroom Mastery Course

    dps-lightroom-mastery-hero-v1b-large

    If you’ve ever wanted to learn more about Adobe Lightroom, now’s your chance to do it with our brand new Lightroom Mastery Course – and if you act fast you can save 50%!

    Over the last few years here at dPS we’ve noticed that the most common tool that our readers use to process their photos is Lightroom.

    Along with this rise in the use of Lightroom we’ve noticed that many of our readers are coming to us with questions about how to use it most effectively and the feeling of being overwhelmed by how to get started with it.

    So earlier this year we approached Pro Photographer and Lightroom Expert Mike Newton to create a course for our readers on how to Master Lightroom.

    Mike went above and beyond and created Lightroom Mastery – a course that we’ve had some fantastic feedback on.

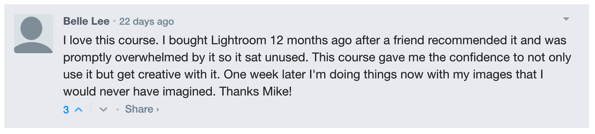
    Here’s what one of our readers said about the course a few days after it launched.

    Lightroom mastery course review

    Belle wasn’t the only one – much of the feedback was along similar lines with readers reporting that they finally felt like they knew how to take control over Lightroom and to develop a workflow to help them take their photos to the next level and create beautiful images.

    Early Bird Special: Ends in 48 Hours

    Over the last 4 weeks we’ve offered Lightroom Mastery at an Early Bird discount of 50% off. We’ve also been putting everyone who purchases a copy in the draw to win $ 1000 USD toward new camera gear.

    Many of you have taken up this offer already but we wanted to let you know today that there are just 48 hours left to take advantage of it.

    At midnight (US EDT) the competition closes off and we’ll be reverting the course to its full price so now is your last chance to take advantage of this Early Bird Offer.

    Discover How to Transform Your Images Today

    This online course includes 16 modules and just over 3hrs of video tutorials.

    Here are some of the things you’ll learn:

    • Editing – How to use the crop tool, basics panel, tone curve panel, color panel, split toning, details panel, and lens corrections panel, all while improving the image.
    • Tools – Using the spot removal brushes (cloning/healing), red eye correction tool, graduated filter, radial filter, and adjustment brushes!
    • Workflow – Lightroom presets, finding lost photos, stacking, the face finder tool, lights out mode, and more advanced topics!
    • Creative Techniques – How to Create Panoramas and HDR images.
    • How to Bring your Photos to Life – Full Photo Edit Workflow.

    … and much much more.

    And remember – when you order before midnight EDT this Friday, not only will you save a whopping 50%, you’ll also go into the draw to win USD $ 1,000 to spend on your photography.

    So don’t wait – grab Lightroom Mastery here – or you might miss out!

    googletag.cmd.push(function() {
    tablet_slots.push( googletag.defineSlot( “/1005424/_dPSv4_tab-all-article-bottom_(300×250)”, [300, 250], “pb-ad-78623” ).addService( googletag.pubads() ) ); } );

    googletag.cmd.push(function() {
    mobile_slots.push( googletag.defineSlot( “/1005424/_dPSv4_mob-all-article-bottom_(300×250)”, [300, 250], “pb-ad-78158” ).addService( googletag.pubads() ) ); } );

    The post Discover the Secrets of Lightroom: 48 Hours Left to Save 50% Off Our Lightroom Mastery Course by Darren Rowse appeared first on Digital Photography School.


    Digital Photography School

  • Lytro Immerge VR footage showcased for the first time

    Last November, Lytro unveiled Immerge, a pro-grade camera rig for producing cinematic VR content using the company’s light field technology. At the time, Lytro offered interested partners and studios the option to checkout a prototype of the rig, but little had been said since. That changed last week, with Lytro publishing a demonstration video showing footage created by its rig as seen through an Oculus Rift VR headset.

    Lytro’s Immerge produces content by capturing data from all directions around the rig, using that to generate views for VR footage. The resulting footage can be presented in a few different forms: as spherical videos, 180-degree and 360-degree immersive videos, and there’s also the option for seamless capture. Unlike most VR cameras on the market, though, Immerge is being targeted at large studios and others interested in producing cinematic VR content. As demonstrated in the video below, these studios can use Immerge’s end-to-end system to blend CG elements into the footage without using a traditional green screen.

    It’s not clear which companies have partnered with Lytro. However, Lytro VP of engineering Tim Milliron said in a statement to The Verge, ‘What I can say is definitely in Q1 of 2017 you should be seeing several kinds of these kinds of experiences out in the real world from other content producers that we’re working with today.’ The rig’s price hasn’t been revealed, but previous statements from the company pegs it at ‘multiple hundreds of thousands of dollars.’

    Via: The Verge

    Articles: Digital Photography Review (dpreview.com)

  • Image Editing Software Overview – On1 Photo 10

    Since the advent of digital photography there has been one program that has been the penultimate of all image editing – Adobe Photoshop. There is no denying that it is powerful, but many find it confusing and hard to learn. Another aspect that some people aren’t sure about is the new subscription based ownership. So for many, another solution to the predicament is On1 Photo 10. It’s a program that is not that expensive, and can do most of what the majority of photographers want.

    leannecole-on1-enhanced003

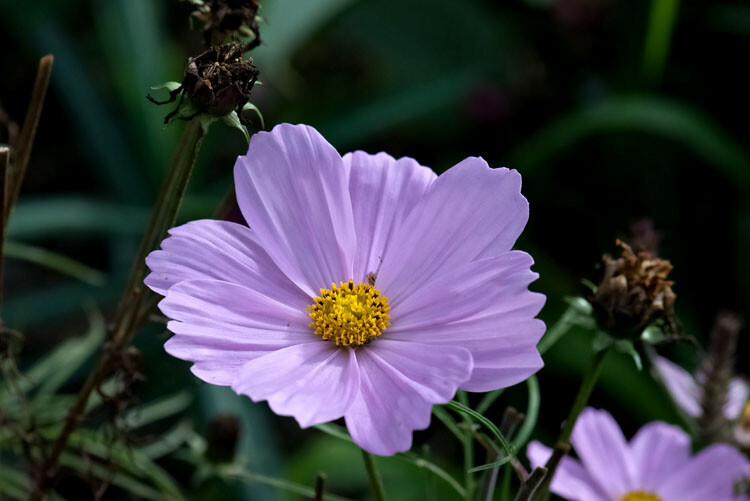
    Image processed with the Enhance Module in On1 Photo 10

    Overview of On1 Photo 10

    The On1 Photo 10 editing software has been around for some time, and you may know it more as plugins for Lightroom and Photoshop. However, recently it has been given a new look, and it is now also a standalone program. This means you don’t need another program to be able to use it. You can download it and do all your editing within its confines.

    When you open On1 Photo 10, it looks a bit like Lightroom, but that is about it. Locating all the tools is different, but not so different that you can’t find things. When you begin using On1, a window pops up with several videos to teach you how to use it. It is advisable that you watch them and learn. They are not very long, but they are packed with useful information.

    On the right side of the panel there are a series of modules that you can edit your photos in. Each one is specific and gives you different options.

    Browse Module

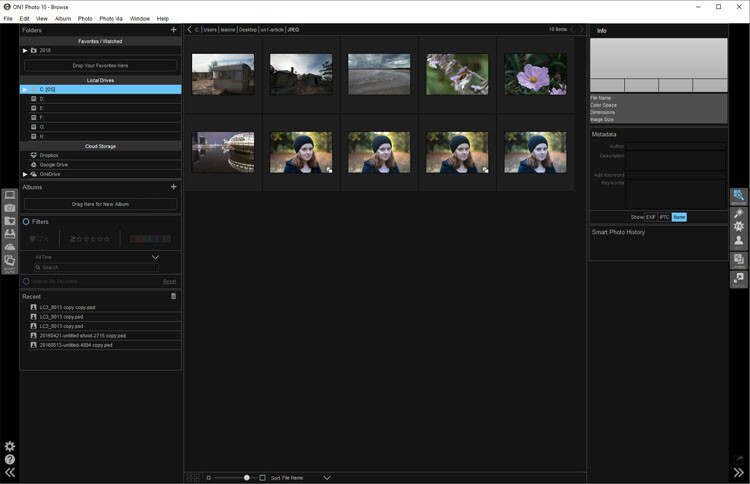
    In the Browse section you can look at your photos and catalogue them, decide where you want them, and upload them to Cloud storage facilities like Dropbox, Google Drive, and OneDrive. It is similar to Bridge in Photoshop or the Library Module in Lightroom. You can make the images larger, so you can get a better look at them and decide which ones you want to work on.

    When you want to start editing, the other modules are there for you to use.

    leannecole-on1-browse-folder

    Browse Module, here you can view your photos and move them around.

    Enhance Module

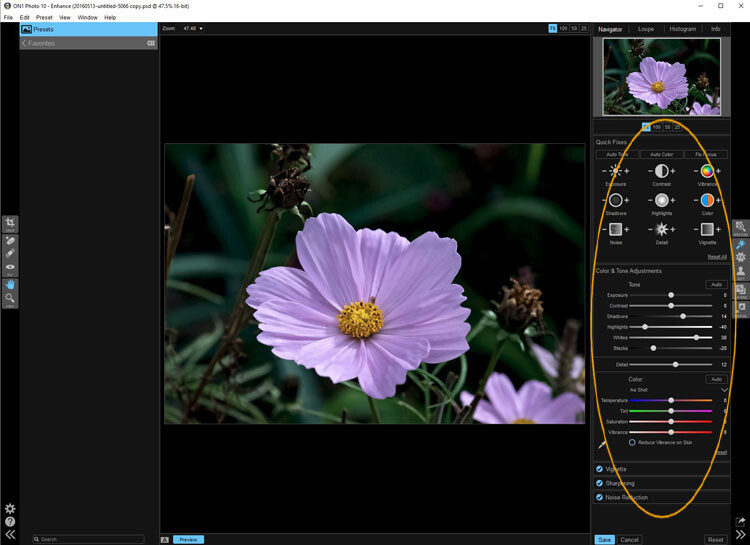
    When you open your photo into the Enhance module you can do some basic editing, for example: changing the exposure, adjusting whites, black, shadows, and highlights. It will allow you to fix the white balance and help with noise reduction. This section is where you get your image ready for further work. It is like the preparation area before you go on to do the real work.

    Similar to Lightroom, On1 works in a non-destructive manner. If you don’t understand that, it means nothing you do to your image is permanent. If you do something to it and don’t like it, you can go back and reverse the change. When you are just learning photo editing, it is good to work with software that allows you to work this way, without having to worry about ruining your image.

    leannecole-on1-enhance-folder

    The Enhance Module allows you to do some basic editing to your images.

    Effects Module

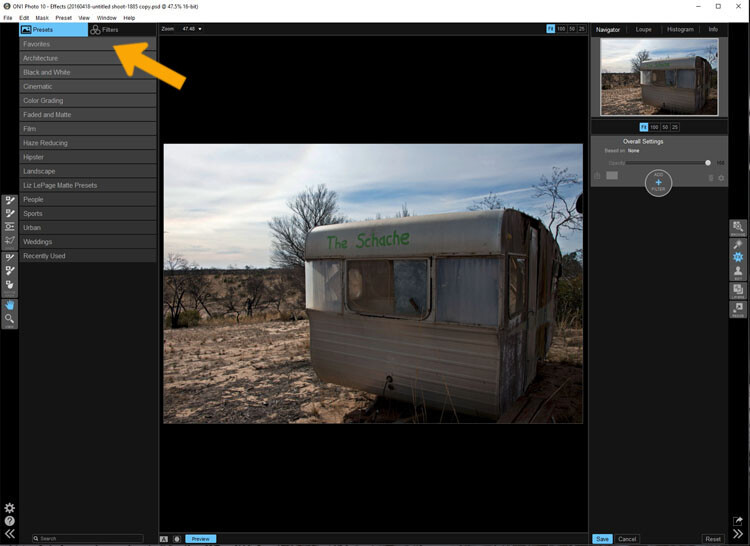
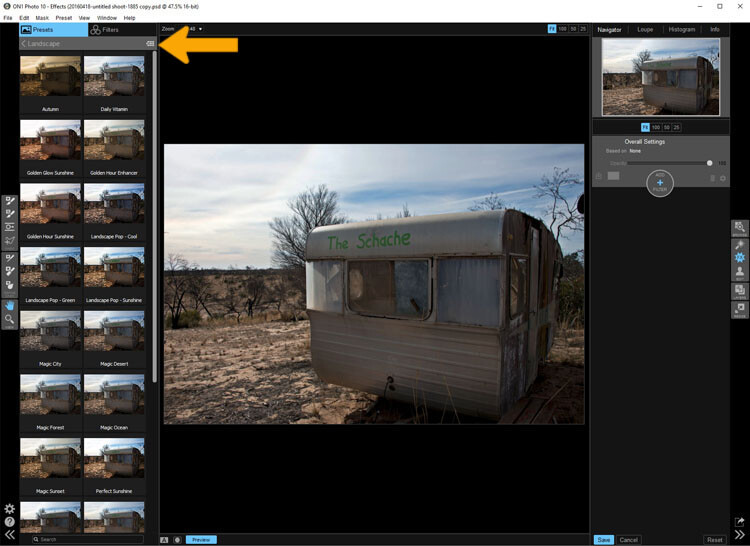
    In Effects, you can add filters and presets to your photos. There is a large variety of them, and each one has several options within. You have the option of creating your own and saving them (just as in Lightroom), which is very helpful if you want to use the same one a lot.

    There is a difference between presets and filters. On1 explains that presets do multiple effects, while the filters have only one. When using any of them you can make adjustments so it is as strong as you like, or they can be made to have less effect. You get to be the judge of how you want the final result to look.

    leannecole-on1-effects-module-1

    In the Effects Module you can apply presets and filters to your images.

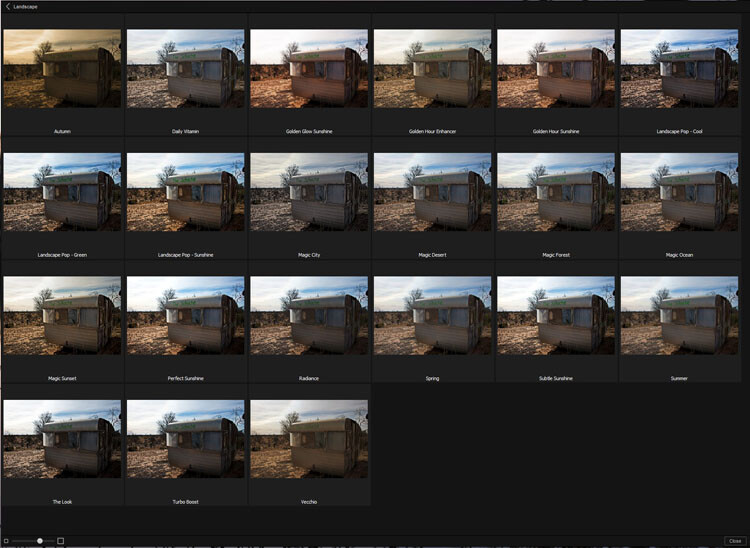
    leannecole-on1-effects-module-2

    You can see what the presets or filters will do to your image, if you click the grid you will get a larger of view of each option.

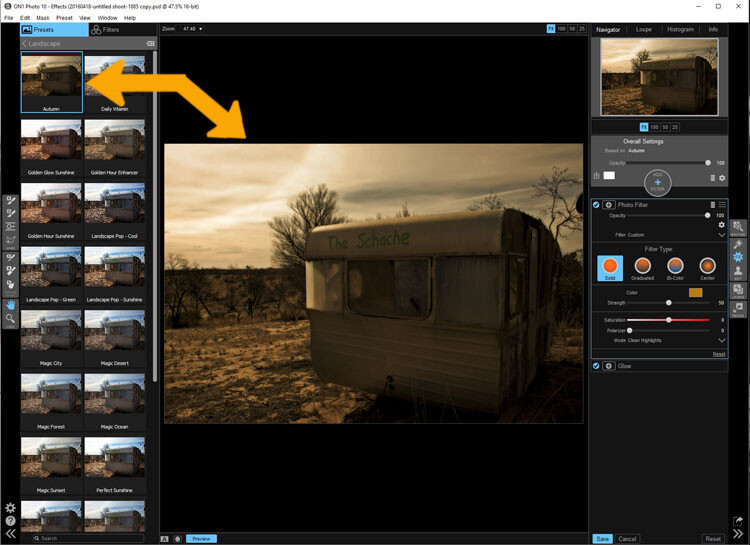
    leannecole-on1-effects-module-3

    You can see what each preset or filter will do and when you decide which one to use, just click on it.

    leannecole-on1-effects-module-4

    On1 will then apply it to your image.

    Portrait Module

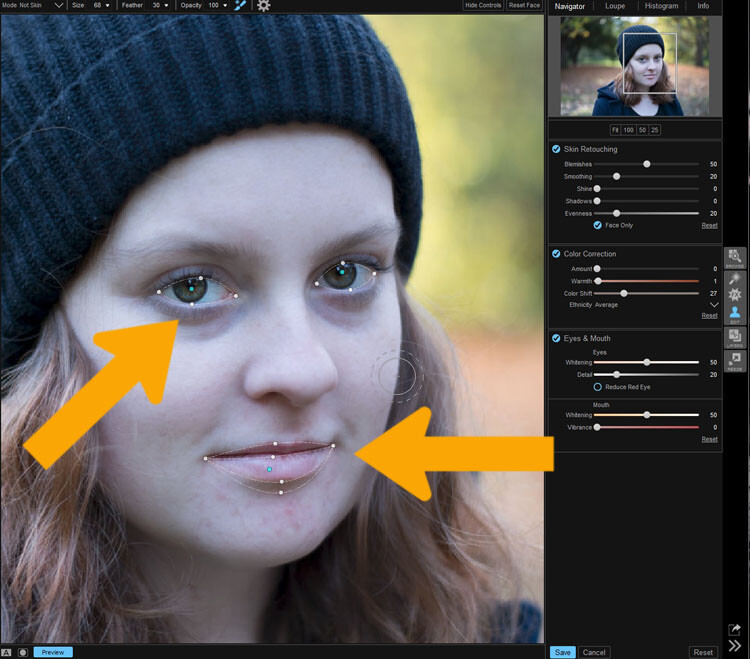
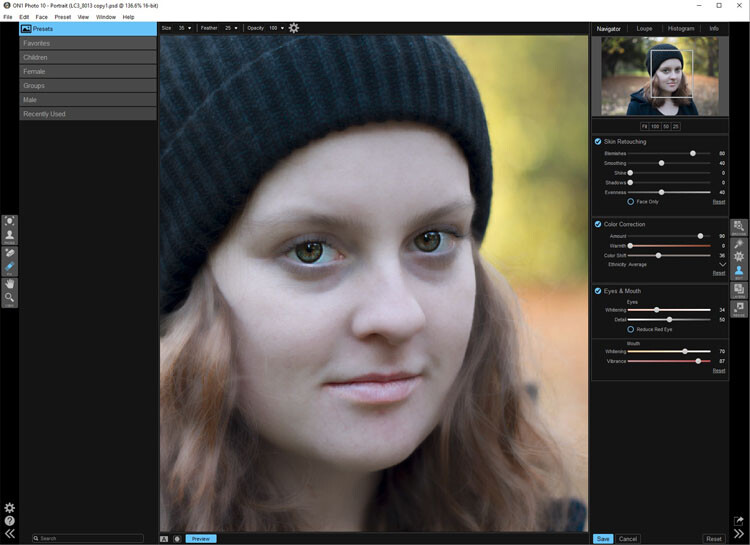
    Portrait module is possibly is the hardest one to use. For people who photograph portraits on a regular basis, though, it may seem more intuitive. You have to work out faces, and point out the eyes and mouth to the program. Then it will whiten the eyes, and make the lips lighter. You also have the option of going back over everything and readjusting the settings. While whitening the eyes can be nice, if it is done too much it looks very strange.

    leannecole-on1-portrait-module-1

    On1 allows you to do specific work to faces, and asks you to highlight the eyes and mouth so it can to its thing.

    leannecole-on1-portrait-module-2

    You can work on the skin and other parts of the face as well.

    Layers Module

    On1 Photo 10 also has the ability to work in layers, so if you like working with texture overlays and replacing skies, you will like this module. It makes these very easy to do, especially the former.
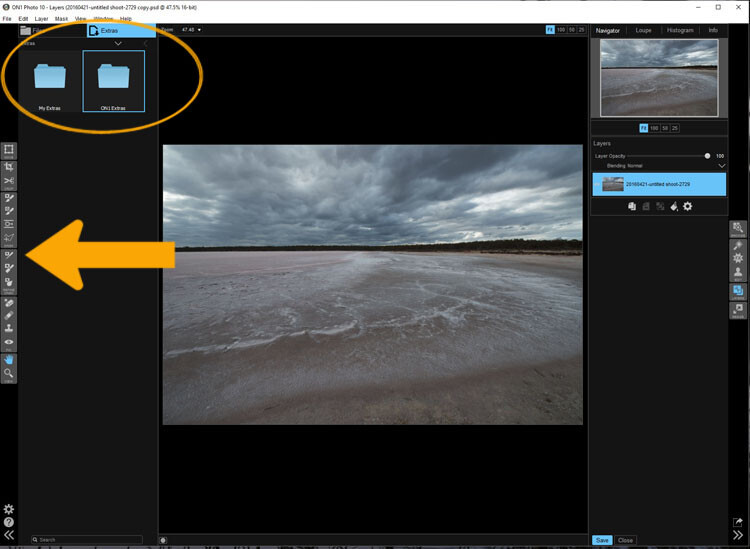
    The program comes with a number of textures, backdrops, and borders. You could quite easily just use what it provides, but it also has a section where you can add your own. So, you can upload any textures you have collected and apply them to your images.

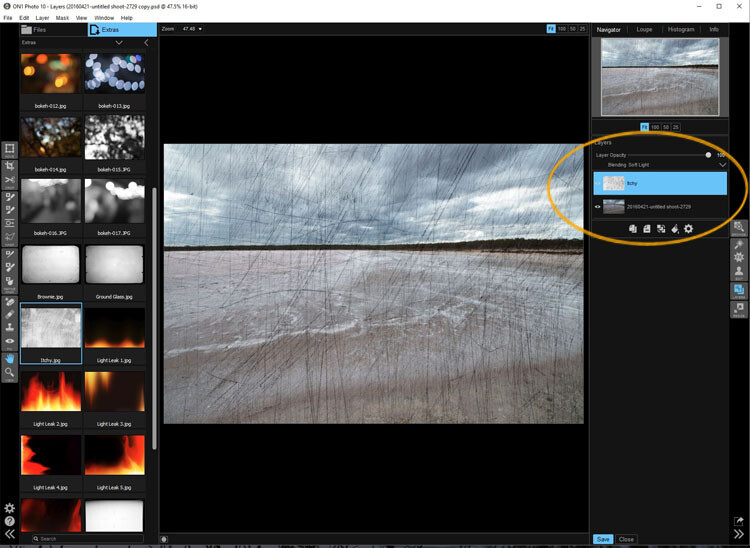
    As with most sections in On1, you can adjust, and then decide how strong the layer will be. There are blending options and tools are available if you want to remove part of it too.

    leannecole-on1-layers-module-1

    The Layer Module lets you work in layers, there are also some tools on the left that allow you to do some specific processes.

    leannecole-on1-layers-module-2

    You can apply textures.

    leannecole-on1-layers-module-3

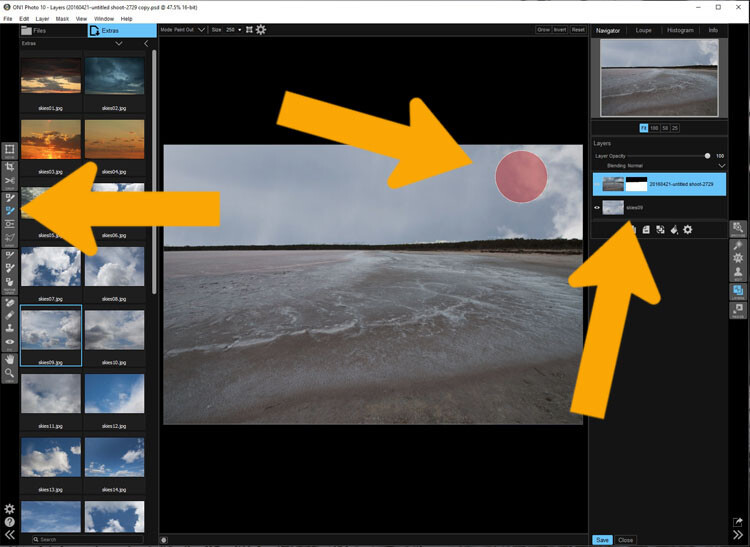
    Or you can replace a sky, which is very easy with the masked brush tool.

    Resize Module

    Figuring out how to resize an image is easy, and fairly straight forward. It is a task that many people usually find difficult. I often see people putting up large images on the internet because they don’t know how to make them smaller. On1 has a separate module where you can make them  the size you want. If you want to resize it for something special, there are options available for that as well. There are no excuses now for loading images that are too big.
    Who would use On1 Photo 10?

    If you like plugins and seeing the different effects on your images, you will love this software.  It is perfect for someone who is just starting out, and looking for software that is simple and easy to use. Many of the other programs can get you bogged down because of how complicated they are, On1 has great online help and there are a number of videos available to help you work through it.

    Experience using On1 Photo 10

    I have to admit that while I know how to use many different types of editing software, I had to find some video tutorials to help me find my way around. On1. It is something that you should always do when learning new products, it can help you find the correct way to use them. Fortunately, On1 has a lot of tutorials available to help you learn how to use it.

    It could just be my computer, or the size of my files, but I had trouble with the program crashing or freezing. I have a PC and am using Windows 10, so it may not be compatible. I have sent an email to the developers in hope of finding out what keeps causing that. There is however, a 60 day trial version available, which is far more than most other software products. So you can find out if it will work for you or not.

    The program does have a tendency to blow out the highlights. In Photoshop you can often fix them, but On1 blows them out even more, and it seems like you are unable to do anything about it. However, it only happens when using RAW images, if you convert them to JPEG it doesn’t appear to happen. Though, it will teach you to be careful with them.

    leannecole-on1-highlights-001

    You can see with the top image, which was a RAW file how the highlights have been blown out, but it has not happened in the jpeg file.

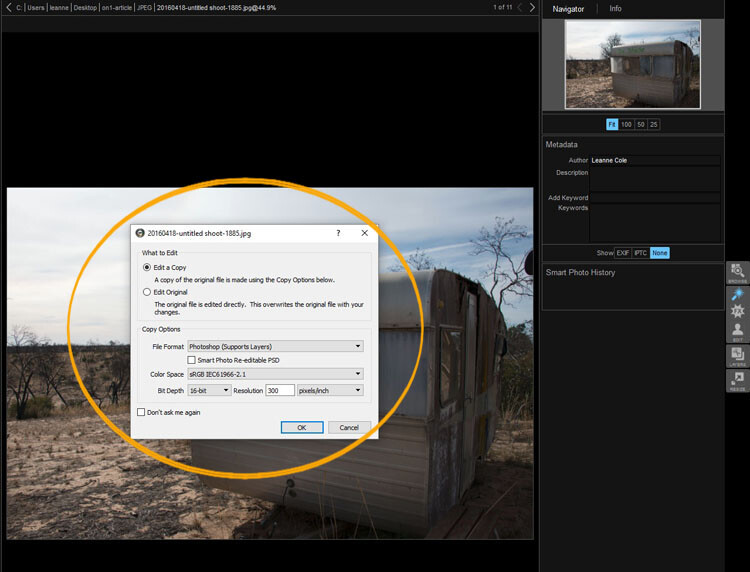
    Every time you open an image it asks if you want to edit a copy or the original. When you start you may find that every time you open the image you are creating another copy of it. Take care, and perhaps once you have that first copy, just work on that one.

    leannecole-on1-opening-an-image

    Read the windows as they open up, and make sure you are aware of what you are doing.

    Overall

    On1 Photo 10 is a good program, and those interested in doing only basic editing will find it very useful. Those that love the grunge look and adding textures will also enjoy using it. It likely won’t replace Photoshop, but for beginners and people who love using plugins, it’s a great option.

    Have you tried it? What are your thoughts?

    googletag.cmd.push(function() {
    tablet_slots.push( googletag.defineSlot( “/1005424/_dPSv4_tab-all-article-bottom_(300×250)”, [300, 250], “pb-ad-78623” ).addService( googletag.pubads() ) ); } );

    googletag.cmd.push(function() {
    mobile_slots.push( googletag.defineSlot( “/1005424/_dPSv4_mob-all-article-bottom_(300×250)”, [300, 250], “pb-ad-78158” ).addService( googletag.pubads() ) ); } );

    The post Image Editing Software Overview – On1 Photo 10 by Leanne Cole appeared first on Digital Photography School.


    Digital Photography School

  • Hasselblad X1D-50c shipments delayed until September 15

    Shipment of the Hasselblad X1D-50C has been delayed for a couple of weeks, according to a listing on B&H Photo. The retailer’s product page now shows a shipment start date of September 15, two weeks later than the previously given August 30 date.

    Hasselblad’s 100MP H6D has also missed its target ship date, though by a much greater margin: announced in April, it’s currently listed as unavailable at B&H. Hasselblad announced a trade-up deal for those waiting for the H6D-100c; customers can purchase a 50MP H6D-50c and only pay the difference to trade up for the 100MP back when the H6D-100c becomes available. Earthquake damage to Sony Japan’s sensor facilities has been cited as the root cause of that delay.

    Via: Mirrorless Rumors

    Articles: Digital Photography Review (dpreview.com)

  • Circular Reasoning: How Rounded Homes Resist Storms & Save Lives

    [ By WebUrbanist in Architecture & Houses & Residential. ]

    modern round house

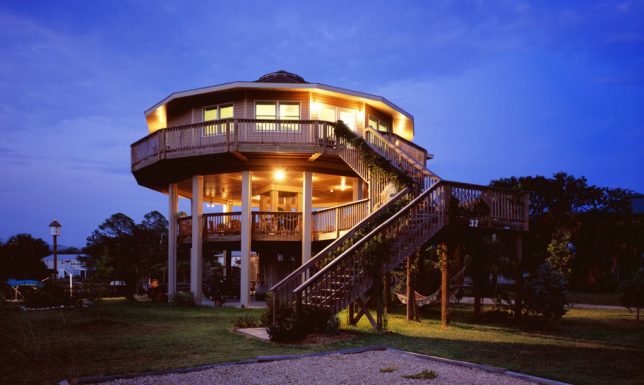
    Combining the physical benefits of circular plans with the practicality of straight lines and corners, octagonal houses are uniquely positioned to resist hurricanes, tsunamis and earthquakes that threaten coastlines. Rounded habitats have a long history, from tipis and yurts through the geodesic domes of Buckminster Fuller. Indeed, round homes make sense for a lot of reasons. They have less surface area, which means they require less construction material and have greater energy efficiency, for instance.

    round house avoids destruction

    Critically, rounded homes are also ideal for resisting extreme weather (above: a regular home destroyed in a storm and a surviving semi-round house).

    round house diagram

    round house functionality

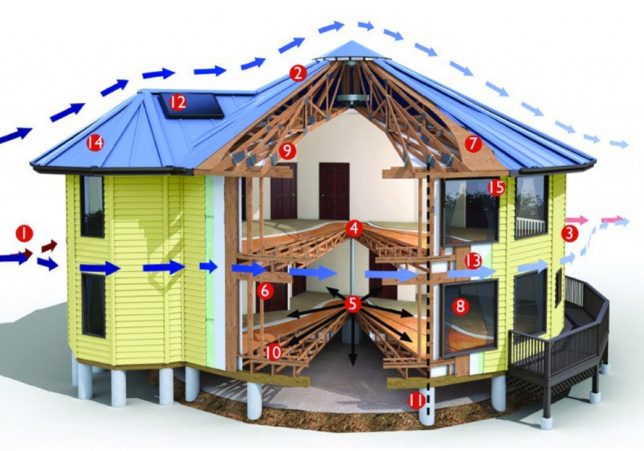
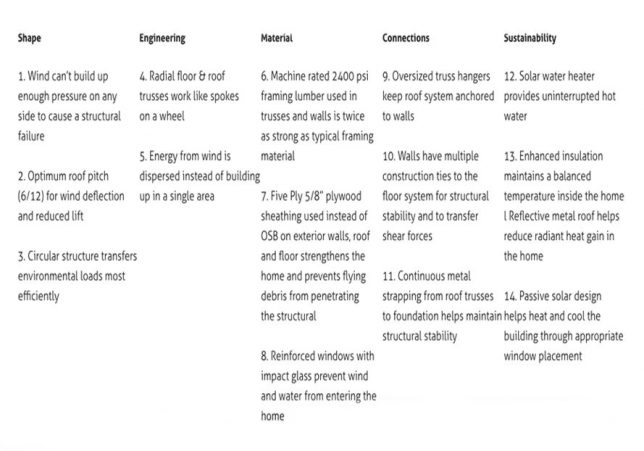
    Flat sides pose a significant structural risk during hurricanes and tsunamis. It is much easier for wind and water to flow around a round house than a square or rectangular one.

    round structural design

    In modern rounded house designs, radial floor and roof trusses meet in a center ring like spokes on a wheel and thus lock the building in a constant state of compression, which further reinforces its structural integrity. This approach also helps them resist earthquakes.

    round interior

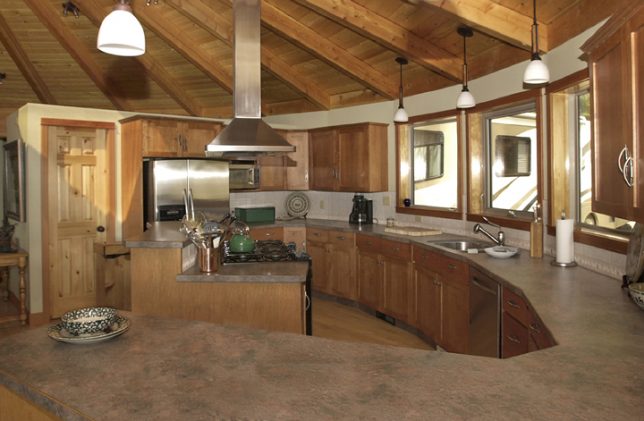
    Of course, fitting furniture along the edges of a truly round house can be frustrating. The space and materials saved are nice, but the usability of the resulting spaces is diminished.

    round house

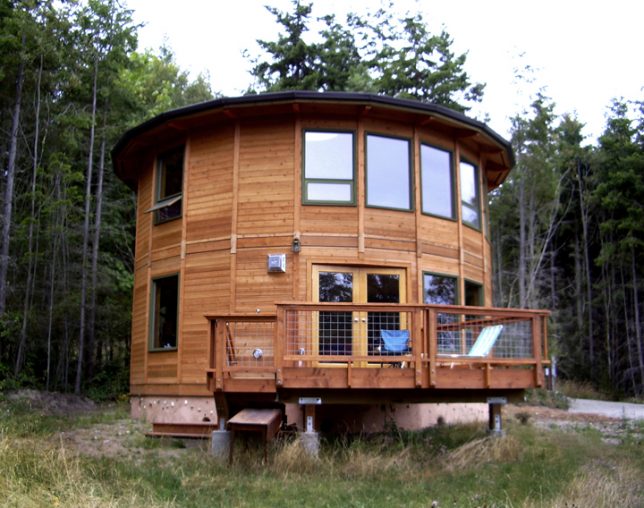
    Today, many round-house makers opt for a middle ground and go with octagonal floor plans (or other variants with more than four sides). Doubling the number of walls, this represents the best of both worlds in many ways. These are easier to construct with contemporary materials and techniques, but still take advantage of wind- and water-resistance found in edge-less dwellings.

    round edge house

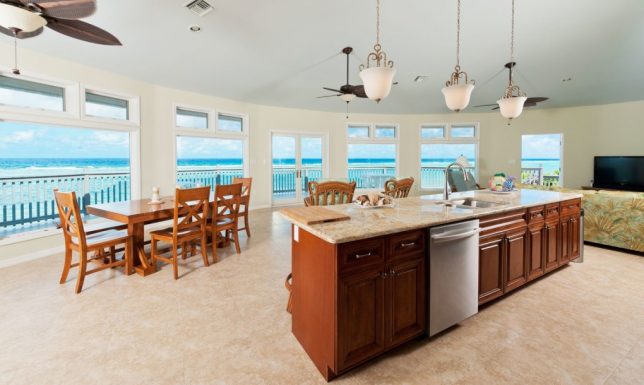
    Deltac, one manufacturer of such semi-round structures, boasts that none of their 5,000 homes built to date has been knocked down by nature. These kinds of homes also have an added benefit for those living along coasts, where storms are a great thread: their shapes provide seaside dwellers with amazing panoramic views (images via Deltac and Cayman).

    round houses surviv

    Share on Facebook


    [ By WebUrbanist in Architecture & Houses & Residential. ]

    [ WebUrbanist | Archives | Galleries | Privacy | TOS ]


    WebUrbanist

  • Putting Image Microadjust to the test on the Canon 5D Mark IV

    One of the most discussed features of the Canon EOS 5D Mark IV is Image Microadjust. This uses the slight difference in perspective between the left and right-facing halves of the split ‘dual’ pixels to fine-tune the effective focus point of the images.

    Like everyone else, we were interested to see what degree of refocusability this gave.

    If you’re wondering: ‘will this let me correct which eye my portrait is focused on?’ The answer is a resounding ‘no’. Indeed, even if the question is: ‘can I shift the focus back from the eye lashes to get the iris sharp,’ the answer isn’t much more positive.

    Dual Pixel Image Microadjustment

    We set up the 5D Mark IV with EF 35mm F1.4L II USM at F1.4, set up at approximately 25x focal length distance from our LensAlign target. The Dual Pixel Raw file was then processed in Digital Photo Professional (DPP) to see how much the maximum backward and forward adjustments could move focus.

    +5 (Max backward adjustment) 0 (No adjustment) -5 (Max forward adjustment)

    AF (Lens) Microadjustment

    For comparison, here’s the amount of adjustment that can be achieved using AF microadjustment – the traditional method for calibrating your lens to your body to correct back/front-focus issues. The rollover starts at +1 as this is the degree of adjustment needed by this lens on this body.

     +20  +10  +3  +2  +1  0  -1  -2  -3  -10  -20

    Real-world difference

    To demonstrate the real-world impact image microadjust might have on a traditional head-shot portrait, we shot Carey with an EF 85mm F1.8 at F1.8.

    This portrait was very slightly front focused, so we tested the degree to which it can be refocused, backwards. For each of the adjustments, ‘Strength’ was set to 10 to maximize the input from one set of pixels.

    +5 (Max backward adjustment) 0 (No adjustment) -5 (Max forward adjustment)

    Interestingly, it appears the images become noticeably softer when you apply forward or backward adjustment, which may mask some of the advantages of the focus shift (there’s a chance that slightly better-looking results will be possible if you apply higher levels of sharpening to the microadjusted images). However, the degree of correction we’re seeing is so small that we wonder whether it’s worth the additional effort of having to incorporate the DPP software into your workflow, especially given the relatively long opening times required for each image, even on a fast computer. Or the doubling in file size.

    Overall, traditional ‘AF microadjustment’ is a much more powerful tool for achieving pinpoint sharpness and ensuring any particular lens is properly calibrated to your body. Dual Pixel Raw’s primary value, in this particular incarnation, is questionable, as it will only be useful for very minor focus shifts, rather than as a general tool for correcting focus error. That said, the technology itself is promising, and we hope to see more capable future iterations as Canon iterates on the technology.

    Articles: Digital Photography Review (dpreview.com)

  • How to Use an iPad as a Softbox or Custom Background

    What I really like about the iPad is the retina display screen; the quality of the images displayed on it is simply stunning. The brightness emitted from the screen is also quite powerful, so I was curious to see what apps are available in harnessing the light to aid photographers and see if the iPad can be used as a small softbox.

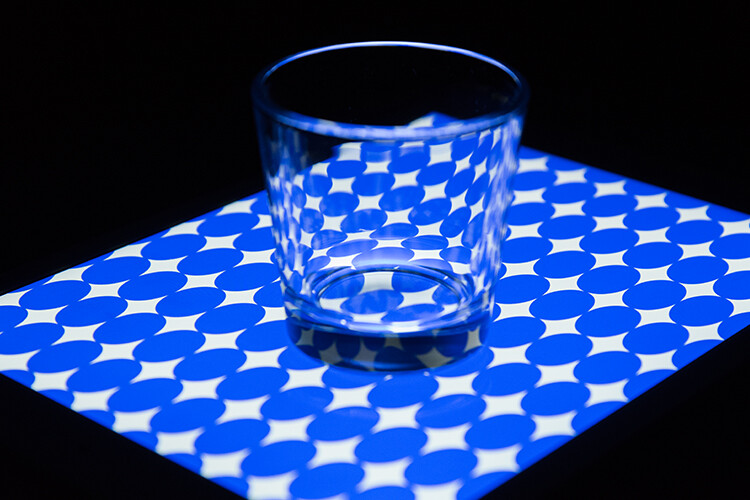
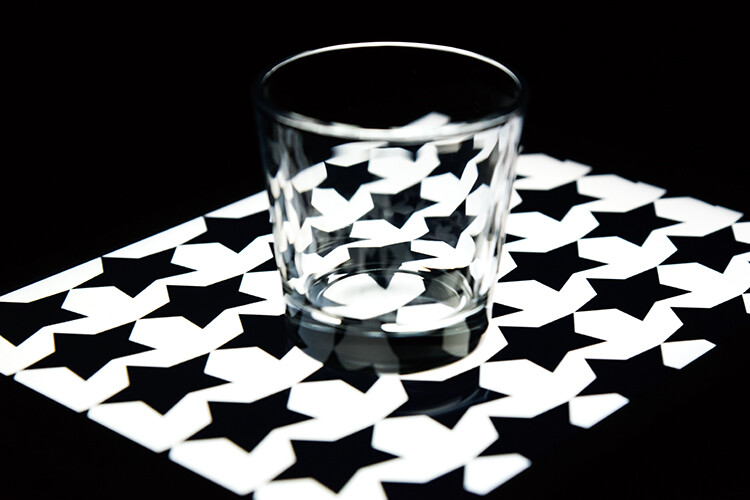
    A glass tumbler shot on an iPad. I created the custom pattern using Photoshop.

    For this article, I wanted to see how useful some of these apps on the iPad are for photographers. In particular, if you are only starting out in photography and you need to understand more about lighting. Or you are stuck in a hotel room, and you want to have a bit of fun experimenting with a light source.

    Can an iPad be used as a Softbox? Or is it just an interesting alternative light source to explore your photography skills?

    I will also demonstrate a simple step-by-step Photoshop tutorial on how to create simple pattern preset images for your iPad or tablet, that you can use as creative backgrounds for your shots.

    If you are not interested in creating your own, you can simply download the free ones I’ve created specially for this article. Please click on the download button at the bottom.

    What is a softbox?

    A softbox is really only a light modifier, similar to an umbrella. However, a softbox controls the shape and direction of light more so than an umbrella does. A softbox has the flash (strobe) enclosed behind a diffuser, which prevents light-spill from occurring. They come in different shapes and sizes. The more common ones are square, rectangular and octagonal.

    Softboxes also have the advantage of being able to produce natural-looking light by mimicking the shape of a window. As the name suggests, they produce a soft light for all types of shooting, be it food, product, portraiture, and so forth.

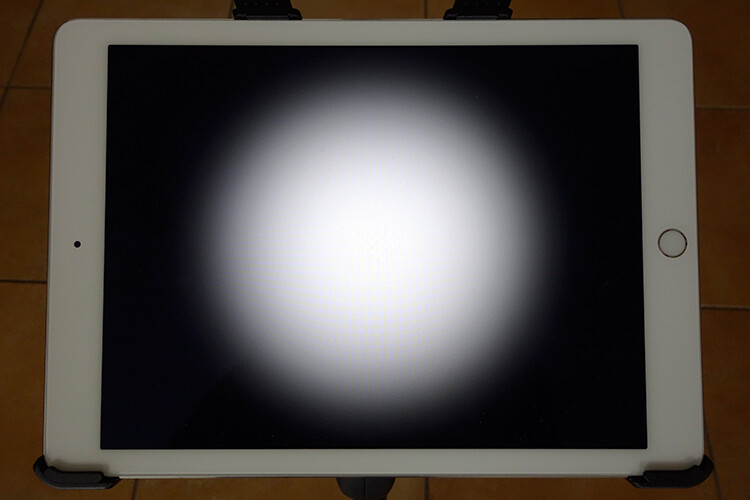
    The regular size iPad has 9.7 inch (1536x2048px) display, and most softboxes range from small (12″) to quite large (four by six feet). This makes the iPad a very small softbox. A good rule of thumb is the bigger the light source relative to distance to the subject, the softer the light.

    How to use a soft box?

    A quick on search on iTunes and I came up with the following apps:

    • Photo Soft Box Pro HD – $ 2.99
    • Soft Box Color – FREE
    • SoftBox Pro for iPad – $ 2.99
    • Photo Light HD (SoftBox) – $ 1.99
    • Refboard – FREE (This app acts more like a board reflector)

    As I can’t make the iPad bigger, I’m going to use the iPad as a softbox in four different ways:

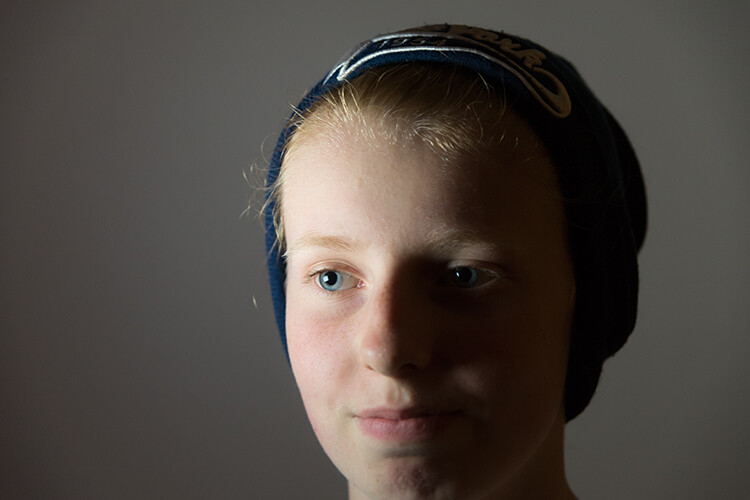
    Head shot using an iPad as a soft box

    My daughter shot with an iPad I used the Photo Light HD (Softbox) app

    As a main light source

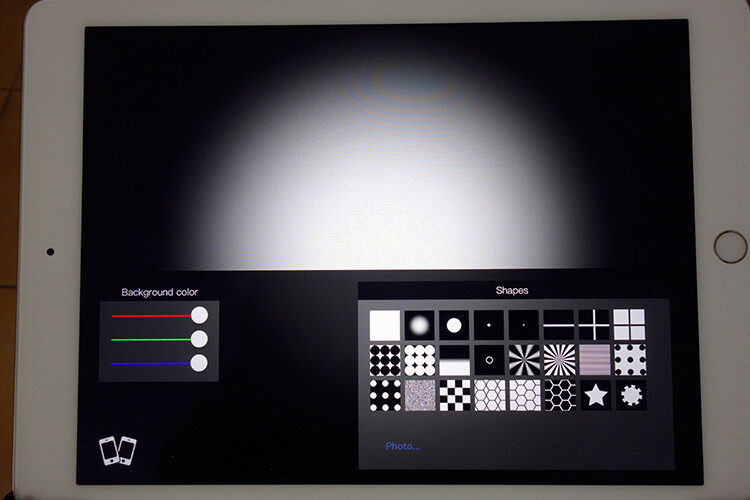
    The first method is using the iPad as my main light source. I had the iPad on a tripod, close to my daughter’s face. You do need to turn off all other light sources. Having the iPad on a tripod made it easier for me to direct my subject. I downloaded the Photo Light HD app to test it out.

    photo-light-HD-app

    The Photo Light HD (SoftBox) app comes with 24 preset pattern images.

    preset-image-photo-light-HD-app

    One of the preset images that comes with the Photo Light HD (Softbox) app

    It comes with 24 preset images. I used the second one here (see above photo). I was also able to use my iPhone as a remote with this app. I wanted a more dramatic portrait, where half of her face is illuminated, and the other half falls off to darkness. I did bump up the ISO quite high, as I handheld my camera.

    Tip: You can mount your camera on a tripod and reduce the ISO, which will also help reduce noise in your photos.

    Of course you don’t have to download this app. You could try out the Refboard or Soft Box Color apps instead, which are both free.

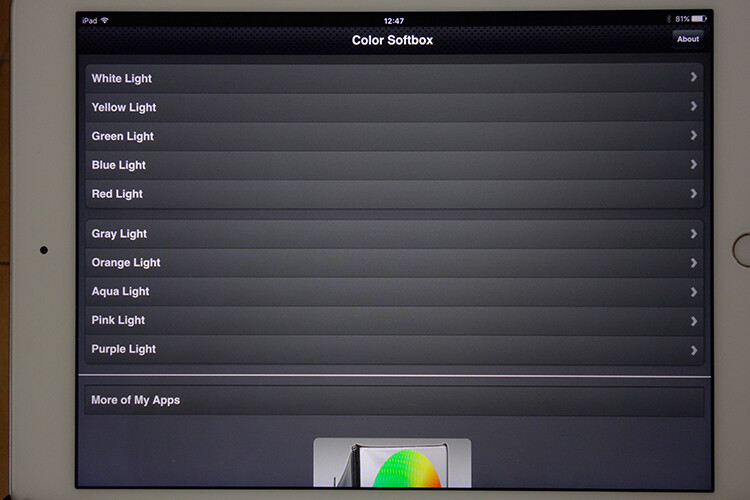
    color-softbox-app

    The Soft Box Color app is free to download.

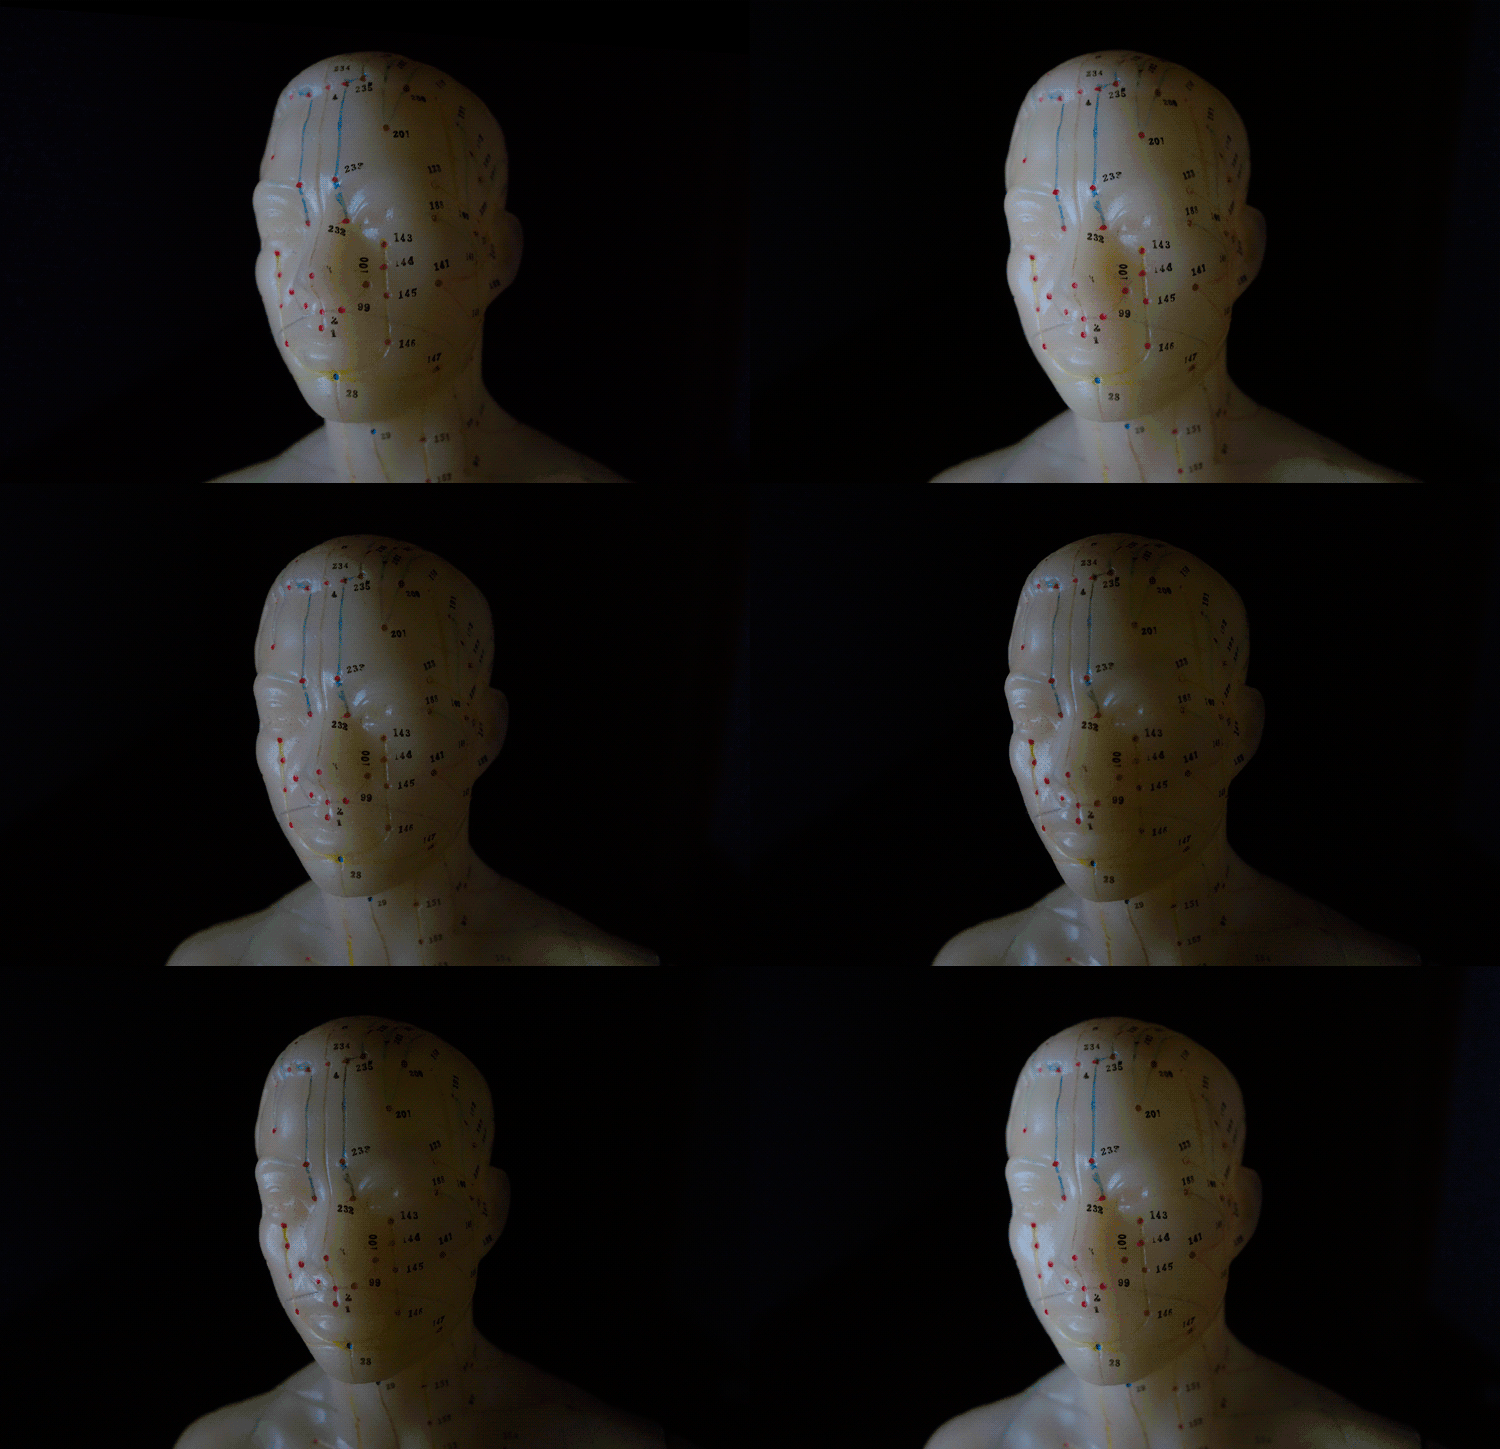
    Set the background color to white. Use a willing subject or object, and experiment by moving the iPad nearer or closer. You will see how the light wraps around the subject. Pay attention to how the shadows appear and drop off. See animated gif below.

    meridian-man

    By moving the iPad nearer or further away from your subject. You can determine how soft or hard the light will be.

    Monster lighting

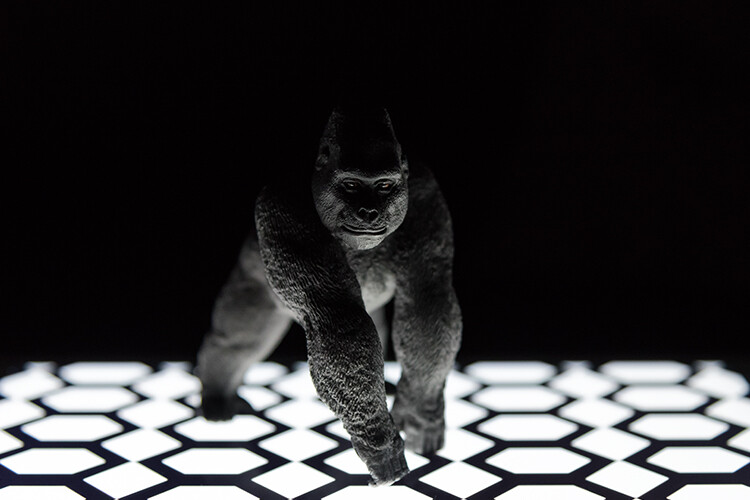
    The second method is called Monster Lighting. This is done by placing the main light directly underneath the subject. So I positioned a toy gorilla on the iPad, and displayed a patterned image that I created to add more drama to the photo.

    toy-gorilla

    Monster Lighting – where the light source is directly underneath the subject.

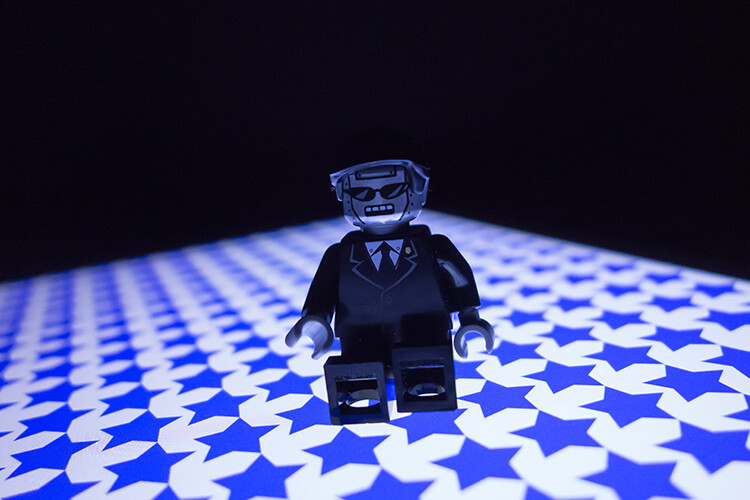
    lego-figure-blue-stars-background

    Another example of the Monster Light effect. The reflection of the pattern image highlighted just under the mouth of the Lego figure adds to the drama. I wish I could say that this was intentional but it was purely experimental.

    In the photo of the Lego figure above, I used a different pattern. You can download this one for free along with two others. See the link at the bottom.

    Colored patterns as a backdrop

    For the third method, I used colored patterns on the iPad as an illuminated backdrop. I created my own in Photoshop, see the step-by-step tutorial below demonstrating how I created them. This is where you can get really creative, and have fun taking these types of shots.

    By placing an ordinary tumbler on the iPad with a preset pattern image, you can get really interesting refractions in the glass. Experiment by moving your camera position slightly up or down, to find the angle that best suits your shot.

    glass-tumbler-on-blue-circles-background

    I love the way the pattern image is distorted by the glass.

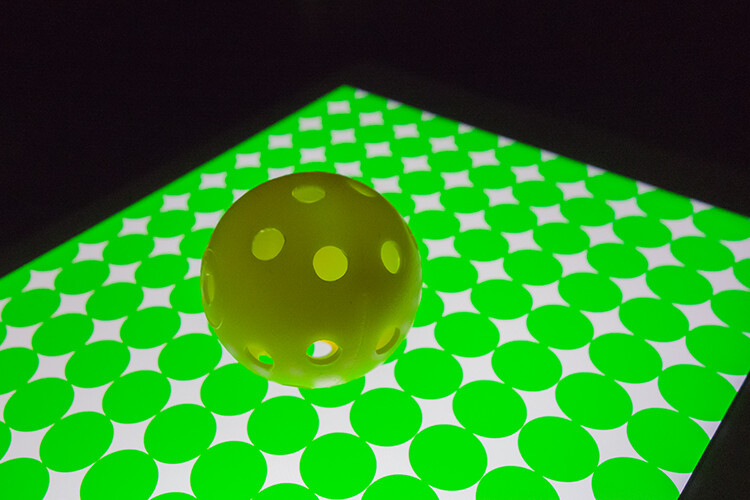
    I also shot this small plastic yellow ball, placed on another preset pattern of green circles, to create an abstract composition.

    yellow-ball-on-green-circles-background

    A small yellow plastic practice golf ball, shot on another custom pattern image on the iPad.

    Create a silhouette

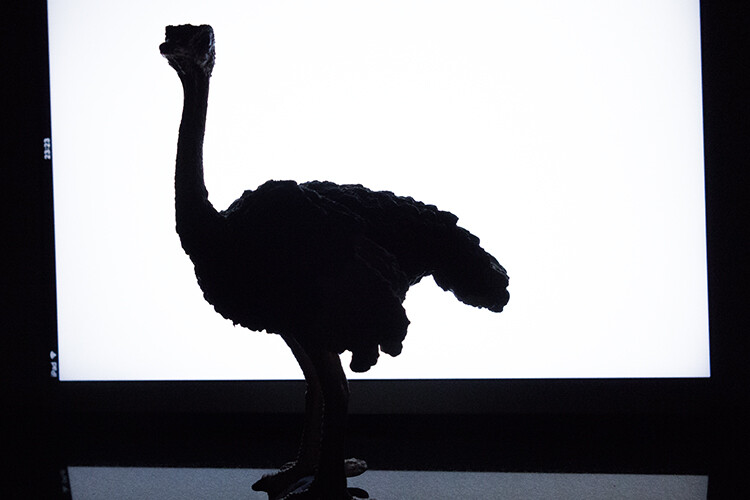
    Creating a silhouette is simple to do. Use the Soft Box Color or the Refboard app, set to white. They are both free to download. Just make sure your brightness level on your iPad is set all the way to the right (brightest) in Settings. In the example below, I used a toy ostrich to create a silhouette.

    ostrich

    A toy Ostrich silhouetted against an iPad, using the Soft Box Color app, set to white.

    Creating your own patterned images in Photoshop

    In this quick Photoshop tutorial I will show how easy it is to make these patterned image,s by using the Step and Repeat technique in Photoshop.

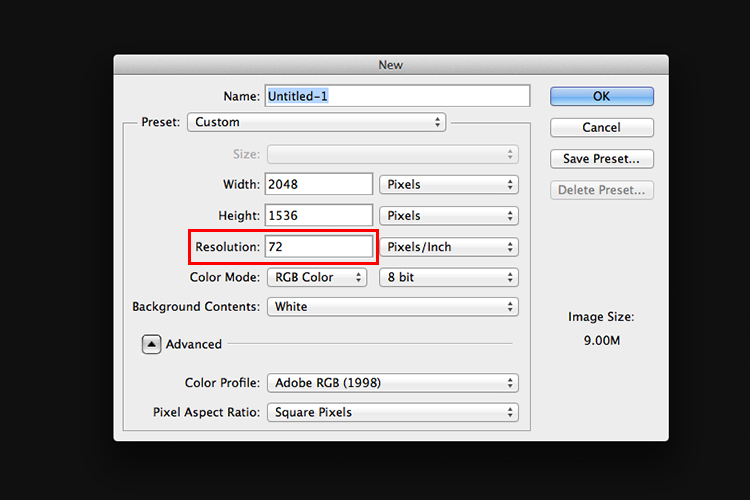
    Start by opening a new document 2048px by 1536px. You can ignore the DPI setting. This only matters when you want to print your images. You will be saving this file as a PNG format which discard pixel density. Our concern here is pixel dimensions. I’m going to leave the background as white. You can choose any color you want.

    resolution-72dpi

    In this example, I’m going to name the document “Circle Pattern” and click OK.

    Make a shape

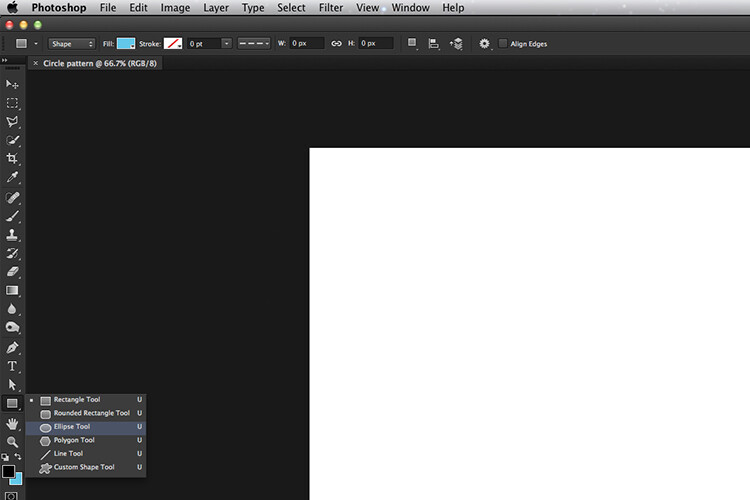
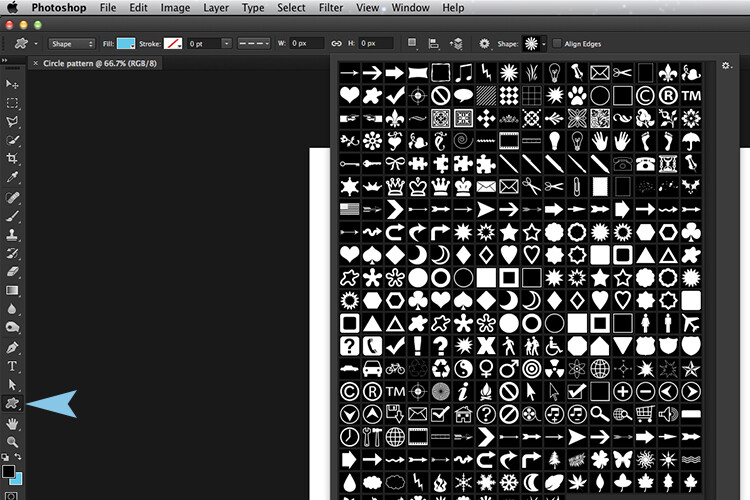
    Click-and-hold on the Rectangle tool in the Toolbox and choose the Ellipse Tool from the menu. If you want a different shape, for example a star or diamond shape, you can select the Custom Shape Tool. There are many preset shapes to choose from.

    ellispe-tool

    Ellipse tool

    Custom shapes

    Custom shapes

    Then, up in the Options Bar, make sure the Shape Layers icon is selected. Choose whatever fill color you want. For this tutorial, I chose Black (with no stroke).

    Hold down the Shift key and draw out a circle. The Shift key keeps the aspect ratio 1:1. I chose 154px, but again choose whatever size circle you want. With the Move tool (shortcut V on the keyboard) place the circle in the very top left corner of the new document file. Have the Info Panel open. Go to Window>Info.

    Duplicating your shape

    Pressing CMD/CNTL+T on your keyboard brings up the Free Transform Tool. But instead, hold down the Alt key as well so: CMD/CNTL+Alt+T. This is the important step, move the cursor over the circle shape. The cursor becomes a black arrow head. Hold down the Shift key and move the duplicated circle shape over by 154px, or equal to the width of your circle or shape. Look at your info panel when moving the circle shape. Release and click on the commit transform button or press Enter. That is the “Step” part of this technique.

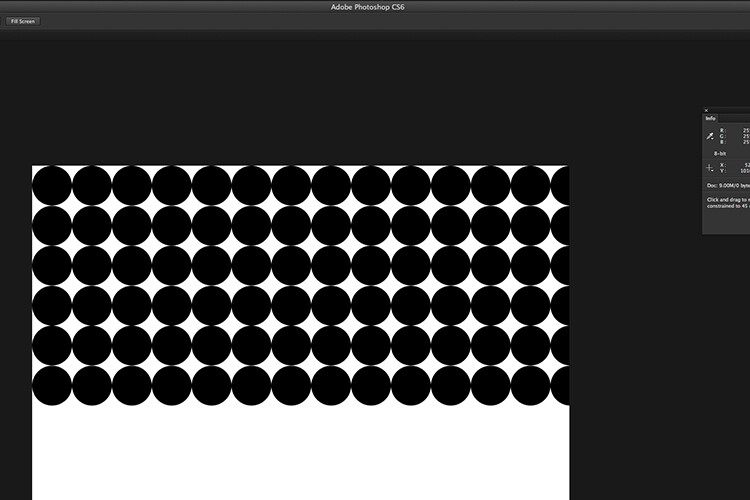
    To repeat this shape, hold down CMD/CNTL+Alt+Shift+T again. Keep holding down CMD/CNTL+Alt+Shift while pressing T multiple times, to create a line of circles across the document. Make sure the last circle goes beyond the document boundary (off the edge).

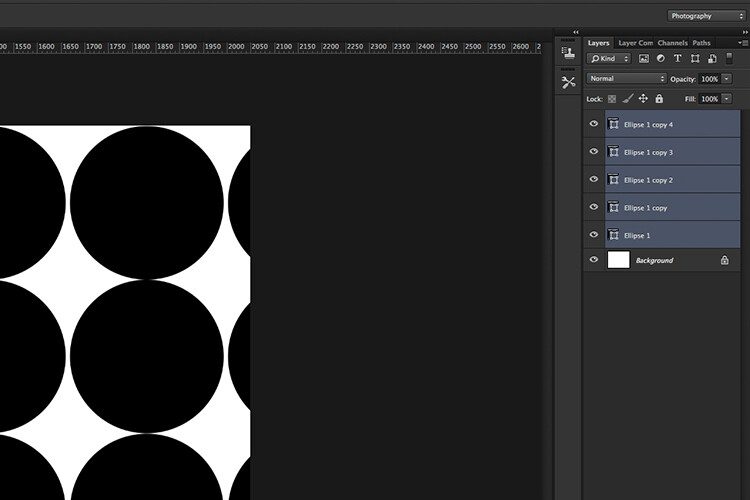
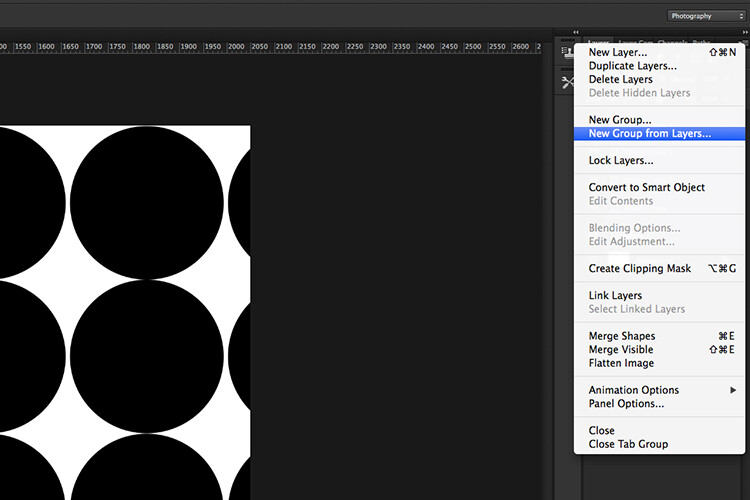
    In your layers panel, you’ll notice that we have only the one layer and not duplicated layers for each circle. To create a new line of circles. Hold down the Shift+Alt keys and drag down by 154px. Continue all the way down the document until you have a document full of circles. Now go over to the Layers panel and select all the layers and put them into a group folder.

    Creating a custom pattern image using the Step and Repeat technique in Photoshop.

    Creating a custom pattern image using the Step and Repeat technique in Photoshop.

    select-layers

    Select all your shape layers

    select-layers-into-group

    Make a group of all the shape layers

    You can now use the Free Transform tool to hold to scale the shapes (CMD/CNTL+T ), so that they are all contained within the document boundaries to create a seamless pattern effect.

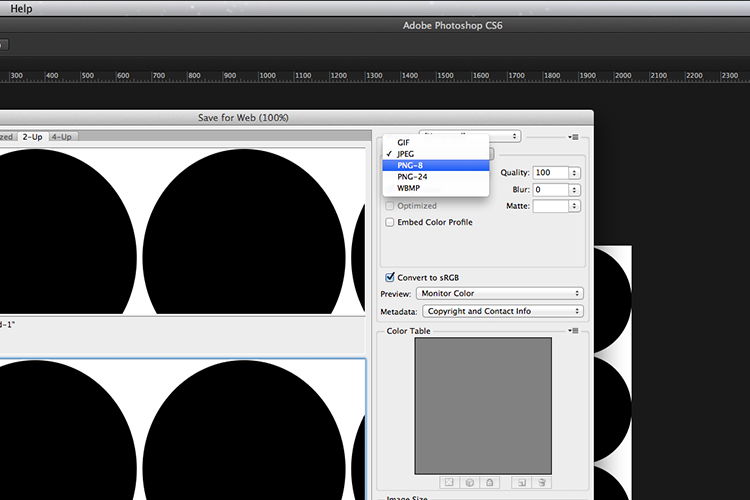
    Go to File>Save for the Web. Choose PNG-8 for the file format and click Save. Another pop dialog box appears. Name your file and select the location on your computer and click Save.

    save-as-a-png-8

    You now have a pattern preset image to transfer to your iPad or tablet.

    If you haven’t got Photoshop, feel free to download the preset images by downloading the ones I made below, enjoy (just right-click and choose “open link in new tab”, then right click and choose “Save Image As”).

    green-circles

    diamonds

    blue-stars

    Summary

    Can an iPad be used for photography? Well not in the professional world. If you a beginner to photography and experimenting with artificial light for the first time, give it a try if you have an iPad or tablet. But I wouldn’t suggest going out to purchase an iPad for this reason only.

    I am great believer in using whatever light source(s) are available, to explore different shooting techniques and styles. So if you don’t have an iPad/tablet or photography lights, why not experiment with just a flashlight or LED light!

    Do you have an iPad/tablet? If so what photography apps have you used? Please leave your comments below.

    googletag.cmd.push(function() {
    tablet_slots.push( googletag.defineSlot( “/1005424/_dPSv4_tab-all-article-bottom_(300×250)”, [300, 250], “pb-ad-78623” ).addService( googletag.pubads() ) ); } );

    googletag.cmd.push(function() {
    mobile_slots.push( googletag.defineSlot( “/1005424/_dPSv4_mob-all-article-bottom_(300×250)”, [300, 250], “pb-ad-78158” ).addService( googletag.pubads() ) ); } );

    The post How to Use an iPad as a Softbox or Custom Background by Sarah Hipwell appeared first on Digital Photography School.


    Digital Photography School

  • Sony introduces FE 50mm F2.8 Macro with 1:1 reproduction

    $ (document).ready(function() { SampleGalleryV2({“containerId”:”embeddedSampleGallery_2105353860″,”galleryId”:”2105353860″,”isEmbeddedWidget”:true,”standalone”:false,”selectedImageIndex”:0,”startInCommentsView”:false,”isMobile”:false}) });

    Sony has announced the FE 50mm F2.8 Macro, a full-frame lens with true 1:1 macro magnification. It provides a minimum focus distance of 16cm/6.3in and is resistant to dust and moisture. Its design includes 8 elements in 7 groups and a rounded 7-blade aperture.

    The Sony FE 50mm F2.8 Macro will sell for $ 500 when it goes on sale in September.

    Press release:

    Sony Releases Full-Frame FE 50mm F2.8 Macro Lens

    A lightweight and compact standard 50mm F2.8 macro prime lens that offers versatile shooting experience

    SAN DIEGO, Aug. 30, 2016 – Sony Electronics, a worldwide leader in digital imaging and the world’s largest image sensor manufacturer, has today introduced a new full-frame lens for their E-mount camera system, the FE 50mm F2.8 Macro lens (model SEL50M28).

    Ideal for everyday photography, this 50mm macro lens features an F2.8 maximum aperture that offers outstanding image quality and bokeh, while its 1:1 macro capability allows the photographer to get sharp close-up shots of their subject. Additionally, its comprehensive range of controls including focus-mode switch, focus-range limiter and focus-hold button ensure an effortless shooting experience for a wide range of users.

    The lens offers a 6.3 inch minimum focusing distance and a wider field of view for capturing more background, compared to longer focal-length macro lenses. Weighing in at a mere 8.4 oz., it’s extremely lightweight and portable, making it easy to carry around.

    The new FE 50mm F2.8 Macro lens features an ED (Extra-low Dispersion) glass to effectively compensate for axial chromatic aberration at close focus, allowing it to create consistently sharp and high quality images. The optical and mechanical construction of the lens has less glare and ghosting, even without a lens hood. The lens is also dust and moisture resistant.

    Pricing and Availability

    The new FE 50mm F2.8 Macro lens will be available in September for about $ 500 US and $ 650 CA, respectively. It will be sold at a variety of Sony authorized dealers throughout North America.

    Sony FE 50mm F2.8 Macro specifications

    Principal specifications
    Lens type Prime lens
    Max Format size 35mm FF
    Focal length 50 mm
    Image stabilization No
    Lens mount Sony FE
    Aperture
    Maximum aperture F2.8
    Minimum aperture F16
    Aperture ring No
    Number of diaphragm blades 7
    Optics
    Elements 8
    Groups 8
    Special elements / coatings Extra-low Dispersion glass
    Focus
    Minimum focus 0.16 m (6.3)
    Maximum magnification 1×
    Autofocus Yes
    Full time manual No
    Focus method Extending front
    Distance scale Yes
    DoF scale No
    Focus distance limiter Yes
    Physical
    Weight 236 g (0.52 lb)
    Diameter 71 mm (2.8)
    Length 71 mm (2.8)
    Sealing Yes
    Colour Black
    Filter thread 55.0 mm
    Hood supplied No
    Tripod collar No

    Articles: Digital Photography Review (dpreview.com)

  • Prefab Office Pods: 14 Studios & Workspaces Made For Your Backyard

    [ By SA Rogers in Architecture & Offices & Commercial. ]

    backyard studio sett 1

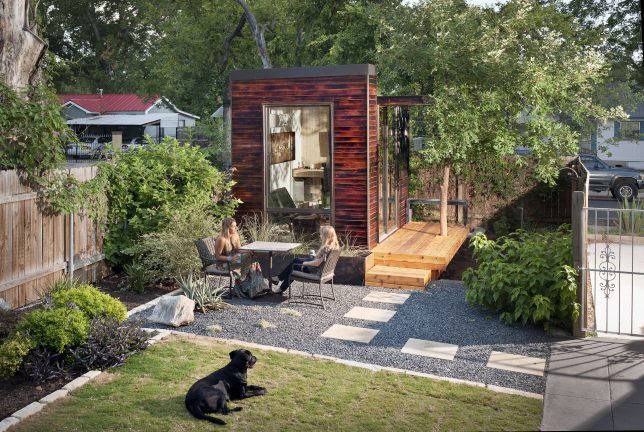
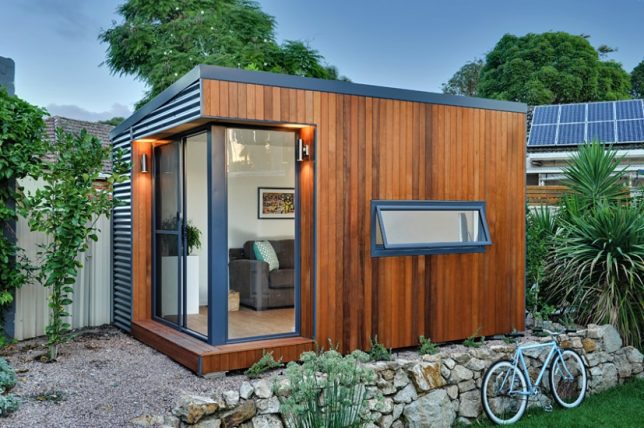
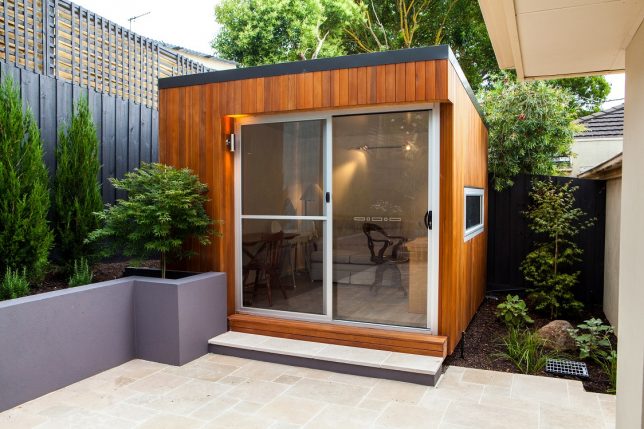
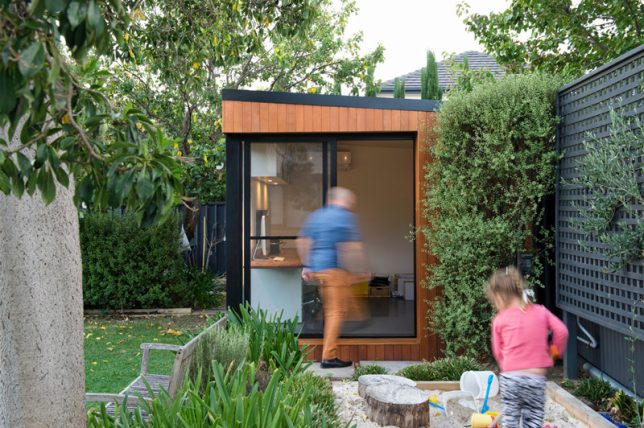
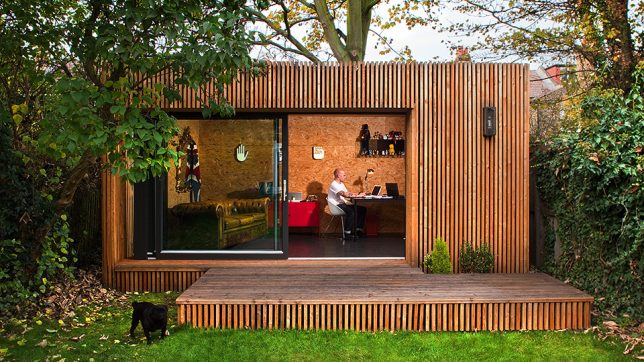
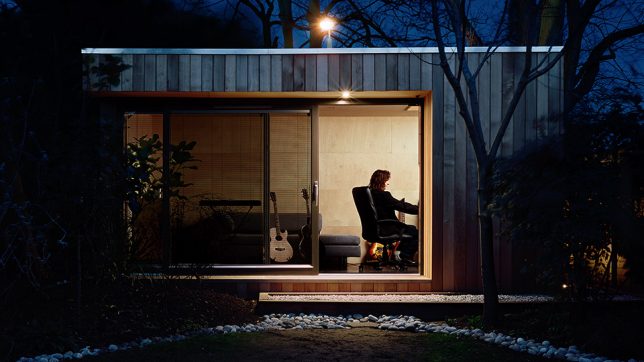
    A backyard refuge to work, practice, paint or meditate separates you from the activities inside your home and gives you prime views of your backyard, garden or urban rooftop space. Adding a freestanding room can be as simple as having a fully-assembled prefab volume plunked right onto your property, and you can often customize them your ideal interior configurations, windows, built-in furniture and surfaces. Order one of these ready-to-go options, or use them as inspiration to build your own.

    Prefabs by InOutside

    inoutside 1

    inoutside 2

    inoutside 3

    A wood-clad cube with one corner entirely consisting of glass, the ‘Cooba’ by InOutside is a prefab modern room that’s ready to be dropped into your backyard as a studio, office or guest space. It starts at just over $ 15K (AUS) and when there’s easy access to the site, it can be delivered pre-assembled, requiring no concrete foundation or special equipment.

    House Arc by Bellomo Architects

    house arc

    house arc 2

    housearc 3

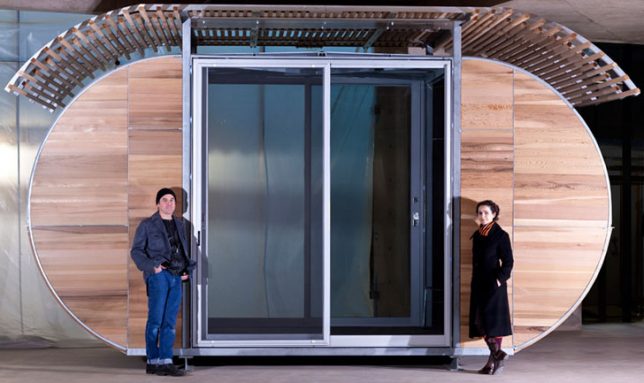
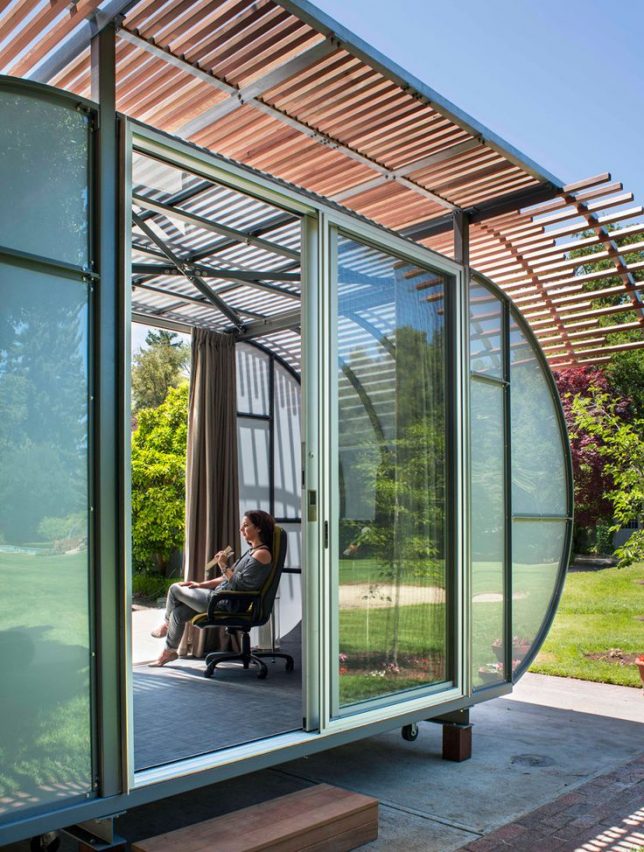
    A modular system of bent steel tubes serves as the basis of ‘House Arc’, an unusually shaped rehab designed with environmental sensitivity in mind. It’s got a lattice screen roof providing a bit of shade and interest, rounded ends , translucent panels to let in light, and sliding glass doors. It’s made to be fully off-the-grid, can be flat-packed and shipped in a box that’s barely larger than that of a typical IKEA bed frame, and weighs 3000 pounds when complete.

    Modular Library Studio by 3rd Space

    backyard library

    backyard library 2

    backyard library 3
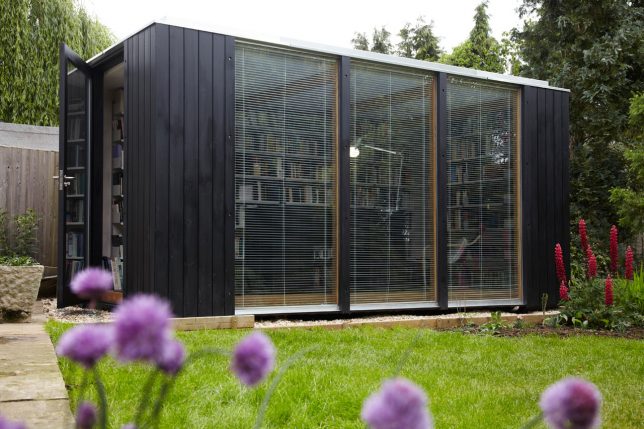
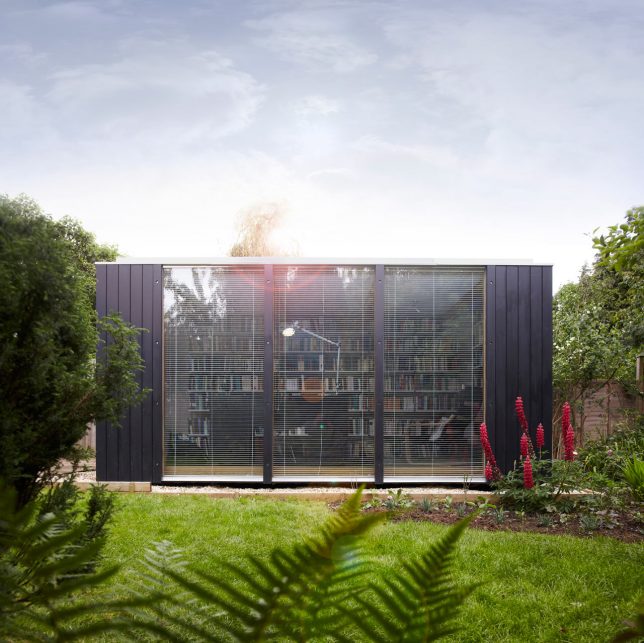
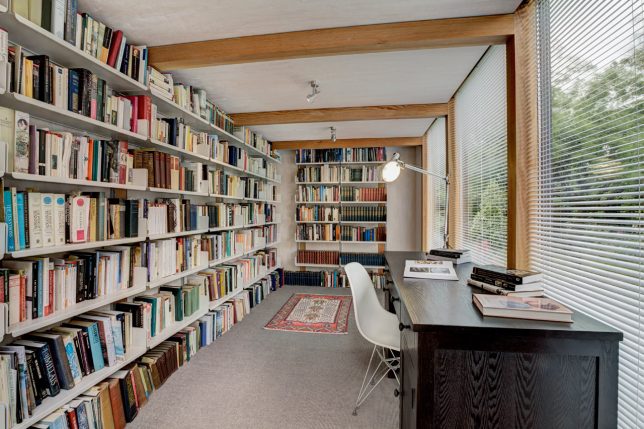
    Is this the coolest backyard room of all time? 3rd Space didn’t just add an office to the garden of a literature professor in Oxfordshire – they gave her an entire private library, with floor-to-ceiling windows and walls lined with books. The prefab system can really be used for anything, but the custom shelving really makes this unit special.

    Green Roof Garden Studio by Eco Space

    ecospace 1

    ecospace 2

    ecospace 3

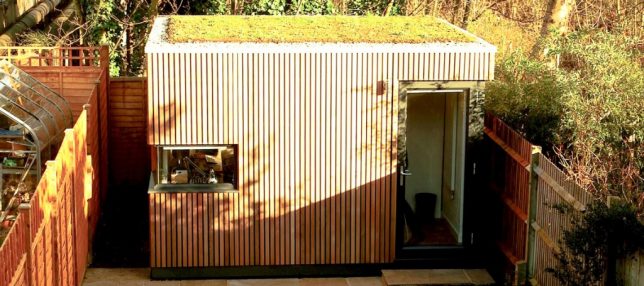
    Vertical slats and optional green roofs add a whole lot of charm to Ecospace studios and their smaller models, including the medium-sized MidiPod. Based in the UK, Ecospace offers a sustainable and affordable alternative to a fixed addition. These studios are flexible and modular so they can be tailored, reconfigured or extended. The WorkPod is the smallest of all, built for a single user with a typical installation time of just 5 days.

    The LoftCube

    loftcube

    loftcube 2

    loftcube 3

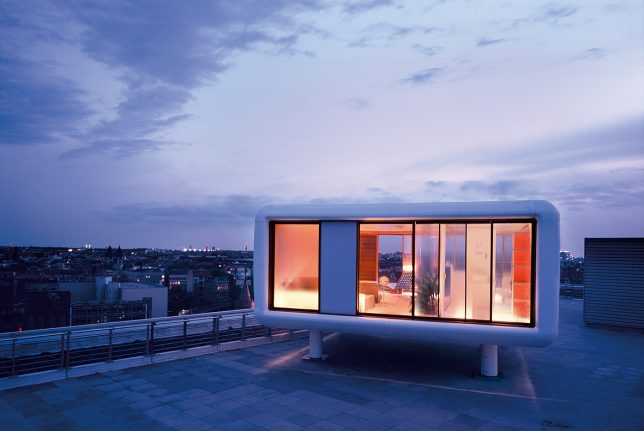
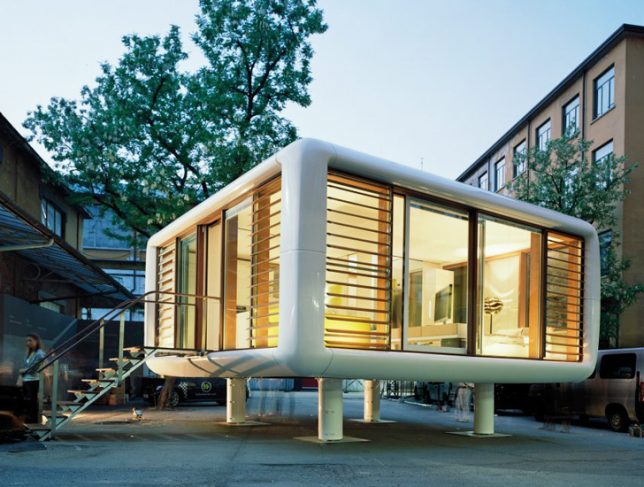
    No backyard to work with? How about a roof? The Loft Cube functions like a ready-to-go rooftop extension and ranges in size from a modest 365 square foot volume, which requires no building permits in its home nation of Belgium, to a volume that’s plenty large enough to live in at over 900 square feet. You can even stack the cubes on top of each other to create a larger dwelling.

    Next Page – Click Below to Read More:
    Prefab Office Pods 14 Studios Workspaces Made For Your Backyard

    Share on Facebook


    [ By SA Rogers in Architecture & Offices & Commercial. ]

    [ WebUrbanist | Archives | Galleries | Privacy | TOS ]


    WebUrbanist