Blog

  • How to Use Manual Mode to Make Artistic Choices for Your Photography

    When learning photography, it can be tricky to understand how your DSLR works. Most of us started shooting in automatic because we did not know what we were doing when we switched our camera to manual mode.

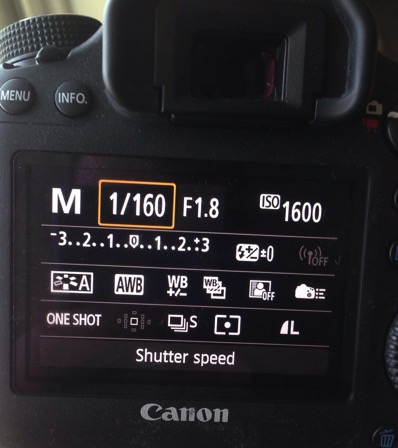
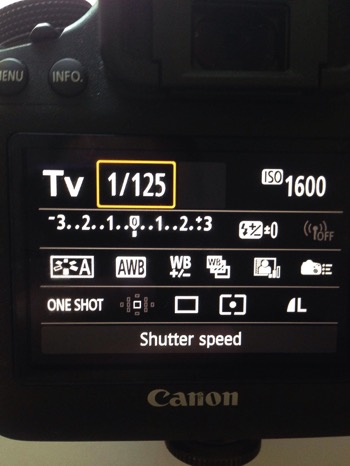
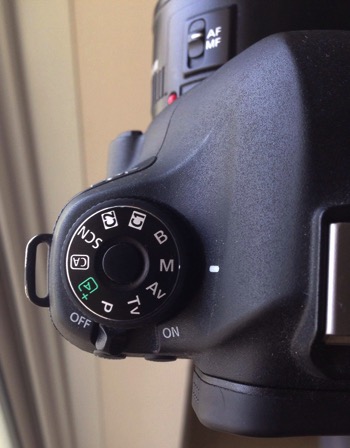
    Basically, your DSLR has four main shooting modes, they are; Program (P), Manual (M), Aperture Priority (Av/A) and Shutter Priority (Tv/S).
    Manual mode image1

    The different shooting modes on an advanced DSLR.

    Manual mode image2

    Manual mode lets you control everything on your camera.

    In this article, I will try to explain shutter speed, aperture, and ISO in the easiest way possible. Hopefully, it will help you to never use automatic mode on your camera anymore. I do not hate automatic mode, but I think that it reduces your creativeness.
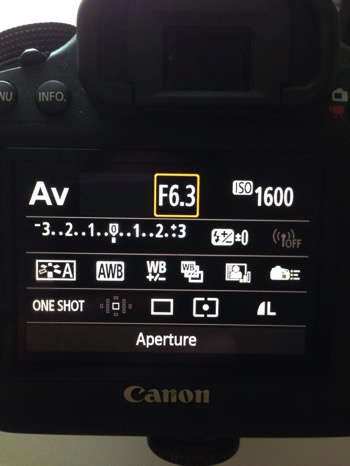
    Manual mode image3

    Aperture Priority mode lets you control everything except the shutter speed – it will be set automatically depending on your other settings. You can control your ISO or leave it on automatic.

    Manual mode image4

    Shutter Priority mode lets you control everything except the aperture – it will be set automatically depending on your other settings. You can control your ISO or leave it on automatic.

    Manual Mode makes you think and slow down

    When you take a photo in auto mode, you’re just capturing a moment objectively. For example, let’s say you’re taking a picture of a cat. Your only intention is to have the cat pictured , that’s a snapshot. Automatic mode gives you the right exposure straight away whereas in Manual Mode, you have to go through a creative process in your brain to take the image.

    Let’s say you’re taking a picture of the same cat in Manual Mode, you’re not just clicking a button. You’re actually thinking about what you want to do. You might want to picture the cat with a blurred background, you might want to photograph the cat in motion or freeze the moment while it’s blinking. My point is that manual mode brings more subjectiveness to your photographs, a bigger piece of consciousness about your intent, and what you need to do to achieve the end result you want.

    Manual mode image5

    The problem many people have with Manual Mode, or at least I did, is how to get the right exposure. My pictures would be either over or underexposed.

    Finding the correct exposure

    You will have a correct exposure when you are able to create the perfect balance between the shutter speed, aperture and ISO depending on the amount of light that’s available. When you are shooting outside, your exposure will always change, let’s say you are doing a portrait session in natural light. Your exposure will change every five minutes because the light varies all the time.
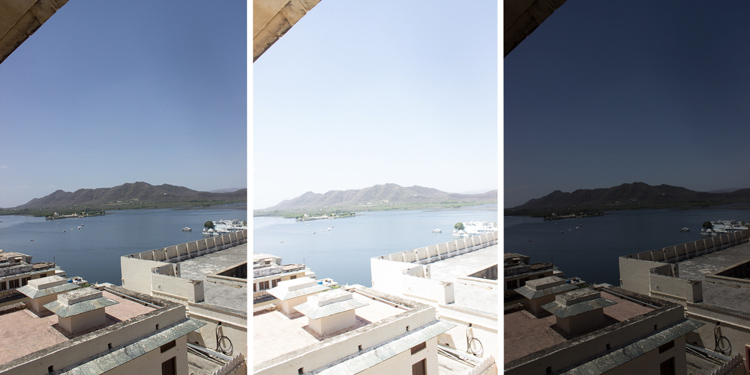
    Manual mode image6 8

    Comparison between a correctly exposed image, overexposed and underexposed one (left to right).

    There might be a cloud covering the sun or it may be setting, so the intensity of the light will change. In a studio session, once you get your lights positioned the way you want and have found the correct exposure, you will not need to change your settings again unless you change the position of your light and its intensity. Basically, my point is you have to consider the amount of light available, the intensity, and its direction.
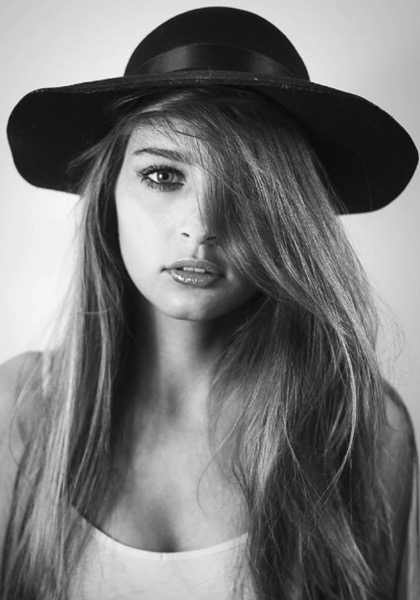
    Manual mode image9

    A studio portrait. As soon as I get my exposure settings right, I will not change them.

    Shutter speed, aperture, and ISO explained

    Before I get to the main subject of this article and you finally leave the automatic mode for good, I want to explain shutter speed, aperture, and ISO.

    Shutter speed

    The shutter speed is the amount of time the sensor inside your DSLR is exposed to light. A faster shutter speed will let in less light than a longer one. That is why we use very long shutter speeds in low light photography. The time between the shutter opening and closing will vary depending on how much light you want in your picture.

    The shutter speed controls ambient light, that is one very important thing. If you need less light, then get a faster shutter speed. Do the opposite if you need more light. A fast shutter speed will also freeze action because the picture will be taken much quicker than a longer shutter speed. This will let you control if you want a moving subject to appear in motion or frozen in your image
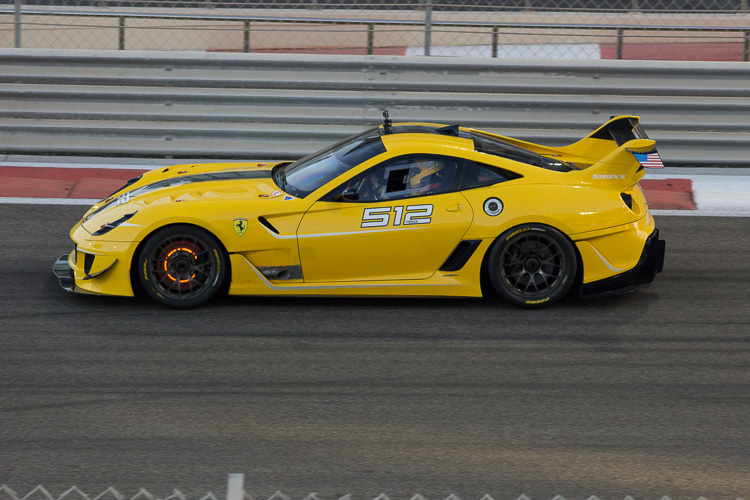
    Manual mode image10

    Using a fast shutter speed to freeze a moving sports car
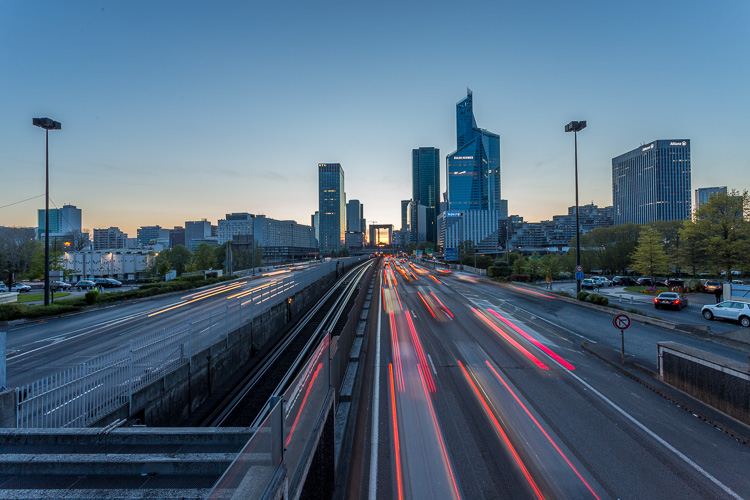
    Manual mode image11

    Using a slow shutter speed shows cars in motion or only the light trails from their headlights.

    Aperture

    The aperture (opening in the lens) controls the amount of light that is let inside the camera. There is one confusing thing about apertures. A large aperture lets in more light but large apertures are translated with small numbers. In other words, an aperture of f/1.8 is a large aperture (opening) but the number is small, whereas an aperture of f/16 is a small opening but the number is big. Once you get this straight in your mind, it should be fine because the aperture is not that difficult to understand.

    Basically, you use aperture for two main things. If you have low light conditions, you will need to use a big aperture (small number) to let in more light. But mostly we use aperture to control the sharpness of an image. A bigger aperture (small number) will give you a shallower depth of field (a blurred background), and a small aperture (bigger number) will give you a larger depth of field (there won’t be any blur in the background, most of the photo will be sharp).

    ISO
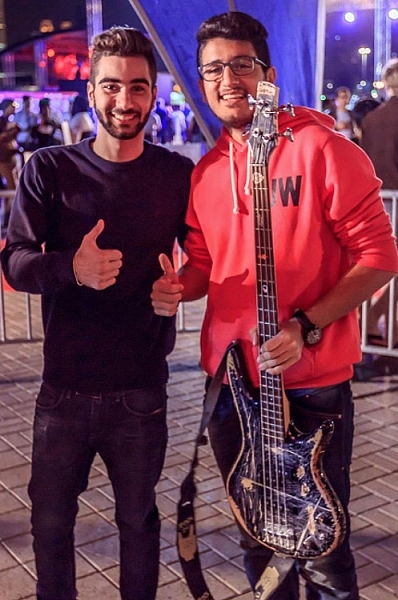
    with an aperture of f/5.6 during a concert, I had no flash and had to boost up my ISO to over 1000 to get a proper exposure. I used a focal length of 50mm

    Shot with an aperture of f/5.6 during a concert, I had no flash and had to boost up my ISO to over 1000 to get a proper exposure. I used a focal length of 50mm.

    The ISO is the sensitivity of your camera sensor to light. With a higher ISO, the sensitivity to light is increased, therefore you will have more light in your photograph. One tip I can give you is not to be scared of the ISO. It does damage your photo quality wise by adding grain (noise) but with today’s DSLRs you can boost up the ISO to 1000 (or more) and still have good quality. Besides, you can always reduce noise later in post-production. I sometimes take portraits up to 1250 ISO, because I don’t really have a choice and choice is the whole point of this article.

    Manual mode

    Manual mode in photography is all about making choices. Sometimes use an ISO of 1250 for portraits. Most people would tell me I have no idea what I am doing if they see my settings because they’re scared of a grainy high-ISO picture. But I made the choice to use a high ISO to compensate for the shutter speed (make sure it was fast enough).
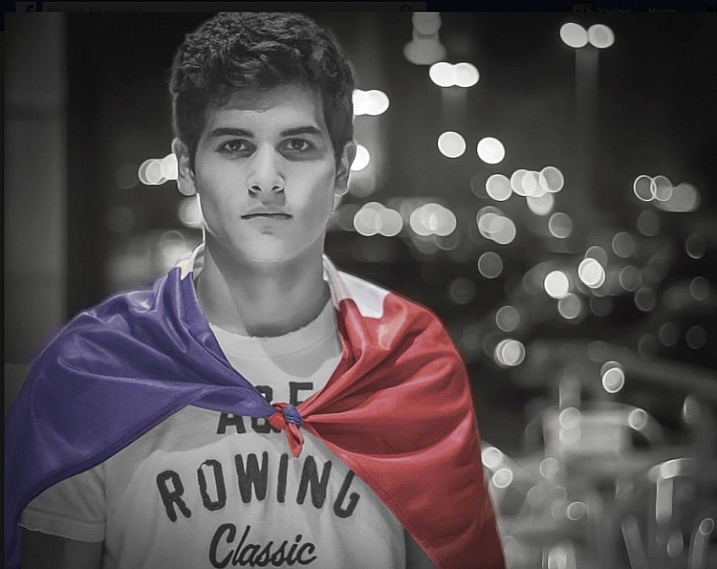
    a portrait using a large aperture of f/1.8 and an ISO of 1000, I had no flash with me and it was long after the sunset.

    This a portrait using a large aperture of f/1.8 and an ISO of 1000, I had no flash with me and it was long after the sunset.

    If I use a long focal length with an aperture of f/5.6, I will mostly likely get satisfying bokeh. A shutter speed of at least 1/125th or 1/160th is needed to avoid any blurred shots due to camera shake as my lens is pretty heavy. I really need a sharp photo, so this will make me boost my ISO to 1250 because my choice was to shoot with that lens, at that aperture and that shutter speed.

    To use manual mode, you have to make artistic choices and play with the shutter speed and the aperture, leaving the ISO as an additive compensation to get the correct exposure. If you want to photograph a road with cars passing by in the middle of the day, you will most likely want a sharp photo so you will use a small aperture. You then need a fast shutter speed to freeze the cars so the ISO, in this case, will most likely be pretty high.
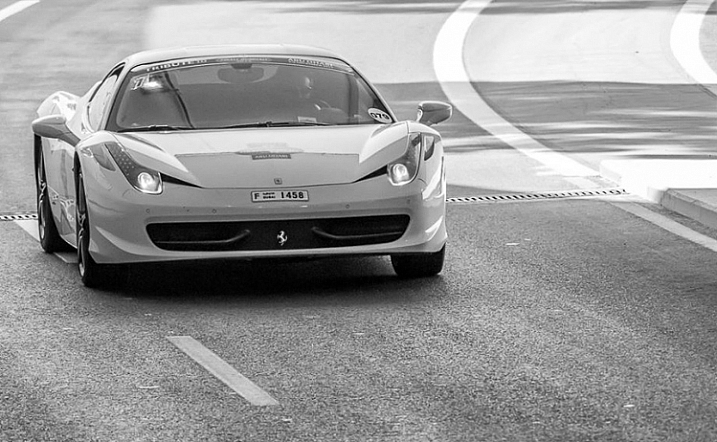
    is an image during daylight of a fast car using a fast shutter speed. The amount of light available enables me to use a fast shutter speed with an ISO of 100 and a small aperture. If it was during sunset I would have needed to increase my ISO to compensate for the light.

    An image during daylight of a fast car using a fast shutter speed. The amount of light available enabled me to use a fast shutter speed with an ISO of 100 and a small aperture. If it was during sunset I would have needed to increase my ISO to compensate for the lack of light.

    If you’re shooting sunsets and you want to capture some clouds moving in the sky; you will most likely use a small aperture to cut down the light, which will force a long (slow) shutter speed so you will likely need to decrease the ISO to 100. What you are doing is playing around with the shutter speed, the aperture, and the ISO to get the desired effect.

    There are many ways to balance them, but each choice produces a different artistic result. It’s up to you to make that choice.
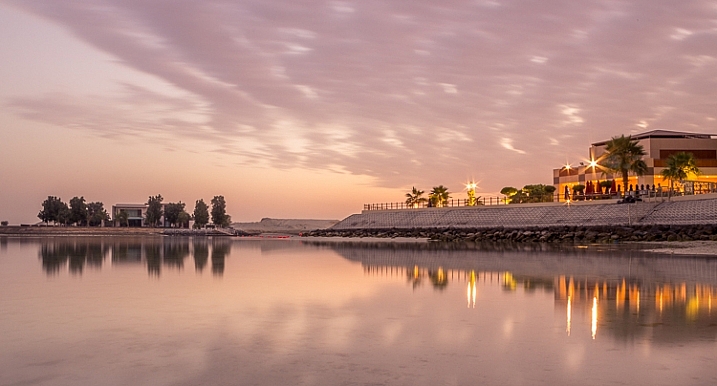
    is a long exposure of 30 seconds with an ISO of 100, the camera was placed on a tripod, I used a small aperture of f/14  for a sharp image.

    This is a long exposure of 30 seconds with an ISO of 100, the camera was placed on a tripod, I used a small aperture of f/14 for a sharp image.

    Conclusion

    Using Manual Mode makes you put more thought and reflexion into the photo you are about to take; I call this the artistic choice. Like I previously said, the shutter speed, the aperture, and the ISO make the photograph. Between your artistic choices, you can choose to have a shallow depth of field, a large depth of field, a subject in motion, or frozen.
    Manual mode image12

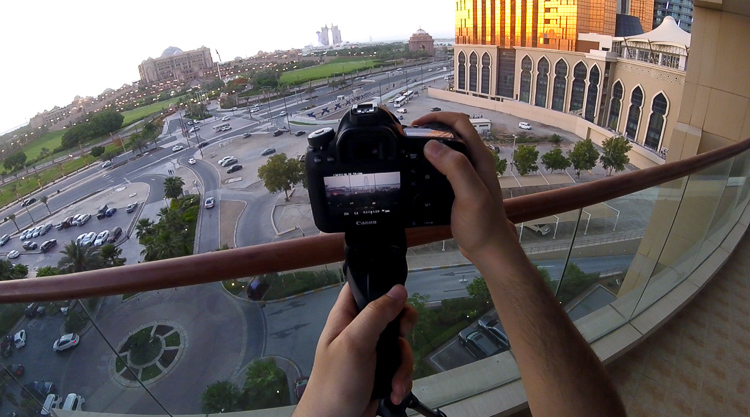
    Think about what you want to do before pressing the shutter button.

    You can also choose how much light you want in your photo. If your artistic choice is determined by the aperture, then you have play around with the shutter speed and the ISO to find the right exposure. However, if it is determined by your shutter speed then you need to play around with the aperture and the ISO to find the correct exposure.

    Note: your camera will reach its limits. But, you can use ND filters to darken your image or flash to brighten it up.

    googletag.cmd.push(function() {
    tablet_slots.push( googletag.defineSlot( “/1005424/_dPSv4_tab-all-article-bottom_(300×250)”, [300, 250], “pb-ad-78623” ).addService( googletag.pubads() ) ); } );

    googletag.cmd.push(function() {
    mobile_slots.push( googletag.defineSlot( “/1005424/_dPSv4_mob-all-article-bottom_(300×250)”, [300, 250], “pb-ad-78158” ).addService( googletag.pubads() ) ); } );

    The post How to Use Manual Mode to Make Artistic Choices for Your Photography by Yacine Bessekhouad appeared first on Digital Photography School.


    Digital Photography School

  • Reader’s poll results: What was the most exciting announcement of Photokina?

    What’s been the most exciting announcement of Photokina?

    Every two years people flock to Cologne to find out what’s next in the world of photography. This year we’ve seen some announcements that left us very excited, but we wanted to know what you, our readers, think of what’s come out of the show this year. So we asked: what’s been the most exciting announcement of Photokina? With more than 5,000 votes counted, we have a pretty good idea.

    Winner: Fujifilm GFX 50S development

    Winning by a margin as big as its sensor is the announcement of the development of the Fujifilm GFX 50S and a selection of lenses to go along with it. Built around the 51.4MP 43.8 x 32.9mm sensor that is found in the Pentax 645Z and Hasselblad X1D-50c medium-format cameras, it lays claim to being the world’s first medium format mirrorless camera with a focal plane shutter. While Hasselblad stuck with leaf shutters built in to the lens, which is common in the medium-format world, Fujifilm claims using a focal plane shutter has allowed them to design a short flange back distance in to their new lenses, helping vignetting and sharpening.

    There’s loads more to the new system, which you can learn more about in the official announcement, or our hands-on article.

    Runner up: Olympus E-M1 II development

    Trailing on the heels of the big Fujifilm with nearly 1,000 votes is the much smaller, but arguably a much more powerful, Olympus E-M1 II. Sure, the 20MP Micro Four Thirds sensor isn’t nearly as big, but this one has been tricked out with all sorts of technology.

    First, it gains an array of 121 cross-type AF on-sensor phase detection points spread further than its predecessor. The new autofocus system and sensor work alongside the new dual quad core TruePic VIII Image Processor with four CPU cores and four image processing cores that achieve image processing speeds approximately 3.5 times faster than the TruePic VII Processor.

    That means this little powerhouse can shoot Raw continuously at 18fps with continuous autofocus and auto exposure, or 60fps without autofocus. This all on top of a slew of other improvements, which you can learn more about in the announcement or our hands-on articles.

    Runner up: Sony a99 II

    Third place in our Photokina poll comes as no surprise, as it helped shed some light around the fate of Sony’s Alpha mount cameras. The Sony a99 II answers prayers with a 42MP BSI sensor from the Sony a7R II, complete with its 399 on-sensor PDAF points. These work in conjunction with the 79-point dedicated PDAF sensor to create what Sony calls ‘Hybrid Cross AF points.’ The a99 also receives an a-mount first: 5-axis in body image stabilization that should provide up to 4.5 stops of stability.

    The improvements don’t stop there. Read the official announcement or look at our hands-on article for more information.

    Runner up: Canon EOS M5

    Another product our readers are excited about is Canon’s latest mirrorless camera: the EOS M5. It gains features fans of the EOS-M lineup have been begging for, namely an EVF and a sensor equipped with Canon’s marvelous Dual Pixel Autofocus system. What results is a small and responsive camera with a touch screen, digital image stabilization for video, and all sorts of other goodies.

    For more information, check out the announcement or our First Impressions Review.

    Runner up: Sigma 85mm F1.4 DG HSM Art

    The Sigma 85mm F1.4 Art edged into the top five by just a single vote, and it’s easy to understand why our readers are excited about it – they’ve been waiting a while for this one. Starting with the 35mm F1.4 Art, Sigma started producing an excellent lineup of zooms and F1.4 prime lenses. After the 35 they made a 50, after which people logically assumed an 85 would come. Instead we got a 24mm F1.4, then an industry-first 20mm F1.4, which are both wonderful lenses.

    Finally, they’ve focused all their optical prowess in to producing what they’ve billed as ‘The Ultimate Portrait Lens’, with a (de) focus on bokeh quality, and an improved AF motor. Our polls indicate that this is a lens many people cannot wait any longer to try, us included.

    Honerable mention: Panasonic Lumix DMC-GH5 development

    It only missed the top five readers’ picks by one vote, and while we only got a look at the new GH5 under glass at the show, Panasonic was able to provide us with some drool-worthy specs and capabilities of their upcoming flagship. It will offer 4K/60p capability for the first time in a consumer ILC, and will provide 4:2:2 10-bit 4K video. The GH5 will also provide a 6K Photo mode that will extract 18MP stills from burst footage, or 8MP stills from 60p 4K clips. These impressive specs are enough to keep us eagerly waiting for the GH5’s arrival.

    Articles: Digital Photography Review (dpreview.com)

  • Traveling light: M.Zuiko 12?100mm F4 Real-world Samples

    $ (document).ready(function() { SampleGalleryV2({“containerId”:”embeddedSampleGallery_6403402487″,”galleryId”:”6403402487″,”isEmbeddedWidget”:true,”standalone”:false,”selectedImageIndex”:0,”startInCommentsView”:false,”isMobile”:false}) });

    The new M.Zuiko Digital Ed 12?100mm F4 IS PRO is a 24-200mm equivalent zoom for the Micro Four Thirds system. On paper, it’s the ideal travel lens, and we were lucky enough to bring one back from Photokina last week to try out. 

    So how does it stack up? That’s what we wanted to know, so we spent a jet-lagged morning back in Seattle trying it out with the OM-D E-M1. And we have the pictures to prove it.

    Articles: Digital Photography Review (dpreview.com)

  • Tips for Getting Started Doing Photography with Drones

    Until very recently, my mindset was decidedly anti-drone. To me, drones seemed like a complicated plaything for geeks. After all, isn’t this photography hobby expensive enough without adding flying apparatuses to the equation? Plus there was very little doubt in my mind that if I bought a drone I would send it flying into the ocean on its first flight. No thanks.

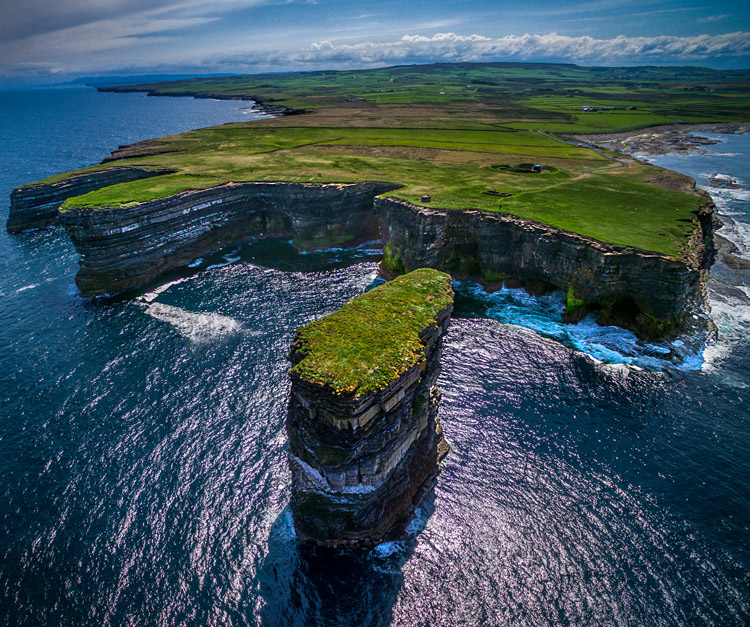
    Downpatrick-Head photography with drones

    Why a drone?

    I had a problem though. I had a coastal photography trip planned, and in coastal photography it is often difficult to take pictures of the coast while standing on the coast. I have long wanted some way to be able to look back at the coast from out to sea and photograph it from that perspective. A drone was the only real answer for me, so I bit the bullet and bought one.

    After having used the drone for several months now, I can say my attitude has changed markedly. Much of what I thought about drones was wrong, or at least the problems were overemphasized. Flying them is actually very easy. It isn’t that complicated. It isn’t even that expensive (at least not compared to what we spend on cameras and lenses).

    You may be pondering buying a drone, or at least wondering what they are all about. You might also see all the video footage from drones and wonder how drones are used in still photography. So let me introduce you to drones and how they can add a new dimension to your photography.

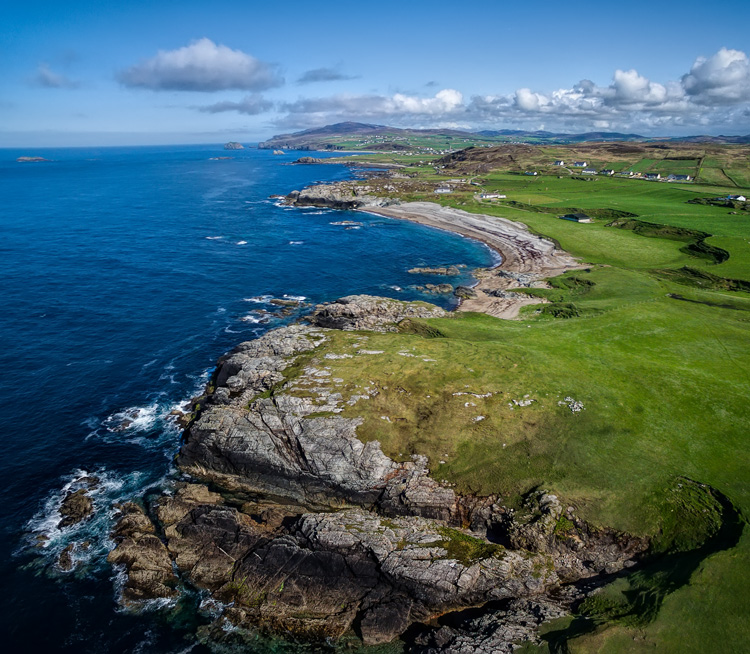
    Kinbane-Head

    Flying drones is easy

    First, let’s talk about flying drones. This is something you are probably concerned about. You might wonder if flying will require skills you don’t have. Or perhaps you just don’t want to devote time to learning it. This is one area where you have nothing to worry about. Flying a drone is remarkably easy. That’s not to say you shouldn’t be careful or that you won’t be nervous every time you fly it, but flying is really easy.

    The main thing to understand is that if you have your drone in the air, and you completely let go of the controls, it will just hover harmlessly in the air. It literally just sits there until you tell it what to do. Another thing that people worry about is having the battery run out while you are in the air. That won’t happen. Most drones have a feature that brings the drone back to its take-off point when the battery gets down to a certain level. In fact, most drones have a return to home feature you can press if you ever find yourself in an uncomfortable situation. You always have a way out.

    Controlling the drone is easy. You have a controller with two joysticks on it. Pushing on one of them sends the drone up or down; doing the same to the other joystick sends it forward and backward. Each of the joysticks also goes right and left. One will turn the drone to the right and left; the other will make it move to whichever side you push to. I’ll talk more about the specifics of the control later. For now, I just want you to get a feel for how easy it is. If you were worried about being able to fly a drone, don’t be.

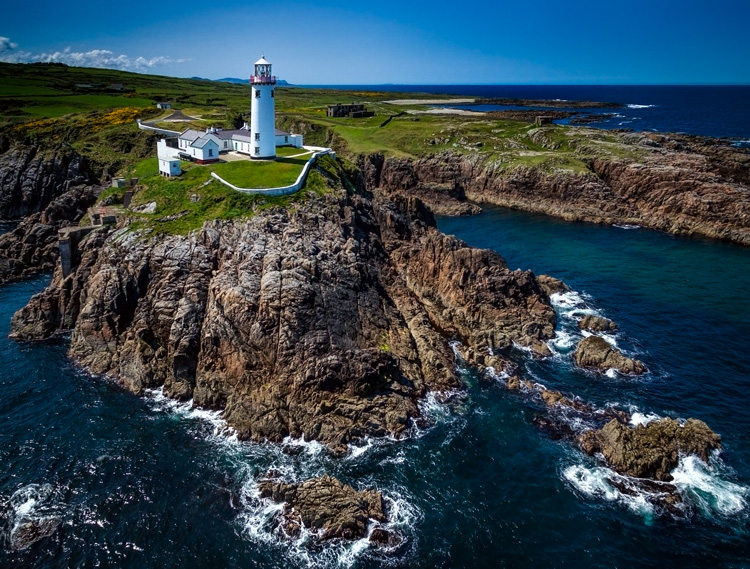
    Fanad-Head

    Watch where you fly

    You may have heard a lot about the new laws affecting drones. It is true that most countries are enacting regulations for drones. In the U.S., the FAA has recently finalized its rules regarding drones. But many of the rules and restrictions apply to those using drones commercially. Most of us are just doing this for fun, so let me try to make this simple for you.

    If you are flying your drone for recreational purposes, you don’t need a permit. There are no pilot requirements. Just register your drone with the FAA and you are set. The registration process is simple and only costs $ 5. To do so, just go to this page, create an account, and follow the instructions to register your drone.

    That said, you cannot just fly your drone wherever you want. The main limitations you should understand are as follows:

    • You must always fly below 400 feet.
    • You must keep your drone within direct eyesight.
    • Never fly near other aircraft, or within five miles of any airport.
    • Never fly over groups of people, stadiums, or sporting events.

    There are other restricted areas as well. For example, you cannot fly anywhere in Washington D.C. or in national parks. There are online maps and apps for your phone – including the FAA’s B4U Fly app – that will tell you when you are in a restricted space.

    Anyway, the regulations above apply to the U.S. Other countries will have their own regulations. Here are links to the regulations for Australia, New Zealand, and the UK.

    Old-Head

    Getting the right drone

    Next, let’s talk about getting a drone, if you don’t already have one.

    You may have dreams of buying a drone and sending up your DSLR to take high quality pictures. Forget about that, unless you want to spend upwards of $ 6,000. Instead, you’ll probably want to get a drone that comes with its own camera, but there are also models that work with the GoPro. The most common models are the Phantom 4 by DJI (check prices on Amazon or B&H Photo) or the Typhoon H by Yuneec (check prices on Amazon or B&H Photo). These will cost you about $ 1,300 – $ 1,500 for the drone and camera, although you can still get older models cheaper.

    What will you get for that? You’ll get a drone that will fly up to about 40 miles per hour, which can operate up to a few miles away from you. It will remain aloft on a battery charge for about 20-30 minutes. You can expect it to have features like an automatic return to home, collision avoidance, and the ability to follow you. Of course, specific features will depend on the actual model you choose.

    As to the camera, you can expect to get one that shoots both stills and video (usually 4K). We’ll talk more about the specifics of the cameras in a minute. First let’s talk more about how to fly.

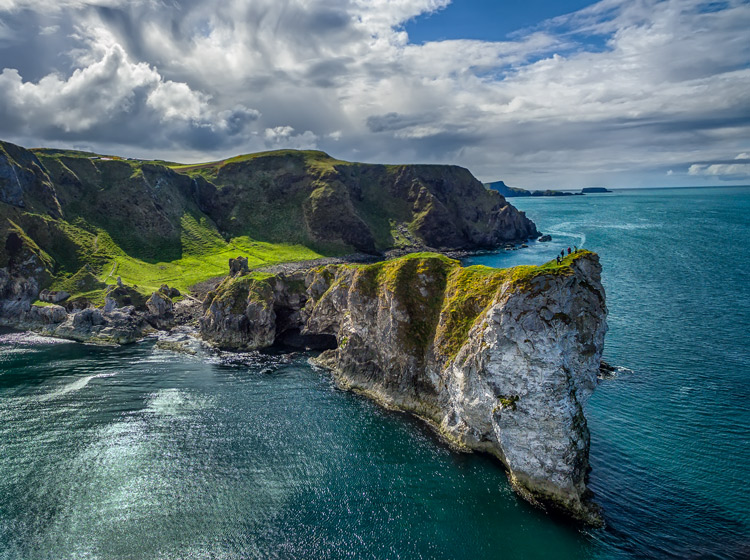
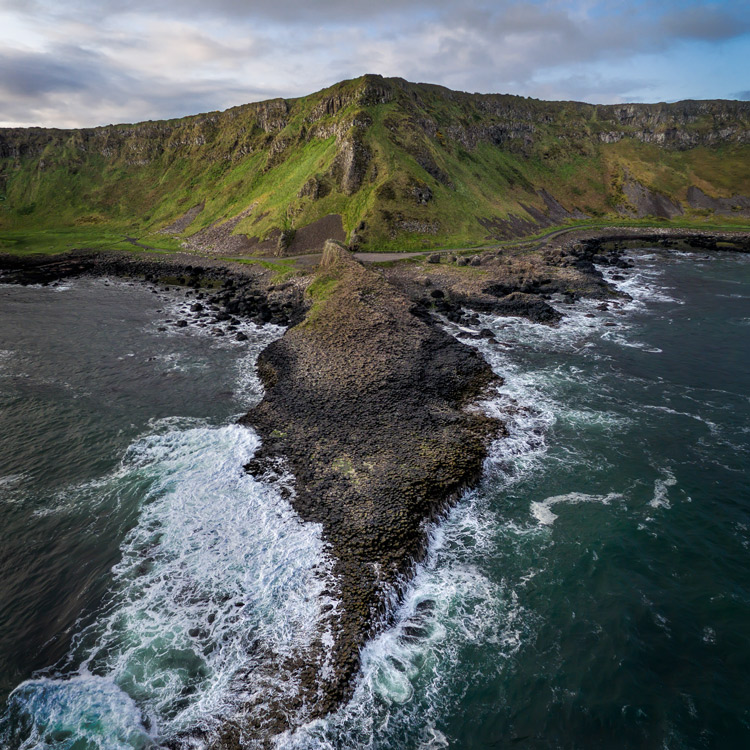
    Giants-Causeway

    How to fly

    When you fly the drone for still photography, things are pretty simple. Unlike shooting video, you won’t need to do any fancy pans or reveals. You just want to get the drone to the right spot(s) to take the picture. It’s just a matter of getting it up in the air, watching where you are going with it, and moving it where you want.

    Your drone will have a controller with two joysticks. The controller plugs into your phone or other device. You control the drone with the two joysticks. At the same time, you can see through the drones camera on your device. To send the drone up into the air, all you do is press up on the left joystick. That stick controls altitude. It is as simple as pushing up on the stick to increase the altitude, and pulling down to bring the drone down. That stick will also turn the drone from side to side. The other (right) joystick will fly the drone forward and backward by pressing up and down. When you press that joystick left or right, it moves the drone in that direction.

    Monitoring the flight

    To keep an eye on where your drone is going, you can either watch the drone itself or watch where it is going via the screen on your phone. Of course, you can operate the controller while keeping your eyes on the drone to make it go where you want.  But you can also see what the drone sees to control it, which is often much easier. You will have a controller that connects to your phone or other device. Your screen will show the view from the drone’s camera as well as other pertinent data. Remember that your drone has to be kept in direct eyesight though.

    That doesn’t sound too difficult, does it? It’s really not. After a few flights, it will be even easier. Of course, there are additional nuances and things will be a little different depending on what model you buy. Be sure to read the instructions and watch a few online videos on your specific model.

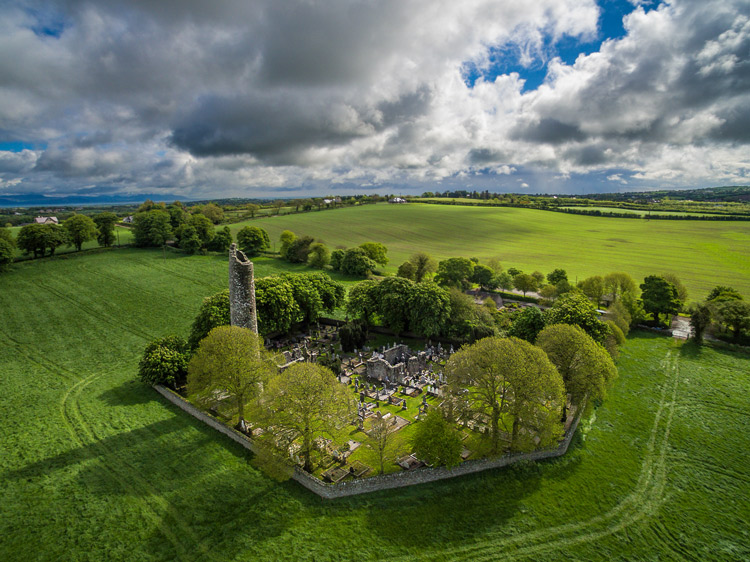
    Monasterboice

    You’ll be using a camera made for video

    Next let’s talk about the camera that will come with your drone. First, the good news. When it comes to shooting video, the cameras in drones are top notch. They routinely shoot Ultra HD and most shoot 4K video. It doesn’t get better than that.

    The bad news is that still photography is something of an afterthought for drones. The sensors are small. In most cases they are what you’d get in a compact camera. The resolution is moderate (12-16 MP is standard). The dynamic range is extremely limited and the low light performance isn’t great.

    In addition, the lens will likely be very limited; a fixed focal length. It will be a wide angle lens, usually around 15-20 mm. The lens will also have a fixed aperture, meaning you cannot change it.

    Working with the limitations

    Virtually none of us would feel good about going out shooting with such a limited camera and lens. However, in drones it isn’t that bad. As to the camera, remember you will be shooting in daylight (you can only fly drones during the day – within 30 minutes of sunrise and sunset – in the U.S.), so there will usually be plenty of light. As to the lens, the fixed aperture isn’t as limiting as it would first appear. Keep in mind that everything in your picture will be so far away that the focus will be at infinity. You don’t need a lot of deep depth of field for everything to be sharp.

    So the cameras are pretty limited, but you can make do. In any event, the cameras are getting better all the time, so you can expect significant improvements in camera quality in the near future.

    Malin-Head

    Tips for photographing with your drone

    We’ve talked about the capabilities of drones and the basics of how to fly them. Let’s talk now about taking pictures with them. For the most part, it is similar to operating a normal camera. You have the normal modes to choose from. You can set the shutter speed and ISO yourself or have the camera set them for you. That said, there are some aspects of using cameras on drones you should be aware of. Here are some tips to get you started:

    #1 Consider Shooting in Automatic Mode

    I am a dedicated manual mode shooter when it comes to shooting with my DSLR. I would not think of using an automatic exposure mode. But when it comes to shooting with a drone, I put it in automatic exposure mode more often than not.

    Why? Because there is enough to worry about when it comes to drones. I don’t want to add exposure control to my list of issues to think about. So when you are starting out using a drone for photography, consider using automatic mode. When you get more comfortable with the other controls, you can then set the exposure controls yourself. In any case, your camera will typically do a pretty good job setting the exposure level. You’ll rarely have tricky exposure scenarios here.

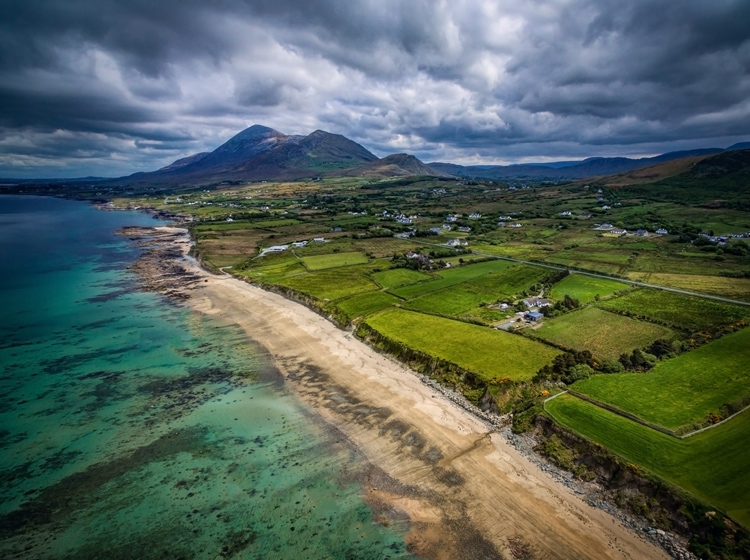
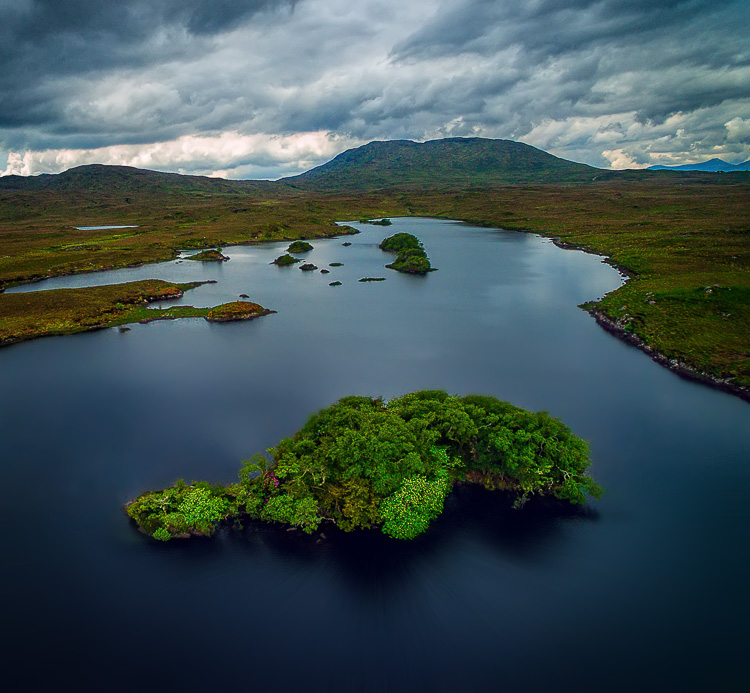
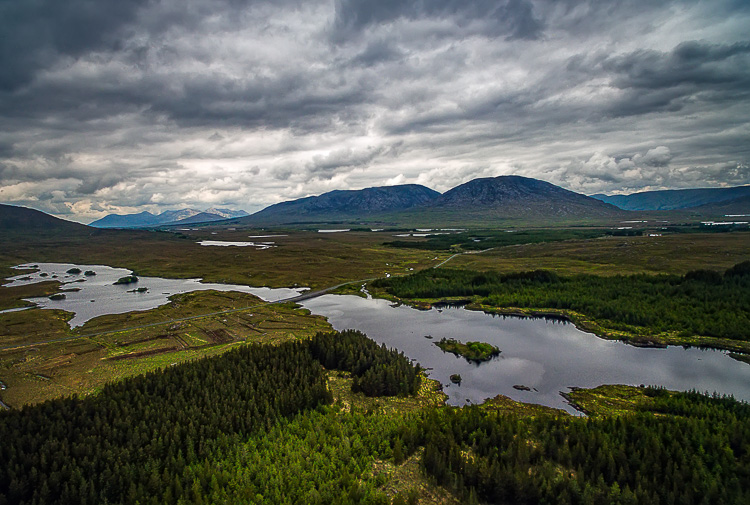
    Connemara

    #2 Bracket your photos

    One way to make sure you get the right exposure every time is to bracket your photos. Drone cameras are usually capable of doing 3-shot brackets. Use this to overexpose and underexpose your shots by a stop. Think of this as exposure insurance. Sometimes you will just like one of the over or underexposed shots better. In that case, just use it. In addition, you can blend the exposures or use HDR software to combine the exposures later.

    #3 Use filters

    As mentioned earlier, the lens on your drone will likely have only one aperture. That leaves you limited options for changing shutter speeds. You aren’t completely out of luck though; you can still buy neutral density filters for your lens. These filters are used more for video, but they also help still photographers. They restrict the amount of light that gets into the camera, thereby forcing the camera to use a longer shutter speed.

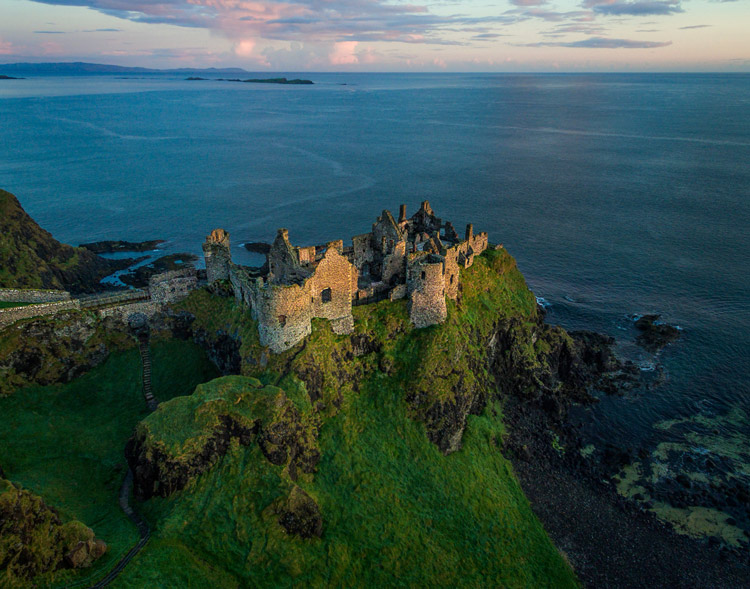
    Dunluce

    You can also get polarizing filters for your drone. These filters cut down on reflections and make skies appear a deeper, richer blue. This is helpful for drone photography, where the sky is often a significant part of the picture.

    #4 Get multiple batteries

    This isn’t strictly a photography tip, but it is important nonetheless. Be sure to get more than one battery for your drone. Drone batteries typically last only 20-30 minutes. That isn’t a lot of time. Further, you may also want to fly in a few different locations on the same day. Most of the time you won’t be able to charge your battery in between locations. So, you’ll need more than one.

    How many do you need? That depends. You can get away with only two batteries (I do), but many drone photographers have three or four. You shouldn’t need more than that. Batteries are not cheap so think carefully about what you will need.

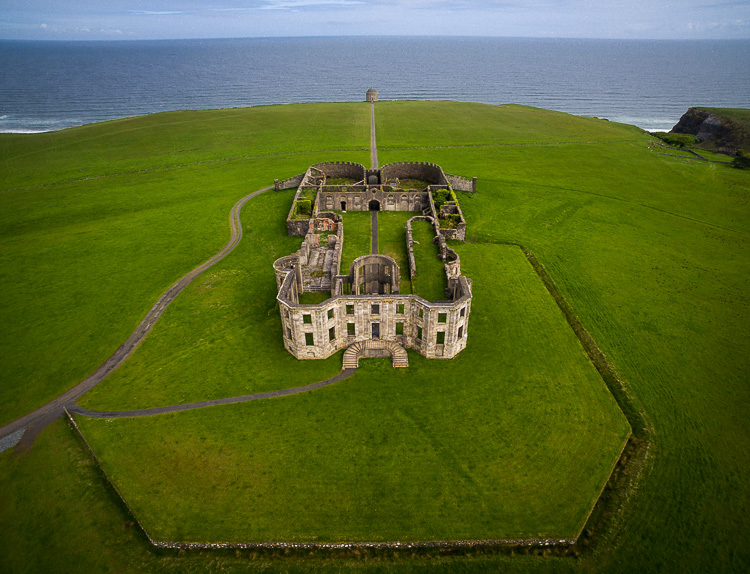
    DownhillCastle

    #5 Watch out for the deone’s blades in your pictures

    Obviously, when you are flying the blades on your drone will be spinning. Remember that you will also be using an extremely wide angle lens. If you aren’t careful, your picture will include the spinning blades.

    The best way to avoid this problem is to simply angle the camera down. That will keep the spinning blades out of the camera’s field of view. Of course, changing the angle of the camera will change the composition of your picture. Flying higher while angling the camera down might keep the composition similar to the picture you originally had in mind.

    In any case, just be sure to look for blades in your pictures. You will need to look closely sometimes because it isn’t always obvious. You don’t want to get home and discover that your pictures are all ruined because there are spinning blades in all your pictures. If they are present, just change things up and take another shot without the blades in the picture.

    #6  Keep it low

    Your drone will fly up to 400 feet in the air. It is fun to fly it high, and it also ensures that you are far away from trees, power lines, and other obstacles. But for the best photos, you will not want to be anywhere near that high. Your shot will look like something from Google Earth. Instead, keep your drones pretty low to the ground (under 100 feet) to get the best shots. That will help you establish a foreground for your picture.

    Connemara-2

    Getting started with your new drone

    So I admit it, I was wrong about drones. They are fun, easy to fly, and they really add something to your photography. Is one right for you? The answer will be different for everybody, but if you are on the fence I really encourage you to give it a shot.

    A “just get out there and do it” attitude might not seem appropriate when it comes to drones. After all, any mistake can lead to a crash. But there is one simple rule that will make flying drones easy. That is to just stay away from everything. In fact, stay far away. Don’t go anywhere near trees, buildings, power lines, etc. If you do that, very little can go wrong.

    Do you have any other drone tips to share with dPS readers? Please do so and share your drone images in the comments below.

    googletag.cmd.push(function() {
    tablet_slots.push( googletag.defineSlot( “/1005424/_dPSv4_tab-all-article-bottom_(300×250)”, [300, 250], “pb-ad-78623” ).addService( googletag.pubads() ) ); } );

    googletag.cmd.push(function() {
    mobile_slots.push( googletag.defineSlot( “/1005424/_dPSv4_mob-all-article-bottom_(300×250)”, [300, 250], “pb-ad-78158” ).addService( googletag.pubads() ) ); } );

    The post Tips for Getting Started Doing Photography with Drones by Jim Hamel appeared first on Digital Photography School.


    Digital Photography School

  • Rebuilding Blocks: Mobile Factory Turns Disaster Debris into Modular Bricks

    [ By WebUrbanist in Architecture & Houses & Residential. ]

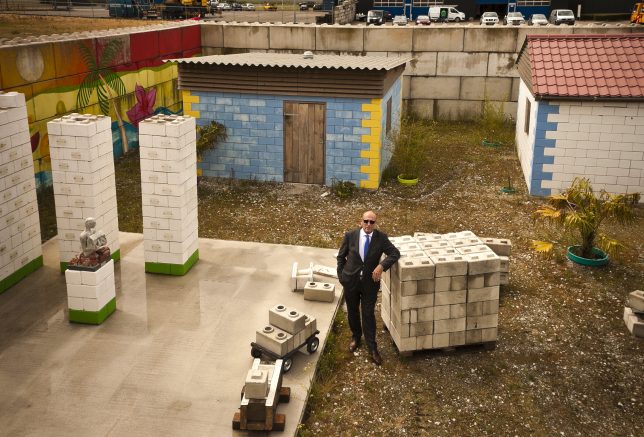
    mobile-factory-homes-copy

    In the wake of intentional demolition or unexpected disasters, the Mobile Factory system can be shipped inside just two cargo containers and begin to turn rubble from ruins into building blocks for reconstruction.

    Developed in The Netherlands, the technology filters concrete from other rubble, which is then cast into interlocking blocks (like LEGO bricks) that require no joinery to form stable walls. These units can be stacked without specialized training or equipment, making it possible for communities to rebuild efficiently and cheaply.

    The resulting structures are earthquake-resistant, held together in part by bamboo rods threaded through voids in a certain subset of the wall blocks (which can also be used to thread in utilities, including plumbing and electrical lines).

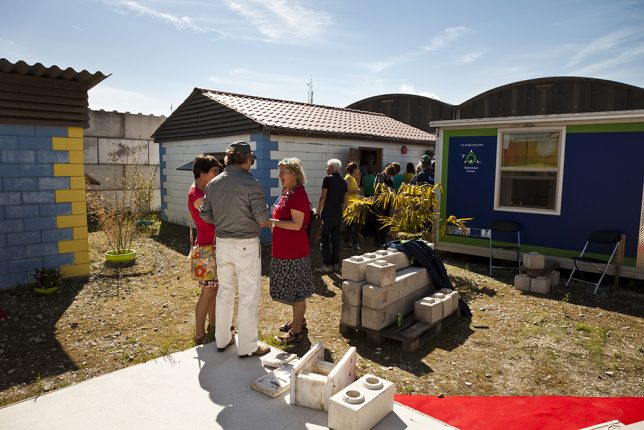
    mobile-factory-walls

    Since the system fits into a pair of shipping containers, it can easily be transported from site to site, building blocks close to where they will be used and reducing transit time and costs. The reversibility of this construction approach also means that temporary buildings can be erected quickly in the wake of a disaster. In turn, these can be disassembled or adapted easily in the weeks, months and years following an emergency situation.

    Consider the 2010 earthquake in Haiti that left hundreds of thousands dead and millions homeless. Over five years later and the country is still littered with 25 million tons of construction debris, which technologies like this can help turn into affordable housing. Indeed, the Mobile Factory organization is looking into expanding their work in Haiti, Peru and other countries in need of this tech.

    mobile-blocks

    “In disasters, you have piles and piles of rubble and the rubble is waste. If you are rich, you buy more bricks and rebuild your home,” said one of the organization’s founders. “But what happens if you are poor? In disasters it is the poorest people who live in the weakest houses and they lose their homes first. I thought, what if you recycled the rubble to build back better homes for poor people?”

    Beyond wars and tsunamis in nations further afield, there are potential urban applications in densely-built places like the Europe and the United States: cities like Baltimore and Detroit spend vast amounts of money demolishing buildings (and in some cases: entire blocks), then clear the rubble and put it in landfills. This technology suggests an alternative: reusing on or close to the demolition site, reducing material and energy waste as well post-demolition transportation costs.

    Share on Facebook


    [ By WebUrbanist in Architecture & Houses & Residential. ]

    [ WebUrbanist | Archives | Galleries | Privacy | TOS ]


    WebUrbanist

  • Creative Live’s Photo Week starts tomorrow

    Now that Photokina is over and we are impatiently waiting for the latest cameras and gear to ship, it’s a perfect time to hone up on our photography skills. Luckily, our friends at Creative Live are hosting their annual Photo Week this week, September 26 – 29.

    Photo Week 2016 is four days of photo education, brought to you through 24 live classes taught by top photographers and educators. It is geared toward people who are comfortable with the basics of photography and are looking to expand their knowledge base into more advanced techniques.

    Some of the classes we are really looking forward to include Brandon Stanton (the photographer behind the popular photo blog Humans of New York) discussing how his experiences have shaped his work as a storyteller, Vincent Laforet sharing ideas for how to move your business from stills to video, Jared Platt giving tips on a whole range of post-processing topics, and Chase Jarvis opening up about his experiences in the photo industry.

    As with all Creative Live classes, you can watch the live classes online for free. If watching the live class won’t fit into your schedule, you can purchase on-demand access so that you can watch it on your own time. The price for the entire week (including all 24 classes) is normally US $ 499, but they are offering it for US $ 199 for a limited time.

    But there’s more! DPReview readers can use the discount code ‘DPR10‘ to receive 10% off of any Creative Live class through December 31, 2016.

    Check out the Photo Week schedule to see what’s available. What looks interesting to you?

    Articles: Digital Photography Review (dpreview.com)

  • Wet Look: 12 More Cool Creative Water Tanks & Towers

    [ By Steve in Art. ]

    water-tanks-towers-1a

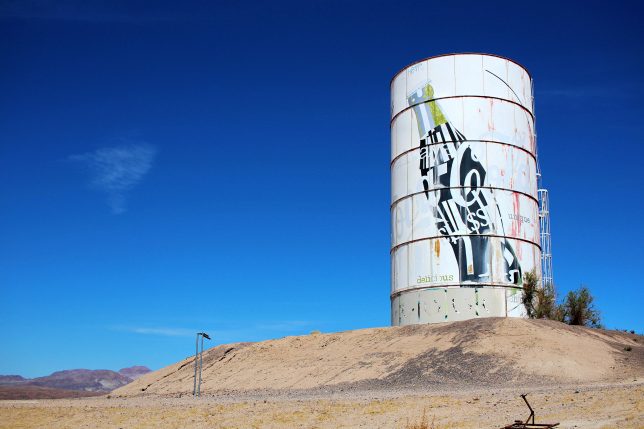
    Due to their sizes and shapes, water tanks and towers lend themselves to artistic embellishment as these dozen creative examples refreshingly illustrate.

    water-tanks-towers-1c

    water-tanks-towers-1b

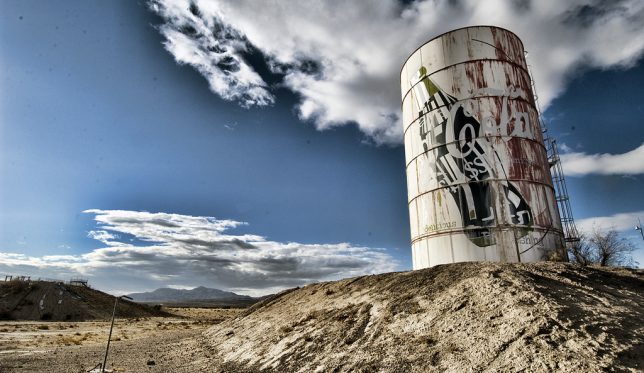
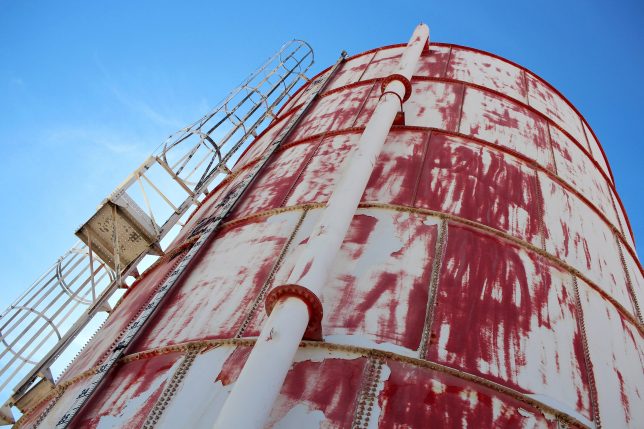
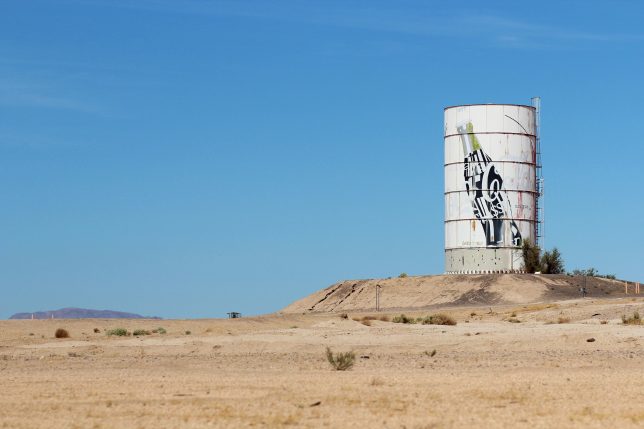
    A waterpark? In the middle of MY Mojave Desert? It’s more likely than you think… or at least it was, before the Lake Dolores Waterpark (later the Rock-A-Hoola Waterpark and then the Discovery Waterpark) circled the drain for the final time in 2004. The water used to “power” the park(s) came from underground springs fed by the Mojave Aquifer and was stored in an enormous water tower shaped like – and painted to resemble – a Coca-Cola can.

    water-tanks-towers-1d

    While much of the park has been vandalized and scavenged for metal, the water tank can blame its current tattered & faded state on the Mojave’s blistering desert sun. Kudos to Flickr user Hans Proppe (shadowplay) and Imgur user loganbush for snapping the eerie and evocative images above.

    Leggo My Necco

    water-tanks-towers-2a

    water-tanks-towers-2b

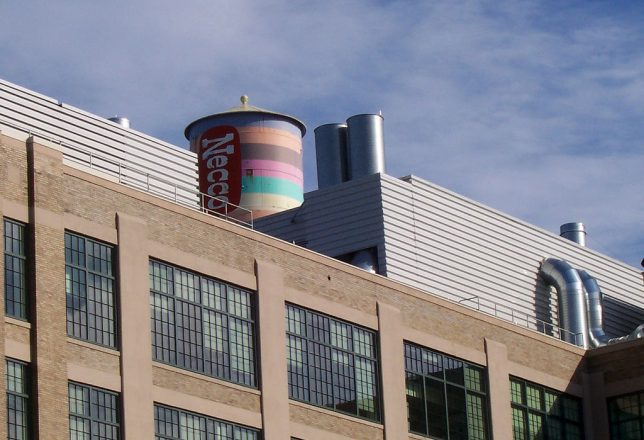
    The circa-1927 New England Confectionery Company (NECCO, for short) building in Cambridge, MA is now occupied by offices of Swiss-based pharmaceutical firm Novartis, who graciously repainted the iconic Necco-wafer water tower in 1997. Flickr user Jill Robidoux (jylcat) snapped the tank on January 1st of 2003 and it’s a good thing she did: Novartis de-necco’d the tank in 2004 by painting it over in a boring-by-comparison pharma theme.

    Behind The 8-Ball

    water-tanks-towers-3a

    water-tanks-towers-3b

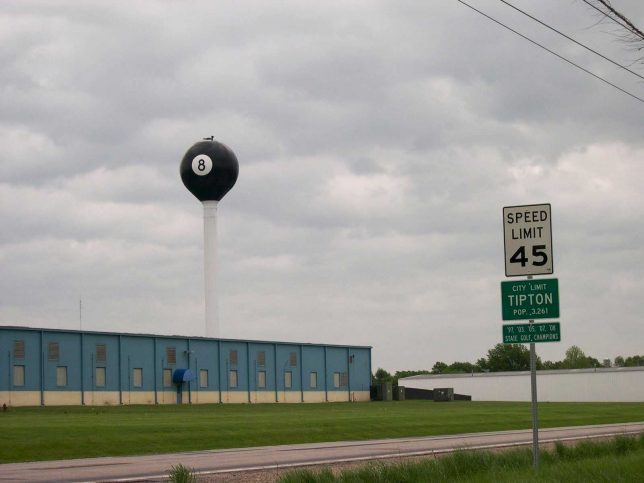
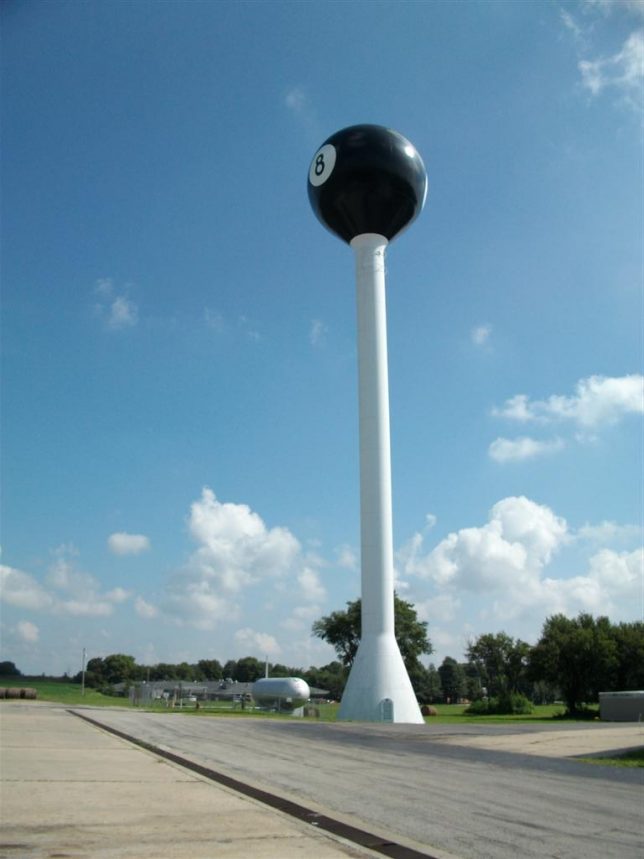
    The giant 8-ball water tower in Tipton, Missouri came and went like a Fast Eddie Felson pool shot in the dark… and then it came back again, this time to stay. According to the Jefferson City News Tribune, in 1968 the water tower was creatively dressed in a billiard-ball theme by its owners, the Fischer Pool Table company. The water tower was ceded to the city and painted all-white after Fischer closed in 1977 but Tiptonians wanted their landmark back so in 1999, the tower was restored to its previous 8-ball livery. Minnesota Fats is likely looking down and smiling.

    Cone Job

    water-tanks-towers-4

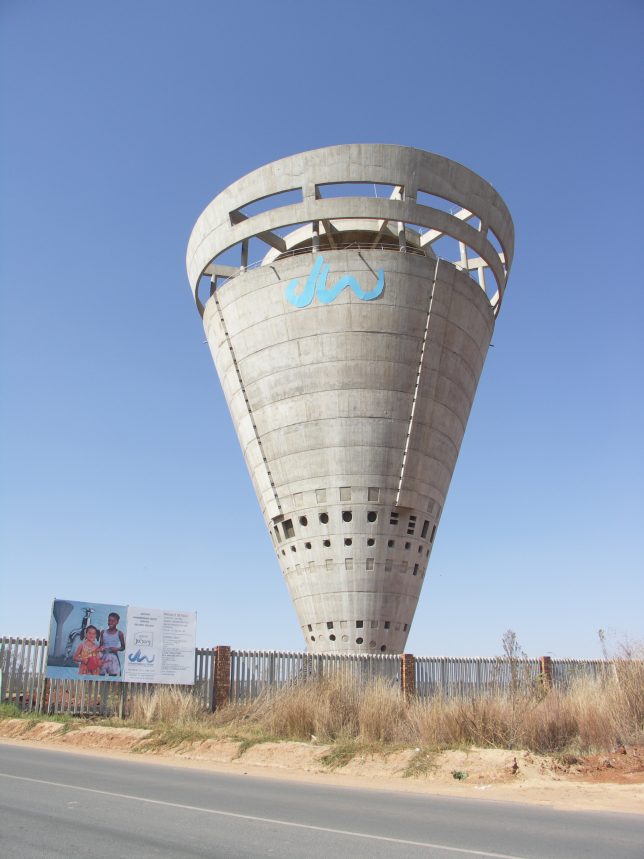
    The only paint on the Grand Central Water Tower in Johannesburg, South Africa, is the aqua blue corporate corporate logo near the top… anything else would be superfluous. The curious conical tower was built in 1997 and stands 40m (131.2 ft) tall, assuming it hasn’t already tipped over.

    Next Page – Click Below to Read More:
    Wet Look 12 More Cool Creative Water Tanks Towers

    Share on Facebook


    [ By Steve in Art. ]

    [ WebUrbanist | Archives | Galleries | Privacy | TOS ]


    WebUrbanist

  • MIOPS displays its MIOPS Mobile smart camera remote

    The makers of the MIOPS smart trigger have returned to Kickstarter looking to fund their latest project, the MIOPS Mobile and are showing a prototype at their Photokina booth. The Mobile connects your DSLR and smartphone via a Bluetooth LE connection and uses your mobile device’s built-in sensors to offer a range of creative capture modes. The camera can be triggered by vibration, sound, motion, a predefined travel distance or a combination of all those events. Advanced timelapse modes are included as well and all parameters and modes are controlled via an iOS or Android smartphone app. 

    Remote shutter control is on board as well – functions include Cable Release, Press&Hold, Press&Lock, Timed Release, Self Timer and Timed Release with Self Timer. The system is compatible with 350 camera models from most major manufacturers and the battery provides power for approximately 24 hours of use with one charge. Firmware is updated automatically over the air. More information including a video can be found on the MIOPS Mobile Kickstarter page. The funding goal has already been reached but you can still secure a unit with a $ 79 pledge. Shipping is planned for April 2017.

    Articles: Digital Photography Review (dpreview.com)

  • 2017 Sony World Photography Awards accepting entries

    2017 Sony World Photography Award entries

    The Dinagyang Festival is a religious and cultural festival in Iloio City, Philippines held on the fourth Sunday of January

    © Raniel Jose Castan?eda, Philippines, Entry, Open, Culture, 2017 Sony World Photography Awards

    The 2017 Sony World Photography Awards are open for business and accepting entries in four main competitions: Professional, Open, Youth and Student Focus. The Open competition includes 10 separate categories including Architecture, Street Photography and Wildlife, and Open competition entries are automatically submitted to an applicable National award.

    If you’re looking for some inspiration, you can find how one DPR regular took home a World Photo National prize last year, and flip through a selection of early entries here. Submissions will be accepted for the Open and National competitions until January 5, 2017.

    2017 Sony World Photography Award entries

    Bear Apartment Six. © Alexandra Cearns, Australia, Entry, Open, Enhanced, 2017 Sony World Photography Awards

    Little bears can be very busy and the cub residents of Free the Bears Fund’s enclosure number six in Cambodia are no exception. ‘Bear Apartment Six’ is a composite print made up of 16 photographs taken by photographer Alex Cearns. The single images have been meticulously pieced together to form a visually enthralling scene of bustling bear activity, indicative of an apartment building. Photographed over 90 consecutive minutes in June 2016, three sun bear cubs are the stars of the show as they climb in and out of their den entrance. Cheeky, joyful and adorable, sometimes they’re solo and sometimes they’re with their bear buddies. Each bear was rescued from the illegal wildlife trade when they were only a few months old, and will now be in the care of Free The Bears for the rest of their lives.

    We have 2 year old Bearzilla, seized from people keeping him as a pet in Phnom Penh; Pooh, aged just under 2 years, surrendered by developers building a hydro dam in the Stung Treng Provence; and 15 month old Soriya Sundance, handed over by a Government Official who obtained her from ethnic minority hunters in the Mondulkiri Province.

    2017 Sony World Photography Award entries

    Manta. © Daniel Hunter, UK, Entry, Open, Wildlife, 2017 Sony World Photography Awards

    A manta ray swimming in the Indian ocean, Indonesia.

    2017 Sony World Photography Award entries

    The Midnight Blossom. © Ellie Victoria Gale, UK, Entry, Open, Enhanced, 2017 Sony World Photography Awards

    Part of the series ‘The Flower Keepers’, a personal series exploring my imagination and thoughts, creating whimsical characters in a world filled with flowers.

    2017 Sony World Photography Award entries

    Paper Mill. © Jassen Todorov, US, Entry, Open, Architecture, 2017 Sony World Photography Awards

    Waste from a paper mill is agitated by aerators, producing steam and foam, which are pushed by the wind. Clearwater Paper Reservoire, Lewiston, Idaho. Aerial Image (shot from a plane at 1,500 feet).

    2017 Sony World Photography Award entries

    The Majestic Dance. © Satvik Bhatt, India, Entry, Open, Wildlife, 2017 Sony World Photography Awards

    This picture was taken in the forest area of Jaipur, Rajasthan (India). Rajasthan has a huge population of the National Bird and they are found in most areas (both urban and rural). This picture was taken during rain season, in which it’s a common sight to see the Peacocks dancing.

    2017 Sony World Photography Award entries

    Equilibrium. © Jose? Mari?a Pe?rez, Argentina, Entry, Open, Enhanced, 2017 Sony World Photography Awards

    Digital edition

    2017 Sony World Photography Award entries

    Politechnika Warszawska. © Lorenzo Linthout, Italy, Entry, Open, Architecture, 2017 Sony World Photography Awards

    The Warsaw University of Technology (Polish: Politechnika Warszawska; literally, “Warsaw Polytechnic”) is one of the leading institutes of technology in Poland and one of the largest in Central Europe.

    2017 Sony World Photography Award entries

    Soar in the blue. © Zuorong Li, China, Entry, Open, Motion, 2017 Sony World Photography Awards

    There was a diving practice, after that, the swimming coach was swimming in the pool, and I was standing in the 5m diving platform, waiting for the right moment, although the light was quiet dim, I still managed to get this shot.

    2017 Sony World Photography Award entries

    Disciplinant. © ?? ?, China, Entry, Open, Culture, 2017 Sony World Photography Awards

    On 8.23.2016, I was traveling to Sertar County (a county of Sichuan Province, China), and visited the Serthar Buddhist Institute here, Lamaism’s piety and the grand scene shocked me. I have never before feel my heart be so pure. When I wanted to take a photo there was a Lamaism walking by – so I got this photo.

    Articles: Digital Photography Review (dpreview.com)

  • Photokina 2016: Hands-on with Hasselblad X1D

    Photokina 2016: Hands-on with Hasselblad X1D

    The star of Hasselblad’s booth at Photokina is the X1D – a compact, mirrorless medium-format camera with a 50MP sensor. Announced earlier this year, the X1D has yet to to start shipping, and the Swedish company’s booth was thronged with photographers eager to get their hands on the new camera.

    Photokina 2016: Hands-on with Hasselblad X1D

    Weighing just 750g without a lens, one of the main selling points of the X1D is its small size and weight compared to traditional medium-format digital products. The X1D (and Fujifilm’s just-announced GFX 50S) dispenses with a conventional mirror box, which allows the camera to be slimmer, and much lighter than DSLRs with equivalent-sized sensors.

    Photokina 2016: Hands-on with Hasselblad X1D

    The X1D is beautifully designed, with relatively few external controls. It’s a bit strange to see a mid-range DSLR-style exposure mode dial on a $ 10,000 camera, but in use, it’s very convenient. A neat ‘pop up to use, pop down to lock’ design means that the dial can be kept flush with the camera’s top-plate until you need to change exposure mode. 

    Photokina 2016: Hands-on with Hasselblad X1D

    We’re seeing more and more cameras being designed with a smartphone style ‘app tile’ interface, and the X1D makes good use of its large, 920k-dot rear touch-screen. The screen is nice and responsive, but this kind of resolution is low compared to the screens found on (for example) the Nikon D5 and D500, which boast 2.3 million dots and look sharper.

    Photokina 2016: Hands-on with Hasselblad X1D

    The X1D’s relatively low-resolution rear screen is partially mitigated by its excellent 2.36-million dot electronic viewfinder. This view also gives you a good idea of just how slim the X1D is, despite its large sensor. The hotshoe is compatible with Nikon flashguns. 

    Photokina 2016: Hands-on with Hasselblad X1D

    Here’s that large 50MP sensor, in all its glory. Hasselblad is calling this new lens-mount ‘XCD’ and as well as a new range of XCD lenses, the company is also offering an H lens adapter, which extends support to Hasselblad’s existing H lens system with full autofocus operation.

    Photokina 2016: Hands-on with Hasselblad X1D

    The X1D is a luxurious, pricey piece of equipment but as we’d expect from Hasselblad, its standard of construction and finish is exemplary. We’re looking forward to testing a shipping sample as soon as one becomes available. 

    Photokina 2016: Hands-on with Hasselblad X1D

    Hasselblad is also showing off an upcoming lens. The XCD 30mm F3.5 offers the same field of view as a 24mm on full-frame, and can focus down to 0.4M. No pricing or availability information has yet been given. 

    Photokina 2016: Hands-on with Hasselblad X1D

    If there’s one thing Hasselblad likes to do, it’s make special limited editions. This is the 4116 edition of the X1D, in matte black. We actually prefer the way this one looks, compared to the more traditional two-tone finish but at $ 12,995 with a 45mm lens, it’s a bit rich for our blood.

    Photokina 2016: Hands-on with Hasselblad X1D

    It does look nice though…

    Photokina 2016: Hands-on with Hasselblad X1D

    As well as the X1D, Hasselblad is also showing off a concept camera – the 75MP V1D 4116 Concept. There’s no word on whether or not this concept will ever become a reality, but it’s certainly a very attractive mockup.

    Photokina 2016: Hands-on with Hasselblad X1D

    The V1D 4116 Concept is built around a (presumably hypothetical) 75MP square-format sensor, and like the classic Hasselblad SLRs of old, it features a modular design.

    Articles: Digital Photography Review (dpreview.com)