Blog

  • Yongnuo YN 85mm F1.8 lens now available

    Yongnuo has announces its full-frame 85mm F1.8 lens, for Canon and (eventually) Nikon mounts. This budget-friendly lens, which closely resembles Canon’s 85mm F1.8, first surfaced a couple of months ago. It features 9 elements in 6 groups, as well as a 0.85m minimum focusing distance, a 58mm filter diameter, and an overall weight of about 460g/16oz. It’s offered Canon EF mount now, with reports pointing to a Nikon version coming soon.

    Yongnuo announced the launch on its Facebook page, where it is also giving away three lenses for testing. The lens features an AF/MF switch and according to its B&H listing, gold-plated contacts. The new lens is priced at $ 177 at B&H, but is currently backordered.

    Via: PhotoRumors

    Articles: Digital Photography Review (dpreview.com)

  • Leica SL gallery update

    Image taken using a Minolta M-Rokkor 40mm F2 adapted using the Leica M-Adapter T and processed to taste in Adobe Camera Raw. ISO 2000, 1/125 sec, F2. Photo by Carey Rose

    As we move towards completing our full review of the Leica SL, we’ve been toting it around town just about everywhere, from the grit of Pioneer Square to…well, the grit of a dim living room rock show. Whether you want images at ISO 50 or ISO 50,000, we’ve got you covered – including an adapted Minolta M-Rokkor lens to boot. 

    See our updated Leica SL sample gallery

    Articles: Digital Photography Review (dpreview.com)

  • Sony FE 100mm F2.8 STF bokeh demystified

    Sony’s new STF (Smooth Trans Focus) 100mm F2.8 GM OSS uses an apodization (APD) filter to create very smooth out-of-focus regions/highlights both in front of, and behind, the focal plane.

    But how exactly does it work? Sony has published a video demonstrating the principle, and the effect. Take a look:

    The apodization element is a circular graduated neutral density filter that lets in more central light rays than peripheral light rays. This smooths out transitions between out-of-focus elements, leading to quite unique imagery.

    The APD element is a (circular) graduated neutral density filter inserted into the optical path of the lens. Out-of-focus light rays that are either converging in front of the focal plane, or diverging behind the focal plane, have a gradual radial softening (seen as darkening of the more oblique rays in front of or behind the focal plane). This yields less interference between out-of-focus light rays and, so, less ‘busy’ and simply smoother bokeh. 

    What’s the real-world impact? Have a look at the image comparison below, which compares the foreground and background bokeh with and without the APD element:

    The APD element leads to smoother foreground and background bokeh. Note how out-of-focus highlights are smoothed, and this applies to everything. There’s a cost though: sometimes I like sharp, enlarged de-blurred out-of-focus highlights, which you won’t get with this lens. But what you will get is smooth, creamy bokeh.

    We’ve had very little time with the lens, but our initial impressions of image quality are extremely positive. If you’d like to learn more about the lens, visit the company’s dedicated page on this lens over at Sony Alpha Universe, then take a look at the phenomenal MTF curves on Sony.com’s site. Yes, this is a sharp lens, but with beautiful bokeh. And image stabilization, to boot, which, combined with IBIS on most E-mount cameras, will allow you to use slow-ish shutter speeds to maximize light gathering, minimizing noise.

    Which you’ll need, because wide open, while you have the depth-of-field of F2.8, you have the light transmission of F5.6.

    Sony’s E-mount system is becoming increasingly hard to ignore for professional results. With the release of the 100mm STF GM and 85/1.8 lenses, Sony is rounding out a format that already accepts arguably the largest lens lineup in history (thanks to its short flange distance). But the importance of a native lineup cannot be over-stressed, as it is native lenses that benefit most from Sony’s AF technologies.

    A note on autofocus…

    Similar STF lenses tend to be manual focus or contrast detect-only, since peripheral light rays – the very ones the filter is designed to block out – are necessary for traditional phase-detect sensors to function. However, since (at least Sony’s) on-sensor PDAF sensors can still use more central light rays for focusing, focusing does still work, remarkably well in fact with the a7R II, even indoors, wide open. That’s quite an achievement, in no small part due to the excellent focusing system of the a7R II. What’s more, movement of the focus element(s) is incredibly fast, thanks to the excellent Direct Drive SSM mechanism we’ve seen in blazingly fast-to-focus lenses like the FE 35mm F1.4 and FE 24-70mm F2.8 GM.

    “Unlike Sony’s recent releases, this lens focuses wide open…”

    In other words, I was able to use to the 100mm STF to focus on faces, even using Eye AF, in fairly low indoor lighting, despite the T5.6 rating at a F2.8 aperture. This is in no small part due to the fact that this lens, unlike Sony’s recent releases, focuses wide open (albeit stopping down after initial acquisition in AF-C). More tests to follow, but simply the fact they got phase-detect AF working, nevermind the AF performance, is nothing short of impressive.

    The FE 100mm F2.8 STF GM OSS is already shaping up to be a spectacular lens, adding to an already well-rounded, serious E-mount lens lineup.

    Articles: Digital Photography Review (dpreview.com)

  • How to Use a Speedlight at Wedding Receptions and Events

    Using a speedlight at weddings and events take me back down memory lane to my very first paid wedding. I had the most basic digital camera, my trusty Nikon D40, the 18-55mm kit lens, a telephoto I bought separately 55-200mm f/4-5.6, and a 50mm 1.8D. What did I know about weddings? Hardly anything technical for sure but I had bags of creativity which got me hired. We have to start somewhere. But before anyone judges me at touting my wedding photography as a professional, well I wasn’t. I was recommended to someone looking for a wedding photographer. I didn’t have a portfolio, so the person who recommended me took some of my family photos to show her friend.
    What did I know about weddings? Hardly anything technical for sure, but I had bags of creativity which got me hired. We have to start somewhere. But before anyone judges me at touting my wedding photography as a professional, well I wasn’t. I was recommended to someone looking for a wedding photographer. I didn’t have a portfolio, so the person who recommended me took some of my family photos to show her friend.

    How to Use a Speedlight at Wedding Receptions and Events

    My first speedlight

    Up until then, I had only photographed friends’ weddings because I enjoyed them and they gave me some practice other than photographing my own kids as well as other families. So this was my first paid venture outside family photography. But, even as a super wedding novice, I knew I needed a speedlight (flash gun) and dared not go without one. I also borrowed a backup camera just in case.

    I bought the super affordable Nikon SB-400, a nifty little speedlight that fits in your pocket with a head that can be tilted overhead (and only that) for bouncing light. It was better than not having a speedlight at all. I was ready to roll, or so I thought.
    How to Use a Speedlight at Wedding Receptions and Events

    Research the venue ahead of time

    On realizing that the venue had a very high ceiling, totally unreachable for light to be bounced back, and with beams spanning the walls, I was stumped. There was no way I could bounce the light as my little SB-400 didn’t swivel sideways to be bounced off the walls. Fortunately, I found this out when researching the venue, not during the wedding day. I McGyvered my speedlight by strapping a white foam card behind it so it bounced the light somewhat in a forward direction. DIY yes, but it did the job, plus I have always hated direct flash anyway so for me, bouncing was the only way ahead at that time.

    I McGyvered my speedlight by strapping a white foam card behind it so that it bounced the light in a somewhat forward direction. DIY yes, but it did the job. I have always hated direct flash anyway, so for me, bouncing was the only way ahead at that time.
    How to Use a Speedlight at Wedding Receptions and Events

    Please the clients

    To cut the long story short, I shot the wedding and the newlyweds were happy with the results. There were times when the flash was not strong enough in the dark venue but I was able to improve the photos somewhat through Photoshop. Thankfully, that was many years ago. Looking back at those photos now makes me realize how much I didn’t know and how much I’ve learned. The pictures were creative definitely, but technically they were cringe-worthy! Too heavy Photoshop actions were used, too much styling like desaturation or oversaturation, missed focus, overexposure, underexposure, I could go on and on. I tried to leverage my creativity to hide the fact that I was technically weak.

    The newlyweds loved them and even ordered albums and a canvas! Luckily for them, I had no idea how to price my wedding services so I sold the products to them at cost, not even charging for the time it took me to make the albums! I mean, what sane professional would do that?

    So I started on a journey that would make me realize just how much technical knowledge and physical work a wedding requires and how we have to learn to price accordingly or live in a perpetual grudge against the business and face an abyss that is the loss of any self-worth.
    How to Use a Speedlight at Wedding Receptions and Events

    Here are three ways you can use a speedlight at events or wedding receptions

    Moving on, this article is all about how I use speedlights at wedding receptions and events now, and some tips for you to do so as well. Thankfully, I now have an arsenal of professional gear that I am confident enough in using and know what to expect from. I have also stopped relying on Photoshop and instead try to get my exposures correct in camera, even with the use of external lighting, the ratio calculations of which I still find super confusing, if I’m being honest!
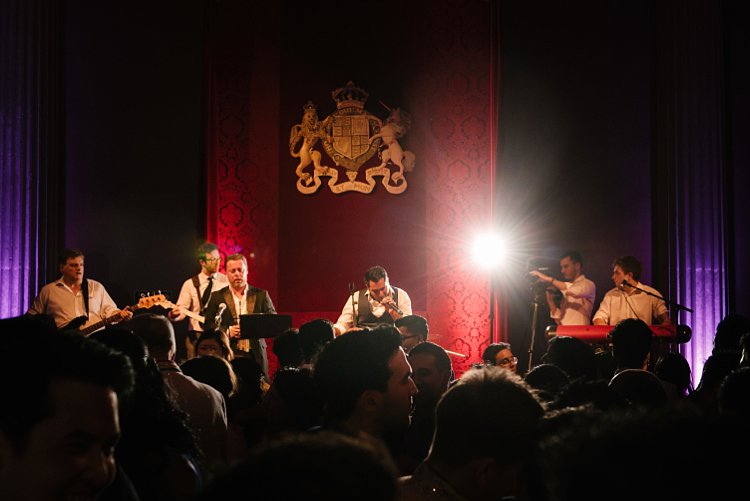
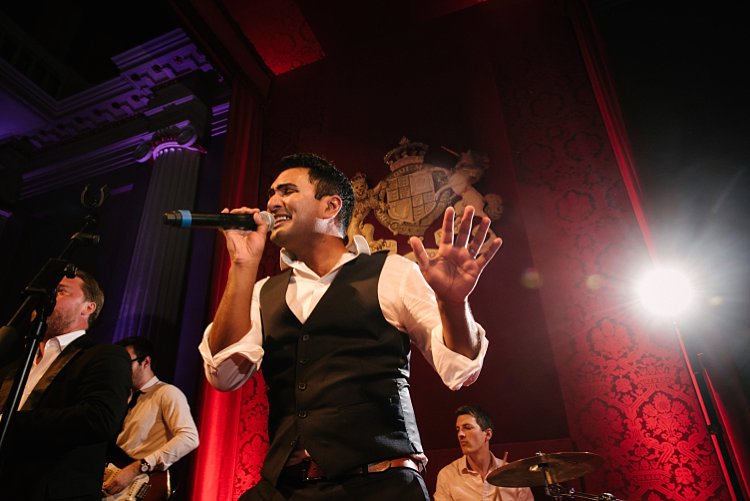
    How to Use a Speedlight at Wedding Receptions and Events

    How to Use a Speedlight at Wedding Receptions and Events

    #1 – On-camera speedlight

    On a wedding day, I prefer not to use a speedlight during the ceremony but at all other times, I pretty much have it sitting on my camera just in case I need a bit of fill light. I now have the Nikon SB-900 / SB-910 speedlights as well, which can be swiveled at all angles, not just upwards, therefore I can bounce the light anywhere needed.

    I always use an on-camera speedlight for all my group portraits as they usually happen while there is still natural light outside and I only need a fill light. After the wedding ceremony and portraits, the reception typically starts with welcome drinks and canapes awaiting the newlyweds’ arrival. It’s at this time that I photograph guests as well as details like flowers, the cake, and room decorations.
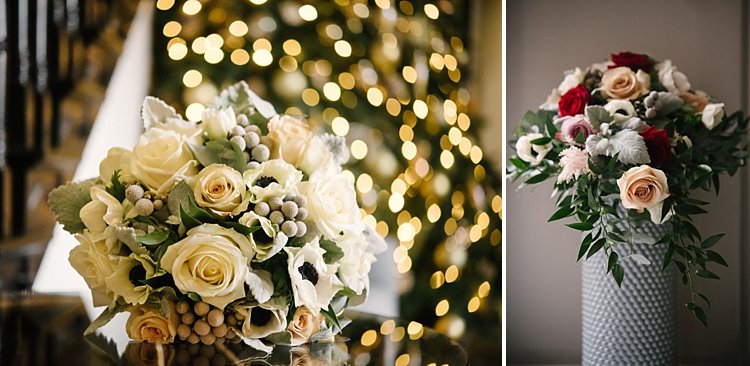
    How to Use a Speedlight at Wedding Receptions and Events

    Shooting candids

    I always have my speedlight on for this bit as I go around the room photographing guests mingling and chatting. My flash head is always angled slightly sideways at 45 degrees to get a directional bounce. If the area is pretty dark with no light coming from windows, I may bounce the light upwards to create a more even spread of light. There is a caveat to this one, however, in that there is a greater chance of deep shadows under the eyes and chins.

    If there is ample light everywhere but I still feel I need a bit of a fill for the face, I would point my flash head backward. The only time I would point my flash head straight at the face/subject is when the scene is completely backlit unless I am after a silhouette. So yes, there’s a lot of swiveling and adjusting to the flash head but it is worth the effort.

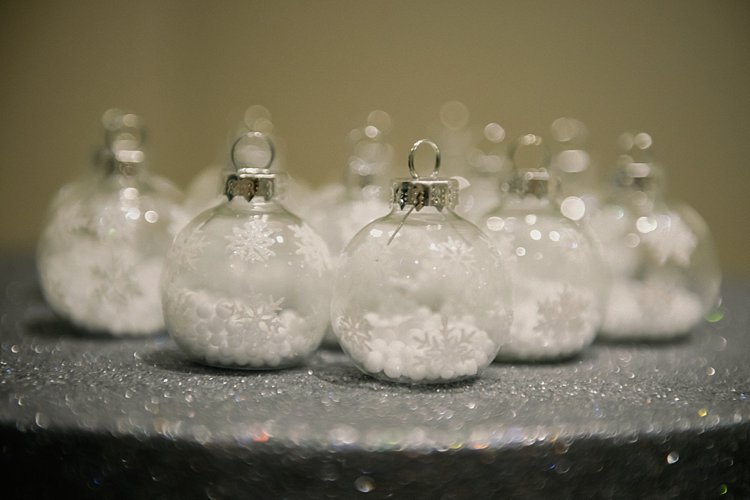
    How to Use a Speedlight at Wedding Receptions and Events

    using-speedlight-wedding-events-photography-flash-tutorial_0000

    The only thing you really need to remember is to NOT have the flash pointing downwards. This can be done so easily and unintentionally when you change the orientation of your camera from landscape (shooting horizontal) where the flash is currently pointed at a sideways angle to portrait (vertical) where the flash head would then be pointing to the floor. That is an absolute no-no as you would get “horror lighting” in that case. You know, the suspense-thriller lighting where flashlights are pointed from under peoples’ noses and you get dark heavy shadows pointing upwards (growing by the minute waiting to devour the photographer). We don’t want that kind of lighting in wedding photography!

    #2 – Off-camera speedlight

    At weddings, I typically carry 3-4 speedlights with me, and 4-6 transceivers. Tranceivers or transmitters/receivers are devices that allow you to remotely trigger your flash without it being attached to your camera. It works using radio waves so that you (and your camera) can be quite far from the flash. You can even have people or a wall directly between your camera and the flash and you can still trigger it. You usually need to have two devices; a transmitter that is attached to your camera, and a receiver that is attached to the flash. Nowadays, transceivers are more popular because they can do both, transmit and receive, so it doesn’t matter which one you put on the flash or camera as these devices will do the job.
    How to Use a Speedlight at Wedding Receptions and Events

    There are two fantastic things about these transceivers in my opinion. First, you can trigger as many speedlights as you want as long as they each have a transceiver attached to them. The second thing, which has been a game changer for me, is the fact that I can put a transceiver on the hotshoe of my camera and then put a flashgun on top of it. That allows me to shoot with an off-camera flash to the right of my subject and if I need a fill light from the front, the speedlight sitting on my camera on top of the transceiver does the job. It’s totally awesome!
    How to Use a Speedlight at Wedding Receptions and Events

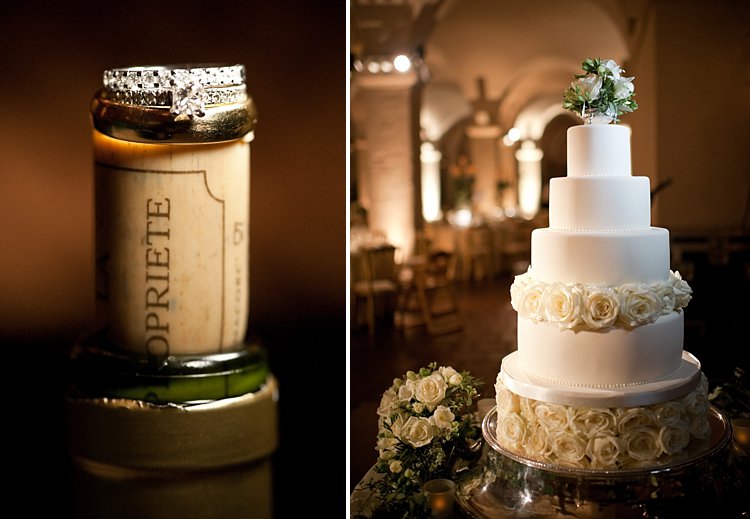
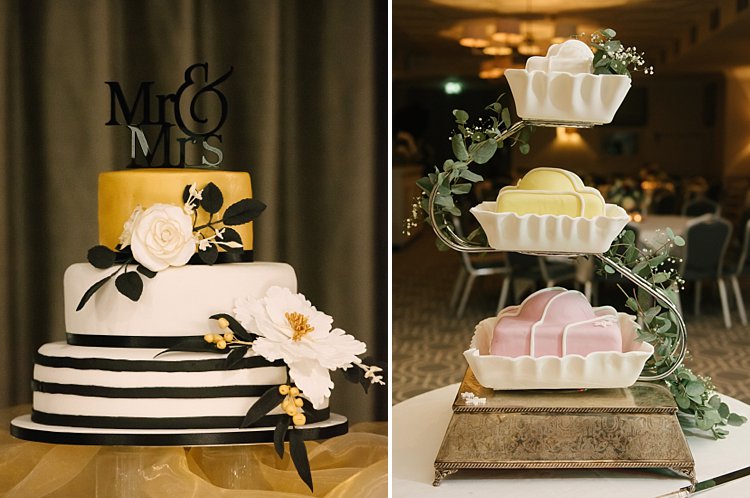
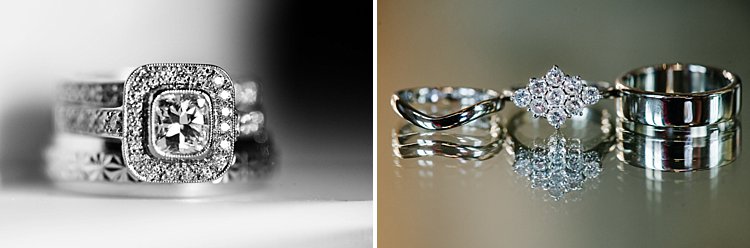
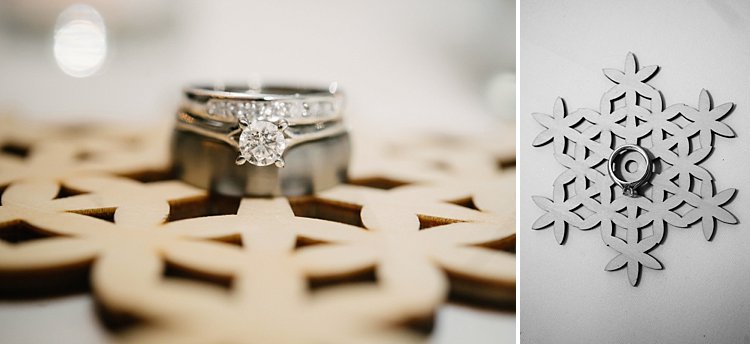
    Great for detail shots

    I do this a lot for details, rings shots, room shots, cakes, flowers, etc. It’s like having an assistant attached to me without having to tell them where to go and what to do. Before these transceivers, what was available was a bracket arm attached to the hot shoe of the camera and your flash sat on the end of the bracket arm. The advantage of this is that you didn’t have direct light hitting your subject, but one that was just slightly off on the side. However, with the amazing bounce capability of the flashes now, you can maneuver the light in more ways than in the past.
    How to Use a Speedlight at Wedding Receptions and Events

    using-speedlight-wedding-events-photography-flash-tutorial_0000

    With an assistant

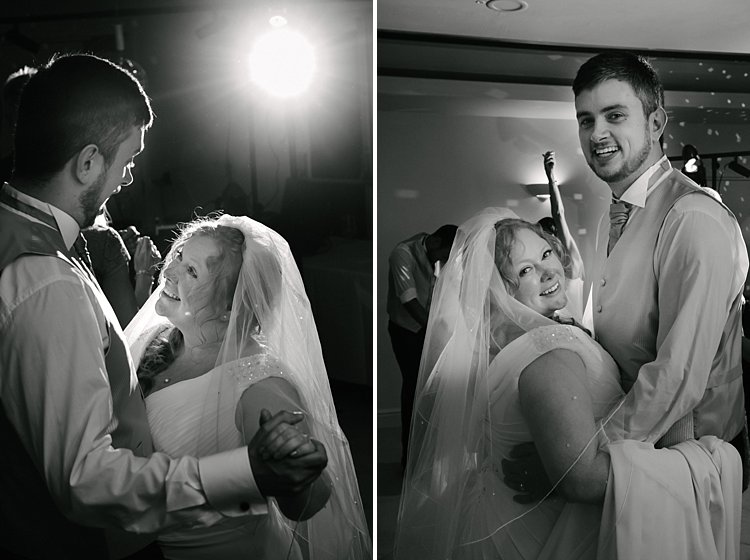
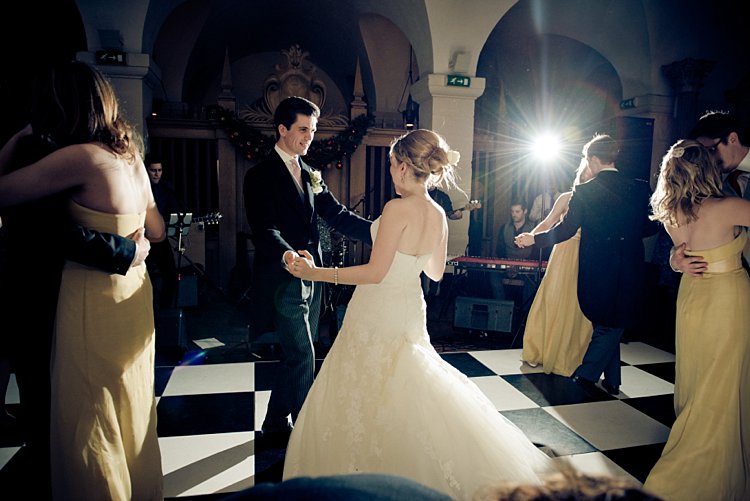
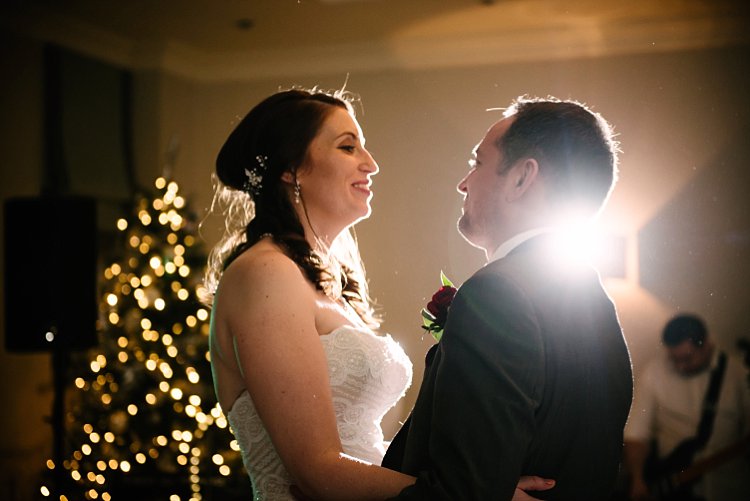
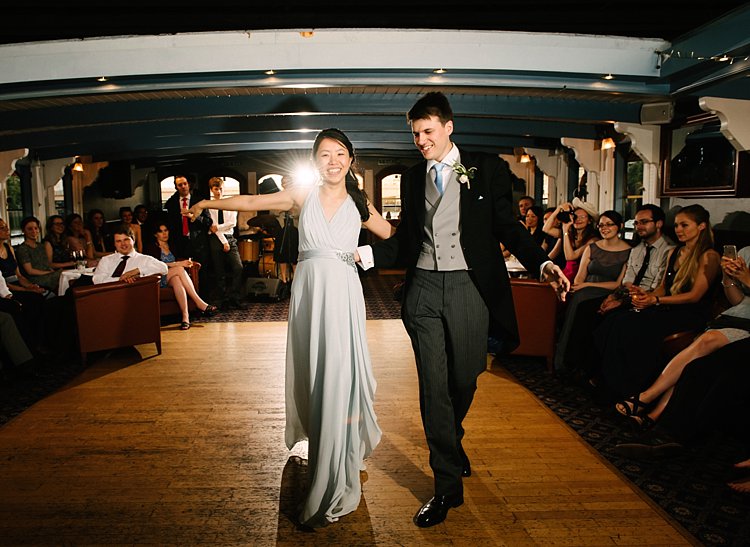
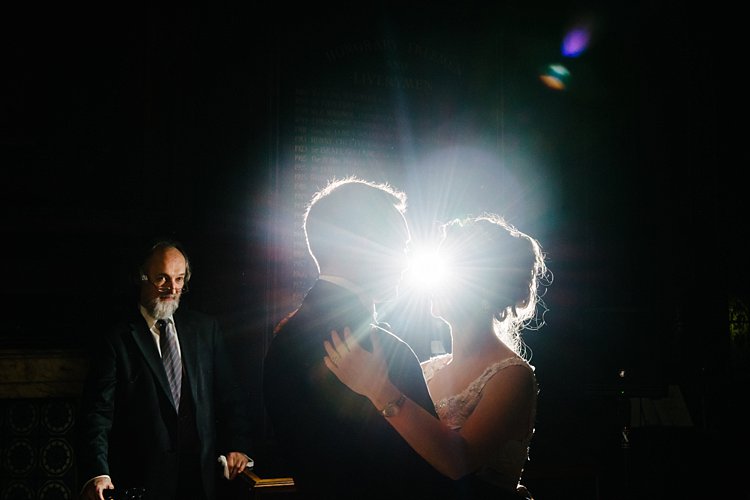
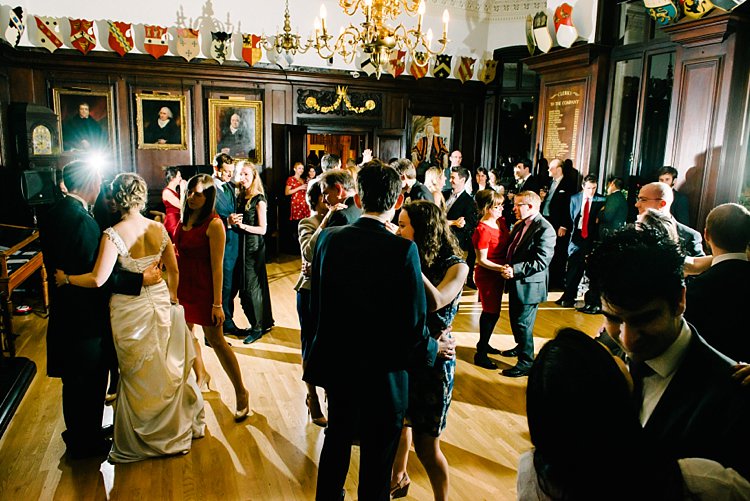
    I lean towards more dramatic photos, so if I have an assistant or a second shooter, I personally prefer that they hold the second off-camera flash at an arm’s length away from me (much like the bracket arm but slightly further away) especially when I’m shooting the first dance.

    I always have at least two lights, a kicker light which is bare bulb (no diffusion) pointing at a 90-degree angle at the newlyweds creating a backlight, and another light held by my assistant to the side for some directional fill. Sometimes I do away with this side light though when shooting a silhouette or if I want a dramatic rim light. I like having light and shadows in my reception pictures especially when the shadows fall in the right places.
    How to Use a Speedlight at Wedding Receptions and Events

    How to Use a Speedlight at Wedding Receptions and Events

    How to Use a Speedlight at Wedding Receptions and Events

    How to Use a Speedlight at Wedding Receptions and Events

    How to Use a Speedlight at Wedding Receptions and Events

    How to Use a Speedlight at Wedding Receptions and Events

    Speeches

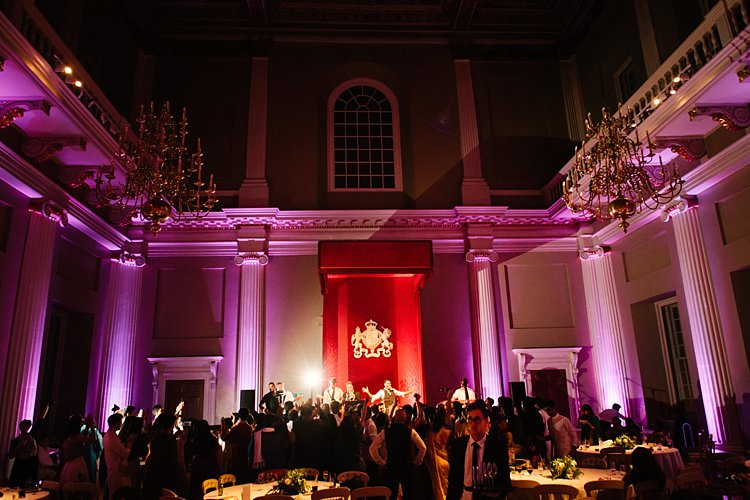
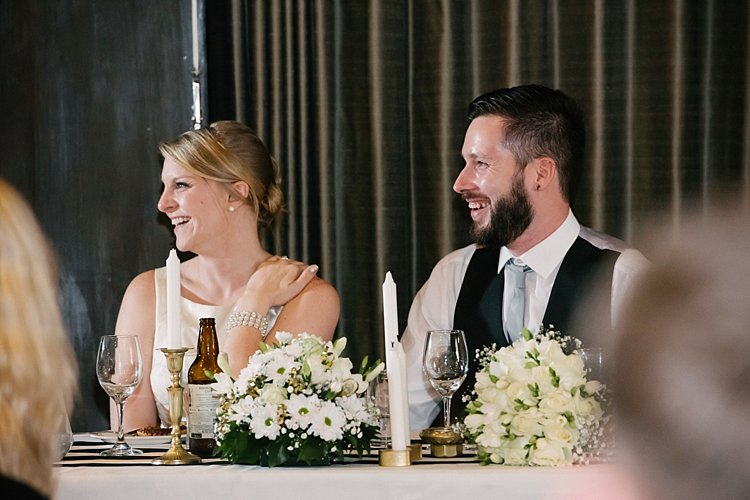
    During speeches, I tend to have one off-camera light positioned on a stand somewhere at a distance, either with an umbrella or bounced, to provide directional light. I also have a speedlight on my camera for fill but only use it when I feel it’s needed, and not for all shots. However, if I have three or four speedlights at various parts of the room for off-camera lighting, I don’t usually bother with any fill light from my camera. I would just position myself in relation to the off-camera lights to get the best directional light for my subject.

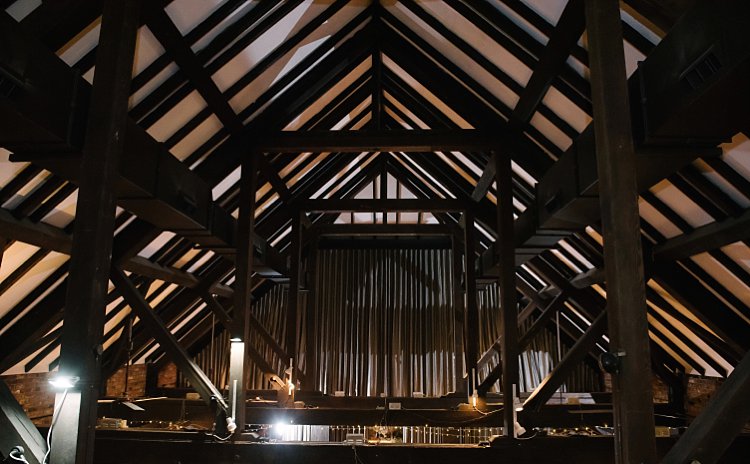
    The examples directly below show where I placed two speedlights on opposite sides of the room. This was because the venue had decided to put the couple at the back next to the cake where there was no light at all. You can see on the photo of the beams where the lights have been placed, one to camera-left directly in line with where the couple was sitting, and one on camera-right angled slightly at about 45 degrees towards me to light the cake and provide fill light for the couple.
    How to Use a Speedlight at Wedding Receptions and Events

    How to Use a Speedlight at Wedding Receptions and Events

    Sparklers

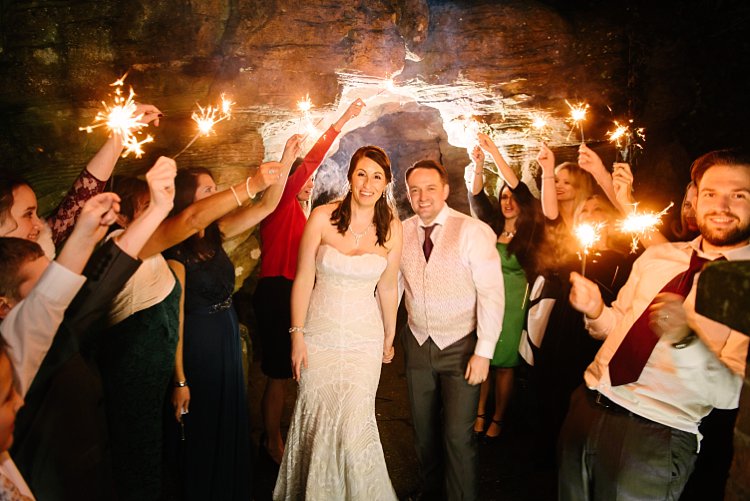
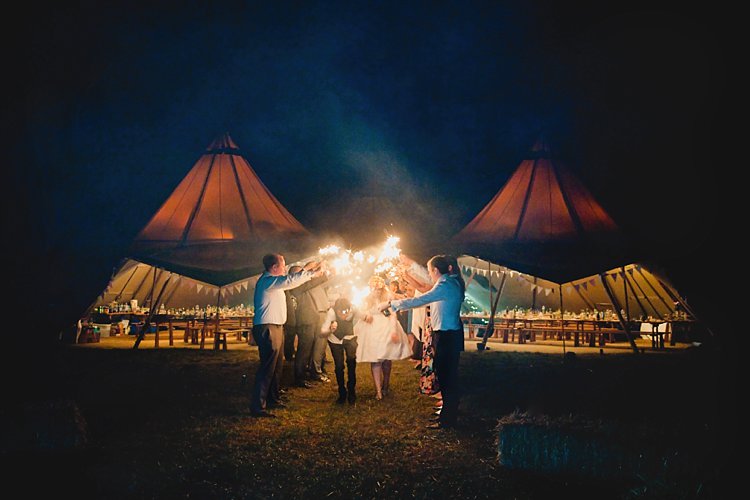
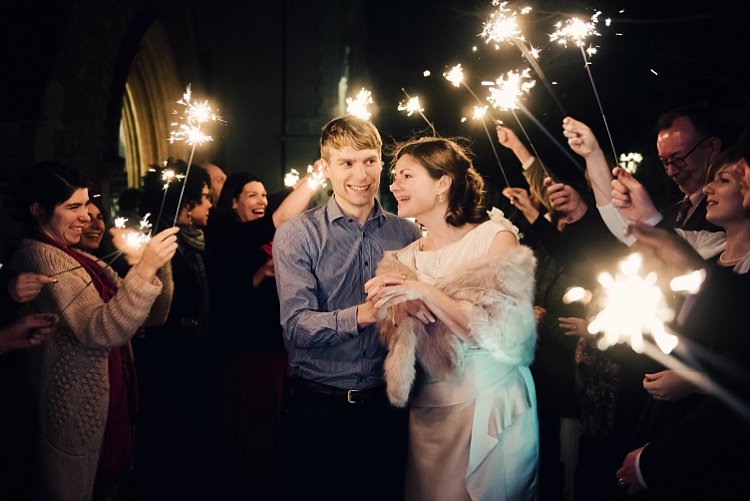
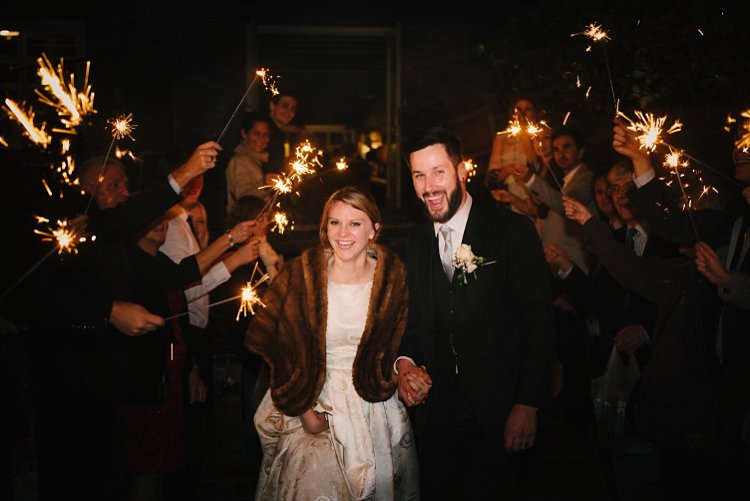
    Sparkler shots are tricky as it depends on the location, space, season, and so on. I have done sparkler shots in all manners; with just a speedlight on-camera both bounced up and angled forwards, an assistant holding a light from the side, a diffused speedlight positioned at 90-degrees, a kicker light behind with a speedlight on my camera for fill, and a shot with no light at all because the flash didn’t recycle in time but it was the best photo of the couple where both looked lovely (no blinkers or funny expressions).

    No matter how prepared you are, in wedding photography, you have to be ready for the unexpected. The main thing to remember, which in the speed and flurry of events I admit that I sometimes forget myself, is to keep the shutter speed at a fairly low setting to let in more ambient light. The sparks and smokey ambiance from the sparklers bring in that subtle and dreamy lighting look.
    How to Use a Speedlight at Wedding Receptions and Events

    How to Use a Speedlight at Wedding Receptions and Events

    How to Use a Speedlight at Wedding Receptions and Events

    #3  – Dragging the shutter

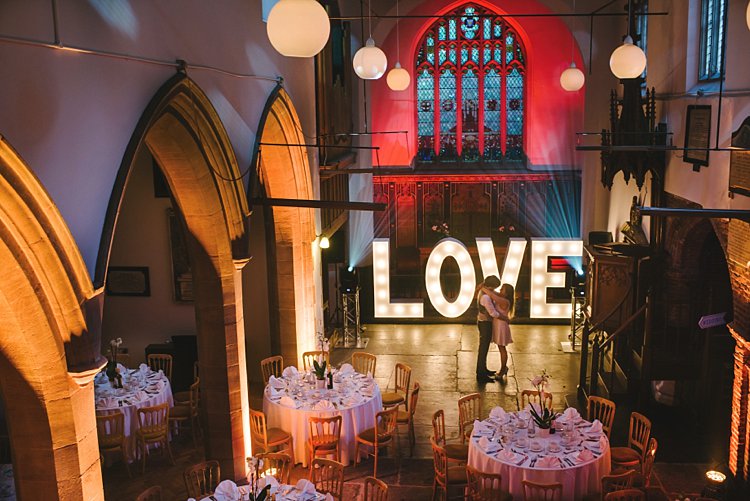
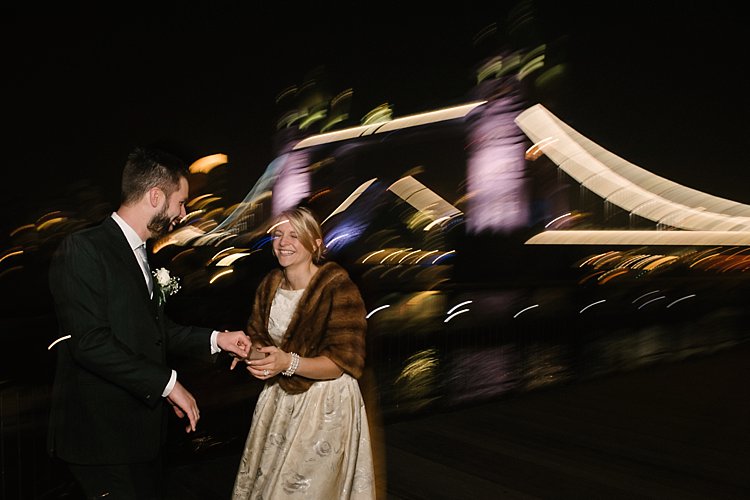
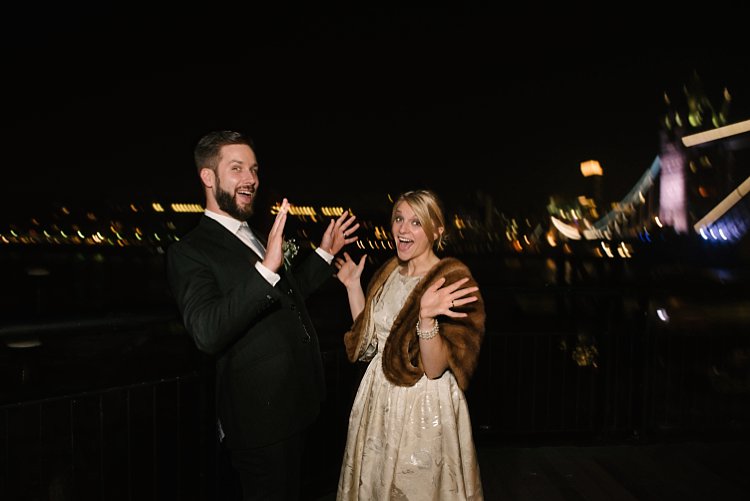
    Dragging the shutter is a technique where you shoot at a very low shutter speed, say 1/10th of a second, to capture the ambient light but have your flash pointing directly at the subject to freeze their motion. While the shutter is open, you also must make exaggerated movements with the camera to get the funky motion of the lights in the background. This is especially necessary if the lights in the background aren’t moving so you have to compensate by making the motion yourself as opposed to shooting car light trails in the background where the cars are traveling at high speed and therefore the head lights trails are captured in motion.

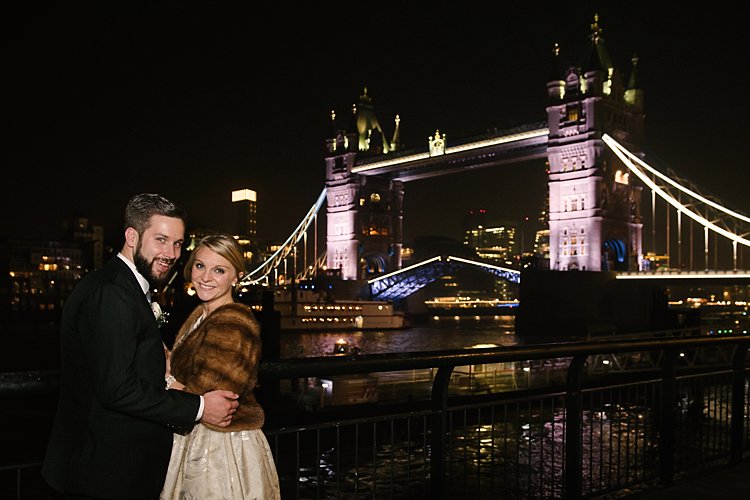
    The flash firing at a single point will keep the subject sharp so you don’t need to worry about blurry faces. This works well in a very dark room or space with dramatic background lighting like fairy lights, illuminated architecture such as the Tower Bridge in London, funky DJ lighting, or disco ball reflections and suchlike.
    How to Use a Speedlight at Wedding Receptions and Events

    How to Use a Speedlight at Wedding Receptions and Events

    Conclusion

    I have shown quite a few examples above of various instances I have used on and off-camera lighting using speedlights. If you look closely, I think you would be able to tell easily what type of lighting combination I have used on each of the photos, whether that included off-camera lighting or a combination of everything, as well as the number of speedlights used.

    I have also referred to my learning journey as a photographer and I know there is still so much to learn; I am only touching the tip of the iceberg. If you have more tips and examples, do share them in the comments below.
    How to Use a Speedlight at Wedding Receptions and Events

    googletag.cmd.push(function() {
    tablet_slots.push( googletag.defineSlot( “/1005424/_dPSv4_tab-all-article-bottom_(300×250)”, [300, 250], “pb-ad-78623” ).addService( googletag.pubads() ) ); } );

    googletag.cmd.push(function() {
    mobile_slots.push( googletag.defineSlot( “/1005424/_dPSv4_mob-all-article-bottom_(300×250)”, [300, 250], “pb-ad-78158” ).addService( googletag.pubads() ) ); } );

    The post How to Use a Speedlight at Wedding Receptions and Events by Lily Sawyer appeared first on Digital Photography School.


    Digital Photography School

  • Metropolitan Museum adds 375,000 scans of artwork to public domain

    “[Advertisement for Sarony’s Photographic Studies]” by Napoleon Sarony (American (born Canada), Quebec 1821–1896 New York) via The Metropolitan Museum of Art is licensed under CC0 1.0

    The Metropolitan Museum of Art in New York City has added 375,000 images to the public domain, each showing a scan of copyright-free artwork in the museum’s collection. Every image has a Creative Commons ‘CC0’ license, meaning they can be used for both personal and commercial purposes, and can be edited or used as parts of other projects.

    This photo release follows the Museum’s Open Access of Scholarly Content initiative launched back in 2014, which made 400,000 photos available for non-commercial use. This latest photo release represents a slight change in the Museum’s policy: that all of its photos of public domain works are now accompanied by a CC0 public domain license.

    Talking about this move, Creative Commons CEO Ryan Merkley said:

    Today, The Met has given the world a profound gift in service of its mission: the largest encyclopedic art museum in North America has eliminated the barriers that would otherwise prohibit access to its content, and invited the world to use, remix, and share their public-domain collections widely and without restriction. This is an enormous gift to the world, and it is an act of significant leadership on the part of the institution.

    The newly released public domain photos can be located using the search tool on the Creative Commons website.

    Via: Metropolitan Museum of Art

    Articles: Digital Photography Review (dpreview.com)

  • iPhone 8 expected to replace Touch ID with 3D facial recognition

    Given 2017 is the tenth anniversary of the iPhone, many expect Apple to come up with a few special features for this year’s generation of its smartphones. A high-end model with 5.8″ edge-to-edge OLED display is widely rumored and according to a note from J.P. Morgan analyst Rod Hall, this top-of-the-line device could do away with the Touch ID fingerprint reader and introduce 3D-facial recognition with a front-facing laser scanner as a security feature to Apple smartphones.  

    Removing the fingerprint reader would be an important step to make the edge-to-edge display possible and would also reduce user frustration in wet conditions when Touch ID doesn’t work well. Additionally, it could potentially be more secure, making it ideal for Apple Pay and other mobile commerce applications. Eventually the technology could also be used for augmented reality purposes but according to JPMorgan this is not expected to happen before 2018. 

    The research note also claims that, based on economies of scale, the 3D recognition technology could also make it onto the lower level models of the 2017 iPhone line. The scanner is said to add $ 10 to $ 15 per module to the iPhone 8’s bill of materials. In combination with the OLED display, glass casing, and related increased production cost this could mean that the new top-model will cost upwards of $ 1000.

    What’s your view on the new technology? Would you prefer it over a fingerprint reader, and be willing to pay a premium for it? Let us know in the comments.

    Articles: Digital Photography Review (dpreview.com)

  • Announcing Two Tamron Competition Winners

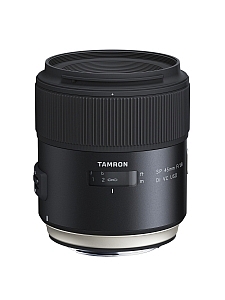
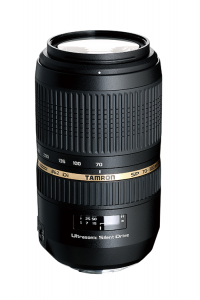
    The Winners of our recent Tamron Holiday Competition for a Tamron SP 45mm F/1.8 Di VC USD and a Tamron SP 70-300mm Di VC USD lens are…

    Thanks!

    A HUGE thank you to everyone who entered our recent competition to win an SP 45mm F/1.8 Di VC USD and an SP 70-300mm Di VC USD lens from our friends at Tamron. Yet again, the response was absolutely AMAZING with over 400 entries! But now…onto the winners!

    Drum roll. And the winners are:

    First Prize

    Winner of the Tamron SP 45mm F/1.8 Di VC USD lens is – Sandeep

    • Tamron SP 45mm F/1.8 Di VC USD – Value $ 599
    • Canon, Nikon or Sony-A mount.
    • No substitutions.
    • For canon, Nikon or Sony cameras.

    Burk Uzzle has said “Photography is a love affair with life”. My journey with photography has been long, filled with love and labour.

    I fumble-started with a twin lens camera borrowed from my uncle about 30 years back, then with a prized EXA (GERMAN film based camera), Olympus C-8080 and since last 4 years a Nikon D5200 (18-105mm VR f3.5). I also own a Yongnuo MK-IV flash, a Sony tripod, a Nikkor 35mm f1.8 prime lens, Hoya ND & CPL filters and a ML-2 remote release given my burgeoning interest to make better photos.

    Many years back, I scanned all my family owned b/w photos, to create a treasure trove of memories… I love the life stories that these photos convey – my son’s dimpled smile over gentle glazed skin next to my mother’s weary eyes filled with compassion… my wife’s lingering gracious beauty over the years as she grows older… the children’s audacious poses giving way to awkward conscious stares at the camera… I get mesmerized often, lose myself for hours in these frozen golden moments.

    My love for my family takes refuge in the photos I take. I am the de facto family photographer responsible for bringing alive visual expressions of many events. I think, prepare, experiment, analyze and post produce thoughtfully to make them worthy of being seen and relived many times over. “Photography takes an instant out of time, altering life by holding it still.” – famous words from the great Dorothea Lange that are, for me, a constant source of inspiration.

    Of late, I have started getting deeper into photography, studied via online training courses, read about great photographers, pored over user manuals and most importantly made a conscious effort to practice long and hard, to make more photos.

    Now if I had the choice to pick from the lenses on offer, I would unhesitatingly pick Tamron 45mm (about 68mm with my D5200’s cropped sensor) which suits the family portraiture I so love to indulge in. The various reviews I went through clearly suggests that Tamron 45mm lens is a winner. The Prime lens I own is good but a poor cousin to Tamron by er, a long way. Going by its looks, build quality, the tack sharp photos demonstrated some at low-light (wow!), its colour reproducibility, sharp corners, flexibility of purpose across landscape to macro — I will really look forward and love to have this one in my bag. I suffer from shaky hands so its 3-stop VC should help which my prime lens visibly lacks.

    Not sure 2017 will serve surprises for me but I surely will pray. Hope is eternal.”

    Congratulations Sandeep! You will also receive a copy of the new Night Photography Course by dPS.

    Second Prize

    Winner of the Tamron  SP 70-300mm Di VC USD lens is – Br Fla

    • Tamron SP 70-300mm Di VC USD – Value $ 449
    • Canon, Nikon or Sony-A mount.
    • No substitutions.

    “As a veteran who has seen my fair share of ugliness in the world, Photography takes me to another place where I can cope with PTSD symptoms by exploring the beautiful world surrounding me.

    For my first prime I was looking for a fast lens at the same focal length as human vision for street scenes, portraits, landscapes, and close photography. I wanted a fast, solid built, durable lens with high-end contrast and resolution. The Tamron SP 45mm F/1.8 Di VC USD fits my current needs and allows me to grow as a photographer finding even more beauty in the world.

    When shooting with my full frame Nikon D800, a prime 45 mm lens is the just right (Goldilocks) focal length. Any wider you can have distortion, which can be really unflattering for people’s faces or create curved lines that should be strait. Any narrower you will have to stand farther back when you may not have the space and will lose some connection with the subject. You can confidently walk around with this 45mm, because with the human field of vision focal length, the beauty you see is the beauty you get.

    The wide open aperture of F1.8 is very fast which will allow for shooting in low light and the circular diaphragm will create beautifully smooth bokeh that no other lens can match.

    More importantly, when I can’t sleep I like to go out and shoot in the predawn hours. I would love not only the wide aperture to bring in lots of light but also 3.5 stop vibration compensation so I can capture beauty that exists in low light conditions.

    Beauty also exists up close. With such a minimal distance to get sharp focus (only 11.4 inches) I can get closer into a subject without having to purchase expensive macro lenses. With the Vibration Compensation the beautiful details will remain sharp and beautiful.

    Beauty can be seen in the contrasts of light. This lens maintains high contrast throughout the frame so you can get more usable images right out of the camera and not have to shoot large just to crop out the edges.

    When shooting in some of the harshest conditions (as much as I enjoy the beach and salt air, it is incredibly harsh on photographic equipment) weather sealing is vital to not only durability but also keeping dust/debris out of your camera body and showing up as annoying spots in your images. The fluorine coating will also help keep spots off the front of the lens.

    However, despite all the impressive specifications of this lens the true beauty is in the details. In this case the details are tack sharp. I have seen that DXOMark tested this lens to have superior sharpness to all other lenses in the class, even ones that cost significantly more. So when asked how I would use this lens it is simple – I would find beauty in this world and capture it in as sharp detail as the true-life experience provides.

    The Tamron SP 70-300mm Di VC USD would be useful zoom lens allowing me to photograph the beautiful wildlife where I live and the Vibration Compensation would greatly help with such long focal lengths.”

    Congratulations Br Fla, you will also receive a copy of the new Night Photography Course by dPS.

    We were all thrilled with the entries. You tugged at our heartstrings, made us laugh, made us smile, but most importantly, you made us keep wanting to do more of what we are doing; providing you quality information and guidance to become a better photographer. We were so pleased to see that you came from every part of the world, young adults to grandparents, and everyone in between. Thank you all for your entries!

    Now, for those of you that didn’t win, Tamron has invited ALL dPS readers download their 2015-2016 eBook Series! You can find those HERE!

    The Winners will be emailed with details of how to collect their prize. Please make sure to look for our email. Thanks you again for all the wonderful submissions and to Tamron for sponsoring this competition.

    For winners outside the USA, please allow 6-8 weeks for delivery.
    Winner responsible for any taxes or tariffs.

    Tamron Rebates!

    For all of you residing in the USA, when you do purchase your next Tamron Lens, make sure to take advantage of the rebates* up to $ 200 through March 4, 2017. Find additional information HERE!

    *Current rebate offers end March 4, 2017. US RESIDENTS ONLY.

    About Tamron

    Disclaimer: Tamron is a paid partner of dPS.

    googletag.cmd.push(function() {
    tablet_slots.push( googletag.defineSlot( “/1005424/_dPSv4_tab-all-article-bottom_(300×250)”, [300, 250], “pb-ad-78623” ).addService( googletag.pubads() ) ); } );

    googletag.cmd.push(function() {
    mobile_slots.push( googletag.defineSlot( “/1005424/_dPSv4_mob-all-article-bottom_(300×250)”, [300, 250], “pb-ad-78158” ).addService( googletag.pubads() ) ); } );

    The post Announcing Two Tamron Competition Winners by Darlene Hildebrandt appeared first on Digital Photography School.


    Digital Photography School

  • Teamlab Jungle: Step Inside a Massive Musical Instrument Made of Light

    [ By SA Rogers in Art & Installation & Sound. ]

    teamlab jungle light vortex

    Anyone who visits ‘Music Festival, TeamLab Jungle’ this summer will get to immerse themselves in a space made of light, interacting with moving beams to help produce collaborative crowd-sourced music. ‘Light Chords’ is one of three ‘4D’ light-based installations the Japanese interdisciplinary group has planned for the event, all of which represent a unique intersection of art, design, technology and nature.

    teamlab jungle light chords

    teamlab jungle

    ‘Light Chords’ aims to create the sensation of being inside a massive musical instrument, touching the ‘strings’ to produce a sound and hearing it reverberate all around you. The beams of light rise into the sky when touched and then settle back down to be activated again.

    teamlab jungle day

    teamlab jungle light vortex 3

    The second 4D space, Light Vortex, places visitors at the center of a surreal light show that bends and stretches around the space, while ‘Light Cave’ builds complex light-based architecture over attendees’ heads.

    teamlab jungle vortex

    teamlab jungle light vortex 4

    Known for their use of illumination as an artistic medium and for a focus on interactivity, TeamLab brings their ‘Music Festival’ to various cities and spaces each year, with different experiences to be had by day and by night. Before dark, TeamLab Jungle is designed as a music festival for families, while after dark it becomes more like a dance party with BACARDÍ-sponsored bars.

    Share on Facebook


    [ By SA Rogers in Art & Installation & Sound. ]

    [ WebUrbanist | Archives | Galleries | Privacy | TOS ]


    WebUrbanist

  • Crash drones over and over again with Microsoft’s open source simulator

    Microsoft has released a free, open source simulator to help engineers test drones in a photo-realistic environment. The AirSim, as it’s called, offers a space for developers to run simulated flights again and again, gathering data and seeing how a drone’s onboard perception systems react to a complex environment. Naturally, that’s a lot cheaper and less time-consuming than studying repeated real-world drone crashes.

    The cross-platform software supports manual or programmatically controlled flights, and thanks to its open source nature, data gathered from test flights can be easily used to create new algorithms to guide drone operation. There you have it – hundreds of simulated drone crashes aren’t just amusing to watch, they may be actually useful.

    The code is available for download via GitHub.

    Articles: Digital Photography Review (dpreview.com)

  • How to Develop a Unique Style for Your Photography

    In today’s world, everyone has a camera. It may be as simple as the camera on their phones, but they still have one. This means that millions, maybe billions of people are taking photos every day. What does that mean for you? It means you have to compete with all those to make your images stand out. You have to find a way to be different, but how? The best way is to develop a style that is uniquely yours.

    When people look at your work they instantly know it is yours, or someone trying to copy it. Your style is how you become known and how you make yourself stand apart.

    How to Develop a Unique Style for Your Photography

    Looking north along the Harbour Esplanade.

    What does having a photographic style mean?

    Basically, that you do something to your images that make them different, whether it is done when the shot is taken or in post-processing, or maybe both. Whatever it is that you do, you want people to know straight away that the image is yours before they see the name. There should be a similarity between all your images and they look like they belong together.

    It almost goes against the grain of what humans are like and our need to conform. If you want your images to stand out you have to find a way to make them different to what everyone else is doing. Think about how you can work that is not the same. It can be about photographing the same thing, but you do it your way.

    When I was in art school we were told over and over again that nothing was original anymore. Anything that you wanted to do had already been done. It is true in most cases, but that doesn’t mean you shouldn’t try to find a way to work that could be different.

    How do you develop a style?

    Ask any artist or photographer that has their own distinct style and they will give you a different answer. For most, there will be something that drives them to create work in a particular way.

    There are four main things to consider when developing your own unique style; why you are doing the work, the subject matter, the technical process, and post-processing. Let’s look at these individually and see some artists who work that way.

    How to Develop a Unique Style for Your Photography

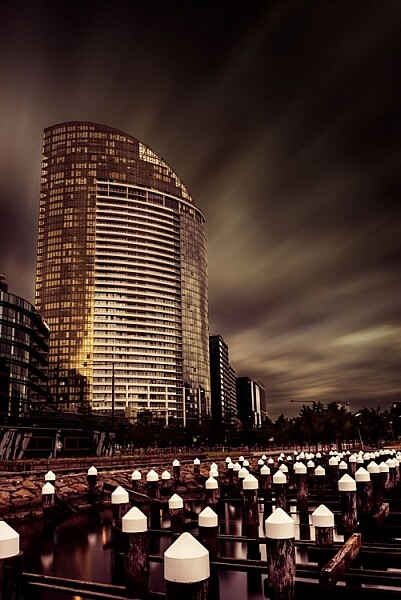
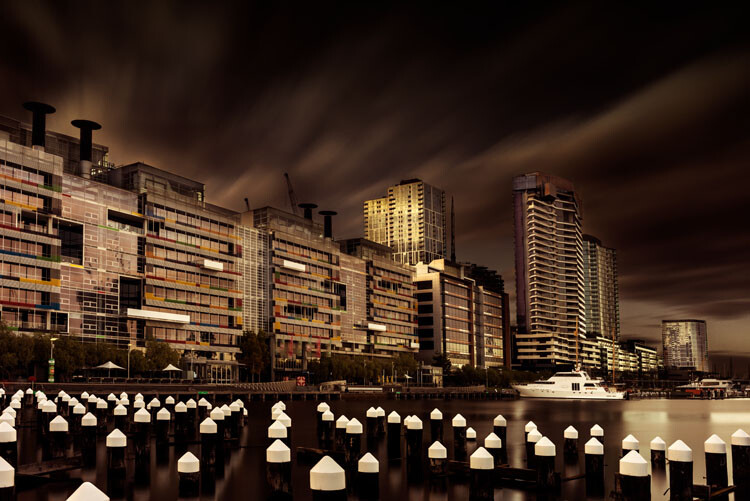
    A long exposure of a building in the Docklands.

    Why are you doing it

    This is a bit like an artist’s statement in that you know what you are trying to do with your images. Many artists work this way. They understand what they are trying to achieve and have a look or story they are trying to get.

    Australian artist/photographer Tracey Moffat looks at indigenous people and culture, and how they are understood culturally and socially. She says she is more interested in creating her own realities than dealing with reality. From the start, Moffat has an idea of what it is she is striving for.

    My own work starts with the idea of what would the world be like without humans. I find places like Pripyat, the worker’s town that was evacuated after the Chernobyl nuclear disaster in 1986, fascinating. It has not been lived in since, and there is a quietness in the images that I find quite appealing. I try to photograph places with no people in them to see if I can imitate that silence. At the same time, I like to create a world in my images that doesn’t seem quite real.

    How to Develop a Unique Style for Your Photography

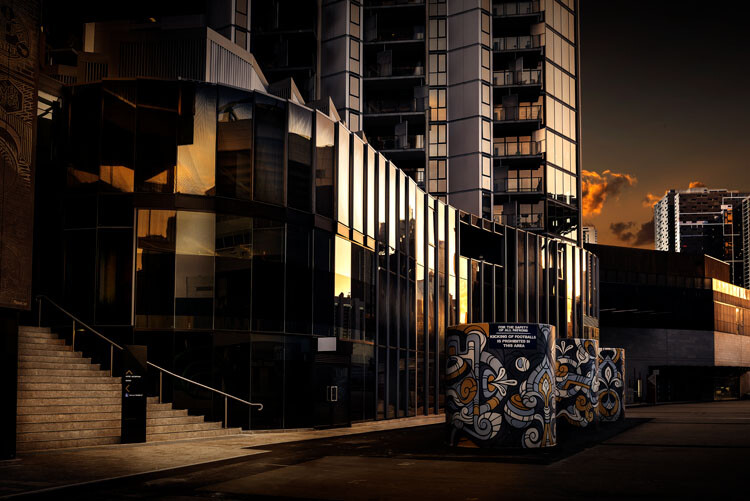
    Off the street at the entrance of a building.

    The subject matter

    Usually, someone who is developing a style, or has one, will have a certain subject matter that they stick to – it might be mountains, the night sky, or waterfalls. It will be what they want to photograph and they tend to only do that thing. While some can be that strict with themselves, most photographers have a few things they like to photograph. However, that doesn’t mean that all the images will fit within that same style.

    One of my favorite painters, Rick Amor, does a lot of architectural paintings. He creates his own realities in fictional cities, but he also likes to paint scenes from the beach and he does a lot of self-portraits. There is variety in his work, and each has its own style.

    It could be said that I like architecture the most, but really, what interests me is the hand of man. I find anything that man has built or destroyed interesting. I tend to concentrate on cities, perhaps because I live in one, and it is easy to get there to take photos. However, if you were to look at my Instagram page you would see that I also like to photograph anything with water in it. Many images do not fit my subject, but you can’t always do art images and I do like photographing other things from time to time.

    How to Develop a Unique Style for Your Photography

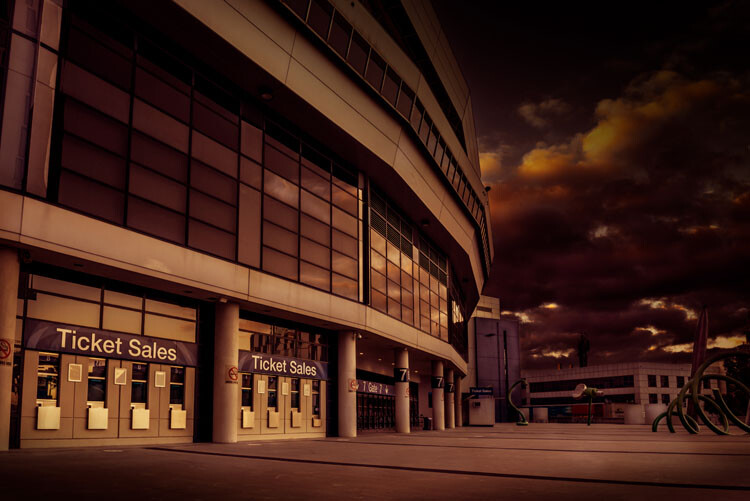
    Etihad Stadium closed.

    The technical process of taking images

    The best way to get your images is knowing how to use your camera and getting the best out of it. There are photographers that rely on their cameras to give them what they want and the technical details become very important. The art of photography comes from the technical aspects.

    If you are a technical photographer then you would be looking for a specific technique that you can use that will help give all your images the same feel. What that technical aspect will be is completely up to you. There are a lot of photographers that are striving for an image that is very technical, and the creative part isn’t necessarily that important.

    You will find that many landscape and nature photographers are more technically driven. Matty Smith, an Australian underwater photographer, does his best to get everything in camera. He likes to reduce how much post-processing he has to do, therefore it is very important to him that he gets what he wants while out in the field, or under the water.

    I am not a technical photographer. I don’t let the technical aspects of photography dictate my image. That doesn’t mean I don’t know them, they just don’t mean as much to me.

    Using Post-processing

    You will find that technical photographers don’t do a lot of post-processing, while others will use it a lot. There are no rules about what you should use, but you will find that many photographers that have really distinctive styles get their look through photo editing.

    Brooke Shaden is primarily an artist who uses photography to create her own look. She does portraits in different settings and often uses costumes for them. The thing that sets her apart is her post-processing. She has a distinctive style that is hers. You will see lots of images that are similar, but they are usually people who are trying to imitate what she does.

    My work is mostly created with post-processing. I have things I like to do to images, and playing in Adobe Photoshop is as much fun to me as taking the photos. I spend far more time processing than I do taking the images. I like to play with the light to see what I can do with it and for me, an image is complete when it looks almost like a movie still, not quite real.

    How to Develop a Unique Style for Your Photography

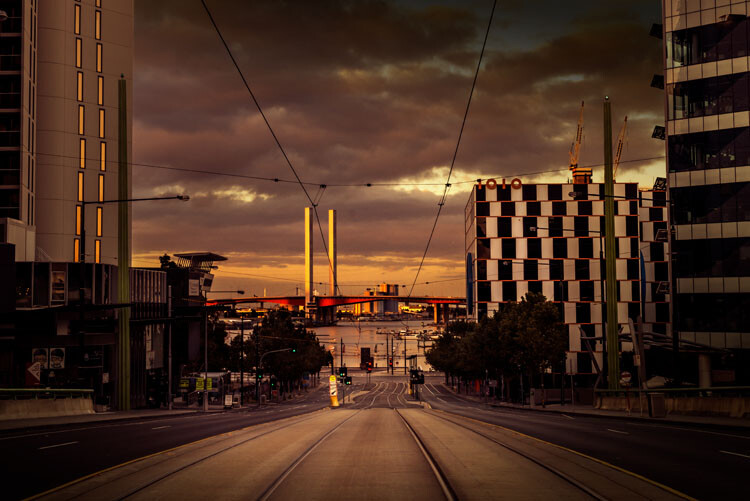
    La Trobe Street looking to the Bolte Bridge.

    Artists who have their own style

    There are so many photographers that have very distinctive styles and if you want to develop your own style you should look at their work to see what they do. See if you can find inspiration.

    Here is a list of photographers that have, at some stage, influenced my photography and helped me to develop my own style.

    • Joel Grimes
    • Peter Eastway – see also: The Magic of Antarctica with Special Guest Peter Eastway
    • Kristy Mitchell
    • Joel Tjintjelaar
    • Julia Anna Gospodarou
    • Art Wolfe

    There are a few for you to start with.

    How to Develop a Unique Style for Your Photography

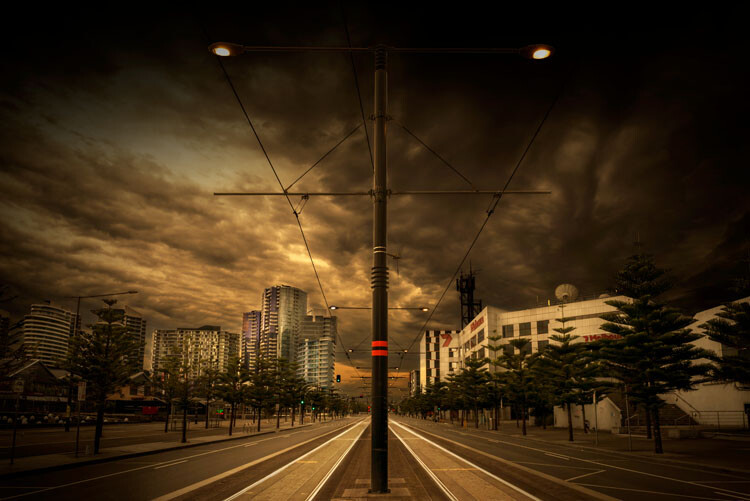
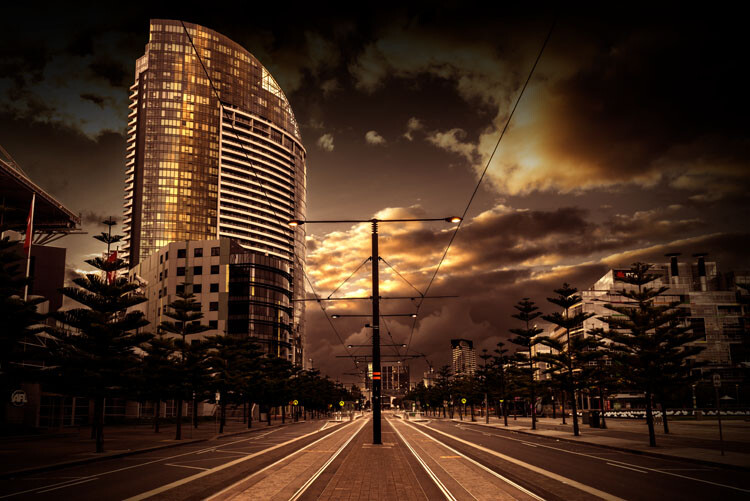
    The Harbour Esplanade looking down the tram tracks.

    Should you copy

    It is so easy to copy what another photographer does, especially if they teach somewhere, but should you really copy what they do? There have been photographers who have done that and everyone just says, “Oh they are copying so and so.”

    It is okay to copy what a photographer does to learn some new skills, but ultimately if you want your own style, one that is uniquely yours, then you need to work out what to do with your own images.

    I learned a lot about developing a style and working as an artist through my fine arts degree. I also watched a lot of videos on how other photographers created their work. I would pick up tips and then see if I could apply them to my own work. I experimented with what they did so I could use it, but also so it would look different.

    How to Develop a Unique Style for Your Photography

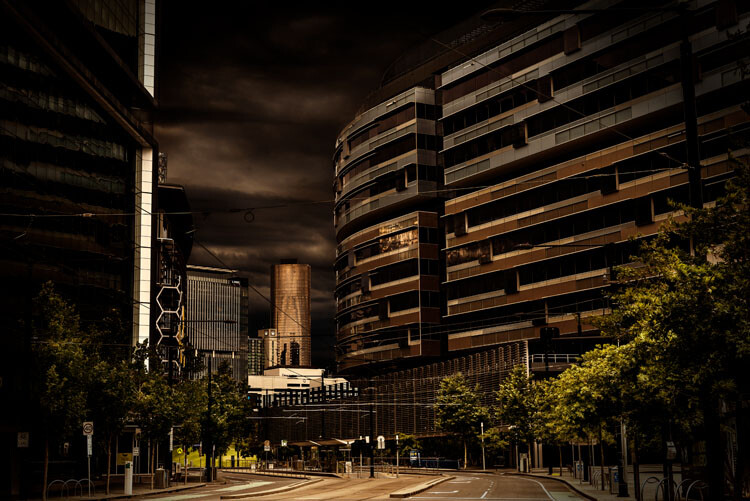
    Near the end of Collins Street.

    How to develop your own style

    Go through all the steps here and see which apply to you. Work out what you want your work to be about and how you can get a look that is you, or so others know it is yours without having to look for a name.

    Remember, that for your style to be uniquely yours, it needs to be different to what others are doing. It can be something simple, or perhaps more complicated. It won’t happen straight away and may take you quite a while to develop your own look.

    You might find that you start one thing, and then change. It is normal, and in the beginning, it will change quite a bit. It will also evolve over time. What I am doing now is quite different to what I was doing 20 years ago, or even 10 years ago. Some might say that it is has changed a lot in the last two to three years.

    As you start thinking about it, you may also find that you already have a style and are not even be aware of it, which is what happened to me. It took me a while to see what my style was, though many others could see it before I did. However, I know it now and understand it better.

    To see how you progress places like Instagram can be perfect. You see all the work there and it is easy to look at the images together and over time.

    Finally

    Just experiment and try things. You never know where it will end up. Also, don’t always listen to others, especially for approval, do your own thing and eventually others will come around to it.

    Have you developed a unique style for your photography? How did you do it? Please share your comments and thoughts below.

    leannecole-developing-your-style-44

    A long exposure over the water at Docklands.

    googletag.cmd.push(function() {
    tablet_slots.push( googletag.defineSlot( “/1005424/_dPSv4_tab-all-article-bottom_(300×250)”, [300, 250], “pb-ad-78623” ).addService( googletag.pubads() ) ); } );

    googletag.cmd.push(function() {
    mobile_slots.push( googletag.defineSlot( “/1005424/_dPSv4_mob-all-article-bottom_(300×250)”, [300, 250], “pb-ad-78158” ).addService( googletag.pubads() ) ); } );

    The post How to Develop a Unique Style for Your Photography by Leanne Cole appeared first on Digital Photography School.


    Digital Photography School