Tag: Textures

  • How to Use Textures to Create Compelling Photographs

    The post How to Use Textures to Create Compelling Photographs appeared first on Digital Photography School. It was authored by Glenn Harper.

    Adding textures to photos is a fun way of creating new pictures. In some respects, it’s not very different to printing your photos onto textured paper or choosing frames for them (or both), except the images needn’t leave your computer. You can do this with photos you’ve already taken, though often it’s best to create them with this treatment in mind.

    Adding textured backgrounds to photos

    Cracked earth photo in the background.

    Choosing your photos

    You can add textures to almost any type of picture, but this method works well with simple photos where there isn’t a lot of fussy detail. Ideally, you need a sizeable single-tone area that allows the background to come through. Otherwise, you can use a simple texture with a complex photo – the important thing is that the two photos do not fight.

    Adding textured backgrounds to photos

    A harmless subject, despite appearances.

    You can apply this treatment to portraits, landscapes, still lifes, or just about any genre. With still life, you’re at a particular advantage because you can take very simple pictures of subjects against plain backgrounds and then attempt to create something interesting later with a textured background.

    Adding textured backgrounds to photos

    Melding photos together is not a purist’s approach to photography, but you need only ask yourself one question: do you like the result? Adding a texture to a background is like putting two pieces of a jigsaw puzzle together. Do the two parts suit each other? A beneficial side effect of creating these pictures is that you’ll start noticing and shooting all kinds of textures to use with your photos.

    Adding textured backgrounds to photos

    Splodges of paint in the background.

    Finding and photographing textures

    You can create your own backgrounds quite easily by photographing textures around the home. For instance, try capturing textured paper, sandpaper, fences, walls, wood grain, baking trays, tiles, canvas, painted surfaces, rusting surfaces or concrete. Mid-tone textures with contrasting colors or details tend to work better than monotonous dark or bright surfaces.

    Adding textured backgrounds to photos

    Silhouetted trees against a blue painted background.

    Try screwing up pieces of paper and then flattening them out for backgrounds. You can even use a scanner for paper backgrounds, which has the advantage of holding them flat while still recording the folds and creases.

    Adding textured backgrounds to photos

    The same silhouetted trees against brown paper. I wanted to avoid distracting contrast in the paper, so the processing holds off on highlights.

    If you want to try this technique and don’t have any texture photographs in your library, you can always grab some to practice with from free photo websites (e.g. https://www.freeimages.com).

    Adding textured backgrounds to photos

    A French WW1 Croix de Guerre medal, originally shot against a white card background.

    Another possibility is to use the in-built textures offered within image editing programs. Photoshop CC has this to a limited extent. There’s also a good textures section in ON1 Effects (standalone or filter plugin) that offers a lot of choice.

    Adding textured backgrounds to photos

    In Photoshop CC you can reveal the “Texture” filter under preferences. It only works on 8-bit images. This is the Canvas texture.

    Photoshop Technique (or similar)

    To blend textures into backgrounds, you need an editing program that has layers and blending modes. The second usually comes with the first. In brief, you just need to drag one photo on top of the other and adjust the blending mode between the layers to suit. Sometimes you might need to tweak opacity.

    Here’s a more precise workflow:

    1. Open the two images you intend to merge (i.e. subject and textured background).
    2. Ensure that the texture image is the same size as the main photo or slightly larger. If it is much larger (e.g. a full-sized file layered onto a web image), it will appear less sharp.
    3. Using the move tool in Photoshop, drag the texture image onto the main photo. This automatically creates a second layer (“Layer 1”).
    4. Try the various layer blending modes in your layers palette until you find one that suits the image. “Overlay” is one that often works well.
    5. Adjust opacity to taste. If you want to strengthen the effect rather than fade it, you can duplicate Layer 1.
    6. Merge the layers (Ctrl + E) or Flatten Image.

    You can do this the other way round and drag the main image onto the texture, but then the opacity slider becomes less useful. You ideally want to be able to fade the texture effect rather than the main photo. Also, if the texture file is larger, having that one on top avoids the need to crop the image afterwards.

    Adding textured backgrounds to photos

    Using the Brush Tool

    Another thing you can do with your textures is to selectively paint parts of the effect out of or into the picture. You might do this if, for instance, you want to create the illusion that an object within the photo is resting on a textured background without being part of it.

    Adding textured backgrounds to photos

    Using a ON1 Effects texture I’ve created henna-type markings on the hand and used the brush tool to remove the same pattern from the watch.

    To do this, you need to create a layer mask on “Layer 1” (your texture photo). Then, making sure the brush foreground color is black – visible in the tools palette – you use the brush tool at 100% opacity to selectively paint the texture out. Hitting “X” lets you paint detail back in again if you get clumsy.

    Alternatively, you can do the opposite and create a black layer mask, painting texture into the picture with a white brush.

    Harmony

    I mentioned earlier choosing textures and photos that suit each other. So, what might that mean? Ultimately, you get to decide what goes well with what, but some textures intrinsically suit some subjects. For instance, old books generally go better with leather, paper or card textures than they do with a brick wall. Metallic objects might go well with rust or oxidation.

    Adding textured backgrounds to photos

    Another ON1 Effects texture (rice paper).

    With human subjects, you might want to infer something else altogether, like cracks for old age or the passing of time. Be careful who you use that on! The bolder the texture is, generally the more limited it is in its potential. You can use paper and canvas textures on almost anything because of their photographic and artistic connection and their unobtrusiveness.

    Express yourself

    Any picture you produce on a computer rather than in camera will likely attract a degree of cynicism. That’s just the way photography is. But it’s not always healthy to be confined by your chosen craft and feel like you’re not doing anything new. Blending photos in Photoshop is creative, fun and even a little beneficial, since an eye for juxtaposition is a valid photographic skill.

    Adding textured backgrounds to photos

    Antique Vaseline pots against an old baking tray surface.

    Get ready for the strange looks you’ll receive when you begin photographing plain walls and fences. Use a tripod for extra eccentricity ….

    Feel free to share your creations in the comments section below.

    The post How to Use Textures to Create Compelling Photographs appeared first on Digital Photography School. It was authored by Glenn Harper.

    Digital Photography School

  • Techniques for Working Textures Into Your Photography

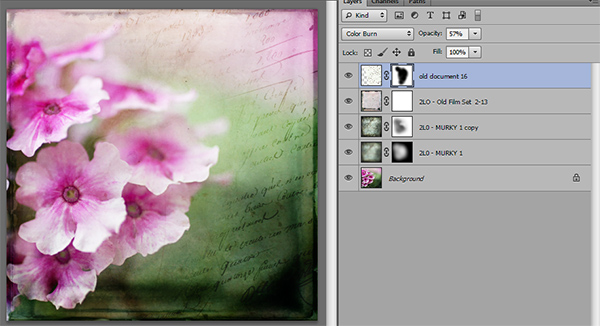
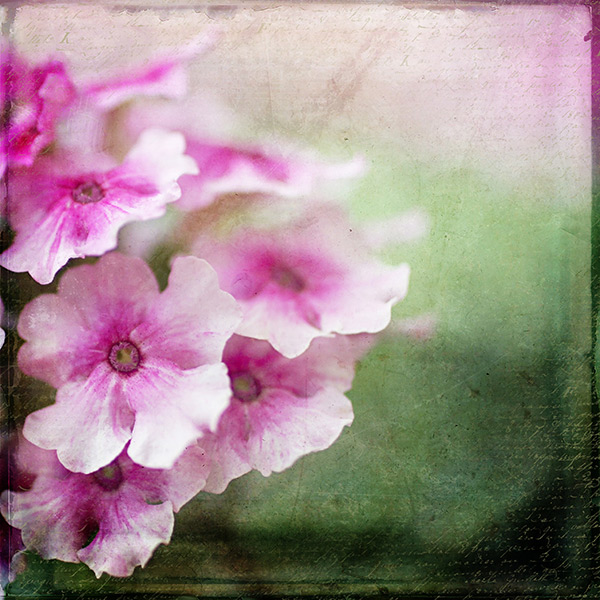
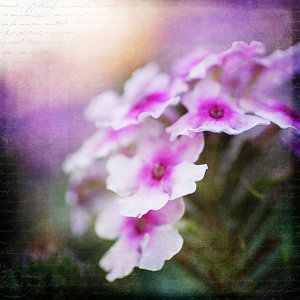
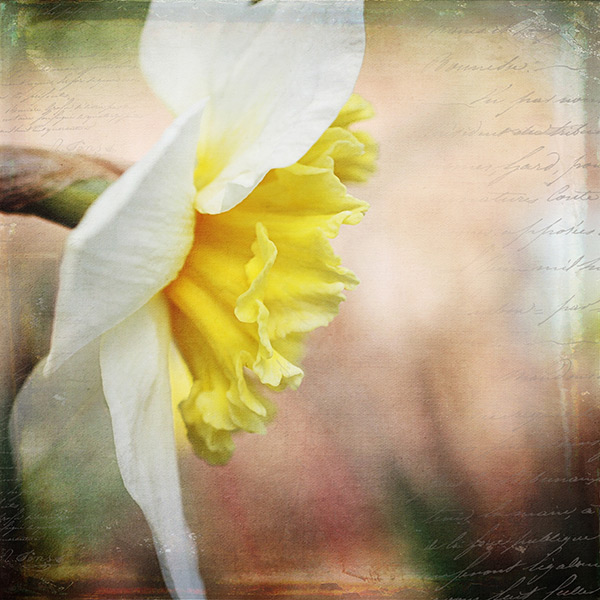
    Textured-purple-flower-600Where do you begin when you are considering using textures in your photography? I suggest you begin with the absolute best photo possible. Adding a texture to a bad photo does not make it a good photo. You want to make sure you have it exposed correctly, composed well, have a clear subject and not too much in the competing in the background competing. Textures work best with photos that are not too busy to start. Once I have chosen the photo I am going to work with, I do all of my edits before I add the texture, including adjusting the colors and sharpening.
    In this article I’ll share some of my techniques for working textures into your photography.

    Sharpening your image

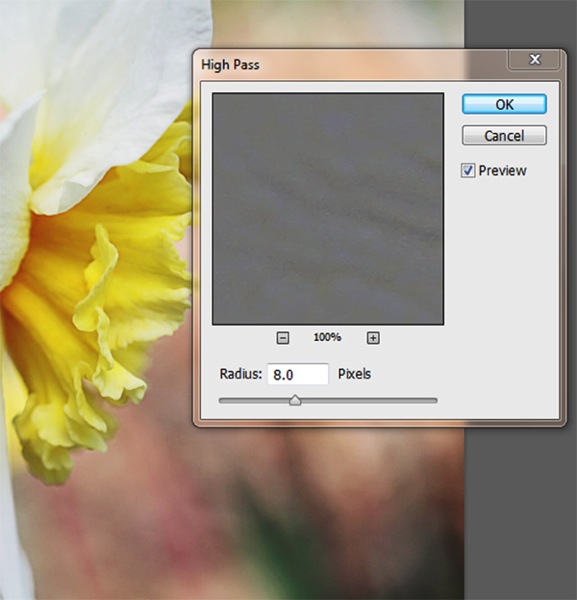
    You want to sharpen your photo before you add the texture. This is so that your subject is sharp and the texture isn’t over sharpened compared to the subject. You want the texture to enhance your photo, not compete with it. When I sharpen the photo I use the high pass filter as opposed to the unsharp mask. I like this method best because it defines and clears up all the edges of your subject without over-sharpening all the fill areas. Below is how I do this and the settings:

    1. Duplicate your background layer and while that duplicate copy is still highlighted, go up to the Filter menu and select: Other > Highpass filter
    2. Set the filter radius between 6 and 10 pixels (or higher) depending upon how sharp you need to have your photo, but be careful not to over sharpen.
      Sharpening highpass pop up
    3. Next change the blending mode of this layer to “Softlight” or “Overlay”. Overlay is stronger than Softlight, so test out each option to see what works best for your image.
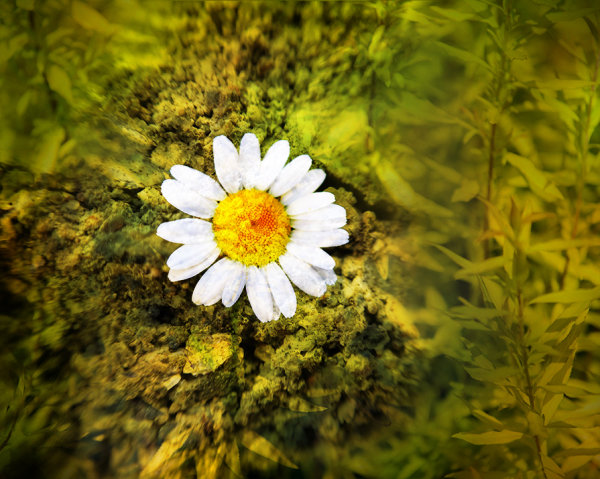
    Textured-yellow-flower-600

    Finished image with texture and vintage paper applied

    Once I am finished adding my textures to the photo I might do a final sharpen at the end if needed.

    How to erase texture and still retain tone, plus a few extras

    Once you are finished with your edits and sharpening, you are ready to add the texture. One concern people have in adding texture is how to erase the texture from the subject without it being obvious. You wouldn’t want to have the face of a baby be texturized, for instance, but you would want the face to match the rest of the photo in color and tone.

    5 Steps:

    1. Place the selected texture on your photo. Do this by going to: “File > Place” in the top menu. Then select the texture image you want to use. It opens up as a new layer on top of your photo, ready to resize. Do that, then I right click the texture layer and choose “rasterize”, so it will no longer be a Smart Object. Change the blend mode and opacity of the texture layer to suit your image, such as “Softlight” or “Overlay”. At this point you are just manipulating the texture and not worrying about erasing it yet.
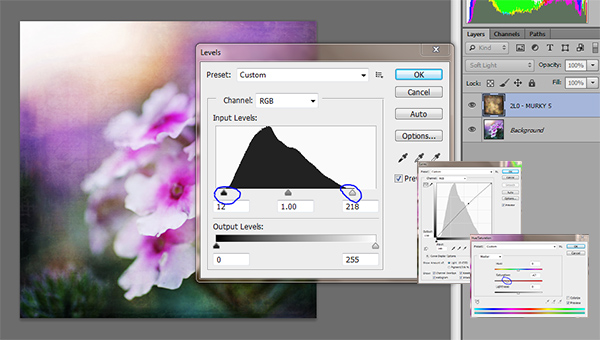
    2. While the texture layer is still highlighted, there are a few techniques you can do to the layer before you move on. Adjust the levels, curves, and the saturation of the texture layer to make the texture more vivid or pronounced, but not more opaque. I work in Softlight mode a lot as it brings out some of the texture without changing the mode.Levels curves saturation
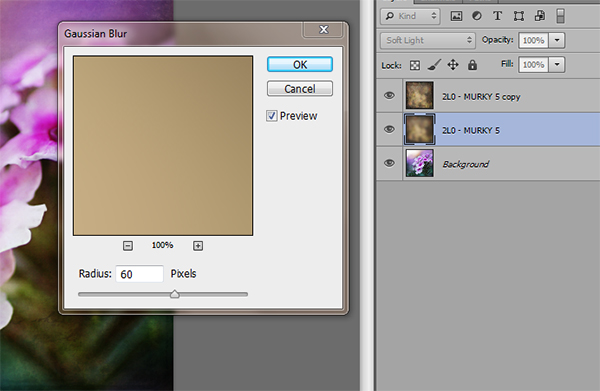
    3. Once you are happy with the way the texture is working with the image, duplicate the texture layer and apply a Gaussian blur set to about 60 pixels to the bottom texture layer so it gives you the exact tones of the texture. Get to the Gaussian blur box by going to “Filter > Blur > Gaussian blur”. Next, turn off the bottom layer that you just added the blur to.
      Gaussian blur
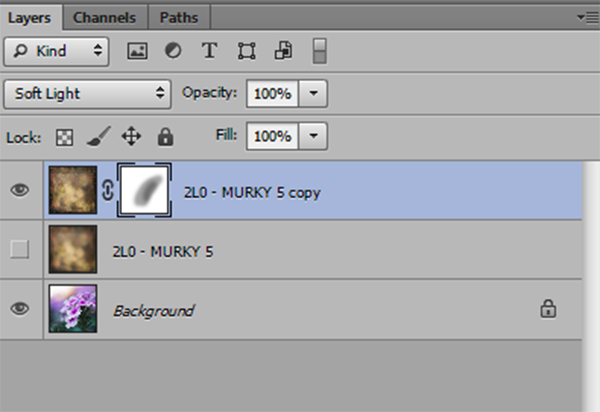
    4. Add a mask to the top layer. With a soft black brush, set to about 30% opacity, ybegin to brush off the texture in any areas where you don’t want it. By using a low opacity you can slowly build up the amount you are removing. If you remove too much simply change the brush to white ,and wipe some of the texture back on. Make sure while you are doing this that you have the mask box selected (it will have square brackets around it) not the image itself.Sharpening mask
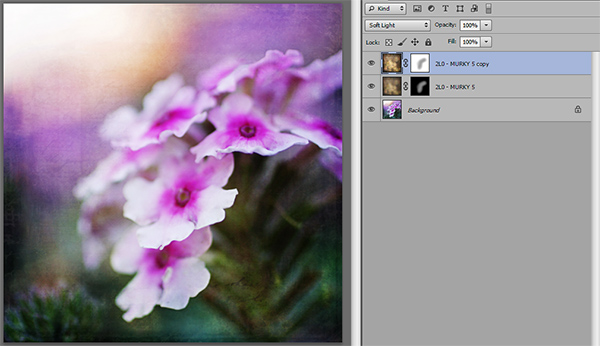
    5. Once you are happy that the texture is removed from all the important areas – select the mask box, hold down “Shift + Alt” and drag the mask box from the top texture layer to the bottom texture layer. Now you have applied the mask to the blur layer, and you have inverted it at the same time. Turn that layer back on and you will notice the tone where you erased the texture has the same coloring as the rest of your photo.Sharpening finished

    Using vintage papers in your photography

    Working with vintage papers is another fun aspect of textures that you can use in your photography. I get vintage papers from several great sources including my own family documents from the mid 1800’s, flea markets, online searches, Etsy, etc. I have curated several collections on my website for sale if you don’t want to go through the trouble of searching for them yourself. I especially love vintage French papers because of their wonderful scripts, markings, and fancy headers.

    Part One

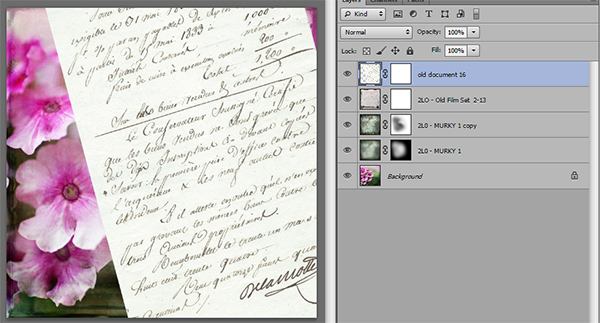
    Working with the vintage papers is the same as working with textures. Place the paper on your photo in the approximate location that you want to use it. You will notice in the sample that I have placed it on the top of the many textures I have used in this photo, but you can place it on any layer that you want, to get the look you are trying to achieve.

    Textures vintage paper

    Part Two

    Next, adjust the layer using the darkening blending modes: darken, darker color, color burn, linear burn, and multiply. Experiment with them all to see which one works best on the photo. The goal is to make the paper part of the document disappear, and have just the writing remain. Then just adjust the opacity to suit your taste. You can add a mask to this layer if you want to strategically erase some of the text which I do quite often.

    Vintage paper texture

    Finished image

    Finished image

    I hope you will give some of these techniques a try whether you are new to textures or have been doing them for years. If you do, please share in the comments below!

    Further reading on using textures in your photography:

    • How To Create Your Own Unique Textures and Apply Them To Your Photography
    • Textures Made Simple
    • How To Apply Textures To Your Photographs

    The post Techniques for Working Textures Into Your Photography by Denise Love appeared first on Digital Photography School.


    Digital Photography School

  • Textures Made Simple

    A contribution from Lori Peterson

    One of the most intimidating editing for some photographers is integrating textures. Textures can transform the mood and overall effect of an image. It can bring about a change that makes the image go from a nice photograph to a piece of fine art. There are an abundance of textures that can be found on the Internet and yet photographers are sometimes hesitant to use them because they feel overwhelmed or don’t understand that using them can actually be very simple. Once you get used to using textures you can usually decide what tones you want to bring in and how you want to use them.

    We are going to do two edits on the same image with the same texture but use two different techniques. Typically I will change the technique I use based on the amount of editing I think the image needs in order to really use the texture. You can use multiple textures and stack them in Photoshop and change their opacity. You can even vary which technique you use on each layer. The fun thing about Photoshop is that if you use layers you can play around with your image. If you don’t like the effect, you simply delete the layer!

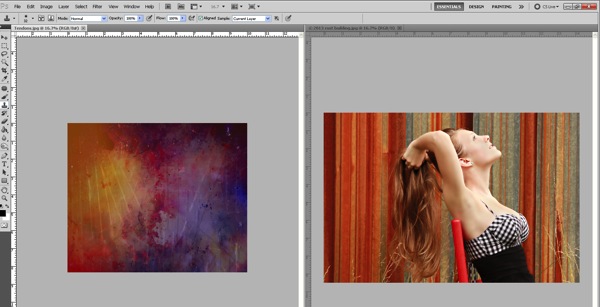
    We are going to start by opening and image and a texture.

    Image 1

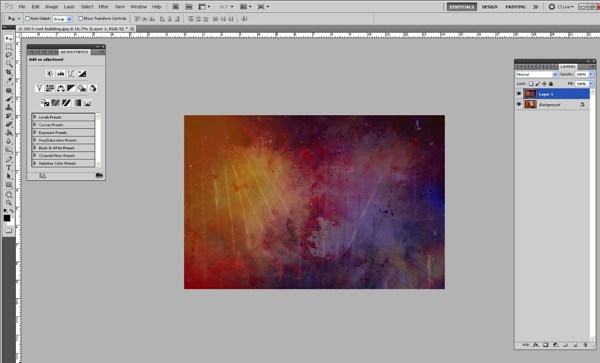
    Now we will just drag the texture on top of our image.  Size it over your image by using CTRL + T and dragging the corner to make it fit.

    Image 2

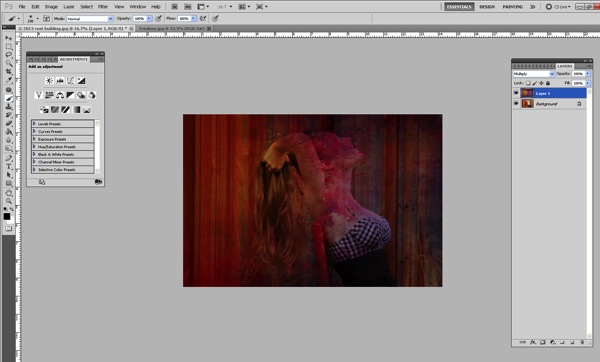
    I typically will change my blending mode to screen or multiply (depending on the image) so that I can see the image underneath.

    Image 3a

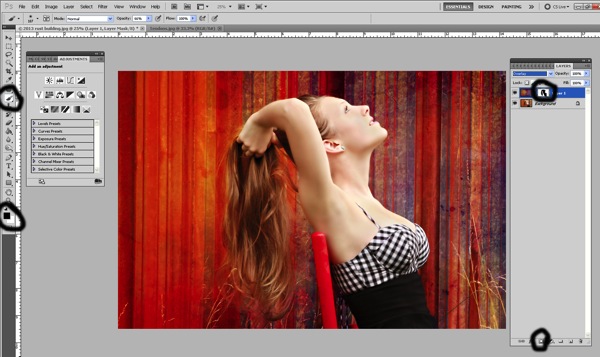
    Now we need to remove the texture off her and her skin. We can do this one of two ways.

    First of all we can just add a layer mask and then remove it off of her and her skin using a soft brush.

    Image 4

    It can be tedious to do it that way because as you get into parts of hair and closer to where her skin meets the texture you will need to make your brush smaller. 

    If you prefer, you can remove the texture this way instead:

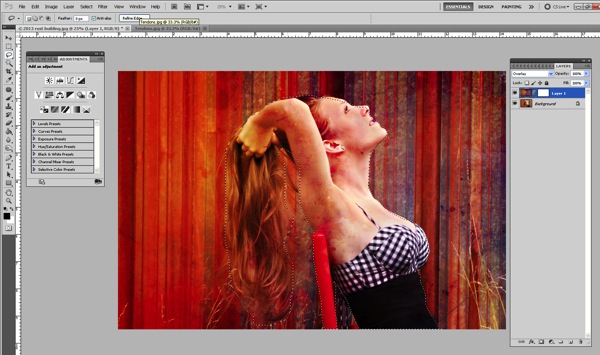
    Once you overlay your texture, go ahead and change the opacity so that you can see underneath the texture. Add your layer mask, you will need that to correct any mistakes or to refine the technique we are about to do.

    Make sure that the texture itself is what is highlighted. Select your lasso tool and then go around your subject. It doesn’t have to be perfect, but it will take you a little practice to get the hang of it!

    Image 5

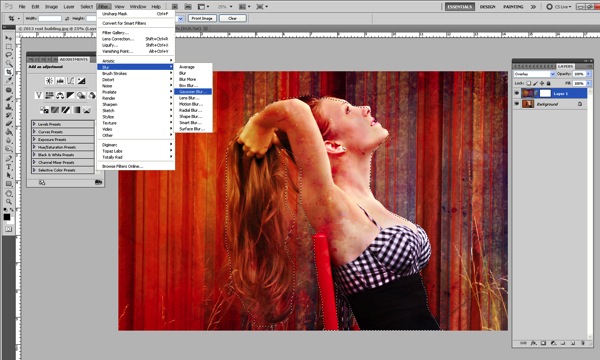
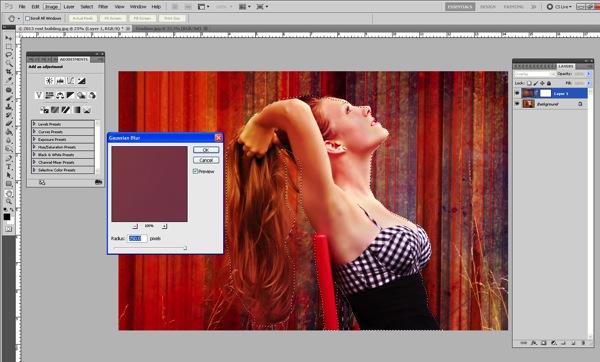
    Once you have your subject highlighted using the lasso tool, then go up to Filter > Blur > Gaussian Blur.

    Image 6

    Push the slider all the way over to the right.

    Image 7

    This will blur the texture on the subject. It doesn’t blur the subject!

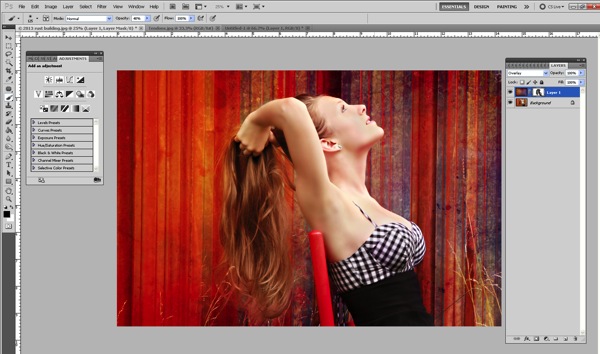
    Now we need to refine the removal of the texture off our subject, which is much easier now that the texture is blurred.

    Click on the layer mask and use your soft brush at a lower opacity to take off the parts of the texture you really want to remove. Since it has been blurred already, it’s not as difficult and tedious to remove.

    Image 8

    Then you can change your blending modes to fit the look you are trying to get for your image. You can also stack textures and leave the parts that you want or remove the parts you don’t.

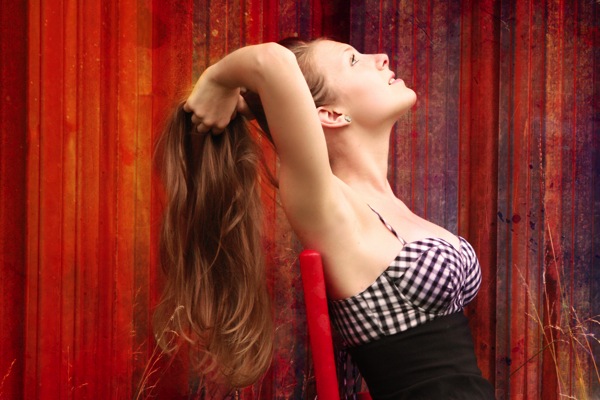
    Textures can really enhance and change the look of your overall image. They can bring more depth and more color. They can change the mood. They are fun to experiment with and once you learn how to use them fluidly you can really do a lot in Photoshop to change your images.

    This was my final image using the Tendons texture overlay. 
    ?
    Image 9

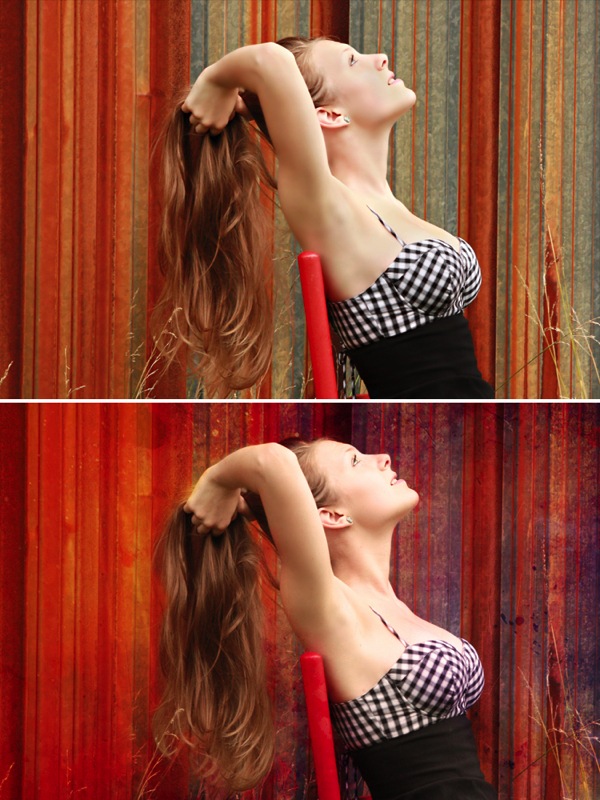
    Here’s the before and after so you can really see how the image changed. 

    Before After Image

    Lori Peterson is an award winning photographer based out of the St. Louis Metro Area. Her dynamic work ranges from creative portraits to very unique fine art photography. Lori’s work can be seen at www.loripetersonphotography.com and also on her blog at www.loripetersonphotographyblog.com. You can follow her on Facebook at https://www.facebook.com/LoriPetersonPhotography.

    Post originally from: Digital Photography Tips.

    Check out our more Photography Tips at Photography Tips for Beginners, Portrait Photography Tips and Wedding Photography Tips.

    Textures Made Simple


    Digital Photography School

  • How To Create Your Own Unique Textures and Apply Them To Your Photography

    I would like to take you through a journey today and show you how some very ordinary looking photographs of the world around us can be combined to create some very interesting and one-of-a-kind pieces of art. Some might argue that what I’m doing is no longer considered photography, but I’d argue that everything presented within the final image was at one point captured using a camera, and therefore still falls under the category of photography albeit slightly manipulated.

    The world around us is filled with textures and abstract patterns that often go overlooked in pursuit for larger more dramatic subjects. No matter what type of photographer you are and whether or not you’d go so far as to do what I’m sharing today I do think it’s worth it to spend some time learning about how to capture these kinds of images as it will help you see the world differently.

    Texture-11

    So What Is A Texture?

    Texture in art (at least in how we’re using it today) can be defined as: the visual ”feel” of a two-dimensional work.

    When I first started getting into photographing textures I wasn’t sure that it could be all that interesting. I thought that a texture had to be something very traditional like sand, or wood, or rust. I soon realized that in reality just about anything can be considered a texture if you want it to be, you just have to use it as such in your final image.

    That said I do think the best textures are more abstract images with a bit of depth to them. If the image you’re using as a texture is too clearly defined then you’ll end up having a difficult time separating your texture from the subject of the image you end up applying it to.

    Capturing Textures

    texture2

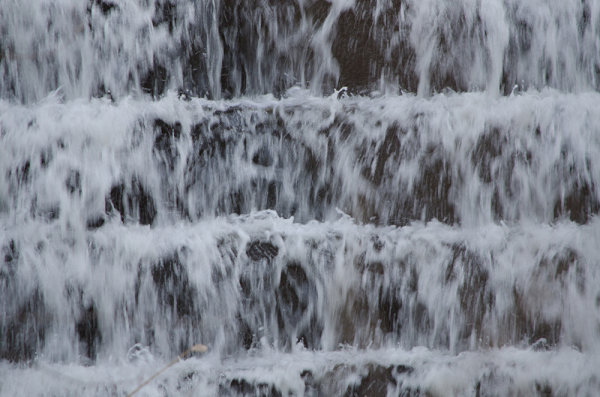
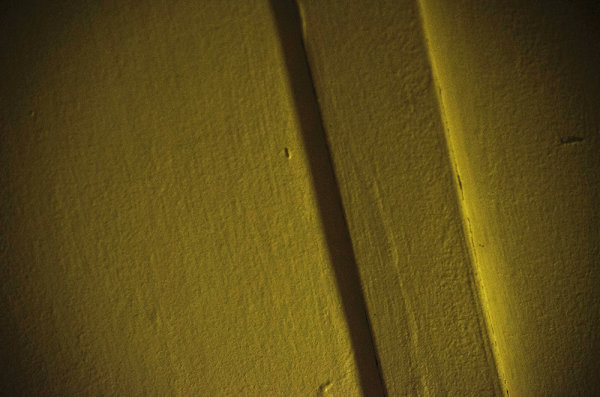
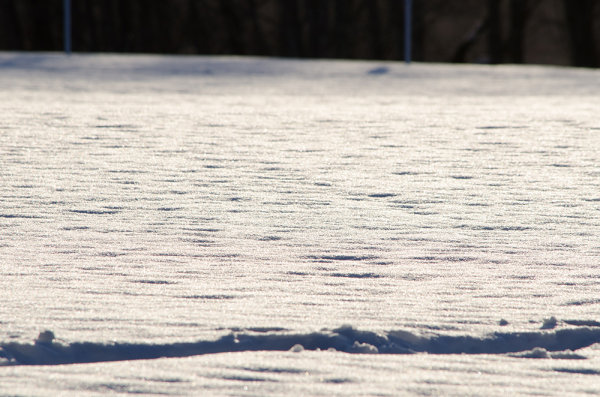
    There are simple textures like – wood, rust, paint, sand, stone – and more complex textures like – a dirt path through the woods, a canopy of a forest, a collection of flowers, the list goes on forever.

    Ideas to Keep in Mind When Capturing Textures

    • Fill the Frame
    • Look for Compositional Elements (Like the beam in the photo above)
    • Don’t rule something out just because it doesn’t look like a texture.
    • Don’t worry too much about your camera’s settings
    • Be creative

    Texture-8

    Creating & Using Textures in Your Workflow

    The first step in the process is to take the individual textures that you’ve collected and create your own unique texture.

    Texture-8

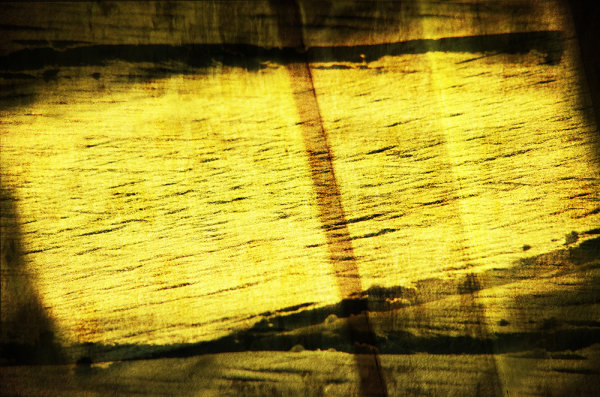
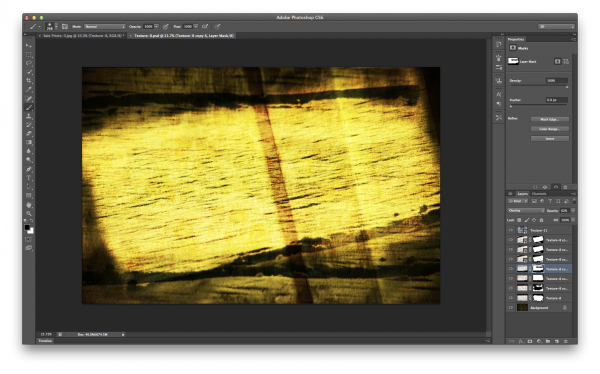
    This texture is the image that I applied to the lightning bolt photo at the bottom of this post and is a combination of the three textures that you’ve already seen above (the waterfall, the ceiling and the frozen lake).

    I won’t go through every step, but instead I’ll give you a general idea of how I went about creating this texture in a simple five step process that you can use as a guideline to create your own.

    Screen Shot 2013-07-14 at 4.01.37 PM

    Click to Enlarge

    • Bring all your textures into photoshop as different layers
    • Determine what you’d like the strongest element of your texture to be – here I choose the ceiling and placed it as the bottom layer (the background).
    • Determine if you want to duplicate any of your textures for a stronger appearance . Here I choose to duplicate the frozen lake a total of 7 times.
    • You don’t have to keep all your layers in the same orientation. Here I’ve rotated two of the frozen lake layers slightly and flipped one upside down. I then applied various layer masks and blending modes to get the final look that I wanted.
    • Play with different blending modes. I find that overlay is my go to blending mode, but subtraction and soft-light work well too. Try them all and have some fun – after all this is creative expression through experimentation!

    Once I create the texture I save it as a JPEG and toss the PSD. I find that there’s no need to really save the PSD as they take up more space and if I want to change the texture in the future I’d rather just try and create something completely different than make subtle changes to one I already have. Of course you’re free to do that differently if you so choose.

    The next step is to apply our newly created texture to our subject photo and create our final piece of photographic art. To do this you pretty much do the same process as we went through above. Bring your texture and your photo into Photoshop as layers, set your photograph as the background and then blend your texture into your photograph.

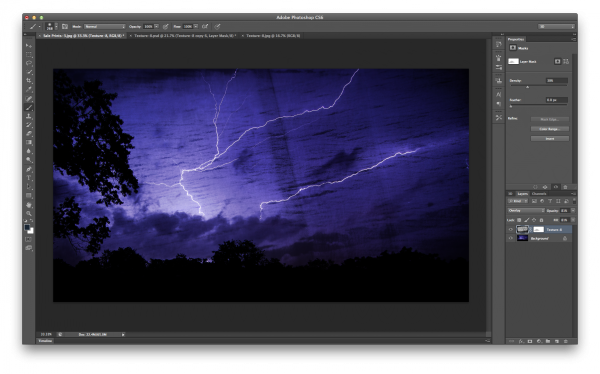
    Screen Shot 2013-07-14 at 4.44.02 PM

    Click to Enlarge

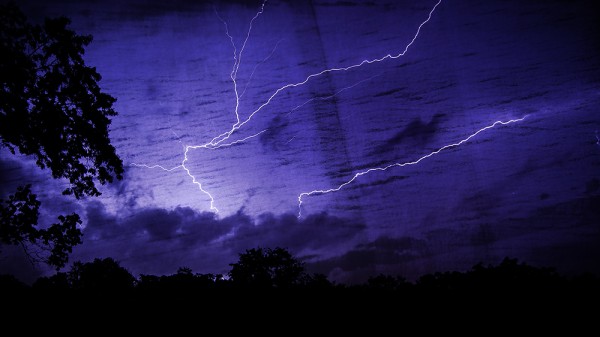
    For this photograph I dropped my texture in on top of the lightning bolt photo, popped it to an overlay and reduced the opacity slightly. I then applied a quick mask to remove some of the brightness that was created around the base of the lightning bolt, and finally converted the textured layer to black and white to let the true colors of the background layer show through.

    I realize this style of processing photography isn’t for everyone and I might be pushing the limits of creativity and for some this might be too much, but I do find it fun and enjoyable to go about creating these images and I hope you’ve learned something today and maybe even got inspired to try it yourself.

    A Few Examples Before I Go

    In closing I’d like to share with you a few examples of what I’ve been able to come up with so far and I hope you enjoy what I’ve created.

    Some Fun with Textures

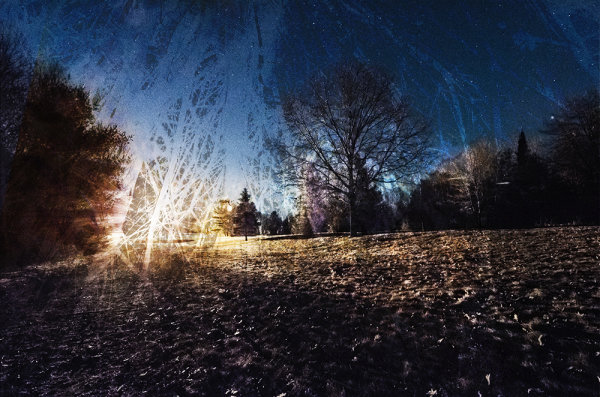
    TexturedExample3

    lightningtextured

    Post originally from: Digital Photography Tips.

    Check out our more Photography Tips at Photography Tips for Beginners, Portrait Photography Tips and Wedding Photography Tips.

    How To Create Your Own Unique Textures and Apply Them To Your Photography


    Digital Photography School

  • Mastering Photoshop Textures to Create Powerful Imagery

    Photoshop has done for photography what the road did for the wheel! That’s quite a bit in case you’re wondering… This union has made photography the worlds 2nd most popular past time… Because let’s face it; creating exciting images is indeed thrilling, and most of all, highly addictive! One such addiction is a single technique: Simple to grasp,hard to master! Continue Reading

    The post Mastering Photoshop Textures to Create Powerful Imagery appeared first on Photodoto.


    Photodoto

  • 3DSMAX – Enhancing your 3D Models with Textures

    In this tutorial I demonstrate how to create a series of textures from a single photo using Adobe Photoshop which include: color, bump, specular and normal. Then how they can be setup in Autodesk 3D Studio Max to enhance your 3D Models. This tutorial is for training and educational purposes only, please do not reproduce without written permission. Enjoy!
    Video Rating: 5 / 5

  • Blender 2.6 Tutorial 12 – UV Mapping (Image Textures)

    In this video I demonstrate and explain how to ‘unwrap’ a model by creating seams, how to export tat mesh’s UV map into a graphics editor like Photoshop, paint a texture, then bring the image back into Blender to apply to the object.
    Video Rating: 4 / 5

  • Textures and Blend Modes – Photoshop Tutorial – lightenupandshoot.com

    A quick video showing how blend modes and textures can produce outstanding results. Part of our Two Minute Tuesday’s. Check them out www.lightenupandshoot.com
    Video Rating: 5 / 5

    iceflowstudios.com – Download the PSD and read the tutorial! http facebook.com Create a Number Flipper Icon in Photoshop!
    Video Rating: 4 / 5

  • Petrified Textures – White Sands National Monument


    Truer words have never been spoken and such was my time in White Sands National Monument, New Mexico …

    When words become unclear, I shall focus with photographs.
    When images become inadequate, I shall be content with silence.
    – Ansel Adams

    Petrified Textures, White Sands National Monument

    Petrified Textures, White Sands National Monument

    Technorati Tags: Photography, White Sands, National Monument, desert, nature, fine art

    Copyright Jim M. Goldstein, All Rights Reserved

    Petrified Textures – White Sands National Monument


    JMG-Galleries – Jim M. Goldstein Photography

  • White Sands Textures I

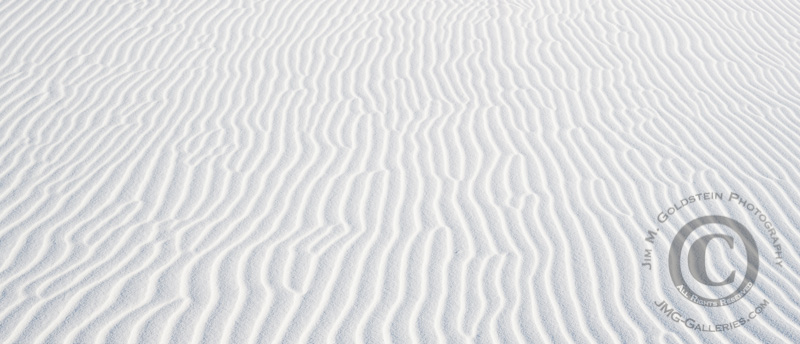
    The dunes of White Sands National Monument in New Mexico are an endless fascination of mine. The landscape here is full of paradoxes. The regularity of irregular patterns formed by the wind create incredibly photogenic sand patterns. The rolling dunes provide an infinite fabric to catch contrasty shadows in the sand patterns throughout the day making optimal lighting virtually an all day affair. Yet what I love most about this terrain is the ability to find simplicity amid the complexity.

    White Sands Textures I - White Sands National Monument, New Mexico
    Click to Enlarge

    White Sands Textures I – White Sands National Monument, New Mexico

    Photo Details:
    (3) Three photo panoramic, Canon 1Ds Mark III, TS-E 90mm f/2.8

    Technorati Tags: , , , , , , , ,

    Copyright Jim M. Goldstein, All Rights Reserved

    White Sands Textures I


    JMG-Galleries – Jim M. Goldstein Photography