Tag: Black

  • Swimming with giants: Black and white whale portraiture by Jem Cresswell

    Creativity showcase site My Modern Met recently interviewed Jem Cresswell, an Australian photographer who has just completed a project he calls Giants. The project is a series of portraits of humpback whales presented in black and white and offers an intimate look into the personalities and emotions of these ‘gentle giants.’

    In the interview, Cresswell describes his process (much of which you can see from the behind-the-scenes video above), as well as some interesting details concerning his interactions with the whales. In addition to only swimming with ‘certain whales,’ Cresswell says they never use scuba gear and he always enters the water ‘as calmly as possible, keeping my heart rate low and wait to see the behaviour.’

    The interview also addresses the presence of ‘spindle cells’ in humpback whales, which are cells that are thought to be responsible for social organization and empathy. ‘It is obvious though, that humpback whales exhibit complex emotional behaviors, have intricate social networks and complex song structures,’ says Cresswell.

    Head on over to My Modern Met or Cresswell’s website to view these stunning portraits for yourself – all of which, Cresswell says, were captured on a Canon 5DS R, 24-70mm F2.8L II and 16-35mm F4L in an Aquatech underwater housing.

    Via: My Modern Met

    Articles: Digital Photography Review (dpreview.com)

  • Fading To Black: 13 Abandoned TV Repair Shops

    [ By Steve in Abandoned Places & Architecture. ]

    TV repair shops, once fixtures of our tuned-in society, have faded away as televisions became more reliable and the broadcast medium itself lost its relevance.

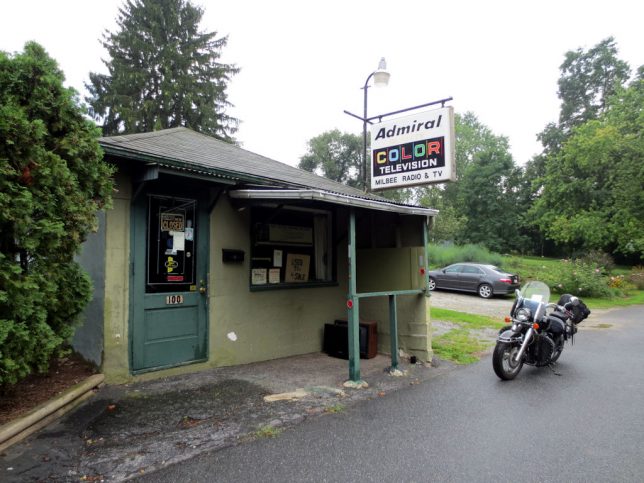
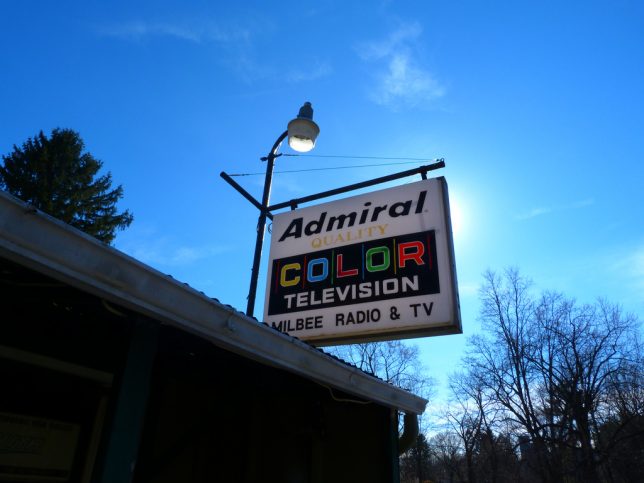
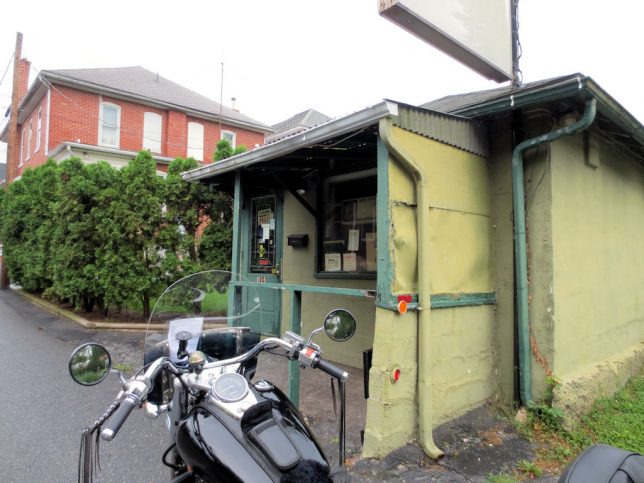
    Take Milbee Radio & TV, a tiny TV repair shop supposedly operating out of Elizabethtown, PA. We say “supposedly” because neither Flickr user Katie Burkey (StarPhotographs) nor Wendyvee of RoadsideWonders have been able to find anyone actually working there – “I think this shop might be abandoned, but I never knew for sure,” stated Burkey in March of 2011.

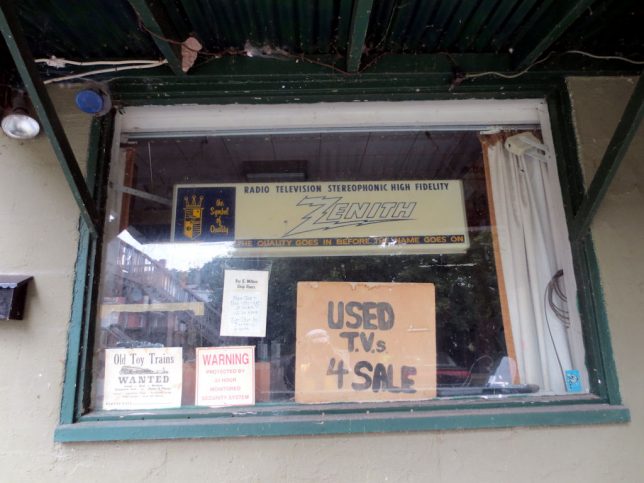
    Aside from the minuscule size of the shop (and its queasy two-tone green paint job), the gloriously retro sign tells a story all on its own. Does anyone remember brand names like Admiral, Zenith, Philco and Quasar? How long since the word “RADIO” on a sign attracted customers? Last but not least, “COLOR” television was once a feature worthy of note.

    Don’t Give A Hoot

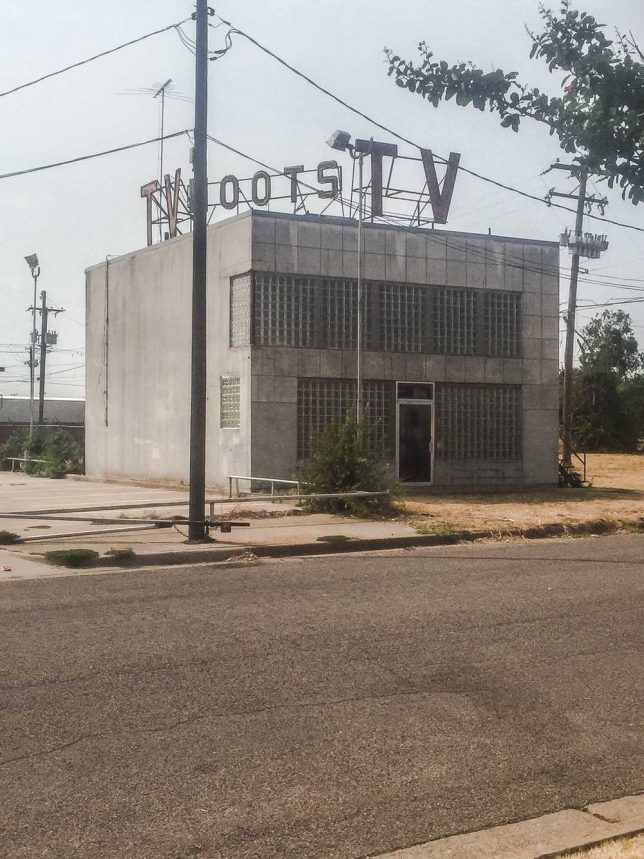
    The latest entry in the Anti-Zombie Fortress sweepstakes is the former Hoots TV Service on Highway 80 West, Fort Worth, Texas. According to Joan Carroll, the glass block-enhanced blockhouse dates from 1964 and was the third (and final) location of Hoots TV.

    Screen Thy Last Screen

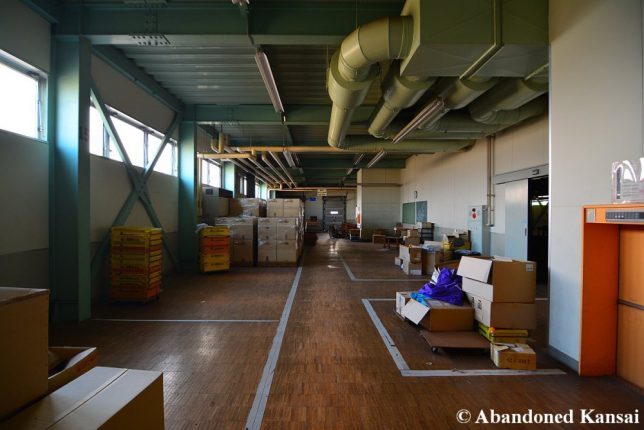
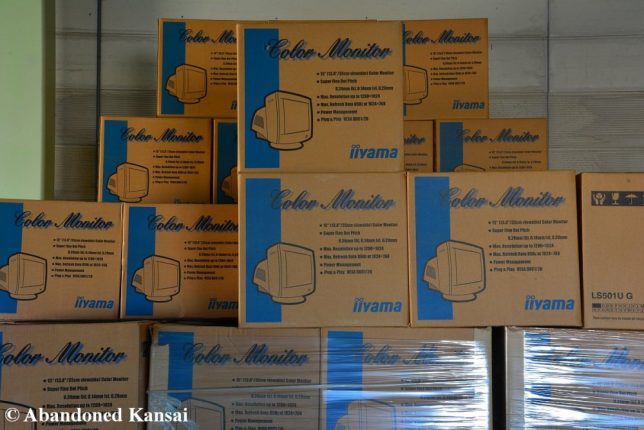
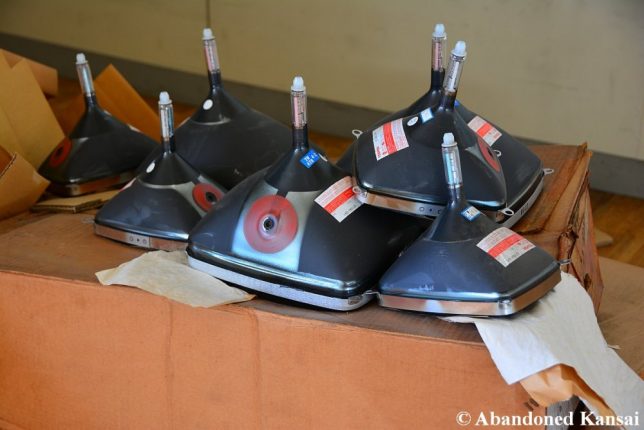
    This Japanese TV and monitor repair, assembly and distribution center seems to have soldiered on until 2008, according to calendars found within by Florian and friends from the Abandoned Kansai urbex blog.

    Like many Japanese abandonments, the business appears to have been closed in a hurry with much equipment and stock left in place and on shelves. Towards the end, the business serviced Sega arcade machines and monochrome computer monitors but couldn’t afford to retool when ponderous CRT screens gave way to flat-screen LCD and TFT-LCD displays.

    Bad Dreams

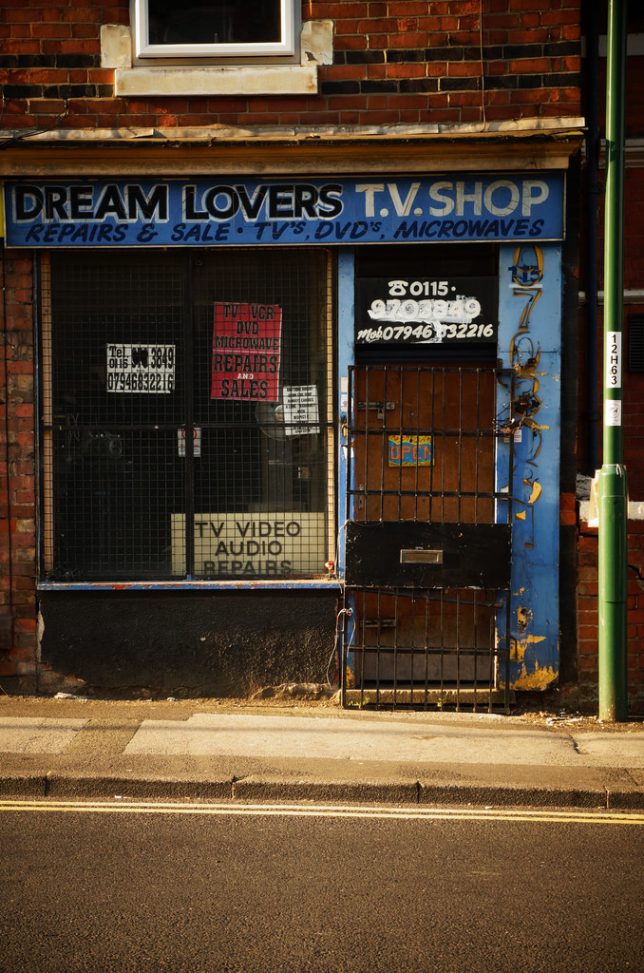
    Odd that microwave ovens were once categorized as electronic devices instead of kitchen appliances but hey, those were the days! Dream Lovers T.V. Shop (why the periods between T and V?) once sold and serviced televisions – and presumably microwaves – from this gritty shop in Nottingham, UK. Flickr user Rust Never Sleeps captured the shop’s well-aged storefront in late July of 2014.

    Rough In The Dimond

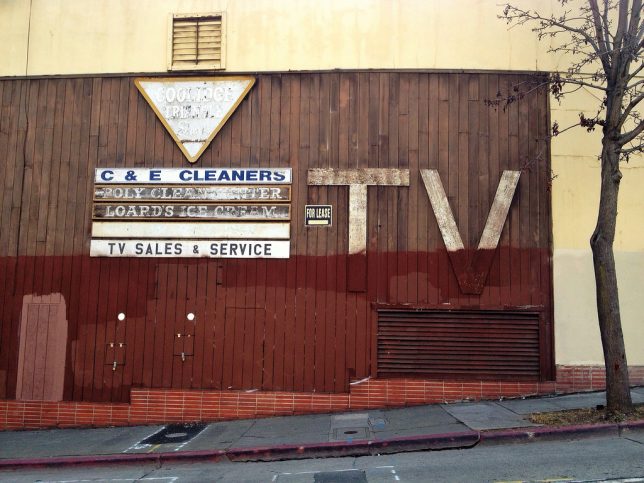
    This ultra-rustic TV Sales & Service shop languishes unlamented in the cold heart of East Oakland’s Dimond (pronounced “diamond”) district. Flickr user Billy (misterbigidea) snapped the shop’s weary weathered facade in late January of 2014.

    Next Page – Click Below to Read More:
    Fading To Black 13 Abandoned Tv Repair Shops

    Share on Facebook


    [ By Steve in Abandoned Places & Architecture. ]

    [ WebUrbanist | Archives | Galleries | Privacy | TOS ]


    WebUrbanist

  • Delkin BLACK USB 3.0 Rugged Memory Card Reader offers microSD, CF and SD slots

    Delkin has launched the BLACK USB 3.0 Rugged, a large memory card reader featuring both microSD and SD UHS-II card slots.  This is the first rugged memory card reader offering both of these slots in a single device, according to Delkin, making it a suitable model for on-the-go photographers who are frequently in ‘strenuous shooting environments.’

    In addition to support both USH-II SD and microSD cards, the BLACK USB 3.0 Rugged has a larger Compact Flash UDMA 7 memory card slot. Transfer speeds reach up to 500MB/s, which Delkin says is ten times the speed of USB 2.0. All three card slots can be used at the same time, while the USB transfer cord and one of each type of flash card can be stored inside of the media card reader when not in use.

    The card reader itself is made from both plastic and aluminum with a rubber cover that shields the device from water, dust, and impacts caused by bumps and drops. If the BLACK USB 3.0 Rugged does break at any point within its 5-year warranty period, Delkin will ship a replacement to the customer within 48 hours. The model is available now exclusively within authorized retail camera stores; price isn’t clear at this time.

    Via: PhotographyBLOG

    Articles: Digital Photography Review (dpreview.com)

  • Fujifilm X100T in black listed as discontinued on B&H Photo

    Is it the beginning of the end for the Fujifilm X100T? The camera has been listed as discontinued on B&H Photo’s website. This isn’t the first time we’ve seen this camera show up on an online retailer’s website as discontinued; Digital Rev showed it out of stock back in September 2016, though it currently lists one version the camera as ‘in stock.’

    The B&H Photo listing shows only the black version of the X100T as discontinued, while the silver version is still available. In contrast, Digital Rev shows the black version as currently available and the silver version as unavailable. Adorama still lists both the black and silver versions available for a discounted $ 1,099.99.

    Via: FujiAddict

    Articles: Digital Photography Review (dpreview.com)

  • 7 Secrets of Black and White Photography

    We’ve all heard it … “to master black and white photography you must learning to see in black and white” – but just how do you do that?

    It can sometimes seem like actually learning to see in black and white is a skill for only the chosen few. But trust us, it’s for you too!

    Here are seven (not-so-secret-anymore) secrets that will help you train your brain and expand your eye for the art of black and white photography.

    (…)
    Read the rest of 7 Secrets of Black and White Photography (844 words)


    © Meg for Photojojo, 2017. |
    Permalink |
    No comment |
    Add to
    del.icio.us

    Post tags:


    Photojojo

  • How to Create Portraits with a Black Background

    Who does not love a crisp, deep black background for a portrait? You can achieve this with the application of just two ideas, and just a little post-processing too.

    black background

    We are talking about a couple of techy things in hopefully, a non-techy way. These two ideas will give you tips for how to make black backgrounds for your portraits.

    No calculations necessary

    As an erstwhile teacher of Mathematics, I should not apologize for numbers, should I? There is quite a lot of Mathematics in photography. However, you may be pleased to know that I think you can achieve everything, without thinking much beyond the basics. If you have a broad understanding of the concepts you will be absolutely fine.

    These techniques are not just applicable to portraits.

    Two Tips for Making Portraits with a Black Background

    Banana palm leaf

    Firstly, please think of stops of light as units. Using the term stop is like saying that something weighs 12 kilograms or that it is 10 miles away. As photographers, we tend to talk about stops and stopping down, but it is just as valid to say units. The thing is not to get bogged down in technicalities, the term stop is only a unit of measure.

    The falling off of the light

    The first concept might be stated simply as light falls off rapidly. Fleshing that out just a little, the amount of light available decreases greatly as you move away from the source of the light. But we are photographers and we do tend to think that a picture is worth a thousand words, so look at the diagram below:

    In the example above, one unit of light arrives at our subject, one meter away from the window. If she moves two meters away, just one-quarter of a unit of light will now be arriving at her. Then, if she moves three meters away from the window, which is the source of light, there will be only one-ninth of a unit of light. The available light disappears very quickly.

    It might suit some if I illustrate the same point with a graph (which, in the past, I have tended to introduce to students as a Mathematical picture).

    Two Tips for Making Portraits with a Black Background

    A mathematical picture tells a story?

    How does that affect the background?

    When trying to achieve a black background, you are interested in the amount of light hitting it. Again, pictures tell the story best. Both these photos had only white balance and very small adjustments to balance exposure done in post-processing.

    Two Tips for Making Portraits with a Black Background

    Not happy

    The image on the left has the background close to the subject, about three feet (one meter) behind her. Then, on the right, the white background is about thirteen feet (four meters) back. You do not need me to do calculations, quote some nice formulae, to prove what is happening above. It is obvious, isn’t it?

    In these photographs, the subject hasn’t moved and the exposure does not change. The background moves farther away, and the amount of light reaching it reduces rapidly. Even when the background is white, rather than the desired black, it gets much darker the greater the distance it is positioned from the light source.

    In the practical world, there may be limits to what you can do, perhaps by the shooting space you have available. However, the message is simple, push the background as far away as possible, and even a seemingly small distance will help make it appear darker.

    Two Tips for Making Portraits with a Black Background

    Young Filipino.

    The background for this photograph was the inside of a room. The teenage Filipino boy was standing in a doorway, getting full benefit from the light source. The background, the far wall of the room, might be only eight feet (just over two meters) away, but it is getting very close to the blackest of blacks, isn’t it?

    Combine this reasonably straightforward science, the way light falls away, with the science of the dynamic range of camera sensors and you will be a long way towards achieving black backgrounds for your portraits.

    Dynamic Range

    Please understand that the numbers I am using here are approximate. They do vary from camera to camera, and from the conclusion given by one source to another. But I am going for using what is easy, what is really needed to make the point so you understand.

    Dynamic range is the measurement from the darkest to the lightest item which can be seen. Your camera has a great deal less dynamic range than the human eye. It is much less capable of seeing into dark and light areas at the same time. That is why, when your camera produces an image with blown out highlights, and blocked up shadows. But your eye can still see the detail of a bird, which sat in bright sunlight, and you can also see the black dog which sat in the darkest shadows. Your camera simply cannot see both at the same time.

    Two Tips for Making Portraits with a Black Background

    Light the subject, not the background

    It might be stating the obvious, but it needs to be said – the first step to getting a black background is to use a black backdrop. Then, if you can get the subject lit more brightly than the background, that will push the background into the underexposed, dark areas, outside the camera’s more limited dynamic range.

    Portrait setup

    If you can throw some extra light onto the subject and have them exposed correctly, in the brighter end of the dynamic range, that will help to send the rest of the image into darkness. The brightly lit subject should be properly exposed. Then there is a good chance that the background will be outside of the part of the dynamic range for which you are exposing. It will, at the very least, be heading towards black.

    Portrait setup

    Here is the setup for a portrait, with only natural light hitting the subject. It is not as obvious in this reduced jpeg as in the original RAW file, but the background is rather muddy, certainly getting towards black, but not the pure black you are looking for. In the original, you can clearly see folds in the cloth.

    Two Tips for Making Portraits with a Black Background

    Still not happy – most people would describe the background as black, but it is not the blackest of blacks, is it?

    Here is the same set up again, with some extra light on the subject.

    black background

    I think the point is illustrated. Is it clear that the background is worthy of the classic description “inky”? Other things could be improved with a few post-processing tweaks. They are presented to show the backgrounds, not as finished portraits, and I’ve only changed color balance and tried to balance the exposures.

    Use the natural law (it is called the Inverse Square Law) which dictates that light falls away rapidly from the source, and the limited dynamic range of your camera and you are a long way to getting a good, deep black, background. Next, you can help complete it further in post-processing.

    Post-processing

    I am referring to Lightroom here, but there are equivalent tools in other software.

    Two Tips for Making Portraits with a Black Background

    A bit of a muddy RAW file.

    This is the photograph from the top of the article, as it first appeared out of the camera. You do not want to hear my excuses, but I did not get it as completely right in-camera as I would normally like to do. However, it turns out that is lucky, as it makes a good example for a post-processing in this case. Because the file was produced with the application of the ideas talked about above, it is very workable.

    Most of the way to being processed in just a very few steps.

    Edit intuitively

    One of the best bits of advice I ever received, which I sometimes manage to apply, is to ignore the numbers. You should move those sliders till they give the look which you think suits the picture. Look at the photo and see what happens, take a breath, pause for a moment, and make some judgment as to whether it gives you what you’re looking for. Often this involves going a bit too far (whether it be with sharpening, or exposure, shadows, or whatever) and then dialing back a little.

    I managed to do just that with this image. It makes me smile when I look at it now, a few weeks later, as I am slightly surprised at how far I went. I adjusted the color balance, brushed some negative clarity onto mom’s face, rotated the image counter-clockwise a little, but the exposure was not adjusted at all as the faces looked fine to me. Then I started pushing the sliders around.

    Push the limits

    It was a bit of a surprise to see just how far towards the negative I had moved the contrast slider. This may be counter-intuitive when you are trying to make parts of the image darker, but because we have got a reasonably well-produced file, we can get away with reducing the contrast, and this has the pleasing effect of lightening the hair and separating it from the background.

    Of most significance to this exercise is the shadows slider which was moved in the opposite direction to usual. It was moved to the negative, to block up the shadows, rather than to the right, to try to pull out some detail.

    I was also a bit surprised at how far I moved the black point. It seemed to work, though. As I say, I think it often works best if you move the sliders, without too much concern for the numbers they represent. Try to look at each photograph individually, rather than apply some sort of formula.

    The final image had only a couple more, tiny, detailed tweaks.

    black background

    Extra Tips

    A couple of other things.

    How you decide to throw some light onto the subject of the photograph is for other articles. There are many other great Digital Photography School articles, which offer a huge number of suggestions for illuminating subjects. I thought you should know that I do very much like my LEDs, as I like being able to see the light. I also use reflectors. However, the first source of light in all the photographs above is natural light. You do not necessarily need a fancy kit.

    In respect of the black cloth, most advice will suggest that you buy black velvet. I am sure it does an excellent job of absorbing light from all directions. But it is expensive, and with careful technique, it seems to me that another dark, non-shiny cloth can do the job too. One thing to pay a little attention to is making sure that you stretch the background cloth out a little. Try to get it as smooth and even as possible, with no creases, as any imperfections are liable to catch the light.

    black background

    Conclusion

    The power of photography! 25 years after the event, I paid a bit of homage to Annie Leibowitz’s photograph of Demi Moore. I was not trying to replicate it as such, just nod in the photograph’s direction. But I did manage to get a really black background, didn’t I? Please give it a go yourself.

    Share your images and questions in the comments below. I’m happy to try to help further if I can.

    The post How to Create Portraits with a Black Background by Richard Messsenger appeared first on Digital Photography School.


    Digital Photography School
  • Hovering Tiny Black House Haunts the Woods Under a Railway Bridge

    [ By SA Rogers in Art & Installation & Sound. ]

    black flying house 3

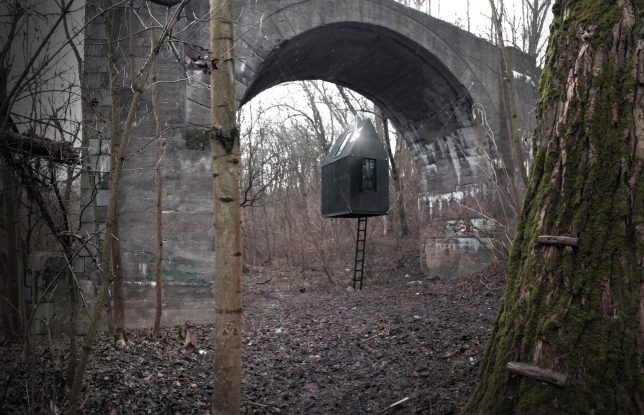
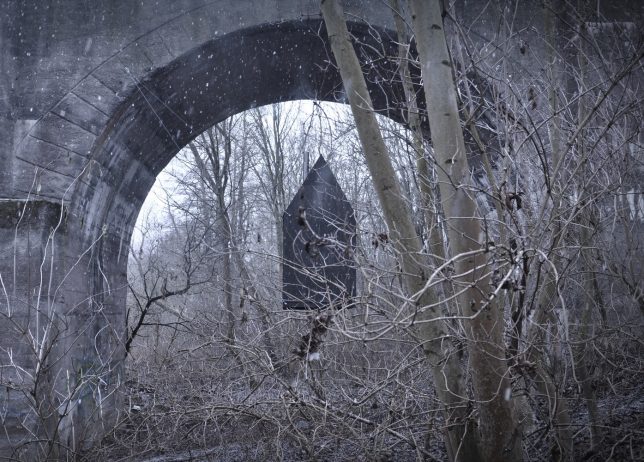
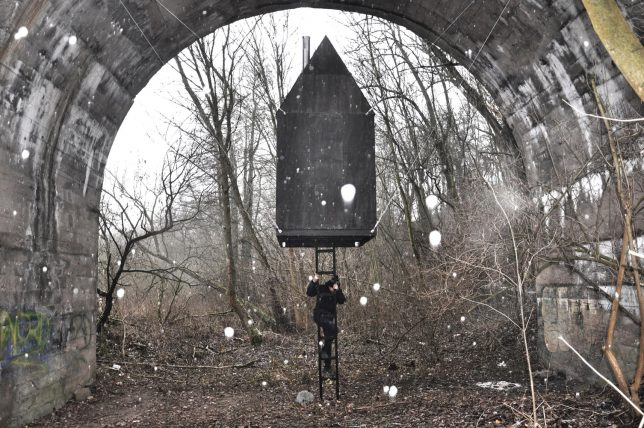
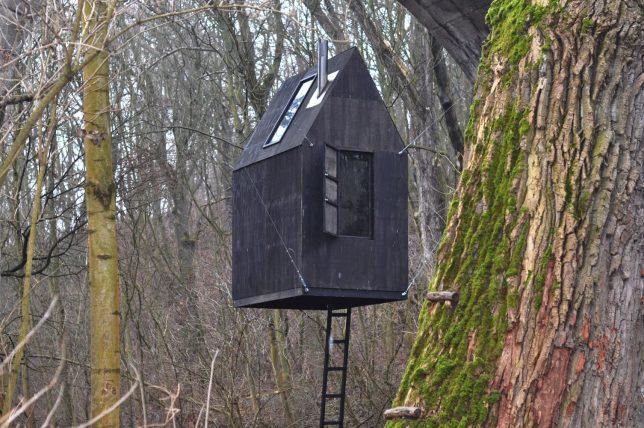
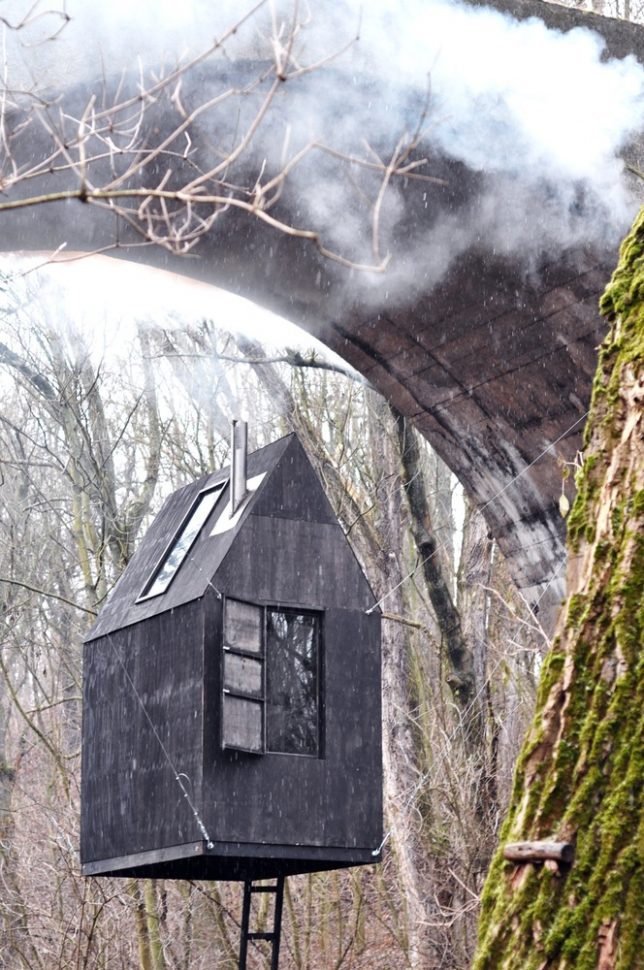
    Looking like something out of a creepy fairytale, this little black house hovers in the air beneath the arch of an old railway bridge, a spindly ladder reaching down into the fallen leaves. If you weren’t expecting it to be there and happened upon it while on a walk, you might be a bit shocked to see it seemingly floating in space, its skylights glinting in the sun. From far away, you can’t see how it could possibly be supported, lending it a somewhat supernatural appearance.

    black flying house 7

    black flying house 1

    The steel cables that support the structure become apparent as you walk up, and the ladder is usually hidden off to one side, requiring passersby to look around a bit for a way to get up.

    black flying house

    black flying house 8

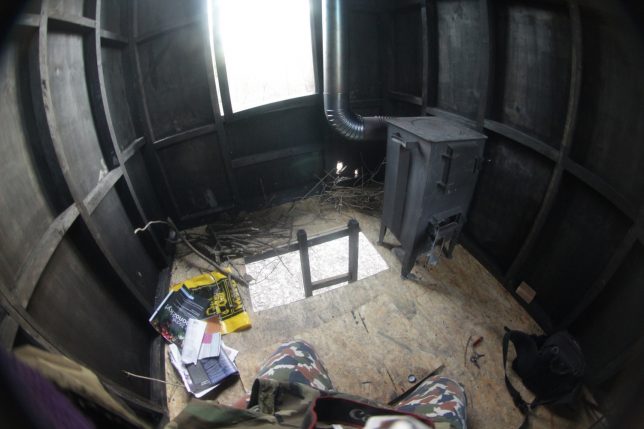
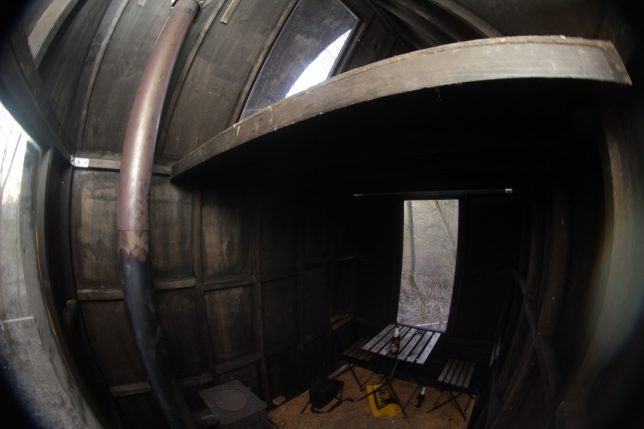
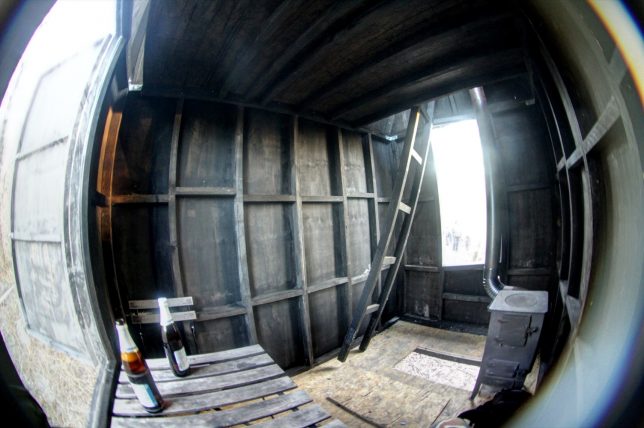
    But if you did happen to be brave enough to approach it and climb the ladder, not knowing what you’d find inside, you’d be greeted with a bare-bones but cozy hut from which to survey the surrounding woods, complete with a loft and a wood stove.

    black flying house 5

    black flying house 4

    Set in an area that’s 15 minutes walking distance fro the city center of Pardubice, Czech Republic, the installation takes advantage of stark scenery left behind by disused infrastructure, aiming for the feel of a mysterious military complex.

    black flyling house 2

    Created by H3T Architekti and photographed by Maritna Kubesova and Tomas Rasl, ‘Flying Black House’ is a temporary installation daring passersby to give in to their curiosity, even if it makes them feel like the foolish protagonist in a horror movie.

    Share on Facebook


    [ By SA Rogers in Art & Installation & Sound. ]

    [ WebUrbanist | Archives | Galleries | Privacy | TOS ]


    WebUrbanist

  • How to Enhance your Black and White images with Infrared Photography

    This article will give you some tips on how you can enhance your black and white images by using infrared photography.

    Enhancing your Black and White images with Infrared Photography

    Infrared photography for something different

    Are you a fan of black and white photography? Like many, I love a good black and white image. The mood you can exude from the shadows and light always fascinates me.

    When I was new to photography, I mostly avoided black and white landscapes. I used it mainly a handy way to hide the sporadically bizarre white balance my old Olympus EPL1 used to occasionally surprise me with.

    Infrared photography (IR) also took a while to attract my attention. I wasn’t a huge fan of the typical false colour images, but quite liked the black and white IR photos, particularly the work of Simon Marsden. If you haven’t explored his portfolio of dark and atmospheric infrared film photography, you are missing something unique.

    Anyway, after a while, I started doing more black and white landscape images, and eventually followed the urge to get into IR images purely for their unique monochrome potential.

    Enhancing your Black and White images with Infrared Photography

    I went down the path of buying a modified camera off Ebay. You can buy anything from a point and shoot to a full frame DSLR, and everything in between. If you have an old body you can always get it converted, but it’s worth checking the cost against buying one that’s already been modified.

    I picked up an Olympus EPM1 for around AUD $ 300 ($ 230 USD). The advantage for me was being able use the same lenses and batteries I already had for the EPL1.

    Why buy a modified camera rather than use IR filters?

    Filters are a great and relatively inexpensive way to get into IR photography, but they have their limitations.

    The main attraction of a modified camera is that you are not limited to the long exposures needed for an IR filter. You can capture sharp images in any conditions, and can be more creative with your exposures (e.g. pick the perfect shutter speed for moving water). You can shoot handheld from any point of view without being limited by a tripod.

    Enhancing your Black and White images with Infrared Photography

    It is also much quicker. When using filters, you need set your focus before attaching the filter which can become tiresome.

    I used to take my IR camera with me for a run along the river. Without the need for a tripod, I could travel light and take quick photos whenever an interesting composition presented itself.

    Enhancing your Black and White images with Infrared Photography

    What can infrared photography bring do for a landscape photographer?

    Perhaps the most striking characteristics of infrared photography are the typical white vegetation, black water, and dark skies. You can create punchy, high contrast images. The middle of the day works best for these type of shots. Perfect for those landscape photographers that hate early mornings!

    If you like capturing the complex patterns in clouds, you’ll find that the black skies really allow the clouds to stand out.

    Enhancing your Black and White images with Infrared Photography

    IR also gives you clarity. Any haze visible to the eye tends to disappear in infrared photography. So you can achieve a very crisp and contrasty look.

    Enhancing your Black and White images with Infrared Photography

    The deciding factor for me was tone. I found the infrared monos gave me a wonderful palette of greys and blacks to work with, particularly for trees and vegetation. The balance between light and dark just seems easier to manage in infrared and really lets you produce some unique images.

    Enhancing your Black and White images with Infrared Photography Enhancing your Black and White images with Infrared Photography

    Processing

    So what processing should you use for infrared photography? The short answer is not much really. Experiment to find out what works for you.

    Myself, I don’t normally use Lightroom or Photoshop, so my workflow may be a little different than yours. But the principles will be the same.

    I import my raw images into Corel’s AfterShot Pro, which is a handy little raw file editor. Here I’ll straighten the image, adjust the exposure, and maybe increase the contrast if required. My infrared raw files come into AfterShot Pro displaying blue-grey hues, which is a good starting point for me. From here I export them as TIFFs into PaintShop Pro.

    PaintShop Pro has a “Black and White Film” effect that lets you apply a colour filter to your image. Changing your filter between blue, red, and green gives a different result.

    From here it is a matter of personal taste adjusting the light and dark of your image, the white and black points to suite the image, and maybe applying curves as appropriate.

    Enhancing your Black and White images with Infrared Photography Enhancing your Black and White images with Infrared Photography

    What is the Secret Sauce?

    Infrared photography is wonderfully clean and crisp. But what if you love that IR film look with a ghostly flare?
    Don’t worry. PaintShop Pro has it in the bag. They have an “Infrared Film” effect that was probably created to make ordinary images look a bit infrared-ish.

    But when you apply it to a proper infrared image as a starting point, you get a wonderful controlled flare effect. It doesn’t quite match the often spooky and surreal results Simon Marsden achieved with IR film, but it does get you a lot closer than anything else.

    Enhancing your Black and White images with Infrared Photography

    Enhancing your Black and White images with Infrared Photography

    The flare can be applied to give a sense of mystery, mood, and surrealness that is hard to replicate any other way.
    Enhancing your Black and White images with Infrared Photography

    Are there any downsides to infrared photography?

    Not really. The only big drawback you’ll find is that you cannot use your favourite filters. Standard neutral density and polarizers do not work in the IR spectrum. If you sky is very bright and your subject is dark, you’ll just have to blend a few different exposures. Shooting in RAW of course gives you more leeway, but my Olympus files are not as forgiving as my Nikon files when recovering blown highlights.

    Enhancing your Black and White images with Infrared Photography

    The only other thing I notice is that some people get so enamoured by the white leaves and black sky effect that they forget to put their attention on the composition. Yes, everything looks cool in IR, but don’t take pictures of everything. Aim for strong compositions and uncluttered images. IR really shines with a minimalist approach.

    Enhancing your Black and White images with Infrared Photography

    Many dismiss infrared photography as an oddity; a strange niche that is a bit too left of centre for them. Others just think it is too hard and expensive to get into.

    But if you like creating black and white images that stand out from the crowd, I’d suggest you have a crack at it. You’ll find it a challenge but also quite rewarding.

    Enhancing your Black and White images with Infrared Photography

    The post How to Enhance your Black and White images with Infrared Photography by Matthew Larsen appeared first on Digital Photography School.


    Digital Photography School
  • How to Create Good Black and White Portraits

    The most difficult question I often ask myself is, “Do I convert this image to black and white or leave it in color?” This question is particularly difficult with people, because black and white portraits look really good.

    googletag.cmd.push(function() {
    mobile_slots.push( googletag.defineSlot( “/1005424/_dPSv5topic-rhs(300×250)”, [300, 250], “pb-ad-124309” ).addService( googletag.pubads() ) ); } );

    My go to rule is that if the colors in the image do not match, are not complementary, or simply do not look good, then I convert my image to black and white.

    Tips to Making Black and White Portraits

    A lot of people prefer black and white images and because of that I always send to my models/clients one black and white image and one edited image in color. I basically force myself to convert all my images to black and white, and in some cases, I get surprised because the result looks really good.

    Black and white is less forgiving

    Flaws in monochrome images will automatically stand out than in color ones. This is because sometimes color distracts the viewer and it can give the impression that the image is perfect even if the composition, facial expression of the model, or lighting are not the best.

    With black and white portraits, you will need to pay more attention to light, composition, contrast, and the whole scene in general.

    Tips to Making Black and White Portraits

    Lighting for black and white

    Contrasty lighting is what makes a black and white image pop. If you look at the work of famous photographers like Ansel Adams, his images stand out because of the light contrast. Fine art photographer, Joel Tjintjelaar, explains very well separation and the grey scale, tonal contrast, separation and presence and depth. Black and white is all about presence and depth. Most of the time this can be created and enhanced using the dodge and burn tools in Photoshop.

    It is important to study the work of others. For example, Peter Coulson is a photographer who takes stunning black and white portraits.

    When taking portraits in natural light, always use a shallow depth of field to centre the attention on the eyes and avoid slow shutter speed as the image needs to be completely sharp.

    Tips to Making Black and White Portraits

    Taking images during the magic hour will give a very flattering result as the light will be very soft. In studio sessions, a large softbox or window light will give you very soft light. For more contrasty results, the best solution outdoors is to photograph during the middle of the day and in studio is to use a beauty dish.

    The difference will mainly play in the shadows and it will depend on how dark do you want your shadows to be.

    Tips to Making Black and White Portraits

    Plan for black and white

    Most of the time, the best solution is to have black and white in mind for the final image because you will automatically pay more attention to light and shapes around your model. You also need to tell your model that this is your intention because the pose and facial expression will be more important and emphasized.

    Black and white portraits are all about facial expression and transmitting emotions. The eyes of the model should always be the centre of attention and facing the light source to create a little sparkle of light (called catch lights), this makes the difference. You can also create a second sparkle if you use a light reflector. You don’t necessarily need an assistant to hold the reflector, you can ask the model to hold it or you can hold it yourself with one hand.

    Tips to Making Black and White Portraits

    Studio portraits in black and white can be much more creative because you fully control the amount of light in the room. You can control the direction and intensity of that light towards your model. Try to get creative by only lighting one part of the face, by using objects or using a black background to isolate your subject.

    Post-processing

    Black and white work is not only desaturating an image, it is much more complex. The work flow I usually use is I start by editing my image in color and playing around with the contrast of colors. I adjust my exposure, the sharpness, do skin work and then I do my first dodge and burn. Afterward, I convert my image to black and white using the channel mixer and it is quite simple because the different filters will give you different results.

    https://digital-photography-school.com/tips-making-natural-light-portraits/

    The most important part of post-processing is using dodge and burn to give life to your image. Brighting and darkening up key areas of the image is the most important step, take your time to do it well. The result will depend on you, so don’t hesitate to do it several times before you are completely satisfied. I recommend using a Wacom Tablet for full control. Finish your post-processing by creating a vignette to add another feel of dimension.

    Conclusion

    Black and white portraits look amazing when they are done properly. The result will depend on how good you can control and define the light around your subject. In other words, how defined is your contrast between the different tones.

    Always think about black and white when the colors in the RAW image do not look good, when when your model has a very strong facial expression, and when you have good looking light whether it’s outdoors or indoors.

    Please share your comments and black and white portraits in the section below.

    Tips to Making Black and White Portraits

    googletag.cmd.push(function() {
    tablet_slots.push( googletag.defineSlot( “/1005424/_dPSv4_tab-all-article-bottom_(300×250)”, [300, 250], “pb-ad-78623” ).addService( googletag.pubads() ) ); } );

    googletag.cmd.push(function() {
    mobile_slots.push( googletag.defineSlot( “/1005424/_dPSv4_mob-all-article-bottom_(300×250)”, [300, 250], “pb-ad-78158” ).addService( googletag.pubads() ) ); } );

    The post How to Create Good Black and White Portraits by Yacine Bessekhouad appeared first on Digital Photography School.


    Digital Photography School
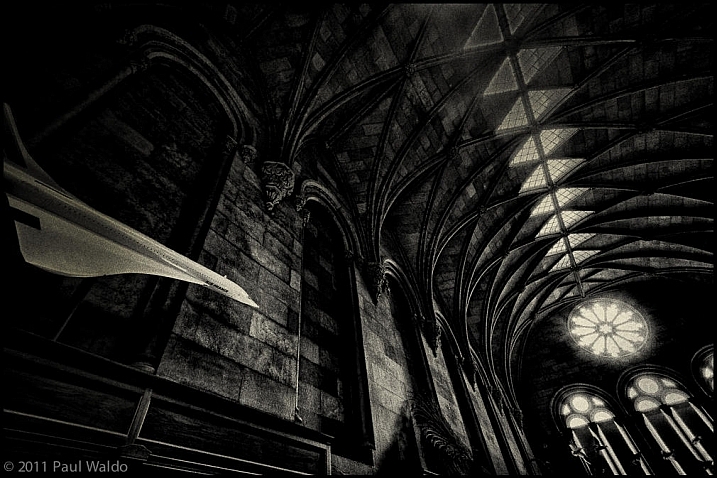
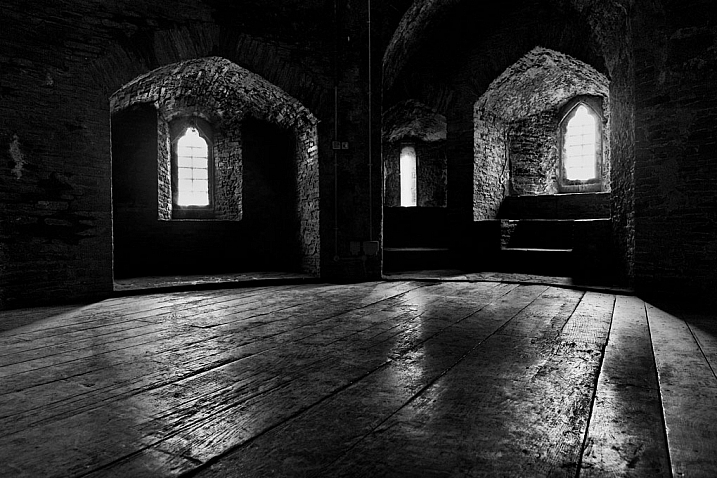
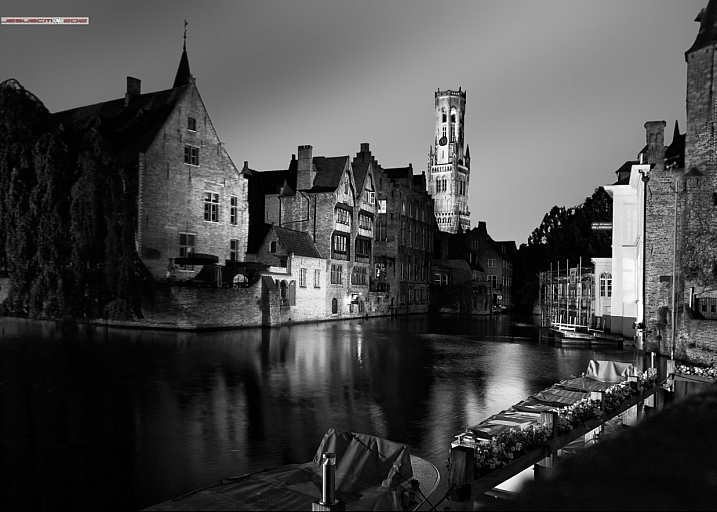
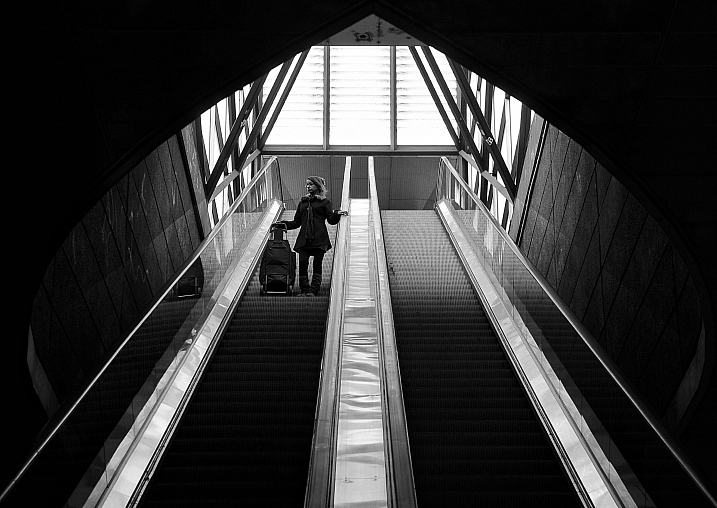
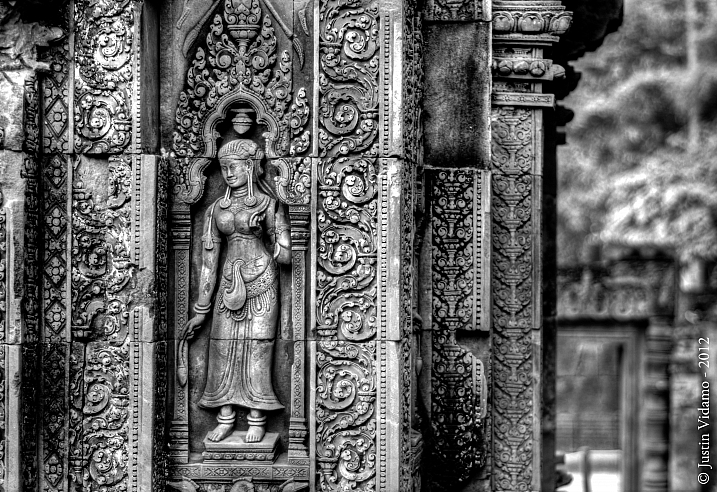
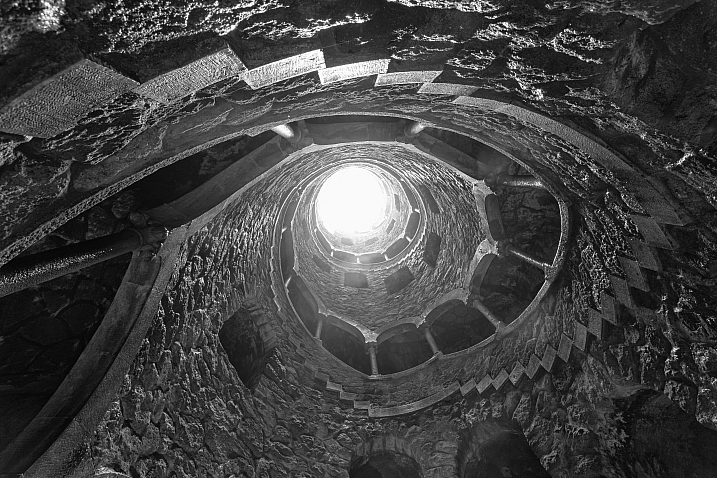
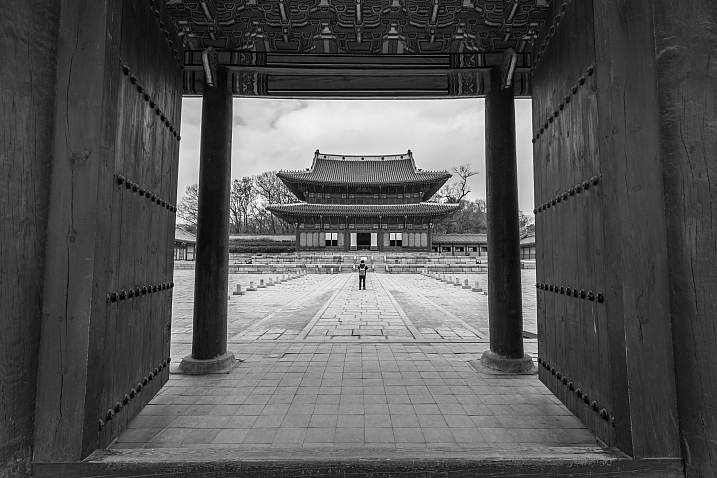
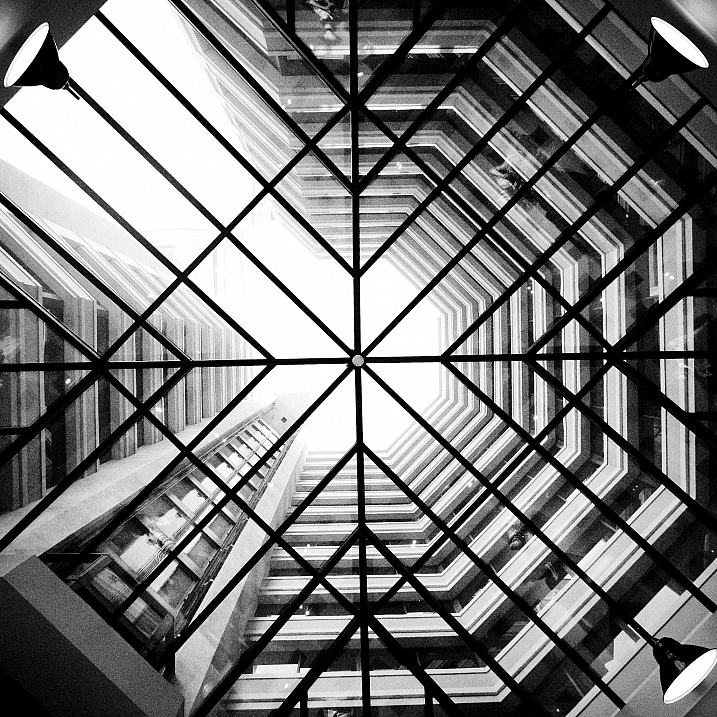
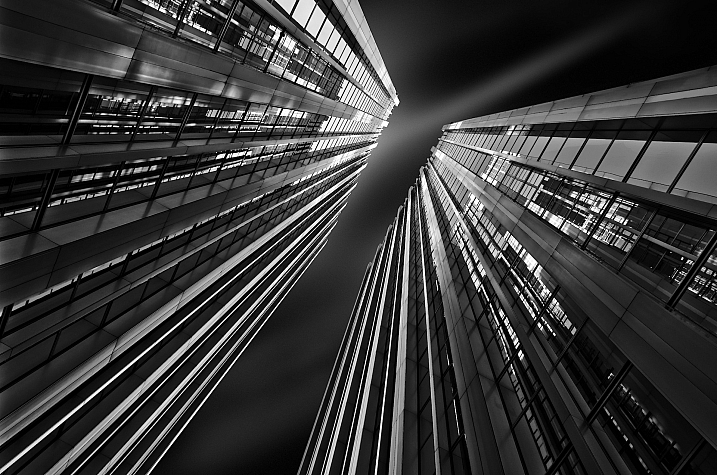
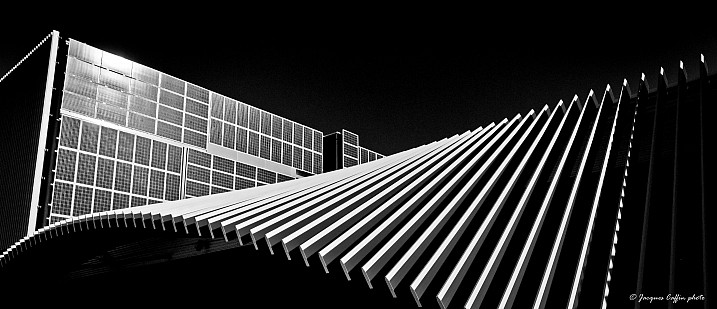
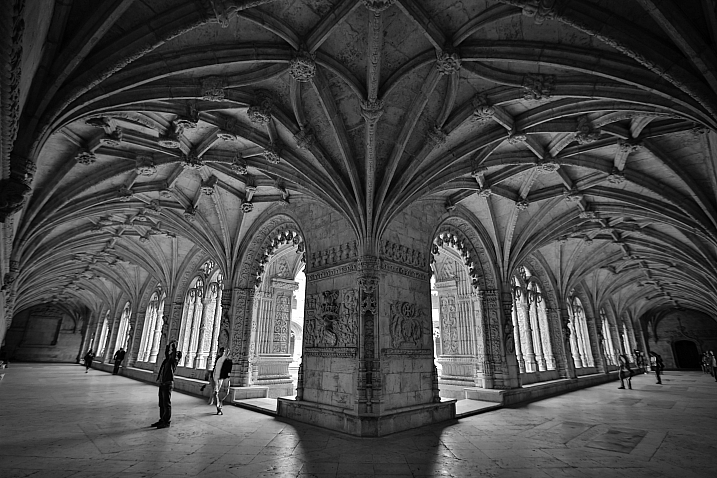
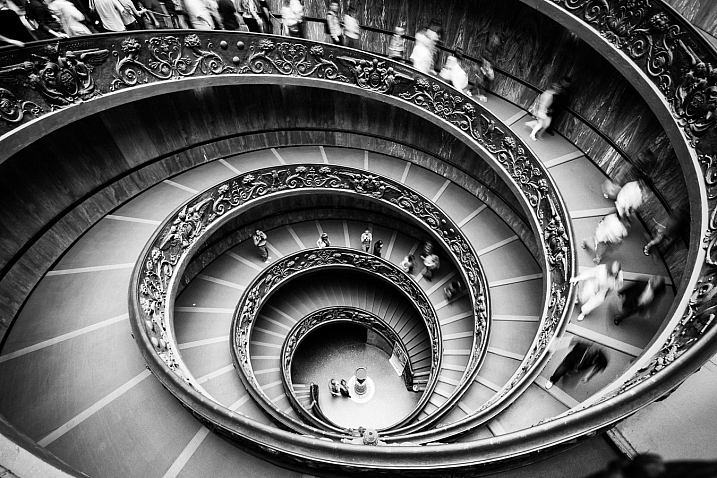
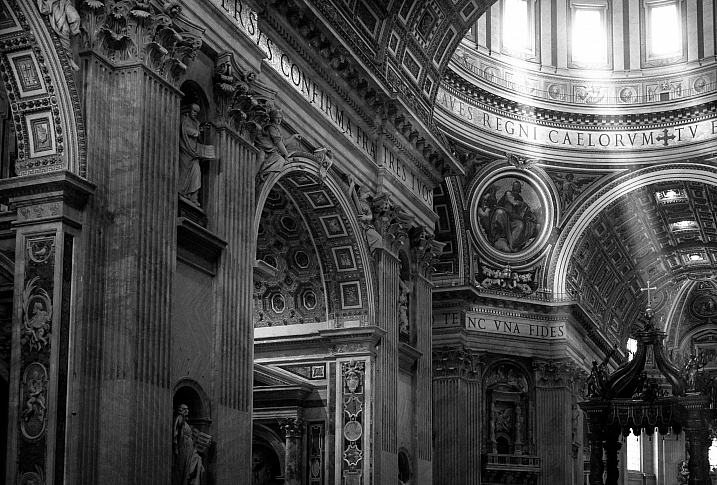
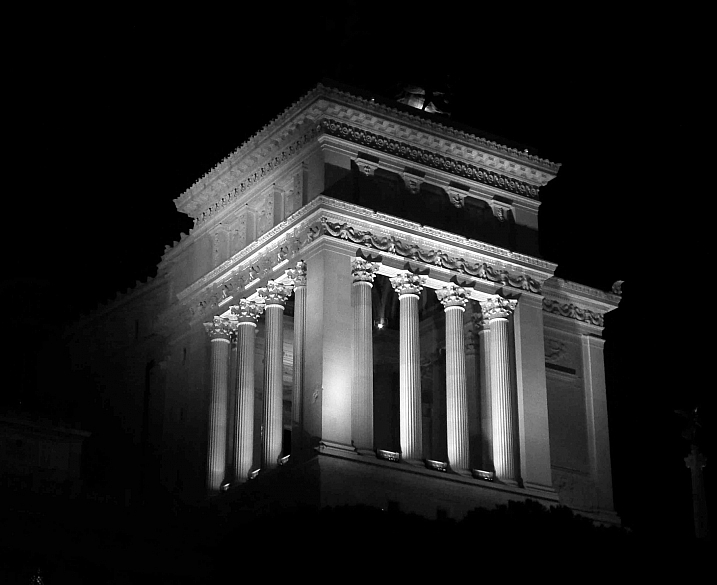
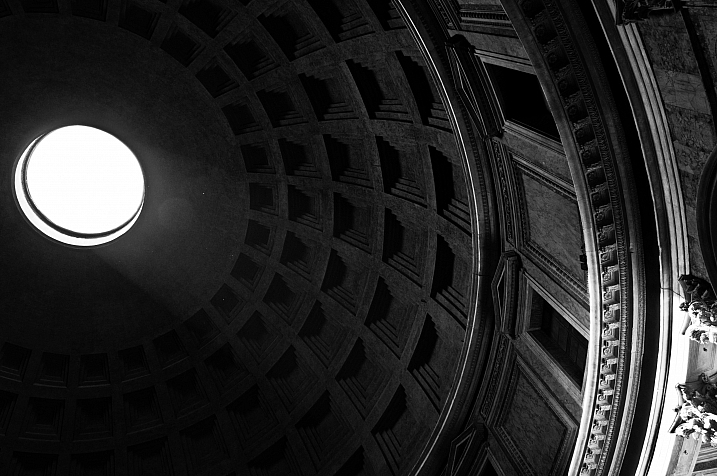
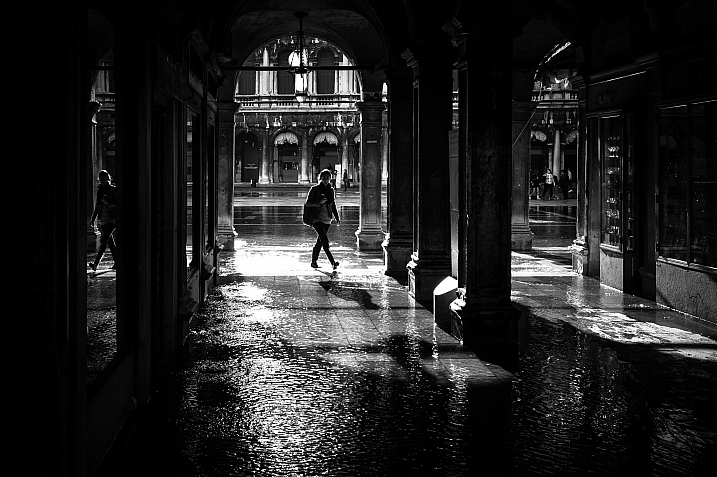
  • 23 Moody Black and White Architectural Images

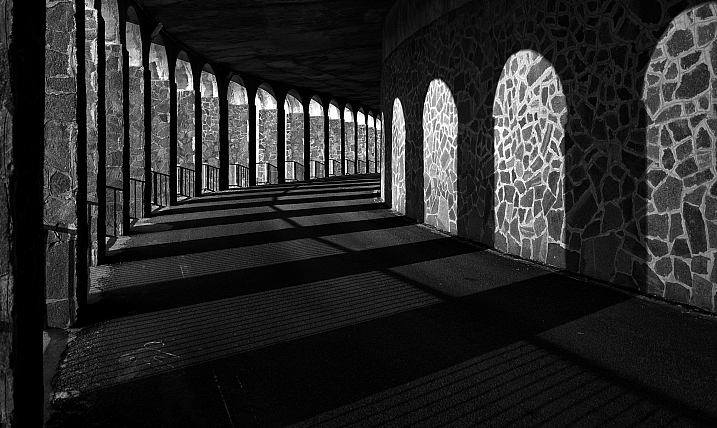
    Architecture provides a few things that photographers love; texture, shape, contours, dramatic lighting.

    Let’s see how these 23 photographers found and photographed different buildings and kinds of architecture in black and white.

    By Marco Crupi

    By Paul Waldo

    By Andrew Howson

    By jesuscm

    By Thomas8047

    By Justin Vidamo

    By Brad Hammonds

    By Brad Hammonds

    By Thomas Hawk

    By ?Jin Mikami?

    By perceptions (creative pause)

    By Peter Tandlund

    By ?Jin Mikami?

    By ?Jin Mikami?

    By Jacques Caffin

    By Paulo Valdivieso

    By Franck Vervial

    By Chris Chabot

    By Wasif Malik

    By Davidlohr Bueso

    By gato-gato-gato

    By Brad Hammonds

    By Premnath Thirumalaisamy

    googletag.cmd.push(function() {
    tablet_slots.push( googletag.defineSlot( “/1005424/_dPSv4_tab-all-article-bottom_(300×250)”, [300, 250], “pb-ad-78623” ).addService( googletag.pubads() ) ); } );

    googletag.cmd.push(function() {
    mobile_slots.push( googletag.defineSlot( “/1005424/_dPSv4_mob-all-article-bottom_(300×250)”, [300, 250], “pb-ad-78158” ).addService( googletag.pubads() ) ); } );

    The post 23 Moody Black and White Architectural Images by Darlene Hildebrandt appeared first on Digital Photography School.


    Digital Photography School