Category: Photography

  • How To Create A Multiple Exposure Effect In Post

    Using this technique you can create a stippled effect common to impressionist painters by blending multiple layers of a single image.

    To do this technique, you will need to use a photo editor that supports layers. I use Photoshop Elements but you can also use Gimp, which is free, and many other photo editors.

    Don’t let the layers thing scare you away, ok? In fact, if you are leery of layers trying this technique should, ironically, make it all become clear.

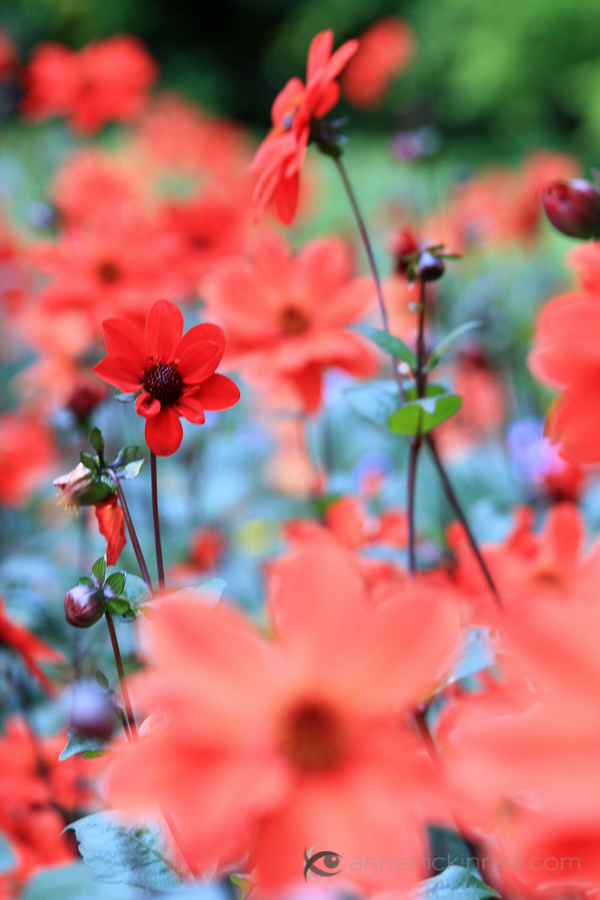
    Pick an image to start. I particularly like this effect on flowers and foliage but it works for other subjects too. Here is the image I will use to start.

    Red Flowers Original

    Follow these steps:
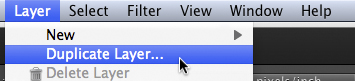
    1. Duplicate the background layer (Layer>Duplicate Layer)
    Duplicate Background Layer


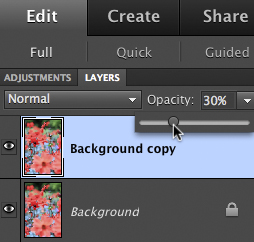
    2. Reduce the opacity of the new layer to 30%
    Reduce Layer Opacity


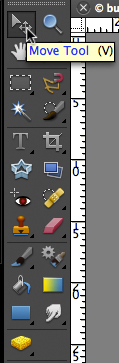
    3. Use the move tool (usually an arrow) and move the layer slightly in any direction
    Move Tool


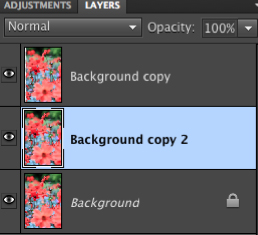
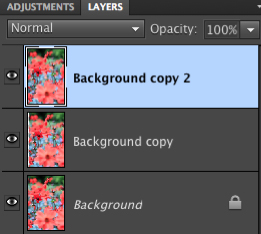
    4. Duplicate the background layer again (it’s on the bottom of the layer list)
    5. Drag the new layer to the top of the layers list
    Layer List 1Layer List 2


    6. Reduce the opacity of the new layer to 30%
    7. Use the move tool to move the layer slightly in a different direction
    8. Repeat steps 4-7 any number of times
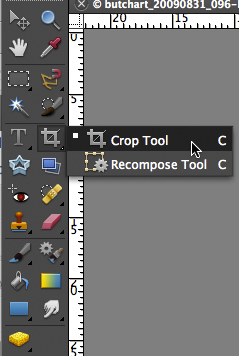
    9. When you are happy with the result, use the crop tool to crop the edges of the image where you can see the borders of the moved layers.
    Crop Tool

    Here’s a little video that shows me performing these steps.

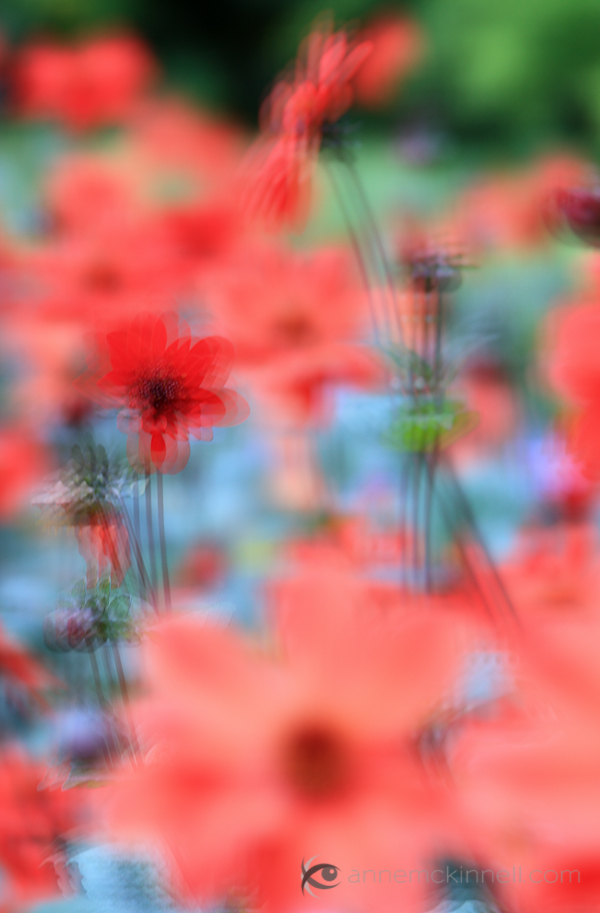
    And the final image:

    Red Flowers with Multiple Exposure Effect

    There are many different ways you can accomplish a particular effect in photoshop (or your photo editor of choice). I try to use the simplest methods I can find to keep it simple.

    Post originally from: Digital Photography Tips.

    Check out our more Photography Tips at Photography Tips for Beginners, Portrait Photography Tips and Wedding Photography Tips.

    How To Create A Multiple Exposure Effect In Post


    Digital Photography School

  • I’m a ‘Typical Photographer’ and This Is How Much I Post Process

    OK, I’m going to come right out and say it … there are a lot of lies in photography! It’s out there now and I suggest we all take some time to let it sink in before we do anything rash.

    Of course we all know this but it’s not a subject that a lot of people openly talk about.  Before I say any more let me be completely straight.  I’m not saying that there are a whole load of photographers out there actively seeking to deceive you, more that most of us (me included) tell ‘little white lies’ about our images. Of all the subjects open for favorable interpretation is the amount photographers post process their pictures.

    No Biggie?

    I’m not saying for one minute that anyone is looking to be intentionally deceptive, most of the time all we are really talking about is the omission of a few minor finishing touches.  So what’s the big deal? Well there isn’t really any big problem as such, however I remember as a beginner how frustrating it was trying to work out how much of a great image was due to gear, processing or falling that the skill of the photographer.   Becoming a great photographer takes time, patience and practice and its understandable why more experienced photographers might want to protect their trade secrets.

    Post Processing in Modern Photography

    A common view is that post processing is a phenomenon that has only come about with the age of digital photography.  To a certain extent this is true however we need to be careful not to lump all forms of image manipulation into the same category.  In the age of film it was still possible to alter not only the basics such as aperture, shutter speed but also things like ISO, white balance and the overall aesthetic of the final image.   It’s true to say that these adjustments were less convenient than they are today (you had to physically swap out your film etc) but we shouldn’t confuse the convenience of modern technology with any form of deception.  It has always been necessary to ‘adjust’ the final image to achieve something more like reality and despite the capability of todays cameras and equipment this remains the case.  The reality is that even the best photographers make at least minor adjustments to their images.

    So How Much?

    So as a beginner what you really want to know is how much processing do most people and how do you know if you are doing too much?  When I started to get serious about photography this was a question that took up far too much of my time. To give you a sense of a typical photographers workflow here is a quick summary of my typical post processing routine and a few examples of how my images typically look before and after.

    My Basic Workflow

    My basic advice is this; only do as much post processing as necessary to achieve the look you want.  If your goal is to achieve an image that is realistic to real life then assuming you have a decent initial image you should be able to do this fairly quickly.  If however you want to achieve a more artistic result then you may need to take a bit longer.

    The majority of my images are either travel or portraiture and therefore my basic post processing workflow is relatively simple.  Pretty much every image I take goes through the following five-step process, although for specific effects I will often do more.  Just so you know, I shoot all of my images in RAW with Lightroom being my editing software of choice.

    • Crop & Straighten – To clean up and correct any issues with composition.
    • White Balance – To correct any colour casts and ensure the image colour is as accurate as possible.
    • Exposure – To improve the overall tonality and dynamic range of the image.
    • Contrast & Clarity – To bring back any missing punch and bring out emphasis and detail.
    • Sharpening – Where necessary the last step is to apply selective sharpening to bring out any key details.

    To give you an idea as to what this really looks like in the real world, here are a few examples of images I have taken and how they looked like before and after processing.

    Example 1 – Travel Landscapes

    Typical post processing for landscapes will include straightening and cropping to improve composition, followed by basic exposure and contrast adjustments. Finally I add some saturation and vibrance for impact.

    Example 2 – Street Portrait

    For travel portraits, its all about the white balance to ensure that the subject skin tones are spot on. After that I add contrast and boost detail with sharpening.

    Example 3 – Studio Work

    For studio portraits, white balance is again key followed by basic exposure and composition adjustments. In this case I may also spend more time working on more artistic effects and specialised image touch ups.

    The Two Minute Rule

    Obviously when you are starting out its important to spend time developing your processing skills, however as you start to get a handle on this its also very important to get efficient.  Not only will doing so stop you from wasting hours in front of your computer screen, but its also the best way limit the potential for over processing.  The ‘Two Minute Rule’ is the probably the best ‘pro tip’ I have ever heard and is something which has fundamentally changed my approach to photography.  The basic idea is to limit the time you spend processing any image to no more than two minutes.  Imagine that, just two minutes to do everything you need to get an image to look exactly as you want it to?  Basically you should be asking yourself if an images needs more than two minutes of work in post, is it worth the effort?  I’m not going to try and convince you that I follow this rule religiously but it is a really powerful way to focus your post processing efforts and I would certainly encourage you to consider building this into your own routine.  Limiting the time you spend in post will stop you from trying to rescue dud images and also give you a rough guide as to when you may have gone too far.

    The ‘So What?’ for Beginners

    If you are a beginner or someone getting started in post processing, what am I really telling you?  Simply it is this, most of this images you see will be post processed.  Whether this is to overcome the limitations of our equipment, correct mistakes or achieve a specific ‘look’ most photographers will process their photos. The important thing is not to worry about what others are doing, rather on if you are doing the right things to create the images you are looking for.  Focus on learning the techniques which will help deliver the photograph you want and use this as a way to hone your individual style and workflow to become an even better photographer.  If you get this right, then it won’t be long before you can start fibbing about your photographs too!

    Post originally from: Digital Photography Tips.

    Check out our more Photography Tips at Photography Tips for Beginners, Portrait Photography Tips and Wedding Photography Tips.

    I’m a ‘Typical Photographer’ and This Is How Much I Post Process


    Digital Photography School

  • Joy to the World, Flickr Offers 3 Months of Pro for FREE!

    Joy to the World, Flickr Offers 3 Months of Pro for FREE!

    I saw an unusual notification on my Flickrstream this morning — you probably did too. It seems that Flickr just offered to extend to every account on Flickr (and new accounts too) three months of free Pro service. Ho Ho Ho! Merry Christmas! Happy Hanukkah!

    Thank you Flickr!

    This is an absolutely brilliant move on Flickr’s part, for many reasons.

    First, the timing of this offer could not be better. After last week’s Instagram fiasco, Flickr signed up a lot of new accounts. Now these new accounts get to have the cleanest advertising free Flickr experience possible during those formative first three months.

    Folks will like the paid service more than the free version and after three months they’ll be more invested in the site than after two days, and potentially will be more likely to keep paying. Flickr is also signing up more new accounts due to their fantastic new mobile app.

    Second, Flickr limits Pro accounts to 200 visible photos. More active users will post more than 200 photos there in the next three months. After their Pro term is up, they will want to see their photos that will then disappear (or the critic might say “held hostage”), the only way to do that will be to reup and pay for more Pro service.

    If people are not paying attention to the 200 photo limit, they will be more likely to reup when they have 300 photos uploaded than if they have 200 uploaded and all of a sudden notice that photo number 201 is not showing up. Most people will just quickly accept the offer rather than carefully consider the differences between free and Pro accounts and Flickr will end up with more Pro accounts three months from now than they would have had without the offer. Some will stick.

    Third, the Holidays are an especially important time to be out there recruiting new accounts. People share a lot of family photos during the Holidays and Flickr is striking while the iron is hot here at just the right time. BTW, those important family Christmas photos will be some of the first to disappear for new Flickr accounts three months from now. ;)

    Fourth, activity begets activity. You will be more likely to use a Pro Flickr account than a free Flickr account. Already Flickr is seeing a big influx of new relationships because of their new find friend features with Twitter and Facebook.

    If you haven’t logged into your Flickr account in a while, log in now and look at your recent activity. What you’ll notice is a lot more people have been adding you as a contact. You’ll also notice that a lot of the familiar names are people that are connected to you on Twitter and Facebook. That’s because your friends are using the new Flickr iOS mobile feature that allows you to add your Facebook and Twitter friends to Flickr. More people will be hoping on Flickr to claim their free Pro upgrade and notice all the new activity and be more likely to engage.

    BTW PRO TIP: If you are an Android user, you don’t need the iOS app to add your Facebook friends. You can do that on the web here.

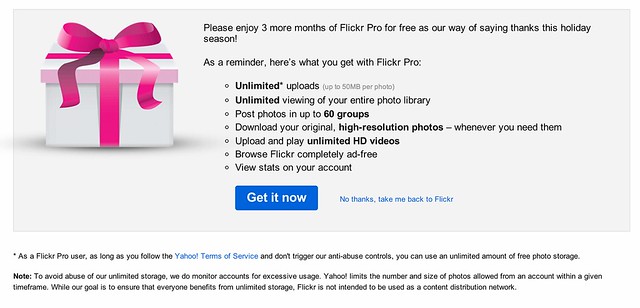
    Now, the free gift doesn’t come without just a tiny bit of controversy though. Although Flickr in NO WAY changed their Terms of Use or their Community Guidelines (this is important and smart after the Instagram debacle), they DID, for the first time that I’m aware of, put users on warning that unlimited at Flickr really does not in fact truly mean unlimited. All of us seasoned and cynical internet geeks knew this anyways, but I’ve never seen Flickr say it before. Tacked on to today’s free gift is the following bit:

    “Note: To avoid abuse of our unlimited storage, we do monitor accounts for excessive usage. Yahoo! limits the number and size of photos allowed from an account within a given timeframe. While our goal is to ensure that everyone benefits from unlimited storage, Flickr is not intended to be used as a content distribution network.”

    Aha! Say what? Wait, a minute, what’s this all about?

    Users have already raised this issue with Flickr in their help forum and so far there is no definitive answer as to what exactly constitutes this sort of abuse. I doubt you’ll see one either.

    Flickr’s deal with us in the past has always been that Pro accounts get an unlimited number of photos to upload. For someone like me who is planning on publishing one million photos to the web during my lifetime, this has always been a huge benefit in using Flickr over other services. To publish the same amount of photos I’ve already published to Flickr at Google’s Picasa, it would cost me hundreds of dollars a year. I am clearly taking advantage of the whole unlimited storage thing at Flickr with over 77,000 high res photos up there currently. At $ 24.95/year for me, this is a HUGE bargain.

    It’s fine that I’m doing this by the way, and all in, even though it probably costs Flickr more to store my photos than I pay in subscription fees, my photos make up for it in other ways (by driving more users to Flickr as a community member, through my participation in the program with Getty, etc.). I’m probably still actually a profitable account to Flickr all things considered.

    Personally speaking, I feel 99.9% confident that even uploading a million photos to Flickr during my lifetime I will not run afoul of this new notice. That’s because I’m doing the sort of thing on the site that is good for Flickr. I’m a good community member. Although I’m very prolific and using Flickr in an extreme way, I’m basically using it for what it is meant for, to share my photos with my friends and the world.

    If I was truly doing something abusive (like uploading a million private high res copies of the exact same black square 24 hours a day and just chewing up bandwidth and storage for no apparent reason) I’d probably be shut down.

    So for the 99.9% of you out there who read that notice and worry a little bit, don’t. You are not who Flickr is concerned with here. Besides, you can always say, why is Thomas Hawk allowed to upload so many photos if I can’t. ;) Unlimited really does mean practically unlimited for almost every conceivable authentic use case for Flickr.

    By the way, even without this sort of “excessive use” disclaimer from Flickr today, Flickr always could have deleted your account for excessive use in the past anyways. Flickr’s Community Guidelines are wide enough to drive a Mack truck through. You can have your account deleted on Flickr simply for being “that guy.” So Flickr always has had the right to delete your account for essentially any reason that they feel like.

    Anyways, thanks to Flickr for three extra months of Pro — a good marketing effort at just the right time. Flickr has really been firing on all cylinders lately and this is great to see. Now just give me that new Android app for New Year’s Day and justified photos in sets and search as a token of love on Valentine’s Day. Oh and better blocking tools and the ability to mute threads would be cool for Lincoln and Washington’s birthday! ;)


    Thomas Hawk Digital Connection
  • 6 Tricks for Shooting Steady Shots Without a Tripod

    Once upon a time, every photographer needed a tripod. Early cameras were too bulky and heavy to hold by hand. Later, it was absolutely essential to have a tripod in order to get a steady shot. Indeed, tripods can help achieve sharp, crisp shots with your DSLR camera. However, tripods aren’t without fault. They can be expensive. Tripods can also Continue Reading

    The post 6 Tricks for Shooting Steady Shots Without a Tripod appeared first on Photodoto.


    Photodoto

  • 6 Tips for Near-Macro Photography with a Telephoto Lens

    Macro photography is the art of capturing the fine detail of very small subjects that may not be able to be seen by the naked eye.  Technically, to fall under the term ‘macro’, the subject should be captured with a reproduction ratio of 1:1, i.e. the subject will be captured on the sensor at 100 % life size.

    Macro lenses are specially designed to minimise the focussing distance, allowing the photographer to get closer to the subject and so increase the reproduction ratio.  There are a number of other techniques that can be used to help achieve the desired magnification without a dedicated lens (extension tubes, close-up filters, reversing rings), however, one of less often considered techniques is to use something that you probably already have in your kit bag: a telephoto lens.

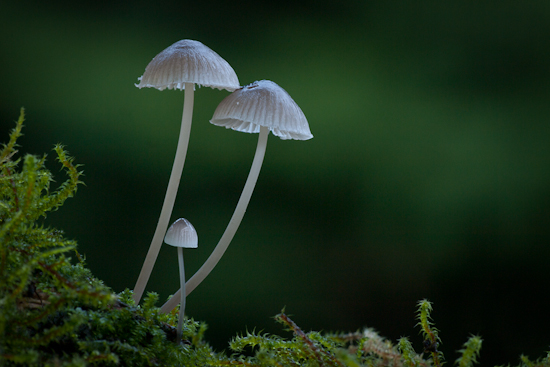
    Milking Bonnet Fungi (Mycena galopus)

    Milking Bonnet Fungi (Mycena galopus)

    Telephoto lenses offer extreme magnification but generally have much larger minimum focussing distances pushing the photographer further from the subject and so reducing the reproduction ratio.  Some telephoto lenses, when combined with camera systems utilising smaller sensors, are able to offer 1:1 magnification (‘true macro’) however, typically, telephoto lenses are limited to close-up photography, at near-macro reproduction ratios.

    Using a telephoto lens for this kind of work offers a couple of advantages over a dedicated macro lens that are a direct result of the large minimum focus distance.  Because the working distance to the subject is in the region of 1 metre (compared to 15 – 30 cm of standard macro lenses) the risk of disturbing your subject as you compose your shot is much reduced.  Also, given the extra distance between the camera and the subject, you are much less likely to cast a shadow over your subject and have a lot of freedom with the lighting you can employ to light the subject – both natural and flash.

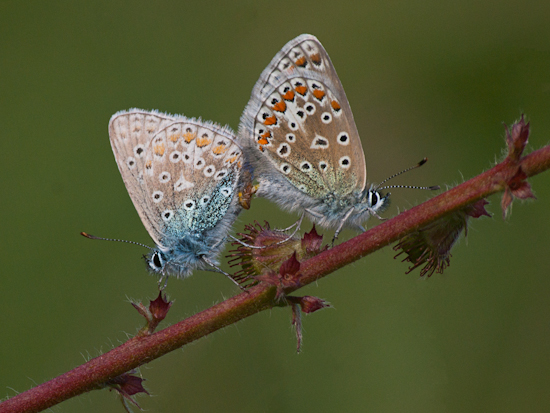
    Common Blue butterflies, mating (Polyommatus icarus)

    Common Blue butterflies, mating (Polyommatus icarus)

    Using a telephoto lens for such precise work is not without challenge, so here are a few tips to help maximise your chances of getting that near-macro shot, with your telephoto lens:

    1. Due to the extreme focal length, the risk of reduced sharpness due to camera shake is higher.  Therefore, it is imperative to use a tripod and remote shutter release to try and limit lens/camera movement.
    2. Even on a tripod, images can still suffer from camera sake.  Try and use a tripod collar for your telephoto lens, so that the lens is clamped directly to the tripod, reducing the chances of ‘lens wobble’.  If not, use the ‘1/focal length’ shutter speed rule to help capture sharp images (I always use 1/effective focal length (i.e. multiply your focal length by sensor crop factor to give the focal length in 35 mm terms) when selecting a shutter speed to reduce movement).
    3. Be aware of the depth of field.  Using extreme focal lengths at such close distances can reduce the depth of field to fractions of a millimetre.  Therefore, to ensure the subject is sharp throughout, use a small enough aperture to ensure the depth of field extends across your whole subject (there are websites and apps to help you do this).
    4. Ensure your subject is parallel to the sensor.  If you want to capture your subject in focus from front to back, ensure that it is parallel to your sensor.  The depth of field will be so narrow at the extreme focal lengths that you may not have more than a few millimetres to play with.  Therefore, position yourself accordingly to maximise your chances of capturing a sharp image.
    5. Switch the lens to manual focus.  If your telephoto lens as an AF/MF switch, switch it to manual focus and compose/focus the shot manually.  You may find that when focussing manually, the minimum focussing distance decreases meaning that you can get closer to your subject, increasing the magnification.
    6. Use a teleconverter to increase the focal length, but retain same minimum focussing distance.  This will allow you to significantly increase the magnification of the subject, without having to move any further away.  Increasing the focal length in this way will have consequences on your choice of shutter speed and aperture, but as long as it is taken into consideration, a teleconverter can successfully be used to increase the reproduction ratio.
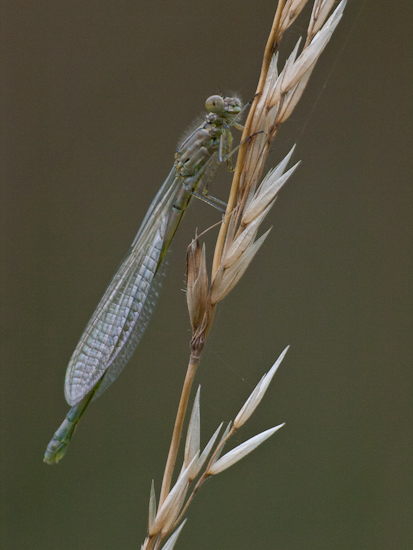
    Common Blue Damselfly (Enallagma cyathigerum)

    Common Blue Damselfly (Enallagma cyathigerum)

    Using a telephoto lens for near-macro photography will typically not allow you to magnify your subject as far as if using a dedicated macro lens, but you will be able to test the water to see if macro photography is something you enjoy, without having to splash out on any additional kit.  If you do decide that macro photography is for you, by putting this technique to practise you will learn a lot of good field craft that will be of benefit when you get around to picking up that new macro lens.

    Post originally from: Digital Photography Tips.

    Check out our more Photography Tips at Photography Tips for Beginners, Portrait Photography Tips and Wedding Photography Tips.

    6 Tips for Near-Macro Photography with a Telephoto Lens


    Digital Photography School

  • Best Shot of 2012: Weekly Photography Challenge

    2012 (light writing)As we approach the end of the year I thought it might be time to do a weekly challenge on the topic of ‘best shot in 2012′.

    So dig through your shots from 2012 and share your best shot with us.

    What ‘best’ means is up to you. It could be a shot that is technically best, makes you feel great or captures a best moment. Whatever you like.

    Once you’ve selected your best shot of 2012 upload it to your favourite photo sharing site and either share a link to it or – embed it in the comments using the our new tool to do so.

    If you tag your photos on Flickr, Instagram, Twitter or other sites with Tagging tag them as #DPSBEST2012 to help others find them. Linking back to this page might also help others know what you’re doing so that they can share in the fun.

    Also – don’t forget to check out some of the great shots posted in last weeks Environmental Portraits challenge where there were some beautiful shots submitted.

    Post originally from: Digital Photography Tips.

    Check out our more Photography Tips at Photography Tips for Beginners, Portrait Photography Tips and Wedding Photography Tips.

    Best Shot of 2012: Weekly Photography Challenge


    Digital Photography School

  • Why the Instagram Debacle Just Taught Every Tech Company to Take Your Photos More Seriously

    Why the Instagram Debacle Just Taught Every Tech Company to Take Your Photos More Seriously

    “Whatever kind of victory all those protests achieved, it wasn’t one for consumer rights — if anything, Instagram is the real winner here. The company just managed to score a round of positive press for retracting an unpopular change and give itself the ability to actually use photos in ads.” — Nilay Patel, The Verge

    Over at the Verge Nilay Patel makes a case that the backlash earlier this week against Instagram’s unpopular TOS update was actually a loss for consumers not a gain. He argues that Instagram’s current TOS is broader than their more explicit proposed one and so consumers are worse off, not better off. Because Instagram technically still holds the rights to sell your photos under their current TOS, and even more broadly, the consumer backlash was misguided and really did more harm than good.

    I disagree with Nilay and feel that actually this week’s backlash was one of the more significant movements yet for photo sharing on the web.

    It’s not that Facebook (whose TOS is equally broad) and Instagram couldn’t legally sell your photos on the web under their broad TOS in the past or in the future, it’s more that *politically* it is now far more difficult for them to begin selling your photos out from under you on the web using their broader TOS.

    Who cares what the TOS says, the message that Facebook got loud and clear this week is not to f*** with your photos. Your photos are important. You care about them. They are much more personal to you than Facebook may have previously considered. They have emotional importance and significance and collectively your users will rise up and bash you in the face if you try to exercise terms of your TOS that your lawyers have allowed you to screw around with photos. Whatever your future monetization strategies might be, they will not be based on a loss of control over OUR creative efforts — even our duckface creative efforts.

    No, there is no question about it. Instagram lost this week and they lost big. This is in no way a positive for Instagram. People trust them less and they had to turn around and eat crow, they gained nothing.

    Flickr won big at Instagram’s expense and Google+ won a little. Flickr won more because like Instagram their site is 100% about photography. They also just released a pretty awesome new iPhone app that is in fact even slickr than what Instagram currently offers.

    Flickr also went out of their way last year to really drive home the ownership rights of your photos. This old forgotten post was revived with new life as a stark contrast to what it felt like Instagram was trying to pull. Kevin Systrom eventually even had to parrot back some of that “yes, we know your photos are your photos” stuff in his awkward non-apology apology.

    Dan Lyons wrote a post that talked about Google+ winning some here too. Google+ smartly has a provision in their TOS that specifically limits their rights to your photos to basic operational use. Google+ is probably the most active community of photographers on the web today and are a natural beneficiary from what Lyons’ refers to as “Facebook Greedheads.”

    The biggest winner or all though was you, the photographer. Whatever Instagram’s original intention was in being more specific in their TOS, it backfired on them. The idea that they could/would profit off your emotionally significant photos without your consent, authorization or most important, sharing the dough, hit a nerve with photographers and likely won’t be tried again by anyone in a long, long time.

    The thing is, this didn’t have to be such a painful learning experience for Instagram. There was/is in fact a HUGE opportunity for some smart social media property make a ton of money off of your photos, Instagram just went about it wrong.

    As much as Flickr’s deal with Getty sucks (photographers get a miserly 20% payout) photographers on Flickr still went bonkers for it when Flickr released it. The idea that you could actually get PAID to post your photos on a social network, paid ANYTHING, had most users on Flickr clamoring to get into the program, not out of the site.

    Even though Flickr/Getty’s call for artists group is now closed (due to overwhelming demand) almost 90,000 photographers joined this group hoping to get selected by Getty for the right to sell their photos for the paltry 20% payout.

    The difference with Flickr’s deal though was that 1. you CHOOSE to opt in and 2. at least you got paid something.

    What if instead of Instagram saying, “hey, we might sell your photos without your consent and pay you NOTHING,” they said, “hey, do you want to sell your Instagram photos and if we sell them for you split the money 50/50″? Instead of losing accounts and becoming the scourge of the internet for three days, they would have had photographers rushing to sign up and begin marketing their images on their site.

    Although there are sites out there like 500px and SmugMug that let you sell your photos now, Flickr is the only larger social network that has a selling program. Google+, Instagram, Facebook, even Twitter, all have a major opportunity to become the first large social network to allow us to license our images through their service and share in the revenue with them. This is a multi-BILLION dollar industry dominated at present by Getty who is not paying creatives enough for their work. What the internet does best is get rid of middlemen when they are being unreasonable, and an 80/20 split with photographers is unreasonable.

    Instead of stealing our work and paying us zero, how about using your significant reach in reputation, marketing and search to partner with us and empower us to sell our work together. I guarantee you that whoever comes up with the best program first has some of the best photography on the web flooding your network. Even if 99% of us never sell a single photo, simply giving us the feeling that we have the opportunity to sell a photo would be a powerful incentive to get us active and humming on your network.


    Thomas Hawk Digital Connection

  • Get 25% Off Trey Radcliff’s New Video Course: The Art of Photography

    NewImageTodays deal in our 12 Days of Christmas is fantastic – access to one of the world’s most followed photographers on social media, sought after speaker and one of the nicest guys you’ll meet – Trey Radcliff.

    In todays deal you get Trey’s new course – The Art of Photography – for 25% off the normal price when you use the coupon code of ArtOfPhotography25.

    But remember – the deal only lasts 24 hours.

    Here’s what it’s all about – in Treys own words

    I’ve spoken with thousands of people who — despite the beginner or even intermediate courses they’ve taken — are still confused about the basic elements of photography. So I developed my own style of teaching based on an artist’s natural instincts of curiosity and discovery which quickly produces dramatic results.

    In the first tutorial is a great way to get started with photography, regardless of the type of camera you own. You’ll learn the fundamentals of your camera, how to take your first photos and how to edit them with Adobe Lightroom.

    The complete series goes deeper on how to properly compose a photo, finding your artistic style, and improving the quality and beauty of your photos.

    The course is in 4 great video modules:

    1. Episode 1: Getting Started
    2. Episode 2: Photo Composition
    3. Episode 3: Finding Your Own Style
    4. Episode 4: Photo Editing

    Learn more about the course here or order direct using this link (and don’t forget to use the coupon code of ArtOfPhotography25 to get your 25% discount.
    // < ![CDATA[ function EJEJC_lc(th) { return false; }

    // ]]>

    Post originally from: Digital Photography Tips.

    Check out our more Photography Tips at Photography Tips for Beginners, Portrait Photography Tips and Wedding Photography Tips.

    Get 25% Off Trey Radcliff’s New Video Course: The Art of Photography


    Digital Photography School

  • Best Practices for Communities on Google+

    Community Coffee

    I love communities. There are great big giant communities that are social networks themselves, but then there are smaller and more intimate communities where over time you really do get to know people better. These have always been the communities that I end up liking best. Places where you can go and eventually some really cool people end up setting up part of their daily internet experience there. I used to use Flickr groups for these sorts of communities, now I use Google+ (for a lot of specific reasons).

    Google+ communities are new though and so I thought I’d take a few minutes to point out some best practices for how to engage, grow and participate in communities.

    1. If you are starting a new community yourself, there are several important things to think about. How you manage and grow your community will have a lot to do with the success. For starters, you must be committed to moderating the community. This means showing up, doing a lot of the grunt work (removing spam, managing members, etc.).

    I think it’s important to be as friendly as you can and to welcome new members personally even when you have time.

    It’s also important that you grow the community. If it is a public community, try and get the word out. Promote your community on Twitter, Facebook, Flickr and your other social networks. Be sure to use the invite feature on Google+ to invite your friends — you may have to break down some of your larger circles into less than about 190 blocks of individuals if you want to invite a circle. Did you know that you can “share” your community to your current G+ stream? Consider putting a link to your G+ community on your G+ profile page. Don’t over invite someone to your community though. If you invite them once and they decline that’s probably enough. If you keep inviting them you will feel spammy.

    Think about why you are starting a community. Should you even start one? What is unique about yours? Does it make sense to start a new general community for photograpy, or is there some unique area of photography you want to explore (portraits, urbex, long exposure, a specific geographic area, etc.)

    2. Communities are best started with a closer group of friends. Find some of your friends who share your passion for whatever your community is about and make them mods. Make sure that they are on board with helping to manage, grow and promote the community as well.

    3. Be nice. The worst communities are full of negative people. Try to avoid these types as much as possible — not just on Google+ but in life in general. :)

    As a leader of a community especially it’s your job to try and set the tone. I’m all for free speech, but I’d recommend against allowing bullying and harassment in your community. If you see it call it out gently. If someone is a real problem or trolling consider banning them.

    4. As a participant in a community be thoughtful when you join a community. Are there rules? Try to figure out what these rules are. Try to engage with others on their posts first before starting lots of your own. Nobody likes spam. Don’t just show up to a community to post your photos and leave, or to promote some other community and leave, or worst of all dump commercial spam or links to stupid websites. Make sure you are posting the right thing in the right area. Some communities don’t want you to post dumb mind numbing photos in the discussion threads. Maybe there is a specific place for you to dump your photos. Find out where that is first.

    5. The best communities are about discussions. Participate in these discussions. Find good ones that you like and get to know people through participation. +mention people specifically by name in community discussions. Unfortunately Google+ communities don’t bump threads yet :( and so this may be the only way that someone knows you are engaging them in a conversation in a community of fast moving threads.

    6. Consider adding the most active members of your community to a specific circle. This helps you look at their stuff outside of the community as well. Circle sharing is also a great way to help promote your community. For the main community that I’m involved in, Light Box, I’ve created a circle for everyone who gets a photo voted into our Light Box. I shared it when it hit 100 members, 200 members and will share it next when it hits 500 members, 1,000 members, etc.

    7. Pro Tip (thanks Ricardo Lagos): When you start a community make a separate private community just for your mods. Here you can hash out issues that come up with the community. You can discuss problems together privately and discuss policy issues. While you certainly will want to get the larger community opinion on the guidelines or direction of your community, having a smaller place for those most invested to figure things out is good too.

    8. Add different sections to your community. Create an FAQ.

    9. Try out different communities, but don’t try out too many. I think it’s a good practice to check out a bunch of communities to see where you like hanging out. Different communities will have different flavors. If you spread yourself too thin though it will be harder to get to know people there. Take some time finding a few communities that you really like and then once you settle in invest more time with those communities. Remember the key to enjoying a great community is individual participation.

    10. Remember not to neglect your other participation on G+. It’s easy to get sucked into a community and end up spending all of your time there. As much as communities can become really nice little watering holes where you become better friends with some members over time, remember that the world is big and that one of the things that still is nice about G+ is that there is a whole big network out there without community walls. Some people will not want to join communities. Some people don’t have TIME to join communities. Make sure to take some time keep up with these folks as well. :)


    Thomas Hawk Digital Connection
  • Color in Photography: What Happened to Oz?

    Lately, I have been filtering my way through many photo sites looking at all the amazing and different work that is out there in the photographic ether. There are so many wonderfully, creative photographers out there that it is a privilege to catch a glimpse of their work and be able to experience the moment they captured as they see it. What a fantastic impact the digital revolution has had on photography and its exposure.
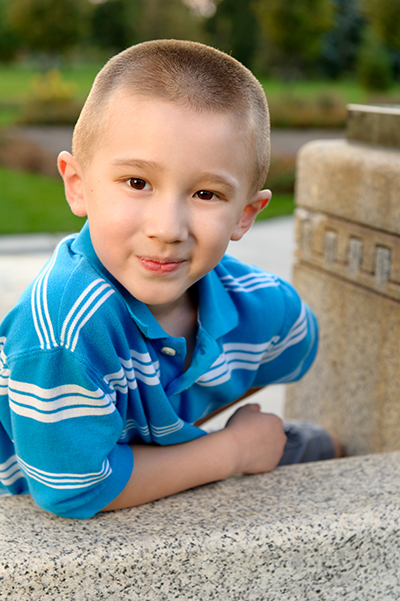
    Now, all this perusing through these numerous and vast websites of photographic wonderment always make me evaluate my own work and consider current trends in photography. I highly suggest you get out there and take a peek every once in a while to experience this for yourself, as it is likely to give you some inspiration for pushing the boundaries of your own work. Recently, I found that after this particular exercise, I was left with an interesting question which unfortunately is antithetic to my own personal photographic style. Then I thought this would be an interesting discussion to pose to other photographers, artists and creatives to see what sort of discussion was stimulated.

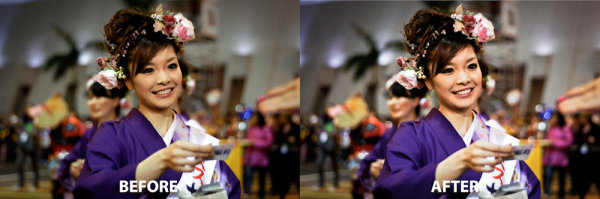
    What I noticed, was that there seems over recent years to be quite a trend of desaturated, washed out or toned down images in portraits as well as landscapes. Muted skin tones, bleary backgrounds, and moody, melodramatic musings seem to be predominant and I found myself wondering what this exactly means. Especially since my own personal style is to embrace colors and the power and meaning they portray and how they can change the entire feel or emotion of an image.
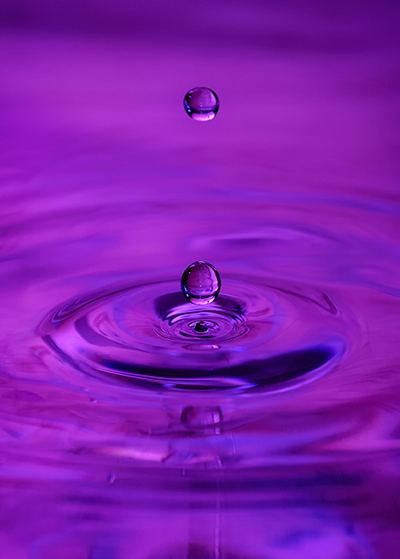
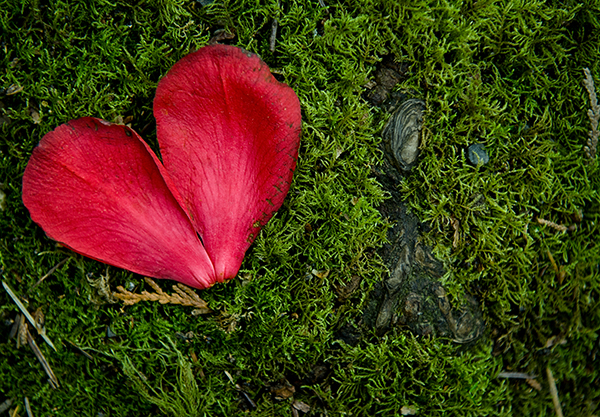
    My first thought was that maybe current worldwide economic complications and overall pessimistic outlooks have caused this overwhelming trend. Then I also considered the possibly that mainstream entertainment trends of zombies, vampires and gothic imagery could also be somewhat responsible. Whatever it is, I found myself concerned that my style is diametrically opposite to this trend. I was the metaphorical Bizarro Superman in Regular Superman’s world. This led me to consider re-evaluating my photography a bit and created a definite schism within the internal workings of my right brain.

    First, why would one want to forego the magical nuances and emotive power of colors? Color is everywhere. It is all around us at all times. Color makes a bowl of fresh strawberries look enticing. It makes sunsets and sunrises spectacular and breathtaking. If you were waiting for the Wizard of Oz analogy that was foreshadowed in the title, here it comes, so brace yourself. In Kansas, at least we have the dramatic impact, mood and contrast of black and white imagery. Oz provides spectacular colors and vibrance in an emotive explosion. But what is in between? Are we currently in some sort of photographic purgatory that is lost between Kansas and Oz?

    The following is a list of colors and what they can portray in an image:

    1) Red – fire, blood, energy, war, strength, power, determination, passion

    2) Pink – romance, love, friendship, feminine, passivity

    3) Orange – joy, sunshine, enthusiasm, fascination, happiness, warmth, attraction, success

    4) Yellow – joy, happiness, intellect, energy, cheerful, warmth

    5) Green – nature, growth, harmony, freshness, fertility, safety

    6) Blue – depth, stability, serenity, trust, loyalty, wisdom, confidence, intelligence, faith, truth

    7) Purple – royalty, power, nobility, luxury, ambition

    Pretty fascinating to see meaning through color. I would encourage you to try and use color in this manner to give your photos specific visual impact. We all stop at red lights in traffic and go when the light is green. That is an immediate ingrained response to color. How many other colors that we see every day invoke specific emotional responses? The use of color in photography is a worthy area of study for anyone from the weekend amateur to the serious professional. Every photographer should invest some time and thought into this captivating clockwork of colors.

    Now, I did not mean to imply that any of the current photographic trends are right, wrong, or somewhere in between. The reality is all imagery has its place and we as photographers need to find the style that suits our photographic philosophy. I love looking at all sorts of photographic styles and find that there is something to be learned from each and every creative mind. Where do you stand on this black and white, muted tones, vibrant color issues? I think it is obvious where I stand, but what is your style and why? Do you feel pressure to stay within the constraints of current photo trends or do you pioneer your own style? Color me crazy, but I think these are important questions to help all of us reflect upon and evaluate our own work.

    Post originally from: Digital Photography Tips.

    Check out our more Photography Tips at Photography Tips for Beginners, Portrait Photography Tips and Wedding Photography Tips.

    Color in Photography: What Happened to Oz?


    Digital Photography School