Category: Photography

  • Your First DSLR – now what?!

    Yikes! You’ve got your first DSLR! Now what?
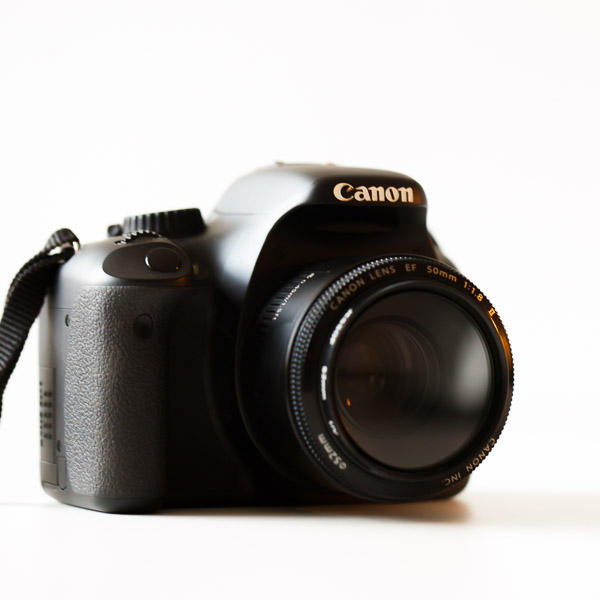
    My first dslr 03

    One of my friends recently received a DSLR from her husband for her birthday. She was over the moon! One afternoon over coffee, she asked if I had any advice to help her get started with her new camera. I’ll share some of the top tips that I shared with her, with you too:

    Nine tips to help you with your first DSLR

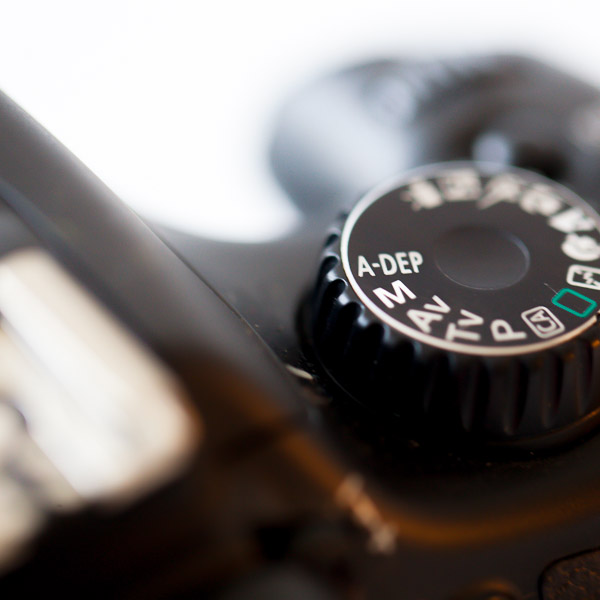
    #1 – Get off Auto as a soon as possible and start shooting on Manual mode

    Cameras these days are very clever when put on Auto. You will certainly get some lovely photos shooting on auto, but it will limit you from taking your images to the next level. Go from creating something that’s good to creating something that’s amazing! Learn how your camera works and its capabilities. Getting off Auto and shooting in Manual mode will open up a world of possibilities such as shooting in low lighting conditions or bright sunshine, shooting fast moving objects, creating a soft blurry background, the list is endless.

    #2 – Understand the terms ISO, shutter speed and aperture and how to use them

    Use these as your starting point for learning how to control your camera. There are some great articles on dPS to help get you started, as well as a good eBook to start you off right:

    • Learning the exposure triangle
    • ISO
    • Shutter speed
    • Aperture
    • Photo Nuts and Bolts – a dPS ebook by Neil Creek
    My first dslr 04

    #3 – Google is your best friend

    There are lots of free tutorials, blogs and YouTube videos to help develop your skills and knowledge. Use what’s already out there and easily accessible before buying expensive books and enrolling in expensive courses. dPS was, and still is my ‘go to’ website for inspiration and learning new techniques when I was starting out. If you haven’t found it yet, they have a great ‘tips for beginners’ page too.

    #4 – your camera manual is your second best friend

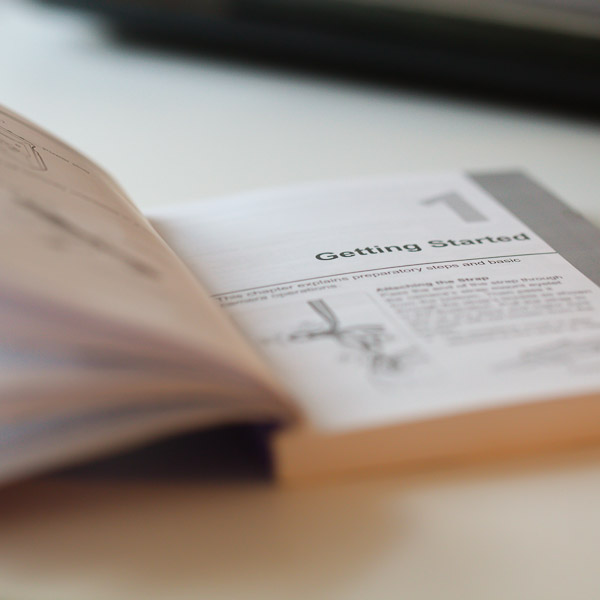
    Do you actually read instruction manuals when you get something new or do you just put them back in the box never to see the light of day again? I must confess that I’m probably one of the world’s worst culprits for this! Some of the best advice I received when I was starting out on my photography journey, was to read my camera instruction manual cover to cover, and when I’d finished, to go back and read it all again! I remember going through my manual for the first time; it was like a series of mini light bulbs going off, followed by lots of ‘oohs’ and ‘ahhs’! If you haven’t already picked up that little white book that came in the box, put it at the top of your to ‘do list’ – you’ll be glad you did! (Note: if you bought you camera used and it didn’t come with a manual, see #3 above! You can usually find a PDF version online somewhere, just search by brand and model number of your camera.)
    My first dslr 01

    #5 – Take your camera EVERYWHERE

    By this I mean, don’t just have it tucked away somewhere; take it out of its bag and hang it round your neck. You’re more likely to use the camera if it’s within reach, than if you have to negotiate getting it out of its bag, taking off the lens cap, turning it on etc. By the time you’ve done all that, the moment’s gone! Get yourself a UV filter to protect the front of your lens, and leave the lens cap off so you’re ready to go whenever an opportunity presents itself.

    #6 – Friends make great models but then again so do apples and pears

    Friends make great models to practice on, and will usually be flattered when you ask them if you can take a few photos of them. All my early portrait images are of friends; even the most reluctant ones were bribed with chocolate or a bottle of wine to model for me! While having a ‘person’ to photograph is great, don’t let it stop you from practicing portrait photography skills if you don’t have any willing subjects. Fruit also makes for an amazing model; yep you read right–fruit!

    Place an apple on a table top or chair in front of a window, and shoot it from every angle. Look at the way light falls on it and what happens when you move it closer or further away from the light. Draw a face on it using a marker pen, and turn it from left to right to see how the light behaves. Once you have exhausted all the options, look at your images and compare them to see what worked well, and what didn’t work so well.

    My first dslr 02

    #7- Practice, practice, practice

    As the saying goes ‘practice makes perfect’! We’re lucky to be living in a digital world. We’re not limited by number of photographs we can take. We can easily upload thousands of images to our computer, or delete them all in one go with the press of a single button. Don’t be afraid to take hundreds of photos. The key is to spend time looking at your images and thinking about what you could have done differently to make them better.

    #8 – Mistakes are good – don’t be scared to make them

    Yes it can be frustrating when something doesn’t quite go as planned but mistakes help you learn. The more you learn, the fewer mistakes you’ll make, and the better your photography skills will become. Don’t give up because your images aren’t as good as you want them to be. Read, learn more, then go out and shoot again.
    My first dslr 06

    I remember the first wedding I shot. I was second shooting for a friend; she always liked to work with a back up photographer for weddings. Her usual second shooter was on holiday and as a result she asked if I’d like to do it. I jumped at the chance! I did my homework prior to the big day and carried out a Reiki of the church and planned what lens and camera settings I’d be using. After the ceremony, I followed the bride and groom from the inside of the church to the bright sunshine outside. I kept on clicking away getting swept up in all the excitement. It wasn’t until about the 10th frame that I looked at the back of my camera and saw that all of my images were over exposed! I hadn’t adjusted my ISO when I went outside. It was too high and there was nothing I could do with those images, they were beyond repair. Luckily I was only second shooting and the main photographer had lots of her own perfectly exposed photos. It was still a steep learning curve for me though and I can assure you that I’ve never made that mistake again.

    #9 – Master using the gear you have now before you upgrade

    Becoming a master of the camera gear you currently own will give you an advantage for the really cool stuff you’ll purchase later. You need to know how both your camera and lens behave, and how to control them; how light affects an image; and how you can work with your environment to create the perfect shot. Once you can do this, you’ll find that when you upgrade your camera or purchase a new lens, you’ll be able to get the best out of it and use it to its full potential.

    Feeling inspired? Pick up your camera, get outside and start shooting!

    Profile:

    Daniela Beddall from Ferri Photography is a Northamptonshire photographer who specialises in working with natural light. She shoots weddings and portraits and loves all things vintage! You can follow her on Facebook, Twitter on Pinterest or drop her line – she’d love to hear from you!

    The post Your First DSLR – now what?! by Daniela Beddall appeared first on Digital Photography School.


    Digital Photography School

  • How To…

    The below are a collection of explainer posts on a variety of subjects—some specific, some general. But all, hopefully, helpful.

    Read more »
    Strobist

  • Annual Best-of-Strobist Collections

    Starting in 2008 we began the tradition of taking a pause as each New Year approached. The result was the time a space to reflect back on the best work of the year—my choices and yours:

    Read more »
    Strobist

  • A Note to Mobile Phone Browsers/Readers

    Please note that for the time being I had to turn off Strobist’s default mobile template for phone browsers.

    The mobile template was not compatible with the new archive-facing site transition. I do understand this gives a non-optimal view for some, and for that I apologize.

    So, if you have bookmarked the mobile version of the site and are viewing it thusly, you’ll probably henceforth see a confusing hodgepodge of list posts. You should navigate to the non-mobile version, and bookmark that site.

    Thanks very much,
    David


    Strobist

  • The 3Pod P5CRH Tripod – A Review

    The 3Pod P5CRH tripod is a reliable option for photographers looking for an affordable carbon-fiber tripod system.

    The 3Pod P5CRH tripod is a reliable option for photographers looking for an affordable carbon-fiber tripod system.

    Sitting down to write a review of a tripod is actually more difficult that it sounds. When a new camera model hits the market, it often boasts significant changes over the model it’s replacing. Faster read and write speeds, or higher capacities set new memory cards apart from the old. These differences give us something to write about, and gear-heads something to argue about in photography forums. But when you’re staring at a row of new tripods standing on the other side of your desk, you realize that you have to take a closer look. After all, it’s a pretty basic concept, right? Three sturdy legs and a place to put your camera. Can it do that? Great. End of story.

    Except we all know that’s not really the end of the story. If it was, companies like Manfrotto, Induro, Benro, 3 Legged Thing, and others would not be continuing to innovate the humble tripod year after year, elevating it beyond the simplicity of its three sturdy legs, and a place to put your camera.

    3Pod by Flashpoint, a recent newcomer to the Tripod Wars, has a new line of six different tripods, designed around the needs of professional and hobbyist photographers and videographers. For this review, we are taking a look at the P5CRH Carbon Fiber Outdoor/Travel tripod with the K3 BallHead.

    The Legs

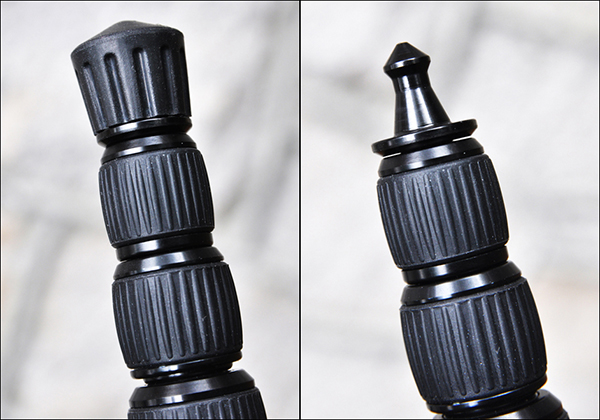
    Four-section legs that adjust to three different angle positions, and a retractable ballast hook for added weight are two of the useful features.

    On the left, legs that adjust to three different angle positions. On the right, a retractable ballast hook for adding weight and extra stability.

    The best thing I can say about any product I review is that it does what it says it is supposed to do, and it does it well. That statement definitely applies to the P5CRH. It is a full-featured camera support, balancing streamlined design with carbon fiber construction to provide a great combination of strength and portability.

    Carbon fiber tripods have become the gold standard for many photographers over the past several years. They are strong, generally well-made, and are so lightweight that traveling with them, or taking them on location, are no longer the hassles they once were. The only drawback to virtually every high-quality carbon-fiber tripod system on the market today is the cost. An outdoor/travel tripod from any of the other companies listed above will set you back anywhere from $ 250-$ 400 (USD). The P5CRH from 3Pod, however, comes in at only $ 125, including the K3 BallHead.

    Unlike some tripods that make you swap out the rubber feet for the spikes, the 3Pod leaves the spikes on, covered with rubber grip caps.

    Unlike some tripods that make you swap out the rubber feet for the spikes, the 3Pod leaves the spikes on, covered with rubber grip caps.

    I can practically hear the outcry. “$ 125?!? Are you insane? Don’t you know that you get what you pay for?”

    Slow down– I was skeptical, too. Thankfully, though, there are exceptions to every rule. Let’s take a look at some of the specs and what comes in the box.

    • CNC forged carbon fiber construction
    • 3 independently adjustable,lockable leg angles
    • Height: 56″ fully extended, approximately 12″ folded
    • Load bearing: holds 22 pounds, weighs 2.6 pounds
    • Extendable, detachable dual-section center column
    • Outdoor-ready spiked feet with removable rubber grip covers
    • Metal-jacketed, wear-resistant twist locks
    • Retractable hook under the center column, for adding weight
    • K3 hydraulic ball head with built-in bubble level
    • Allen wrench set for tightening connections
    • Padded carrying case
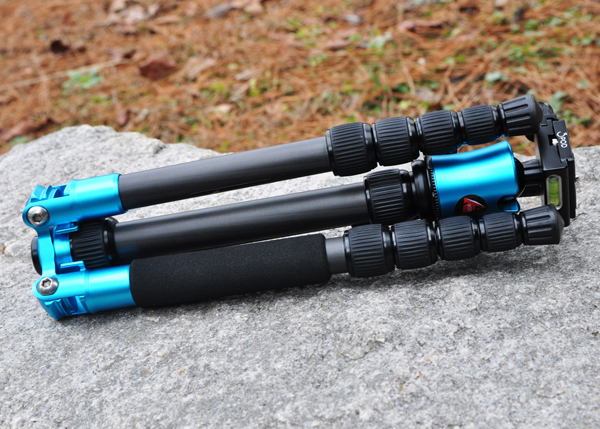
    The P5CRH folds up to approximately 12 inches.

    The P5CRH folds up to approximately 12 inches – ideal for travel!

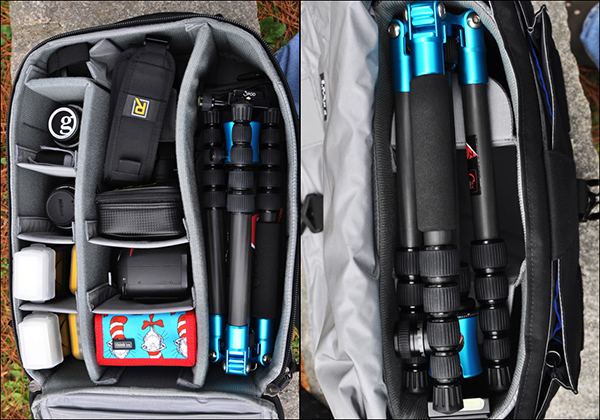
    This tripod is able to fold up so small because the legs fold back 180 degrees, coming up around the center column. In addition to the packing and travel convenience of this feature, it also provides easy configuration for a variety of camera angles and positions. Trying it with several different Think Tank camera bags, I was able to pack it comfortably inside, or tether it securely to the outside of the bag.

    The BallHead

    The K3 ball head provides secure, sturdy support.

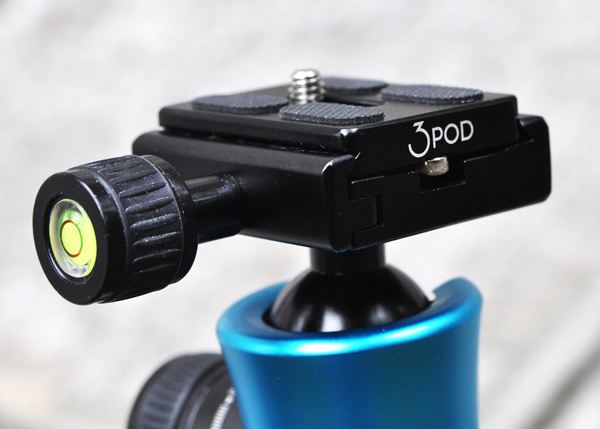
    The K3 BallHead provides a secure, sturdy platform for mounting your camera

    The K3 BallHead is an Arca-Swiss compatible tripod head with a sliding quick-release plate and universal 1/4″ mounting screw, and appears to be well designed for optimal weight distribution. It’s made of scratch-resistant carbon, with a hard, protective finish for a (hopefully) wear-free appearance. Hydraulic damping for smooth, 360-degree rotation, and two bubble levels are features which are particularly helpful when shooting landscapes and panoramas.

    Wrap-up and Recommendations

    I haven’t been using this tripod for very long, but it appears to be sturdy, secure, and light-weight, with built-to-last, high-quality construction. I’m not sure how much more you can ask of a tripod, regardless of budget or price. I’m not trying to tell you that the 3Pod is a feature-for-feature match of the comparably sized tripods you’ve been lusting after from the big-name companies. What I can tell you with absolutely certainty, however, is that if you’ve been looking for a reliable, affordable, and compact carbon fiber tripod, the 3Pod P5CRH might just be that tripod.

    3Pod-tripod-review-dps-004

    The P5CRH fits comfortably inside the Think Tank Airport Commuter backpack, and the Think Tank City Walker 30 shoulder bag.


    The post The 3Pod P5CRH Tripod – A Review by Jeff Guyer appeared first on Digital Photography School.


    Digital Photography School

  • 7 Ways of Marketing Your Photography to Get People to Notice You

    Irony is hard at work in photography: Taking pictures appears to be the easiest aspect of working in the industry, yet the business side of photography is what confounds many a photographer. What’s going on here? Surely, not every photographer has mastered taking good shots, so how can he find that easy while finding it hard to take a business Continue Reading

    The post 7 Ways of Marketing Your Photography to Get People to Notice You appeared first on Photodoto.


    Photodoto

  • Happy New Year 2014 from dPS

    Another year has draw to a close and the clock has ticked over to 2014 on the Australian side of the world. We’d like to wish you a very Happy New Year from all of us at dPS!

    By David Yu

    If 2013 was kind to you, may you have more of the same.  If it wasn’t your best year ever, don’t look back, just close the door and leap into 2014 ready to tackle it head on. We’ll have more great photography articles, tutorials and reviews for you coming up and we will resume our regular schedule of two articles a day on the 3rd (in two days).

    So have a great New Year wherever you are, whatever you decide to do. Me, I’ll be at a fondue with friends tonight (31st in Canada) and tomorrow will help serve 1000 homeless and low income families a hot lunch. I do it every year because it’s puts it all in perspective for me, makes me grateful, and allows me to give back.

    In the comments below, share with us at dPS:

    • how will you ring in the New Year (or did you if you’re in Australia or that side of the world)?
    • what will you do to kick off 2014?
    • what part of the world do you live in, and what’s the celebration like there?  Are there fireworks? Parties? Or does it just slip by quietly?

    Whatever you do, make it a happy one and we’ll see you in 2014!

    HAPPY NEW YEAR

    By Sergiu Bacioiu

    The post Happy New Year 2014 from dPS by Darlene Hildebrandt appeared first on Digital Photography School.


    Digital Photography School

  • 15 Inspiring Image Collections from 2013

    Over this year we’ve seen some amazing images that have inspired us – today we take a look back at:

    The most popular image collections in 2013.

    1. How to Take Beautiful Bokeh Christmas Images [With 31 Stunning Examples]

      By Kathy

    2. 13 Fabulous Photos of a Rainy Day
    3. 41 Delicious Flower Photographs

      By rosemary*

    4. 17 Amazing Wide Angle Images

      By justin tippins

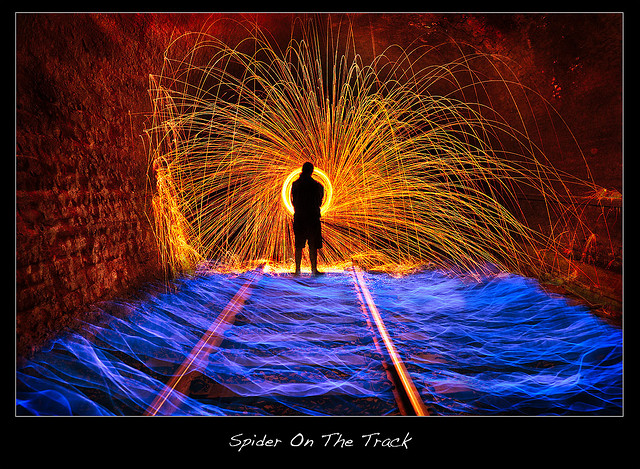
    5. 25 Spectacular Light Painting Images

      By Brent Pearson

    6. 27 Beautiful Black and White Portraits

      By wolfgangfoto

    7. 23 Beautiful Dawn Images

      By James Jordan

    8. 12 Stunning Silhouette Shots

      By Thomas Hawk

    9. 61 Amazing Kite Aerial Photography Images

      By Pierre Lesage

    10. 17 Images of Poverty

      By HORIZON

    11. 18 Stunning Self Portraits
    12. 25 Shadow Images to Inspire You

      By zev

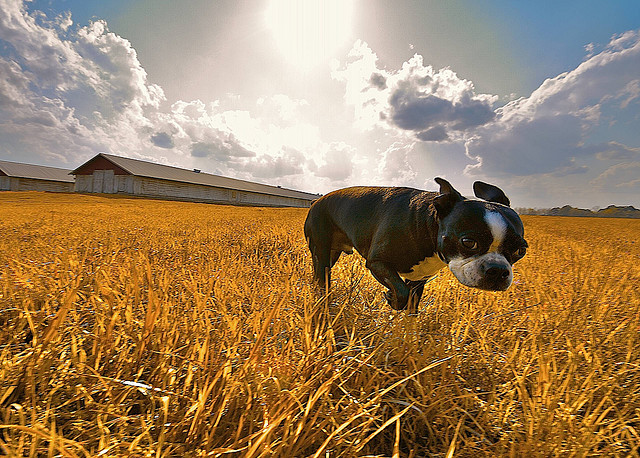
    13. 17 beautiful images with shallow depth of field

      By Dustin Diaz

    14. 25 special snow fall images
    15. 21 Impressive Tree Images

      By Trey Ratcliff

    The post 15 Inspiring Image Collections from 2013 by Darlene Hildebrandt appeared first on Digital Photography School.

    Digital Photography School

  • Magical Photo Project by Gianluca Giannone: The Ships That Sail Through The Clouds

    Have you ever seen a boat floating in the air like birds in a movie, drawing or dream? There is a place on Earth where you can witness these floating ships with your own eyes. It’s the small studio of Luigi Prina. There are tons of ships right next to each other sailing in the air. Luigi Prina had been Continue Reading

    The post Magical Photo Project by Gianluca Giannone: The Ships That Sail Through The Clouds appeared first on Photodoto.


    Photodoto

  • Don’t Miss Out: Soon These 12 Photography Training Deals Will Be Gone Forever

    With the countdown to the end of 2013 we’re also closing in on the time that our 12 Photography Deals of 2013 will be ending.

    NewImage

    In just a few hours (as the calendar ticks over into 2014 US Eastern Time) these fantastic deals will close forever. Among them are some great savings to be had – up to 77% off resources that will help you make 2014 the year of great photos!

    The Most Popular Deals of 2013

    A number of people have messaged me for my personal recommendations on which deals I think are best. Of course it will depend upon your needs but here are the deals in order of ‘best sellers’ so you can see what others bought this year:

    1. Day 12: $ 10 Day – where we offered 10 dPS (including our portrait lighting, travel photography and kids photography eBooks) for $ 10 each as well as a couple of great $ 10 bundles of eBooks from Ed Verosky and Andrew Gibson.
    2. Day 7: 77% off Living Landscapes – this $ 7 Landscape Photography eBook deal almost took our servers down it was so popular! There’s also an option to bundle it with 4 Jay Patel eBooks.
    3. Day 9: 77% off Photo Nuts and Post – another $ 7 deal, this one on Post Production Techniques is perfect for those of you looking to learn some great Post Processing Techniques (there’s also an option to get all 5 Neil Creek eBooks for $ 90 off!)
    4. Day 11: $ 40 off Kelby Training – this deal gets you hundreds of hours of photography training from some of the world’s best photographers for just cents a day.
    5. Day 5: 65% off Portraits, Making the Shot – our 2nd most popular eBook ever and yours for just $ 7.
    6. Day 6: 75% off The Art of Black and White Photography – for just $ 24 you can get Udemy’s most popular course.
    7. Day 3: 60% off Going Pro – thinking of making money from your photography? This one is for you.
    8. Day 2: 60% off James Brandon’s ’10 Most Common Photography Mistakes and How to Fix Them’ – just $ 12 for this great course.
    9. Day 8: Save 30% on Fro Knows Photo Beginners Guide – if you’re new to photography then this is a great introduction to get you hands on.
    10. Day 1: 65% off our Natural Light eBook – another $ 7 dPS eBook on one of our most popular eBooks. It’ll help you take great natural light images (there’s also an option to get your hands on all 3 Mitchell Kanashkevich eBooks and save $ 35.
    11. Day 10: Save 37% on Mastering Photography eBook By Andrew Gibson – a great beginners guide to using your digital camera.
    12. Day 4: Save 50% on the Amazing Fundamentals of Digital Photography course – 5 massive days of training for just $ 74. The perfect way to set up 2014.

    See all these deals on our 12 Days of Christmas page but don’t delay, these deals end as the clock strikes midnight and we see in 2014 (US Eastern time).

    The post Don’t Miss Out: Soon These 12 Photography Training Deals Will Be Gone Forever by Darren Rowse appeared first on Digital Photography School.

    Digital Photography School