Are you an avid photographer? Are you having problems with your camera lens retracting or are you simply wanting to learn more about the issue? Then you are in the right place! This article is going to discuss what to do when your camera lens will not retract including all the possible solutions. What does is mean that your lens Continue Reading
Photodoto
Category: Photography
-
Camera Lens Will Not Retract – Here’s What To Do
-
How to Do Storytelling With Your Images: 8 Useful Tips
The post How to Do Storytelling With Your Images: 8 Useful Tips appeared first on Digital Photography School. It was authored by Ben McKechnie.

As a photographer of people and cultures, I spend a lot of time thinking about storytelling with my images – how I can convey emotions and narratives through a few simple frames.
Beginners often fail to think about the storytelling aspect of photography, and that’s okay. When you’re just starting out, it’s important to focus on lighting, composition, and camera settings. But once you’ve familiarized yourself with those key concepts, what’s the next logical step? How do you hook people for more than just a few seconds?
Storytelling.

In this article, I share eight tips to get you started with storytelling in photography, accompanied by my own images to help illustrate the points. The photos may be taken in far-flung locations, but I promise you: the tips I offer can be applied anywhere on Earth.
1. Include small details to tell a story in a single frame
Imagine your task is to tell the story of a person. A parent, or even yourself.
How would you do it?
A standard portrait wouldn’t tell the full story. A person’s full story is often in the details: a picture of their desk, travel books strewn across a bedroom floor, a close-up of their hands dirty from working in the garden, a wide-angle portrait of them surrounded by a few of their favorite things.
So the next time you’re photographing a person, try to include small details that add to their story.

I didn’t visit India to focus my lens on poverty alone. However, when trying to tell the story of Mumbai, it would have been dishonest of me not to include it. Confronted with the scene above, I saw the gap between the rich and poor. The small details here are my subject’s plastic bag, the skin condition on his arm, and his frail body. A big (and still important) detail is his juxtaposition with a backdrop of expensive high-rise buildings.
2. Aim for variety in a series of shots
This storytelling tip is related to the last point:
You must take a variety of different images of a single situation. Whether you want to photograph a camel market in India, a farmers’ market in a Chicago suburb, or your niece’s birthday party, just creating one type of photo won’t tell the whole story.
Instead, you need portraits, wide-angle shots, shots from up high, shots from down low, action shots, zoomed-in details, and more. All of these perspectives combined tell the whole story.
In the image series below, I tried to tell the story of a sunrise hot air balloon flight over the ancient, temple-strewn plain of Bagan, Myanmar. Capturing a variety of images was key to my success.


3. Take control of the entire frame
Now that you’re thinking about telling stories, you’re not just a photographer; you’re a storyteller, too. And that role involves taking control of the whole frame.
In other words:
Don’t just think about your subject, their lighting, their positioning. Be aware of the whole scene in front of you, including surrounding details, backdrops, shadows, bright areas, etc.
Sometimes, I lie flat on the ground with my camera. Why? I want to include environmental details in the frame that improve the shot through storytelling. I get strange looks, but I don’t care; it’s the price of telling the real story.

The Holy Man of Umananda Island (Assam, India).
Here, I wasn’t just thinking about the position of this gentleman’s face. I was also aware of his three-headed Hindu spear – a key detail in his story – and the flowers on its tips.
I tried to tell the whole story of this chaotic riverfront by zooming out and including multiple subjects (Dhaka, Bangladesh). 4. Plan ahead with a shot list
Whether you’re heading out into your hometown for some street photography or to the Eiffel Tower for some vacation photography, why not create a shot list? I’m talking about ideas for specific shots, angles you want to try, and people you might include in the frame.
Research the kind of shots that other photographers have taken at your destination. Seek out new angles that’ll produce fresh storytelling even at well-known locations.

A traditional Taj Mahal composition that I just had to include on my shot list. I focused on capturing beautiful light and clean lines instead of a brand-new angle. 
Sometimes seeking out fresh angles is a real pain in the neck, especially when you’re photographing buildings like the Taj Mahal. I jumped for joy when I saw this dog showing the Taj some serious love at sunset. I’d like to think even animals can appreciate how awesome this building is. 5. Learn to narrow down, trim, and exclude
Uploading a hundred photos to Facebook, all of a similar setting and taken from the same few angles, is a surefire way to lose people’s attention. Those 100 photos could easily be narrowed down to the 10 essential storytelling shots.
So learn to be selective! Start sharing only your best images.
Loktak Lake (pictured below) was so spectacular that I wandered around a single hilltop taking hundreds of images. It was bliss. A lot of the results were great, but would I really want to dump them all online for friends, family, and followers to sift through? No, I would not!
Instead, it’s important to find a few favorites that tell your subject’s story:

Manipur, India 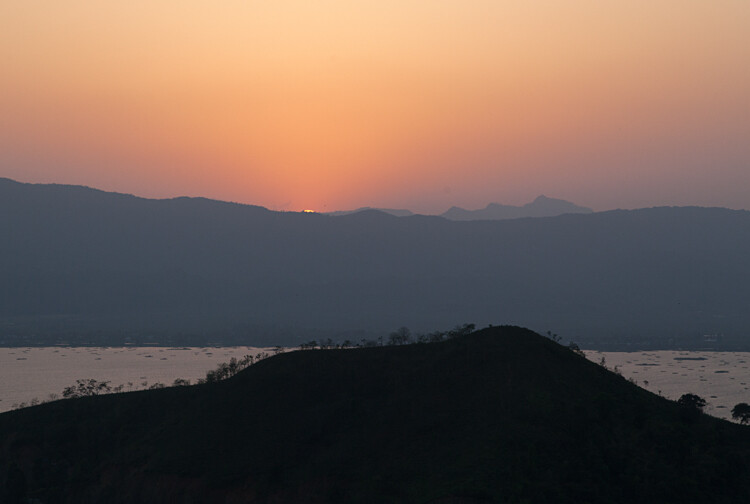
Manipur, India 6. Emotions are an important part of storytelling
To capture emotions, you’ll primarily need people and faces. Emotion can also be communicated through body language, so capturing whole bodies works sometimes, too.

At the marvelous Mother’s Market in Manipur, India, I met these lovely ladies (above) animatedly playing a board game. I broke the ice by asking if I could join in. They said “No,” but it made them laugh and I got permission to shoot away. The best photos came after they’d forgotten about me; their natural expressions returned and I was able to capture their emotions.
7. Don’t forget about the basics
In your bid to learn storytelling, don’t forget about settings, composition, and lighting. It’s all too easy to fall out of touch with photography basics, especially when you’re first learning to tell a story with pictures.
After all, when you’re thinking about storytelling, you might start to drift away from photographic fundamentals.
So instead of replacing composition, settings, and lighting with storytelling, make sure everything works together. A shot with beautiful light, excellent composition, perfect exposure, and a great story? That’s how you capture people’s attention!

A lady on a train in Shan State, Myanmar. 8. Use narrative structure
How does a traditional novel or movie work? Novels and movies are stories, so they contain beginnings, middles, and ends.
You can do the same with your photos!
If you’re just starting out taking a series of storytelling pictures, try creating a chronological narrative. It’s by no means the only or even recommended narrative structure to follow, but it’s a fun and easy way to practice.
You might tell the story of a single day in a place you know well. Start with sunrise, then take photos throughout the day as the light changes. Conclude the series with sunset and night shots.
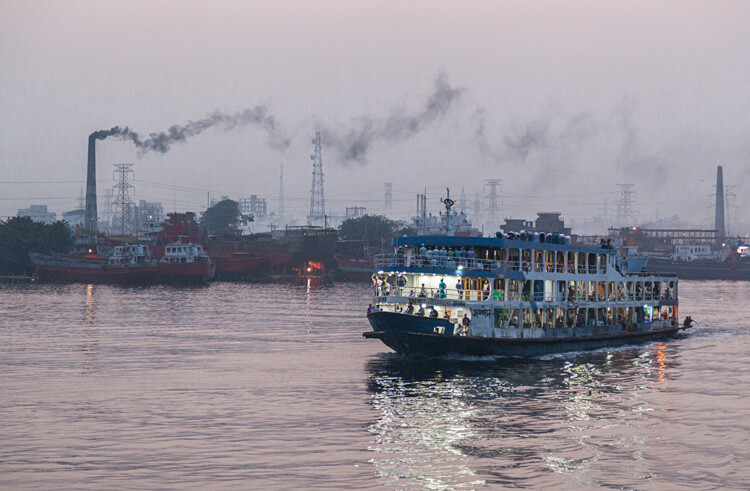
Here, I attempted to tell the story of day and night on the rivers running through the cities of Chittagong and Dhaka:



Telling a story with pictures: final words
Now that you’ve finished this article, you’re ready to begin telling stories with your photos!
So remember these tips, get out there with your camera, and have fun.
Now over to you:
Have you tried doing storytelling photography? What was it like? Did you enjoy it? Share your thoughts and storytelling images in the comments below!
The post How to Do Storytelling With Your Images: 8 Useful Tips appeared first on Digital Photography School. It was authored by Ben McKechnie.
-
The Best Lens for Street Photography: Top 11 Picks (in 2021)
The post The Best Lens for Street Photography: Top 11 Picks (in 2021) appeared first on Digital Photography School. It was authored by Simon Bond.

What’s the best lens for street photography on the market today?
In this article, I’ll share my favorite street photography lenses, including options for all budgets and camera brands. I’ll also explain how you can pick the perfect street lens for your needs – by taking into account important factors such as focal length, sharpness, and low-light performance.
So if you like street photography and you’re looking to buy a new lens to improve your photos, then read on.

Which direction will you go with your street photography?
Canon 5D Mark II | Canon 50mm f/1.2L | f/8 | 1/800s | ISO 3201. Canon EF 50mm f/1.2L USM

If you’re prepared to pay the price, then the Canon 50mm f/1.2L is one of the best lenses for street photography available today. The large aperture lets you photograph in low-light conditions without needing to boost the ISO, and the optics and build quality are outstanding. The 50mm f/1.2 works well for both street photography and street portraits (i.e., posed portraits with people on the streets), and the standard focal length offers enough reach for intimate compositions.
- Low-light performance: Stellar; not many lenses have an aperture as large as f/1.2
- Quality: Excellent build, just what you’d expect from a flagship Canon lens
- Price: On the expensive side ($ 1399 USD)
- Weight: Pretty heavy, thanks to the solid build quality and wide maximum aperture
2. Canon EF 50mm f/1.8 STM

Like the 50mm f/1.2, above, the Canon 50mm f/1.8 STM is a great lens to have in your street photography bag – in fact, there are plenty of reasons to buy it over the f/1.2 version. For one, the cheaper price is going to be much more appealing, especially if you’re new to photography and not yet ready to commit to more expensive gear. And the 50mm f/1.8 is also much smaller and lighter than its bulky f/1.2 sibling. While low-light performance isn’t on par with other lenses on this list, you can still count on the 50mm f/1.8 in the shade and at night.
- Low-light performance: Pretty good, thanks to a relatively large maximum aperture
- Quality: Good, but not as solid as the f/1.2 version (above)
- Price: You can pick up this lens for just over $ 100 USD – it’s just about the cheapest lens you can buy
- Weight: The size and weight of this lens make it easy to carry around
3. Canon EF 135mm f/2L USM

Those looking for a longer street photography lens could do a lot worse than the Canon 135mm f/2L. At 135mm, you’ll be able to photograph your street scenes from a distance, though the size of the 135mm f/2 makes discreet shooting difficult. It’s a great lens for separating your main subject from a busy background – you can use that extra focal length to compress the scene, and the f/2 aperture helps achieve outstanding background bokeh. And while the 135mm f/2 isn’t as forgiving as a 50mm lens, you can use it in low light, especially at f/2.
- Low-light performance: Good for the longer 135mm focal length
- Quality: A great build that’s usable in all weather conditions
- Price: Reasonable ($ 999 USD) for a high-level lens
- Weight: Relatively heavy, but much lighter than a 70-200mm f/2.8
4. Nikon AF-S 50mm f/1.8G

Nikon users looking for an affordable street photography lens should consider the 50mm f/1.8G. It offers good quality with an aperture that’s large enough for most situations, plus the 50mm focal length is a street photography classic. Nice build, weight, and size make it a great option for any Nikon street photographer.
- Low-light performance: Good for most situations
- Quality: Well built
- Price: The most affordable lens for Nikon street photographers (that offers a decent maximum aperture)
- Weight: The slightly smaller aperture means less lens glass, which means it’s easy to carry
5. Nikon 24-85mm f/2.8-4D

Thanks to its zoom range, the Nikon 24-85mm offers a little more flexibility than other options on this list – and it can double as a general-purpose lens, too. It’s a step up from a kit lens and offers you an aperture of f/2.8 on the wide end. This lens covers the 50mm focal distance that many consider optimal for street photography, and you’ll be able to zoom in and out, a major advantage if you want to frame a photo quickly without needing to move. The major downside is the 24-85mm’s low-light capabilities; the f/2.8 to f/4 maximum aperture just won’t be enough for some situations.
- Low-light performance: Decent, but not what you get with a prime lens
- Quality: Good overall quality for street photography
- Price: In the midrange price bracket (around $ 750 USD). You’re paying for a zoom lens with a large maximum aperture.
- Weight: The lens is heavier than a prime lens (a compromise for more focal length flexibility)
6. Sony 35mm f/2.8 Sonnar T FE ZA

While 35mm is on the wider side for street photography, the Sony 35mm f/2.8 is great for those with an APS-C sensor who want to photograph with a 50mm field of view. Build quality is good, so you can shoot in most conditions. And while the f/2.8 aperture isn’t ideal for nighttime outings, it’s more than enough for daytime and twilight street photography.
- Low-light performance: It’s going to be more of a challenge to use this lens in dim light, though the wide focal length means you can handhold at a slightly slower shutter speed.
- Quality: It’s a nice lens, and its compact size is a definite plus for street photography
- Price: In the midrange price bracket ($ 799 USD)
- Weight: Coming in at just 4.2 oz (119g), this lens isn’t heavy
7. Sony E 50mm f/1.8 OSS

If you’re just getting into street photography, you’re a Sony APS-C user, and you want an affordable option, then the Sony 50mm f/1.8 could be the lens for you. The sleek, compact design makes it ideal for the street photographer, and its fast focusing is important for nailing the perfect shot. You get a 75mm effective focal length, which is a bit tight for some photographers – but if you like the narrower field of view, then the 50mm f/1.8 is a perfect choice.
- Low-light performance: The larger maximum aperture is good for most low-light situations
- Quality: Well built; ideal for both beginners and more experienced photographers
- Price: Offers great value (around $ 350 USD)
- Weight: Standard primes aren’t usually heavy, and this lens weighs just over 7 oz (200 g)
8. Fujinon XF 35mm f/1.4 R

The Fujinon 35mm f/1.4 is a great lens for any Fujifilm camera user, whether you’re interested in street photography, portraits, or simply creating abstract bokeh. The lens is sharp, has decent focus speeds, and offers an f/1.4 for nice blurred-out backgrounds and nighttime photography. The bokeh effect is especially good (and can produce very nice street photography backgrounds).
- Low-light performance: With a 35mm focal length and a maximum aperture of f/1.4, this lens is ideal for low-light shooting.
- Quality: A solid, dependable lens; will keep up with the fast pace of street photography
- Price: Midrange ($ 599 USD), thanks to the wide maximum aperture
- Weight: Decent to carry around for a day on the street
9. Fujinon XF 56mm f/1.2 R

The Fujinon 56mm f/1.2 offers a wide maximum aperture, one that’s perfect for low-light street photography, plus it can generate beautiful backgrounds. The focal length is on the long side – on Fujifilm APS-C cameras, it’s an effective 84mm – but you can use it for close-ups, tighter scenics, and intimate street portraits. And for an f/1.2 lens, the price is pretty reasonable!
- Low-light performance: You’re not going to get a better lens than this for low-light scenes
- Quality: This is a great piece of glass that produces excellent images
- Price: Quality lenses cost a lot; this lens will set you back around $ 1000 USD
- Weight: It’s heavier than most of the primes on this list, but that’s one of the tradeoffs for such a wide maximum aperture
10. Sigma 35mm f/1.4 ART DG HSM

Sigma has been making excellent lenses with its ART series, and the 35mm f/1.4 is no exception. The lens comes in mounts for all the major camera manufacturers, including Nikon, Canon, and Sony, and while it’s a third-party lens, it does well against the other glass on this list. The large aperture and medium-wide focal length make this an ideal lens for any street photographer, whether shooting in the day or at night. It really is one of the best lenses for street photography available today, and it’s cheaper than the high-end lenses offered by other major manufacturers.
- Low-light performance: Strong. This is a fast lens that allows for great images in tricky lighting
- Quality: Very nice; Sigma is one of the best third-party manufacturers, and the ART series is top-notch
- Price: For around $ 700 USD, you’re picking up excellent glass at a midrange price.
- Weight: The Sigma 35mm f/1.4 is on the heavier end of the scale
11. Tamron 24-70mm f/2.8 Di VC USD G2

Looking for a versatile street photography lens? The Tamron 24-70mm offers a similar focal range to a kit lens but with a fast f/2.8 aperture. You get significant flexibility thanks to the wide-to-telephoto zoom capabilities, so you can easily capture street photos that require rapid changes in composition. The downside is this lens’s size and weight (f/2.8 zoom lenses are always on the heavier side). For a zoom lens, the f/2.8 aperture is impressive and will let you blur out backgrounds, though you might prefer a larger-apertured prime lens in low light. Bottom line: The 24-70mm is a good daytime street photography lens, and it’s also perfect for other types of photography, such as travel.
- Low-light performance: Not the best; you’ll primarily use this lens in the daytime
- Quality: Good quality, with image stabilization compensating for the smaller aperture
- Price: On the pricier side ($ 1200 USD), though it is multifunctional thanks to its range of focal lengths
- Weight: Pretty heavy, but the zoom range lets you carry one lens rather than several
Factors to consider before buying a street photography lens
All the lenses on this list are great, but the final decision is up to you – and should depend on your shooting style and preferred type of street photography.
So here are the key items to consider when looking for the perfect street photography lens:
Focal length
Many photographers say the best focal length for street photography is 50mm, and 50mm lenses do offer a great perspective (plus, this field of view has been popularized by many famous street photographers). Those who like the 50mm focal length but use crop sensors should go for a 35mm lens.
That said, you don’t need to feel constrained by what has come before, and wider focal lengths are becoming more popular among street photographers.

Nighttime street photography needs a larger aperture or a high ISO.
Canon 5D Mark II | Canon 50mm f/1.2L | f/2 | 1/400s | ISO 500Low-light performance
For moody and dramatic street photos, you’ll often need to shoot in low light. You might find yourself doing street photography in a dingy indoor market, at twilight, or at night – and in all of those situations, a lens with a large aperture provides a major advantage. Yes, modern cameras perform well at high ISOs, which negates the need for a high aperture to some extent. However, a large aperture is still required if you want beautiful bokeh lights in the background of your low-light photos.
Size and weight
To get great street photos, you’ll need to be out walking for much of the day. This means a smaller, lighter setup is a big help. Try to pick just one lens and keep it as light as possible.
Autofocus speed
Street photography is often done in fast-paced and dynamic environments, so if your lens is too slow to focus, you’ll miss a lot of shots. You need a lens that focuses almost instantly, especially if you hope to capture action-oriented street images.
Sharpness
Pretty much all forms of photography require sharpness, and street photography is no exception. Look for a lens that gives you crisp, clear, detailed photos. Some street photographers do like a softer, grainier look, but you can add this in post-processing. Generally speaking, the sharper the lens, the better.

Canon 5D Mark II | Canon 50mm f/1.2L | f/2 | 1/60s | ISO 1000 Time to choose the best lens for street photography
Now that you’ve finished this article, you should be ready to choose the right street photography lens for your needs.
Remember: the best street photography lens is the one that matches the aesthetic you want to create. So don’t think too much about the popularity of different lenses; instead, ask yourself how they’ll work with your interests and style.
Now over to you:
Which of these lenses is your favorite? Is there one in particular that appeals to you for street shooting? Share your thoughts in the comments below!

The best lens for street photography will allow you to get close to the action!
Canon 5D Mark II | Canon 17-40mm f/4L | 24mm | f/4 | 1/60s | ISO 2500The post The Best Lens for Street Photography: Top 11 Picks (in 2021) appeared first on Digital Photography School. It was authored by Simon Bond.
-
11 Sunset Photography Tips for Beautiful Results
The post 11 Sunset Photography Tips for Beautiful Results appeared first on Digital Photography School. It was authored by Darren Rowse.

If you’re looking to do gorgeous sunset photography, then you’ve come to the right place.
Because in this article, I’m going to share 11 simple tips that will instantly improve your sunset photos.
Specifically, I’m going to explain:
- How to capture beautiful sunset tones consistently
- How to create balanced, pro-level sunset compositions
- The best type of weather for sunset photos
- Much more!In fact, sunsets (and sunrises) aren’t even difficult to photograph!
Ready to become a sunset photography master?
Let’s dive right in.
1. For the best shots, plan ahead
While you can sometimes capture beautiful sunset shots without any forethought…
…the best shots usually come from real planning.
So scope out places that might be good for sunsets the day or two before your shoot. Look for interesting locations – locations where you can photograph the sun all the way down to the horizon, and where there will be opportunities for shots that include foreground elements and silhouettes.
Sunsets only take a few minutes, which is why you want to think about these elements before the sunset begins. Otherwise, you might miss the best shots.
Find out when the sun will set, then arrive at least half an hour beforehand. It’s often in the lead up to a sunset that the real magic happens.
And keep an eye on the weather. There are a variety of different types of sunsets that produce a range of different types of lights and patterns in the sky. Don’t just head out on clear days, because while these can produce some wonderful colors, it’s usually the days with (partial) clouds when the real action happens.
(Also, dust and smoke in the air can produce amazing results, too.)
Consider the equipment you might need. Take a tripod, lenses with a range of focal lengths, and extra batteries.
That way, when the sky turns beautiful, you’ll be ready!

2. Shoot at a variety of focal lengths
Most sunsets are photographed with wide-angle lenses, and these focal lengths can make for beautiful images. A lens in the 10-30mm range will give you sweeping shots of your sunset scene.
However, if you want the sun itself to be a main feature of the shot, you’ll need to zoom right in. The sun is just half a degree across, so when you shoot with a wide-angle lens, the sun will be tiny in the frame. If you want to highlight the sun, you’ll need to zoom in with a 200mm lens or longer.
(This, in turn, will increase your need for a tripod!)
Also, be hyper-aware of eye-safety concerns: looking at the sun is always dangerous. And it’s even more dangerous when you look at it through a telephoto lens. So if you do include the sun in your composition, never look through your camera’s optical viewfinder. Instead, use Live View to check your composition and exposure on the rear LCD.
(If you use a mirrorless camera, this won’t be an issue. You can safely look at the sun through the electronic viewfinder.)

3. Use the rule of thirds to improve your sunset photography compositions
The rule of thirds states that you should position key elements of your scene a third of the way into the frame.
So instead of putting the horizon in the center of the composition, put it toward the top or the bottom, like this:

Do you see how the horizon is a third of the way up from the bottom? That’s what the rule of thirds suggests.
And it’s not just about horizons. You can also use the rule of thirds to position the sun, foreground elements, background elements, you name it.
Of course, the rule of thirds isn’t a requirement. And you can break the rule of thirds for stunning results in certain situations.
But in general, the rule of thirds is a great starting point – so unless you have a good reason to do otherwise, I highly recommend you follow it!
4. Experiment with different exposures (to achieve a magical result)
First things first:
When doing sunset photography, you should always shoot with a semi-automatic or Manual mode. Don’t let your camera dictate your settings for you (in other words: get off Auto mode immediately!).
So before starting a sunset shoot, switch your camera over to Aperture Priority mode, Shutter Priority mode, or Manual mode.
And don’t just take one shot at one exposure. Instead, take a variety of shots at different exposures.
So while you can try a “standard” exposure based on your camera’s recommendation…
…don’t be afraid to underexpose by raising your shutter speed or narrowing your aperture. And don’t be afraid to overexpose by doing the opposite.

The great thing about sunsets is that there is no one “right” exposure. You can get stunning results with underexposure and overexposure; the key is to experiment.
(Personally, I tend to start with a relatively quick shutter speed, then slowly work down to slower shutter speeds for brighter, more luminous shots.)
5. Bracket often
In the previous tip, I talked about experimenting with different exposures.
But did you know that there’s a technique, called bracketing, that guides you in your exposure experimentation?
Here’s how it works:
First, take a photo using your camera’s suggested settings.
Then adjust the settings (either manually or via exposure compensation) to slightly underexpose the photo and then to slightly overexpose the photo.
So if your camera says to shoot at f/8, you would take your first shot at f/8, as recommended. But your second shot would be at f/5.6, and your third shot would be at f/11.
That way, you’d end up with a “standard” shot, a darker shot, and a brighter shot, all of which will give you different colors and effects.
It’s a good way to guide your experimentation, and it’s also a good way to create “insurance” photos – so that, if you overexpose the standard shot on accident, you still have a darker file on your memory card.
Make sense?

6. Auto Exposure Lock is your friend
Bracketing can be a lot of fun, but it also takes time – and it’s not the most precise way to create a well-exposed image.
That’s where Auto Exposure Lock (AEL) comes in handy.
Using AEL is simple. First, you point your camera at the area of the scene you want perfectly exposed, such as a beautiful foreground feature.
Then lock the exposure.
Finally, reframe the picture (while maintaining the exposure lock).
Basically, it lets you determine the exposure without interference from the ultra-bright sunset, which can wreak havoc on a camera’s meter.
Also note that you can use Auto Exposure Lock to create beautiful silhouettes; just point your camera at the brightest part of the sky, lock the exposure, and then reframe with a foreground subject. The result will look like this:

Cool, right?
7. For the best colors, get off Auto White Balance
Your white balance setting adjusts the temperature of the colors in your scene.
So depending on the white balance, you’ll end up with a cooler (bluer) photo or a warmer (redder) photo.
When the white balance is set to Auto, your camera will automatically deal with the color temperature. And while this can sometimes work, it often gives subpar results – where you lose the warm golden tones of your sunset.
So instead of using Auto White Balance, switch your camera to the Cloudy or Shade presets, which will warm things up a little.
Alternatively, if you’re shooting a sunset and you do want a cooler, moody shot, you can experiment with other white balance settings, such as Incandescent.
One more thing:
If you shoot in RAW, it’s true that you can always tweak the white balance during post-processing. However, this is often pretty inconvenient; after all, how much time do you want to spend adjusting the white balance in front of your computer?
Which is why it’s worth getting the white balance right in-camera.
8. Always bring a tripod for the sharpest results
If you’re shooting at longer shutter speeds, such as 1/60s and beyond, then a tripod makes a huge difference.
It’ll keep your camera stable – so that your files remain tack sharp.
When you’re out doing sunset photography, you don’t need to start the shoot with a tripod, because the minutes leading up to a sunset bring plenty of light.
But as the sun sinks on the horizon, a tripod will become more and more necessary. (And by the time the sun is gone, a tripod will be absolutely essential.)
Note that you might want to use a tripod for your whole photoshoot, especially if you plan to capture long exposures that feature moving water, like this one:

What if you don’t have a tripod? Or you forget to bring one?
In such cases, I recommend you stabilize your camera against an object. You can put it on the hood of a car, or you can just set it on the ground; whatever allows you to minimize movement as much as possible.
9. Don’t be afraid to focus manually
We all love autofocus – but sometimes, when shooting in extreme lighting conditions, autofocus just won’t get the job done. Your lens will hunt all around, and the shot will end up out of focus.
That’s where manual focus comes in handy.
Now, not all lenses support manual focus. Some only allow for autofocusing, in which case you’re out of luck.
But many lenses do let you focus manually (and you can generally activate manual focus by pushing the AF/MF switch on the lens barrel to MF).
So when your lens starts to hunt, don’t fret; just swap over to manual focus and keep shooting!
10. Shoot more than just the sunset
Here’s one of the many wonderful things about sunsets:
They don’t just create wonderful colors in the sky; they also cast a beautiful golden light that is great for other types of photography!
So as the sunset progresses, keep an eye on other photographic opportunities around you. For instance, you can capture portrait, landscape, or macro shots. In the light of the setting sun, it’ll all turn out amazing!

11. Keep shooting (even after the sun is gone)
A sunset constantly changes over time – which means that every additional minute is an opportunity for a different shot.
So don’t take a few shots and call it an evening. Instead, stick around and photograph the sun as it goes down. You can continue to capture the same composition, or you can test out different compositions; the key is to keep your camera out and your finger on the shutter button.
Also make sure to capture different exposures (bracket!) and consider working with different focal lengths, as I’ve discussed above.
And finally:
Don’t pack up once the sun is gone. The period after the sun has disappeared – called the blue hour – can be great for photography, too, thanks to its beautiful colors and ethereal light. So if you still have the energy, keep finding compositions until the colors have vanished completely from the horizon.

Sunset photography tips: conclusion
Now that you know these tips, you’re well on your way to capturing some stunning sunset photography of your own.
So the next time the sun starts to get low in the sky…
…grab your camera and head outside!
Amazing images await.
Now over to you:
Which of these sunset photography tips is your favorite? Are you going to use any of them the next time you photograph a sunset? Share your thoughts (and sunset photos) in the comments below!
The post 11 Sunset Photography Tips for Beautiful Results appeared first on Digital Photography School. It was authored by Darren Rowse.
-
How to Achieve Blurred Backgrounds in Portrait Photography
The post How to Achieve Blurred Backgrounds in Portrait Photography appeared first on Digital Photography School. It was authored by Darlene Hildebrandt.

How can you create a beautiful, soft blurred background, like the one you see below?

It’s a question I hear over and over from my students. But there’s a major misconception among new portrait photographers: that to achieve such a stunning background blur, you need to go out and buy an expensive lens.
And this is just plain wrong.
Because while it’s true that certain (often expensive) lenses are better for creating blurred backgrounds, it’s also true that several other key factors go into achieving the soft background look – and most photographers fail to consider these factors and how they can be used for gorgeous results.
In other words:
You are capable of creating a lovely blurred background, and you can probably do it with the lenses you already own.
So if you want to learn how to create that gorgeous background, then read on!
Four factors affect background blur
Whenever you see a beautifully blurred background, know that four factors together produced the effect:
- the aperture setting
- the focal length of the lens
- the distance between the subject and the background
- the distance between your camera and the subject
If you use a wide aperture, you’ll get a blurry background, sure – and this is what most photographers think of when they see beautiful background bokeh.
But you can use a relatively narrow aperture and achieve the same look with a longer focal length, or by increasing the subject-background distance, or by getting closer to your subject.
So even if you have a lens with a relatively narrow maximum aperture, such as f/5.6, you can get the look you’re after. You just have to carefully control the other background blur factors.
Make sense?
The background blur factors: a quick demonstration
To demonstrate the factors affecting background blur, I’ve created some example photos of a friend’s daughter (she was a more willing subject than my husband!).
This first set of images was taken with my subject about two feet away from the front door of the house. The focal lengths used for all the example shots are (on a full-frame body) 16mm, 35mm, 70mm, and 150mm; note that I backed up with each shot to keep the framing constant. Also, I am deliberately not divulging my aperture, though it is the same for every image.

Now, the second set of images below was taken with my subject about 20 feet away from the house. Again, each time I changed focal lengths, I moved farther away to keep my subject the same size in the frame.

Now take a careful look at each set of images. What do you see?
Did you notice how much softer the background is in the second set of images? Especially at the 150mm focal length?
Remember: All eight images were taken with the same aperture. The only adjustment made for the first set is the lens focal length. And the only difference between the first set and the second set is the distance between the subject and the background; I had my subject move several feet forward.
But what about the aperture?
As you know, I deliberately withheld the aperture – but would you be surprised if I said that all the images were taken at f/5.6?
It’s true! I used an f/5.6 aperture for each shot. Not the first aperture you think of when someone says “blurred background,” right?
Which means that, as long as you have a lens that can shoot at f/5.6, you can get the same exact look.
One more comparison using f/2.8
Just to further prove the point, here are two more sets of images. All the shots are taken at f/2.8, though the first set shows my subject positioned close to the house, whereas the second set shows my subject positioned away from the house.
Can you see how much more the focal length and the distance between the subject and the background affect the background compared to the wide aperture? There’s not a big difference between these shots and the shots at f/5.6 – but there is a huge difference between the images shot at different focal lengths, as well as the images shot with the subject close versus far from the background.


Capturing blurred backgrounds: key takeaways
While using a wide aperture is a factor in creating a blurred background, it is not the only factor. And in my opinion, it’s not the most important.
Instead, if you want to create beautiful backgrounds, make sure you:
- Use a longer lens (I generally shoot at 85mm or longer for portraits)
- Ask your subject to move away from the background (note that this also depends on the environment, so make sure you do a bit of location-scouting before taking out your camera!)
You can also consider getting closer to your subject; this will increase the blur, though it’ll also tighten up your framing – just something to keep in mind.
Now, go look at the image at the top of the article again.
It, too, was taken at f/5.6! Bet you didn’t guess that the first time you looked at it, am I right?
And here’s one last set of examples to show you the power of a long focal length plus a distant background:

Taken with a 200mm lens at f/2.8 
200mm lens at f/2.8 
200mm lens at f/5.6 Background blur: final words
Now that you’ve finished this article, you know how to create stunning background blur – and you know that you don’t need an expensive f/1.2 lens to make it happen.
In fact, I challenge you to test this out yourself. Find a willing subject, start them close to the background, then slowly move them forward. Test out different focal lengths, different apertures, and different distances to your subject.
In the end, you’ll have some stunning shots – even if you only shoot at f/5.6 and beyond.
Now over to you:
Do you struggle to get perfect blurred backgrounds? Which of the tips from this article are you going to use first? Share your thoughts in the comments below!
The post How to Achieve Blurred Backgrounds in Portrait Photography appeared first on Digital Photography School. It was authored by Darlene Hildebrandt.
-
The Weekly Photography Challenge – Architecture
The post The Weekly Photography Challenge – Architecture appeared first on Digital Photography School. It was authored by Sime.
“Architectural photography is about capturing the design and accurately representing a building, but to also have your photographs be aesthetically pleasing to your viewer’s eye”
Now I’m no architecture photography, but I know a really good one (Hi Mike!) and love his work, it’s quite amazing, so that, combined with one of your suggestions that we try ‘architecture’ is the reason for this week’s photo challenge theme! #dPSArchitecture
Don’t have access to some stunning, amazing architecturally designed skyscraper? Photograph your own house/apartment/caravan! Push that creativity and do your best! After this photo I’ve put a glut (is that a collective noun for url’s) of links to articles on dPS that might help!

Photo by Anders Jildén on Unsplash
We have tried this theme before now, but it was a long time ago! Check out what people submitted back then, and here’s a great article on creative architecture photography techniques, could be handy! Perhaps you’re more of a storyteller and you’d prefer a different approach! Go for it! Lastly, here are 6 more ways to try your hand at making architecture photography stand out. That oughta do it!

Photo by Maarten Deckers on Unsplash
Amazing photos above, huh! DO NOT let those put you off, they’re polished and stunning, but they’re there to inspire you to make yours the best it can be!
Now how to get yours online…
Great! How do I upload my photos?
Upload your photo into the comments field (look for the little camera icon in the Disqus comments section below this post) and they’ll get embedded for us all to see. Or, if you’d prefer, upload them to your favourite photo-sharing site and leave the link to them.

The post The Weekly Photography Challenge – Architecture appeared first on Digital Photography School. It was authored by Sime.
-
The Best Gear of 2021? TIPA Announces Its Winners
The post The Best Gear of 2021? TIPA Announces Its Winners appeared first on Digital Photography School. It was authored by Jaymes Dempsey.

The Technical Image Press Association (TIPA) has released its 2021 World Awards recipients, celebrating the best cameras, lenses, and other photography gear released over the past year.
Hailed as the “most coveted photo and imaging awards worldwide,” TIPA aims to “both recognize and honor [photography] industry companies and their products.” Winners are chosen by TIPA member magazine representatives, who vote for class-leading gear across dozens of categories, including Best APS-C Camera (Entry-Level, Advanced, and Expert), Best Tripod, Best Telephoto Zoom Lens, and much more.
All the usual suspects took prizes, with Sony grabbing an impressive six awards (including Best Full Frame Professional Camera, Best Photo/Video Camera (Expert), and Best Photo Smartphone). Sigma snagged four awards, Canon and Nikon each snapped up three, while Fujifilm and Tamron took two.
Olympus was notably absent for the second year running, but Pentax made the list – thanks to its K-3 Mark III – for the first time since 2015.
While the TIPA awards can only reveal so much, this year’s awardees do seem representative of the broader camera world – where Sony, Canon, and Nikon dominate headlines, Olympus and Panasonic cater to a niche audience, and third-party manufacturers such as Tamron and Sigma offer highly respected alternatives to Canon, Sony, and Nikon glass.
In fact, out of nine lens awards, six were handed to third-party lens manufacturers. And the trend is hardly new. Last year, six out of eleven lens awards went to third-party manufacturers, and the year prior saw six out of twelve. It highlights the outstanding products offered by “optics-first” companies such as Tamron, Sigma, and Laowa.
Below, I’ve included the full list of awards and the corresponding winners. Give it a read – and once you’re done, leave a comment. Did any equipment deserve to be awarded that was skipped? What do you think of TIPA’s picks? Share your thoughts!
The TIPA World Awards 2021 winners
- Best APS-C Camera (Entry-Level): Canon EOS M50 Mark II
- Best APS-C Camera (Advanced): Fujifilm X-S10
- Best APS-C Camera (Expert): Pentax K-3 Mark III
- Best Full Frame Camera (Advanced): Nikon Z6 II
- Best Full Frame Camera (Expert): Nikon Z7 II
- Best Full Frame Professional Camera: Sony a1
- Best Photo/Video Camera (Advanced): Sigma fp L
- Best Photo/Video Camera (Expert): Sony a7S III
- Best Medium Format Camera: Fujifilm GFX 100s
- Best Prime Wide Angle Lens: Laowa 15mm f/4.5 Zero-D Shift
- Best Prime Standard Lens: Sony FE 50mm f/1.2 GM
- Best Prime Telephoto Lens: Canon RF 600mm f/11 IS STM
- Best Wide Angle Zoom Lens: Nikon Nikkor Z 14-24mm f/2.8 S
- Best Standard Zoom Lens: Tamron 17-70mm f/2.8 Di III-A VC RXD
- Best Telephoto Zoom Lens: Tamron 70-180mm f/2.8 Di III VXD
- Best Ultra-Telephoto Zoom Lens: Sigma 100-400mm f/5-6.3 DG DN OS | Contemporary
- Best Portrait Lens: Sigma 85mm f/1.4 DG DN | Art
- Best Macro Lens: Sigma 105mm f/2.8 DG DN Macro | Art
- Best Vlogger Camera: Sony ZV-1
- Best Professional Video Camera: Panasonic Lumix DC-BGH1
- Best Fine Art Printing Solution: Hahnemühle Print – Protect – Authenticate Product Range
- Best Photo Printer: Canon imagePROGRAF PRO-300
- Best Imaging Software Expert: Zoner Photo Studio X
- Best Imaging Software Professional: DxO PhotoLab 4
- Best Lighting Technology: Profoto AirX
- Best Portable Flash: Godox Pocket Flash AD100Pro
- Best Tripod: Vanguard VEO 3GO series
- Best Tripod Head: Gitzo Ball Head Series 4
- Best Gimbal System: Manfrotto Fast Gimboom and Gimbal series
- Best Enthusiast Photo Monitor: ViewSonic VP2768a
- Best Professional Photo Monitor: LG UltraWide Thunderbolt 4
- Best Professional Video Monitor: LG UltraFine OLED Pro
- Best Photo Smartphone: Sony Xperia 1 III
- Best Power Accessory: NITECORE SCL10 2-in-1 Smart Camera Light & Power Bank
- Best Video Accessory: RØDE Wireless GO II
- Best Photo Accessory: Hoya PROND GRAD Circular Graduated ND Filters
- Best Retail Finishing System: CEWE Photocenter
- Best Photo Lab: WhiteWall Room View
- Best Photo Service: CEWE Photo Calendar A2 Gold Edition
- Best Imaging Computer: Asus ZenBook Pro Duo 15
The post The Best Gear of 2021? TIPA Announces Its Winners appeared first on Digital Photography School. It was authored by Jaymes Dempsey.
-
iPhone Live Photos: A Comprehensive Guide
The post iPhone Live Photos: A Comprehensive Guide appeared first on Digital Photography School. It was authored by Simon Ringsmuth.

Baked into every iPhone is a neat trick – one that combines the serendipity of photos with the magic of video to produce a Live Photo. These aren’t the same as normal photos, but they’re not exactly videos, either.
Live Photos are images that can be edited, adjusted, and shared just like any other image. But they are also tiny video clips: each contains three seconds of video showing a brief moment right before, during, and after you take the picture.
To learn more about Live Photos, including how to use and edit them, keep reading!
What are iPhone Live Photos?
First introduced in the iPhone 6s, Live Photos are a great way to add a bit of context to your iPhone pictures.
Instead of just taking a picture of your kids, you capture the photo – but you also get a brief clip of them running and laughing. Rather than photographing only a flower, your iPhone captures the flower, but it also displays the wind, moving insects, and background noise. A snapshot of your friend holding a freshly caught fish becomes a short clip where you can see the fish wiggling and flopping free.
These short bits of video might not sound like much, but they can go a long way toward bringing a still scene to life. A simple Live Photo can trigger emotions and memories years later that you never knew you wanted to save. The best part about Live Photos is that you don’t have to do anything to create or view them – they’re captured automatically by your iPhone unless you turn the option off manually.
That said, despite the prevalence of Live Photos, there’s still a great deal of confusion among iPhone users. For instance, how do you use Live Photos? How do you edit and share them? What are their benefits and drawbacks? That’s what I aim to cover in the rest of this article.

I shot this as a Live Photo on my iPhone, so I get a bit of motion to go along with the still image. How to use Live Photos
As with a lot of things in the Apple ecosystem, using Live Photos requires almost zero effort. Any time the camera interface is open, there is an icon in the top-right corner that looks like three concentric circles (pictured below). If there is a line through the icon, Live Photos is turned off. If there is no line, it means Live Photos is enabled. Tap the icon to switch between On and Off.

Tap the concentric circle icon in the top-right corner to enable or disable Live Photos. When Live Photos is enabled, you don’t have to do anything different when you take a picture. Any time you press the shutter button, your iPhone automatically captures the picture and a bit of video. It’s almost like a short animation, or like a moving picture you might see in one of the Harry Potter movies.
If you don’t want to toggle the Live Photos setting every time, navigate to Settings and then choose Camera>Preserve Settings. If you have Live Photo checked, the camera app will remember whether you had Live Photos enabled or disabled the last time you used it. That way you won’t have to click the Live Photos icon every single time you want to take a picture – it will be enabled or disabled depending on your previous settings.

To make your iPhone remember whether you had Live Photos turned on or off, toggle the Preserve Settings>Live Photo option. Once the Live Photos setting is enabled, all you have to do is snap a picture and your phone takes care of the rest. There are no parameters to tweak, no options to configure, and no changes from one iPhone to the next. Every time you take a picture, your phone automatically saves a Live Photo.
What can you do with Live Photos?
Apple cofounder Steve Jobs once said that people don’t know what they want until you give it to them. Live Photos are kind of like that, in that they give you a tiny glimpse into the context of your images.
People take pictures with their phones every day, but those images are devoid of the audiovisual context that Live Photos provide. Live Photos aren’t life-altering or world-changing, but the few seconds of video alongside each photo is so nice that it’s hard to give up once you’re used to it.
In fact, the real benefit of Live Photos isn’t readily apparent until you start scrolling back through images from months or years ago. You see a picture of a parent, child, or loved one – and you suddenly realize you also have a few seconds of their voice and past life. That’s when Live Photos become indispensable.
Personally, I don’t find Live Photos to be particularly useful for landscapes, animals, or everyday objects, but it’s those images of the people in my life that make me glad to have Live Photos as an option.

I didn’t remember what was going on in this picture of my relatives from several years ago. But since it was a Live Photo, all I had to do was tap and hold. Turns out they were caring for a small animal. How to view Live Photos
While taking Live Photos is easy, viewing them can be a bit confusing. As you scroll through your photo library, there aren’t any indicators that separate Live Photos from normal photos. And when you tap on a Live Photo, all you see is a still image.
Viewing a Live Photo sent by someone else can be tricky, too, because it looks like any other picture.

When scrolling through your iPhone photo library, there isn’t any way to automatically distinguish Live Photos from normal photos. The key to viewing Live Photos lies in the key to operating your phone: You have to use your fingers. So to view a Live Photo, whether in your own photo library or one sent to you in a text message, you have to press and hold. The pressure will activate the Live function and start playing the video.
(Note: If you are viewing Live Photos on a Mac computer in the Messages or Photos apps, you have to click and hold on with the mouse cursor.)
Viewing Live Photos is one thing, but what about finding them in the first place? With scant visual clues to separate Live Photos from normal images, locating them can be confusing. Fortunately, you can use the Media Type option in your iPhone photo library to show all Live Photos; this eliminates the need to scroll through all your images in the hopes of randomly stumbling across a Live Photo.

Open the Photos app on your iPhone, then tap Albums. Finally, scroll down to Media Types to see all your Live Photos. There are also a few hints embedded in every Live Photo to help you know what you’re looking at: Every Live Photo has the word “Live” in the top-left corner, along with the Live Photos bullseye icon. And when you receive a Live Photo over text message, you won’t see the word “Live” – but you will see the Live Photos icon, which means you can tap and hold to view the clip.
How to edit Live Photos
One of the most compelling features of Live Photos is how they can be edited and tweaked just like any other image.
You can use the iPhone Photos app to crop, adjust color, change brightness, add a vignette, and even use filters such as Mono, Silvertone, Dramatic, and more.
You can also change the Key Photo – the image that shows up when you first view a Live Photo (before video playback begins).

When editing a Live Photo, you can tap and drag the horizontal bar at the bottom of the screen to change the displayed still photo (also known as the Key Photo). I’m a fan of Live Photo editing capabilities; they reinforce the idea that Live Photos aren’t to be treated differently from any other picture. Editing prohibitions or restrictions would be a big drawback – but at present, the only thing you can’t do with a Live Photo is use markup effects to draw on it.
(If you do want to add markup, the Live Photo is discarded and you’re left with a still image. It’s not necessarily a bad tradeoff, just something to keep in mind.)
Apple also gives you some fun ways to edit your Live Photos that go beyond what you can do with normal images. When viewing a Live Photo, you can tap the Share button to save it as a movie, which can then be sent to anyone for viewing on any device – iPhone, Windows computer, etc. You can tweak things even further with some fun effects, too.
For instance, tap and hold on a Live Photo, then – without letting go – swipe upward. This brings up an Effects menu, where you can make a Live Photo loop, bounce back and forth from the end to the beginning, or create a long exposure that blurs all the frames together. These can be shared like other Live Photos, exported as movie files, or uploaded to websites like Giphy.com, which can turn the content into animated GIFs.

If you sync your pictures to iCloud then download a Live Photo to your computer, you get two files: a still image and a movie, which is the Live Photo. If you have your iPhone pictures synced to your Mac via iCloud, you can even separate a Live Photo into its component parts: a single HEIC image file and a QuickTime movie file. (HEIC files are similar to JPEG files, but they offer more color information and better compression.) You can then edit and share each file individually, or you can use software such as iMovie or Adobe Premiere to stitch multiple Live Photo QuickTime movies into a single video.
Drawbacks to Live Photos
There are a few caveats to keep in mind when using Live Photos.
For one, while Live Photos are a great way to add a bit of context to your memories, they do take up more storage space than traditional photos. The exact file size varies, but Live Photos are generally about twice as large as normal photos. Even if you have 256 GB or 512 GB of storage space, Live Photos can eat through this pretty quickly.
That’s not to say you shouldn’t take Live Photos; just be aware of your storage limitations.

If you find yourself running low on iPhone storage, it’s possible that Live Photos are part of the problem. Also, Live Photos exist only within the Apple ecosystem. Other Apple users can see the entire three-second clip – but if you send a Live Photo to an Android user, they’ll only receive a single JPEG image. There is a process you can use to export a Live Photo as a movie clip or animated GIF file, but those extra steps are an obvious inconvenience.
And Live Photos offer no customization options, which might bother folks who enjoy tweaking things to fit their own preferences. Every Live Photo is exactly 3 seconds – no more, no less. Every Live Photo is also shot at the same resolution and quality settings, and these limits can be somewhat frustrating. It would be nice if Apple had the option to shoot longer Live Photos, but I wouldn’t count on that changing anytime soon.

This still image turned out great. But what if I had just a few seconds of him swinging at the tennis ball? Thanks to Live Photos, I do. Once you start using Live Photos, you might never want to go back to still images. iPhone Live Photos: final words
Live Photos are a great way to get more enjoyment out of everyday images.
While drawbacks exist, the benefits mostly outweigh the negatives – and it can be incredibly rewarding to look back on these brief video snippets years later. You will find yourself enjoying your images in a whole new way, and the creative sharing options might open up new doors you never knew existed.
Now over to you:
What do you think of iPhone Live Photos? Do you plan to use them often? Do you prefer them to still images? Share your thoughts in the comments below!

Live Photos FAQ
How do I turn on Live Photos?With your camera app open, tap the little bullseye icon in the top-right corner. If the icon is yellow, then Live Photos are enabled. If the icon is white, Live Photos are disabled.
How much storage space do Live Photos use?As a rule of thumb, Live Photos are about twice the size of a normal image. Most Live Photos are about 6-7 MB in size, though this varies depending on the subject you’re shooting.
How do I share a Live Photo to an Android phone?When you tap the Share button, use the “Save as Video” option. This will convert your Live Photo into a movie file, which you can send to an Android phone (or share with someone who uses a Windows computer).
How can I turn a Live Photo into an animated GIF?Your iPhone can’t do this by itself, but you can save a Live Photo as a movie and then upload the movie to a GIF website such as Giphy. The GIF website will convert your movie into an animated GIF, which you can share with others.
The post iPhone Live Photos: A Comprehensive Guide appeared first on Digital Photography School. It was authored by Simon Ringsmuth.
-
How to Make a Photoshop Collage (in 9 Simple Steps)
The post How to Make a Photoshop Collage (in 9 Simple Steps) appeared first on Digital Photography School. It was authored by Natalia Robert.

Looking to make a collage in Photoshop? You’ve come to the right place.
In this article, I’m going to give you an easy, step-by-step process for creating a stunning collage – one that looks like this:

(It’s a perfect way to share photos from an event, a real-estate shoot, or even a family photo session!)
Let’s get started.
Step 1: Choose your collage photos
Before you actually create the collage, you’ll need to pick your collage photos – and you’ll need to do this carefully.
I recommend selecting images connected by a theme (such as a location, an event, or even a concept). Include a mix of subjects at different scales; for instance, pick some wide shots that show the entire scene, as well as some detail photos that show lots of texture and personality. Without one or the other, the story won’t be complete. And it won’t carry the level of emotion that you’re after.
Speaking of storytelling: It often does help to focus on the story you’re trying to tell. Do you want to offer a narrative surrounding an event? Do you want to clearly convey a meaningful concept? Make sure to take this into account when picking photos!
One more tip: If possible, include at least three photos and no more than eight. Too few photos, and you won’t be able to tell the full story. Too many photos, and you’ll confuse the viewer with clutter (plus, it’ll be tough to show off individual details).
Step 2: Open the selected images in Photoshop
Once you’ve picked your photos, open them all in Photoshop.
To do this, you can drag and drop files directly onto the document window, or you can select File>Open and click on the relevant images.

You should see the photos as separate tabs in the document window, like this:

Step 3: Create a new file for your Photoshop collage
Every Photoshop collage needs a background file where all the images will eventually be assembled.
While you can use an old collage template, if you’re making your first-ever collage, you’ll need to create a new document.
So select File>New in the Menu bar (or tap Ctrl/Cmd+N):

A New Document window should pop up, and you’ll need to dial in your file preferences.

The specifics will depend on what you plan to do with the collage as well as the sizes of your chosen photos. If you’re working with big JPEGs and you aim to print, you should probably pick a 5000+ pixel width and height. If you want to display your collage on a standard web page, however, a 1500 pixel width and height will do just fine (though you can always start big and resize later, as discussed in Step 8 below).
(I do recommend you make the file size a bit larger than the size you want in the end; that way, you can do a final crop to deal with any arrangement issues.)
Step 3: Add your images one at a time
Head to your first open photo, then select it.
To do this, you can drag with the Marquee tool:

Or you can hit Ctrl/Cmd+A. You should see the marching ants around the border of your image:

Then choose Edit>Copy (or tap Ctrl/Cmd+C):

Finally, head over to the new document, then choose Edit>Paste (or tap Ctrl/Cmd+V):

This will add the photo to the blank document, but on its own layer.
Depending on the size and resolution of the new image, you may need to make some adjustments with Edit>Free Transform (or Ctrl/Cmd+T). For instance, my first photo was way too large:

So I used the Free Transform option to scale it down:

(Once you’ve activated Free Transform, simply drag the edge nodes until you get the result you’re after. You want an image that’s small enough to be comfortably moved around the canvas.)
Then repeat the above instructions for all the remaining collage photos.
Step 4: Arrange your photos
After you’ve added all the collage photos to your document, it’s time to do some arranging. This is where you shift the photos around until they tell your story.
After doing several collages, you’ll start to discover your preferred style; personally, I like to create symmetrical layouts as well as interlocking puzzles. But each story does have slightly different needs, so don’t be afraid to experiment!
To adjust the photo positions, you can select the Move tool (or tap V):

Then drag around all the images until you get a good result. If you’d like to resize any photos, use the Free Transform option discussed above.
With my pet collage example, I first tried a more symmetrical arrangement:

But I settled on a puzzle-type composition:

Step 5: Add image spacing
Once you’ve determined the layout and you’ve sized all the images, I recommend giving the design some space. It’s personal preference, but the effect is generally nice.
In other words, instead of a collage like this:

You want one like this:

It’s pretty easy to do; you simply create a thin, white border between the images. You can select each photo, then use the mouse or arrow keys to drag until you see white space. Or you can double-click on each image in the Layers panel:

This will open the Layer Style menu, where you can select the Stroke option:

Make sure the Position is set to Inside, the Blend Mode is set to Normal, and the color is set to White:

Then increase the Size until you see a nice border appearing around your images.

Unfortunately, this will crop the images somewhat – but depending on the look you like, it might be worth it.
Step 6: Merge all layers
At this point, you should have your collage laid out with perfect photo spacing.
Which means you’re ready to merge all the layers.
Simply select Layer>Merge Visible (or tap Ctrl/Cmd+Shift+E):

And the layers will merge into a single beautiful Photoshop collage!
Step 7: Crop the final image
Before you resize and export your collage, I recommend cropping any extra white space around the edges (you want the design to look even).
Just hit C or select the Crop tool:

Then drag at the edges of the photo to get rid of any unwanted areas:

Step 8: Resize
This step depends on your goals for the collage. If you want to print, you’ll need to resize based on printing requirements (which will generally involve leaving the image pretty large). If you want to post your collage on Facebook, Instagram, or Pinterest, however, consider sizing down to a maximum of 1500 pixels on the long end.
So select Image>Image Size (or tap Alt/Opt+Ctrl/Cmd+I):

Then dial in your preferred width and height.
Step 9: Save and export your collage
Last but not least:
Save and export!
You’ll want to select File>Save As:

Then choose a location and file name, make sure that Save as type is set to JPEG, and hit Save:

And select your preferred image quality (I usually go for around 8):

And you’re done! Photoshop will save your collage in the specified location.
How to make a Photoshop collage: final words
Well, there you have it:
A simple process for creating a collage in Photoshop. It’s bound to look great, so don’t be shy; share it all over your social media pages!

Now over to you:
Have you made any collages previously? Have any additional tips? Please share your advice (and collage photos!) in the comments below.
The post How to Make a Photoshop Collage (in 9 Simple Steps) appeared first on Digital Photography School. It was authored by Natalia Robert.
-
How to Capture Motion Blur in Photography (6 Tips)
The post How to Capture Motion Blur in Photography (6 Tips) appeared first on Digital Photography School. It was authored by Darren Rowse.

Are you looking to capture motion blur in your photography?
While photographing motion blur might seem difficult, it’s actually pretty easy; with a bit of camera know-how, you’ll be taking stunning photos like a pro.

And that’s what this article is all about: giving you the tools and techniques you need to get beautiful results!
Note that motion blur can look great in any photography genre, so don’t try to limit yourself. Instead, embrace the power of the blur!
1. Slow down your shutter speed
Here’s the fundamental motion blur tip:
Use a slow shutter speed.
You see, the reason for motion blur is simply that your camera’s shutter remains open for a significant period of time. In other words: you get motion blur when your shutter speed is long, whereas you freeze the action when your shutter speed is short.
So the number one tip for capturing movement is to select a longer shutter speed.

If your shutter speed is too fast (e.g., 1/4000s), you’re not going to capture much movement. But if you dial in a lengthy shutter speed (e.g., five seconds) you won’t need your subject to move much at all before you start to see blur.
How long should your shutter speed be? Here, the speed of your subject comes into play. A moving snail and a moving racecar will give you very different results at the same shutter speed. The slower your subject, the slower the shutter speed needs to be to create blur.
The other factor that comes into play when determining shutter speed is how much light exists in the scene. A longer shutter speed lets more light into your camera and runs the risk of blowing out or overexposing your image. Below, we’ll cover some ways to let less light in (so you can use long shutter speeds without overexposure concerns).
Bottom line:
There’s no one-size-fits-all shutter speed for motion blur. It’ll depend on the speed of your subject, the brightness of the scene, and how much motion blur you want to capture. The key is to experiment!
2. Stabilize your camera
There are two ways to get a feeling of motion in your images:
- Have your subject move.
- Have your camera move.
But for the type of photo we’re after today, it’ll be the subject that’s moving. In such cases, you need to do everything you can to keep your camera perfectly still. Otherwise, you’ll capture a blurry subject – but you’ll also end up with a blurry background.
How do you stabilize your camera?

A tripod is ideal, but you can also place your camera on some other steady object (e.g., a table or a bench). I’d recommend using a remote shutter release or a self-timer mechanism; that way, you can trigger the shutter without touching your camera (because the more you touch your camera, the more likely it is that you’ll introduce blur).
3. Try Shutter Priority mode
As you know, the shutter speed is crucial to achieving a beautiful blurred look. Even small changes will have a big impact upon your shot – so you should use a camera mode that gives you full control over your camera’s shutter.
You have two options. First, you can switch your camera to full Manual mode. It’ll work well, and it’s a good idea for more experienced photographers – but in Manual mode, you’ll also need to select your aperture and ISO (and you’ll need to make sure that the shutter speed, aperture, and ISO interact to create a perfect exposure). So if you don’t yet feel confident working in Manual mode, you have another option:
Shutter Priority mode.
With Shutter Priority, you set the shutter speed (and the ISO, if you so choose), but your camera will set the aperture to ensure the shot is well exposed. It’s a very handy mode for motion blur photography because it ensures you get the movement effect you’re after while also capturing generally well-exposed images.

How to compensate for long shutter speeds when there is too much light
Remember what I said about a long shutter speed?
The longer the speed, the more light that will get into your camera, and the brighter your photos will be.
So unless you compensate for this, whenever you try to capture motion blur, you’ll end up with overexposed shots.
Below, I’ll suggest three easy methods for preventing this overexposure.
(Note: A fourth method is to simply wait for the light to change – i.e., for it to get darker. Many shots that incorporate blur are taken at night or at dawn/dusk for this reason.)
1. Use a small aperture
Here’s the first, and simplest, method of preventing overexposure:
Narrow the aperture.
Because the narrower the aperture, the less light that will hit the camera sensor.
If you’re shooting in Shutter Priority, your camera will actually narrow the aperture for you. As soon as it detects a slow shutter speed, it’ll close down the aperture and deliver a well-exposed shot.
But if you’re shooting in Manual mode or Aperture Priority, the aperture can generally be changed via a dial on your camera.
One thing to bear in mind:
Adjusting the aperture won’t just affect your photo’s exposure. Aperture also affects the depth of field, which refers to the amount of the scene that’s sharp. A wide aperture creates a limited depth of field, like this:
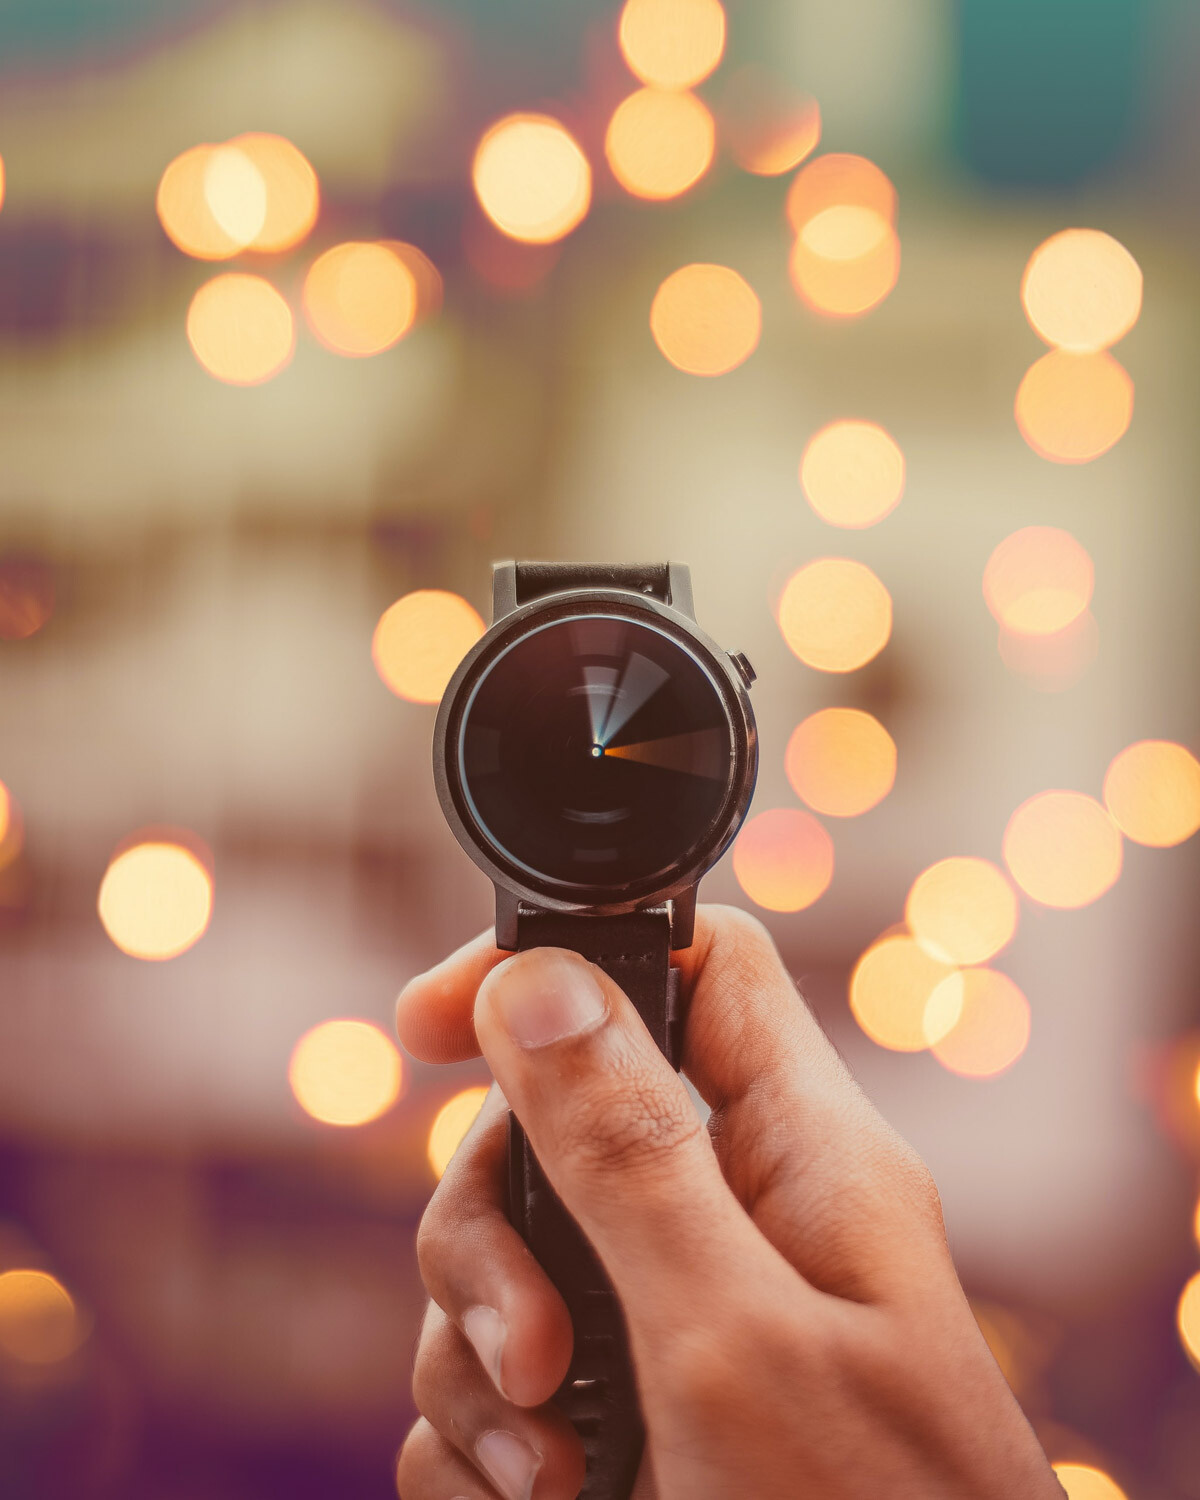
Whereas a narrow aperture ensures the entire scene is sharp throughout:

So while it’s easy to combine a deep depth of field with a well-exposed motion blur image, working with a shallow depth of field while also ensuring well-exposed motion blur can be tough. If you’re after a shallow depth of field effect, you’ll need to counteract overexposure another way, as I explain in the next section:
2. Decrease your ISO
If you’ve tried narrowing your aperture and still aren’t getting you the results you need, or if you’re after a shallow depth of field, here’s an alternative method for preventing overexposure:
Drop your ISO.
ISO impacts the sensitivity of your digital camera’s sensor to light, where a higher number will induce greater sensitivity (and therefore a brighter exposure) and a lower number will induce less sensitivity (and therefore a darker exposure).

You can adjust your ISO in Manual mode or Shutter Priority mode, so simply dial in a low ISO (such as 100) and watch as your exposure decreases. Of course, there’s a limit to how low you can drop your ISO; once you get to ISO 100 or ISO 50, your camera won’t allow you to go any further. But it’s always worth checking whether a lower ISO is an option because it’s a simple way to prevent overexposure.
3. Try a neutral density filter
Say you’re after a motion blur photo, but you just can’t get the exposure dark enough. You’ve narrowed the aperture, you’ve dropped the ISO, but your shots keep coming out overexposed.
You still have another, more dedicated option:
A neutral density filter. It’s a piece of glass that blocks light from passing through your lens – sort of like sunglasses – and lets you use a long shutter speed while preventing overexposure.
For example, if you’re shooting a seascape in bright sunlight and you want to blur the water, you’ll end up with a blown-out, overexposed scene – even with a narrow aperture and low ISO. But pop a neutral density filter over your lens, and you can slow the shutter speed right down while keeping a perfect exposure.

(By the way, a polarizing filter can have a similar effect, though it’ll also impact the look of your images by cutting out reflections.)
Note that neutral density filters come in many strengths. You can get a basic, subtle ND filter, one that’ll slightly darken the scene. Or you can buy an ultra-powerful, 10-stop ND filter, which will allow you to dramatically lengthen your shutter speed in bright sunlight.
A quick note: two more creative techniques to try
If you want to capture images with motion blur but you’re looking to come away with uniquely artistic results, here are two other techniques to consider:
- Slow sync flash. This lets you capture a relatively sharp subject while creating a moving, blurry background, and it’s a great way to create in-your-face shots.
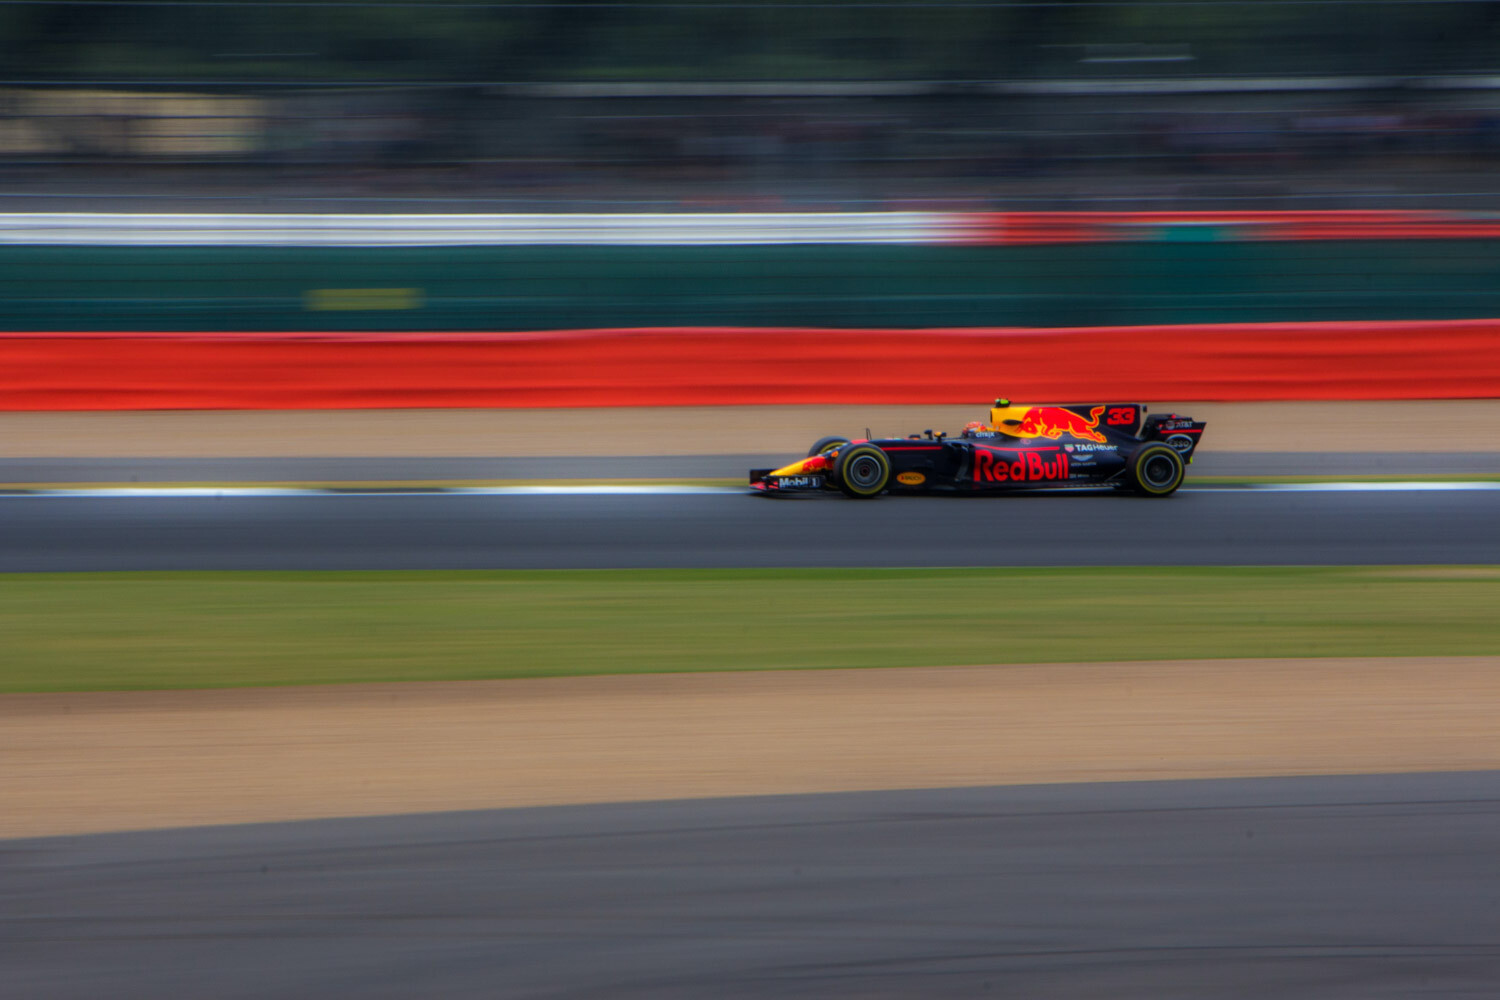
- Panning. Here, you simply follow a moving subject with your camera; the subject will generally come out nice and sharp, while the background stretches and blurs.

Motion blur in photography: conclusion
Well, there you have it! Six easy tips to capture motion blur in photography.
So remember these tips. And the next time you’re after some creative motion blur photos, you’ll get stunning results!
Now over to you:
Have you tried taking motion blur photos? Did it go well? Do you have any tricks or tips? Share your thoughts (and images!) in the comments below!
The post How to Capture Motion Blur in Photography (6 Tips) appeared first on Digital Photography School. It was authored by Darren Rowse.