Category: Photography

  • 6 Ways to Improve Your Street Photography

    Street photography is an exciting genre of photography that interests many people. Although it has many meanings, in its simplest form, it is candid photography of life and people. Street photography encapsulates everyday life, not just in roadways, as the name suggests but within our surroundings.

    It can be demanding to capture good pictures that tell the viewer about the daily moments we encounter. Here are six tips to help you improve your street photography.

    Street photography 01 - graffiti artist working

    #1 – Walk around

    Have you ever felt uncomfortable at the thought of photographing random people in public places?

    My first tip is to just walk around and get comfortable with your surroundings. Look for interesting things to photograph in the everyday life that encompasses you. Once you have taken some pictures, move on to another location and capture a few more images of another subject that pleases you.

    Street photography 02 - old lady in Peru in traditional attie

    I saw this elderly lady walking through an old town while out taking photos during my travels and thought she would make an interesting photo.

    #2 – Shoot in crowded places

    With life at the core of street photography, it makes perfect sense to capture pictures of people amongst crowds going about their everyday lives.

    Capturing life around us in different situations can be a challenging undertaking.

    Street photography 03 - 2 ladies walking past street art

    You may feel uncomfortable at the thought of taking photos of people in busy areas. However, it can be very rewarding to get out of your comfort zone and photograph in crowded places. From a busy marketplace to photographing the general public attending a sporting event, these are just some examples of where you can capture street style photos in crowded areas.

    Next time you go on holiday or visit your local neighborhood, visit the park to practice your street photography.

    Street photography - Asian men playing a board game

    #3 – Photograph people on the streets

    Street photography as a subject can take many forms from scenes depicting human nature to interesting moments in everyday locations. To enhance your street photography images, try and capture scenes that evoke different emotive responses such as happiness or humor, for example.

    Street photography 05 - street dancers

    While on a city break, I came across an interesting scene where I captured these guys enjoying dancing to music.

    #4 – Consider color

    Street photography is very popular as black and white images because the contrast can emphasize light, shadow, and form. It can also reduce the elements of a busy scene down to its most vital shapes and narrative. Although black and white pictures can look great, I encourage you to shoot in color.

    Color can be a great visual element to consider and it has the advantage of adding another layer of narrative.

    Color shows the world as it truly is and is a more honest reflection of how we see the world. Anything from radiant buildings to transport or street lighting can provide an element of luminosity that may help to elevate your photos. Street art and graffiti is another aspect that could provide some vibrancy to your street photography.

    Street photography 06 - graffit artists working

    #5 – Shoot spontaneously

    Street photography is all about spontaneity. It is at the opposite end of the spectrum to say landscape photography where the approach to capturing images is pre-planned and everything related to the shot can be set up in advance.

    Shooting spontaneously to photograph an intriguing moment can happen at any time from the minute you leave your house to getting your morning coffee. This cannot be taught and is entirely an intuitive and instinctive process. Practice is the way to develop this skill.

    Allow yourself to shoot freely in order to make interesting pictures of the world around you and your everyday life.

    Street photography 07

    #6 – Shoot an event

    Lastly, local events are great places to try your hand at street photography. This could be a sports match, a local event with some interesting activities or even an annual festival, where you can capture compelling shots of the participants.

    Festivals provide great subjects for street photography as you have the opportunity to capture pictures of street parades, performers in action and candid portraits of interesting characters on location. Find out if an event is happening near you, find some engaging subjects to photograph and put these tips to the test.

    Street photography 08

    Conclusion

    It’s now time for you to go out and practice your street photography skills by photographing a person on the street or a local event near you. What tips and images do you have to share with us?

    The post 6 Ways to Improve Your Street Photography appeared first on Digital Photography School.


    Digital Photography School

  • How to Avoid Distracting Backgrounds in Street Photography

    Have you ever been excited that you captured a really cool street portrait only to notice later that there’s something growing out the side of the person’s head? You were so excited that you caught the moment and the expression but you just did not see that street sign that looks like it’s growing out of your subject’s ear.

    In this article, I want to run through some of the techniques and tricks I use to help avoid distracting backgrounds when doing street photography.

    Kayan girl playing with bubbles. Photo by Kevin Landwer-Johan (copyright) - How to Avoid Distracting Backgrounds in Street Photography

    Fill Your Frame

    Fill the frame. This was drummed into me when I started working as a newspaper photography cadet. I was instructed, rather than taught, that whatever is in the frame must be relevant to the story the photo was illustrating.

    This is still the most important aspect of composition I follow strictly.

    Look at the edges and into the corners. Whatever is in the frame needs to support, not distract from, whatever it is you are photographing. If you keep this in mind, you will find the distractions most of the time.

    With a lot of street photography what’s in your frame will be changing rapidly so you must be attentive. You must anticipate what’s going to happen next.

    Market scene with Thai flag and samlor. Photo by Kevin Landwer-Johan (copyright) 7 Tips for Avoiding a Distracting Background in Street Photography

    The Decisive Moment

    Wait for the action to peak. Capture your photos when all the elements fall into place, not just some of them. If you have a photo lined up and someone you didn’t see coming walks into your frame, wait until they have moved away. If you take the photo with them visible in your frame you will most likely delete it later anyway.

    So much of the best street photography is about waiting and being patient. Anticipate when the action will be at its best, then take the photo.

    With this photo of the samlor (tricycle taxi) rider, I waited a while for the traffic to clear. The street behind him is typically quite busy and cars in the background did not enhance the photo at all. So, I waited and chatted little with the rider.

    I knew he would not be moving off quickly and that he was comfortable with me photographing him. I wanted to include the shadow in a horizontal composition and anything like a passing car or motorcycle would have been distracting.

    tricycle taxi and rider at a Thai market by Kevin Landwer-Johan (copyright) - 7 Tips for Avoiding a Distracting Background in Street Photography

    Concealment

    If whatever is passing by in the background is small enough, you might try to time your photo so the offending distraction is hidden behind the subject. To make this work your timing has to be just right.

    First, your subject will need to be large enough in the frame. Getting closer to them can be to your advantage. When there is no way to avoid passing pedestrians just wait until they are behind your subject.

    With this young girl performing in a street parade there was a constant stream of people moving behind her. I had taken a few photos from further back but was having trouble isolating her in my frame. I noticed she was quite enjoying being photographed so I moved in a little closer.

    From this angle, she filled more of my frame and I was able to hide people passing by behind her.

    Dancer at a parade in Thailand by Kevin Landwer-Johan (copyright) 7 Tips for Avoiding a Distracting Background in Street Photography

    Prevail With Your Position

    Pick your spot carefully. When you’re concentrating on a single subject, move around it, or them, until you are satisfied with the background. Don’t just stand and take a photo from the first position you think of as often it is not the best.

    As you move about, watch the background in relation to your subject. Often you will be able to avoid distracting elements by cropping them out our obscuring them behind your subject.

    This Kayan girl was sitting outside her home. The front of the home has a small stall where they sell trinkets. I did not want that clutter in my portrait, so I moved. I got creative with my point of view so I achieved the clean background I wanted.

    Portrait of a Kayan girl photo by Kevin Landwer-Johan (copyright) 7 Tips for Avoiding a Distracting Background in Street Photography

    Scout About to Get Minimal

    I love a minimalist background. This can be a challenge in street photography.

    Look around where you are photographing. Find a place where there’s contrast in the light. Maybe where people are walking in the sun and the background is in the shadows. If you expose for the brightest areas the background will fall into darkness in your photo and disappear.

    Alternatively, look for a situation where your main subject will be in the shade and the background is in bright sunshine. This will produce the opposite effect if you expose well. Set your exposure to be correct for the shadow area and the bright background will overexpose, isolating your subject. Or you can expose for the background and make a silhouette.

    When conditions are right the contrast doesn’t have to be extreme for this technique to work. With this photo of the steamed fish vendor at the market the background actually was quite distracting to the eye. It does not appear this way in the photo because the light on her and the lack of light in the background is sufficient enough to render the background dark.

    Tweaking this a little during post-processing to make the background darker does enhance the effect. We do not see this scene naturally with our eyes like this. We see all the detail, but the camera does not. If you look for situations like this you will be able to create images with your subject isolated from the background.

    fish vendor at a market in Chiang Mai photo by Kevin Landwer-Johan (copyright) 7 Tips for Avoiding a Distracting Background in Street Photography

    Lens Selection Strategy

    The focal length of your lens makes a difference. Working with a wide lens, you will see more of the background. With a longer lens, you will capture less of the environment.

    Often with street photography, you want to include the surroundings for context, so a long lens may not be best. Using a wide lens may include too much and be distracting.

    Experiment with different lenses to find a balance in your compositions. If a wide-angle lens is producing pictures which include too much background try a longer one. Move back from the spot you were photographing with a wide lens so your subject is still the same size in your frame with the longer lens. Can you see how different the background is then?

    The narrower field of view of a longer lens will include less background than the wider lens. Read How to use Focal Length and Background Compression to Enhance Your Photos.

    With the women at the bus stop (below), I only wanted to see them and the advertisement behind. With a wide lens I was seeing too much of the surroundings, so I changed lenses and moved back a bit. From further back with a 105mm lens, I was able to capture exactly what I wanted.

    women in a bus stop in Thailand. Photo by Kevin Landwer-Johan (copyright)

    Brave the Bokeh

    I know a lot of street photographers prefer to use a narrow aperture so focus is easier. This means distracting backgrounds are more common. Be brave, capture some bokeh. Open up you aperture and get precise with your focus.

    You don’t need to work with your widest aperture setting. Find the sweet spot where the background is sufficiently blurred and still discernible. I can’t tell you what f-stop that will be, as other factors come into play too. Your lens choice, the distance between you and the subject, and subject to background will determine the amount of blur.

    I like using prime lenses as it’s easier to get a feel for how much of the background will be in focus at various settings. This photo was made with my 35mm f1.4 lens set at f/4. If I had opened the lens up to its widest aperture setting, the background would be completely blurred and the context lost.

    market porter at a Chiang Mai market. Photo by Kevin Landwer-Johan (copyright) 7 Tips for Avoiding a Distracting Background in Street Photography

    Conclusion

    One of the most frequent mistakes I see students in our workshops make is not being aware of what’s in the background. It’s understandable that you want to totally focus on getting your subject looking the best.

    But if you do not pay enough attention to the background you will often find it protrudes, interferes, clutters and bombs where you least expect it. Compose so that everything in your frame is relevant and adds to the picture you are making.

    The post How to Avoid Distracting Backgrounds in Street Photography appeared first on Digital Photography School.


    Digital Photography School

  • Review – Acratech GP Ball Head for Tripods

    When my original tripod head started getting a bit loose and wobbly, the decision had to be made to replace it. But what was I going to get for a new head?

    There are many brands and choices and after doing a lot of research and reading reviews, the most important parameters (for me) were narrowed down to these:

    1. It must be as light as possible
    2. There must be a lever clamp
    3. Panorama leveling included

    Review - Acratech GP Ball Head for Tripods

    After much careful consideration, I opted to go with the Acratech Ball Head with Lever Clamp option. For those interested, the other serious contender was from Really Right Stuff. Pricing was similar but the Acratech was a lot lighter.

    When it finally arrived (it takes a long time for things to travel to NZ affordably) the first thing that surprised me was how small it was. The second thing was how hefty, solid and well made it was. It is almost a work of art in its own right, how sculptured it looks.

    Up close and personal with the Acratech GP Ball Head

    There are three knobs on the base of the Acratech GP. The largest one with the notches is the ball head release – this is the one that gets used all the time to position the head.

    On the same level is a smaller round knob which is responsible for adjusting the tension. When you loosen the main knob it can go completely loose and floppy really quickly, or you can tension it to have a bit more resistance.

    There is a small notched knob on the panorama ring. It allows the whole head to swivel around from side to side – a necessary requirement when panning across for panorama images.

    Review - Acratech GP Ball Head for Tripods

    Back of the tripod as it faces the photographer with the three main control knobs and the lever clamp in a closed position.

    There is one notch that allows you to drop the camera over 90 degrees (to a vertical position) and be held firmly in place there.

    Review - Acratech GP Ball Head for Tripods

    Front of the tripod head showing the drop notch.

    At the top is the camera mount plate which has a lever clamp with a safety release. This has to be held down for the lever to let go. It’s easy to get a shirt cuff caught in the lever so this is a very important feature.

    On the front of the camera mount, is a high friction adjustment knob so you can close the lever tightly around the tripod plate on the camera.

    Finally, there is a bubble level on the camera mount plate.

    Review - Acratech GP Ball Head for Tripods

    Top view of camera mounting plate with the lever clamp in the closed position.

    Here are the specifications on the Acratech GP Ball Head from the manufacturer’s website:

    • Will hold up to 25lbs (11.4kg)
    • Height 4.14″ (105mm)
    • Length 3.47″ (88mm)
    • Wide 3.20″ (81mm)
    • Base Diameter 2.375″ (60mm)
    • Weight 0.95 lbs (.43kg)

    NOTE: It also comes with a 10-year warranty.

    Setting up the Acratech GP Ballhead

    Step 0 is to screw the head to the top of your tripod legs.

    Step 1 is to sort out your appropriate level of tension needed for the ball head when you release the main locking knob.

    • Too loose and the camera will instantly flop over to one side if you don’t have a hand supporting it.
    • Too tight and it can be stiff and difficult to position, which slows you down and is quite tiring after a while.
    • My preferred option is set so that it’s tight enough to loosen off slowly initially but has enough play to move about easily.

    Step 2 is to put the camera on the mounting plate (with the ball locked shut) and the adjustment knob on the mounting plate loosened.

    This allows you to seat the camera firmly and holding tightly with one hand, screw the adjustment knob as tight as you possibly can.

    Step 3 is to figure out how it all works together with the camera mounted. You may want to change the tensioning once the camera adds its weight to the arrangement.

    There is a full set up video on the manufacturer’s website, or you can watch it below:

    ?

    Features

    One of the benefits of the Acratech GP ball head is it offers three key features in one mount:

    1. Standard ball head with lever clamp option
    2. Gimbal head
    3. Panorama head

    1. The standard ball head allows you full rotation around the top of the head and a drop notch to allow a 90-degree supported camera position.

    2. Gimbal head utilizes the drop notch and by having both the main knob and the panorama knobs loosened, you can swing the camera around and swivel up and down freely. This works best when you have it mounted on a longer lens with a locking collar.

    3. The panorama head is a unique feature where you unscrew the head from the legs, also unscrewing the camera mounting plate from the top of the tripod.

    You then screw the camera mounting plate on the bottom of the head and screw the reassembled head back onto the tripod legs.

    (See the video above which fully explains all these features.)

    The User Experience

    I have had my Acratech GP Ballhead for several years now and in general, I really like it though there are some design features I find quite irritating.

    1. The main locking knob has a really short shank (the distance between it and the body of the head). My hands aren’t huge but I often scrape my knuckles on the side of the head when tightening the locking knob.
    2. The main locking knob is quite small which means you need to turn it a lot because it lacks the leverage a wider knob would give. As a result, I have the tensioning set quite high.
    3. When the tensioning is set towards the higher end (i.e. quite resistant), it can sometimes seem that the camera is locked in place. However, if the locking knob is not fully engaged, the camera can suddenly drop or slump especially if you have a heavy lens. Or if you are really unlucky and you didn’t check the friction knob was tight, your camera literally falls out of the head and smashes onto a concrete floor!
    4. Check that the lever clamp high friction knob is tight as it can loosen over time.
    5. It may be the age of my head but I notice it droops down a bit when the camera settles into position. Not a huge amount but it’s noticeable when working with macro and tightly framed compositions. It’s manageable by setting it a tad higher than usual and letting it drop into the correct position.
    6. For panoramas I have never bothered to muck around with unscrewing it as its designed to be, I just set everything up and then loosen the pano base knob and swing it around happily.
    7. I have never used the gimbal feature so I cannot comment here.
    Review - Acratech GP Ball Head for Tripods

    Side view showing some of the wear and tear on my Acratech GP Ball Head – it’s a solid piece of kit.

    My Gear

    I shoot with a Canon 7D Mark II and my heaviest/longest lenses are Canon 24-70 II F2.8 IS, Canon 100mm F2.8 IS L macro and Canon 70-200 F4 IS L with a locking collar.

    I got an RRS L-plate for the camera and a lens plate for the 70-200mm lens.

    My tripod gets used a lot. I always use it for landscapes, as I do a fair amount of long exposures. Any macro photography is always done using the tripod and most of my food and still life shots are done on a tripod as well.

    Review - Acratech GP Ball Head for Tripods

    Acratech ball head with a Canon 7D mounted for scale.

    Summary

    This is only the second tripod head I have owned in 10 years of doing photography and in general, I am very happy with it.

    It is tiny in comparison to other options, so the lighter weight is appreciated when traveling or carrying the tripod. Despite the size, it does provide a good firm base and allows me to get solid sharp images.

    There are a few quirks to get used to in regards to setting up and using the head. I am sure this is pretty common no matter what brand or option you get.

    My one main niggle is the design of the main locking knob. The shank is too short and I have scraped my knuckles bloody on more than one occasion. It can be avoided by careful positioning of my hand in relation to the knob, but in my opinion, it is a design flaw that should be improved upon.

    Overall, based on the range of features it offers a run of the mill photographer (i.e. you don’t have big heavy lenses), the lighter weight, quality of workmanship and design, I give the Acratech GP Ball Head 8 out of 10.

    The post Review – Acratech GP Ball Head for Tripods appeared first on Digital Photography School.


    Digital Photography School

  • Making the Best Use of HDR in Landscape Photography

    Do you love landscape photography? It provides ample rewards for those who are drawn to the outdoors. Chasing the light can be very exciting but it also poses some significant challenges. What you see versus what the camera sees can be two very different things.

    Making the Best Use of HDR in Landscape Photography - two images of a forest

    What is High Dynamic Range and why it matters

    Much of the best light comes with difficulties related to exposure, and all cameras have limitations when it comes to exposure. The problem is High Dynamic Range or HDR.

    Your eyes have an immense dynamic range when it comes to scenes with extremes of bright and dark. Your eye adjusts so quickly you don’t notice it. But your cameras sensor, on the other hand, has a fixed dynamic range. If the scene you’re photographing exceeds that, the camera can’t capture all the details at both ends of the contrast range.

    There are several methods for dealing with this limitation:

    • You can underexpose the image and allow the darker elements to become silhouettes. But that only works in a few situations.
    • You can use a graduated neutral density filter. This works best when there is a straight dividing line between the bright and dark areas of the image. Otherwise, the tops of foreground objects like trees become darker than the bottoms.
    • Or you can use a method that works in all situations and the solution is simple. If the sensor can’t capture the full dynamic range in a single shot, take several shots at different exposures that span the dynamic range. Later, in the digital darkroom, blend the images together to make a single image.

    Lower Antelope Canyon - Making the Best Use of HDR in Landscape Photography

    There are two parts to the HDR process – capturing the image in the field and processing it in the digital darkroom. Let’s start in the field.

    Setting up an HDR shot

    Here are the things you need to do to set up an HDR shot for landscape photography. The starting point is your normal landscape configuration.

    • It’s customary to use a tripod for landscape photography and this applies to HDR as well. However, with the exciting advances in alignment technology in applications like Photomatix Pro, more and more HDR photography can be done hand-held.
    • Set your camera mode to Aperture Priority. You want all your exposures to maintain the same depth of field.
    • Set your focus to manual (or use back button focus); you don’t want the focal point changing between shots.
    • Use a remote release and set your drive to continuous mode. That way, you don’t inadvertently jiggle the camera when you press the shutter button. This way, one press of the remote‘s button takes all your shots.
    • Set your exposure bracketing, you’ll typically want 2 stops difference between shots.
    • Set the number of shots, typically 3. But be aware that in extreme conditions you may need 5 or more shots to capture the full dynamic range of the scene.

    Note: Your camera may have restrictions on exposure bracketing and/or the number of shots, so you will need to work with that. The important thing is to get enough shots to cover the entire dynamic range.

    Now you’re ready to go. For a more detailed introduction, see this article “Setting up Your Digital Camera for HDR Shooting”

    How to know you need to do HDR

    Your histogram will tell you if you need to use HDR. Here is an example of what you’re looking for.

    Histogram - Making the Best Use of HDR in Landscape Photography

    The histogram spans the range of brightness from maximum dark on the left to maximum bright on the right. For each level of brightness, the graphs shows you how much of your scene has that tone.

    The histogram above clearly shows a situation where HDR is needed. The histogram pushes up against the left side, which indicates the shadows are clipping and there is a loss of shadow detail. Similarly, the histogram pushes up against the right side where you have highlight clipping, again, with a loss of detail.

    When checking your histogram for potential HDR problems, you only need to look at the left and right sides. What it looks like in the middle doesn’t matter.

    For a full explanation of histograms, check out “How to Read and Use Histograms”.

    Capturing the images in the field

    You’ve identified a shot that requires HDR. Next, you’ve set up the shot and taken your set of bracketed exposures.

    Riverside Walk - Making the Best Use of HDR in Landscape Photography

    You got it. Or did you?

    How do you know your shots spanned the entire dynamic range? If you’re thinking it’s the histogram, you’re right. You don’t need to check the histogram for every one of your shots, just two – the most underexposed (the darkest one) and the most overexposed (the lightest one).

    Over and underexposed histograms - Making the Best Use of HDR in Landscape Photography

    The histogram on the left is the most underexposed shot. It is well away from the right side. In fact, there’s very little beyond the middle. You may think this is too underexposed, but experience shows that the best practice is to underexpose by too much rather than not enough. There can be areas that are extremely bright but too small to register. It’s better to play it safe.

    The histogram on the right is the overexposed shot. Because it is pulled away from the left side, you can be confident you have captured detail in the shadows. Regardless of how many shots you took, these are the only two histograms you need to check.

    Making the Best Use of HDR

    In landscape photography, you have no control over the light. You need to work with what nature serves up. Sooner or later you will run into HDR situations.

    With experience, you begin to anticipate when you need to use HDR. Here are some of those situations, with the before and after images displayed for each. The after image, by the way, is the result of the HDR blending and nothing else. More work will be done in Lightroom and Photoshop later.

    Twilight

    HDR conditions occur during twilight, the hour before sunrise and just after sunset. During most of this time, the dynamic range is well within your camera’s limits. But there is a period of about 10 minutes or so when the sky becomes very bright while the land is still dark.

    This moment captured in Joshua Tree National Park, California, illustrates this issue.

    Twilight before and after - Making the Best Use of HDR in Landscape Photography

    The image on the left is the before image; a single exposure that captures detail in the foreground. Notice how the dramatic sky is lost. With HDR you get it all – foreground, sky, everything. And besides capturing the sky, look at the enhanced detail in the foreground.

    Sunrise and sunset

    Often during sunrise and sunset, you want to have the sun in the composition. The bright sun can create an extreme dynamic range, however, and can also confuse your camera’s light meter. The sky may get washed out or the foreground can be darker than you’d like.

    Sunrise before and after - Making the Best Use of HDR in Landscape Photography

    Look at this photograph of Thor’s Hammer (above), captured at sunrise in Bryce Canyon National Park, Utah. The hoodoo to the right is an important part of the composition. Getting the starburst of the rising sun through the window adds to the interest.

    But the before image without a sky misses another key element. With HDR, however, it all comes together and the moment is recreated.

    Full moon at twilight

    As it rises through the Venus Belt, a full moon makes an exciting image, with the band of color that sometimes appears in the eastern sky as the sun sets. The best time to capture this is one or two days before the actual full moon.

    You may not think of this as an HDR shot. The dynamic range of the earth and the darkening sky is well within your camera’s capabilities. The moon, however, is in full sunlight. It is as bright as midday. So, the challenge is to capture the detail in the moon.

    Full moon before and after - Making the Best Use of HDR in Landscape Photography

    The before image has no detail in the moon or the shadows. But the HDR image captures the moon and can be worked with to produce a beautiful photograph. You might like to see how this turned out (below).

    Bristlecone moon - Making the Best Use of HDR in Landscape Photography

    Dappled sunlight

    In a woodland or forest on a sunny day, the sun’s rays pierce the canopy to create enchanting bright patches. It’s beautiful, but it presents a serious exposure problem. In the days of film with a limited dynamic range, you would likely pass it by.

    Dappled sunlight before and after - Making the Best Use of HDR in Landscape Photography

    This before image (above) has a problem that often goes overlooked; the foliage in the background is blown out. And not just that, but the fern at the bottom is also in the sun and it too is overexposed. But the HDR image handles both areas beautifully and, as a side benefit, produces richer colors.

    This is just the beginning

    There are a lot more situations where HDR can save the photograph. Slot canyons come to mind or rays of light in a redwood forest, as you saw above. The trick to avoiding HDR problems is to always check your histogram.

    Another good practice is to do brackets shots even when it’s not obvious that the scene requires it. It’s good insurance. If you don’t need the bracketed images, you lose nothing. But if you need them and don’t have them you lose the photograph.

    Processing in the digital darkroom

    There are many tools that can blend your bracketed files. Even Lightroom and Photoshop now have very rudimentary HDR options, albeit without any significant controls. You get what you get.

    The premier HDR tool is HDRsoft’s Photomatix Pro. HDRsoft has been around since the dawn of HDR photo editing. All they have ever done is HDR processing, and they are very good at it. Photomatix Pro provides a robust and powerful set of adjustments that enable you to create photographs ranging from natural to surreal, and even black and white.

    Suppose you were photographing in Zion National Park, Utah at sunrise, and you took these three shots bracketed by 2-stops.

    3 bracketed exposures - Making the Best Use of HDR in Landscape Photography

    None of these photographs are very good on their own. The middle image, the underexposed one, captures the blue of the sky that isn’t in any of the other images. And the image on the right captures all the detail in the foreground. However, this is exactly what you want for HDR.

    Let’s pick up the workflow where you have already uploaded your images into Lightroom and selected the files you want to process.

    1. Initial Lightroom processing

    Don’t do anything to your files before you do the HDR blending other than capture sharpening. In the Develop module, make sure all your settings in the Basic, Tone Curve and HSL groups are set to zero.

    2. Export the files to Photomatix Pro

    When you install Photomatix Pro with the Lightroom extension, an Export preset is created automatically. With all the files selected, in Library mode, click the Export… button in the lower left-hand corner. In the Export dialog, select the Photomatix Pro preset and click Export.

    3. Make setting selections in the Export dialog

    There are a number of settings in the export dialog box. The two most frequently used are Align images and Automatically re-import into Lightroom Library.

    • Align images – Always click the Align source images checkbox. In the Preset pull-down menu select whether you captured the images on a tripod or hand-held. It’s a good idea to also click Crop aligned images.
    • Automatically re-import into Lightroom library – Check this box because you will want to continue your workflow in Lightroom once you have your HDR image. In Output Format: be sure to select TIFF 16-bit. Also, click Stack with selected photo.
    • Other Settings – You can explore the other settings for further control. The Show dialog with options to remove ghosts setting is like magic if any elements in your composition moved between exposures. It’s called ghosting. You have a tremendous amount of control in removing ghosting with this option. Check it out. Sooner or later you’re going to need it.
    • When everything is set the way you want, click Export.

    Lightroom converts the selected files to TIFFs, launches Photomatix Pro and exports the files. Photomatix Pro will do the initial processing and display the blended image.

    4. Refine the image in Photomatix Pro

    The image is already looking so much better. But you can do more.

    The best place to start is the presets. Try out the various presets. There are over 40 of them, not counting any that you might have created. Everything from natural to surreal is covered. Detailed seems to work best for this photograph.

    Check the histogram. Check the luminance, red, green, and blue histograms. The point of using Photomatix Pro is to eliminate clipping, especially highlight clipping and the histogram tells you how you’re doing.

    Here, luminance has a small amount of highlight clipping. Red is fine but green and blue have a lot of clipping. That can be fixed with the White Point adjustment in the HDR settings group (you need to scroll down to see it).

    White Clip – Set this to 0 and check your histograms again. The luminance and green clipping is totally gone but there’s still blue clipping. That’s not really a problem, though, because most of the blue has no detail.

    Other HDR SETTINGS

    Try the other adjustments in the HDR SETTINGS group. At the bottom of the panel is an explanation of what each does, so refer to that. After a little experimenting, setting Strength to 65 and Tone Compression to -4.0 produces a very favorable result with this image.

    COLOR SETTINGS

    Color Settings are fairly new and a great addition. Bumping both Saturation and Temperature to 4.0 is very pleasing.
    It would be nice to draw more attention to the trees in their autumn colors. To do that, select Yellow from the Image Colors drop down and adjust the Brightness slider to 5.0, Saturation to 2.0 and Hue to -2.0.

    5. The Results

    Here’s how the image looks now. Looking good.

    Photomatix pro ending point - Making the Best Use of HDR in Landscape Photography

    6. Finishing up

    Click Next: Finish to continue. Photomatix Pro applies all of the adjustments you’ve made and gives you the option of a few more – Contrast, Sharpen, Crop, and Straighten. These are handy when you’re using Photomatix Pro to create the final image. But if you intend to do more processing in Lightroom or Photoshop, you might want to do your tweaks there instead.

    7. Save and Reimport

    Click Save & Reimport. Photomatix Pro will create a TIFF file and save it to the same drive as the original files. It will also add the new file to the Lightroom catalog so you can continue editing it there.

    8. Finish your workflow

    Continue your normal workflow with the file that’s just been imported. You could end up with something like this.

    Final thoughts

    Sometimes I’m asked if my photographs are what the camera saw. My response is, “No, because the camera doesn’t know what I’m feeling.”

    Landscape photography can be so much more than just documenting experiences. It has the power to convey the emotions and states of mind that come upon us when we stand in the presence of such majestic scenery as this.

    But there are times when nature challenges us. And with techniques like HDR and powerful tools like Photomatix Pro, our creative expression is unleashed, and we are able to make photographs that go beyond simply capturing the moment but hold a deeper meaning.

    Do you have any questions about using HDR in landscape photography? If you do, please let me know in the comment area below and I will be happy to answer them.

    Disclaimer: HDRsoft is a paid partner of dPS

    The post Making the Best Use of HDR in Landscape Photography appeared first on Digital Photography School.


    Digital Photography School

  • How Color Balance Can Kill Your Color

    Sometimes taking a neutral position on things like color balance isn’t really the safe or smart thing to do – sometimes it’s downright dangerous!

    Gray Balance Versus White Balance

    The camera term for color balance is White Balance, although we measure gray cards rather than white surfaces. Why? The difference isn’t about semantics, it’s about math.

    Color Checker Gray - How Color Balance Can Kill Your Color

    This is the bottom row of patches from the full ColorChecker chart published (now) by X-Rite.

    Neutral gray colors (yes, gray is a color) are all composed of equal measurable parts of each RGB color, while pure white contains no measurable color at all. Photographic gray cards are absolutely color-neutral. We don’t use white cards simply because you can’t measure data that doesn’t exist.

    What we perceive as white in a photograph more often than not contains trace amounts of red, green, or blue. Just enough to throw the color balance of the photo way off center if used as a reference (try it and you’ll see).

    The Gray Balance tools in Photoshop and Lightroom will neutralize whatever color you click on, so always pick a gray patch rather than a white one. The ColorChecker includes a row of neutral gray patches, none of them being pure white.

    Eye Versus Camera

    The human eye is very forgiving in this respect. It perceives white in a very assumptive manner. White paper viewed under color light still appears white because of what we call memory colors, a cognitive database of repeated experience. If we associate a color with an object often enough, we establish a link between the two.

    Not so with the camera. Its sensors have no such recollection and are not so forgiving. This is why you must balance color in Photoshop and Lightroom by referencing known neutral gray elements in the photo to known values.

    Auto White Balance

    Your camera’s Auto White Balance, or AWB, is what is relied on by most shooters because the flawed assumption that cameras recognize light like we humans do. Actually, the cameras are dumb electronic devices that evaluate light more clinically than do our eyes. Our brain’s cerebral cortex parses the hues of light according to our memory color catalog.

    Memory Colors

    White Balance Memory Colors - How Color Balance Can Kill Your Color

    Memory colors are logged into our brains. These include grass (green), sky (blue), paper (white), orange (orange), etc.

    Whether under candlelight or sunlight, fluorescent or tungsten, sunset or noonday, a white sheet of paper will always appear white because your brain retains the associative reference. Your brain compensates for almost every color of light, delivering a believable impression of what you’ve come to think of as reality.

    No matter when you see these memory color items, your brain registers these colors and in a sense, overrides the actual color of the light. Unfortunately, this is not true for (digital or film) cameras.

    White Balance Symbols - How Color Balance Can Kill Your Color

    How it works

    Trusting that the camera’s AWB will correctly diagnose light and set the proper color interpretation is a flawed and risky assumption fraught with problems.

    First, in the language of RGB color, equal values of red, green, and blue (like red 128, green 128, and blue 128) light produce an absolutely neutral gray color. This is an absolute of color science.

    In order for the camera’s AWB algorithm to deliver accurate color, it must assume that there exists a detectable and absolutely neutral gray component in the scene. A pretty wild assumption considering that there are over 16,000,000 colors in the visible spectrum.

    The camera then examines the light reflecting from objects in the scene and locks onto the cluster of pixels whose RGB values are closest to equal (regardless of how dissimilar). The AWB mandate then forces those colors to become absolutely neutral value while twisting all other colors in the scene in a similar manner.

    This is all well and good IF that cluster of pixels in the captured scene actually is, in reality, neutral (gray) in color. The corrected values will then actually balance the colors in the image and produce an image that looks “real”.

    The issue

    But, if the scene does not have an absolutely neutral component – if there is a bluish somewhat-gray item in the scene but is not truly neutral gray (like the snow scene below) – then the image processor in your camera will dutifully and obediently change that bluish color to neutral gray, and shift all the other colors in the scene in the same direction on the color wheel.

    While your eyes and your cerebral cortex use memory colors to forgive any color cast in a scene, they do not afford that same corrective assumption to photographic images. If the collection of pixels or printed dots produce off-color results, your perception will register and report “bad color”.

    You are smarter than your camera

    Your camera is not smart, it is simply efficient and obedient. It will obey anything you tell it to do. It’s a machine, it is not a volitional entity. It has neither reasoning power nor color-compensating algorithms.

    Your camera may claim to have “intelligence,” but that intelligence is merely scripted logic, sometimes labeled artificial intelligence (the keyword here is “artificial”). You are the only one with actual intelligence. You must tell the camera what to do, NOT the other way around.

    Take control of the situation and set your camera’s white balance setting according to the current lighting conditions. Your options include manual pre-sets for all typical lighting situations: Daylight, Cloudy, Shade, Tungsten, Fluorescent, Flash, and usually a couple of custom setups.

    White Balance Genoa Cathedral - How Color Balance Can Kill Your Color

    These two images were captured within 5 minutes of one another, under identical lighting. AWB (left) neutralized the color but destroyed the richness of the scene. The camera’s Shade color balance (right) added a slight amount of warmth and captured more closely what my eyes observed.

    Color Balance Tools

    There is a time to use your white balance tools to reference true neutral gray in the scene to set the gray balance in your photos, and there is a time to keep those items in your camera bag. The truth is, neutralizing every image can literally suck the natural color right out of a scene.

    White Balance Tools - How Color Balance Can Kill Your Color

    White Balance Tools: A) Digital Grey Card, B) DataColor SpyderCube, C) X-Rite ColorChecker Passport, D) Photoshop Levels, E) Camera Raw, F) Lightroom.

    A gray balance tool placed in the scene (for an initial test shot) will serve as the gray balance reference for correcting any color casts in images captured in that scene.

    This correction takes place after the capture when the test image is opened in Adobe Lightroom, Camera Raw, or Photoshop. When the White Balance tool is applied to a reference gray in the test image, all photos open at the time can be color corrected automatically.

    This is truly a great way to accurately set the lighting balance within a series of photos taken during a single session.

    White Balance Sunset Fence - How Color Balance Can Kill Your Color

    The sunset light reflecting off this wooden fence would be scuttled if the colors were neutral balanced.

    Exceptions

    Unless the scene contains “emotional” light such as candlelight, sunrise/sunset, late afternoon or early morning light, nightlife/neon, etc. If the scene to be captured contains this kind of emotional (or mood) lighting, the very mood can effectively be neutered by the white balance process. Shooter beware.

    White Balance Disney - How Color Balance Can Kill Your Color

    Late afternoon Florida sun added a very warm and rich appearance to the shot on the left. I used the Neutral Balance eyedropper (choosing the most neutral colored surface I could find) to set the White Balance. As a result, the process destroyed the warmth that attracted me to capture the image in the first place.

    White Balance Alaska - How Color Balance Can Kill Your Color

    This snowy night shot was taken in Fairbanks Alaska on December 28th at 10 PM, capturing the surreal natural lighting that occurs in Alaska at this time of year.

    The cool shadows that are evident in the image on the left are typical of moonlight reflecting off the snow. Setting the camera’s color mode to Daylight, allowed the tungsten lamplight to capture warm lighting amidst the cold snow, recording the scene exactly as I experienced it.

    In the picture on the right, the camera’s White Balance was set to AWB, assuming that this “automatic” setting would capture the colors of the image faithfully. Oops! In truth, AWB actually lost the shivering cold lighting altogether.

    In both of the above cases, white/neutral balance routines were employed, and the ambiance of both scenes was dutifully destroyed. By forcing each unique lighting to be neutralized, both the warmth of the sun and the frigid look of the night snow were lost.

    Conclusion

    There is no single, always-right color balance setting on the camera. In fairness, most times the AWB setting in the camera and gray balance in the editing software work out very nicely.

    But occasionally the “intelligent” camera and the powerful editing software need smarter input. That means you. Using a known neutral color element in the picture as a reference allows you to become the color expert.

    White Balance Kids - How Color Balance Can Kill Your Color

    Using the aluminum window panel (top right) as a gray reference allowed me to automatically color correct this picture with a single click.

    So what have we learned? There is a time for White Balance just as there is a time for political correctness. BUT to force the strict application of either in every situation can destroy the spirit of free expression.

    Use gray balance only when emotional/mood lighting isn’t present and when a good gray component is in the scene. Too many dramatic scenes get neutered (or neutralized) in the name of neutrality.

    The post How Color Balance Can Kill Your Color appeared first on Digital Photography School.


    Digital Photography School

  • 4 Less Popular Types of Lighting Every Photographer Should Know

    How can you, as a photographer, best use lighting to your advantage? Working with different kinds of light can be a challenge for even the most seasoned photographers. This often leads to a common suggestion: “Point your shadow at the subject.” Yet certain underutilized less popular types of lighting can actually enhance your photographs.

    macro photography bokeh flower dahlia - Types of Lighting

    In this article, you’ll get tips for working with four different types of natural lighting, including shade, overcast light, and strong backlighting. Hopefully, you’ll come away with the know-how and inspiration to start using more creative lighting in your own photographs.

    macro photography bokeh flower tulip - Types of Lighting

    1. Shade plus front light

    By “shade plus front light” I’m referring to the lighting situation when the sun is behind you (and coming over your shoulder), but the subject is shaded. That is, the sun would normally front light the subject, but it is blocked by an object.

    macro photography bokeh flower trout lily - Types of Lighting

    I shaded this trout lily with my body, resulting in a shaded subject and a well-lit background.

    Many photographers like to ignore shaded subjects. However, I love this lighting situation for a few reasons.

    The first is that it is easier to expose for a shaded subject. You don’t have to deal with intense highlights and shadows. Instead, you can rest easy knowing that the range of lights and darks in your image will be rendered properly by your camera’s sensor.

    purple flower - Types of Lighting

    Another shaded but front lit situation. Notice the brighter background here.

    The second is that this lighting scenario offers up wonderful backgrounds. This is an especially powerful technique when shooting during the “golden hours”, the time just after sunrise and just before sunset.

    If you can position the subject so that the sun falls behind it, you can take images with rich, warm background colors. The key is to expose for the main subject (i.e., meter off it), and let the background remain bright. Use a wide aperture to ensure that the background is thrown out of focus.

    macro photography bokeh flower cosmos - Types of Lighting

    Shading this cosmos flower allowed me to produce a more subtle looking subject with a beautiful background.

    Shaded subjects can make for great photographs if you know how to use them!

    2. Shade plus backlight

    To continue with the “shade” theme, let’s discuss another underutilized type of light: shade and backlight.

    By this, I am referring to a situation with a shaded subject where the sun is positioned behind that subject so that you are pointed toward the sun. In this situation, you cannot do the shading yourself. Instead, you have to rely on environmental features to block the light.

    macro photography bokeh flower - Types of Lighting

    This flower was shaded by some nearby grasses. I was able to get these background highlights by including the edge of the sun in the frame.

    What does this type of lighting offer you? Similar to a shaded and front lit subject, a shaded but backlit subject is easier to expose.

    If you’re struggling to photograph a brightly colored flower, for instance, it might be beneficial to find a similar specimen in a shaded area. This will help prevent you from blowing out the highlights on the flower’s petals.

    macro photography bokeh flower aster - Types of Lighting

    Another compelling reason to use this particular type of lighting is that it can create beautiful bokeh. I’m not really talking about bokeh in the sense of that smooth, creamy look that we photographers love (for that, go back to shade plus front light).

    Rather, I’m referring to those beautiful geometric shapes that occasionally appear in the background of photographs.

    macro photography bokeh flower tulip - Types of Lighting

    Notice the slight highlights in the background, created by the shade-sun combination.

    How do you do this?

    In a backlit environment, the light is often filtered through the surrounding greenery. These are often leaves, but also grasses, shrubs, branches, tree trunks, etc. The rays of the sun are broken up into small points of light, which are then rendered in that geometric fashion when incorporated into your images.

    This is a beautiful effect that can add an extra punch to your photographs.

    3. Overcast lighting

    This type of lighting is more commonly used than the two mentioned above, but overcast light (i.e., light on cloudy days) deserves a mention.

    macro photography bokeh flower aster - Types of Lighting

    I photographed these flowers on a cloudy afternoon.

    You might think that the camera should stay inside on overcast days. After all, the subjects aren’t very well lit, and everything seems a bit gloomy and bland.

    Actually, overcast days are fantastic for photography. Especially if you go out toward the middle of the day when the sun is high in the sky (and blocked by clouds), you’ll find wonderfully diffused lighting.

    The clouds act as a giant softbox, subtly lighting the entire landscape. This results in colors that are deeply saturated. Macro photographers such as myself love overcast lighting because our flower photographs become much more colorful.

    macro photography bokeh flower tulip - Types of Lighting

    Another advantage to shooting on overcast days is similar to that of shaded lighting in that the subjects are easier to expose well. There is no bright sunlight to create harsh shadows and unpleasant highlights.

    Therefore, overcast days can be a great choice for photographing brightly colored subjects.

    4. Direct backlighting

    Direct backlighting refers to situations where the sun is directly behind the subject (and therefore directly in front of the photographer).

    macro photography bokeh flower tulip - Types of Lighting

    The sun is just out of the frame here, above the tulip.

    This type of lighting is difficult to work with. Photographers often come away with unwanted flare and a drastically underexposed subject. However, using backlighting is simpler than you might think. Just remember a few key guidelines.

    The first thing to note is that I don’t like to use direct backlighting unless the sun is low in the sky. Otherwise, instead of achieving a charming, warm look, you’ll find yourself with a harsh, contrasty image. Sunrise and sunset are your windows, so you’ll need to work quickly and efficiently.

    Second, don’t put the sun in the image itself. This will result in a nearly impossible lighting situation. Instead, block the sun with your subject. Move around a bit. Get down low. If you do decide to include the sun in the image, put it at the very edge of the frame (as I did in one of the photos above).

    macro photography bokeh flower bleeding heart - Types of Lighting

    Backlighting (the sun was in the background on the right-hand side) produced some really interesting bokeh in this bleeding heart photograph.

    Third, make sure that your subject stands out against the background. I often try to compose with the subject against the sky.

    Fourth, expose for your main subject. Don’t worry about the bright background. Then, once you’ve settled on an accurate exposure for the subject itself, feel free to raise or lower the exposure. Lower it for a slightly darker, more dramatic look (and if you lower it a significant amount, you’ll end up shooting a silhouette). Raise it for a slightly brighter, in-your-face type image.

    While there are certainly variations in backlighting conditions, these four guidelines will get you well on your way to shooting some creative backlit images.

    Conclusion

    While it can be difficult to think outside the box and take risks when it comes to lighting, the rewards can be great.

    Try using some of the lighting scenarios discussed above: shade and front light or backlight, overcast light, or even direct backlighting.

    Your images will become far more diverse and a lot more impressive!

    macro photography bokeh flower aster - Types of Lighting

    The post 4 Less Popular Types of Lighting Every Photographer Should Know appeared first on Digital Photography School.


    Digital Photography School

  • How to Work a Location to Get More Great Photos

    I wouldn’t be able to count the number of potentially great photos I’ve missed because I visited a location with only one image in mind. It’s easy to fall for the temptation to set up, get your shot, then pack up and leave. I’ve done it countless times, and I’m sure you have too.

    How to Work a Location to Get More Great Photos- photo of a rocky coast and trees

    Every location on earth has the potential for thousands of different images. Even a simple beach scene can be photographed in a huge variety of ways to create many beautiful images. You don’t need to have stunning scenery to come home with a collection of great images.

    It only takes a little planning combined with the ability to improvise and adapt to the environment. Here are some tips to help you work a location to come home with more and better photos.

    Step 1: Plan Plan Plan

    I’m a huge advocate of planning your photos. In landscape photography, you’re at the mercy of mother nature, so the more prepared you are, the better your chances are of getting the shot.

    How do the top landscape photographers in the world manage to consistently produce gorgeous images? They’re in the right place at the right time. Of course, there’s a bit of luck involved, but it’s largely down to a lot of careful planning.

    How to Work a Location to Get More Great Photos - sunset and reflection in water

    Once I’ve chosen a photography location I’ll almost always do some planning for the shots I want. This usually involves looking at satellite and topographical maps on Google Maps. This will give you an idea of the landscape and features of the location.

    Consider the time of day

    Once you have an idea of the photos you want to take, it’s worth considering the best time of day. Golden hour at either end of the day provide great light, but you also may need to consider other factors like the tide and travel time.

    There are many tools available to help you research and plan your photos. My favorite by far is PhotoPills. It’s a paid app, but worth every cent. It includes too many features to list here, and I can’t recommend it enough.

    Photo sharing sites like Flickr and Instagram are great for finding inspiration. Experiment with a variety of tools and find what works for you. Whatever you decide on, be sure to use them. Planning your landscape photos will dramatically increase your rate of keepers.

    How to Work the Scene to Get More Great Photos - overhead view of a rocky beach

    Step 2: Work the Location

    Once you’ve planned your photos, the obvious next step is to go and create the beautiful images you’ve imagined.

    Make sure you’re well prepared. Nothing will ruin well-planned photography like flat batteries or full memory cards. Watch the weather forecast and get to your location with plenty of time to spare. Wear comfortable shoes because you’ll likely be doing some walking.

    Get the shot, but don’t stop there. There are still many opportunities to get more great photos. Exploring on foot is the best way to find different and interesting photos that you may not have considered when originally researching the location.

    Walk in the direction you just photographed and look back the way you came. Hike up to a high place. Walk up a river or climb some rocks. Move your legs. Very few incredible photos are taken from parking lots.

    How to Work the Scene to Get More Great Photos - empty beach and blue sky

    Change it up

    Other than finding different perspectives and subjects to photograph, there are a few other ways to get more out of a location. Try using different gear. A different focal length can open up a bunch of new possibilities for shooting the same scene.

    If you’re used to photographing landscapes with a wide-angle lens, put a longer lens on your camera. It will not only allow you to create many more compositions from the same place, but it will also stretch you creatively.

    How to Work the Scene to Get More Great Photos - aerial view of coastline

    Rent or borrow a macro lens and try taking a look at the smaller details of the location. You have almost limitless possibilities once you start looking at the grass, rocks, sand, or trees around you.

    Light is everything

    Another option is to wait for the light to change. Within the space of a couple of hours, you can photograph everything from daylight, through the golden hour, and into twilight. The same scene can look very different as the intensity, color, and direction of the light changes. Watch the way the shadows shape a landscape as the sun drops.

    How to Work the Scene to Get More Great Photos - tidal pool at sunset

    I learned to love photographing blue hour when I went out for sunset and noticed that I loved the light about 30 to 60 minutes after sunset. Try sticking around into the evening and playing with the low light. You could even stay until well after sunset and try including some stars or the Milky Way in the scene.

    Finally, using various photographic techniques or effects can add a different look to the same location. If there’s movement in the scene, try photographing it with different shutter speeds. Fast shutter speeds that freeze movement look very different from long exposures that blur movement.

    How to Work the Scene to Get More Great Photos - long exposure of ocean waves sunset

    The way you expose the light can also change the look of the image a lot. Try exposing for a blown-out back-lit image or an underexposed the foreground for dark silhouettes. Photograph landscapes with both a large and small depth-of-field for a different look.

    That’s it!

    As you can see, with a bit of creativity, forethought, and patience, your options are many. You don’t need to come home from a location with only one good image.

    Since I’ve learned to work a location, I often come home with many more decent images than I expected. Even with plenty of research and planning. Next time you go out to photograph a location, do some planning, get the shot, then walk, wait, and get creative to find a bunch more photos you’ll be happy with.

    The post How to Work a Location to Get More Great Photos appeared first on Digital Photography School.


    Digital Photography School

  • Cell Phone Versus DSLR – Can you tell which is which?

    We live in weird times as photographers. Paradoxes abound and when it comes to the idea of cameras and whether or not cellphone photographic performance is on par with dedicated digital camera systems is an issue which sees even learned opinions hopelessly polarized.

    “Cellphone cameras are killing photography!” – “It’s such a great time to be a photographer since we have cameras right on our phones.” – “A cell phone is not a camera!” – There are many opinions on this topic!

    I have a good friend who photographed his way through Europe with nothing but his cellphone while editing along the way using Lightroom Mobile. His photographs are nothing short of incredible.

    At the same time, even I sometimes get tired of all the “cellphone artists” who seem to bypass the fundamental nature of photography with their tiny little gadgets held out in front of them.

    Canon camera and a smartphone - Mobile Phones Versus DSLRs

    So with the debate still raging over whether or not a cellphone can match the performance of a more traditional camera…an idea suddenly came to me. Granted, I’m not the first person to ever think of this but it’s a new idea for me nonetheless and one that I wanted to share with all of you fine people.

    I decided to put my own cell phone up against one of my standby full-frame DSLR camera bodies and do some blind comparisons of the images.

    I want you to come along for the ride. Can you tell which images were shot with the DSLR and which were done with the cell phone? Could it be that a cell phone will ever be capable of producing images that are close to or dare I say even exceed the results obtained from a “professional” grade DSLR?

    The Test

    For this fun little evaluation we will be looking at the core quality of both RAW and JPEG files from a DSLR and a cellphone. The test camera is a Canon 5D Mk3 and the phone is the Samsung Galaxy S8 Active.

    The comparison is for image quality only. Pay attention to the sharpness, the color, and the contrast presented in each one of the images. I’ve numbered each photo so you can make your guesses down below in the comment area if you like!

    And yes, before you mention it, lenses play a huge role in final image quality. To me that makes this test even more interesting because the glass of the cell phone camera isn’t interchangeable; meaning the lens you have on your phone is the essentially the only one you can use (unless you go with aftermarket attachments) which makes its fidelity all the more crucial.

    Let’s talk sensors…

    As far as image sensor size is concerned there really isn’t much comparison between one inside a full-frame DSLR image and the one that fits inside of your cellphone. This is what interests me. Dimensionally speaking the image sensors from the 5D MK3 and the S8 Active is like comparing grapes and watermelons.

    That being said, deciding how that impacts image quality is completely up to the eye of the beholder depending on your definition of “professional quality”.

    Samsung Galaxy S8 Active

    Samsung phone - Mobile Phones Versus DSLRs

    The camera on the Galaxy S8 Active sports a 12MP sensor which has a physical dimension of 1/2.55 inches or about 12.7mm with individual pixels measuring 1.4 microns. I assume the 12.7mm is the diagonal measurement but I have found no information directly indicating this.

    The lens of the S8 Active has a maximum aperture of f/1.7 and fixed (??mm) focal length.

    Canon 5D MK3

    The Canon 5D MK3 has a 22.3MP full frame sensor featuring a diagonal measurement of approximately 1.7 inches (about 43.27mm) with a pixel size of 6.1 microns. I used a (??mm) lens with a maximum aperture of f/1.4.

    Canon camera and 50mm lens - Mobile Phones Versus DSLRs

    I know I know…there’s no focal length indicated for either the S8 Active or the one I used with the 5D MK3. This is because some of you astute readers would probably connect the dots for each image and that would ruin the fun!

    So, I’m keeping everyone in the dark as far as the focal lengths for both lenses are concerned.

    RAW Versus RAW

    Just like the estimable 5D MK3, the Samsung S8 (like many others) has the capability to record both RAW and JPEG image files when shooting in “Pro” mode.

    So the first series of photos will be comparing the typically drab RAW images from both the 5D MK3 and the S8 Active. Each image was shot at ISO 100 with the shutter speed being matched as closely as possible.

    Mobile Phones Versus DSLRs - red fire hydrant

    Image #1

    Mobile Phones Versus DSLRs - puddle reflection

    #2

    Mobile Phones Versus DSLRs - cat

    #3

    #4

    brick wall - Mobile Phones Versus DSLRs

    #5

    JPEG Versus JPEG

    Moving into the realm of non-RAW (uncooked?) image files, it’s time to take a look at the JPEG photos from both the Canon 5D MK3 and the Samsung Galaxy S8 Active.

    Just like the RAW files before, each one of these images was shot with the same ISO setting except this time at ISO 400. The 5D MK3 was set to Adobe Standard Fine JPEG and the S8 Active was set to its “Standard” profile mode as well. Again, shutter speeds were kept as close to uniform as could be achieved.

    Toyota car logo - Mobile Phones Versus DSLRs

    #6

    shadows of door handles - Mobile Phones Versus DSLRs

    #7

    door handles - Mobile Phones Versus DSLRs

    #8…These two looked so similar that I had to include them both.

    laptop keyboard - Mobile Phones Versus DSLRs

    #9

    fence design - Mobile Phones Versus DSLRs

    #10

    Peeping at Pixels

    Alright, you know you want to do it. Let’s really take a close look at the images from my S8 Active cell phone and the tried and true 5D MK3.

    Just to refresh ourselves with the rules of the game here, we are looking at overall image quality. First, let’s have a look at a RAW file of a leaf lying on a bed of grass.

    leaf on grass - Mobile Phones Versus DSLRs

    Then I cropped and got extremely up close and personal with said leaf…

    Mobile Phones Versus DSLRs

    11a (left)
    11b (right)

    And here’s one more for those of us who like to hold a magnifying glass up to each one of our photos. This time let’s take a look at a side-by-side zoom of a JPEG image from both the 5D MK3 and the S8 Active.

    Here we have a photo originally shot as an in-camera JPEG.

    Sony camera - Mobile Phones Versus DSLRs

    Now zooming in on those knobs and buttons.

    Mobile Phones Versus DSLRs

    12a (left)
    12b (right)

    Final Thoughts

    I realize that it’s somewhat of a risky move not telling you which one of the images are which here at the terminus of this article. Alas, that is exactly what I’m going to do.

    Have a look at each one of these images which I assure you were, in fact, each shot with both my everyday-carry Galaxy S8 Active cell phone and my trusty 5D MK3. As you look at the photos examine them closely and pick which one you think came from which source.

    I also encourage you to evaluate where you stand on the idea of whether or not cellphone photography is a good or a bad thing for the medium as an art. Do you think cameras and cell phones will forever remain separate pieces of technology or do you feel that some day they will be one in the same?

    I’d love to hear your ideas on the future of camera tech and your opinions on the photos from the above tests. Please post your thoughts in the comments below. And yes, eventually I will provide an answer key so you have to forgive me.

    The post Cell Phone Versus DSLR – Can you tell which is which? appeared first on Digital Photography School.


    Digital Photography School

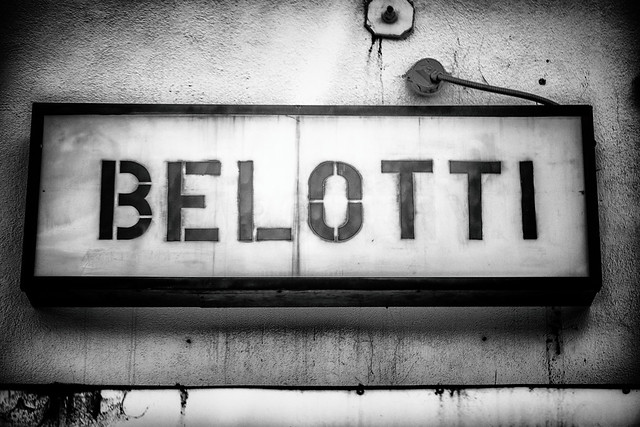
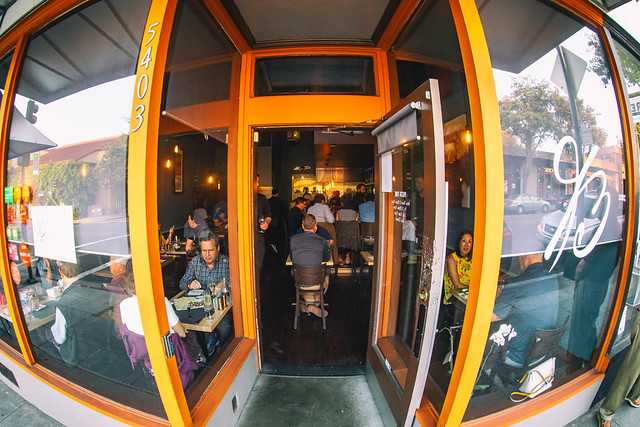
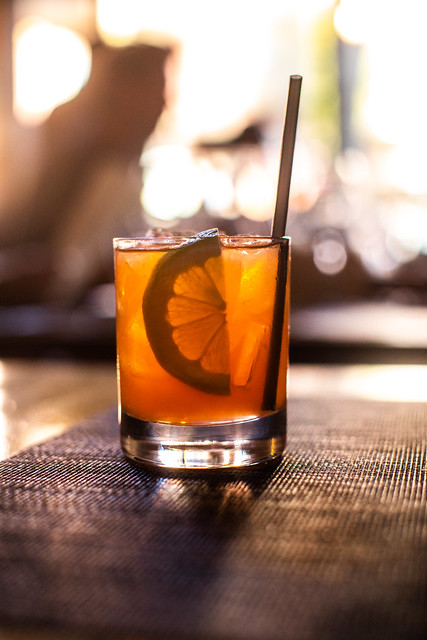
  • Belotti, Oakland, California

    Had dinner tonight at the lovely Belotti on College Avenue in Oakland, California — a wonderful Italian restaurant with some of the most amazing dishes. Definitely a memorable meal and definitely a new local favorite. Since we were speaking Italian, brought a nicely cellared 1998 Barolo which accompanied the meal perfectly.

    Belotti

    Belotti

    Sen?or Belotti

    Clerico 1998  Ciabot Ginestra Mentin Barolo

    Belotti
    Hand cut certified Piedmontese ribeye dry aged beef tartare, carasau bread, parmigiano reggiano, micro arugula, aged balsamic, truffle caviar, quail egg yolk.

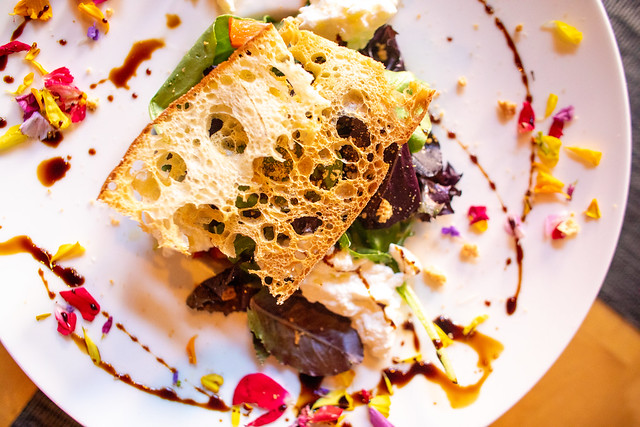
    INSALATA DI BURRATA
    INSALATA DI BURRATA — Organic mixed leaves, celery, California nectarines, Italian burrata, crostini, Piedmontese amaretti cookies, 8 years aged balsamic Giuseppe Giusti

    Tortino
    My favorite dish of the night. Don’t miss this one! Tortino. Organic spinach flan with runny egg yolk center, Grana Padano D.O.P. sauce, sauteed spinach, brown butter, Alba black truffle.

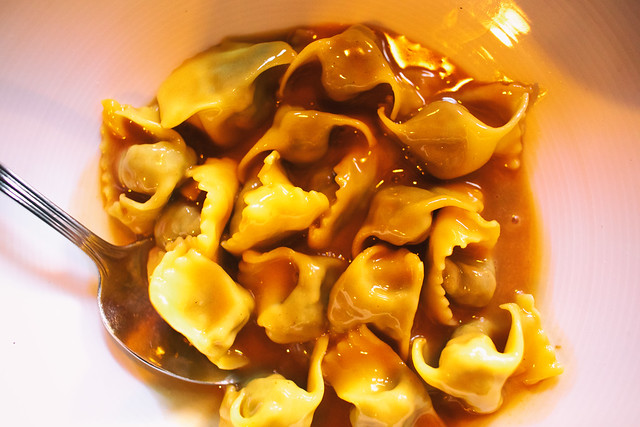
    AGNOLOTTI DI LIDIA
    AGNOLOTTI DI LIDIA — Traditional Piedmontese style stuffed pasta with beef shank, flat iron, pork loin, sausage, escarole, spinach, parmigiano, beef reduction

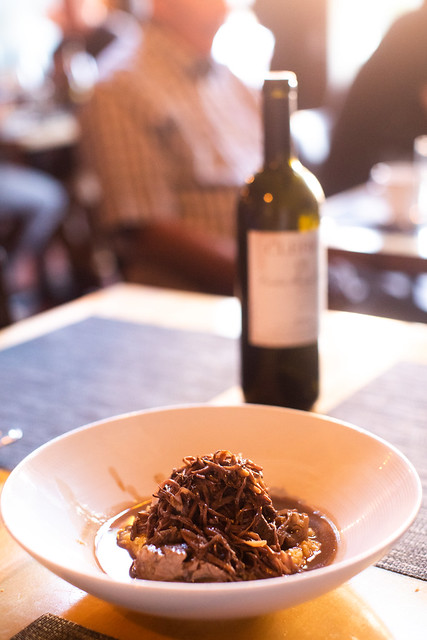
    BRASATO
    Brasato — 5-hour braised flat iron, Italian organic polenta, organic hen of woods mushrooms, nebbiolo reduction

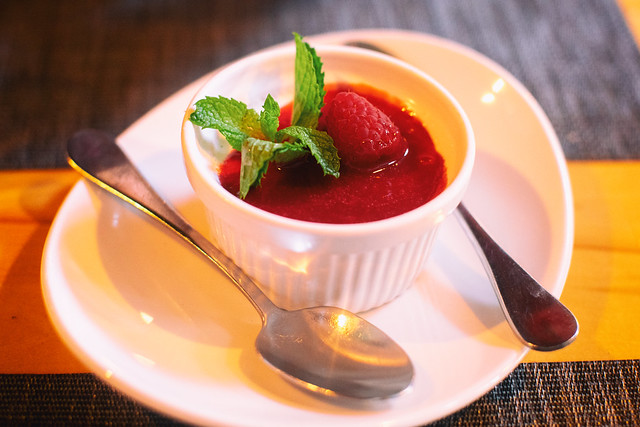
    Panna Cota
    Panna Cota for dessert.


    Thomas Hawk Digital Connection

  • 8 Elementary Travel Photography Mistakes to Avoid When Starting Out

    Starting out in photography may seem like a daunting task. There are so many things to learn and practice that sometimes it can seem like an impossible task. Unfortunately, there are no shortcuts and if you want to take better photos then you need to be willing to put the hours of practice and learning in.

    The good news is that these days there are lots of resources online that can help you. To get you started here are 8 elementary travel photography mistakes to cut out when starting in photography.

    temple in asia in golden light -  Travel Photography Mistakes

    Mistake #1 – Setting Your Camera On Auto

    It always amazes me when I see newbie photographers with the latest expensive DSLR, using the auto mode. Besides capturing better quality photos from a resolution point of view, the other main benefit of DSLRs is the amount of control that you have over the photo taking process.

    Admittedly auto functions on cameras are a lot better these days. But often it means compromises which are not necessarily best for the image. For example, if your camera is setting your ISO too high you will get a lot of noise in your photo. Instead, you may decide that actually underexposing your image slightly, which you can then adjust in post-production, will be a better compromise than extra noise.

    But the biggest reason you should avoid auto mode when starting out is that it will stop you from learning. You need to learn to be able to set your shutter speed and aperture. You need to learn when and how much to raise your ISO by because it’s the only way that you can have full control over the final outcome.

    auto mode on DSLR -  Travel Photography Mistakes

    Mistake #2 – Shooting in JPEG

    I can’t see any reason why anyone would want to shoot in JPEG format with a DSLR camera. Unless you are on a specific brief that requires instant upload of the images to the client, capturing JPEGs shouldn’t be an option. The only reason that people use JPEG mode in the camera is to save disk space.

    But ask yourself if it’s worth compromising the quality of the photo for the sake of buying a couple more memory cards?

    If your camera has RAW files (which all DSLRs and most mirrorless and compact cameras do these days) that’s what you should use. It gives so much more flexibility when it comes to post-processing, supplying images to clients, and even printing them out.

    Even if you plan to only use your images on social media you are better off capturing the images in RAW, post-processing them and then saving them as JPEGs.

    raw setting on a DSLR menu -  Travel Photography Mistakes

    Mistake #3 – ISO Too High

    A few years ago I remember bumping into an amateur photographer in Vietnam. As we got talking it became apparent that he didn’t understand what ISO actually was and how it affected his photos. He just assumed it was a number that allowed him to take photos in most conditions. So while his ISO was at 6400, his shutter speed was 1/4000th.

    For those of us who were photographing in the days of film, ISO was the sensitivity of the film to light. So if you wanted to capture photos in darker conditions you would use a roll of film with a higher ISO.

    This concept is exactly the same now in digital photography. The higher your ISO the more sensitive the camera’s sensor is to light. The downside of this is that the higher your ISO is, the more noise you will get in your image.

    So while the amateur photographer I met was able to capture photos in any and lighting conditions, all of his images when zoomed-in were soft and grainy. So one of the biggest tips for any aspiring photographer is to always keep your ISO as low a possible and only increase it as much as you have to in order to get the shot.

    The Kremlin -  Travel Photography Mistakes

    Image taken at 4000 ISO means noise and an image lacking sharpness.

    Mistake #4 – Shutter Speed too Slow

    One of the biggest struggles for newbie photographers is often capturing sharp images. One reason could be that the camera has been focused on the wrong part of the image. The other big reason is often that the photographer didn’t use a fast enough shutter speed.

    At slow shutter speeds of 1/60th or slower, you simply will not be able to hold the camera steady enough for sharp photos. Even 1/60th for some people might be too slow so it’s worth testing this when you are starting out.

    Start capturing photos of the same subject at 1/100th all the way down until the image is blurred. You’ll then know how slow you can go. But your shutter speed is also dependent on how fast the object that you are photographing is moving and the lens you’re using.

    For example, you might be able to capture a photo of someone running with a shutter speed of 1/250th. But a fast-moving car would need a faster shutter speed to freeze it. If you’re using a 300mm lens you will also need a faster shutter speed (keep the shutter speed as a reciprocal of the focal length so 1/300th).

    With experience you will learn what shutter speed you will need so make sure you practice photographing different moving objects.

    blurry trumpet player -  Travel Photography Mistakes

    Shot at 1/40th of a second. This was not fast enough to freeze the action so the image is blurred.

    Mistake #5 – Photographing at Midday

    For any outdoor photography, light is often the key component of turning an okay image into a great image. As such photographing at midday when it’s bright and sunny will usually mean your images will look flat as the harsh light washes out shadows. So try to avoid photographing around midday and instead build your shoot around early morning or late afternoon/evening.

     Travel Photography Mistakes - two guys by a lake

    The light is too harsh and so the image looks flat.

    Mistake #6 – Not Being Ready

    One of the great satisfactions for photographers is capturing those fleeting moments that would otherwise be missed. But to do that you have to be ready.

    That means having your camera out of your bag, turned on, with the lens cap off. You should also get into the habit of adjusting your settings as you are moving around to cater for the conditions so that you are ready to capture the image when the opportunity arises.

    rural farm with pigs in Asia -  Travel Photography Mistakes

    Mistake #7 – Highlights / Shadows Clipped

    One of the key tools for you as a photographer is the histogram. Even if you don’t fully learn or understand how to read one, the one thing you should know is how to use it to see if your highlights and shadows are within an acceptable range.

    Highlights are bright areas in your photos and shadows are dark areas. If your highlights are too bright they may actually be completely white with no detail at all. Similarly, if your shadows are too dark they will be completely black. This is called “clipping”.

    The best way to check this at the time of taking the photo or in post-production is to use your histogram. If any part of the histogram is cut off on the left there are pure black areas in your image and if it is cut off on the right there are pure white areas in your image.

    By spotting this on your histogram you can either adjust your settings to avoid clipping or fix any issues in post-production.

    photo with clipped areas -  Travel Photography Mistakes

    The areas highlighted in red are pure white and the areas highlighted in blue are pure black. In other words, those areas are “clipped” and will have no detail.

    Mistake #8 – Photo Not Straight

    Whether you are an advocate of post-processing or someone who doesn’t believe photos should be altered, the one thing that you should always do is to ensure that your images are straight.

    Of course, it is best to get things right in-camera when you are taking the photo. Some DSLRs have various elements to help you get your image straight when you look through the viewfinder or on the LCD screen.

    But if you find that your image is not straight, make sure you fix it in post-production.

    grid view on a DSLR screen -  Travel Photography Mistakes

    Conclusion

    Most people who start out in photography will make some of these mistakes along the way. The important thing is to learn from them and move on. But if you can cut these mistakes out from the start you’ll be well on your way to capturing better photos.

    Have you made any mistakes that others should avoid? Please share your experiences below.

    The post 8 Elementary Travel Photography Mistakes to Avoid When Starting Out appeared first on Digital Photography School.


    Digital Photography School