Category: Photography

  • DIY Photography: How to Make Your Own DIY Lightstick for Cool Photos!

    The post DIY Photography: How to Make Your Own DIY Lightstick for Cool Photos! appeared first on Digital Photography School. It was authored by Simon Bond.

    diy-lightstick

    In this article, you’ll learn how to make your own DIY lightstick.

    You’ll be able to use this to create fascinating light paintings, and the best thing is, you can do it on a budget!

    The simple DIY lightstick is made with easily available household objects and a set of fairy lights. Once it’s made, you’ll be able to create beautiful light patterns during long exposure photos.

    DIY-Lightstick

    Using a light stick for light painting can transform a scene.

    What is light painting

    Light painting is a long exposure technique.

    To achieve this kind of photo, you’ll need a camera on a tripod, and usually, the photo will be taken at night. The exception to this would be a studio that is completely dark – this too can be used for light painting.

    Most people will know light painting as simply spelling something in the sky with a torch.

    There are two main forms of light painting, kinetic light painting, and regular light painting. In this article, you’ll learn about using a light stick to create regular light paintings.

    Image: There are light sticks out there you can buy. This photo was taken using a pixelstick.

    There are light sticks out there you can buy. This photo was taken using a pixelstick.

    Lightsticks you can buy

    You can buy a ready-made lightstick.

    Indeed, some of these are already quite cheap and will give you the chance to practice some of the ideas presented in this article. There are also those sticks that are more expensive.

    It’s worth keeping the more expensive sticks in mind, as they will give you more options when compared to a stick like the one you’ll be shown how to make in this article.

    • LED light sticks – The creme of the crop are the LED light sticks made by pixelstick and magilight.
    • Glow sticks – The glow sticks often seen at parties and festivals. They’re cheap, and can be used for light painting.
    • Toy light stick – Head down to your local toy shop and pick up a light saber. Indulge your inner child, and it also makes some great photos!
    • Light painting swords – These are similar to kids’ toys, but are made specifically with photographers’ needs in mind. They are available through this site.
    DIY-Lightstick

    You’ll use tie straps to attach the wire to the tube.

    How to make a DIY light stick

    There are some very good cheap options when it comes to light sticks, and you might decide to pursue one of those instead of making a DIY lightstick. If you want a little challenge, then read on and see what you can make.

    The supplies you’ll need

    First of all, let’s gather the supplies you’ll need. You can find most at home, however, you may need to visit your local DIY store or look online for some too.

    • Battery operated fairy lights.
    • A piece of plumbing pipe. Around one meter long, and 2cm in diameter.
    • A plumbing pipe connection piece. A t-shape variety is best, and also 2cm in diameter.
    • A set of tie straps.
    • A copper piping half-circle bracket.
    • Wire cutters.
    • A saw.
    • Solder and soldering iron.
    • Electrical tape.
    • Glue gun.
    • Bungee cord.
    Image: The battery pack needs to be glued onto the stick as well.

    The battery pack needs to be glued onto the stick as well.

    Putting the whole thing together

    Now you have everything you need, take the following steps to put it all together.

    The task is fairly simple. It’s really just attaching some fairy lights to a stick. Why the plumbing tube? That’s so you can break it down to a stick that’s half of its size in an easy way.

    Attaching the fairy lights

    1. Take your length of plumbing tube and use the saw to cut it in half. The length of the 2 halves is optional. In my case, I went with 50cm.
    2. Attach the two pieces together using the connection piece.
    3. Now Attach the end of the fairy light wire to the end of your tube use a tie strap.
    4. Pull out the fairy lights to the length of the tube. Then give a little slack to allow the tube to be detached at the connection point.
    5. Use another tie strap to attach the fairy light wire to the other end of the tube.
    6. Run the wire back down the length of tubing again, and then attach the wire to the tube using another tie strap.
    7. You’ll now have excess wire and fairy lights left over. You could repeat steps 4,5 and 6 if you wish, or continue to the next part.
    DIY-Lightstick

    This stick divides into two. This makes it easier to carry around and gives you the option of using the stick at half its full length.

    Putting the battery pack on, and finishing the stick.

    1. Use the wire cutters to cut away the excess wire, leaving around 20cm to the battery pack.
    2. Strip away some of the plastic coatings on the wire on the side with the battery pack, and the side attached to the piping.
    3. Solder the two pieces of wire back together again. Make sure the correct wire is soldered together or the lights won’t work. When you cut the wire, two wires will be revealed on each side of the wiring. You need to solder this back together to re-complete the circuit.
    4. Use the electrical tape to cover up the soldered wire, or if you have it, plastic that shrinks when heated to cover the join.
    5. Test the lights, they should now work, and you should now have a light stick!
    6. Take the copper bracket and hoop it around the pipe, and touch it to the battery pack to ensure it connects.
    7. Use the glue gun and add glue to the joining section on the battery pack, the pipe, and the copper bracket.
    8. Hold everything in place until the glue has dried hard.
    9. Finally, run the length of the bungee cord through the piping, and knot it at both ends. The cord should be tight enough to hold the pipe together, but loose enough that you can easily detach the two halves of the stick.
    DIY-Lightstick

    The stick is now ready, it just needs the bungee cord put through the middle.

    Light painting with a lightstick

    Now you have a DIY lightstick you can use to create interesting light paintings.

    Lightsticks work because of the repetition factor – lots of lights moving altogether in a uniform pattern. It’s best to keep your light paintings relatively simple. Use defined movements, like spinning around, to create light cones. Spin the stick around to create circles, or simply walking along with the stick to create light ribbons.

    What you do creatively with the stick is now up to you, but enjoy experimenting!

    Image: It’s usually a good idea to keep light paintings simple, with a defined message.

    It’s usually a good idea to keep light paintings simple, with a defined message.

    Conclusion

    It’s always fun to make something for your photography. Have you ever tried to make an accessory yourself? Maybe it was for flash photography, something like a snoot?

    Here at digital photography school, we love to hear from you, so please share your experiences. If you have any light painting photos taken with a light stick that you would like to share, that would also be great!

    You may also like:

    • DIY Photography Backdrops for Still Life and Product Photography
    • 5 DIY Macro Photography Hacks for Stunning Macro Photos (on a Budget)
    • How to Make a DIY Photography Softbox
    • Try this DIY Neutral Density Filter for Long Exposure Photos
    • DIY Food Photography Props on a Budget
    • DIY Photography Backlighting for Beginners
    • How to Make a DIY Lens Hood to Eliminate Lens Flare
    • How to Make Easy and Affordable DIY Food Photography Backdrops


    The post DIY Photography: How to Make Your Own DIY Lightstick for Cool Photos! appeared first on Digital Photography School. It was authored by Simon Bond.


    Digital Photography School

  • 5 Tips to Get Out of a Photographic Rut so You Can Get Back to Doing What You Love!

    The post 5 Tips to Get Out of a Photographic Rut so You Can Get Back to Doing What You Love! appeared first on Digital Photography School. It was authored by Megan Kennedy.

    tips-to-get-out-of-a-photographic-rut

    Creative ruts happens to the best of us. Fortunately, there are many ways to combat the dreaded photographer’s block. Here are 5 tips to get out of a photographic rut and back into doing what you love!

    Tips to get out of a photographic rut

    Canon 5D MK II 50mm lens with Kenko extension tubes, f/1.8 at 1/80th of a second ISO 800

    Research

    Books research photography

    Canon 5D MK II Canon 50mm lens with Kenko extension tubes, f/8 at 1/40th of a second ISO 200

    Getting stuck into some artistic research is one of my first tips for getting out of a photographic rut. Whether it’s online or in-print, checking out what other photographers have done can stimulate fresh photographic approaches.

    Having a look at contemporary photography can inform your practice with new perspectives. In addition, brushing up on your photo history can give you the motivation to expand on tried-and-true photographic methods.

    Don’t limit yourself to researching one area of photography either. Branch out into different genres you are curious about. And don’t forget to explore other types of artistic practice. A lot can be gleaned from disciplines like painting and sculpture – practices that rely just as heavily on light and composition as photography does.

    Create a visual diary

    visual diary for photography

    Canon 5D MK II Canon 50mm lens f/5.6 at 1/40th of a second ISO 100

    Often, writers find that putting ideas on paper helps stimulate creative thought. It’s the same for photographers too.

    A great way to organize your favorite research discoveries is to create a visual diary. Visual diaries (or art diaries) have been kept by artists for centuries as a way to consolidate ideas and cultivate inspiration.

    Grab a blank visual diary (a portable size works best) and start to add prints, drawings, paintings, notes, journal entries, rubbings, whatever! The idea is that your visual diary is your own physical expression of the creative process. When organized into a visual diary, your photographic trajectory becomes clearer. It can be as neat or messy as you like, don’t overthink it and have fun!

    Pick a theme

    Tips to get out of a photographic rut blue abstract

    Canon 5D MK II Canon 50mm lens with Kenko extension tubes, f/2.2 at 1/320th of a second ISO 100

    Another tip to get out of a photographic rut is to choose a single theme to photograph. Pick any theme; abstraction, the seasons, portraits…anything that you find interesting or challenging.

    Selecting a specific theme focuses your creativity. Having a theme also simplifies your photographic process, defining a clear goal for you to work on. Furthermore, when you work within a theme, you start to uncover interesting perspectives about a subject you may never have considered before. This feeds your creative momentum, helping to lever you out of photographer’s block.

    Try something new

    Trying something new camera tossing

    Canon 5D MK II Canon 50mm, f/2.5 at 1 second ISO 100

    Photography is made up of an endless amount of techniques and approaches. This provides photographers with many great tools to get out of a photographic rut. Trying something new can be exciting, and it can re-frame your whole photographic practice, kick-starting your creative flow and getting you back in the game.

    Investing in new equipment is one way to change-up your photography, but simpler (cheaper) ideas work well too. For example, trying out portraiture or getting into black and white photography can help just as much. You could try photographing a new location or embark on a 365 project. You could also try camera tossing or set your sights on street photography – the choice is yours.

    Keep a camera with you

    Tips to get out of a photographic rut camera diana

    Canon 5D MK II Canon 50mm lens with Kenko extension tubes, f/1.8 at 1/80th of a second ISO 200

    Creativity can be fickle, and inspiration can strike at unexpected times. If you are in a photographic rut, capitalizing on these bolts of inspiration is important. The last tip to get out of a photographic rut is to keep a camera with you, ready for action.

    Today, many people have a camera constantly within reach on their phones. Concepts like composition and settings on a camera phone are similar to a dedicated camera. This means that taking photos with a camera phone can, in itself, flex your photographic muscles. In addition, you can also record interesting subjects on your phone to return to later with a dedicated camera.

    For me, I try to keep a small, plastic camera with me in my pocket or bag. There’s something about having a camera that inspires me to keep a lookout for new photographic opportunities. The whimsical nature of a plastic camera adds an element of surprise to photography too.

    Conclusion

    Photographic ruts are a stubborn burden suffered by many photographers. Luckily, taking active steps can alleviate the symptoms of a creative dry-spell.

    While these tips are drawn from my own experiences, it is by no means an exhaustive list.

    Have you been stuck with photographers block? Let me know your tips to get out of a photographic rut in the comments.

    The post 5 Tips to Get Out of a Photographic Rut so You Can Get Back to Doing What You Love! appeared first on Digital Photography School. It was authored by Megan Kennedy.


    Digital Photography School

  • Review: 2 K&F Concept Carbon Tripods Put to the Test

    The post Review: 2 K&F Concept Carbon Tripods Put to the Test appeared first on Digital Photography School. It was authored by Kav Dadfar.

    kf-concept-carbon-tripods

    Recently, I was given 2 new K&F Concept Carbon tripods to test out.

    Founded in 2011, K&F Concept is not a new player in the photographic industry, but they have wasted no time forging a name for themselves into a very niche market. Like most things coming out of China, their products are well designed, innovative and offer great value, so I was excited to get my hands on these tripods.


    The TC2834L Explorer Series carbon tripod

    First up is the K&F Concept TC2834L Explorer Series carbon tripod with a CL40 ball head.

    At a glance:

    • Material: Carbon Fiber
    • Net Weight: 1440g
    • Max Height: 1500mm
    • Height without Central Axis: 1235mm
    • Min Height: 430mm
    • Max load: 15kg
    • Price: $ 299.99 (at the time of writing)

    Review: 2 K&F Concept Carbon Tripods Put to the Test

    First thoughts

    The tripod comes in a really nice carry bag with all the necessary Allen keys to maintain it. There are also a set of three screw spikes in the accessory bag that I wasn’t expecting.

    My first thoughts were correct, and these were to replace the rubber grips on each leg for those times when you need a little more traction. Simply screw off the rubber pads and screw in the spikes. It’s super easy and a very nice addition that you won’t get with many other tripods.

    k&f-concept-carbon-tripods

    Locking system

    K&F Concept has used twist-leg locks to reduce weight and folded size rather than the more traditional lever lock. Aside from the weight and size, the other advantage of the twist legs is their slick design. I have always found that levers tend to snag on the straps of my camera bag when trying to remove the tripod. Whilst, not a huge inconvenience, it generally results in me having a little wrestle with my camera bag.

    With the twist-lock, you eliminate this issue.

    The primary leg join is a very unique and innovative design that allows the photographer to get the camera as close to the ground as possible. You simply pull the red leaver out and tilt the legs up to one of the other two notches before pushing it back in to securely lock the legs in place.

    k&f-concept-carbon-tripods

    Tripod size

    The tripod is made up of four carbon fiber sections to keep the weight to a minimum and keep it to a compact height.

    One of the most notable aspects of the TC2834L is the lack of center column attached to the tripod. Instead, this comes as a separate section that needs to be screwed onto the tripod when needed. Whilst this achieves its goal of a more compact size tripod, it does mean an extra piece to carry as the column doesn’t attach to the tripod (something that would have been nice to be able to do).

    However, I haven’t found this to be a huge problem as the standard height of the tripod is 1235mm, which is more than an adequate hight. Plus, generally having a center column raised on a tripod, is not a great idea as it can mean camera shake through any sort of movement.

    I never use this, so actually not having the center column means less weight to carry.

    After feeling how light the tripod is, I was a little concerned that it may struggle to support a camera and a 70-200mm lens in anything less than perfect conditions.

    Thankfully, I was proved wrong. It proved to be very steady and held up as well as any other travel tripod I have used even in blustery conditions.

    The tripod is made up of four carbon fiber sections to keep the weight to a minimum and keep it to a compact height.

    One of the most notable aspects of the TC2834L is the lack of center column attached to the tripod. Instead, this comes as a separate section that needs to be screwed onto the tripod when needed. Whilst this achieves its goal of a more compact size tripod, it does mean an extra piece to carry as the column doesn’t attach to the tripod (something that would have been nice to be able to do).

    However, I haven’t found this to be a huge problem as the standard height of the tripod is 1235mm, which is more than an adequate hight. Plus, generally having a center column raised on a tripod, is not a great idea as it can mean camera shake through any sort of movement.

    I never use this, so actually not having the center column means less weight to carry.

    After feeling how light the tripod is, I was a little concerned that it may struggle to support a camera and a 70-200mm lens in anything less than perfect conditions.

    Thankfully, I was proved wrong. It proved to be very steady and held up as well as any other travel tripod I have used even in blustery conditions.

    Review: 2 K&F Concept Carbon Tripods Put to the Test

    Ball head

    Sold separately to the tripod, the KF-LC40 ball head may just be the best ball head I have ever used! Beautifully designed for ease of use, the ball head has a slick feel.

    It uses the Arca Swiss locking system, which is great as this has now become the universally preferred locking method. This means all your old accessories and L-brackets will work seamlessly with this ball head.

    The cleverly designed locking lever is placed a little behind the nodal point, making it much easier to adjust when a camera is attached. It does make the ball head a little bigger, but it’s not an issue, and it allows extra space for more substantial support in the ball head.

    However, it’s important to remember that the ball head is sold separately.

    Review: 2 K&F Concept Carbon Tripods Put to the Test

    Verdict

    This is a fantastic sturdy, lightweight, pro-level compact tripod that is a joy to use and even easier to carry.

    With a price of just $ 299.99 (remember, ball head sold separately) and 30 days, no-questions-asked return policy, there isn’t much to not love about this tripod.

    Review: 2 K&F Concept Carbon Tripods Put to the Test

    Lightweight Travel Tripod

    Next up is the TC2634 (Blue) carbon fiber lightweight travel tripod;

    At a glance:

    • Material: Carbon Fiber
    • Net Weight: 3.7 pounds
    • Max Height: 1500mm
    • Min Height: 430mm
    • Max load: 15kg
    • Price: $ 182.28

    First thoughts

    Like its bigger brother, this tripod also comes in a nice bag with all the same accessories. However, no spikes this time.

    It’s amazingly lightweight and compact but still incredibly sturdy. This all makes this tripod perfect for a travel photographer.

    You could easily carry this tripod around with you all day without any problem. This is a huge benefit for someone like me who leaves the hotel very early in the morning and ends up having to carry their tripod all day.

    This tripod also has a great little trick up its sleeve. One of the legs detaches to become a stand-alone monopod. Just unscrew the ball head and attach the newly removed leg, and you are ready to shoot.

    Monopods are great for busy cities and festivals, so it’s nice to have one as easily accessible as this is.

    Review: 2 K&F Concept Carbon Tripods Put to the Test

    Locking system

    Like the TC2834L, the TC2634 uses a twist leg lock, which is great for all the reasons mentioned above. But what this tripod does differently is its 180-degree locking system that makes the tripod even smaller when packed away. It is a little fiddly to get the ball head in the correct spot to make sure all the legs lock closed to be as compact as possible, but you get used to the method after a few uses. This makes the folded up tripod just 430 mm in height!

    k&f-concept-carbon-tripods

    Tripod size

    Given the compact size of this tripod, you could be mistaken for thinking it is going to be pretty small and not sturdy. This is certainly not the case. Whilst it is not as sturdy as the larger TC2834L, it held up fantastically well in all conditions except a fairly fast flowing river where there was some noticeable shake.

    However, I expected that, as this tripod is not designed for that purpose. You can’t have super compact and lightweight without some sacrifices. To help avoid any shake issues, the center column has a hook that can be weighted down to add extra stability.

    With the 180-degree leg locking system, it means you can get your camera as low to the floor as you wish. The camera will be upside down, but that’s nothing a rotate tool won’t fix in post-production.

    k&f-concept-carbon-tripods

    Ball head

    This is a very sturdy and well-designed Arca Swiss 360-degree ball head. It’s a little smaller than I would normally like, but this doesn’t affect performance in any way. Unlike the previous tripod, the ball head is included with this tripod, making this an even more attractive option.

    Review: 2 K&F Concept Carbon Tripods Put to the Test

    Verdict

    This tripod is quite a lot smaller than what I normally work with, so I was a little skeptical beforehand. But it turned out to be great, and I really enjoy using it. So much so that I will be adding it to my own photography kit.

    It’s a great option for a city break and offers more than enough support for the DSLR or mirrorless systems.

    Review: 2 K&F Concept Carbon Tripods Put to the Test

    Overall

    I have had my existing tripod for almost 15 years, and I never thought that I would replace it with anything other than just a newer model when it was time.

    But having tested these tripods, I must confess that I am now using them instead of my existing tripod.

    Note: The author was given these tripods and ball heads free of charge to test and was offered no incentives. This review is an unbiased opinion of his experience in using the products provided.

    The post Review: 2 K&F Concept Carbon Tripods Put to the Test appeared first on Digital Photography School. It was authored by Kav Dadfar.


    Digital Photography School

  • Portable Portrait Studio in a Bag: Now You Can Take Portraits While on the Road

    The post Portable Portrait Studio in a Bag: Now You Can Take Portraits While on the Road appeared first on Digital Photography School. It was authored by Mat Coker.

    portable-portrait-studio

    It is wonderful having a permanent studio to work in. But imagine being able to pack that studio into your camera bag and take it with you anywhere you want. You can do this by creating a portable portrait studio.

    The problem is, portable studios tend to take up a lot of space.

    I traveled from school to school with a portable studio. But it would take up my entire car, leaving no room for a passenger!

    Half the fun of being a photographer is embracing constraints. So I decided to see how minimal I could get with a portable studio. Could I create a studio that fits into one small camera bag?

    This is an important project because when you are confident that you can make nice portraits with minimal gear, you can take your studio down any road and into any situation. Your limits fade away, and the whole world becomes your studio.

    portable portrait studio

    This is my portable portrait studio. One camera, one lens, two speedlights, a rainbow of colored gels, one light stand, one umbrella, one reflector, and one piece of white fabric.

    A studio is a place to study. By making your studio small and portable, you can study anywhere you desire.

    Three things to consider as you travel with your portable studio

    1. The person

    The person you’re photographing is more important than your gear, your schedule, or anything else. Put all your focus on the person you’re photographing in order to achieve a good portrait. I tested out my new studio with a person, but if you don’t have a model you can practice with toy figures.

    2. The light

    When you need to make a portrait, look for a good light source.

    A larger light source creates softer shadows and a smaller light source creates crisp shadows. Often, softer shadows are pleasing for a portrait.

    The first thing I look for is a large window for my light source. If I can find a large window, then I don’t even need to use the lights in my bag. In that case, my portable portrait studio whittles down to a camera and a reflector.

    But if I need to create my own light source, then I use a speed light and umbrella or softbox. By itself, the speedlight is a small light source. But the umbrella converts it into a larger light source and softens the shadows.

    3. A clean background

    You don’t want distractions in the background of your photo. Either keep the background clean and simple or make it part of the story. There isn’t much in your portable portrait studio, so you’ll have to work with the backgrounds you find on location.

    The goal for all of these photos is a simple portrait with nice light and a clean background.

    Portraits with a large window

    Let’s begin with a simple scenario using a large window as the light source.

    When you place your subject near the window, and you expose properly for their skin tone, much of the background will fall into darkness.

    portable portrait studio

    This is not a pleasing environment for a portrait. However, don’t be concerned with what the whole room looks like, only how your final portrait will look. Notice where the girl is positioned in relation to the window.


    portable portrait studio

    The large window has created soft shadows on her face. The catchlights bring her eyes to life. There are some distractions in the background that could have been taken care of with a slightly different composition. 50mm, ISO 1600, f/4.0, 1/400 sec.

    Portraits with a small window

    Smaller windows can produce harsh shadows. The secret is to keep your subject as close to the window as possible. The closer they are to the window, the larger the light source becomes in relation to your subject.

    Image: She is placed extremely close to the window.

    She is placed extremely close to the window.


    portable portrait studio

    The light on her face is quite nice but the background is distracting. 50mm, ISO 1600, f/4.0, 1/400 sec.


    Image: I moved her to the other side of the window.

    I moved her to the other side of the window.

    portable portrait studio

    I used the wall as the background for the portrait. 50mm, ISO 1600, f/4.0, 1/320 sec.

    A portrait using a neutral-colored wall

    I found a really good bit of neutral-colored wall but it was not near a window. This is when you need to set up your speedlight and umbrella.

    Neutral color background

    This patch of grey wall will be perfect as a background.


    portable portrait studio

    The umbrella illuminated both her face and the wall but didn’t cast any harsh shadows. 50mm, ISO 100, f/8.0, 1/200 sec.


    Creating a white background

    You can create a white background by using a white wall or a white piece of fabric in your portable portrait studio. Make sure to illuminate the white background with the second speedlight in your bag.

    how to make a white background for portraits

    The white piece of fabric will be taped to the wall to use as a background. The second speedlight will light up the fabric so that it turns pure white instead of grey.

    Creating a white background


    portable portrait studio
    Portable Portrait Studio in a Bag: Now You Can Take Portraits While on the Road

    Turn any background into black

    You can turn any background black with two simple steps.

    1. Move your subject as far away from the background as you can
    2. Light your subject with your speedlight but don’t let the light fall onto the background (this is why we’re keeping the background so far away).
    how to make your background black

    The background is about 20 feet away


    portable portrait studio

    You may need to darken the background a tiny bit more in post-processing. 50mm, ISO 100, f/9.0, 1/200 sec.


    Make a colored background with gels

    You can turn that neutral wall a different color using gels on your speedlight.

    how to use gels with your speedlight

    Place the colored gel over the speedlight to transform the color of the wall.


    portable portrait studio
    Portable Portrait Studio in a Bag: Now You Can Take Portraits While on the Road

    Go crazy with the light!

    There comes a moment in every session when you just have to try something completely different.

    Being a fan of backlight, I put both speedlights with colored gels in the background and pointed them right toward the camera.

    portable portrait studio

    Don’t settle for the same old photos every session. Always try at least one new thing. This was her favorite photo.


    How to make your studio infinitely larger

    It’s good to have a permanent studio as a home base, but even a full-scale studio can become a limiting place. Figure out the minimal amount of gear that you need to make a portrait, pack it into one bag and then go and explore your world with your portable portrait studio.

    Here are more tips for portrait lighting as you travel:

    • 5 creative portrait lighting tricks using only phone light
    • How to create awesome portrait lighting with a paper bag an elastic band and a chocolate donut
    • 6 portrait lighting patterns every photographer should know/
    • One speedlight portrait lighting tutorial
    • 5 places perfect natural portrait lighting
    • How to use an outdoor studio for natural portraits
    • Portrait lighting project rainy day

    The post Portable Portrait Studio in a Bag: Now You Can Take Portraits While on the Road appeared first on Digital Photography School. It was authored by Mat Coker.


    Digital Photography School

  • Irfanview – The Free Program You Need in Your Photo Editing Toolbox

    The post Irfanview – The Free Program You Need in Your Photo Editing Toolbox appeared first on Digital Photography School. It was authored by Rick Ohnsman.
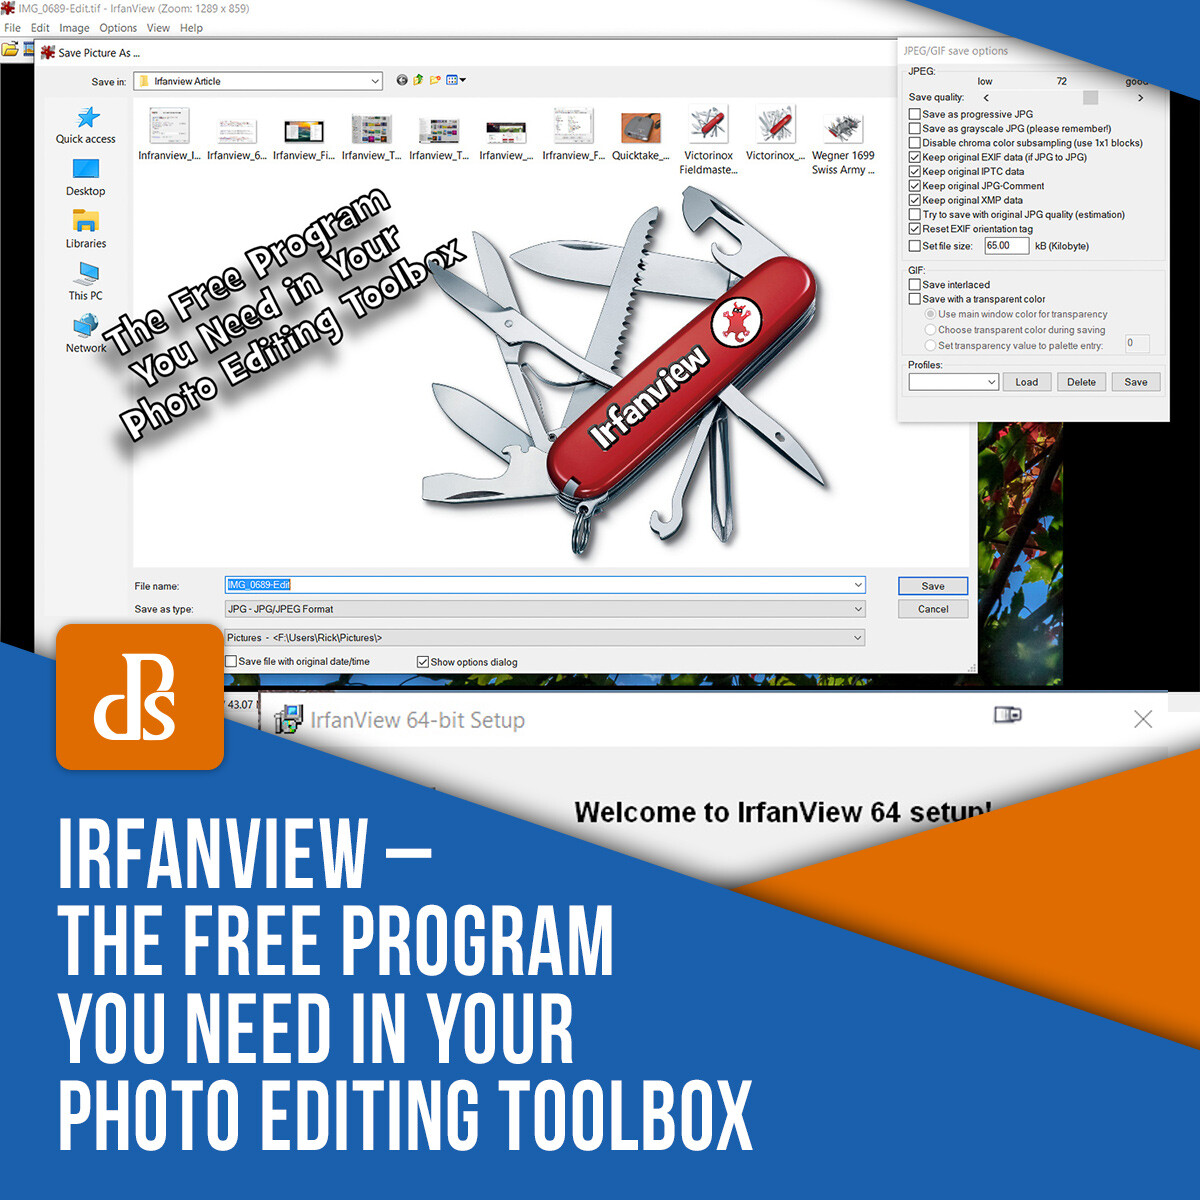
    irfanview-software

    You would typically expect an article on a photo editing/utility program to be about the new latest-greatest thing to come out.  Instead, this article will tell you why Irfanview, a program that has been around since almost the dawn of digital photography, is still as useful as ever and, as a photographer, it’s something you’ll want in your toolbox.

    This is the main screen that will greet you on the Irfanview.com site.

    This is the main screen that will greet you on the Irfanview.com site.

    The “Swiss Army Knife” of digital photography

    You no doubt have heard of Swiss Army knives, those pocket multi-tools that have all manner of flip-out gadgets to perform whatever task you might require. Need a knife, a corkscrew, scissors, screwdriver, bottle opener, saw, tweezers, you-name-it? You can get all those things in one pocketable tool.

    The largest such knife made by the company Wegner is the model 16999, and it has 87 tools that can perform over 141 functions. It’s hardly pocketable, but probably more of a demo of what is achievable. More typical Swiss Army knives have about 15-30 functions and are very pocketable.

    Sure, a dedicated screwdriver or saw might do a better job, but the idea of having an entire toolkit in your pocket is the attraction.

    The Victorinox SwissChamp knife

    Irfanview is like a Swiss Army Knife – Lots of tools in one compact package.

    Such is the case with the utility program Irfanview.

    This little do-all program is the brainchild of student Irfan Škiljan, from Jajce, Bosnia/Herzegovina, who first introduced the program in 1996. To put that into perspective, the first commercially successful consumer digital camera, the Apple Quicktake 100, was introduced in 1994. I would venture that some of the readers of this article weren’t yet born.

    Not only has Irfanview been around for 23 years, like the Swiss Army knife, but it also is small, compact, can fit on, and even be run from a thumb drive and performs more functions than I’ll even be able to cover here.

    If you could only have one digital photography tool to work with, I daresay this might be the one you’d want. (Providing you work on a PC, sorry Mac users, this one’s not available for you unless perhaps you use a Windows emulator).

    If you have been involved in digital photography for a long time, you may already be familiar with Irfanview. (Especially considering that since 2003 it’s been downloaded over a million times each month.)

    It could be that you’ve used it in the past, but have forgotten about it. If so, you might learn some new tricks it can do now that you didn’t know about.

    If you’ve never heard of it, it’s time you did. Either way, the list of Irfanview tools, features, functions, and tricks is impressive.

    And did I mention it’s all free?

    Yes, Irfanview has always been free, though Irfan Škiljan does accept donations and sells the product when used for commercial use. He has pretty much been able to live off the program.

    The Apple Quicktake, released in 1995 was the first consumer digital camera.

    The Kodak-made Apple Quicktake, released in 1995 was the first consumer digital camera.

    What can’t it do?

    I bought my first personal digital camera in 1999, a Nikon Coolpix 950. One of the first tools I used to work with my photos was, yup, Irfanview.

    Over the years, new features and functions have been added, many of those created by other contributors who’ve created “plugins.” Adding to the already impressive list of functions the native program can perform, there are now over 70 plugins for Irfanview, expanding its capabilities even further.

    It might be easier to list what the program can’t do rather than what it can do, but I will attempt to give you an overview of its basic functions. This will not be a “how-to-use” Irfanview article. One of the great things is the program is very easy to learn, and there’s no end of support available.

    Pick the 32 or 64-bit version of Irfanview for your particular computer.

    32 or 64-bit versions of Irfanview are available. Pick the version (and the plug-ins) for your particular computer.

    Acquiring, downloading and installing

    The official site for Irfanview is what you’d expect, Irfanview.com. Once there, you will see there are now two main versions, one for 64-bit and the other for 32-bit versions of Microsoft Windows. It will run on Windows XP, 7,8, and 10. If for some reason, you need older versions, those are available too.

    Pick the version suitable for your computer. I suggest downloading the versions with the installers build in (these will be .EXE files).

    Once downloaded, just double-click the file, tell it where you want it installed, and let it do its thing. (I also mentioned if you want a “portable” program, you can download and install it to a flash drive. It can be handy to have the program with you when you may want to use it on someone else’s computer and not have to install it to their machine.)

    The Installation menu for Irfanview

    The installation menu for Irfanview.

    The Plug-ins

    You don’t have to install the plug-ins, but I don’t know why you wouldn’t, as they greatly expand the list of what Irfanview can do. 

    The easiest way to do this is to download and install the All Plug-Ins Installer. Be sure to pick the one that matches the version of the main program you downloaded and installed, 32 or 64-bit

    Run the .EXE file just as you did the main program. It will find Irfanview on your machine (install that first) and then put the plugin-ins where they need to go. The whole process is very easy and straightforward.

    You can configure Irfanview as the default view for whatever filetypes you choose.

    You can configure Irfanview as the default view for whatever filetypes you choose.

    Exploring the functions

    With so much capability, I think the easiest way to give you an overview of the features is to look at the kinds of tasks you might want to accomplish and how Irfanview can handle those. I’ll briefly describe common tasks, though this will not be an in-depth instruction on how to perform the functions.

    You might find this website a good resource for that purpose. The beauty of Irfanview is it’s very easy to learn and quite intuitive.

    Open, view, save and convert files

    As a photographer, you will likely be working with image file types like JPG, TIF, PNG, GIF, or possibly raw files like Canon CR2 or Nikon NEF.  What’s great is Irfanview opens dozens of different file types, even things you probably haven’t even heard of.  Here’s a link to a full list.

    Open a file and view information in Irfanview.

    You can learn lots about your image when you open it and use the Information option in Irfanview.

    Open and View

    To open a file/image, go to the File dropdown, pick Open and use the next menu to browse to where your file is located.

    Click it once and, with the Preview Active box checked, you will see a thumbnail below.  There will also be information on the width and height of the image in pixels, the color depth, the size in RAM, and the file size.

    Click Open or double-click the image and it will open in Irfanview.  If you want to go to the next image in the same folder, just click the spacebar on the keyboard or use the arrows on the top menu bar.

    File conversion is a real strength of Irfanview.

    Open one image type and convert it to something else. Irfanview excels at this. Here a .tif is converted to a ,jpg.

    Convert

    A powerful feature of Irfanview is the ability to convert one file type to another. For example, open a TIF file and save it as a PDF file or maybe a JPG. It’s as easy as opening the file and then saving it as whatever else you like.

    If you like keyboard shortcuts, Irfanview has many. For example, an open image, click the “S” key to Save and then use the menu to tell Irfanview the file name, type, and location you wish to save it.

    Irfanview can run video files too, like this mp4 video file.

    Irfanview can run video files too, like this MP4 video file.

    Not just for image files, Irfanview can play mp3 and other audio files.

    Not just for image files, Irfanview can play MP3 and other audio files.

    Not just photos

    Irfanview goes beyond just opening photos.  It can also load and play audio and video files.  Want to play an MP3 music file or maybe an AVI video file?   Irfanview can do!

    Send Irfanview images to an external editor of your choice.

    Setting up external editors allows you to send an image from Irfanview to another editor, Photoshop in this example.

    Open with an external editor

    If Irfanview can’t do what you need, you can have it send the image to an external editor of your choosing.  You can specify up to three different editors in the Properties/Setting Menu.

    The Thumbnails menu is Irfanview gives you many ways to look at your image files in a folder.

    The Thumbnails menu is Irfanview gives you many ways to look at your image files in a folder.

    View Thumbnails

    This is a useful option.  (The “T” key is the shortcut).  Pick this, a submenu will open, and you can then browse all the folders on your drives.  Find the image you want, double-click it, and it will open in Irfanview.  The Thumbnails feature is very robust, offering many ways to view your files and see information about them.

    Irfanview is a great program for making slideshows.

    Irfanview is a great program for making slideshows.

    Make a slideshow

    This is one of my favorite features of Irfanview.

    You can create an impromptu slideshow from images on any drive – even a plugged-in flashdrive. You can have the images automatically or manually advance, set timings, add music, show text such as file name, or even complete EXIF data.

    If you want to save and take your finished slideshow elsewhere, you can save it to a self-contained EXE file, burn it to a CD or DVD, or even create a Screensaver file (SCR). With your computer connected to a projector, Irfanview makes a great presentation program, even allowing you to do things on the fly.

    The batch conversion-rename tool in Irfanview is very powerful.

    A top feature of Irfanview is its powerful batch conversion-rename utility. I’ve found none better.

    Batch conversion/rename

    I have not found a better program for this kind of work than Irfanview. Say I need to convert 200 TIF images to JPG, resize them to 1200 on the long side, sharpen them slightly, and rename them all to the same name but with sequential numbering. Irfanview has many of these options. You can tell it exactly what to do, how to do it, and where to save the results.

    Once set up, it can work with as many files as necessary and, when set in motion (Start Batch), will quite quickly perform the assigned task.

    Yes, the menus are quite extensive in this portion of the program, and taking the time to prepare your batch command carefully is important. What’s great, however, is the extensive options giving you very precise control of what you want.

    There’s only one caution I’d give (and the default settings will usually protect you from doing this); if you convert or rename your files, be sure to set Irfanview to make a copy of those instead of overwriting the originals. You don’t want an “oh no!” moment if you discover you made a mistake and overwritten your originals.

    Irfanview is a reasonablly capable image editor.

    It’s not Photoshop, but Irfanview is a reasonably capable image editor.

    Editing images

    I won’t suggest that Irfanview will replace your dedicated photo editors like Lightroom, Photoshop, or whatever editing tool you use. That would be like saying the saw on a Swiss Army knife is a fine substitute for a chainsaw when felling trees.

    However, in a variation of the saying about the “best camera,” let me say that the best editor is… the one you have with you.

    Since Irfanview can work from a thumb drive, if necessary, without even installing it to the host computer, it’s easy to have it with you.

    It’s installed on my desktop and notebook computers, and I carry a copy on a thumb drive on my keychain. Don’t leave home without it!

    So what can you do with Irfanview as an editor?  Here’s a quick list:

    • Adjust color, brightness, contrast, saturation, gamma,
    • Resize image, canvas size
    • Crop
    • Add text
    • Paint – adjust brush size, color, shape, type
    • Fill
    • Sample color
    • Replace colors
    • Flip, rotate, mirror vertically or horizontally, straighten
    • Draw lines, arrows, shapes
    • Add borders, frames
    • Convert to grayscale, adjust color depth, invert to negative
    • Show histogram
    • Fix Red-Eye
    • Sharpen
    • Clone Stamp
    • Plus more!
    Create multi-image montages with Irfanview.

    Use Irfanview to create multi-image montages.

    Other editing/compositing functions

    Irfan has other great tricks it can perform. Need to create a contact sheet? Make a montage image? Yes, Irfanview can do these things.

    While it also has a “Panorama” creation function, this is not a stitching program that can detect and seamlessly merge multiple images. It works better for making horizontal montages with multiple images where the edges need not match.

    For stitching panoramas, I would instead suggest another free program, Microsoft ICE, on which I wrote this previous article.

    Irfanview can control your scanner, bringing the scanned image into the program for further work.

    Irfanview can control your scanner, bringing the scanned image into the program for further work.

    Scanning, copying, and printing

    Irfanview can connect to scanners and other TWAIN devices to bring images directly into the program. Point Irfanview to the device, and it will allow you to scan single or multiple images.

    If you need to make a quick copy of something and have both a scanner and printer connected to your computer, Irfanview has a Copy Shop feature that scans the image and immediately sends it to the printer.

    Still more tricks

    You will want to explore Irfanview on your own as there are more possibilities than I can possibly write about here. As with many things, the best way to learn is to experiment and get some hands-on experience.

    Here a few other things you may wish to try:

    Screen captures

    Need a screenshot to save or send someone?  Use the Print Screen function on your keyboard to capture the screen.  Then open Irfanview and Edit->Paste the captured image.  Crop it as desired and save the image for attachment to your email, further editing, or printing.

    Add your exposure data to your photo with Irfanview.

    Want to have your exposure data show on your photo? Irfanview can do! Display any Exif or IPTC data you like.

    Put exposure data (or other text) on photo

    There could be times you might want to display Exposure data or other text on your photo.  Here’s a simple way to do it in Irfanview:

    • Open the photo of interest
    • Drag a box on the portion of the image where you want to display the text
    • Click Edit->Insert Text
    • Use the menu that appears to fill in the information you want to be displayed.
    • You can use the Exif data codes to pull data from the file (if you haven’t overwritten it with a previous edit to the file).  A list of all codes is available in the Irfanview Help menu. Click the Help button in the menu to see them.  See an example in the image above.
    • If you want to be able to save the “recipe” you created, you can save it as a Profile which you can then use later.  This same technique can be used within the Batch conversion tool to do multiple images.
    Plug-ins offer many more options in Irfanview like this Effects option.

    Plug-ins offer many more options in Irfanview like this Effects option.

    Plug-ins and filters

    When you really want to dig deep into what Irfanview can do, you can explore the plug-ins and filters option. Here you can do such things as OCR (Optical Character Recognition), which will allow you to scan in a page of text and then convert it to editable text.

    There is Facial Recognition (which I’m still deciphering), and there are the Image Effects (with an image open in Irfanview, click Image->Effects->Effects Browser, to get an overview of the various looks you can achieve.

    Want even more? There are plug-ins under the Effects Menu like Filter Sandbox or Filter Factory. Irfanview can also use any Adobe-compatible 8BF filters.

    Conclusion

    The Swiss Army Knife analogy is a perfect description of the way I use Irfanview. It may not be the tool I use routinely, and certainly isn’t my primary photo editor, but, like carrying a utility tool in my pocket, it is oh, so handy when I need it. It’s also easy to always have around.

    For a few tasks, it even does things commercial programs can’t or does them in a simpler, better way.

    I have used the program for over 20 years, and I can say even as I prepared this article, I learned some new things I’d not yet discovered. If you try it, you, too, will find a place in your photo-editing-toolkit for Irfanview.

    Let me know in the comments how you found it useful in your work.

    The post Irfanview – The Free Program You Need in Your Photo Editing Toolbox appeared first on Digital Photography School. It was authored by Rick Ohnsman.


    Digital Photography School

  • How to Remove a Fence From Your Photo in Just 3 Steps in Photoshop (video)

    The post How to Remove a Fence From Your Photo in Just 3 Steps in Photoshop (video) appeared first on Digital Photography School. It was authored by Caz Nowaczyk.

    In this Photoshop video tutorial from Piximperfect, you’ll learn how you can remove a fence from your photo in Photoshop – you know, those annoying fences in front of your subject.

    ?

    How to remove a fence from your photo in just 3 steps in Photoshop

    Use the following steps to remove your fence:

    Step one: Painting out the fence on a layer mask

    1. Make a layer mask.
    2. Zoom in close to your fence, then choose a hard-edged brush that is just slightly larger than the edge of your fence (be sure your paintbrush color is black).
    3. To paint the fence, simply click at the beginning of the fence, then hold the shift key, move the brush to the next section of fence and click. This will create a straight line.
    4. Continue this process over every section of the fence. While this can take some time, duplicating the pattern generally won’t work as no two sections will be the same).
    5. While zoomed in, to move around the image, press the space bar to bring up the Hand and then move the image to where you need it. Then continue painting in the fence lines.
    6. Be sure to paint over all the discrepancies in the fence. If some sections of the fence aren’t straight, simply paint in two or three points.
    7. Once you have painted in all the fence lines, you can move onto the next step.

    Step two: Apply the Content-Aware fill

    1. Select the background layer and turn off the fence mask layer using the eye icon next to the layer.
    2. Now hold Ctrl (PC) or Cmd (Mac) and click on the thumbnail of the fence mask layer. This will select the fence layer.
    3. Go to Edit->Content-Aware Fill (If you are using an older version of Photoshop, for to Edit->Fill and then choose Content-Aware from the dropdown section).
    4. This will open up the Content-Aware Fill settings. Leave them at the default settings. Just change the Output To: setting to New Layer. Click OK.
    5. Press Ctrl+D (PC) or Cmd+D (Mac) to deselect the fence.
    6. To see how the Content-Aware Fill tool has worked, turn off your background layer momentarily. Then turn it back on.

    Step three: Making minor adjustments

    1. The image may look great while zoomed out on the full image, but when zoomed in close, some areas may not look right. This is where the minor adjustments come into play.
    2. Create a new layer.
    3. You can use the Spot Healing Brush Tool. Paint over areas that need fixing with a soft brush. Be sure that the “Sample All Layers” box is checked too. That way, it samples all the layers below the layer you are working on.
    4. For trickier sections, like eyes, select the Clone Stamp Tool.
    5. Take a sample of a similar section by clicking the Alt Key and selecting. If you need to rotate your clone (for example, around an eye). Hold down Shift+Alt+Right or Left Arrows or > (Win) and Shift+Opt+Right or Left Arrows (Mac)
    6. You can also do that by going to Window->Clone Source and then manually entering in the angle of rotation.
    7. Then use the regular Healing Brush Tool. Click the Alt (Win) or Option Key (Mac) to take your sample then paint in the areas that need fixing.
    8. If you are having difficulty fixing areas such as the eyes, consider duplicating the other eye.
    9. To do this, make a new layer. Then use the Clone Tool and make your selection from the same eye. Then repaint it onto the new layer.
    10. Then press Ctrl or Cmd+D to select it and right-click and select Flip Vertical. This then brings up the corner anchors, and you can rotate the eye as you please.
    11. Next, move the rotated eye section over the top of the original eye.
    12. Click on the Mask icon on the Layers panel to create a mask. Select your brush tool. Remember, a black fill will hide your layer (paint it out).
    13. Start painting out the sections you don’t want. You can lower the opacity of your layer so that you can get it’s positioning just right too.
    14. Next, merge your clone layers (not the background or Content-Aware Fill layers). To do this, select the first layer, then press Ctrl or Cmd and click on the next layer. Then press Ctrl or Cmd+E to merge them.
    15. Continue to look for discrepancies and fix those using the same process.

    Step Four: Further adjustments

    1. Now, you can make further adjustments to your image, including selective focus.
    2. Next, create a stamp visible layer.
    3. To do this, first, create a new layer and call it “Selective Focus.” Then select Ctl+Alt+Shift+E (win) or Cmd+Opt+Shift+E (Mac). This will bring your image into the layer.
    4. Then convert the layer to a smart object. Go to Filter->Convert for Smart Filters. Click OK.
    5. Then go to Filters->Blur Gallery and choose Tilt Blur. Next, rotate it. Keep in mind that the areas in the middles are focused – they have zero blur.
    6. Adjust the blur level to whatever you like. You can also adjust the width of the blur area by pulling the lines outward.
    7. Always have your eyes in focus.
    8. You can also add other blur types if you like.
    9. You can also add some sharpness to the eyes. Create another Stamp layer as above. Then desaturate it by clicking Ctrl+Shift+U (Win) or Cmd+Shift+U (Mac). Then go to Filter->Convert for Smart Filter. Click OK.
    10. Next, go to Filter->Other->High Pass. Zoom in so you can see the detail. Decrease the radius slowly and gradually increase it. Just when you begin to see the halos, stop.
    11. Change your layer blend mode to Overlay.
    12. You will see the sharpness on the overall image, but you really only want it on the face. So, hold down the Alt Key (win) or Opt Key (Mac) and then click on the mask. This will create a negative (black) Mask.
    13. First, name it “Sharpen.” Then click the mask, select your Brush Tool, then choose a soft brush and paint on the areas you want to sharpen (Be sure your white paint palette is selected).

    And that’s it!

    Share your before and after results with us in the comments section!


    The post How to Remove a Fence From Your Photo in Just 3 Steps in Photoshop (video) appeared first on Digital Photography School. It was authored by Caz Nowaczyk.


    Digital Photography School

  • Weekly Photography Challenge – Protests

    The post Weekly Photography Challenge – Protests appeared first on Digital Photography School. It was authored by Caz Nowaczyk.

    This week’s photography challenge topic is PROTESTS!

    Climate-Change-Rally-Wollongong-January-2020-by-Caz-Nowaczyk

    Climate Change Rally, Wollongong NSW Australia, January 2020 by Caz Nowaczyk

    In many countries around the world, people protest all sorts of issues – climate change, equality, human rights, government policies etc.

    In my home town, there was a recent protest on climate change – brought about by the recent bushfire crisis in Australia.

    So, this week’s challenge is to go out and shoot any pictures that include protests (if there are none in your town, perhaps you protest about something and would like to depict that somehow in picture form).

    Set out to capture the energy, emotion, wide crowd shots, close-ups of signs and people.

    So, check out these pics, have fun, and I look forward to seeing what you come up with!

    Climate-Change-Rally-Wollongong-January-2020-by-Caz-Nowaczyk-02

    Climate Change Rally, Wollongong NSW Australia, January 2020 by Caz Nowaczyk

    Climate-Change-Rally-Wollongong-January-2020-by-Caz-Nowaczyk-03

    Climate Change Rally, Wollongong NSW Australia, January 2020 by Caz Nowaczyk

    Climate-Change-Rally-Wollongong-January-2020-by-Caz-Nowaczyk-04

    Climate Change Rally, Wollongong NSW Australia, January 2020 by Caz Nowaczyk

    Check out some of the articles below that give you tips on this week’s challenge.

    Tips for Shooting PROTESTS

    The Ultimate Guide to Street Photography

    The Ultimate Guide to Zone Focusing for Candid Street Photography

    Photographing Festivals and Events – Tips for Travel Photographers

    How to Organize and Photograph Events Like a Pro

    5 Tips for Safely Photographing a Dangerous Event

    7 Tips for Capturing the Decisive Moment in Street Photography


    Simply upload your shot into the comment field (look for the little camera icon in the Disqus comments section) and they’ll get embedded for us all to see or if you’d prefer, upload them to your favorite photo-sharing site and leave the link to them. Show me your best images in this week’s challenge.

    Share in the dPS Facebook Group

    You can also share your images in the dPS Facebook group as the challenge is posted there each week as well.

    If you tag your photos on Flickr, Instagram, Twitter or other sites – tag them as #DPSprotests to help others find them. Linking back to this page might also help others know what you’re doing so that they can share in the fun.

    The post Weekly Photography Challenge – Protests appeared first on Digital Photography School. It was authored by Caz Nowaczyk.


    Digital Photography School

  • How to Photograph Travel Icons With Success

    The post How to Photograph Travel Icons With Success appeared first on Digital Photography School. It was authored by Jeremy Flint.

    how-to-photograph-travel-icons

    With far-reaching places more accessible than ever, many more people are traveling around the world. Seeing the many pictures people post of popular landmarks on social media, it seems everyone has traveled to the same places. Amongst some great shots of the famous travel icons that are frequently shared, there are many below average shots. So how should you photograph travel icons successfully? Here are some useful travel photography tips to help you return with better shots.

    Photograph Travel Icons

    Taj Mahal, India

    Research

    To photograph travel icons well, start by doing a bit of research to identify some of the world’s famous sights.

    Some of the most popular places include the Taj Mahal, the Eiffel Tower, Machu Picchu, Angkor Wat, the Houses of Parliament and the Grand Canyon.

    During your research, think about when and where you want to go and the best times of day to visit. Some of the top travel sights in the world are only open during certain hours, so do your research and time your visit accordingly.

    Explore on foot

    One way to get around on your travels is to explore on foot. What are the benefits of doing so?

    A benefit of walking around is that it is more enjoyable than being confined to a vehicle. You may also come across things to photograph that you wouldn’t see from a car.

    Exploring on foot is a great way to photograph travel icons as you have the ability to move around freely and can change your perspective with ease. By exploring on foot, you can find other interesting points of view to shoot. For example, you can shoot at ground level or find a higher elevation to shoot from.

    Image: Blue Mosque, Turkey

    Blue Mosque, Turkey

    Use a tripod

    If there are too many people at your chosen sight, there are other ways to photograph travel icons, such as using a tripod and doing long exposures to blur people out of the shots entirely. You may need to use a neutral density (ND) filter to slow your exposure down in bright conditions.

    Other benefits of using a tripod besides blurring people out are that it will help to minimize the risk of movement in your shots and allow extra light to enter the frame making your pictures brighter than if you were taking pictures by hand. It also helps to take the weight off your shoulders if you carry a heavy camera bag and allows you to return to a place and replicate shots at different times of the day.

    If you do use a tripod to photograph travel icons, be aware that certain travel locations, such as the Taj Mahal, won’t allow you to bring in a tripod, so consider this when planning your trip.

    Capture the moment

    Photograph Travel Icons

    Iguazu Falls, South America

    Capturing the moment is about choosing when to shoot and anticipating the right moment to press the shutter button to get a great image.

    The best time to capture the moment and make an image stand out is at a decisive moment. This could either be the instant something interesting happens or a sequence of events that occur quickly – that disappears in the blink of an eye.

    A fleeting occasion could be some dramatic light hitting the side of a well-known building, a rainbow suddenly appearing and adding drama to the background of a travel icon or when the northern lights (Aurora Borealis) appear and dance in the night sky before the moment fades.

    Whatever moment you want to capture, think about how you could present your travel icon at the decisive moment.

    Look for new angles

    Research the travel icon on social media and see how most photos represent it. Then look for new angles to photograph travel icons successfully and capture the sight uniquely. Consider what makes the icon so special and change your composition to capture the most exciting parts.

    Image: Taj Mahal, India

    Taj Mahal, India

    Storytelling

    To photograph travel icons well, try telling the story of the icon through wide shots, details shots, and both interior and exterior images. This can add interest to your pictures and show a famous landmark in a new light.

    Conclusion

    In summary, to photograph travel icons well, do your research and plan ahead. Think about where and when you want to go. Bringing a tripod can be useful for shooting longer exposures and to create more blur in your shots. Try capturing a new angle and shoot a variety of pictures to tell a story of a familiar landmark including a wide-angle and close-up shots.

    With these tips, get out and capture a travel icon near you or during your next holiday. Share your pictures with us below and any tips you have for photographing travel icons well?

    The post How to Photograph Travel Icons With Success appeared first on Digital Photography School. It was authored by Jeremy Flint.


    Digital Photography School

  • What is Ambient Light in Photography? An Explanation for Beginner Photographers

    The post What is Ambient Light in Photography? An Explanation for Beginner Photographers appeared first on Digital Photography School. It was authored by Lily Sawyer.

    what-is-ambient-light-in-photography

    Have you ever wondered what ambient light in photography means? You may have heard phrases such as “capture the ambiance,” “allow ambient light,” and have wondered how to do that. This article explains exactly that!

    So let’s get started.

    dps-ambient-light-in-photography-beginners-guide-tutorial

    f/5.6, ISO 3200, 1/60th

    Simply stated, ambient light means the light already available in the space before you add any other lighting. Yes, any light already available and that could be many types!

    Types of ambient light in photography

    1. Natural light from outdoors

    The first type of ambient light in photography is natural light from outdoors. This is the daylight that comes through side windows, ceiling windows, and open doorways.

    dps-ambient-light-in-photography-beginners-guide-tutorial

    f/5.6, ISO 6400, 1/60th (This was shot on a very dark and overcast winter day in a north-east facing kitchen)

    Compare the two images above and below. The image above was taken using purely natural light from outdoors whilst the image below incorporated neons, lamps and spotlights.

    dps-ambient-light-in-photography-beginners-guide-tutorial

    f/5.6, ISO 4000, 1/60th

    2. Natural light from indoors

    Candle lights and the glow of light coming from fireplaces are natural lights that can already be indoor sources rather than the natural sunlight coming from outdoors.

    dps-ambient-light-in-photography-beginners-guide-tutorial

    f/5.6, ISO 1600, 1/60th


    dps-ambient-light-in-photography-beginners-guide-tutorial

    f/5.6, ISO 1000, 1/60th

    3. Artificial lights in the home

    This is a range of lights commonly seen in homes and spaces. It includes ceiling down-lighters, spotlights, ceiling pendants, chandeliers, table lamps, floor lamps, neon lights, lights from mirrors, fluorescent lights, and wall sconces.

    dps-ambient-light-in-photography-beginners-guide-tutorial

    f/5.6, ISO 6400, 1/30th

    Which light/lights do you require?

    In photography, the question is, what light is needed to achieve the image the photographer wants to capture? I dare say there are no hard and fast rules as the success of an image depends on getting the correct lighting combination required, regardless of the type of lighting.

    Let’s explore some lighting scenarios in various spaces.

    Portraits

    Just like any type of lighting, whether it be natural or artificial, ambient light is just one option for photographers.

    dps-ambient-light-in-photography-beginners-guide-tutorial

    Left: f/2.8, ISO 1000, 1/100th  Lens 24-70mm Right: f/4, ISO 400, 1/125th with off-camera flash

    In portraits, ambient light could be purely the sunlight coming through a side window. To shoot this, a photographer would only need a camera. And, if it helps to achieve the image, a few accessories such as a reflector, a diffuser, and a backdrop – or use an existing wall.

    dps-ambient-light-in-photography-beginners-guide-tutorial

    Left: f/2.8, ISO 1000, 1/100th  Lens 24-70mm Right: f/4, ISO 400, 1/125th with off-camera flash

    Conversely, the photographer may choose not to use ambient light at all and solely utilize electronic flashes or vice versa in the same space above.

    Sunlight from windows is not usually strong (depending on the size of windows and the position of the sun). It’s definitely not as strong as electronic flashes can be, so sometimes there is no need to block it out fully. Electronic light can cancel out any natural light from the windows or can add a touch of light to any ambient light where needed. The outcome depends on the settings used by the photographer.

    The images on the left above have been shot using natural light filtering through the diffused window and a reflector to increase the shadows. The images on the right have been shot using electronic flash in a softbox. Here is an article on how to achieve both set-ups. My typical settings for portrait shots are around f/2.8 – f/4, ISO 200 – ISO 400, SS 1/100 – SS160.

    Events

    Ambient light is your best friend when it comes to events. Weddings and parties are often busy and buzzing with people. Here in the UK, space for large equipment at such events is not always available and often the photographer has to rely on just a camera and a speedlight to capture these events.

    dps-ambient-light-in-photography-beginners-guide-tutorial

    f/2.8, ISO 3200, 1/100th  Flash power 1/32 Lens 24-70mm

    Letting the ambient light in is key to capturing the ambiance of the room and the atmosphere of the party. This means allowing background lights such as fairy lights, festoon lights, wall sconces etc to seep into the image.

    The resulting look has depth rather than a flat dark backdrop. My typical settings for events range between f/4 – 5.6, ISO is rather high especially indoors in dark areas around 3200 – 6400, SS rather low around 1/60 – 100.

    dps-ambient-light-in-photography-beginners-guide-tutorial

    f/5.6, ISO 3200, 1/100th  Lens 70 – 200mm

    The last thing a photographer wants to do is to kill any ambiance by using a strong flash to mitigate low light – especially in events where dry ice is used to create smoke effects and various colored lighting for a party atmosphere.

    You don’t want to completely obliterate these just to light your subjects’ faces.

    dps-ambient-light-in-photography-beginners-guide-tutorial

    f/8, ISO 2000, 1/30th, Lens 24-70mm, off-camera flash

    Balancing speedlight flash power and shutter speeds is key to achieving images like these as well as incorporating existing ambient light.

    dps-ambient-light-in-photography-beginners-guide-tutorial

    f/5.6, ISO 3200, 1/125th, Lens 24-70mm with off-camera flash

    You can read more about dragging the shutter here, a technique used often to produce these images.

    dps-ambient-light-in-photography-beginners-guide-tutorial

    f/5.6, ISO 2500, 1/60th,  Lens 70 – 200mm with off-camera flash and on-camera flash

    You can use ambient light in the background to create silhouettes.

    In the photo below, there was no light whatsoever on the balcony. I used the light inside the building to create a silhouette of one of the guests. This was an unposed shot so it was a rather hasty one.

    dps-ambient-light-in-photography-beginners-guide-tutorial

    f/11, ISO 2000, 1/200th,  Lens 24-70mm

    Interiors

    Most photographers and magazines require natural light only in the interiors images they use.

    Most often this would need a tripod and the use of slow shutter speeds to mitigate dark areas in the space that need capturing. But if the space is characterized by light features such as neon and lamps that make the atmosphere of the room, then I’m for capturing these with the lights on too.

    dps-ambient-light-in-photography-beginners-guide-tutorial

    f/5.6, ISO 2000, 1/100th,  Lens 24-70mm

    In my opinion, it is necessary to be selective with the amount of artificial ambient light to allow in a photographic composition to ensure a harmonious and natural-looking image.

    More importantly, it is a must to edit out the lights that are unnecessary in the space for the image you want to achieve. Below are three different lighting set-ups in one space. All three dramatically change the look and feel of the same room.

    My typical settings for interior shots depend on the time of day and how much natural light the room gets but range between f/5.6 – f/8, ISO is quite high around 2000 – 4000, SS usually really low around 1/30 – 60 or 100 depending on light availability.

    On the photos below, the top photo utilized only natural light. The photo in the middle had all sorts of lights going on like festoon, lamps, fairy lights, candlelight, and neon but without the main ceiling chandelier, which is very bright. The third photo had the chandelier switched on on top of everything else, but because it got too bright, it killed the ambiance in the room.

    dps-ambient-light-in-photography-beginners-guide-tutorial

    f/5.6, ISO 3200, 1/80th,  Lens 24-70mm

    dps-ambient-light-in-photography-beginners-guide-tutorial

    f/5.6, ISO 4000, 1/80th,  Lens 24-70mm

    dps-ambient-light-in-photography-beginners-guide-tutorial

    f/5.6, ISO 3200, 1/60th,  Lens 24-70mm Highlights taken down in editing.

    I lean towards a selective mixture of lighting in my interiors.

    Some areas are so hard to capture. For example, really dark areas where there is no ambient light at all and using a long shutter speed will overexpose the areas with light and correctly expose the unlit area.

    dps-ambient-light-in-photography-beginners-guide-tutorial

    f/5.6, ISO 2500, 1/60th, Lens 24-70mm

    Of course, this can be rectified by bracketing and compositing in Photoshop. But I don’t always want to be doing that! Besides, I think adding some form of ambient light brings some charm in. Take these photos above and below, for example, illustrating this point.

    dps-ambient-light-in-photography-beginners-guide-tutorial

    f/5.6, ISO 6400, 1/30th,  Lens 24-70mm

    Color temperature

    One of the most common problematic issues when using mixed lighting, especially when including electronic flash into the mix, is color temperature disparity. Natural light from sunlight is usually around 5600K range, while tungsten lights indoors are usually around 3200K.

    This means that when shooting outdoors, you need to set your white balance to around 5000 – 5750 Kelvin. That way, the resulting image looks similar to what you see with the naked eye. If you were to set the white balance to 3000K, for example, everything will look very blue (nothing worse than a white wedding dress looking blue!).

    The same is true when shooting indoors with tungsten or incandescent lights on. The temperature required to shoot this image is around 3200K, but if you shoot it with the white balance set at 5650K, you will end up with an image looking very orange.

    dps-ambient-light-in-photography-beginners-guide-tutorial

    f/5.6, ISO 3200, 1/80th,  Lens 24-70mm

    The most important thing to remember is to shoot with the correct white balance setting.

    However, when using mixed lighting, you will still get color disparity. Here are three ways to solve this, depending on what you require for your images.

    1. You can adjust the white balance in post-production (shoot with a gray card or specified color temperature in your white balance)
    2. Use gels for your artificial lights to match the ambient temperature
    3. Change the bulbs in your indoor lamps to match the sunlight temperature and then adjust everything evenly in post-production if required.

    As for me, I try to match what I see in real life to the outcome of the images. Then they are warmed up in post-production for a natural color with the added touch of a film look to best capture what my eye sees.

    I hope this little article has helped you in your understanding of ambient light in photography as well as balancing color temperatures when dealing with mixed lighting.

    If you have any tips to add about ambient light in photography, do share in the comments below.

    The post What is Ambient Light in Photography? An Explanation for Beginner Photographers appeared first on Digital Photography School. It was authored by Lily Sawyer.


    Digital Photography School

  • Back to Basics: What is the Reciprocal Rule in Photography?

    The post Back to Basics: What is the Reciprocal Rule in Photography? appeared first on Digital Photography School. It was authored by Adam Welch.

    what-is-the-reciprocal-rule-in-photography

    There are extremely few true “rules” in photography. This is an odd thing to say, especially in an article explaining the “Reciprocal Rule”. In an effort to do you and I both a favor, I think it’s best to get this out of the way right here at the beginning. Whenever we refer to the Reciprocal Rule in photography as…well…a rule, just know that it’s meant as more of a helpful guide rather than an iron-clad rule. Got it? Good.

    Now, onward to the good stuff!

    In photography, motion is both our friend and enemy. Intentional or anticipated movement from our subjects or camera can result in magically extraordinary photos. At the same time, unintentional motion, specifically unwanted camera shake, can rob our images of sharpness and depth.

    Sanderlings on the Pacific Coast

    Falling short of the Reciprocal Rule requirements. 1/200th of a second at F/5.6 with a 300mm lens.

    We’ve mentioned the Reciprocal Rule quite a few times in other articles, but today we’re going to dig a bit deeper and learn more about how to use this extremely simple technique. It very well could be one of the most useful bits of knowledge you can possess when it comes to helping you prevent unwanted camera shake.

    What is the Reciprocal Rule?

    Banish all thoughts of grade school math and algebra class from your mind when you read the word “reciprocal.” True, the Reciprocal Rule hints at mathematics but the technique itself is incredibly simple.

    Simply put, for full-frame image sensors (more on this in a bit) the Reciprocal Rule states that your slowest shutter speed when shooting handheld should not be longer than “1” over your selected focal length in millimeters.

    Reciprocal Rule in photography formula

    Not so bad, right?

    In order to reduce the appearance of inherent camera shake when hand-holding your camera, just don’t allow your shutter speed to dip below the reciprocal of your focal length.

    Author’s Note: In mathematics, the word “reciprocal” is generally considered interchangeable with “multiplicative inverse”…which sounds much cooler. 

    It’s here where our previous discussions of the Reciprocal Rule in photography have ended but that is not the case today! Let’s drill down a little further and examine how the Reciprocal Rule works.

    A caveat on reciprocal vs reciprocity

    Talking about the Reciprocal Rule in photography can be tricky at times because it sometimes gets confused with another photographic principle called “reciprocity.”

    Reciprocity, or more specifically reciprocity failure, is a phenomenon photographers sometimes had to manage back in the pre-digital photography days of film. Simply put, film emulsions become less light-sensitive as they are exposed which requires adjusted exposure times based on the type of film and the duration of the metered exposure.

    Kodak Ektar 100 35mm film

    Each of these 35mm frames is approximately the size of a modern full-frame digital sensor.

    Fortunately for us, digital camera sensors don’t suffer from reciprocity failure. However, there are times when autocorrect or well-meaning individuals sometimes confuse the Reciprocal Rule and reciprocity failure as being one and the same when they absolutely are not.

    Why does the Reciprocal Rule work?

    While the Reciprocal Rule centers around estimating exposures based on your focal length, it is not actually dependent on that variable. In fact, the reason why the focal length of your lens matters is because longer focal lengths result in more constrained angles of view (field of view). The tighter your angle of view, the more noticeable camera shake becomes.

    Long focal length camera lens

    So, shorter focal length lenses can achieve relatively long handheld exposures over longer focal lenses due to their wider angle of view – not their optical focal length. The Reciprocal Rule is useful because it takes into consideration the progressively decreasing angle of view produced as focal length increases.

    Check out this quick video where I breakdown why the Reciprocal Rule works.

    ?

    Sensor size and the Reciprocal Rule

    First, a bit of backstory on sensor sizes, but I promise it will come back around to the Reciprocal Rule.

    If you’ve been involved in making photos with a digital camera for any length of time, then you likely have encountered the phrase “crop factor” when talking about digital camera sensors. Albeit there are exceptions, today almost all consumer photography lenses center around the standard 135 film format, commonly known as 35mm.

    This is where the concept of “full-frame” digital sensors originated as they are roughly the same dimensions as those of a frame of 35mm film, give or take. Therefore, mounting a lens of a focal length based on the 35mm full-frame film standard to a cropped sensor camera, the field of view becomes inherently more narrow (cropped) due to the smaller sensor size.

    Essentially, a cropped sensor will “zoom” a full-frame lens and cause it to have a longer effective focal length.

    Hasselblad medium format digital sensor and full frame Sony A7r sensor

    Every camera manufacturer’s cropped sensor has a crop factor you can use to approximate the resulting focal length of a full-frame lens when used on a cropped-sensor camera. For example, Canon’s cropped sensor (APS-C) has a crop factor of 1.6x because a full-frame Canon sensor is approximately 1.6x larger than that of its cropped-sensor counterpart.

    Canon 5D MK3 compared to Canon 7D MK1 sensor

    So, my 50mm lens is considered a true 50mm lens when mounted to my full-frame sensor 5D MKIII. However, if I were to mount that same 50mm to my cropped sensor 7D, it would instantly become approximately an 80mm lens (1.6 x 50mm) instead of 50mm.

    The reason why sensor size and crop factors become important when using the Reciprocal Rule in photography is due to their effect on the effective angle of view.

    The Reciprocal Rule states that I should use a shutter speed no slower than 1/50th of a second with a 50mm lens and full-frame camera.

    A cropped sensor camera with that same 50mm lens would dictate a faster shutter speed be employed since the crop factor has changed the effective focal length of our lens to 80mm.

    This results in a reciprocal of 1/80th of a second minimum shutter speed.

    Without going much further down the rabbit hole on sensor sizes, just know that the opposite is also true when using sensor sizes larger than the full-frame standard. The resulting “reverse crop factor” would be less than 1x. It would mean that a full-frame sensor camera lens would now produce a wider angle of view, thus, increasing the duration of your allowable handheld shutter speed.

    The effects of image stabilization

    Another aspect to consider when talking about the Reciprocal Rule is that of image stabilization. More and more often today, manufacturers are building better and more efficient image stabilization into their cameras and lenses. Many of these image stabilization systems offer upwards of 2-stops of reported stabilization (meaning you can shoot 2-stops or more slower shutter speeds).

    Lens image stabilization

    This means that we can incorporate the approximate stops of image stabilization (should you have it) when making use of the Reciprocal Rule.

    It’s actually quite simple.

    If you engage your lens or camera’s image stabilization, you are effectively lengthening your allowable handheld shutter speed by ever how many stops the stabilization states it will compensate. Feel free to adjust the shutter speed of the Reciprocal Rule and see if you can manage even longer shutters due to the stabilization.

    Final thoughts on the Reciprocal Rule

    There are very few absolutes when it comes to making photographs. Every photographer is different, and what works for one might very well not work for another.

    This is especially the case when dealing with techniques such as the Reciprocal Rule in photography. Although it attempts to help us prevent unwanted camera shake by providing a quick and easy baseline shutter speed based on our lens, it should not be considered a true “rule.”

    Granted, some of us are simply better at holding our cameras more steady than others, but there is no replacement for practice and optimal body mechanics when it comes to producing less shaky photos.

    The next time a tripod is not handy or practical, use the Reciprocal Rule to help you increase your odds of getting a sharper photo each and every time you’re shooting from the hip.


    You may also like:

    • Back to Basics: Deciphering Shutter Speed and Motion
    • Back to Basics: Understanding the “Sunny 16 Rule” in Photography


    The post Back to Basics: What is the Reciprocal Rule in Photography? appeared first on Digital Photography School. It was authored by Adam Welch.


    Digital Photography School