Author: Gaurav Birla

  • 16-bit Vs. 32-bit Vs. 64-bit: What Does it All Mean?

    bits  

    A Guest post by Steve Berardi from PhotoNaturalist

    In digital photography, there’s a lot of talk about bits:

    • 12-bit vs 14-bit Analog to Digital Converters (ADC)
    • 8-bit vs 16-bit color
    • 32-bit vs 64-bit Photoshop

    But, what does it all mean? Although more bits generally means better quality processing, it’s not always that simple. Sometimes you really need to know the full story before making a conclusion.

    Before we jump into these specific examples that are common in digital photography, it’s important to understand what a bit actually is.

    What is a bit?

    The word “bit” comes from two words: binary and digit. Each bit has two possible values: 1 or 0. Sometimes it’s also helpful to think of a bit as either “on” (1) or “off” (0).

    Although one bit can store two possible values, a sequence of two bits can store four possible values: 00, 01, 10, and 11. With a sequence of bits, order matters, so “01″ is very different from “10.”

    Each time you add a bit to a sequence, you double the number of possible values, so if you go from two bits to three bits, you go from four possible values to eight possible values.

    As an example, let’s say you were interested in storing something that has 16 possible values. You would need 4 bits in this case (2 x 2 x 2 x 2 = 16).

    Analog to Digital Converters (ADC): 12-bit Vs. 14-bit

    Every digital camera has some kind of analog to digital converter (ADC) that converts the analog signal captured by the sensor into a digital signal that produces your image. Most DSLRs these days either have a 12-bit or 14-bit ADC.

    The bits in this case refer to the number of possible tonal values that your camera’s sensor can capture. For example, a 12-bit ADC can capture 4,096 possible tonal values for each pixel. On the other hand, the 14-bit ADC can capture 16,384 tonal values for each pixel.

    At first, it may seem like the 14-bit ADC is a clear winner: it can capture 12,000 more tonal values! But, these two extra bits are not increasing the dynamic range of your camera, they’re only adding more steps within that range. It’s kind of like if you took a loaf of bread and cut each slice in half to make even smaller slices. You might have more slices of bread now, but the size of the loaf is the same!

    So, you’ll experience slightly better image quality with the 14-bit ADC, but it’s really just noticeable in the deep shadows and smooth gradients (like those you find in a photo of a sunset).

    For more details on 14-bit vs 12-bit ADCs, check out these helpful articles:

    Color: 8-bit Vs. 16-bit

    In most post-processing software, you have the option between 8-bit color and 16-bit color. The bits in this case refer to the number of possible tonal values available to each color channel (red, green, and blue) of each pixel.

    With 8-bit images, you have 256 possible values for the red channel, 256 values for the green channel, and 256 values for the blue channel. And with 16-bit images, you have 65,536 possible values for each color channel.

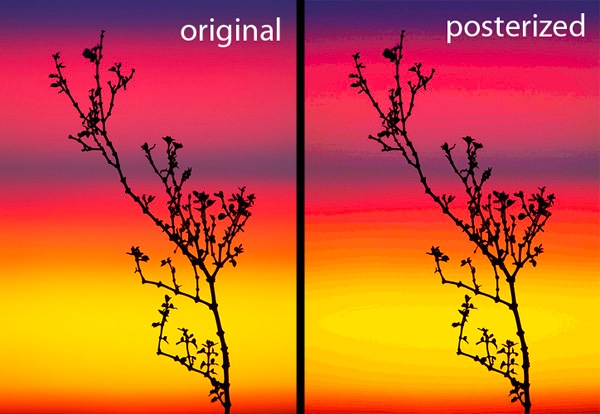
    Using 16-bit color will result in some pretty large filesizes, but it’s worth the extra size because with 16-bit processing you’ll significantly reduce your chances of posterization (as seen in the photo below). It’s a good idea to use 16-bit color even if you originally shot in JPEG (which is 8-bit), because the extra bits will help reduce rounding errors when performing common post-processing tasks like Curves or Levels.
    bits-posterized

    For more information on 8-bit vs 16-bit color, check out these helpful articles:

    Photoshop: 32-bit Vs. 64-bit

    Some post-processing applications, like Adobe Photoshop, offer 32-bit versions and 64-bit versions. The bits in this case refer to the number of possible memory addresses. With 32-bits, you can use up to 4GB of physical memory, but with 64-bits you can theoretically use up to 17.2 billion GB of memory (although this amount is usually severely limited by the operating system).

    There’s a common misconception that the 64-bit version of Photoshop is always faster, but in reality, to take advantage of the speedup (which is minimal), three things need to happen:

    1. You need more than 4GB of physical memory
    2. You need to be working with very large images (at least 800 MB)
    3. You need to be running a 64-bit operating system (e.g. Vista x64 or Mac OS 10.6)

    You might think that 800 MB is larger than you’ll ever work with, but filesizes can get big pretty quick if you’re building a panoramic image, or working with multiple layers of images to blend exposures.

    Even if you do meet all three conditions above, there’s still a chance you won’t notice any speed-up at all, depending on the operations you’re performing on the image. Also, keep in mind that many third-party plugins do not work with the 64-bit version of Photoshop.

    For more details on 32-bit Vs. 64-bit Photoshop, check out these informative articles:

    Remember: Not all bits are created equally

    The key thing to take away from this post is that not all bits are created equally. Just because something has twice as many bits that doesn’t mean it’s automatically twice as fast or two times better quality. Before making any kind of conclusion about 16-bit vs 32-bit / etc, you really have to understand the story of how those bits are being used.

    201008201339.jpgAbout the Author: Steve Berardi is a naturalist, photographer, and computer scientist.

    You can usually find him hiking in the beautiful mountains and deserts of Southern California. Read more of his articles on nature photography at the PhotoNaturalist and follow him on Twitter.

    Post from: Digital Photography School – Photography Tips.

    dpsbook.png

    16-bit Vs. 32-bit Vs. 64-bit: What Does it All Mean?


    Digital Photography School

  • 3D SCREEN TEST – anaglyph – Adjust LCD/3D Glass

    3D SCREEN TEST – anaglyph – Adjust LCD/3D Glass Try watch the movies on: 3Dstreaming.it
    Video Rating: 0 / 5

  • Disney’s Recycled Animation

    Disney (for so many years) has been recyling their animations and here is a compilation of most of the reused clips. The song is called The Silly Song and it is from snow white. Here’s a link to download it for free. www.mp3raid.com
    Video Rating: 4 / 5

  • Galaxy-2007; 3D; RB ANAGLYPH

    For 3D use red/blue glasses (red on the left)
    Video Rating: 3 / 5

    Anaglyph Video composed from 3D-AVI of Camera Fujifilm FinePix REAL 3D W1 by StereoMovie Maker stereo.jpn.org

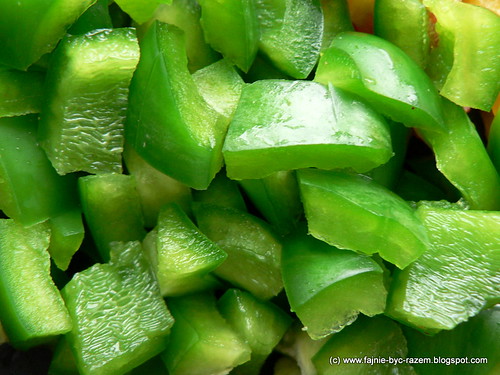
  • Green peppers

    Catchy Colors Photoblog

  • Shoot like a pro with the latest digital compact cameras.

    © billy1125
    With even the cheapest digital cameras loaded with features, even a complete novice will be able to take some fabulous shots. If dealing with f-stop and aperture has put you off taking anything but holiday snaps, the latest digital camera will have you taking pictures like a pro.

    Digital cameras in the 0 range can come loaded with some of the following features:

    Face Detection
    With automatic face recognition and tracking, portrait photography just got a whole lot easier.

    Digital …

    Digital Shot

  • Amazing Hidden Animations!

    The illusion of movement with a record player. Watch as hidden animations come alive by using a specific frame rate and shutter speeds of a camera and RPM of a record player. To me this is one of the ultimate illusions. Definition of Illusion: something that deceives by producing a false or misleading impression of reality. I used a Numark turntable set to 45 RPM and the camera was set to 24 FPS. The shutter speed was set to around 840. With that combination of settings a 30 frame animation would appear to stand still. I used the slider to increase / descrease rpms which caused the images to move foward or backward. The sequence of the guy jumping on the blocks was the most difficult but turned out the best, in my opinion. The images of the guy jumping is me. I recorded myself jumping in the living room then took 30 frames from that footage and traced the images in photoshop and filled with black. Then printed out the 30 images and cut each one out. I used 30 wooden blocks and glued them to a piece of construction paper then taped the images of the jumping guy to the clear sheet and aligned them with the blocks. I also love the pac-man animation. It’s so simple but just has such a cool feel to see the mouth opening and closing. I’m giving away the record playing that I used to make this video. I bought it brand new for the video and have no need for it now. It’s the Numark TTUSB 0.00 value. Here are the rules: To be eligible to win you must: – Be subscribed to my
    Video Rating: 4 / 5

    This lively RSA Animate, adapted from Dan Pink’s talk at the RSA, illustrates the hidden truths behind what really motivates us at home and in the workplace. www.theRSA.org
    Video Rating: 4 / 5

  • 3D animation of how IVF works

    This is a beautiful medical animation about IVF (In Vitro Fertilization)
    Video Rating: 4 / 5

  • How to Photograph Bands in Bars – Equipment

    A guest post by Music Photographer Rick Bennett.

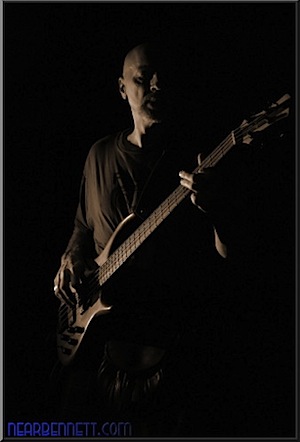
    Bass player lit with off camera flash

    Some of my favorite photography subjects are musicians while they are performing. They tend to be having fun, they like the attention, and they’re challenging to capture well because of their environments. Capturing musicians in the wild can be tough and very rewarding.

    Digital Photography School recently published 6 Tips for Budding Live Concert Photographers. One of the tips was to start out shooting friends’ bands in small clubs. I’m going to expand on that suggestion by writing a three part series on photographing bands in bars. In the first part, I’ll deal with equipment choices. In the second part, I’ll deal with set-up just prior to the performance. In the last, I’ll discuss shooting techniques.

    The most obvious part of the equipment you’ll need is a camera, and your choice of camera can really make or break your final images. It should probably go without saying that a dSLR is almost certainly required, but there are some high end compacts that could fit the bill. At a minimum, the camera should either have a hot shoe or replaceable lenses. If the lenses aren’t replaceable, look for very fast built-in glass. It also needs the ability save images in RAW format since the color balance will likely be completely crazy from any stage lights. If you’re not familiar with RAW processing, its easy enough to convert your images to black and white, and those look cool too. Finally, your camera needs to give you the ability to choose your focus point and easily manually focus. Like I said, most standard dSLRs fit all of these requirements.

    One consideration that’s more difficult to determine is low noise at high ISO. Don’t be fooled by the specs on the box: 1600 ISO on a Nikon D5000 is not the same as 1600 ISO on an Olympus E-620. For example, in one review the noise in a D5000 JPG at 3200 ISO is about the same as the noise in an E-620 JPG at 800 ISO. That’s a two stop difference that can change a 1/30s blurry shot into a usable 1/120s. Check the available reviews to make sure you’re getting a camera with the best high ISO performance in your price range. High quality at high ISO means you’ll be able to boost the ISO close to the max, meaning faster shutter speeds to help stop motion when using ambient light.

    Next, you have a choice when starting out: either use off-camera flash or use fast (f/2.8 or better) lenses. At the low end the price is about the same: a decent manual flash + triggers + mounts can be just under 0 while a “Nifty Fifty” or the Jive Thirty Five are also under 0. As with everything photography, the prices only go up. The choice of off-camera flash vs. fast glass is a tough one. Flash can work in most situations but there are some venues where placement of a remote flash can be very challenging or even prohibited. Conversely, an f/1.8 50mm or 35mm lens captures a lot of light but the short focal length means you’ll be right in the performers’ faces, and some bars (at least in my town) don’t even bother to light the performance area. I started with off-camera flash, then acquired the Jive Thirty Five, and I’ve used them both during performances to capture different moods.

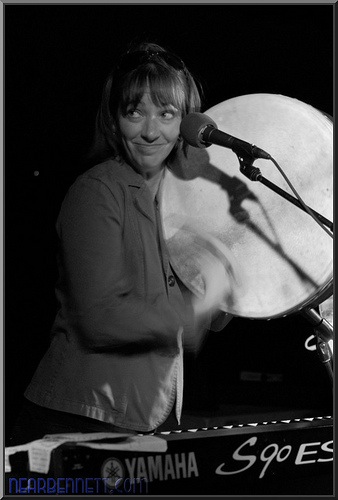
    Ambient lighting, 1/30s f/3.2

    The ideal lens is a bigger zoom: 70-200mm f/2.8. Its almost as fast as an f/1.8 but it allows you to back away from the performers a bit (or shoot a stage that you can’t access). But even that lens doesn’t solve all the lighting problems in a bar and I’ve found I still like to use off-camera flash for many bar stages. If you can’t afford an f/2.8 zoom, then any other zoom will do if you’re willing to use off camera flash. In most bars a 5.6 300mm lens won’t be able to shoot at less than 3200 ISO at 1/30s. That means a lot of motion blur and camera shake if you don’t use flash.

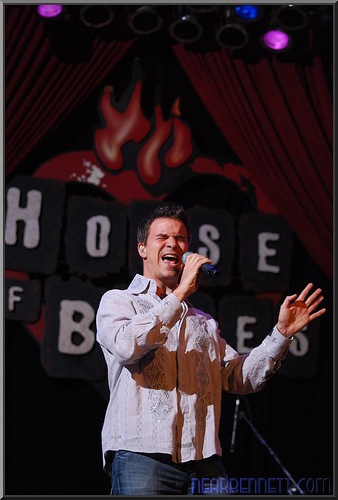
    Off-camera flash used at the Chicago House of Blues

    To go with flash, you probably will start with a lower cost full manual flash like the workhorse classic Vivitar 285HV. It gives you decent range of manual power settings, and a tilt-zoom head. My one complaint about the 285HV is that it doesn’t have a swivel head. In a bar with awkward mounting conditions, a swivel head can go a long way. So look for a flash that has manual power settings down to 1/32 and a zoom-tilt-swivel head. Some in this class have a built in optical slave, which might seem like a good way to save some money on the triggers, but it will likely just kill your batteries-the slaved flash will go off every time some other fan of the band takes a picture. Manual triggers (i.e. those that don’t support TTL metering) can be had for less than .

    If you want to take it up a notch, you can go TTL (through the lens metering) with your off-camera flash. That is beyond the scope of this article, but it will allow you a better level of creative control from the camera, and it will cost significantly more as well.

    When I’ve done off-camera flash in a bar, my preferred light stand is a VAL-voice activated light stand. They range in price, but frequently can be had for the price of a pint or two when you enlist a friend or relative to help you. With a VAL, you can have very focused light on a single performer without blasting the whole stage with light. And it is easy for a VAL to adapt to performers moving around a lot-a clamped flash can’t do that. My preferred VAL is my wife, and we quickly worked out elaborate hand signals so that I could tell her who to point the flash toward: one finger meant the first performer from the left, two fingers meant the second one, and so on. I know its complex, but you can probably figure out your own method of signaling the VAL. If you add a snoot to the flash, which keeps the beam narrowly focused, you can create dramatic lighting on a performer that looks a lot like a spot light.

    If a VAL isn’t an option for you, you’ll need a way to secure the flash to something in the bar. You’ll likely need an umbrella swivel, or some other method of converting a hot shoe to a 1/4-20 bolt. Then you can clamp the flash pretty much anywhere. I’ve clamped flashes to pictures, light bars, chair backs, shelves, posts, and drop ceilings (the drop-ceiling scissor clamp is a must here!). If you can, scouting the location will help you know what kind of clamp you’ll need for ideal placement. In some venues, if the crowds are light, I’ve even used standard light stands. A super clamp or modified A-clamp will serve you well here.

    In part two, I’ll discuss setting up your gear at the venue.

    Rick Bennett has been shooting bands in bars, at festivals, and on big stages for about a year. You can see more of his work on his blog, portfolio, or Flickr stream.

    Post from: Digital Photography School – Photography Tips.

    dpsbook.png

    How to Photograph Bands in Bars – Equipment


    Digital Photography School

  • Stereoscopic 3D (need glasses)

    A 30second 3D test made with Zbrush 3.12, Adobe Photoshop CS4 and After Effects CS4. You need Red/Cyan (blue) glasses to watch the Stereo Effect. Learn how to make stereoscopic 3d in after effects with Digital-tutors. For daily news about stereoscopic 3D, visit MarkedSaw.