Blog

  • Apple introduces new ProRes RAW video format with Final Cut Pro X update

    Credit: Apple

    In a surprise update ahead of NAB, Apple has introduced a brand new video format called ProRes RAW. The format was introduced alongside an update to Final Cut Pro X, which also added advanced closed captioning tools for professional filmmakers.

    The captioning tools are neat—they allow video editors to more easily create, view, edit, and deliver captions, with support for both the CEA-608 and iTT formats—but this feature will no doubt be overshadowed by the much bigger news: the introduction of ProRes RAW.

    As the name suggests, ProRes RAW is an evolution of the Apple ProRes video codec. Apple claims that ProRes RAW “combines the visual and workflow benefits of RAW video with the stunning performance of ProRes.” By pulling RAW data from the sensor, video editors will have a lot more dynamic range flexibility—important as more and more displays, including Apple’s own iPhone X, become capable of displaying true HDR—all while taking advantage of the space and performance benefits of a compressed ProRes file.

    In fact, Apple claims that ProRes RAW files take up less space than ProRes 4444. And since it’s Apple’s format, it has been performance optimized for macOS so that you can play full-quality 4K ProRes RAW files on your current MacBook Pro or iMac in real time without rendering.

    Credit: Apple

    The format drops today, and already Apple has made inroads into the professional community with Atomos and DJI. ProRes RAW compatibility will be made available as a free update for Atomos Shogun Inferno and Sumo19 users, and as “a free update for users with the RAW activation package” for the DJI Inspire 2 Drone and Zenmuse X7 camera.

    Once updated, Final Cut Pro users will be able to work natively with ProRes RAW and the ProRes RAW HQ files created by the two Atomos external recorders mentioned above.

    To learn more, check out the full press release below; or, if you’re feeling exceptionally brave and nerdy, you can read Apple’s full white paper on the new format here. Final Cut Pro X version 10.4.1 will be available as a free update to current users ($ 300 USD for new users) starting April 9th.

    Press Release

    Final Cut Pro X update introduces ProRes RAW and advanced closed captioning

    Apple is introducing a new update to Final Cut Pro X, the most popular version of its professional video editing software, with more than 2.5 million seats. Final Cut Pro 10.4.1 introduces a groundbreaking format from Apple, ProRes RAW, which combines the visual and workflow benefits of RAW video with the performance of ProRes. The update also adds advanced closed captioning tools that allow video editors to easily view, edit and deliver captions from right within the app. Apple is also adding complementary new features to Final Cut Pro companion apps, Motion and Compressor.

    ProRes RAW

    ProRes RAW is a new format from Apple that offers the quality and workflow advantages of RAW with the stunning performance of ProRes. With ProRes RAW, editors can import, edit and grade pristine footage with RAW data from the camera sensor, providing ultimate flexibility when adjusting highlights and shadows — ideal for HDR workflows. And with performance optimized for macOS, editors can play full-quality 4K ProRes RAW files on MacBook Pro and iMac systems in real time without rendering. ProRes RAW files are even smaller than ProRes 4444 files, allowing editors to make better use of storage while providing an excellent format for archiving.

    Final Cut Pro editors can work natively with ProRes RAW and ProRes RAW HQ files created by Atomos recorders. The format will be available as a free update for owners of Atomos Sumo 19 and Shogun Inferno devices. The format will also be available as part of a forthcoming upgrade package to users of the DJI Inspire 2 drone and Zenmuse X7 Super 35mm camera system designed for aerial cinematography.

    Closed Captioning Tools

    As closed captioning becomes increasingly important around the world, Final Cut Pro now includes powerful closed captioning tools for professional filmmakers, YouTubers and students looking to add captions to their projects without the need for expensive third-party software or services. Users can import closed caption files directly into their project or create them from scratch. Captions appear in the viewer during playback and can be attached to video or audio clips in the timeline, so they automatically move with the clips to which they’re connected. An all-new captions inspector makes it simple to adjust caption text, color, alignment, location and more. Users can even create captions in multiple languages within the same timeline and easily share captioned videos to YouTube and Vimeo. And in the share window, a new Roles tab displays titles, video and audio roles in a single consolidated interface, making it easy to configure roles and closed captions when sharing.

    Motion 5.4.1 and ProRes RAW enable motion graphics artists to take full advantage of RAW image quality with superb performance and flexibility when designing graphics and effects. Compressor 4.4.1 gains support for closed captioning with comprehensive controls to view, adjust and deliver captions as part of a batch or iTunes Store package.

    Pricing and Availability

    Final Cut Pro 10.4.1 will be available on April 9 as a free update for existing users, and for $ 299.99 (US) for new users on the Mac App Store. Motion 5.4.1 and Compressor 4.4.1 will also be available on April 9 as free updates for existing users, and for $ 49.99 (US) each for new users on the Mac App Store. Education customers can purchase the Pro Apps Bundle for Education for $ 199.99 (US). For more information, please visit: apple.com/final-cut-pro.

    Articles: Digital Photography Review (dpreview.com)

  • How Slow Photography Can Help You Improve Your Images

    So often we are caught up in hectic schedules and checking completed items off our to-do lists that we don’t make time to truly enjoy our photographic experience. I believe slow photography can be a fabulously enjoyable, and even therapeutic experience, especially when you give yourself time to indulge.

    Woman making giant soap bubbles in a park. - How Slow Photography Can Help You Improve Your Images

    When you have a camera in hand you can set your mind and emotions free from the troubles of the day and step into another world, one of inspiration and creative expression. But you must be mindful and make time for yourself to achieve this.

    Man with his tricycle taxi in Chiang Mai, Thailand - How Slow Photography Can Help You Improve Your Images

    Being Patient

    Patience is a virtue and should not be exclusive to bird and wildlife photographers. Maybe these genres require somewhat more patience, but street photography, sports, landscape and most other kinds of photography require you to slow down and take time to obtain the best possible images from most situations.

    Some of the very best street photography is not brought about by spontaneity alone, but by careful planning, anticipation and patience. Finding a great location on the streets is one thing, but often you’ll have to wait for the best light and the most interesting action to present itself in your chosen location to capture the most impressive photographs.

    Street with activity in Muang Mai Market, Chiang Mai, Thailand. - How Slow Photography Can Help You Improve Your Images

    Even the best sports photographers take time with their photography. The time they invest may be in studying the game more or getting to know the players and coaches of the teams they photograph the most.

    Doing this will give them the knowledge and relationships which will enable them ultimately to capture more dynamic pictures in the spur of the moment. They will more easily anticipate the flow of the game than someone who’s inexperienced and knows little or nothing of the character of the team.

    Thai man working as a porter at the fresh market in Chiang Mai - How Slow Photography Can Help You Improve Your Images

    Observe

    Taking time to observe the environment in which you are photographing will help include more sense of feeling into your photos. Rather than rushing in to get some photos as soon as you arrive at your location, leave your camera in its bag or case and just observe what’s there and what’s happening.

    Use your other senses too, not just your eyes. Listen, feel, smell and even taste (when it’s appropriate) to become more aware of the environment where you want to take photos.

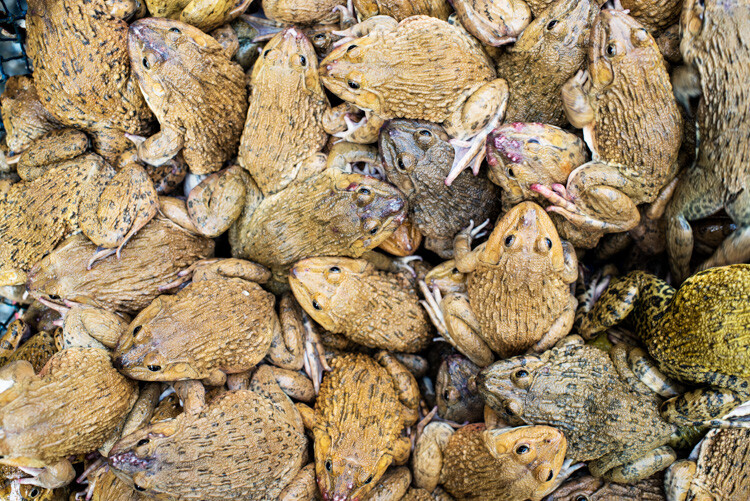
    Lots of frogs - Slow Down and Take Your Time – Don’t Rush Your Photography

    Give yourself space to slow down, to take a step back and observe what’s going around you. You will often discover interesting and photogenic subjects that you may not notice if you move in too quickly and start taking photos immediately.

    Incorporate Photography into Your Schedule

    Take your camera with you wherever you go. To work, school or university, when you exercise, when you go shopping, and when you walk the dog. By doing so you will learn to see your regular environment in different ways.

    Thai woman outdoors - Slow Down and Take Your Time – Don’t Rush Your Photography

    Making time to use your camera each day is one of the best ways to improve your skill and technique and to develop your own unique style. Giving yourself time within the regular context of your day might seem hard or a little strange at first. But as you commit yourself to doing this you can begin to find ways you hadn’t thought of to make interesting photos.

    Think outside the box as you go about your regular routine. Make the ordinary things in your life look extraordinary in pictures.

    Thai woman selling mangos at the fresh market in Chiang Mai - Slow Down and Take Your Time – Don’t Rush Your Photography

    Revisit Locations and Subjects

    Visiting the same locations multiple times and photographing the same subjects more than once is often worth taking the time to do. If you go someplace just once you will never really know if you’ve gotten the best photos possible.

    Reviewing the images from your first or subsequent visits to a location will help you build a more critical eye. Then when you return to that place and subject you will have a more experienced perspective than at first go around.

    Female butcher are a Chiang Mai market - Slow Down and Take Your Time – Don’t Rush Your Photography

    By making time to do this you will most likely enjoy the experience more and produce better photographs.

    Be careful to opt for places you really enjoy and feel good about as this will help compel you to return and seek to make better photographs than you have done previously.

    Kayaw girl blowing bubbles in Chiang Mai, Thailand.

    In Conclusion

    By allowing yourself time to slow down and enjoy using your camera you will begin to see a progressive improvement in the quality of your images. Continuing to delve into techniques you’ve not previously mastered and experimenting with new subjects will help maintain a freshness in your pictures and you will enjoy your photography time even more.

    Maybe we can make slow photography the next popular craze!

    The post How Slow Photography Can Help You Improve Your Images appeared first on Digital Photography School.


    Digital Photography School

  • Samsung explains the sensor tech behind the Galaxy S9’s super-slow-motion mode

    Samsung published a couple of technical blog posts today, providing some detail on the stacked sensor technology used in the new Galaxy S9 and S9 Plus smartphones, and specifically how this tech is used to power the devices’ super-slow-motion mode.

    This mode can record 960 frames per second at HD resolution for a duration of 0.2 seconds, which translates into 6 seconds playback time at 30 fps—32 times slower than standard video. The resulting videos can be reversed, exported as GIFs and edited in other ways.

    To achieve the blistering fast frame rates, Samsung has adopted similar imaging technology to what we’ve previously seen on some Sony devices. The S9 sensor offers faster sensor readout-times, bandwidth and video processing of the application sensor than on previous Galaxy generations by using a three-layer stacked sensor design that consists of the CMOS image sensor itself, a 4x faster readout circuit, and a dedicated DRAM memory chip for buffering:

    In addition to slow-motion, the stacked sensor helps reduce rolling shutter effects in video mode, and counter camera shake through frame-stacking methodologies.

    “We were able to achieve a readout speed that is four times faster than conventional cameras thanks to a three-layer stacked image sensor that includes the CMOS image sensor itself, a fast readout circuit, and a dedicated dynamic random-access (DRAM) memory chip, which previously was not added to image sensors,” explained Dongsoo Kim. “Integrating DRAM allowed us to overcome obstacles such as speed limits between the sensor and application processor (AP) in a high-speed camera with 960fps features.”

    You can see some of the Samsung super-slow-motion video results in the video below. Samsung’s article on the technology is available on its blog, where you’ll also find an interview with the team behind the new sensor.

    Articles: Digital Photography Review (dpreview.com)

  • Shedding Light on the Histogram – 8 Rumors and the Real Facts About this Graph

    There have been dozens of articles and many videos published about the purpose and interpretation of the histogram in post-production. It serves a purpose in both the camera capture and post-production processes.

    Tons of pulp has been generated about this tiny graph clarifying the general purpose of the histogram. But there is still much to be learned about this graph. This article will clarify some issues while focusing mainly on post-production concerns.

    Shedding Light on the Histogram - How to Use it in Post-Production

    The individual RGB values are dominant in this image. Only the cracks in the sidewalk and spots of white in the cement cause the spikes on the outside edges of the graph.

    Some articles I’ve read portray the histogram as the Holy Grail of digital photography and even describe an ideal histogram shape. Others describe the histogram as an accurate revelation of image health, sort of like a digital EKG. Still, others downplay the value of the statistical feedback completely and totally miss its primary purpose. Listed below are actual quotes from tutorials and articles about the histogram.

    Colored Fence - Shedding Light on the Histogram - How to Use it in Post-Production

    The two histograms reveal more information than you might think. The RGB graph reveals the same solid yellow and blue colors while the Luminosity graph represents the combined RGB luminosity (effectively, the grayscale equivalent values).

    I’ve been adjusting images for decades; long before the graph was publicly introduced and I’ve worked with it every day since so I’d like to weigh-in on rumors and clarify some facts. Once you understand the histogram’s primary function and limitations, you’ll find it to be a solid feedback resource.

    The Histogram’s Vertical Lines Defined

    RUMOR #1: The histogram is a graphic blueprint of a digital image. The horizontal span represents the image’s tonal range and the vertical lines reflect the contrast of the image; the higher the vertical lines, the more contrast the picture contains.

    FACT: The horizontal axis does reflect the image’s tonal range (from the darkest tones to the lightest), though the vertical lines reveal little about its contrast. Actually, the horizontal distribution is what reveals the overall contrast. Tones located mostly on the right reveal very light (or high-key) images while tones favoring the left side are darker (low-key) images.

    The extreme right side wall represents white and the extreme left wall of the graph represents solid black. The highest (vertical) peak of the graph merely indicates the highest ratio of pixels containing that particular color tone as it relates to the others. The lowest vertical level on the graph indicates the tone color with the least number of pixels in the image.

    Hi Key Low Key Histogram

    The left graph represents a high-key or light toned image. The histogram on the right represents a low-key or dark toned image.

    Histogram Shape

    RUMOR #2: There is a preferred “mountain” shape for a histogram. The ideal shape displays a single peak beginning at the “ground” on one side, reaching upward into a bell shape near the middle, and tapering down to the ground on the other side. An ideal histogram contains information from all channels everywhere, from the left to the right in the graph.

    FACT: There are as many histogram shapes as there are images. There is no such thing as a good or bad histogram and there is no such thing as an ideal histogram. Because these graphs reflect each image’s distribution of tones, you’ll be hard-pressed to find any two alike.

    Histogram Shapes

    Only images containing mostly middle tones will actually display a true bell (mountain) shape on the histogram as in the one top left.

    Clipping

    RUMOR #3: The extreme left and extreme right sides of the histogram should never hit the “sidewalls” of the graph. If the left or right side hits and travels vertically up the wall, an undesirable effect called “clipping” will occur, indicating that either solid black or solid white “no-detail” areas will be visible in the image. Utilize the warning signs (The Blinkies and triangles) and avoid clipping on either tonal extremes of the graph.

    FACT: Depending on whether the image is high-key (medium contrast on a pure white background) or low-key (dramatic lighting with a black background), either side of the mountain may actually resemble a tonal cliff. Real-life lighting dynamics make these wall-climbing graphs quite acceptable. Photos captured against white seamless backdrops are purposely exposed to produce dropout white backgrounds.

    Jupiter Air Show - Shedding Light on the Histogram - How to Use it in Post-Production

    The U.S. Air Force Thunderbirds screaming across a very bright mid-summer South Florida sky were captured against totally white clouds. The apparent clipping shown in the histogram accurately reports the totally white clouds.

    Tone Distribution

    RUMOR #4: Histograms that display significant gaps on either side of the graph should be adjusted to distribute the tones more evenly. A well-shaped histogram is a happy histogram.

    FACT: Real life lighting doesn’t demand that every scene contain both deep shadows and bright highlights. Images are sometimes brightened or darkened unnecessarily revealing a typical rookie editing mistake. Many times these bookend extremes establish an emotional mood that would be lost if the images were over-corrected in this manner.

    Dark Green Leaves2 - Shedding Light on the Histogram - How to Use it in Post-Production

    This low-key shaded scene contains very little highlight shades at all.

    Corrected Dark Green Leaves2 - Shedding Light on the Histogram - How to Use it in Post-Production

    Adjusting the image destroys the rich colors of the low-key scene.

    Histogram Gaps

    RUMOR #5: The silhouette of the histogram mountain should remain smooth, displaying no gaps or fissures in the mountain shape. These smooth tone transitions are necessary to maintain the photo’s full visual range. Gaps in the histogram’s silhouette indicate an interruption in the gradual tones and will result in banded or posterized stages. These gaps appear because the JPEG image is only 8-bit.

    FACT: There are only 256 vertical bars presented in the Histogram. Each horizontal bar represents less than one-half of one percent (0.4%) of the total tonal range (100% / 256 = 0.390625%). Even if a photo contains a very gradual change in tones across a wide area (like an unclouded sky), your eyes will only perceive “banding” if the JPEG image has been degraded by repeated Save functions.

    JPEG images contain a maximum of 256 levels (8-bits) of tone between black (solid color) and white (no color). Once JPEG files have been opened and saved a number of times, the number of tone levels can become significantly reduced and tone-banding may occur.

    News Journal - Shedding Light on the Histogram - How to Use it in Post-Production

    News Journal Gappy - Shedding Light on the Histogram - How to Use it in Post-Production

    These two histograms appear quite different though the images are very similar. As you can see, “gappy” pictures rarely interrupt the flowing tones in a photo and often clarify more detail.

    Full Range Images

    RUMOR #6: 8-bit images (256 levels of tone/color per Grayscale/RGB channel) are required for an image to display the full range of detail contained in a high-resolution digital image.

    FACT: The human eye is designed to focus on detail in a scene or image. Detail is a product of contrast, and contrast is only noticeable when adjacent colors display significant differences. For the most part, the fewer colors that are displayed, the more obvious are the differences in those colors. This sounds bad but it is actually quite beneficial. It may fly in the face of popular logic but there is a fundamental truth to be recognized. The picture with the least colors (also known as bit depth) is many times the most detailed picture.

    Daytona Beach Bandshell 750px - Shedding Light on the Histogram - How to Use it in Post-Production

    Daytona Beach Bandshell 15 Post 750px

    The top image contains 256 levels of color per RGB channel; or up to 16,800,000,000 colors. The bottom image contains only 15 levels of color per RGB channel; only 3375 possible colors. This image uses less than 5% of the tones that are used in the top image. Don’t live or die on the issue of bit depth. It is important, but like other issues in life, more isn’t necessarily better.

    There is, of course, a reasonable limit to this reduced color observation. Too few levels of color will lose the smooth transitions between colors and thus will also lose detail.

    Try this exercise: open a full-range photo in Photoshop and duplicate the image on another layer. Open the Histogram (Window/Histogram). Now select Image > Adjustments > Posterize, enter the number 15 and view the image as a Preview. Watch the Histogram window as you preview the image. The graph will display only 15 vertical columns instead of 256 but the image will look pretty much the same.

    The point I’m making is that “gaps” in a normally smooth histogram doesn’t necessarily indicate a visual disaster. Instead, a few gaps might just inject a little more drama in your images.

    Smooth Flowing Tones

    RUMOR #7: Digital captures should display the highest number of tones possible in order to preserve the smooth continuous tones.

    FACT: While nature provides an extreme level of dynamic range and true continuous tone gradation, there is no such thing as “continuous tone” digital images. The word “digital” affirms this statement. Virtually all digital images are comprised of square pixels displaying individual tone values. The perception of continuous tone is an illusion.

    Pixel Patch - Shedding Light on the Histogram - How to Use it in Post-Production

    These blue pixels were captured from the sky of the Thunderbirds image above. The patch of sky appears as continuous tone in the original picture although the enlarged individual pixels vary quite a bit in value. The top histogram shows the combined channel luminance while the bottom shows individual RGB channel values. It’s complicated.

    Exhaustive Reference

    RUMOR #8: A Histogram is an exhaustive systematic and statistical accounting of all the internal colors and tones of an image, from dark to light (100% – 0%).

    FACT: Each histogram does reveal the relative placement and distribution of all tones and colors, but due to its size, there is a serious limitation to its accuracy. Since editing software histograms are based on a horizontal graph only 256 pixels wide, each representation is a basic overview at best. If the full range of possible colors were truly represented by a single graph, the chart would occupy the wall of a good size room!

    HistoMeasurements

    Both the top and bottom tonal adjustments were severe enough to create significant gaps in the histogram and to alter the shift of tones in each range, though there are no visible interruptions in the smoothness of each gradation.

    Let me break down the numbers. This 256 pixel-wide graph portrays each image’s potential color range using an 8-bit (256 level) interpolation. This means that all 16.8 million possible colors are represented in a mere 256 horizontal point histogram. Tones change levels in 0.4% increments. The graph significantly exaggerates the difference between minor shifts in tonal value.

    256 Pixel Histogram2

    Human eyes barely perceive a half-percent (0.5%) difference between tones, which is why 256 levels in a JPEG image provides the illusion of continuous tone. This means the histogram uses less than two vertical columns to represent a single percent of change in value.

    57 58 percent

    The two bottom patches are separated by only 1% in tone, though your eyes may have trouble seeing the difference. The top band shows a gradual change between the two values.

    What does all this mean? Quite simply, the histogram delivers a good estimation of overall tone distribution but cannot be relied on for accurate measurement. A few gaps in the graph will rarely be visible to the human eye.

    Wrap Up

    The histogram is a valuable instrument intended to deliver a quick overview of the makeup and tonal shape of digital images. It was never intended to be a scary reference tool.

    Learn to use the histogram to deliver interactive feedback as you work through your editing steps but appreciate the graph for the information it provides; mostly defining the distribution of tones, highlights, and shadows.

    What the histogram does not show is whether the image requires internal adjustments to reveal hidden detail. That’s another topic altogether.

    Push pixels around and stay focused.

    The post Shedding Light on the Histogram – 8 Rumors and the Real Facts About this Graph appeared first on Digital Photography School.


    Digital Photography School

  • Snapchat’s first TV commercial calls the app ‘a new kind of camera’

    If you’re over the age of 30 (and I’m being generous here) Snapchat probably isn’t one of your go-to apps. In fact, you might not even know what it is. Is it a social network? Is it like Instagram? Isn’t it that app that Instagram copied a bunch of features from after the company refused to sell to Facebook for billions of dollars?

    In this order: sort of, sort of, and yes.

    But if you asked Snap, Inc. CEO Evan Spiegel what Snapchat is, he’d probably point you to the video above. It’s the company’s very first TV commercial and an attempt to re-brand the app as “a new kind of camera.”

    The commercial is the latest in a series of attempts by Snapchat to fight off Facebook—who has been shamelessly copying the app’s features into Instagram—and position itself as something better than a social network: a camera. Better yet, a camera “where how you feel matters more than how you look.”

    In a way, it feels like Snapchat is trying to become the digital photography version of Lomography: where capturing snapshots is more important that proper photography—don’t think, just shoot. It’s point & shoot photography reborn, except as point & shoot & share… but maybe add a puppy dog mask or flower crown first because why not.

    Maybe Snapchat—with its app and its wearable Spectacles—will become the digital Lomo LC-A or Diana: an imperfect outlet for imperfect pictures that takes some of the pressure out of photography. Not what I would call “a new kind of camera” exactly, but not a terrible idea either.

    Articles: Digital Photography Review (dpreview.com)

  • Behind the scenes with some incredible camera robots

    Tech YouTuber Marques Brownlee of MKBHD recently took a trip to Portland, OR to meet up with the team behind Motorized Precision and show off some of the incredible camera robots they’ve built. The resulting behind the scenes videos show you why these robots exist, and the kinds of shots they’re able to get that are just plain impossible for a human to recreate with the tools we currently have available.

    Forget stabilizers and dollies and tracks and sliders, a human would have a very hard time capturing a shot like this:

    Which was done like this:

    You might recognize this robot and its CGI-like moves from the commercial that introduced Microsoft’s Surface Studio to the world. Anything that wasn’t CGI or visual effects in that commercial was shot using the KIRA robot:

    Brownlee and the team at Motorized Precision set up several example shots using both the KIRA—MP’s most powerful and capable robot—and the smaller MIA. Both of these are controlled by a piece of software called MP Studio, which also allows you to manipulate the robot using an XBox controller, something Brownlee also demos.

    Check out the full ‘Dope Tech’ video at the top to see more interesting behind-the-scenes shots.

    Articles: Digital Photography Review (dpreview.com)

  • Bellus3D uses the iPhone X’s TrueDepth camera to 3D scan your face

    Bellus3D, a Silicon Valley startup that last year launched a 3D face scanning accessory camera for Android smartphones, today unveiled its FaceApp iPhone X application. The app does pretty much the same thing as the accessory camera but does not require any additional hardware as it is making use of the iPhone X’s front-facing TrueDepth camera, which Apple uses for Face ID.

    FaceApp captures more than 250,000 3D data points on a face in 10 seconds while the user slowly turns their head in front of the camera. The app then reconstructs a virtual high-resolution version of the face that can be rotated, zoomed and viewed in three dimensions. Additionally, the face model can be viewed with interactive lighting, using the device’s gyro to control viewing angles.

    The resulting 3D selfie videos can be saved, shared or posted on Facebook.

    The app is not all about 3D selfies though. Bellus3D imagines the technology being used in a range of consumer applications, including: mobile gaming, custom eyeglass design, virtual make-up sessions, medical applications and custom dolls.

    “We are thrilled to be introducing this exciting breakthrough to Apple iPhone X users,” said Eric Chen, co-founder and CEO of Bellus3D. “Our FaceApp takes full advantage of the TrueDepth camera to bring easy-to-use and professional quality face scanning capability to millions of users and will inject an entirely new level of personal presence into our daily use of digital media.”

    Bellus3D is launching a public beta program today, and version 1.0 of FaceApp will be available at no charge. Future releases will allow file export in industry standard 3D formats and the company will also release a Face SDK for iOS to enable third party developers to use the technology.

    If you are interested in the beta trial, you can sign up on the Bellus3D Facebook page, and developers can register to receive notifications about the SDK on the Bellus3D website. Check out the video above to see the system in action, and then head over to Facebook for some 3D sample scans.

    Press Release

    Bellus3D Announces High-Resolution 3D Face Scanning App for Apple iPhone X Utilizing Built-In TrueDepth Camera.

    Bellus3D FaceApp for iPhone X is first to utilize the Apple TrueDepth Face ID Camera to capture and reproduce high-resolution lifelike 3D selfies.

    Los Gatos, Ca. April 4, 2018 – Bellus3D, Inc. a Silicon Valley startup formed by leading computer vision experts, announced today the Bellus3D FaceApp iPhone X application, a remarkable advancement in face scanning technology. The company is the first to utilize the built-in TrueDepth camera incorporated in the Apple iPhone X smartphone to scan 3D faces in high resolution with a lifelike quality that was only previously available with expensive professional 3D scanners.

    Bellus3D FaceApp for iPhone X is an easy-to-use, high-resolution, 3D face scanning application that captures over 250,000 3D data points on a user’s face in 10 seconds while the user turns their head in front of the smartphone camera. Immediately after the scanning, the user’s face is virtually reconstructed in 3D with lifelike detail and can be rotated, zoomed and viewed in three dimensions on the screen of the iPhone X.

    The app allows: the 3D face to be viewed with interactive lighting; the use of the smartphone’s built-in gyro to control viewing and; the ability to save a 3D selfie video to their camera roll photo album to share with others. Users will also have the ability to immediately post their 3D selfie as a 3D post on Facebook.

    Bellus3D is the first to use the iPhone X TrueDepth camera for high-resolution 3D face scanning and the company is already seeing many new uses that will impact millions of people. Consumer applications incorporating 3D faces include mobile gaming, custom eyeglass design, virtual 3D make-up sessions, medical applications, 3D selfies, custom dolls, and emerging 3D augmented and virtual reality experiences.

    Bellus3D is starting a public beta program in April to enable early adopters and third-party developers to test the application as the company finalizes its formal release. Version 1.0 of Bellus3D FaceApp will be free and will include posting of 3D selfies to Facebook. A subsequent release of the app will allow users to export their 3D faces in industry standard 3D file formats to other applications and AR/VR digital environments. Bellus3D will also release a Face SDK for iOS to enable third party developers to add high-resolution 3D face-scanning capabilities to their own iPhone X apps.

    “We are thrilled to be introducing this exciting breakthrough to Apple iPhone X users,” said Eric Chen, co-founder and CEO of Bellus3D. “Our FaceApp takes full advantage of the TrueDepth camera to bring easy-to-use and professional quality face scanning capability to millions of users and will inject an entirely new level of personal presence into our daily use of digital media.”

    In addition to FaceApp for iPhone X, Bellus3D currently ships the Face Camera Pro USB accessory camera for Android & Windows platforms. The accessory camera captures up to 500,000 3D data points and is targeted for professional markets such as orthodontics and custom eyewear design. The Face Camera Pro is currently available and will continue to be offered for Android and Windows platforms.

    Interested users can participate in the beta trial of the Bellus3D FaceApp for iPhone X by signing up at: www.Bellus3D.com/FaceApp.

    Third party software and hardware developers can register to be notified of the availability of Face SDK for iOS by filling out an inquiry form at: www.Bellus3D.com/FaceSDKiOS.
    To see examples of 3D Face Posts on the Bellus3D Facebook page, visit: https://www.Facebook.com/bellus3d/

    Articles: Digital Photography Review (dpreview.com)

  • Avoid Blurry Long Exposure Images with Proper Tripod Setup

    A tripod is an important piece of gear for all photographers, but even more so for those who are hooked on shooting long exposure photography at the blue hour like myself (I primarily shoot waterfront cityscapes). Those photos require exposures lasting for minutes with a use of neutral density (ND) filter. Therefore, a sturdy tripod is absolutely essential to keep photos sharp.

    Avoid Long Exposure Photographers’ Worst Nightmare by Setting Your Tripod Low

    A sturdy tripod is a must for long exposure photography, as there is no chance at all of shooting sharp photos by hand-holding a camera for minutes.

    Get a Best Tripod Within Your Budget

    This article is not your ultimate tripod buying guide (dPS already has an excellent article on that here), but let me mention a few brief pointers first.

    First of all, unlike your camera body, a tripod isn’t something you will upgrade very often. In fact, a good one could last a lifetime, so it’s advisable to get the best possible tripod within your budget. Here are a few other things to look out for when choosing your tripod.

    Load Capacity:

    The maximum load capacity of your tripod should be at least twice or preferably three times the maximum weight of your camera body and biggest lens combined. For example, my trusty Manfrotto MT190CXPRO3 Carbon Fiber Tripod supports up to 7kg, which is more than sufficient for my Nikon D610 (850g) and Nikon 18-35mm (f/3.5-4.5) (385g) combined (1.25kg).

    Tripod Head:

    Your tripod head also has a maximum load capacity, and it should at least match that of your tripod. If your tripod supports up to 7kg, but the head only supports up to 5kg, then the load capacity of the entire tripod system is to be 5kg, as the maximum load comes from the weaker component. For your information, I own the SIRUI K-20X Ballhead, which supports a whopping 25kg.

    Tripod Weight:

    Decent tripods are commonly made of aluminum or carbon fiber. Both are equally good, but carbon fiber tripods are lighter yet more resistant to vibration (hence they are also pricier, too). My Manfrotto Carbon Fiber Tripod weighs 1.6kg (3.5 lbs.) while its aluminum counterpart the Manfrotto MT190XPRO3 weighs 2kg (4.5 lbs.), with all the other specs being pretty much identical).

    Tripod Leg Sections:

    While 3-section legs provide a more stable platform, tripods with 4-section legs have a shorter closed (folded up for transportation) length and make it easier to pack into a suitcase when traveling. For example, closed length for my 3-section leg Manfrotto MT190CXPRO3 Carbon Fiber Tripod is 61 cm (24 inches), but its 4-section counterpart the Manfrotto MT190CXPRO4 is only 52 cm (20.5 inches).

    If you ask me, I recommend choosing nothing but 3-section tripod legs. I personally won’t compromise stability for convenience. That said, my tripod still fits into my check-in luggage (after taking out the center column). Before purchasing, I even tested it by bringing my luggage to the camera shop!

    Tall Isn’t Always Cool

    Having a good tripod is one thing, but using it correct way is another. I see way too many photographers fully extending tripod legs even when it’s not necessary. The rule of thumb is that the higher the tripod legs are extended, the less stable it gets, leaving more prone to high winds and undermining your chance of taking sharp photos. The photo below (at Victoria Peak in Hong Kong, with an altitude of 552m) is a good example.

    Victoria peak - Avoid Long Exposure Photographers’ Worst Nightmare by Setting Your Tripod Low

    To take blur-free shots here, I kept the tripod low and put the lens through the bars, rather than fully extending the tripod legs and center column to shoot from above the railing.

    Instead of fully extending the tripod legs (and even the center column, which is a big NO-NO) to position the camera above the railing, I put the lens through the bars and kept the tripod as low as needed to minimize the risk of vibration.

    Actually, I learned this from a previous mistake. I shot at this exact location the previous year but screwed up the opportunity by setting up the tripod too tall (over the railing by extending the center column) in high winds, and none of the photos came out sharp.

    Center column - Avoid Long Exposure Photographers’ Worst Nightmare by Setting Your Tripod Low

    Extending the center column in high winds or when shooting long exposure photography is a recipe for a disaster. It’s very unlikely that you’ll be able to capture sharp photos this way.

    Long Exposure Photographers’ Worst Nightmare

    Let’s say you’re shooting waterfront cityscapes at blue hour with a few minutes of long exposure at a tourist-centric area (places like Victoria Harbour in Hong Kong, The Bund in Shanghai, etc.) on your holiday. It may be your once-in-a-lifetime trip, and the weather is clear and perfect.

    Such places are always crowded especially at sunset and dusk times with herds of tourists flocking to take snaps, selfies, and groupies. Extending all the tripod legs inevitably takes more space on the ground, which has a huge risk of someone accidentally kicking it during long exposure and ruining your potentially epic shot. This is long exposure photographers’ worst nightmare (and happened to me once).

    Crowded spot - Avoid Long Exposure Photographers’ Worst Nightmare by Setting Your Tripod Low

    At a crowded photography location like this (Merlion Park in Singapore), keep your tripod setup as low as possible so that it takes less space on the ground and reduces the risk of someone accidentally kicking your tripod legs.

    Tripod Alternatives

    To avoid such a nightmare, I’m also using a sort of a tripod alternative that helps stabilize my camera setup. A clamp tripod like the Manfrotto 035 Super Clamp without Stud comes in handy at places with high winds or at crowded city shooting locations where you feel worried about someone accidentally kicking your tripod legs.

    It’s not that you can use a clamp tripod anywhere you want, as it needs a railing or something that it can be clamped onto. But where possible, this setup can be rock solid (with a load capacity of 15kg) and the resulting long exposure photos are appreciably sharper than those shot using a regular tripod.

    Super clamp in use - Avoid Long Exposure Photographers’ Worst Nightmare by Setting Your Tripod Low

    A Super Clamp is like a game changer, it’s small and strong.

    Set up clamp - Avoid Long Exposure Photographers’ Worst Nightmare by Setting Your Tripod Low

    To mount a DSLR on a Super Clamp, first, plug a separately-sold Manfrotto 208HEX 3/8-Inch Camera Mounting Platform Adapter (or a cheaper alternative Manfrotto 037 Reversible Short Stud) into a Super Clamp socket and secure it with the double lock system. Then mount a tripod head with DSLR on the mounting platform adapter, just like you do with your regular tripod.

    Conclusion

    I hope these tips help you avoid making the same mistakes I did. Don’t blindly follow the mantra that says, “Extend your tripod and place the viewfinder at your eye level” (you’ve probably heard about that before!).

    There’s nothing wrong with setting up your tripod low and bending down. This increases your chance of capturing sharp long exposure photos in high winds and also prevents your tripod legs from getting accidentally kicked.

    If you have any other tips or experiences to share, please do so in the comments below.

    The post Avoid Blurry Long Exposure Images with Proper Tripod Setup appeared first on Digital Photography School.


    Digital Photography School

  • Leica will increase its prices in the US starting May 1st

    According to a report from Red Dot Forum by Leica Store Miami, Leica will increase the price of most of its products in the US starting May 1st. The site has published a list of the 66 products that will become more expensive next month, which includes most Leica M cameras and nearly all M lenses—for example, the Leica M10 with chrome finish will increase in price by $ 400, from $ 6,895 to $ 7,295.

    You can check out the full list here, but according to the report you’ll pay:

    • $ 200 to $ 500 more for Leica M cameras
    • $ 100 to $ 600 more for Leica M lenses
    • $ 100 to $ 200 more for Leica S lenses
    • $ 45 to $ 245 more for Leica APS-C gear
    • $ 245 more for the Leica Q (Typ 116) black anodized model
    • $ 200 more for the Leica X-U (Typ 113)
    • and a whopping $ 1,045 more for the Leica S (Typ 007), which will now cost $ 19,995.

    You’ll notice the SL system, new Thambar 90mm and Noctilux 75mm lenses, and Leica CL camera are not affected by this price increase.

    Per Red Dot Forum’s report, orders placed by April 30th will honor the current, lower prices—that includes items that won’t be in stock until May 1st or later. If you’re in the US and are interesting in purchasing a Leica product, you can browse the full list of affected products here.

    Articles: Digital Photography Review (dpreview.com)

  • Adobe Premiere Pro CC just got some really useful AI-powered features

    Yesterday, Adobe announced a ‘massive update’ to Adobe Camera Raw, Lightroom CC, and Lightroom Classic CC, adding new Adobe RAW and Custom profiles that showed the company was taking color and tonality more seriously. But that wasn’t the only update to come out of Adobe this week.

    In preparation for NAB 2018, Adobe has also updated its video editing applications with useful new features for both After Effects and Premiere Pro users, and some really cool Adobe Sensei AI integration specifically for Premiere Pro.

    The video above gives you a good overview, or you can can keep reading to dive a bit deeper.

    Adobe After Effects

    $ (document).ready(function() { SampleGalleryV2({“containerId”:”embeddedSampleGallery_0471977329″,”galleryId”:”0471977329″,”isEmbeddedWidget”:true,”selectedImageIndex”:0,”isMobile”:false}) });

    After Effects received a few interesting new features, including a new Advanced Puppet tool for creating complex motions, and Master Properties that allow you to apply changes to individual effects across multiple versions of a composition. Or, to let Adobe explain it:

    With Master Properties, you can create compositions that allow you to control layer properties in a parent composition’s timeline. You can push individual values to all versions of your composition or pull selected changes back to the master.

    Adobe has also added Immersive Environment into After Effects, providing 360-degree and VR content creators with a more efficient workflow.

    Adobe Premiere Pro

    $ (document).ready(function() { SampleGalleryV2({“containerId”:”embeddedSampleGallery_6733734684″,”galleryId”:”6733734684″,”isEmbeddedWidget”:true,”selectedImageIndex”:0,”isMobile”:false}) });

    Master Properties and the Advanced Puppet tool are pretty neat, but to see the most useful and impressive new features you’ll have to open Premiere Pro.

    First and foremost, the new Color Match feature leverages the Adobe Sensei AI to automatically apply the color grade of one shot to another. This feature comes complete with Face Detection so Premiere can match skin tones where necessary, and a new split-view allows you to see the results of your color grade as you go, either as an interactive slider or as a side-by-side comparison.

    You can see the feature demoed in the video below:

    In addition to Color Match and Split View, Adobe has used the Sensei AI to make some audio improvements as well. Autoducking will automatically turn down your music when dialog or sound effects are present, generating key frames right on the audio track so you can easily override the automatic ducking or adjust individual key frames as needed.

    Finally, Adobe has also added Adobe Stock integration into the apps for purchasing and pulling in stock video footage or motion graphics, and a new Learn panel in Premiere Pro gives new users “a place to start with targeted tutorials that guide them through the foundational steps of video editing.”

    To learn more about all of these updates, head over to the Adobe Blog where there’s a good breakdown of all of the most important new features in both Adobe After Effects CC and Premiere Pro CC. Or, since these updates are live right now, update your Creative Cloud apps and give the new features a try for yourself.

    Press Release

    Adobe Creative Cloud Empowers Creatives to Thrive in the Video Age

    New Release Accelerates Workflows for Color, Graphics, Animation and Audio with Adobe Sensei

    SAN JOSE, Calif. — April 3, 2018 Ahead of the 2018 NAB Show, Adobe today announced a major update in Adobe Creative Cloud, giving video professionals new tools to automate and expedite time-consuming production tasks without sacrificing creative control. Available today, the updates include powerful new capabilities for refining color, creating graphics and crafting audio, along with enhanced VR tools, improved collaboration, integration with Adobe Stock and advanced artificial intelligence powered by Adobe Sensei.

    With the growing demand for video, the opportunity for content creators has never been greater, but video professionals are faced with new pressure to deliver more work in less time while ensuring content stands out and meets high audience expectations. In addition, creators must optimize for different platforms, ensure accessibility, meet required broadcast standards and deliver numerous versions of content across languages and regions. This tremendous shift in the way video professionals work requires more refined and streamlined workflows to reduce time to production, giving video creators more time to focus on their craft.

    “The demands and pace of video content creation are reaching levels we’ve never seen before. The time pressure on video professionals means the need for powerful and efficient creative tools has never been greater,” said Steven Warner, vice president of digital video and audio at Adobe. “Adobe video apps like Premiere Pro and After Effects give them that power which, combined with the services available in Creative Cloud, provides broadcasters, media companies, filmmakers and YouTubers a complete ecosystem to bring their stories to screen faster than ever.”

    Ranging from Hollywood to Sundance, feature films to premium television channels, a growing number of industry-leading professional editors are using Adobe Premiere Pro CC to bring their creative visions to life. Projects that premiered this year include The Florida Project, The Square, Only the Brave and 6 Below; indie hits RBG, Clara’s Ghost and Search; and award-winning series MINDHUNTER and Atlanta.

    Attendees at this year’s NAB Show can get a closer look at the newly available features and hear from industry experts at the Adobe booth (#SL4010, South Hall in the Las Vegas Convention Center) and at over 140 partner booths from April 9–12.

    Video and Audio Workflows: Streamlined and Fine-Tuned

    New feature highlights include:

    • Edit more powerfully with color and light in Premiere Pro CC – Powered by Adobe Sensei, Color Match two shots with one click, applying editable Lumetri adjustments from one clip to another to achieve visual consistency in scenes and across whole projects. Compare shots using the new split-view.
    • Create animation and graphics more quickly in After Effects CC – Stacked behaviors and effects in combination with timeline-based animation now make the creative process more visual and intuitive. Apply changes to individual effects across multiple versions of a composition with a single adjustment using new Master Properties. Also, complex motions can be made to any surface mesh with the new Advanced Puppet tool.
    • Sound even better with Sensei-powered audio workflows – Automatically adjust soundtrack audio around dialog, whether for a single clip or an entire project, with Sensei-enabled autoducking, now available in Adobe Premiere Pro.
    • Bring art to life faster with Character Animator – Animate personas more quickly and efficiently with a library of behaviors and custom triggers. Drag layers from the Puppet panel into the Triggers panel to apply and refine existing behaviors or create new ones with intuitive new drop targets.
    • Add 360 degrees of creativity with improved tools for immersive content – Adobe Immersive Environment is now available in After Effects CC, simplifying the immersive workflow to move more efficiently through clean-up and effects tasks. New support for the Microsoft Windows Mixed Reality platform offers a wider range of headsets to choose the best tools for the job.
    • Collaborate more easily in Team Projects – For the ultimate in project collaboration, real-time presence shows when teammates are online and new badges indicate when a project has been updated.
    • Get content you need with Adobe Stock – With direct access to millions of curated HD and 4K videos, select clips for establishing shots, fill in the final gaps in projects or enrich storytelling with visual variety. Add sophistication and polish to video content with professionally designed Motion Graphics templates, including animated titling and lower thirds graphics with editable effects and text.
    • Learn panel for new users – Premiere Pro beginners now have a place to start with targeted tutorials that guide them through the foundational steps of video editing. The new Learn panel is just a click away whenever it’s needed.

    Pricing and Availability

    The new features for Adobe Creative Cloud announced at NAB are now available with the latest version of Creative Cloud.

    For more information on pricing, visit https://www.adobe.com/creativecloud/plans.html.

    Multiple subscription plans for Adobe Stock are available at https://stock.adobe.com/plans.

    Articles: Digital Photography Review (dpreview.com)