Blog

  • DIY Food Photography Props on a Budget

    The post DIY Food Photography Props on a Budget appeared first on Digital Photography School. It was authored by Charlie Moss.

    With the rise of Instagram, every meal has become a potential subject for a photographer. We’re sharing our food through photographs like never before, and higher quality imagery gets more likes in the world of #instafood.

    But how do you create that styled look to your food photographs when you’re on a budget? Not everyone has the cash to drop on a whole styling kit of tableware, linens, and backgrounds. ‘Necessity is the mother of invention,’ as the proverb says, so let me tell you about a few creative ways I’ve made the money go a little further when it comes to food photography.

    Take the suggestions in this article as a starting point and be creative with your own ideas. Bring in skills you’ve already got (or would love to learn) in your quest to DIY your food photography on a budget!

    Shop your home

    It seems so obvious, but you’d be amazed at what you can find at home (or in the homes of your friends and relatives). The best thing about shopping your home is that everything is free! Take a minute now to take a look around your house and see what you already own that might work for food photography.

    The kitchen is the first place to start – but don’t just stop at crockery and flatware! Ancient old baking trays make fabulous backgrounds, and interesting glassware can make great detail in an out-of-focus background.

    Don’t neglect the bathroom as you make your shopping trip. More than once I have put food on a (clean) soap dish that happened to be beautiful in color or texture. From the living room, vases can hold a freshly cut flower for a food photography scene. Bedrooms are a treasure trove of trinket dishes, baskets, boxes, and fabrics (more than one evening dress has found its way into my shots as a textile element). Finally, check outside – weathered old plant pots or interesting bits of wood can really bring life to your food stories (once they’ve been scrubbed, of course).

    On a similar note to shopping your home, don’t forget to visit your local thrift shops regularly! The staff in my local shops know me so well that they put interesting flatware, linens and ceramics aside for me now. Moreover, each item costs very, very little compared to buying them new.

    Creating backgrounds and surfaces with interest

    When you’re setting your scene for a styled food photograph, the background can really make or break the shot. You can purchase pre-made background boards designed especially for photographers that replicate various textures. They’re very and good, and I use them often, but they’re also quite expensive! While homemade boards don’t replace textures such as wood or marble they can be very effective for the right shot.

    Top: pink stripes created with a child’s foam painting roller.
    Bottom: blue, black, and grey emulsion paints applied with a kitchen sponge.

    Head along to your local DIY store that sells sheet materials. There you can buy sheets of plywood. If you are lucky, the store will also cut these sheets of plywood into manageable chunks either for free or at a minimal cost.

    It works out to be extremely cost-effective to create backgrounds using these boards as a base. A sheet of plywood that is 2.4m by 1.2m costs about £25 here in the UK and that makes eight neat 60cm square boards. You can paint both sides too, so it works out to about £1.50 per background (plus whatever paint you use).

    Usually, I use cheap emulsion paint samplers to create backgrounds. Don’t be restricted to brushes for applying the paint either – a sponge is my favorite tool followed closely by children’s painting toys! Go bold with your designs; once you’ve made the background out of focus with a shallow aperture, you won’t see small details. Experiment with color – dark backgrounds can be as interesting as light backgrounds.

    Build the set

    Once you’ve created some backdrops, put one on a table next to a window and prop the other up behind it vertically like a wall. You now have a table set for a fraction of what it would cost you to buy special backdrops marketed to photographers!

    Floor tiles used as backgrounds for food photography.

    While you’re at the DIY store buying your plywood, check out the flooring section too. Very often DIY shops will sell sample flooring tiles for people to try at home. For just £1.50 I bought all three of the flooring tiles in the pictures above. The boards are often quite small, but if you’re shooting close-ups, they can still work really well (they’re also good for jewelry photographs).

    Customised table linens

    Beautiful linens can help to make a food shot pop. They feel luxurious because they’re something you usually only use for special occasions. Plus if you keep your eye out, you can often find linens with unusual textures to the fabric or fancy trim around the edge, and these can help elevate your shots to be something quite special.

    Two different colours of linen fabric used for food styling. Consider the mood of your final image when selecting colours.

    Table linens are, at their most basic, just a square of interesting (or not-so-interesting) fabric. To create the simplest DIY napkin that really packs a punch, head to a fabric store that sells dressmaking fabrics. Have a look through their linen selection. You’re after something heavy with lots of texture, and you’ll want half a meter of the fabric. Use sharp scissors to cut it into a large square (you should get at least two out of half a meter of fabric) and you’ve created your first designer napkin!

    You can either turn the raw edges over and sew them with some matching thread or start pulling the threads away to fray them. Both styles give a different look to your shots as you can see in the shots above. Think about color when you are purchasing fabric; it can really make a difference to the mood of your shots. I’d suggest purchasing neutral colors first and then venturing out into colors when you have some good basics.

    Many shops sell a ‘fat quarter’ of fabric (it is a meter of fabric cut horizontally and then vertically to make a rectangle). These cuts are the perfect size for a single oversized napkin. Once you’ve built up a stash of beautiful plain napkins, you can try venturing out into something a little more complicated.

    Embellish your DIY props

    If you browse the designer homeware stores, you’ll find that table linens often have intricate detailing like trim or hand-stitching on the edges. Back to the fabric shop again, and this time shop for some coordinating trim that matches some fabric you’ve got.

    You can sew the trim around the edges of your napkins, or you can take some fabric glue to it. Food styling props for photography don’t have to be perfectly functional; they just have to look good on camera! Make sure you arrange your props so that any mistakes are facing away from your camera!

    In the photograph above is white linen. The linen was made with very cheap white cotton fabric with fancy pompom trim stitched around the edge. It cost me around £3 in total. Considerably less than buying the fancy version I’d had my eye on in a shop! Photography is all about illusion. If the trim is particularly expensive just buy enough to go around two edges. You can style it when you shoot so that the other side doesn’t show.

    The proof is in the pudding

    In any good food photograph, success is measured by how much your viewer wants to eat the subject. I followed my own advice: shopping at my house, creating backdrops, buying fabric and trim, and then I photographed the results.

    For under £15, I put together two completely different food photography sets that I can reuse time and time again. Moreover, the bonus is that if I don’t like the backgrounds in the future, I can paint over them time and time again!

    Now it’s your turn; have a go at building yourself some props and shooting some food photos. I’d love to see what backgrounds and props you create for your food photography shots. Perhaps you can apply a skill you already know and create something really special that you just can’t buy in the shops.

    Please share with us in the comments below.


    The post DIY Food Photography Props on a Budget appeared first on Digital Photography School. It was authored by Charlie Moss.


    Digital Photography School

  • Aputure announces the Spotlight Mount, an add-on to shape light just right

    New and unique in the world of light modifiers, Aputure have announced its new Spotlight. This unit interfaces with their range of C.O.B. lights, including the recently announced 120D MK II.

    After the recent reveal at NAB 2019, more details have emerged for this unique light modifier. There are three lenses available at launch—19°, 26° and 36—each of which are user interchangeable to give either wider coverage or more pinpoint accuracy. This, together with the iris and shutter, allow more flexible creative options in shaping the beam.

    Key features

    • Bowens mount to interface with Aputure’s 120D, 120D Mk II and 300D lights.
    • Available with a 19°, 26° or 36° lens.
    • Dual slots for included Gobo frame and gel holder or optional iris.
    • Internal shutters for precise beam shaping.
    • Lightweight aluminum die-cast alloy construction.
    • Dual Junior/Baby mount.
    • Includes B size Gobos
    Precision lenses reduce chromatic aberrations and fall off

    The Spotlight uses newly developed lenses to minimize color fringing at the edges of the projected beam circle down to less than 1 mm at 0.5 m. The new high resolution optics give 10x the native light output when used with a 120 D Mark II. This is combined with minimal light fall off and a color shift of less than 200° Kelvin.

    The dual mount system also enables the spotlight to be mounted easily on C stands in the field or under slung on the lighting grid in the studio. Below is a quick video from Newsshooter detailing the new Aputure Spotlight:

    The Aputure Spotlight is available to pre-order (Adorama, B&H) with one of the three lenses for $ 499. The lenses are also available separately at $ 259 (Adorama, B&H), as is the optional iris at $ 99 (Adorama, B&H). The Aputure Spotlight and accessories are expected to ship mid-May.

    Articles: Digital Photography Review (dpreview.com)

  • Kickstarter campaign presents Bokeh, a platform for privately sharing images

    A Kickstarter campaign seeks funding for Bokeh, a new photo sharing platform that enables users to privately share images with friends and family. Bokeh is presented as an alternative to traditional social media services, offering users a focus on privacy and a lack of ‘creepy ads,’ according to Bokeh creator Tim Smith.

    Bokeh is an ad-free image sharing service where accounts are set to private by default (the option exists to make them public), accounts are only searchable by username, and followers are hidden from public view. The platform includes features to help keep content private and users safe, such as an automatic prompt to block a user after their follow requests have been declined three times.

    The Boken interface resembles Twitter profiles, at least based on the Kickstarter previews. Rather than selling user data and showing advertisements to fund the platform, Bokeh will charge users a fee to use the service. Individual accounts will cost $ 3/month with the option to pay $ 30 per year. Family accounts (up to five users) will be offered for $ 5/month or $ 50 per year.

    Smith explains in his campaign:

    I believe that your data shouldn’t be mined to sell you targeted ads, that your timeline should be chronological and not based on some algorithm, that tech CEOs shouldn’t allow hate groups to flourish on their platforms, and that we need more social networks that are privacy-focused and ethically sustained.

    The Kickstarter funds would be earmarked to develop the service. As with any crowdfunding campaign, there are risks involved and a final product may never reach the market.


    Disclaimer: Remember to do your research with any crowdfunding project. DPReview does its best to share only the projects that look legitimate and come from reliable creators, but as with any crowdfunded campaign, there’s always the risk of the product or service never coming to fruition.

    Articles: Digital Photography Review (dpreview.com)

  • Voigtlander Nokton Classic 35mm F1.4 II lens for Leica M-mount will be released in June

    Following a leak last week claiming the lens would soon be announced, the Voigtlander Nokton Classic 35mm F1.4 II wide-angle prime lens with single coating and multi-coating options has been announced. The updated model features ‘the latest optical material,’ according to Cosina Japan, while retaining nearly the same size and design as the original.

    The Nokton Classic 35mm F1.4 II for Leica M-mount features 8 elements in 6 groups, an F1.4 to F16 aperture range, 10-blade diaphragm, 43mm filter size and 63° angle of view, mirroring the original model. The weight has been slightly reduced in the updated model, dropping from 200g (0.44 lb) to 189g (0.41 lb).

    Cosina says it brought ‘the latest optical technology’ to the Nokton Classic 35mm F1.4 II lens, explaining that its new product:

    Reproduces the unique depiction of the classic lens. At the open aperture, a gentle and gentle bokeh creates a three-dimensional effect. If you focus on it, it will be a sharp depiction, and a variety of expressions are possible with one lens … a gentle and beautiful bokeh when the aperture is open and a sharp notch when it is narrowed widens the width of the photographic expression.

    The lens is offered in two variants: single coating (SC) for classic color reproduction and multi-coating (MC) for neutral color reproduction. The company will also sell the LH-6 lens hood for the new model as an optional accessory.

    The Voigtlander Nokton Classic 35mm F1.4 II lens will be available starting in June for 75,000 JPY ($ 680 USD, £523, €607). The model isn’t yet listed on B&H Photo or Adorama, but can be pre-ordered in Japan through Yodobashi.

    Articles: Digital Photography Review (dpreview.com)

  • B&H effectively cancels out internet sales tax in US with its new ‘Payboo’ credit card

    Just shy of a year ago, the United States Supreme Court ruled that out-of-state retailers are required to collect sales tax on internet sales. B&H has long been known for the absence of sales tax outside the state of New York and to account for the ruling, it’s decided to take a unique approach to effectively cancelling out the sales tax for B&H customers.

    It’s called Payboo, and it’s a credit card B&H has created in partnership with Synchrony Bank that will automatically reward you, instantly, with the amount sales tax would effectively cost at checkout. As explained on B&H’s FAQ page about the new Payboo card, ‘B&H issues instant Payboo Card Savings on all non-tax-exempt purchases shipped to eligible states paid for with the Payboo Card in the form of a reward concurrently issued and redeemed directly on your order during checkout.’

    B&H further explains the process under the question ‘How does the Payboo Card benefit really work?’

    ‘When you pay for B&H purchases with the Payboo Credit Card, B&H will charge the total of merchandise plus applicable fees and taxes; but we instantly issue and apply a reward on orders made in our SuperStore or shipped to eligible states right in checkout as a form of customer payment. Then, the amount charged to the Payboo Card is net of the benefit applied.’

    In other words, consumers won’t notice any difference in the cost, as B&H effectively takes on the cost of the sales tax. Better yet, since B&H collects and disburses state sales tax in accordance with state sales tax laws and regulations, nothing needs to be done on the consumer’s end come tax season.

    B&H says there will be no upper-limit on how much you can save using this benefit and notes that the savings will vary based on the zipcode products are being shipped to. To apply for the B&H Payboo Card, which doesn’t require an annual fee, you must have a valid Social Security Number (SSN) or Individual Tax Identification Number (ITIN) and a U.S. billing address. Of course, applying doesn’t guarantee a card, which is subject to credit approval.

    B&H addresses further questions on its Payboo page and has a dedicated page for signing up.

    Articles: Digital Photography Review (dpreview.com)

  • Instagram posts will soon be screened by Facebook fact checkers

    The amount of fake news and conspiracy theories on Facebook and Twitter is troublesome, but by no means limited to those two social media platforms. Instagram users have to deal with a fair share of general misinformation as well.

    The company has already been working to reduce the reach of posts containing false information, but is now taking things one step further. Soon potentially misinforming posts will go through parent company Facebook’s fact checking procedures.

    Posts that are identified as false will not necessarily be removed but won’t appear on the Explore page or hashtag search. Talking to Poynter, a company spokesperson said: ‘Our approach to misinformation is the same as Facebook’s — when we find misinfo, rather than remove it, we’ll reduce its distribution.’

    The newly introduced measures now ensure the fact checkers also find images on Instagram that have not previously been flagged on Facebook.

    According to reports Instagram has been working closely with Facebook’s fact checking teams since the US midterm elections. When images with misinformation are identified on Facebook, an image recognition algorithm can search for the same image on Instagram. The newly introduced measures now ensure the fact checkers also find images on Instagram that have not previously been flagged on Facebook.

    According to Poynter, Instagram is also considering the option to add pop-ups that alert users who are searching for misinformation. It’s good to see the platform and its parent company Facebook taking a stronger stance against misinformation in social media but for many the measures to counteract fake news and hate messages are still not going far enough.

    Articles: Digital Photography Review (dpreview.com)

  • Olympus OM-D E-M1X review

    $ (document).ready(function() { SampleGalleryStripV2({“galleryId”:”5346361820″,”isMobile”:false}) })

    Sample photoSample photoSample photoSample photoSample photo
    Silver Award

    85%
    Overall score

    The Olympus OM-D E-M1X is a dual-grip Micro Four Thirds mirrorless camera aimed at pro sports and action photographers. It’s designed to be rugged, durable, fast and capable, and has a price tag to match that ambition.

    The EM1X uses fast readout and fast processing both to provide high-level AF performance and fast burst shooting as well as a range of novel modes and features. It also promises new levels of performance in terms of weather resistance.

    Key Specifications

    • 20MP Four Thirds sensor
    • 121-point autofocus system with deep learning-based subject recognition
    • Hand-held high-res shot mode
    • Up to 60 fps Raw + JPEG capture (up to 18 fps with autofocus)
    • Pro Capture mode records frames before you hit the shutter
    • Up 7.5EV of image stabilization (CIPA-rating) with supported lenses
    • ‘Live ND’ multi-shot mode simulates ND filters
    • Large 2.36M-dot LCD viewfinder able to work at up to 120 fps
    • Dual BLH-1 batteries giving 870 shots per charge (CIPA)
    • Dual UHS-II SD memory card slots
    • Extensive direct control, dual AF joysticks, articulating touchscreen
    • UHD 4K/30p video and DCI 24p at up to 237Mbps
    • Extensive, IPX1-rated weather sealing
    • USB charging

    To a degree the E-M1X resembles a twin-grip E-M1 II with more powerful processors and two batteries. What makes the camera interesting is what it does with that extra power.

    The E-M1X is sold body only at an MSRP of $ 2999, CAN $ 3899, €2999 and £2799.


    What’s new and how it compares

    The E-M1X brings improved AF, a hand-held high res mode and Live ND as the headline updates.

    Click for more

    Body and Handling

    The E-M1X is the first Olympus digital camera to offer the dual-grip design favored by pro sports cameras. It’s also one of the few to receive a formal rating of its environmental sealing.

    Click for more

    Controls and Operation

    There are plenty of direct control points on the E-M1X but also a lot that can be customized.

    Click for more

    Is the E-M1X right for you?

    The E-M1X’s primary use cases are sports, action and wildlife photography. But that doesn’t mean the camera isn’t fit for other disciplines.

    Click for more

    Shooting Experience 1

    Carey Rose was impressed by the performance of the E-M1X at a pre-launch shooting event, but there are some things he’d like to see improved.

    Click for more

    Shooting experience 2

    When it comes to tennis, the E-M1X is faster than a Nikon D5, but its autofocus is less reliable.

    Click for more

    Image quality

    The E-M1X likely uses the same sensor as the E-M1 II and image quality is top notch for a Four Thirds chip.

    Click for more

    Autofocus

    The E-M1X offers impressively sticky AF tracking. However, AF-C performance falls behind the competition.

    Click for more

    Performance

    Two processors give the E-M1X a decent amount of buffer depth. They also play a part in the camera’s stabilization, which is on par with the E-M1 II, but behind the Panasonic G9.

    Click for more

    Video

    Video quality doesn’t blow us away, but the E-M1X just might have the smoothest in-camera video image stabilization around, but it comes with a slight crop.

    Click for more

    Conclusion

    After all our testing and real world shooting, here’s the final takeaway.

    Click for more

    Sample gallery

    We’ve spent a ton of time shooting with the E-M1X, here’s all our samples, including Raw conversions.

    Click for more

    Articles: Digital Photography Review (dpreview.com)

  • Twitter now supports adding images and other media to retweets

    Image by Twitter via The Verge

    Twitter has announced support for adding images, as well as videos and GIFs, to retweets and quoted tweets. Users had requested this feature for years, but Twitter explained to The Verge that it was tricky enabling media comments on retweets and quotes while maintaining a logical design that viewers could readily parse.

    The new support, which is currently rolling out Twitter’s mobile apps and mobile website, allows users to add an image, video, or GIF after tapping the ‘Retweet with comment’ option on an existing tweet.

    The company has chosen a design that nestles the original tweet with a timestamp and thumbnail under the full-width media published by the user who responded to the original tweet. This design only appears on mobile at this time, however, and The Verge points out that GIF comments on retweets look clunky on desktop.

    It’s unclear when the feature and mobile-like nesting design will arrive for desktop users. The new option is rolling out on Android and iOS now.

    Articles: Digital Photography Review (dpreview.com)

  • The FAA predicts the commercial drone market could triple in size by 2023

    The Federal Aviation Administration (FAA) recently released its two-decade Aerospace Forecast for fiscal years 2019-2039. While they’ve successfully predicted steady growth in the drone industry over the past five years, this latest annual update reveals that they’ve underestimated the phenomenal rate of adoption for unmanned aerial vehicles.

    ‘A comparison of last year’s data with this year’s (2018) shows that the annual growth rate to be around 13 percent,’ reads the report. ‘This continues to be substantial growth as anticipated from the introduction of drones as a recreation activity facilitated by falling equipment prices and improved technology, such as built-in cameras and relatively easy maneuvering.’

    Last year, predictions put roughly 452,000 commercial (non-model) drones in the sky by 2022. Now it appears that the industry will reach that landmark around the beginning of next year. According to the latest data collected, if trends continue, the FAA foresees market growth tripling in size over the next five years, topping off at 835,000 drones by 2023 – an average annual growth rate of 24.7 percent.

    The FAA has registered more than 116,000 remote pilots through the end of 2018. Officials expect that number to reach roughly 350,000 pilots with Part 107 certification by 2023.

    The FAA has registered more than 116,000 remote pilots through the end of 2018. Officials expect that number to reach roughly 350,000 pilots with Part 107 certification by 2023. In this category, “the pace of monthly registration, almost 15,000, is nearly 3-times higher than the pace at which non-model aircraft owners registered their craft during the same time last year.”

    Despite the significant growth, the FAA acknowledged that as with all technologies, model aircraft (non-commercial drone) sales will inevitably slow as ‘the pace of falling prices diminishes and the early adopters begin to experience limits in their experiments or simply eagerness plateaus.’

    Since the FAA’s online registration system went into effect on Dec. 21, 2015, more than 900,000 owners have registered their drones through September 2018. The agency estimates 1.25 million drones are currently in use across the U.S. with growth projected to reach 1.4 million by 2023. Monthly owner registration for model aircraft averaged around 8,000 – 9,000 per month from January – December, 2018. The overall pace of registration has decreased to about half compared to the same period the year before.

    As the commercial industry continues to grow, new sectors and uses for drone technology will continue to emerge. Google’s Wing recently received permission to deliver small commercial goods to consumers, a first for the FAA to grant any company. A kidney was transported, via drone, to a transplant patient this past week.

    Articles: Digital Photography Review (dpreview.com)

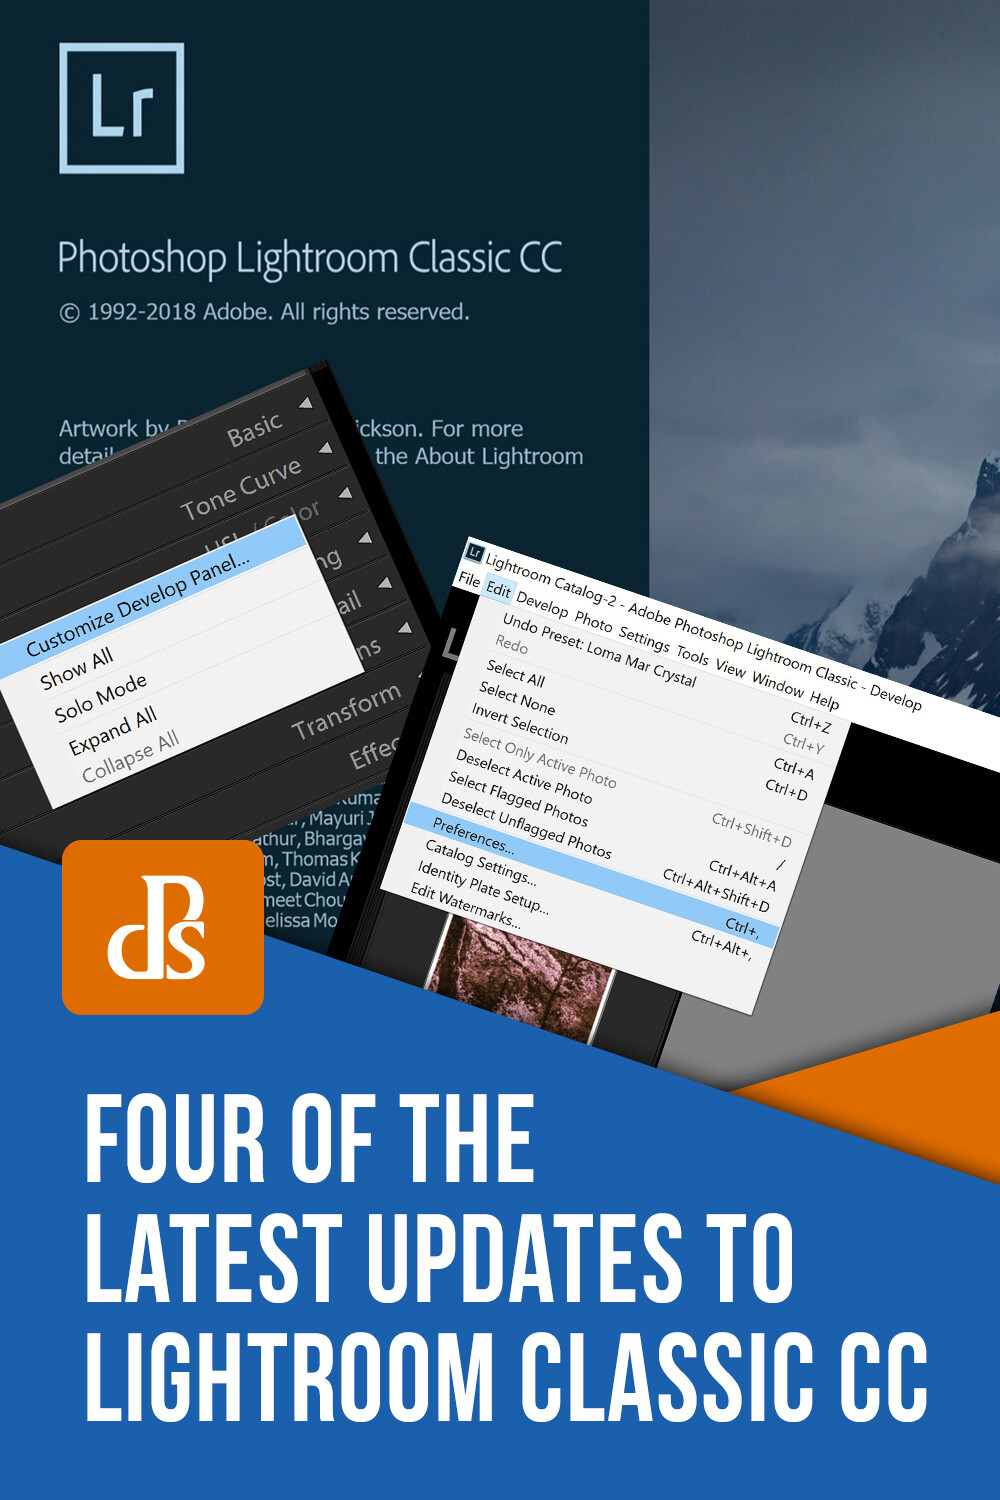
  • Four of the Latest Updates to Lightroom Classic CC

    The post Four of the Latest Updates to Lightroom Classic CC appeared first on Digital Photography School. It was authored by Adam Welch.

    When it comes to the world of photography it seems as if change is an everyday occurrence. New cameras, new lenses and new ways to make your photographs better, give the feeling that we are never quite standing still. One of the biggest testaments to this fluidity comes from the recent changes made to Adobe Lightroom Classic CC. It seems as if Adobe has been extremely busy over the past year by introducing new features and settings to Lightroom.

    F:\DPS Images\Four Updates for LR Article\Lightroom-updates-adobe-adam-welch-digital-photography-school-3-3.png

    It’s impossible to list all of the changes here, so I’ve picked four of the biggest and freshest new features to be introduced into Lightroom Classic CC. These range from somewhat complex to some very simple tweaks that might leave you thinking “hey, why didn’t I think of that?!”

    Here’s a short list of the new features which are currently available in Lightroom Classic CC v8.2 which was the most current build at the time this article was written.

    Customize Develop Panels

    To kick things off, we’ll take a look at a very simple yet interesting new feature introduced to Lightroom in December of 2018. Until now the only choice of customization for our Develop panels was to switch to “Solo” (highly recommended) mode. With the release of Lightroom Classic CC v8.1, we can now choose the order we want the Develop panels to appear and even decide which panels we want to have listed at all.

    Lightroom-updates-adobe-adam-welch-digital-photography-school-3

    I know, right? Looks a little odd to see all the panels in a different order and a few missing! To customize your Develop panels all you need to do is right-click on the title bar of any panel.

    Lightroom-updates-adobe-adam-welch-digital-photography-school-3

    This opens up the customizer dialog box.

    Lightroom-updates-adobe-adam-welch-digital-photography-school-3

    From here it’s just a matter of checking or unchecking the panels and/or dragging and dropping them into the order you like.

    Show/Hide Develop Presets

    Moving over from the far right to the far left side of Lightroom Classic CC, we’ll find another new feature added to the v7.4 (seems so long ago) update which dropped in June of 2018. Beginning with this build, we can now control which Develop Preset groups appear in our Preset panel. This feature is called “Manage Presets,” and it is accessed by right clicking on any Develop Preset group or by clicking the dropdown icon at the top right of the panel.

    Lightroom-updates-adobe-adam-welch-digital-photography-school-3

    We are then met with this preset management window.

    Lightroom-updates-adobe-adam-welch-digital-photography-school-3

    This is where you can check or uncheck the preset groups you want to appear in the Develop presets panel. Remember, you can always select “Reset Hidden Presets” should you ever decide you want to restore everything to the default configuration.

    Preset Compatibility

    While we’re on the topic of Develop presets, it’s worth mentioning another brand new aspect to grace the halls of Lightroom Classic CC in 2018. Starting with the v8.1 update, we have the option to determine which presets appear in our Develop Preset folders even more judiciously than before with the ability to hide or show partially compatible presets.

    Now, you might be wondering what a partially compatible preset is? Simply put, any Develop Preset that contains a setting not compatible with your current version of Lightroom will now be italicized or hidden depending on your preferences.

    Here, let me show you.

    First, let’s say this preset was made with a creative profile which you don’t have installed. You’ll notice that its name appears in italics. This means that the preset is still usable, however, it only offers limited functionality.

    Lightroom-updates-adobe-adam-welch-digital-photography-school-3-3

    Alternatively, we can choose to not have that preset appear at all. To do this, we first select ‘Edit’ and then ‘Preferences’

    Lightroom-updates-adobe-adam-welch-digital-photography-school-3-3

    Next, click on the ‘Presets’ tab and then set the preset visibility checkbox to your desired preference. If left unchecked ANY of your presets that feature settings not fully compatible with your version of Lightroom will no longer appear in your presets folder.

    Lightroom-updates-adobe-adam-welch-digital-photography-school-3-3

    This of course can be undone at any time by simply checking the presets visibility box once again.

    Single-step HDR Panorama Photo Merge

    Don’t worry, just because the title is lengthy doesn’t mean this next feature is overly complicated. For years we’ve been able to tell Lightroom to stitch together our panoramic and HDR images for us. Now, the folks at Adobe have given us an incredibly easy way to combine the best of both worlds with the release of Lightroom Classic CC v8.0 back in October of 2018. We can now merger multiple bracketed photos into a high dynamic range (HDR) panorama in, you guessed it, just a single step. Well, maybe a little more than that – but it is still incredibly easy.

    Lightroom-updates-adobe-adam-welch-digital-photography-school-3-3

    The majority of the work involved in making use of this new feature happens before you ever import your images into Lightroom.

    Namely, your photos need to be correctly bracketed and meet a few other criteria. It will be helpful to read the full release notes from Adobe to learn more about how to make sure your images are compatible with Single-step HDR Pano Merge.

    In any case, once you have selected the bracketed images for your HDR pano, the actual process is remarkably straightforward. So go ahead and select them first.

    Lightroom-updates-adobe-adam-welch-digital-photography-school-3-3

    Then right-click on any image and select ‘Photo Merge,’ and then ‘HDR Panorama’.

    Lightroom-updates-adobe-adam-welch-digital-photography-school-3-3

    From here, Lightroom will create a smart preview of your HDR Panorama.

    Lightroom-updates-adobe-adam-welch-digital-photography-school-3-3

    You then have options to control the way the final photograph gets cropped as well as how the images combine. This new “single-step” approach to creating high dynamic range panoramas is light years ahead of previous methods. Instead of first needing to merge individually bracketed image sets into separate HDR photos, only then to require further stitching into the final panorama, we can now eliminate virtually half of the effort involved. If you’re an avid landscape photographer, you will absolutely fall in love with single-step HDR Panorama Photomerge.

    And that’s not all…

    Of course, this is just a taste of the new flavors Adobe has added to Lightroom in the last year or so. It’s nearly impossible to include all of the new features constantly added – and that’s a good thing. There are many more fresh features to be found in Lightroom Classic CC.

    Do you have any favorites? Feel free to let us know in the comments!


    The post Four of the Latest Updates to Lightroom Classic CC appeared first on Digital Photography School. It was authored by Adam Welch.


    Digital Photography School