Blog

  • 8 Creative Ways to Photograph Trees

    The post 8 Creative Ways to Photograph Trees appeared first on Digital Photography School. It was authored by Simon Bond.

    A favorite subject for many photographers is the tree. Tree’s can be found everywhere, so wherever you are in the world, you’ll have a chance to photograph them. In this article, you’ll see how adding a tree to your composition can add oxygen to your photography! So take a deep breath and learn how inspiring tree photography can be by using these seven different approaches to photograph trees.

    1. The lone tree

    A lone tree frames a typical landscape scene in southern England.

    The lone tree alone in a field or on the brow of a hill really is a photo for the ages. It’s as strong a main subject as you’ll ever take in landscape photography. Whether you position this tree in the center of your frame or the left or right third, the photo is likely to work. The main thing is to ensure the tree is truly isolated and doesn’t have other rival trees in the frame competing for attention. The challenge, of course, is to find such a tree. In some cases, these tree’s are famous like the one at Wanaka lake in New Zealand. The chances are you’ll find a tree near where you live though.

    Lens choice

    The choice of lens you use may well help you isolate that tree once you’ve found it.

    • Wide angle – This type of lens works well when you want to get close to the tree, yet want to show the tree in its entirety. Through the use of this lens you might be able to create a minimalist style photo containing just the tree, the sky, and some fields where the tree is located.
    • Telephoto – When that tree is a long distance away, and is perhaps inaccessible because it’s on private land, a telephoto lens could work.Of course, make sure you’re not impinging on someone’s privacy when taking that photo. You’ll also be able to zoom in to isolate a lone tree, which is perhaps near to other trees and removing those other trees from your composition.

    2. The tree tunnel

    Another popular type of photo is the tunnel. These contain a strong leading line and an infinity point. They’ll also work very nicely with portrait photos, where the model acts as a foreground element in front of this tunnel. When it comes to trees, you’ll find they’re naturally good at creating tunnels. This happens when a mature tree has an arching main trunk, and branches that hand down to the side of the tree. Another place you can see a tree tunnel is a path or road that has trees on both sides, where those trees form a roof of interlocking branches. Photos of tree tunnels like this are usually more dramatic taken at longer focal lengths, where the comprehension that gives will enhance the effect of the trees creating the tunnel.

    Tree lines work very well in photography.

    3. The change of seasons

    As with all things in nature, they’ll change with the seasons. As long as you’re not in the tropics, you’ll be able to see the change in a tree throughout the year. The most powerful way to record this is to choose one composition and photograph it for each of the four seasons. Whether that composition is a single lone tree or a path with trees along it will be up to you.

    You don’t necessarily need to make your seasonal set from the same location though. You could choose to show photos of trees in the country you’re from, with clear markers that you’re in a particular country from your photos. Each scene you show can show the different seasons, and show the trees of that country.

    Autumn is one of the most popular times to take photos of trees, and with good reason.

    4. Applying creative techniques

    There are many photography techniques out there which you can try. A lot of these techniques are adaptable to use with tree photography. Here is a selection you could try the next time you photograph a tree:

    • Silhouette – This works great with trees, especially those trees with beautiful branches that show the detail of the tree when silhouetted. Silhouettes are relatively easy to achieve. Expose for the sky, and aim towards the sky. The tree should naturally silhouette as long as you’re photographing with the sun in front of you.
    • Refraction – Another classic for tree photography involves using a lensball. Here you’ll see an inverted image of the entire tree all captured with a small glass sphere.
    • Infrared – Choose a sunny day with some clouds in the sky. You’ll want to choose the summer as well, as this technique needs green leaves on the tree. These photos can be taken with infrared filters or repurposed cameras. You’ll need to adjust the white balance in post processing. Once done, you’ll produce a beautiful dreamscape image.
    • Long exposure – The tree itself won’t benefit from long exposure. However, on days when clouds are moving across the sky, this technique looks great. The static tree juxtaposed against blurred moving clouds will work very well.

    This is a slightly different take on the lone tree photo, and uses a lensball to achieve it.

    5. Details photos

    Having taken plenty of photos of entire trees, it’s a good idea to balance this with some detail photos. You’re really spoiled for choice when it comes to the type of photos you take here. All areas of the tree offer potential.

    The following ideas can guide you:

    • Leaves – Detail photos of leaves could take different forms. You could focus on a single leaf, and produce a bokeh background behind it. You might use a macro lens and focus on all the detail the veins of the leaf give you. Photographs of leaves work very well with the sun shining through the leaf from behind.
    • Bark – The texture of bark is a natural fit for a detail photo. Look to side light the bark to get maximum texture in your photo.
    • Trunk – The trunk is not just about the bark on the tree. Focus on the root system around the trunk, and all the patterns you can find at the foot of the tree.
    • Branches – Looking up works equally well. Interlocking branches make for great pattern photos, especially when silhouetted.

    One of the best places to photograph trees is the jungle. This photo show the detail at the tree trunk.

    6. Portrait work

    The use of trees as backgrounds for portrait photos is a popular idea. There is a good reason for that; much of which is related to the points made earlier in this article. Tree’s have the potential to form natural frames, especially where branches arch back from the trunk towards the ground. A line of trees forms a leading line, one that can draw the eye towards your model.

    In the summer months, you’ll find leaves are amazing for creating a natural bokeh background for your portrait. Your model will be able to interact with the tree, perhaps mimicking the shape of the branches. There are many ways trees can add to your portrait work. So using trees for portrait work is another way to use trees creatively.
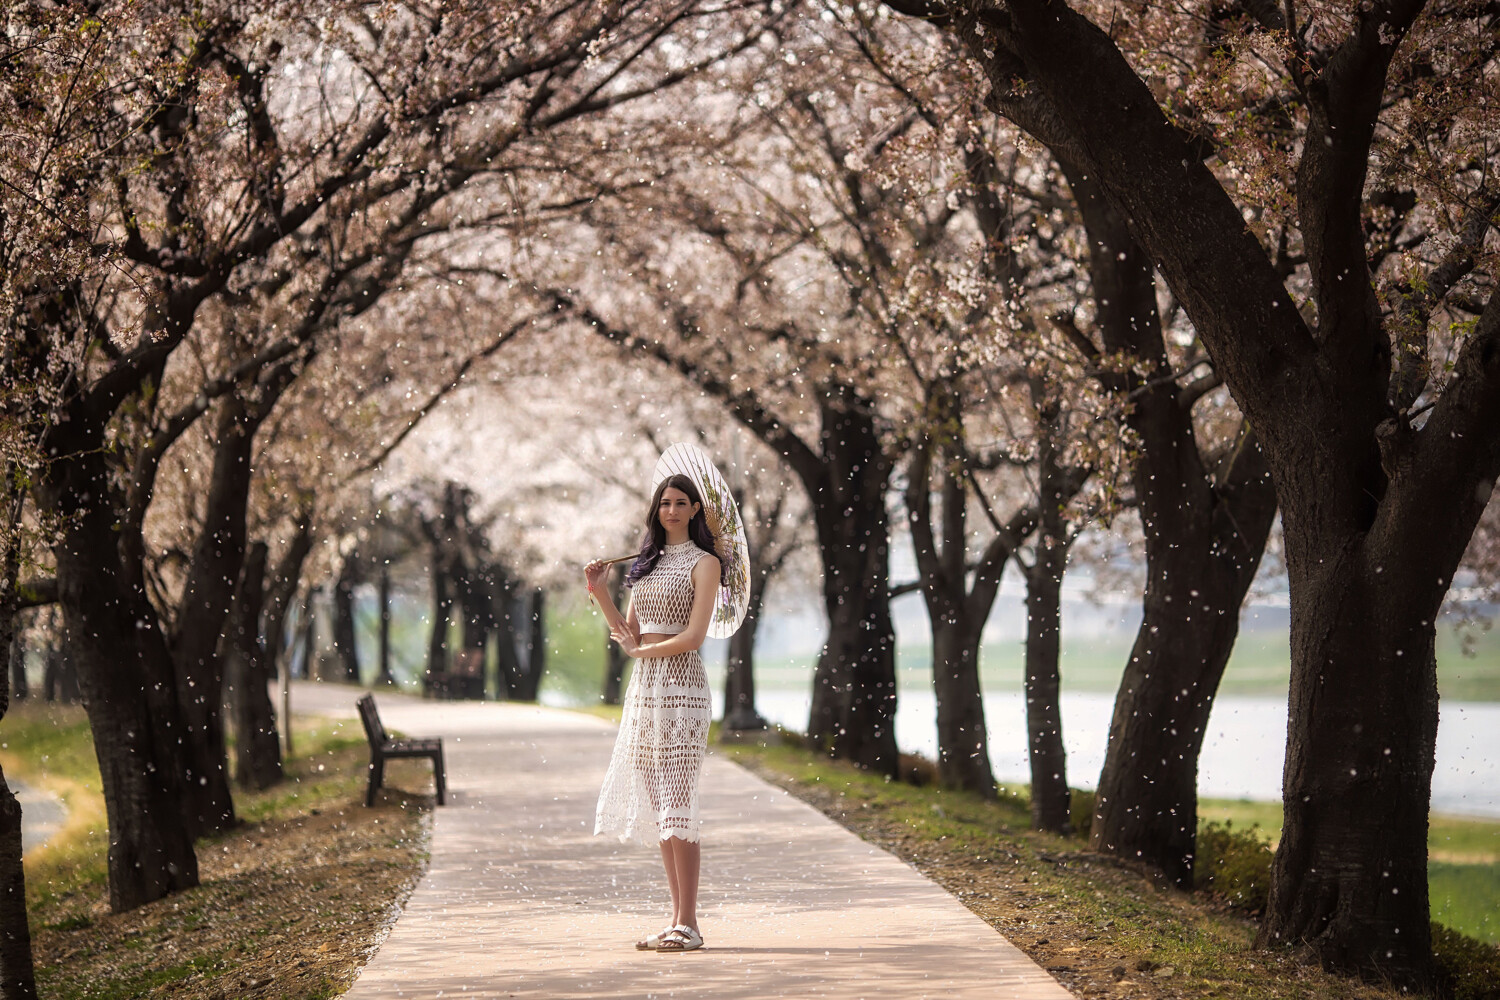
    In this photo the model stands under cherry blossom trees as the petals fall down.

    7. Different perspectives to photograph trees

    Another way to photograph trees more creatively is to change the perspective. There are lots of angles you can use, though you’ll need to be close to the tree to utilize some of these. Take a look at the angles you could be using, and see how you can apply them to your work.

    • Low angle – Either from a distance or closer to the tree, photographing from a low angle will give you a different perspective. Foreground elements will show up a lot more in the frame, so you could place flowers in the foreground with the tree in the background.
    • Worm’s eye view – Low to the floor, but now looking up at the sky. This is a great angle when there are several trees together, and you stand in the middle between them.
    • Bird’s eye view – Should you have a way of getting an overhead photo of the tree, or a canopy of trees, this is a great angle.
    • Framing – Look for ways to frame a tree, perhaps use another tree in the foreground to frame a tree in the background.

    This photo uses the branch of one tree to frame another tree in the background.

    8. Wildlife photography

    It goes without saying that a tree is a living ecosystem. Many living things rely on trees for life, including humans. In terms of photography, you could start small by looking for beetles in the soil, or under the bark. Leaves will also be home to a lot of smaller life such as caterpillars. So you’ll be able to get your macro lens out and explore the world of insects.

    Of course, larger creatures feed on these insects, and you’ll be able to photograph them as well. You’ll find lots of species of birds, squirrels, and other animals. Photographing these is trickier, and you’ll certainly need a longer focal length. The use of camouflage gear and bird-watching huts also enhance your chance of photographing life within a tree.

    In some countries the wildlife in the trees is a little bigger than a squirrel.

    Conclusion

    A tree is an interesting subject for a photo and has been used by photographers many times to create photography projects. In this article, you’ll have seen several methods you could use to photograph a tree.

    Are there any in this list that interest you? What other approaches to tree photography have you used that aren’t discussed here?

    At Digital Photography School, we’d love to see examples of your tree photography, together with your thoughts about this article.


    The post 8 Creative Ways to Photograph Trees appeared first on Digital Photography School. It was authored by Simon Bond.


    Digital Photography School

  • Is the Sony a6400 right for you?

    Is the Sony a6400 right for you?

    We’ve put the wraps on our full review of Sony a6400, where we look at its image quality, autofocus and more. But is it the right camera for you, and the style of photography you enjoy? Taking the a6400 into account as a whole, here’s how we think it stacks up for these common photographic use cases.

    • Family and moments
    • Travel
    • Video
    • Lifestyle and people
    • Sports and action
    • Landscape
    • Candid and street
    • Formal portraits

    Family and moments

    Sometimes, a killer new feature comes along that really changes the way you take photographs – in this case, that feature is Sony’s Real-time Tracking AF. Once you get the camera set up, all you really need to do is place an AF area over the subject you want to track, whether it’s a human or not. If it’s not a human, the system will track that object very tenaciously as you recompose the scene. If it is a human, the system will automatically switch to face or eye detection and reward you with incredibly accurate focus, almost regardless of lighting or subject movement, and even at wide apertures. It’s really something.

    As a point-and-shoot family cam, the a6400 is hard to beat

    There’s a lot else that the a6400 gets right for this use case, as well. First of all, with the proper prime or the 16-50mm F3.5-5.6 power zoom kit lens, it makes for a compact package that’s easy to toss into a bag or jacket pocket (the very nice 18-135mm F3.5-5.6 kit lens adds quite a bit of bulk, but a very flexible zoom range). There’s above-average battery life, and if you do happen to let the battery drain, the a6400 will charge over its micro USB port. Claimed weather-sealing means a little drizzle doesn’t need to dampen your photographic creativity, and the selfie screen will be handy for, well, selfies.

    Marks against the a6400 include a complex menu system that could overwhelm more novice users, and we’ve found the auto white balance can ‘overcorrect’ daylight images, making them look a little cold for our tastes. But overall, as a ‘point and shoot’ family camera, the a6400 and its Real-time Tracking autofocus are hard to beat, especially at this price point.

    Photo by Rishi Sanyal


    Travel

    Everyone travels differently, but we believe that the a6400 comes with some merits (and, of course, demerits) that will apply broadly to the type of people that like to bring a dedicated camera with them while traversing the globe.

    First off, like all of Sony’s a6x00 cameras, the a6400 is compact and lightweight. Despite this, it still comes with claims of weather-sealing, which is a nice touch should you run into inclement weather. Wireless connectivity, including NFC, is a strong point, so it’s easy to get your photos up onto the web from anywhere, without needing a dedicated computer. There’s an awful lot of lenses in the E-mount ecosystem to choose from at this point, from the flexible 18-135mm F3.5-5.6 Sony kit zoom to Sigma’s excellent 16mm, 30mm and 56mm F1.4 primes. Add on the ability to charge the a6400 from the same power bank that you can use to charge your phone, and you have a strong proposition for a travel camera right here.

    The a6400 is compelling option for you to pack into your carry-on for the next adventure

    But there are a couple of things to consider. Unfortunately, Sony is one of the few remaining manufacturers to not allow in-camera Raw processing. This is a shame, because we’ve found the auto white balance can sometimes result in unpleasant colors in JPEGs, and JPEGs are harder to correct than Raw files. This means that, if you’re a power user and really like to fine-tune your photographs, you may actually find you want a laptop with you to give those Raw files a look. This could be mitigated if Sony’s Imaging Edge app allowed the transfer of Raw files to mobile devices, but at the time of this writing, it doesn’t.

    Still – if you’re primarily a JPEG shooter and don’t mind taking some more control over your JPEG and white balance settings, the a6400 is a compelling option for you to pack into your carry-on for your next adventure.

    Photo by Carey Rose


    Video

    The new screen mechanism on the a6400 tilts all the way up for selfies, yes, but that also opens a window of opportunity for those looking to ‘vlog.’ But aside from vlogging, there’s quite a bit to unpack here, so let’s start with the basics.

    The a6400, like the a6300 and a6500 before it, offers oversampled (read: highly detailed) 4K video capture. Autofocus during video is another strong point, requiring a minimum of input from the user for most types of shooting. The microphone input makes it easy to get higher-quality audio recorded in-camera, and Log capture gives power users more flexible files for post-processing. Sony has also updated the processor in the a6400, and in room temperature conditions, the camera will record 4K continuously until the battery runs out, or the card fills – without fear of overheating.

    The a6400 is a great B-cam for interviews, and decent for vlogging – but it’s worth checking out the competition

    But the market hasn’t stood still. Against competitors like the Fujifilm X-T30, the a6400 has an awful lot of rolling shutter – which is that sort of jiggly, jello-y effect you can often see in shaky footage. And without a stabilized lens, you’ll have a lot of shaky footage, since the a6400 doesn’t include in-body image stabilization. Plus, in 4K/30p, you’ll have an additional crop factor, meaning it will be difficult to get wide-angle footage with standard zoom lenses. There isn’t a headphone jack to make sure your audio sounds alright during recording, and that flip-up screen can be blocked by any microphone you want to put in the hot shoe.

    So thanks to its unlimited recording time, the a6400 makes a great B-cam for interviews, and with Sony’s 10-18mm F4 E-mount lens, which happens to be stabilized, you have a decent option for vlogging as well (just watch that crop if you shoot in 30p). It’s just that, at this point, it’s worth checking out the competition to see if other options have a more modern feature set that will work best for the kind of video work that you want to do.


    Lifestyle and people

    We again see Sony’s Real-time Tracking autofocus playing a major role here; even with a wide-aperture primes, like Sigma’s 56mm F1.4 or Sony’s 24mm F1.4 GM, the a6400 will reliably lock focus on a subject’s eye with incredible accuracy.

    Not only that, but malleable files with plenty of dynamic range give you more flexibility for shooting in harsh lighting conditions, and good low light performance means you don’t necessarily have to stop shooting when the sun goes down. Good connectivity options will let you send those files off to your subjects quickly and easily, so long as you’re happy with the JPEGs – it’s probably best to dial in your white balance manually for best JPEG results.

    Photo by Barney Britton


    Landscape

    The a6400’s 24MP sensor offers a solid amount of resolution for landscape work – and there aren’t many APS-C cameras out there to offer significantly more resolution at this time, anyway. And though it’s the exact same sensor as in the older a6300, it’s still a very good sensor in terms of dynamic range, and so you’ll be able to brighten shadows significantly in high-contrast scenes without introducing a ridiculous amount of noise.

    If you’re a tripod shooter, the tilting LCD will be a help for working at lower angles, though if you like to shoot in the vertical orientation, you’re out of luck on that front – the LCD only tilts on its horizontal axis. There’s a strong selection of lenses, both from Sony and third parties, particularly wide-angle primes. The claimed weather-sealing is of course a welcome addition if you’re finding yourself out in the elements, as is USB charging if you’re operating off the grid for any period of time. There’s also a robust built-in intervalometer for time lapse work, if that’s your jam.

    The inability to process Raw files in-camera or transfer them to your phone may be frustrating

    But for those wanting to travel light, the inability to process Raw files in-camera or transfer Raw files to mobile devices may be frustrating. The a6400 is also one of the few APS-C cameras on the market to only offer lossy compressed Raw files, meaning that you might see some artifacts if you really push your high-contrast files, such as those taken at sunrise or sunset. Overall, though, the a6400 – with the right lenses – is a solid choice for landscape shooters looking to travel light.

    Photo by Carey Rose


    Sports and action

    Sorry to sound like a broken record (do the kids know what records even are, these days?), but Sony’s Real-time Tracking AF is a revelation for sports and action photography, as well. Whether you’re photographing your child’s soccer game or a low light concert, the a6400’s autofocus system is capable of getting you an incredible number of in-focus ‘keepers’, even if you’re firing away at a maximum burst rate of 11 fps. And as stated earlier, the system doesn’t need an eye to latch onto for accuracy – the a6400 will tenaciously track any subject, whether it’s a race car or a helmet, as long as you’ve initiated tracking over that subject.

    We’re pleased with the deep buffer, but less pleased with the slow write-times

    We’re pleased to find that the a6400 comes with a pretty deep buffer, but are less pleased to say that the card slot is only UHS-I. This means that write-times are on the slow side, and that the buffer will take a while to clear after a long burst. While you can still enter playback while images are being written to the card, some functions – like burst speed – cannot be changed until the buffer has finished clearing. Lastly, we’d recommend a grip extension of some sort for use with larger telephoto lenses, as the small grip on the a6400 will be uncomfortable with those lenses after extended use.

    It’s worth adding that the touchscreen on the a6400 can be used for AF point placement, so you can move the area around if that makes it easier to initiate tracking on your given subject. We still prefer a joystick for AF area movement, however, but the touchscreen is better than the fiddly ‘click-click-click‘ of the rear four-way controller / dial.

    Photo by Carey Rose


    Candid and street

    For candid and street, the a6400 is likewise a compelling option. With a tilting screen, shooting from the hip (and using the touchscreen for AF area placement) is a cinch. If you want to be able to react even faster to what’s happening around you, the ‘Wide’ AF area does a surprisingly good job of automatically deciding what to focus on without any intervention from the user. The compact size won’t be terribly intimidating or attract too much attention, and the a6400 comes with a silent electronic shutter for extra discretion.

    The one caveat here, though, is that the scan rate of the electronic shutter is on the slow side. This means that if you’re using that electronic shutter and panning or photographing fast-moving subjects, you may see some odd distortion artifacts, and you may also see very pronounced banding if you’re capturing candids under artificial light.

    Photo by Carey Rose


    Formal portraits

    Formal portraits are actually another situation in which the a6400 performs well. Again, the reliable Eye AF implementation ensures accurate focus, and though there’s no flash sync port, you can add any number of adapters to the camera’s hot shoe. The flash-sync speed of 1/160 sec isn’t great for outdoor use (though you can always use high-speed sync), but should be fine for use indoors. A nice bonus is that the a6400 can shoot tethered using Capture One software, and there’s a wide variety of excellent prime lenses available, including the excellent Sigma 56mm F1.4 that will give you a standard 85mm equivalent field of view on the a6400.

    Photo by Carey Rose


    The wrap-up

    We wrote in our full review that the a6400 is ‘a near-universally capable midrange camera,’ a statement which is borne out through our examination of its merits across these use cases. It’s not a perfect camera – no camera is – but it’s hard to argue against the fact that Sony has created a remarkably flexible camera at an attainable price point for many people. That’s unequivocally a winning combination.

    Whether you’re photographing your own family, stylized portraits, sports or looking for a photographic travel companion, the a6400 probably has just about all you need to get the shot in those situations. We have to admit, though, that some of the less tangible aspects of the camera – such as how engaging it is to use – are less impressive to us. But that doesn’t take away all that a photographer can do with the a6400, once they’ve wrapped their head around the controls and interface.

    If you own or are looking into a Sony a6400, let us know in the comments what types of photography you’re into and how the camera is working for you.

    Articles: Digital Photography Review (dpreview.com)

  • Nikon firmware update improves AF performance, adds eye-detection to Z6 and Z7

    Nikon has announced firmware version 2.0 for its full-frame Z6 and Z7 mirrorless cameras, and it’s all about autofocus.

    The most notable upgrade is the addition of Eye AF, which is available when using the Auto-area AF mode. Nikon says that it will stay locked on eyes if the subject changes poses, or if they are partially obscured by another object. Switching between eyes and detected faces in the scene can be done using the multi- or sub-selectors.

    The update has also improved AF performance in low light, extending the AF detection range from -1EV to -2EV on the Z7, and -2EV to -3.5EV on the Z6. If you’re using the ‘low-light AF function on these cameras, Nikon claims that the Z6 can focus down to -6EV, while the Z7 remains unchanged at -4EV.

    Lastly, Nikon has added the ability for the Z6 and Z7 to shoot continuously with full-time auto exposure at the fastest burst rates: 12 fps on the Z6, and 9 fps on the Z7.

    The update is now available for download on Nikon’s website.

    Press Release:

    NIKON RELEASES THE NEW Z SERIES VERSION 2.0 FIRMWARE WITH ENHANCED FEATURES AND PERFORMANCE INCLUDING EYE-DETECTION AF

    Firmware Upgrade Brings Further Improvements to the Nikon Z 7 and Nikon Z 6 FX-Format Mirrorless Cameras by Adding Eye-Detection AF, Improving AF Performance in Low Light, and Adding Auto-Exposure Tracking to the Continuous High-Speed (Extended) Mode

    MELVILLE, NY (May 16, 2019 at 2:00 a.m. EDT) — Nikon Inc. is pleased to announce the release of firmware Ver. 2.0 that will further enhance the performance of its full-frame mirrorless cameras, the Nikon Z 7 and Nikon Z 6.

    Users will enjoy three main additional features following the Ver. 2.0 upgrade. These include:

    1. Eye-Detection autofocus (AF) for still-image shooting
    2. Extension of the low-light AF detection range
    3. Addition of auto-exposure (AE) tracking capability to the continuous high-speed (extended) mode

    These enhanced shooting functions will further increase camera functionality and performance and are a response to customer feedback for new and innovative ways to capture and create.

    PRIMARY FEATURES OF THE NEW FIRMWARE

    1) Eye-Detection AF for still-image shooting

    The new firmware offers Eye-Detection AF functionality that automatically detects and focuses on human eyes when using the Auto-area AF mode in both AF-S and AF-C. When the eyes of multiple subjects are detected, the multi-selector or sub-selector can be used to select the eye upon which the camera should focus. This enables precise focus on the eye of the intended individual, even when looking through the Electronic Viewfinder. This function is applicable even when the subject’s face is partially covered by another object, or in the event when a subject is frequently changing their pose.

    2) AF performance improvements in low-light situations

    The new firmware enables even faster autofocusing when capturing photos and video in dark or dimly lit scenes, for both stills and video. It will extend the AF detection range*1 from ?1 EV to ?2 EV with the Z 7, and from ?2 EV to ?3.5 EV with the Z 6. In addition, the Z 6 will be able to autofocus with even darker scenes, as the available low-light AF detection range*1 will be extended*2 from ?4 EV to ?6 EV when the Low-light AF function is enabled.

    • With still-image photography in AF-S mode, ISO 100, f/2.0 lens, at 20° C/68° F.
    • The low-light AF detection range will remain the same with the Z 7.

    3) AE tracking in continuous high-speed (extended) mode

    With earlier firmware versions, auto exposure (AE) was locked with the first shot in a burst of high-speed continuous shooting at approx. 9 fps (Z 7) or 12 fps (Z 6) in continuous high-speed (extended) mode. Firmware Ver. 2.0 adds support for AE tracking in continuous high-speed (extended) mode, allowing the cameras to track exposure just as it does focus (AF tracking). This helps to ensure that all images captured with a burst of high-speed continuous shooting are in focus and exhibit optimal exposure, even when the brightness of the scene changes.

    The new firmware can be downloaded (free of charge) from Nikon’s Download Center at the following link: https://downloadcenter.nikonimglib.com. Users will be prompted to follow the instructions provided to successfully install the firmware.

    Nikon will continue to flexibly respond to the evolving needs of our users and offer next-generation imaging experiences that foster creativity. For more information on the latest Nikon products, including the Nikon Z series, please visit www.nikonusa.com.

    Articles: Digital Photography Review (dpreview.com)

  • Hands-on with the DJI Osmo Action

    DJI Osmo Action hands-on

    The Osmo Action is DJI’s answer to the action cam. The 4K rugged action camera utilizes DJI’s built-in stabilization technology, offers dual screens, and like the Osmo Pocket, is simple to use.

    Here is what you need to know about it.

    Hardware overview

    The DJI Osmo Action is built around a 1/2.3″ sensor—the same found in the Osmo Pocket—and has an F2.8 three-glass aspherical lens with a 145 degree FOV. The camera also features a de-warp function so you can maintain a wide perspective of a scene but eliminate the fish-eye effect typically found in action cameras.

    The device features three buttons: power, record and quickswitch (QS). The QS button on the left-hand side lets you toggle between different video modes (video, HDR, slow) and photo without digging into the menu. Holding the QS button down will toggle between the front and back screens on the camera.

    The camera is charged via a USB-C port located above the microSD slot on the camera’s left-hand side.

    Build

    The Osmo Action is shockproof up five feet, dustproof and waterproof down to depths of 36 feet without additional waterproof housing, though users will want to ensure that the microSD and USB charging slot is locked and the screw on front lens protector is secure before submerging. It can withstand temperatures as low as 14° Fahrenheit.

    The rear touch screen features coatings to keep water and fingerprints away, and the protective lens cap has an anti-reflective coating to reduce glare and an anti-fingerprint coating to keep things free of smudges.

    Photo

    The Osmo Action shoots 12MP Raw or JPEG photographs in 16:9 or 4:3 ratios. A self-timer countdown feature is included, and the camera can shoot in burst mode at 3/5/7 fps. Users can select either spot metering or AE lock mode. A setting called Face-Oriented Exposure ensures that faces stay bright in the scene.

    The Osmo Action also allows you to set custom white balances and shoot in full manual exposure mode with an ISO range of 100-3200 and shutter speeds up to 1/8000sec. Additionally, the camera offers WiFi or Bluetooth to connect to the DJI Mimo app. Using the camera with the app gives it added functionality: live feeds, story templates and in-app editing.

    Video

    The camera can shoot 4K video up to 60 fps at 100Mbps with options to shoot as low as 24 fps, HDR video at 4K 30 fps and 8x slow motion in 1080p 240fps or 4x slow motion in 1080p 120fps. Built-in dual microphones and a speaker give the Osmo Action audio recording performance that is on par with that of a high-end smartphone. Adding the 3.5mm adapter accessory will allow you to connect an external mic for higher quality audio.

    Timelapse mode makes it easy to turn hours of footage into seconds with just a few taps. Timelapses are recorded at 1080p and can be set at intervals of 0.5 sec up to 30 sec and durations can be set from 5m up to infinity. Custom exposure mode can be set up to 120 seconds for shooting nighttime landscapes or starscapes.

    RockSteady/EIS

    A new electronic image stabilization technology called RockSteady works to create footage that is smooth and stable even when shooting at 4K/60fps. The technology has a higher image cut ratio, removing blurry shots for smoother footage and analyzing raw data from the frames to increase stability by predicting the movement of the user. It is the first handheld DJI camera to incorporate the tech.

    LCD screens

    The Osmo Action has a 2.25″ rear touchscreen that can be used to access all of the features of the camera. There is an additional front-facing LCD that can be activated by tapping the back screen twice or by holding the QS button down. The 1.4″ front screen doesn’t offer touch functionality. The brightness of the LCDs mean that they can be used in direct sunlight with ease.

    Performance and media

    The Osmo Action uses a removable battery that is charged via USB-C in approximately 88 minutes. A fully charged battery will last 116 minutes when recording at 1080/30p or 91 minutes of 4K/30p with Rock Steady enabled. The camera uses microSD cards up to a maximum size of 256GB.

    Price and availability

    The Osmo Action will be available on May 22 for $ 349. The in-box setup includes camera, frame kit, quick release, two adhesive mounts (one flat and one curved), screw, and a USB-C charging cable. Customers can add accessories like ND filters for shooting in bright conditions, a waterproof case for deep sea shooting, the 3.5mm adapter for attaching a mic, an extension rod for unique angles, a floating handle for shooting underwater and a charging hub that can charge three batteries at once.

    Articles: Digital Photography Review (dpreview.com)

  • What is Royalty-Free Editorial Stock Photography and Can You Earn Money From It?

    The post What is Royalty-Free Editorial Stock Photography and Can You Earn Money From It? appeared first on Digital Photography School. It was authored by Kevin Landwer-Johan.

    Photographs of just about anything can be sold as royalty-free editorial stock photography. How they are licensed is defined as either editorial or commercial. An image sold with an editorial license can only be used in news or general interest publications like;

    • Blogs
    • Textbooks
    • Magazines
    • Newspapers
    Royalty Free Editorial Stock Photography - What is it? Poi Sang Long Festival in Thailand

    © Kevin Landwer-Johan

    An editorial stock photo cannot be used to directly promote anything for profit.

    Photos sold by a stock agency with an editorial license are more limited in how they can be published. Commercially licensed photos can be more broadly used, but there are more restrictions on what they contain.

    What’s the difference between editorial and commercial stock photo licensing?

    Editorial stock photos do not require model or property releases.

    You can submit photos of individuals or whole crowds for editorial licensing and no model release would be requested. If you submit any photos of people for commercial use, signed model releases are required. Whenever a person can identify themselves in a photo, a release is required if the photo is to be sold with a commercial license.

    Royalty Free Editorial Stock Photography - What is it? Crowds During Song Khran Festival in Chiang Mai

    © Kevin Landwer-Johan

    Commercial licensing prohibits the inclusion of any copyrighted elements in your photos. Any branding or products must be removed from the photos. This also goes for people and private property. These things must be accompanied by an appropriate release form. If they’re not stock agencies will not accept the images into their collections.

    Editorial licensing allows visible branding, products, people and property. However, no manipulation of the content is permitted.

    Royalty Free Editorial Stock Photography - What is it? Market Tattoos

    I would not be able to submit this for sale under an editorial license because I have removed a logo from the man’s shirt. © Kevin Landwer-Johan

    If you have a photo of something containing a logo or company name, you can remove it and still license the photo with a commercial license. When uploading editorial photos, you will be asked to state that you have not manipulated the photo in any way. Editorial stock photos must depict things as they really were when you took the photo.

    Most stock agencies have disclaimers attached to editorial licensing of photos. The buyer is in control of how the photos will be used and must be made aware of the restrictions and their responsibilities. Stock photo agencies make it clear they are not liable for how the purchaser uses editorial photos.

    Are there restrictions on the types of photos you can upload?

    Most royalty-free stock agencies don’t have many restrictions. So long as you are uploading photos within the bounds of common decency, you won’t have any problems. Check with each stock agency where you wish to submit photos. They will be able to provide you with their company policy on what they want you to upload.

    The law in most countries allows you to photograph anything you like from a public space. However, in doing so, you must not infringe on the rights of others or abuse their privacy. Photographing military facilities, power plants and other important infrastructure can sometimes get you into trouble. Check with local laws before you do.

    Don’t just upload any old pictures. Make sure to only submit your best images. The market has become so saturated with photos that it’s increasingly difficult to make sales. Make sure your pictures stand out from the crowd.

    Royalty Free Editorial Stock Photography - What is it? Woman with a SLR Film Camera

    I do have a signed model release for the woman in this photo, but because of the branding on the camera I could only sell it with an editorial license. © Kevin Landwer-Johan

    How do you know what photos will sell?

    You really don’t.

    Predicting how well editorial stock may sell is very difficult.

    If you have a good photo of a spectacular event or happening of international significance, it will likely sell well. If you were the only photographer to capture this amazing occurrence, then it will certainly sell better. However, these type of situations are extremely rare.

    Carrying your camera with you wherever you go will increase your chances. It will also sharpen your awareness of what a good editorial image can be as you learn to focus your attention. If you leave your camera at home, it won’t happen.

    Upload a variety of images and build up a large number of your photos in a stock agency website. Doing this gives you practical experience of what will and will not sell. There are many variable factors involved.

    If you can build up a solid base of your own photos, you will be able to analyze which ones sell more consistently. You can then use this information to plan what you will photograph.

    Royalty Free Editorial Stock Photography - What is it? Checking Their Messages

    Annual events can make good subjects for editorial because the can be used year after year. © Kevin Landwer-Johan

    Once you have this information to work with you can decide on a niche or two to concentrate on. Look at which of your editorial stock photos sell the best and which of them you enjoyed making the most. This is what you will be best to focus your efforts on.

    Royalty-free stock agencies boast collections of millions of photos. They contain photos already of pretty much every subject you can think of. You need to take better images than the ones they are already selling.

    Browse these collections for ideas. See what others have done and come up with a new angle. If you see that there is a number of similar images that sell well, and you can produce photos of the same subject, do so. Don’t just copy. Improve on what’s already been done.

    Update images you find that might be out of date. Has your city’s skyline changed recently? There may not be many new photos of it online yet.

    Has there been some big news recently that you can illustrate with a stock photo? This will have to be ongoing news, or you’ll need to produce and upload your photos quickly so as not to miss the moment.

    Royalty Free Editorial Stock Photography - What is it? Flower Parade Float

    © Kevin Landwer-Johan

    How many agencies can I upload my editorial stock photos to?

    You can choose to upload exclusively to just one agency or to as many as you have time to service.

    Signing an exclusive contract to supply just one agency has certain benefits. However, you are restricted to only their customers buying your photos.

    Supplying to many agencies takes time. Each stock library has its own requirements and contracts, and you must understand these and follow their terms closely. If you don’t, you may find you’ll have many of your photos rejected for one reason or another.

    Royalty Free Editorial Stock Photography - What is it? China Girls at New Year

    © Kevin Landwer-Johan

    Conclusion

    Do your research and understand what’s required before you start uploading photos to sell as editorial stock. You will probably find you have a huge number of images on your hard drive you can upload.

    If they’re only stuck on your computer, you’ll never make any money from them. Uploaded to a stock agency, you won’t get rich overnight, but you will earn something over time.

    Taking a business-like approach to stock photography is best if you are serious about it. Treating it too casually, not paying attention to what’s working and what’s not, will not bring you success. You’ll need to stick with it and consistently upload to make a really good go of it.

    The post What is Royalty-Free Editorial Stock Photography and Can You Earn Money From It? appeared first on Digital Photography School. It was authored by Kevin Landwer-Johan.


    Digital Photography School

  • Simple Methods for Creating Better Still Life Images

    The post Simple Methods for Creating Better Still Life Images appeared first on Digital Photography School. It was authored by Charlie Moss.

    Many find shooting still life images a real challenge when they’re just starting out because it can be hard to know where to start. But taking the time to shoot a great still life can be a rewarding and somewhat meditative pastime for photographers.

    Still life photography can help you hone your photographic skills at your own pace while still creating work that can go in a portfolio or be printed for your wall. But styling tabletop images doesn’t come naturally to all photographers, so here are some simple things to think about when you’re next shooting still life.

    Choose props for color and mood

    Now might be a good time to go and brush up on your color knowledge, because you’re really going to need it when it comes to creating still life images! Everything, including the colors, in your still life scene, will be there because you put it there. Nothing has to make it onto your tabletop studio if you don’t want to include it in your shot.

    Colors can be a way of introducing either harmony or contrast. If you were photographing something blue, for example, and you used blue and green backgrounds you’d have a very harmonious and potentially calm image. On the other hand, if you added yellows or oranges into the scene, it would create tension and result in a more dynamic overall feeling to the shot.

    You can bring color to your still life images in different ways. Backgrounds, fabrics, plates, bowls, vases – all these items are props that you can start collecting to build up a color library of props. Don’t forget natural objects like flowers and foliage too; they can often really bring a shot to life.

    Selecting complementary backdrops

    Your backdrops will often be the most dominant colors in your scene, so pick wisely (it’s also hard to change it once you’ve started arranging your props). Pick your backdrops according to the feel you’d like to create in your final image.

    Backdrops can be anything that works with the scene you’re creating. It might be a marble countertop, a beautiful old farmhouse table, or a complementary piece of fabric. Whatever helps to set the mood for your images.

    As well as the color of your backdrop, think about the texture as well. A scuffed up, blackened old baking tray creates a very different feel to draped silk. Think about the way that different backdrops make you feel as you select them for your scenes and decide if that’s correct for the kind of story you’re trying to tell in your photograph.

    Over time you will build up a library of different backdrops to use in your shots. Then you can create a whole variety of different styles of images just by switching out the backdrop. Keep your eye open when you’re out and about for potential backdrops to add to your library!

    Thinking about texture

    I love including texture in my still life photographs, and it has become a part of my style now. Scouring both high street and artists shops for interestingly textured table linens, bowls, and backgrounds for my still life images are favorite pastimes.

    Along with all the other elements of a still life image, texture can really help set the mood. Are you shooting something rustic that would have its story helped by the introduction of some beautiful coarse fabric? Or maybe you’re photographing a more modern scene that would benefit from glossy backdrops and slick, shiny props?

    It also adds interest and depth to your final image. If you look around the room you’re in I’m sure you’ll see a whole variety of different textures. Perhaps you have a smooth leather chair with a velvet cushion on it, placed next to a distressed wood coffee table. Our lives are a riot of different textures, and these affect our senses both visually and through touch.

    Since you can’t touch the objects in a photograph, you need to tell the viewer what they’re like. Texture is the main way to visually convey what something would feel like if you reached into the photograph and touched it. With that in mind, pay attention to what the textures in your shot are telling your viewer.

    Create a beginning, middle, and end

    Just like a good story, a photograph needs a beginning, middle, and end. Except we usually refer to these things as foreground, middle ground, and background when it comes to visual storytelling. Creating a layered effect in your photographs helps to create depth in what is a two-dimensional object.

    Try building your still life scenes intentionally. First of all, place your main object roughly where you think you’d like it to be. It helps if you put your camera on a tripod for this because you can keep the framing and focus consistent.

    After you’ve placed your main object try creating some foreground interest. This could be some petals if you were photographing flowers, or perhaps the curled corner of table linen if you were shooting food. Anything that leads the eye into the shot without distracting too much from the main focal point is good. You want something that adds to the story.

    Lastly, place a background element in your scene. In the shots above, I’ve added a yellow napkin which both creates interests and adds a contrasting color, but you could be more subtle. Your background itself could also be your background element if it were sufficiently interesting! It should be like a “full stop” to your composition; ending the viewer’s attention the same way that a full stop ends a sentence.

    You might find it easier to play with compositional colors and shapes for the foreground and background if you use a shallow depth of field. Rendering these elements as out of focus in your scene helps to keep the viewer’s attention on the main focus of your image.

    Finishing an image in post-processing

    There’s no rule in creative still life photography that says the colors have to be true to life. Using different colors – or even turning your digital files black and white – can result in a change of mood and story.

    Processing your still life images in Adobe Lightroom allows you to create duplicates of images and try out different color treatments while comparing them side by side. It’s great for black and white conversions too. The best thing about Adobe Lightroom is that the editing is completely non-destructive to the original file. This means you can try out everything from wild color treatments to something more conservative and always go back to the original file.

    I touched on color grading your still life photographs in a previous article. It can help evoke different moods, bringing different colors to the fore. It can also help to make items really pop off the page if you use color grading in a way that emphasizes your main subject.

    Color grading your shots can also help to contribute to a more coherent style in your work. You don’t always have to treat the color in your images the same way, but over time you might notice that you seem to pick up a style the more you shoot. This can help to make your work recognizable which you might find desirable.

    Put it all Together

    Now that you know the simple ways that you can improve your still life images it’s time for you to have a go. Get some inspiration, shoot some images, and then come back and let us see them in the comments!

    Don’t be afraid to work slowly and try new things when you’re shooting still life. The objects in your scene are not going anywhere, and they won’t run out of patience as a portrait subject will! Also remember, you don’t have to show anyone the images if you’re not completely happy with them.


    The post Simple Methods for Creating Better Still Life Images appeared first on Digital Photography School. It was authored by Charlie Moss.


    Digital Photography School

  • Adobe adds new Texture slider to Lightroom CC, Lightroom Classic and ACR

    A screenshot of the new ‘Texture’ setting under the ‘Presence’ module inside Adobe Lightroom CC, Adobe Lightroom Classic CC and Adobe Camera Raw.

    Adobe has announced the addition of a new Texture slider to the latest updates for Lightroom, Lightroom Classic and Adobe Camera Raw (ACR). According to Adobe, Texture is the result of user requests for a way to smooth skin without reducing image quality or spending large periods of time making adjustments.

    ‘Photoshop may still be needed for some workflows,’ Adobe’s Max Wendt said in a blog post about the slider, ‘but we think that Texture will be great for many of your images.’

    Texture, according to Wendt, was first developed as a smoothing slider that eventually expanded to cover both smoothing and texture enhancement. Positive texture — that is, enhancement rather than smoothing — is described as something like a cross between positive Sharpening and Clarity. Negative Texture for smoothing is comparable to Noise Reduction.

    Texture reduces or enhances what Adobe calls ‘mid-frequency’ areas of an image, which enables the tool to boost or reduce important details generally without amplifying noise or producing a flat, plastic appearance. Specifically, Texture is great for smoothing skin without obliterating fine details that are key to its realistic appearance.

    Texture and Clarity can be used together to adjust different aspects of the image, as well; Adobe provides examples, beyond the ones we’ve included in this article, involving both portraits and landscape images. Those are ultimately just samples of different ways Texture can be utilized, however, with Wendt explaining in his post:

    The best way to discover your vision is to experiment. Texture is fully non-destructive, so don’t be afraid to explore and just try things. Go too far, pull it back, go too far again. You’ll find what values work for you. It’s all about your own vision.

    Users can access the new Texture slider by updating their software to the latest versions of Adobe Lightroom CC, Adobe Lightroom Classic CC and Adobe Camera Raw available in Creative Cloud.

    Articles: Digital Photography Review (dpreview.com)

  • The OnePlus 7 Pro comes with 3x hybrid tele, ultra-wide-angle and pop-up selfie cam

    Chinese manufacturer OnePlus has announced its latest flagship smartphone, the OnePlus 7 Pro. The new model comes with a completely new triple camera module that features a 48MP Quad-Bayer sensor, F1.6 aperture and optical image stabilization in the primary camera. The 16MP ultra-wide-camera offers an equivalent focal length of 17mm and an F2.2 aperture.

    The stabilized tele puts out 8MP image files and has an F2.2 aperture lens. It combines a longer focal length with digital zoom for an 78mm-equivalent focal length (3x). The AF-system combines PDAF and laser methods and there’s also an improved night mode.

    By default the primary camera produces 12MP image files but can be set to capture at full 48MP resolution. In video mode the OnePlus is capable of recording 4K footage at 60 frames per second. In super-slow-motion mode you can shoot 1080p video at 240 fps or 720p at 480fps.

    The 16-megapixel f/2.0 front selfie camera is built into a pop-up mechanism, eliminating the need for a camera notch in the display. OnePlus says the mechanism has been tested for more than 300,000 actuations.

    The device is powered by Qualcomm’s high-end chipset Snapdragon 855 and UFS 3.0 storage should help increase operating speeds. The 4,000mAh battery supports fast charging. The OnePlus 7 Pro will be available from May 21st. Unfortunately it’s not quite the same bargain as its predecessors anymore. It the US is will start at $ 669 for a 6GB RAM / 128GB storage model. There also an 8GB / 256GB version for $ 699 and the top-of-the-line 12GB / 256GB model will set you back $ 749.

    Articles: Digital Photography Review (dpreview.com)

  • DJI hopes to take on GoPro with its new Osmo Action camera

    DJI has taken a detour from drones and gimbals to release the Osmo Action, a robust action camera designed to compete directly with GoPro’s Hero lineup.

    The compact, ruggedized action camera features the same 1/2.3-inch sensor found inside the Osmo Pocket and captures 12-megapixel Raw stills, as well as 4K HDR video. In front of the sensor is a three-element F2.8 glass lens with a 145 degree field-of-view.

    As noted in our hands-on, the Osmo Action features DJI’s electronic image stabilization (EIS) technology it refers to as RockSteady, an tongue-in-cheek nod to GoPro’s HyperSmooth EIS technology. It’s worth noting though that DJI estimates an 18-22% crop factor when using RockSteady. DJI has also included a de-warp function to minimize the exaggerated perspective of the wide-angle lens.

    One, er two, of the stand-out features of the Osmo Action are its dual displays. In addition to the 2.25in rear touchscreen that’s used to navigate the menu and compose shots, DJI has also added a 1.4in front-facing screen so you know what you’re getting in the shot when snapping a selfie.

    Being an action camera, it shouldn’t come as any surprise the Osmo Action is designed to take a beating and keep on working; it’s dustproof, shockproof up to 1.5m (5ft) and waterproof down to 11m (36ft) as is. If more protection or underwater capabilities are required, DJI is also offering an external housing.

    The device itself features three buttons: a power button, a record button and a dedicated button DJI calls the Quick Switch (QS) button. The QS button makes it easy to transition between shooting modes, flip what screen is active and change settings, even with gloves on. If the Quick Switch button doesn’t fit the bill, the camera can also be turned on and start recording with your voice thanks to integrated voice control.

    On the photo front, the Osmo Action can capture 12MP Raw (DNG) or JPEG images in 16:9 or 4:3 ratios. It features an ISO sensitivity range of 100-3200 and shutter speeds between 120 seconds and 1/8000th of a second. In burst mode, the Osmo Action can capture shots at three, five or seven fps, and the self-timer mode can be set for three or ten second intervals.

    When it comes to video, the Osmo Action can capture 4K/60p video at 100Mbps and 4K HDR video at up to 30 fps. For high frame rate video, the Osmo Action can capture up to 240 fps if the resolution is dropped down to 1080p.

    The Osmo Action has built-in Bluetooth and Wi-Fi so it can be paired with Android and iOS devices via DJI’s Mimo mobile app. When connected, you can compose shots, change settings, capture images and instantly transfer content on the fly.

    Media is stored on microSD/SDXC/SDHC cards up to 256GB. The battery, which DJI says can be fully charged via the onboard USB-C port in 88 minutes, can last 116 minutes when recording at 1080/30p or 91 minutes when recording 4K/30p with RockSteady enabled.

    The DJI Osmo Action is currently available to pre-order at Adorama and B&H for $ 349. It comes with a camera frame, a flat adhesive mount, a curved adhesive mount, a quick-release base, the battery, a battery case, a locking screen and a USB-C cable. Additional accessories are also available.

    Articles: Digital Photography Review (dpreview.com)

  • The Profoto A1X is an upgraded A1 with improved battery life, recycling times and more

    Profoto has announced the A1X, an updated version of its A1 speedlight that’s improved in nearly every way.

    The A1X isn’t quite a successor to the A1. Instead, it sits alongside the A1 as a more powerful alternative in the event the A1 just isn’t enough for your needs. In the words of Profoto, it has ‘a little more of everything.’

    Specifically, the A1X has a more powerful internal battery that gets 450 full power flashes per charge compared to the 350 of the A1. It also features a 1 second recycling time compared to the 1.2 second recycling time of the A1, 20 wireless channels instead of 8 and a new display interface, similar to the one found on Profoto’s B10 light. The A1X is also available for Sony, whereas the A1 was limited to Canon and Nikon camera systems.

    Aside from the above differences, the A1X is effectively identical to the A1. It features the signature round head, AirTTL and HSS, a magnetic click-on mount for Profoto’s optional Light Shaping Tools, an LED modeling light, built-in Air Remote capabilities and firmware update functionality. The device can be used both off-camera and on-camera, features flash durations from 1/800th to 1/20,000th and can work at distances up to 300m (1,000ft).

    Below is a hands-on video created and shared by Adorama:

    The A1X measures in at 75mm x 108mm x 165mm (3.0in x 4.3in x 6.5in) and weighs 560g (1.23lbs) with the included battery. Included with the flash unit is a Li-Ion battery, a USB Type-A to Micro B, a power cable, a battery charger, a flash stand, a dome diffuser, a bounce card and a dedicated bag for protecting the A1X.

    $ (document).ready(function() { SampleGalleryV2({“containerId”:”embeddedSampleGallery_9878191457″,”galleryId”:”9878191457″,”isEmbeddedWidget”:true,”selectedImageIndex”:0,”isMobile”:false}) });

    The A1x is available for Canon (Adorama, B&H), Nikon (Adorama, B&H) and Sony (Adorama, B&H) camera systems for $ 1,095, a full $ 100 more than the A1.

    Articles: Digital Photography Review (dpreview.com)