Composition is often the key to the difference between a good landscape photograph and a great landscape photograph. There are oft quoted rules that we all try to adhere to and break in equal measure (rule of thirds, leading lines, golden spiral etc.) yet when considering what we are trying to capture within the frame, we don’t always consider the frame itself.
The aspect ratio of the photograph can make or break the composition by both emphasising the subject and removing distractions, or by putting the whole scene off-balance. When looking through the viewfinder, about to press the shutter, it’s a good idea to try and envisage the final shot, including the aspect ratio, in order to optimise your composition (too often the aspect ratio is an after-thought, being edited and applied during post-processing to correct for poor compositional choice).
But how does each aspect ratio impact our composition? Hopefully, that’s where this article comes in. I’m going to discuss a few common aspect ratios, with examples, and show the benefits and draw backs for each, considering where each one may be applied.
(Note, there is an argument for cropping your photo without sticking to a defined ratio to give an image a custom ratio based on your subject matter. I believe that can make printing/framing awkward so will therefore be sticking to well-defined ratios that most should be familiar with).
1:1 –Square format
The square format can often be used to simplify an image and give a subject a striking presence at the centre of the frame. By keeping the width equal to the height, the way in which we read the photograph changes, as there is less of a need to move left-to-right through the frame. The square format lends a good opportunity to break the rules we so often follow – place the horizon along the centre of the image or place a subject in centre of the frame, and the composition may only get stronger. You’ll often see a 1:1 aspect ratio used to emphasise minimalism (again, along the theme of simplification).
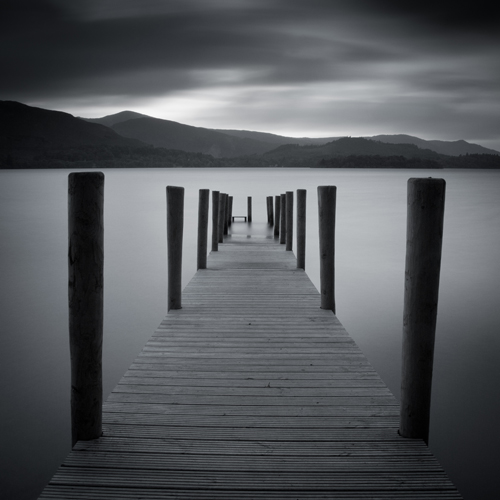
A 1:1 aspect ratio used to add to the simplicity of this image
4:3 – Four-thirds format
This format is the default aspect ratio of cameras that use four-thirds sensors. The image is wider than it is tall, meaning that the eye naturally wants to move left-to-right through the image. However, given that the image is still fairly tall, in relation to the width, this ratio is perfect for leading the eye into the scene through leading lines from foreground interest. The relative height of the image encourages the use of wide-angle focal lengths to capture the depth of a scene within an image, without capturing excess details at the edge of each frame.
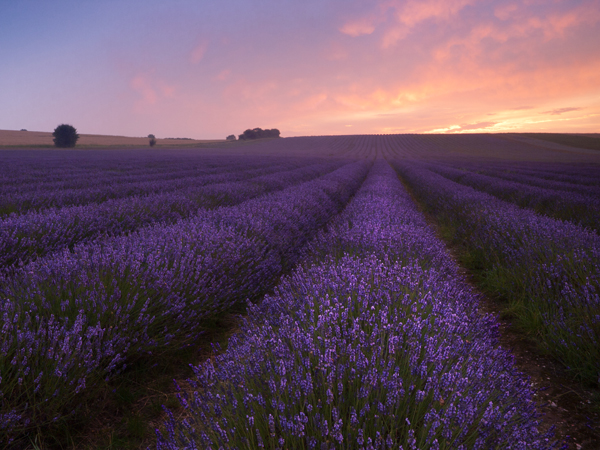
A 4:3 format allows for capturing close foreground detail and leading lines to draw the eye into the image
6:4 – 35 mm format (also called 3:2)
This is the default aspect ratio for 35 mm film, and therefore for full frame and APS-C sensors used in most Nikon/Canon cameras. The width of the image is significantly wider than the height that, again, encourages reading through the image from left-to-right, meaning diagonal leading lines can work a treat. A limitation of this aspect ratio is that the height is that much shorter in relation to the width, meaning that capturing foreground detail using a wide-angle lens becomes more difficult due to the limited vertical space with which to work. It can cause the subjects within the frame to become too disparate and therefore lose impact. The 6:4 ratio can however be a format that is suited to capturing scenes where there is little to no foreground interest, with mid-range focal lengths (e.g. 35 mm).
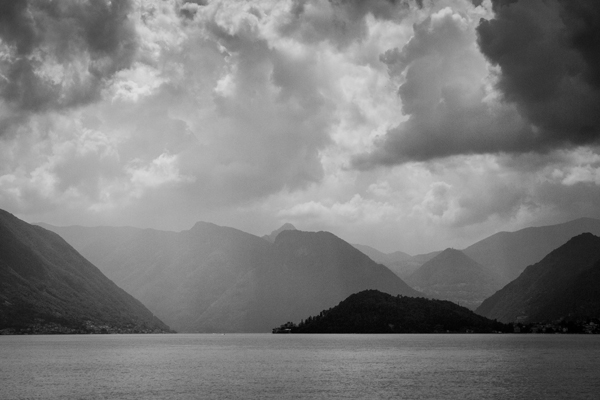
A 6:4 aspect ratio is used here as no close foreground detail is being captured, yet the scene still benefits from a wide aspect
16:9 – widescreen panoramic
This format was supported in film by the advanced photo system (APS) on its introduction and has recently become more popular due to the prevalence of 16:9 aspect ratio displays in the home – tvs, computer monitors, mobile devices. With this format, the width of the image is dominant, meaning leading the viewer in from the foreground is difficult, but the format is ideally suited to presenting portions of landscape scenes captured with longer focal lengths (i.e. zoom lenses) from a distance.
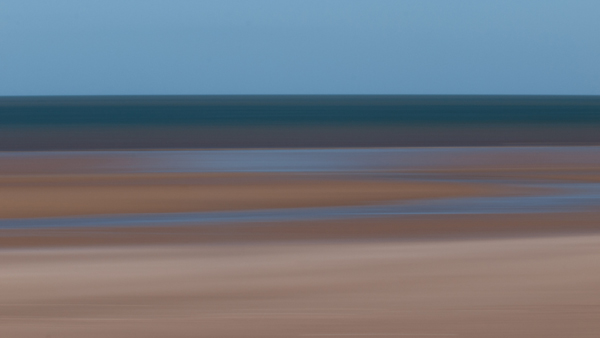
A wide and narrow 16:9 format was used here to emphasise the horizontal bands of colour
12:6 or 18:6 – panoramic (also called 2:1 or 3:1)
I’ve chosen to adopt 12:6 or 18:6 as the panoramic format here for a few reasons. Both 2:1 and 3:1 seem to be fairly well supported in that panoramic picture frame options are typically either 2:1 or 3:1. 2:1 is a panoramic format supported by a number of medium format film cameras and 3:1 was supported by the APS. Typically, panoramic ratios will be used to present the result of stitching 2 or more images together – it’s quite challenging to capture a 3:1 aspect ratio image from one frame and it sill be large enough to print at any meaningful size – and often frames to be stitched will have been captured using a longer focal length in order to pick out details distant in the landscape. There is no real option of including foreground detail here.
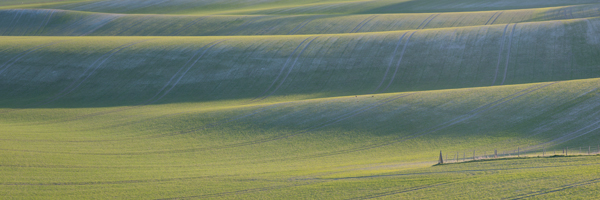
An ultra-wide 18:6 (3:1) aspect ratio was used to present this panorama of 7 stitched images, captured using a focal length of approx. 140 mm
‘Portrait’ mode
I’m aware that I’ve discussed a number of different aspect ratios in the ‘landscape’ format and not in ‘portrait’ format. That is because I believe the options for successful presentation of landscapes in ‘portrait’ format to be much fewer in number. For a landscape to work, you need to balance the composition throughout a frame and aspect ratios such as 6;4 make that very difficult due to the image being too tall, relative to its width. For ‘portrait’ landscapes to work, fatter rectangles such as 4:3, 7:6 or 5:4 are ideal, 5:4 being heavily used by professional landscape photographers using medium and large format cameras. These formats allow the eye to be taken through an image, still from-left-to-right, without having an excess amount of sky putting the frame off-balance.
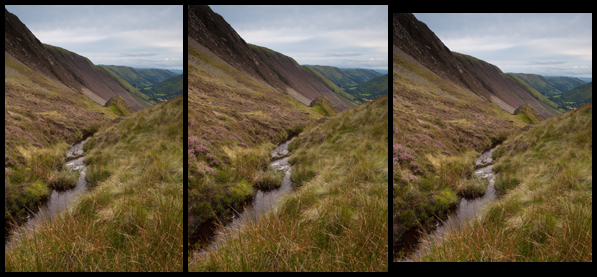
From left to right: 6:4, 4:3, 5:4. Which one looks best?
Conclusion
Whilst I have tried to describe specific uses to certain aspect ratios, I am aware that not all scenes will follow the suggestions I’ve made, and some images may well work in one ratio, not another, contrary to what I’ve suggested.
However, I’m hoping this introduction to aspect ratios will encourage you to think about them when composing your shot, before pressing the shutter. It isn’t always ideal to fill the frame of your camera with the landscape in front of you, and knowing that the aspect ratio you choose is not dictated by which camera you use means you may be able to use them effectively to boost the impact of your landscape photographs.
Post originally from: Digital Photography Tips.
Check out our more Photography Tips at Photography Tips for Beginners, Portrait Photography Tips and Wedding Photography Tips.
Aspect Ratios in Landscape Photography


Digital Photography School


 Alpenglow is often misunderstood. More accurately, certain lighting conditions are labeled as alpenglow when they are not, in fact.
 Some people call direct light hitting a distant peak alpenglow, while they stand in the shadows of a valley (i.e. image at right). While this isn’t technically correct, it’s important not to start an internet flame war about it (hint: that means not in the comments section of this post, either, although legitimate debate is always welcome). If you find yourself getting in a tizzy about someone mislabeling Alps glowing from direct sunlight, instead of indirect sunlight, it might be time to step away from the computer and go shoot some photos. It’s just not worth the headache, both situations make for excellent photos.
