Blog

  • Why the Fujifilm X100V is one photographer’s perfect camera for the streets

    Introduction

    Recently, Fujifilm released its fifth-generation Fujifilm X100V camera, an update that has been two years in the making. By now there are a lot of reviews out there, but my goal here is to focus on why I believe this is the best camera on the market for street photography. The X100V works really well as an everyday travel camera and even as a daily a cityscape/architecture camera, but I think that street photography is in the camera’s DNA.

    I’ve been using the X100 since the first version, released in 2011, as my everyday camera and my primary street photography camera. Since then, it has transformed the way that I work as well as the quality of my work. Full disclosure: Fujifilm provided me with a loaner camera to review.

    How the original X100 transformed street photography

    The original X100 rocked the photography world in 2011. It embraced the design and ergonomics of old rangefinder film cameras and combined them with a cutting edge hybrid viewfinder and excellent image quality. And the cost was fairly affordable considering everything that was packed inside it.

    While a few other camera companies had come close, no company had yet to put together such a small, tight, and refined (after some firmware updates, admittedly) street photography camera. Many photographers began to ditch their SLRs and prime lenses for the X100 and its later models.

    And while many companies have created incredible cameras for street photography, most of them have a significant flaw or two that hold them back in some way (or they cost $ 10,000). I still don’t believe there is a camera company out there that has put together the entire package for street photographers in the way that Fujifilm has. It continues to lead the pack.

    What’s new in the X100V?

    The X100V comes with a host improvements over the previous models, including:

    • More reliable autofocusing: This may be the major reason for upgrading the camera for some of you.
    • New 26.1-megapixel sensor (shared by the X-T3): You get a modest resolution bump and much faster readout speeds.
    • Newly weather-resistant body: You will need to purchase an attachment to make the lens itself weather resistant, but I have shot significantly with older versions in the rain with an umbrella and never had an issue with it getting fairly wet. A weather-resistant body would make me even more comfortable in doing so.
    • Newly developed lens: The lens redesign is two years in the making and improves corner sharpness and close-distance focusing.
    • Slightly sleeker design: Streamlined lines and new top and bottom aluminum plates with a satin finish make the camera even more aesthetically appealing.
    • Two-way tilting screen: The screen is so thin, you hardly know it can tilt.
    • Updated hybrid viewfinder with a new OLED panel.
    • 4K Video: For any street photography videos you may want to make.

    Now let’s take a look at why I think the X100V is perfect for street photography.

    Size and ergonomics

    While the benefit of the Fujifilm X100 series is its complete package of features, the size and ergonomics of the camera are what stand out the most for me. With its very compact 23mm (35mm equivalent) lens, the camera is tiny and a pleasure to carry around all day. It is both inconspicuous for street photography and light enough that it allows you to photograph in a quicker and more spontaneous manner.

    The X100V just makes you want to take it outside and walk around all day

    The camera has dials for all the major camera functions, which makes it easy to change your settings on the fly without going into the menus. The viewfinder allows you to move between an optical view and an electronic view, which I do frequently depending on what I am shooting.

    The X100V just makes you want to take it outside and walk around all day. And it’s tough to understate that, because that’s really the key to street photography: getting out there with a camera consistently and having as much fun as possible.

    Image quality

    Part of the genius of the X100-series is the restraint that they showed in building it. The choice to have a fixed lens and an APS-C sensor could have been thought to have been features that held this camera back, but instead, they were the features that defined this camera. Both choices allowed it to hit a perfect mix between size and image quality. The photos that come out of it look great and I easily feel comfortable blowing them up to giant sizes, even at remarkably high ISOs.

    I find that the colors and black and white tones that come out of this camera are nothing short of remarkable, and in recent years Fujifilm has provided a wide variety of color and black and white profiles that allow you to create a variety of looks depending on your style and the particular image you’re working with.

    High ISO and autofocus

    I’ve found the X100V to be a beast for night photography, whether it’s street or architectural. I tested this camera up to ISO 6400, and found the noise was fairly minimal. The photographs were sharp as well. I would certainly be comfortable printing ISO 6400 photographs and I would even be comfortable using ISO 12,800 in a pinch. The level and look of the noise in the newest version of the X100 is something that I could not have imagined even five years ago.

    Mix the ISO capabilities with the size and inconspicuousness of the camera, and shooting street photography at night is so much easier. In general, street photography at night is incredibly hard to do, but this camera speeds you up enough to significantly lessen some of the primary constraints with night street shooting.

    Autofocus, what was originally one of the main issues with the first X100 camera in 2011, is now one of its strengths. The X100V has incredibly reliable autofocusing and performs remarkably well for a camera of this size. It’s still is not as fast as an SLR, of course, but with each new iteration, they get closer.

    Lens(es)

    The Fujifilm X100V comes with the option to purchase 50mm equivalent and 28mm equivalent attachment lenses. I’ve found that 35mm and 50mm primes are my bread-and-butter focal lengths for street photography: wide enough to get close and intimate while showing a lot of background, but not too wide. Many street photographers love to use a 28mm equivalent as well, although that is usually too wide for me unless I am on a very crowded street corner.

    The act of using a prime lens like this has allowed me to capture so many more split-second moments than I would have missed otherwise. With a zoom, I feel like I am a part of the camera, but with a small prime, I feel like the camera is part of me.

    Battery life

    The battery life over the last few versions is remarkably improved, particularly for a camera of this size. I still find that I need three batteries for an active day of shooting, but the battery life has been turned from a detriment to a benefit over the five generations of this camera.

    Street photography settings and tips

    While I think that the silver version of the camera is the prettiest, people tend to notice it frequently. It still works great for street photography, but I suggest getting the black version, which is more inconspicuous and gets fewer comments.

    The X100V has a leaf-shutter, so is already very quiet, but you can disable all other sounds and enable an electronic shutter for completely silent shooting. This is particularly helpful for indoor and especially quiet situations.

    I also lengthen the time that it takes for the camera to go to sleep. I find this option necessary since the camera will go to sleep occasionally just as a fast-moving moment appears out of nowhere The ‘Boost’ option also enables even faster autofocus speeds. Both of these options will significantly reduce the battery life, but with three batteries, you should have more than enough for a full day of busy shooting.

    Street photography accessories

    While Lensmate has not yet released a thumb-grip for the new design of the X100V (here it is for the X100F), I’m sure one is coming soon. This type of thumb grip makes the camera much easier to hold, particularly with one hand.

    I also find that a soft release button makes the camera more comfortable and sensitive to shoot with: My personal favorite is the Abrahamsson Mini Soft Release. Purchase a couple of these because they can unscrew in your bag and get lost easily. I lose one a year usually and I’m very careful.

    The overall aesthetic of Gordy’s camera straps goes very well with the camera and are incredibly comfortable. I typically keep the strap shorter than normal to keep the camera higher on my chest, which makes it easier to shoot quickly with and isn’t bothersome since the camera is so light.

    Conclusion

    The X100 series has been around for almost 10 years now, and it only gets better as Fujifilm works to find smart and subtle ways to improve it and the photos that come out of it without straying from the initial spirit of the camera.

    I’ve found that the Fujifilm X100V has helped turn me into a more spontaneous street photographer. I can react faster, am able to manipulate the camera easier, and have gotten really in-tune with the fixed focal length. If you decide to get one for yourself, I think you’ll feel much less self-conscious and afraid of getting close and intimate with your photographs.

    The combination of all of these factors has allowed me to capture images that I would not be able to come back with before. And to be honest, I don’t know what camera I would use for street photography if the X100V didn’t exist. I can’t say I would be as happy or comfortable with any other.

    Articles: Digital Photography Review (dpreview.com)

  • How to Use the Luminar 4 Pro Tools Panel

    The post How to Use the Luminar 4 Pro Tools Panel appeared first on Digital Photography School. It was authored by Christian Hoiberg.

    How to Use the Luminar 4 Pro Tools Panel

    Luminar 4 is an intuitive photo editor that’s used by both complete beginners and advanced photographers. Their popular Artificial Intelligence tools such as the AI Sky Replacement and AI Enhance have been talked about a lot, but I want us to take a closer look at the Luminar 4 Pro Tools category.

    Don’t be fooled, though. Despite being named ‘Pro Tools’ and containing more advanced tools, most of them are still easy to use. There aren’t any AI tools in this category, so you will need to do a little more manual work.

    Luminar 4 Pro Tools

    The Professional Tools category is the final tools category marked with the ‘Pro’ icon. Click it to expand the Professional panel and reveal 7 tools.

    Let’s take a closer look at the tools in Luminar 4 Pro Tools panel:

    The Advanced Contrast Tool

    This is a tool that I recommend you learn and take advantage of. In fact, it’s one of my most used tools in Luminar.

    Contrast is important in photography, but it can be difficult to apply it correctly. Globally applying contrast can lead to shadows becoming too dark and highlights becoming too bright.

    Luminar 4 Pro Tools

    The ‘Smart Contrast’ tool (found in the Essentials Tools), does a good job avoiding this by taking the histogram into the equation. But you’ll often want better control over where contrast is introduced.

    That’s where the Advanced Contrast Tool comes in handy. It allows you to manually adjust the amount of contrast introduced to specific zones in the photo.

    I find that the Highlights and Midtones sliders work best for landscape images. Midtones contrast is something I regularly work on in my images and this is an easy method to do so.

    Remember that each image might react differently to these adjustments, so make sure to experiment a little with the sliders before to find what suits a particular image the best.

    The Adjustable Gradient Tool

    The next tool in the Luminar 4 Pro Tools panel is the Adjustable Gradient Tool.

    This tool is useful when you want to make a quick adjustment to the top or bottom part of an image. It’s also a useful tool for those who prefer an easy solution, but it lacks the possibility to create multiple gradients in different orientations (for this you need to create different gradients on individual layers).

    In other words, this is a good tool for more default adjustments if you just need to darken the sky or desaturate the foreground.

    The Adjustable Gradient Tool
    The Adjustable Gradient Tool

    Top/Bottom defines which area of the image gets affected by the adjustments. You can use both at the same time – applying individual adjustment settings to areas above the gradient and below.

    The smoothness of the transition between the two adjustments depends on the distance between the top and bottom line in the gradient.

    Luminar 4 Pro Tools

    The Dodge & Burn Tool

    Dodging & Burning has been around since the beginning of photography. The fact that it’s still used in the digital darkroom is a testament to its effectiveness and a great reason why you could implement it into your post-processing workflow.

    Luminar 4 Pro Tools

    Click Start Painting to reveal the Dodge & Burn tool tab above your image. This is where you choose to Lighten (Dodge), Darken (Burn) or Erase the effect. You can also adjust the brush size and intensity.

    You can switch between the Lighten and Darken brush at any time. If you want to brighten places in the image, simply click the Lighten button and adjust the brush size and strength.

    You can now brush along the areas you want to brighten. Should you accidentally brush somewhere you weren’t supposed to, you can use the Erase option to remove it.

    When you’re finished with dodging and burning, click the Done button. You can use the Overall Amount slider to adjust the global intensity of the adjustment. Reduce the amount to lower the opacity of the adjustment.

    The Dodge & Burn Tool
    Before Dodge & Burn
    The Dodge & Burn Tool
    After Dodge & Burn

    The Color Enhancer Tool

    Several tools impact the colors in your photos, but none of them are quite as advanced as the Color Enhancer Tool. Here you get several options that give you precise control over both the global and local colors.

    You can target Shadows, Midtones, and Highlights individually by selecting them from the Range Selector buttons. Note that the sliders below are linked to the individual tonal region, allowing you to make adjustments to each of them.

    Use the sliders to adjust the balance of the Cyan-Red, Magenta-Green and Yellow-Blue colors. You can use these to, for example, correct the colors in your image or to give a creative look to it.

    Luminar 4 Pro Tools

    The Photo Filter Tool

    Another tool in the Luminar 4 Pro Tools panel is the Photo Filter. You can use this filter to add extra warmth or cool down an image by simulating a color filter placed in front of a camera.

    You can apply it in order to make a sunset sky ‘pop,’ or to give your image an artistic look; it all depends on how you choose to use it.

    Luminar 4 Pro Tools

    The Split Toning Tool

    The final tool found in the Luminar 4 Pro Tools Category is the powerful Split Toning Tool. It can be used to either introduce color toning to Black & White images or to add a color cast to the shadows and highlights individually.

    Amount controls the overall intensity of the applied color toning.

    Highlights Hue lets you adjust the colors found in the bright areas of your image.

    Highlights Saturation increases the intensity of the colors in the bright areas.

    Shadows Hue lets you adjust the colors found in the darker areas of your image.

    Shadows Saturation increases the intensity of the colors in the darker areas.

    Balance shifts the balance between highlights and shadows and how they’re affected.

    The Split Toning Tool
    Before Split Toning
    The Split Toning Tool
    After Split Toning

    Conclusion

    The Luminar 4 Pro Tools category contains a bunch of powerful tools that can help take your post-processing to the next level. There’s no need to be intimidated because of its name. However, I do recommend spending some time playing and experimenting with the tools.

    Several of the tools can quickly become a bit ‘too much’ and need to be applied with some caution. However, when used right, these are the tools that can help your images stand out from the crowd.

    Are you using Luminar 4 and would like to learn how you can create professional-looking images with it? Then make sure to have a look at my popular eBook ‘A Photographer’s Guide to Luminar 4′. Here you’ll learn everything you need about mastering this popular photo-editor.

    If you have any questions or comments, pop them into the comments section.

    The post How to Use the Luminar 4 Pro Tools Panel appeared first on Digital Photography School. It was authored by Christian Hoiberg.


    Digital Photography School

  • The Canon EOS R5 Will Be a 5D Series Mirrorless Camera

    The post The Canon EOS R5 Will Be a 5D Series Mirrorless Camera appeared first on Digital Photography School. It was authored by Jaymes Dempsey.

    The Canon EOS R5 Will Be a 5D Series Mirrorless Camera News

    The Canon EOS R5 has been making waves in recent months, ever since Canon officially confirmed several of its features, including 20 frames-per-second shooting speed, true 8K video, and in-body image stabilization.

    However, despite such tidbits, we were in the dark about a number of EOS R5 characteristics, including its price, its resolution, and its position in the Canon mirrorless lineup.

    Until today.

    While Canon has yet to tell us the R5’s price and megapixel count, we have something that could be just as valuable:

    That the EOS R5 is a “5-series” camera. In other words, the R5 is designed for the same users as the Canon 5D Mark IV, Canon’s professional/semi-professional body with all-around capabilities.

    This comes straight from Canon’s Product Marketing Specialist, David Parry, whose thoughts on the EOS R5 were published in an interview with TechRadar.

    When asked about the EOS R5 design, Parry explained that “because this is a 5-series, more people at that kind of level will expect functions similar to what you get on a 5D.”

    Parry went on to say that the EOS R5 is “aimed at [the 5D] level of the market,” though it “isn’t a replacement for the 5D Mark IV or anything like that. But this is a mirrorless 5-series, it’s aimed at that segment of the market.”

    What does this mean?

    For one, the price tag on the EOS R5 is likely to be in the low $ 3000 USD range (comparable to that of the 5D Mark IV at the time of release). Though it’s possible that the edition of some advanced features, such as IBIS and 8K video, will push the price up to the $ 3500-3800 mark.

    You can also expect a similar level of weather sealing to the 5D Mark IV, a camera that’s quite tough, and a resolution of at least 30 MP (but probably significantly higher).

    And the EOS R5 should be an all-around professional body, good for landscape photographers, wildlife photographers, portrait photographers, product photographers, and more.

    In terms of resolution, assuming the 5D Mark IV offers an aspect ratio similar to that of UHD or Cinema 4K, the EOS R5 must feature 33 MP or more. The 45 MP rumor that recently circulated seems plausible and would be a significant bump up from both the EOS R’s and 5D Mark IV’s 30 MP sensors.

    One last thing to bear in mind:

    While the EOS R5 was expected to ship this summer, supply chain problems due to the novel coronavirus may delay this launch. At worst, you can expect the EOS R5 before the year is out.

    Now over to you:

    Would you take the EOS R5 over the 5D Mark IV? What are your thoughts about the camera that the EOS R5 is shaping up to be? Let me know in the comments!

    Note: There is a poll embedded within this post, please visit the site to participate in this post’s poll.

    The post The Canon EOS R5 Will Be a 5D Series Mirrorless Camera appeared first on Digital Photography School. It was authored by Jaymes Dempsey.


    Digital Photography School

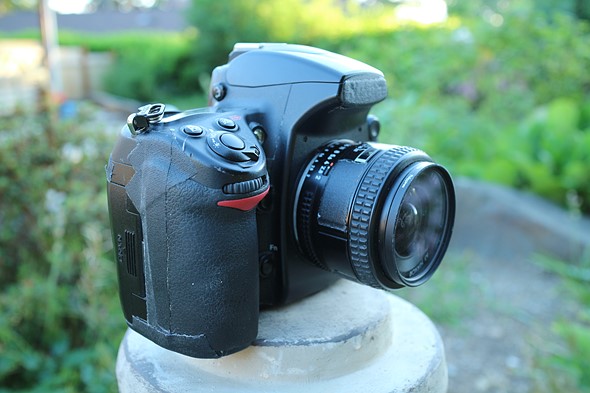
  • The gear that changed my (photographic) life: Nikon’s 35mm F2 AF-D

    My workhorse combo for many years (with a cleaner UV filter, I promise).

    I finished my undergraduate degree in visual journalism using a Nikon D80 while many of my peers were using Nikon’s D90, D300 and D700 cameras. I was, shall we say, a bit jealous. The change in overall image quality from the switchover of 10MP CCD sensors to 12MP CMOS sensors in all of Nikon’s camera bodies (both APS-C and full-frame) wasn’t lost on me, and I couldn’t help but think one of those cameras was really the key to making me a better photographer.

    They weren’t. I got a fancy, brand-new D7000 when I graduated and got my first real job, and a very well-used full-frame D700 after that. They were great cameras (I still have that D700), but it wasn’t so much the cameras that helped me grow. It was my embracing of prime lenses that pushed me photographically, and chief among them, the Nikkor 35mm F2 AF-D lens which was all but glued to my D700 for years.

    ISO 200 | 1/160 sec | F2.8

    Up until this point, I thought I needed a decent wide-aperture zoom to cover everything. I felt I needed the versatility of varied focal lengths, and the idea of having a zoom became a crutch I leaned on. The F2.8 constant aperture on the Promaster 17-50mm lens (I swear, all the reviews said it was just a rebadged Tamron) mounted to my D80 helped during Bellingham, WA’s interminably short and dark winter days, but ultimately, it was $ 250 USD down the drain for my photographic journey.

    Why? Because I spent so much time shooting at the wide end of the zoom range, trying to fit everything in and capture every essence of the scene in each photograph. By looking at the broader picture, I was missing some of the details.

    Once I got that D700 and figured I needed some lenses made for it, I picked up a secondhand 35mm F2 on a whim and discovered that – for myself – I had been shooting photographs wrong a lot of the time.


    Nikon 35mm F2 AF-D sample gallery

    $ (document).ready(function() { SampleGalleryV2({“containerId”:”embeddedSampleGallery_6642767826″,”galleryId”:”6642767826″,”isEmbeddedWidget”:true,”selectedImageIndex”:0,”isMobile”:false}) });


    Framing is everything. We ‘crop’ just about everything in our lives, whether we want to admit it or not. This is a philosophical debate in and of itself, but pretending we’ve come out on the other side of that debate, I quickly found that 35mm lenses provide my eyes with a sense of ‘here’s the most important thing in the scene, but with just the right amount of context’. The photos coming out of this lens and camera combo just felt right.

    When I twisted my 35mm F2 D lens onto my D700 and peered through the viewfinder, I found that instead of trying to fit everything in a 26-28mm equivalent frame, I needed to pick-and-choose-and-layer things into my 35mm equivalent view. My photographs improved because of that. I thought to myself, this is a great way to document the world in front of me. I can get used to figuring out how to cut out the ‘fat’ in the image, and focus on the most important bits.

    ISO 200 | 1/1000 sec | F8

    Fast forward many years, and I still tend to judge a new camera system by whether or not it has a decent and affordable 35mm equivalent prime-lens option. I know that it’s not to everyone’s taste (sorry, Chris, I know you hate 35mm), but with the 35mm F2, my D700 was my carry-everywhere camera for years, and I can honestly look back on my time with it and realize how it helped make me the photographer I am today.


    If you have a piece of gear that you’d like to write about, we’d love to hear from you – and you might even get featured on the DPReview homepage. Leave us a short note in the comments and if you have a longer story to tell, send it to us, and we’ll take it from there.

    Articles: Digital Photography Review (dpreview.com)

  • Pet Photography 101 – video

    The post Pet Photography 101 – video appeared first on Digital Photography School. It was authored by Caz Nowaczyk.

    Taking photos of pets can be tricky. In this video, Matt Granger gives you some great tips to get better photos of your furry friends.

    1. Establish the scene

    Decide on what you want in the scene. Less is generally more, so you may just decide on a nice clean background to really let your pet shine.

    2. Use sufficient depth of field and shutter speed.

    Ensure you have a wide enough depth of field to get your pet’s entire face in focus. Also, use a fast shutter speed. If your shutter speed is too slow, you may end up with some blur if your pet moves suddenly (and we all know they do!).

    Use a flash so that you get enough light into the scene. That way, you can keep your shutter speed fast, and your aperture wide.

    Alternatively, consider photographing them outdoors in sunlight to really make their fur and eyes shine.

    3. Bribery

    You need to get your pet where you want them to be for the shot. To do this, you may need to use a little bribery. This can come in the form of treats.

    Have your camera set and your focus ready, and once they get into position, you can fire off some shots knowing that they will be in focus.

    4. Get their attention

    Once you have bribed them into the position, you need to get their attention so that they look in the direction of the camera.

    You know your pet, so use whatever you know will get their attaention – be it their favorite toy, or simply tapping the lens hood.

    5. Be patient, and review your shots

    Don’t set up a scene that is really unnatural for your pet. Use something that they are used to sitting on so that they are comfortable, and so you are not forcing the scene.

    Don’t always expect to get it right on the first attempt. Take many shots to get the one you like.

    And, moreover, have fun with your furry friends!

    You may also like:

    • How to get the “Money Shot” in Pet Photography
    • 9 Pet Photography Tips
    • Photoshop: Red Eye Fix for Difficult Cases in People and Pets
    • Five Things You Need to Know Before Starting a Pet Photography Business
    • 8 Tips for Better Pet Photography

    The post Pet Photography 101 – video appeared first on Digital Photography School. It was authored by Caz Nowaczyk.


    Digital Photography School

  • DPReview TV: Mirrorless and DSLR microphone pre-amp shootout

    We invited a professional audio engineer to test the microphone pre-amps in cameras from Canon, Nikon, Sony, Panasonic, Fujifilm and Olympus. Find out which ones deliver the best sound.

    Subscribe to our YouTube channel to get new episodes of DPReview TV every week.

    • Introduction
    • What is a pre-amp?
    • The cameras we tested
    • Recording an ideal signal
    • Recording and boosting a weak signal
    • Recording a hot signal
    • The rankings: from worst to first
    • Conclusion

    Articles: Digital Photography Review (dpreview.com)

  • Affinity Photo is Available for a Three Month Free Trial

    The post Affinity Photo is Available for a Three Month Free Trial appeared first on Digital Photography School. It was authored by Jaymes Dempsey.

    Affinity Photo is Available for a Three Month Free Trial featured image

    As coronavirus continues to take its toll on artists and designers everywhere, Serif has decided to act.

    The company announced that their software, including Affinity Photo, will sell with a steep 50% discount, taking the normally inexpensive programs down to bargain-cheap levels:

    $ 24.99 USD for Affinity Photo on desktop (either Mac or Windows), and just $ 9.99 USD for Affinity Photo on iPad.

    And that’s not all:

    Serif has also announced a 90 day free trial on all Affinity software. This means that anyone struggling to afford editing software during the coronavirus pandemic can use Affinity Photo for free. There’s no catch; you can try the software, with all features included, for the next three months.

    Affinity Photo is currently on sale

    As the Serif Managing Director explained, “[H]opefully these things will make life a little easier for people who rely on creative software to make a living but may be stuck at home without access to their usual tools, or for students who might suddenly be without access to their Affinity apps on their personal devices.”

    For those of you unfamiliar with Affinity Photo, it’s one of the most popular Photoshop alternatives around. It’s known for its full-featured, layer-based software, sleek interface, and excellent price.

    In fact, plenty of creatives have abandoned Adobe for Serif, given that the Serif program is comparable in its features and noticeably cheaper.

    In some ways, the standard Affinity price (and the current, even lower, price) is unbelievable, because Affinity Photo just offers so much. The software comes with basic adjustment capabilities, but you also get advanced features such as focus stacking and HDR merging, plus a useful in-built RAW editor.

    So if you’re someone who’s struggling to pay for your current software, or you’re looking for a way out of Adobe’s subscription model, or you just want to take advantage of a tremendous deal, then I recommend you head over to the Affinity website now.

    Chances are that you’ll love Affinity Photo.

    Now over to you:

    Are there any other Photoshop alternatives that you’d recommend? If you’ve already started using Affinity Photo, what do you think of it?

    Share your thoughts in the comments!

    The post Affinity Photo is Available for a Three Month Free Trial appeared first on Digital Photography School. It was authored by Jaymes Dempsey.


    Digital Photography School

  • Film Fridays: 20 film cameras worth buying right now

    The Canon T90 is just one of the 20 film cameras worth buying right now. Check out Analog Gems – part 1 and Analog Gems – part 2 to view them all.
    Photo: Dan Bracaglia

    Happy Film Friday! In the spirit of celebrating all things analog, we felt today was the perfect time to take another look at our two popular film camera buying guides. These guides are chock full of cameras that are easy to find on the secondhand market in good working order, and many of them were included as staff and reader favorites. So if you’re a first-time camera buyer or simply looking to add to your collection, there’s probably a camera in there for you.

    Analog Gems – part 1: 10 film cameras worth buying

    Analog Gems – part 2: 10 more film cameras worth buying

    Do note: the price of one or two cameras has jumped a good bit since initial publication (we’re looking at you Olympus Stylus Epic). That’s not to say we wouldn’t still recommend these cameras, just be aware of price inflation!

    About Film Fridays: We recently launched an analog forum and in a continuing effort to promote the fun of the medium, we’ll be sharing film-related content on Fridays.

    Articles: Digital Photography Review (dpreview.com)

  • Photography deals, discounts and freebies for making the most of being stuck inside

    As the number of newly-diagnosed Coronavirus cases continues to increase, so do the strict orders to stay home. For some, this means an increase in free time along with a decline in disposable income. Across the photography community, multiple retailers, software manufacturers, teachers and more are offering discounts, extended trials or freebies to help pass the time and (hopefully) make your dollars go a little further in this time of economic downturn.

    We’ve rounded up just a few of the offerings from around the photography world and are sharing some of our favorites below. Keep in mind not all of these specials are specifically made in response to the COVID-19 outbreak, but we’ve included them below, unaffiliated, to ensure as little goes unseen as possible.

    This will be a living list, so as we come across more deals and freebies, we will be adding them to the collection, which is split into two categories: ‘Deals and discounts’ and ‘Classes, courses and webinars.’ If you know of any we’ve missed, please share them in the comments below and we’ll be sure to add them to the list.

    Deals and discounts

    Adobe

    In addition to granting free access to its Creative Cloud suite for qualifying students and educators alike, Adobe is also giving everyone two months of free Creative Cloud to help creatives affected by the ongoing pandemic. PetaPixel has shared a thorough guide on how to get your two free months.

    Affinity

    Serif has increased the length of its free trial to 90 days (from 30 days) for its entire Affinity suite and is offering all of its apps, both desktop and mobile, for 50% off. This includes Affinity Designer, Affinity Photo and Affinity Publisher. Additionally, Serif has pledged to ‘engage more than 100 freelance creatives for work, spending the equivalent of our annual commissioning budget in the next three months.’ Serif says more details on that initiative will be announced soon and has in the meantime shared a letter regarding this news.

    Adorama

    As always, Adorama has a number of special offers and discounts across various photo gear, as well as a ‘Deal of the Day’ that kicks off with a new product at 10am EST everyday.

    B&H

    B&H too has its own ‘Deal Zone’ that features ‘unbeatable specials.’ Not everything is photo-specific, but you can count on at least two or three photography-specific deals going on every day.

    DaVinci Resolve

    While not exclusive to the COVID-19 pandemic, DaVinci Resolve 16, an inline video editor akin to Adobe Premiere Pro, is free to download for Linux, macOS and Windows computers. Whether you’re looking to cut your Adobe subscription to bring down your monthly bills or simply want to try something new, it’s hard to beat the price of nothing and the app itself is a treat to use, as we’ve been over before.

    DxO

    DxO is slashing prices by up to 30% off through March 31st, including the recently-released DxO PhotoLab 3.2 update as well as its Nik Collection. With the discount, PhotoLab 3.2 and the Nik Collection cost $ 99.99 each, compared to the usual $ 129.99. You can also try out both programs for 30-days with free trials.

    ON1

    ON1 is currently offering 50% off Photo RAW 2020.1, bringing the normal $ 99.99 price down to just $ 49.99. ON1 is also offering 50% off its ‘Gold Package’ version of Photo RAW 2020.1, which includes the program, 50 fine art texture overlays, the ON1 Foundations video course, a one-year SmugMug Portfolio membership (normally a $ 180 value), as well as a pack of presets, LUTs and ‘styles.’ You can find both the standard download and the ‘Gold Package’ download at ON1’s online store. The deals end March 31, so you only have a few days left to snag this deal.

    Skylum

    Skylum is currently offering Luminar 4.2 and Aurora HDR as a bundle for $ 149, a $ 39 savings over the usual price. In order to see the deal, visit the Aurora HDR product page, click ‘Buy Now’ and scroll down to see the bundle with Luminar 4.

    Classes, courses and webinars

    Professional Photographers of America

    As we covered earlier this week, Professional Photographers of America is currently offering its library of more than 1,100 courses for free. Usually these classes are limited to paying PPA members, but to help photographers and creatives affected by the COVID-19 pandemic, PPA has temporarily opened them up for all.

    Advanced Aerial Photography with Vic Moss

    In a webinar scheduled for this Thursday, March 26th, at 4:00 PM MST (6:00 PM EST), Drone U’s Vic Moss shares important lessons learned through his 30-plus years of experience as a photographer and 6-plus years operating drones.

    ‘Drone U has decided to offer some free courses and webinars during this time to give people an outlet. Many of us are cooped up and still need a creative outlet. Now is a good time to hone our skillsets, so Drone U thought we’d do this. We’re all in this together, so let’s get through it together,’ Moss tells DPReview.

    Here are a few concepts that will be covered:

    • The exposure triangle and how the three parts work together (ISO, f-stop, shutter speed)
    • Megapixel vs. resolution: how are they different? Or are they?
    • The basics of composition
    • How to use the histogram to enhance your images
    • HDR and some basic editing concepts

    While the webinar will be available for replay after it’s recorded, the live session offers attendees the opportunity to ask questions. Register here.

    Introduction to Aerial Videography: Creative Direction for Drone Filming

    This course is offered for free through Skillshare. All you need to do is create a free account to access a 2-month trial that can be canceled (it would be wise to set a reminder if you’re not interested in becoming a full-time member). Drew Roberts and Nathan Labruzza of Los Angeles-based Wild Rabbit Aerials, have created footage for major car companies including GMC, Ford, and Toyota, a Super Bowl ad for SodaStream, and footage for numerous feature film productions.

    The duo walks through the basics of aerial cinematography including how to get started from the ground up. They share some hard-learned lessons from their years of experience, how they conduct the simplest to most complex shoots and run through the post-production process. Register for this course through a free Skillshare account here.

    Various Beginner + Intermediate Photography Courses

    Brit + Co, a lifestyle and DIY-based site, is offering all of their courses, which usually range from $ 27 – $ 107 each, for free through March 31st. Simply use the all-caps promo code ‘SELFCARE’ without the quotes at checkout. Click on ‘Have a Coupon?’ and you’ll automatically be registered without having to use your credit card or PayPal account.

    Relevant courses include ‘How to Become a Wedding Photographer,’Phone Photography: Capturing Your Travels,’Family Photography: Capturing Your Little Ones, and their ‘Wanderlust Photography Bundle’ which gives an introduction to travel photography and walks you through using photo editing apps. ‘Some of us can’t work and are catching a serious case of cabin fever. All of us want to stay inspired, creative, and take care of ourselves,’ reads the official blog post introducing the initiative.

    Adobe Premiere Pro, Lightroom, Photoshop, and After Effects Tutorials

    YouTube hosts millions of free tutorials from creators around the globe. As with any major platform that goes largely unmoderated, save for removing objectionable content, the quality of information offered can vary. Justin Odisho has consistently created high-caliber content around showing creatives how to use Adobe products.

    Adobe Premiere Pro is inarguably an industry standard when it comes to video editing software. In a series of 187 videos, Odisho walks you through everything from color correction to creating effects. Lightroom, Photoshop, and After Effects users will also find a wealth of information to master their respective crafts.

    Kelby One

    Scott Kelby’s Kelby One program is also offering free weekly webinars and memberships to some of its most popular classes. In a notification on the Kelby One website, it reads ‘We hope these resources help during this trying time as you work from home or self-quarantine for safety.’

    Articles: Digital Photography Review (dpreview.com)

  • Loupedeck’s latest software update adds new Profile Creator tool for custom profiles

    The company known for its video and image editing consoles, Loupedeck, has announced a software update that enables users to create custom profiles for third-party applications. With the new Loupedeck Profile Creator, Loupedeck CT owners can create various custom profiles for all of the software they use, including for applications like Davinci Resolve, Logic Pro X, Capture One and more.

    According to Loupedeck, creators don’t need any programming skills to create custom profiles for their favorite applications. Profile Creator can be used for adjustments and actions using everything from mouse movements to shortcuts, macros, keys, run applications, links and text. The new capability is found in software version 3.2 and higher.

    Users can find a series of custom profiles for popular applications available to download on the Loupedeck website here. The company’s Founder and CEO Mikko Kesti explained, ‘The possibility for all users to create custom profiles is an important step in delivering an increased level of functionality and flexibility the digital creator community requires with their editing tools.’

    In addition to announcing the Profile Creator’s Custom Profiles feature, Loupedeck has also revealed that its Creative Tool now has native integration for Streamlabs, a live streaming app that is popular with creators. Going forward, Loupedeck CT owners will be able to use the console to directly control their stream, including the ability to adjust audio, quickly mute and skip content, hide and unhide sources, and more.

    Kesti calls the native integration a ‘natural addition’ to the company’s Creative Tool, which is available to purchase for $ 549. Users who are new to the device can download its companion software from Loupedeck’s website, where the company also offers User Guide downloads for everything from general usage to using Loupedeck CT with specific photo and video applications like Photoshop and Lightroom.

    Articles: Digital Photography Review (dpreview.com)