Blog

  • Fortified Farms: In the Svanti Mountains Every Home is a Castle

    [ By WebUrbanist in Destinations & Sights & Travel. ]

    georgia castle homes

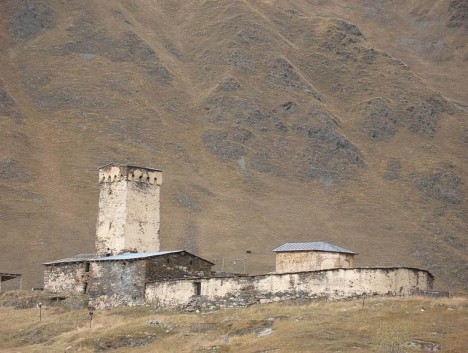
    Facing threats from all sides, the Svans of Georgia became highland gatekeepers of their mountain passes, each distributed dwelling turned into a individually defensible structure.

    georgia defensible mountain homes

    georgia sveti farm estate

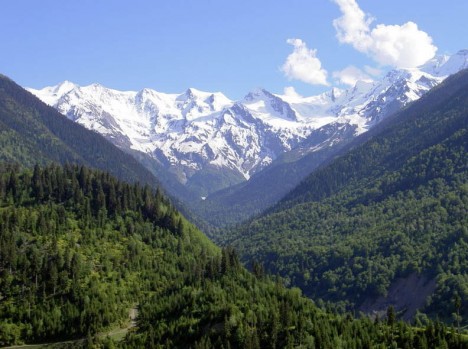
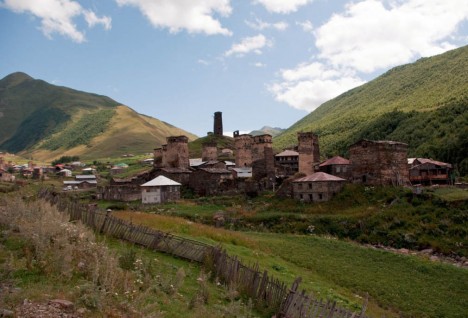
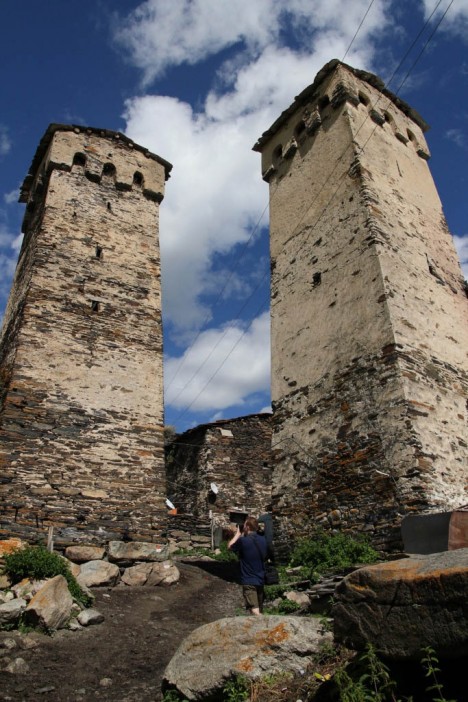
    Spread out across mountainous terrain difficult to encompass with conventional fortifications, many of these ruggedized farmhouses date back over 1,000 years. Some more expansive estates are surrounded by walls with a central tower, while in other more modest homes towers simply jut up from the core structures.

    georgia mountains landscape

    georgia world heritage site

    The history of the Sveti region, with its distinct culture and language, was shaped by strife. “Life was never easy in high Caucasus. Nomads from northern steppes eager to get their hands on the riches of Mesopotamia, and Empires battling for supremacy — Assyrians, Macedonians, Persians, Romans, Byzantines, Arabs, Turks, and Mongols — all clashed with fearless locals. The list of invading armies is nearly endless.”

    georgia fortified farm towers

    As a result of these pressing threats, houses were built to withstand invading (or passing) forces, protecting people, farm animals and other valuables. Rather than retreating behind walls or to a central keep, war-weary residents would simply bar their autonomous semi-castles. Today, many of the distinctive towers that mark the area are still incorporated into the everyday lives of inhabitants. The hundreds of towers that still remain to this day are now protected as part of a UNESCO World Heritage Site. Photos via Wikimedia and by Susan,  deguonis, jan-one and Martijn.Munneke.

    Share on Facebook


    [ By WebUrbanist in Destinations & Sights & Travel. ]

    [ WebUrbanist | Archives | Galleries | Privacy | TOS ]


    WebUrbanist

  • Lytro unveils Immerge, a pro-grade light field VR rig

    Lytro, a company known for its light field cameras and technologies, has introduced Immerge, a professional-grade cinematic virtual reality rig. According to Lytro, this is the first ‘end-to-end’ virtual reality hardware and software solution, with the entire system comprising four primary components: a light field camera array, storage and processing server, an editor, and a video player. Read more

    Articles: Digital Photography Review (dpreview.com)

  • Die imaginierte Welt des Sheldon S.

    Moe © Shel Serkin

    Ein Beitrag von: Shel Serkin

    Seit fünf Jahren bin ich Straßenfotograf und meistens bin ich in New York unterwegs. In dieser Zeit habe ich Tausende Bilder gemacht von New Yorkern, wie sie den Tag verbringen, sei es nun einfach auf der Straße, bei der Arbeit, in der U-Bahn, in ihren Gemeinschaften.
    kwerfeldein – Fotografie Magazin | Fotocommunity

  • Liquid Stop Sign: Emergency Laser Projection on Sheet of Water

    [ By WebUrbanist in Design & Graphics & Branding. ]

    stopcropped

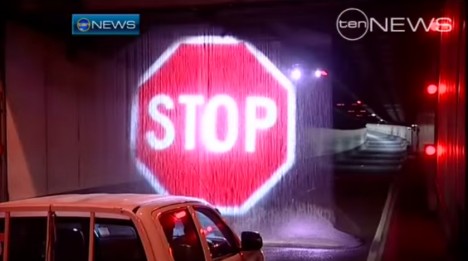
    Serving as a bright and bold last-chance warning for vehicles about to enter tunnels, this wall of water painted turns into a kind of hovering hologram designed to STOP impending drivers from creating or compounding tunnel disaster situations.

    emergency stop lighting

    Dubbed Softstop and deployed first in Australia, the liquid signage does no damage should a car or truck pass through, but still provides an impossible-to-ignore signal for drivers. It is used to warn off too-tall trucks and deter Sydney Harbor Tunnel entry in cases of fires or crashes going on inside the tunnel.

    stop sign photo

    liquid stop sign

    This solution came about after conventional signage failed to warn off drivers in an emergency. “We had a fire in the tunnel,” explains Harbor Tunnel GM Bob Allen, “motorists ignored the warning lights and signs and continued driving towards the fire. These drivers exposed themselves to smoke and toxic fumes from the fire and then to compound the situation they turned around (in a one way tunnel) and drove back out of the tunnel against incoming traffic.”

    floating stop sign

    stop signage

    The wall-of-water solution came about as a collaboration between Laservision, a creative technology firm that designs architectural lighting, and a pump manufacturer: Grundfos.

    Share on Facebook


    [ By WebUrbanist in Design & Graphics & Branding. ]

    [ WebUrbanist | Archives | Galleries | Privacy | TOS ]


    WebUrbanist

  • 2015 Roundup: Long Zoom Compacts

    The Long Zoom Compact category is probably the most diverse of any in our 2015 roundups. Within it are three separate sub-classes of camera, all of which offer 8x optical zoom or greater (up to a whopping 83x). Find out which we recommend. Read more

    Articles: Digital Photography Review (dpreview.com)

  • 10 Tips for Better Landscape Photography

    Landscape photography is a very popular genre and many amateur photographers start their hobbies doing it. There is, however, a lot more to it than just going out somewhere beautiful, putting your camera up to your face, and clicking the shutter button.

    Have you gone out and taken some landscape photos, then found that they didn’t look that good when you got home? Do you get lost when you go out, and don’t know what to photograph, or how? Here are 10 tips to help you get you do better landscape photography.
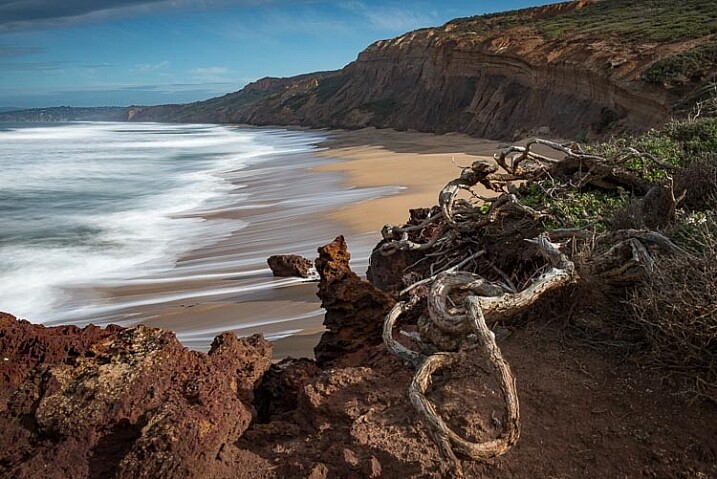
    leanne-cole-ten-tips-landscape-3611

    A bush trying to grow on the edge of some cliffs show how harsh the environment is and leads you to the cliffs.

    1 – Work the scene

    One thing you see a lot of new photographers doing is walking up to a scene, taking one photo, and think they are done. However, a more experienced person will take a lot more photos, and spend time walking around and seeing what they can get from that scene.

    Think about different angles, and different heights. With digital you can take so many photos, and it won’t cost you anything, other than a few minutes. So work the scene, and see what else you can get.

    2 – Leading lines and patterns

    This is something that we all learn from the beginning, find a leading line that will take your viewer into the image. Fences, roads, or anything that is like a line, that starts at the side of the frame, and takes people into your image. It is the invitation to look at the photo.

    Patterns can be a great way attracting attention. If you notice a pattern somewhere, and take a photo of it, there is a good chance that your audience will also find it interesting. Patterns can be anywhere, in the ground, on the bark of trees, how they are planted. They can be fascinating.
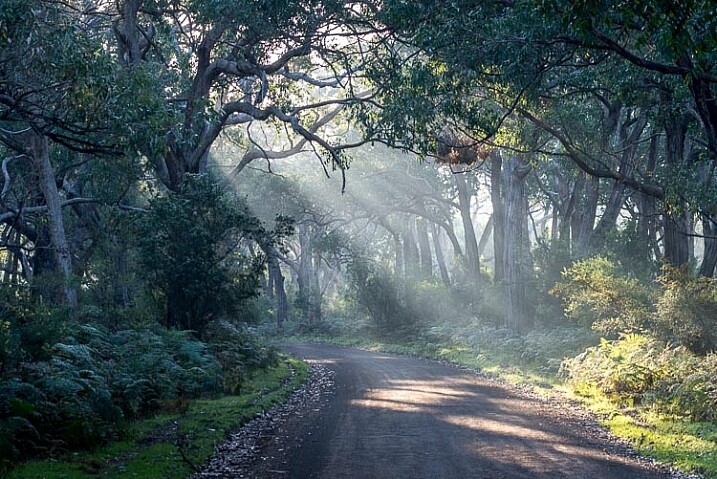
    leanne-cole-ten-tips-landscape-3836

    Roads can be great leading lines to take your viewer into your image.

    3 – Time of day

    This is something that we all learn at the beginning, time of day is important. It is also dependent on the time of the year. Here in Southern Australia you can shoot all day long in winter. The sun is never high in the sky, the shadows are soft, and it is a great time of the year to take photos. On the other hand, summer is terrible. It is hot, the light is harsh, the shadows are sharp, and often the colors in your images can look bleached.

    Think about where you are, and what time of the day is best where you want to take photos. Some people prefer early morning, there aren’t many people around, and you can get what you want before the day starts. Others prefer later in the day, and don’t mind sharing their location.

    Some areas that you want to photograph will be better for sunrise, as you may not be able to get a sunset there. Or it could be the other way around. Many coastal areas on the east coast of Australia mean that is it almost impossible to get a sunset, so you need to get up early and aim for sunrise instead.
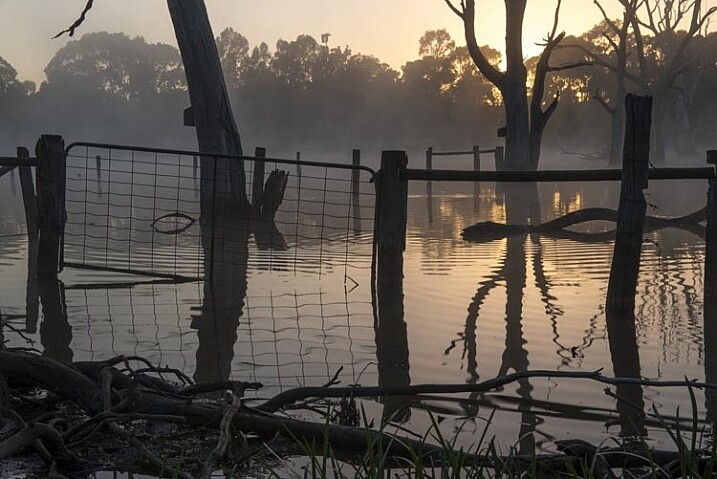
    leanne-cole-ten-tips-landscape-0122

    Early morning can mean sunrise, but at certain times you can also get mist on water.

    4 – Look at your foreground

    The foreground is often forgotten when taking landscape photos, but sometimes what is right in front of you is exactly what you need to make your image stronger.

    Some images of landscapes can be a bit more interesting by adding a small plant or something that is in the front, close to the camera. It can also be a leading point to the scene at the back of the image.
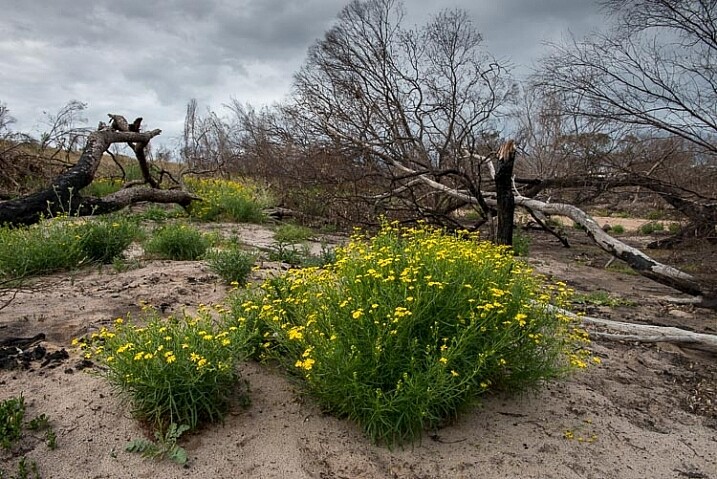
    leanne-cole-ten-tips-landscape-7254

    The foreground plants give interest to the landscape behind.

    5 – Look at what other photographers do

    Without a doubt, one of the best things you can do is to look at other photographers, and take note of what they do. Don’t underestimate how much you can learn by looking at the work of others. Not just good or professional people, but also amateurs, you can see the good and the bad.

    Look work that you like and determine why you like it, exactly what it is that you think makes it work. Can you pinpoint what it is about that image that makes you jealous that you didn’t take it?

    Take notes of images that you don’t think are very good. Analyze them and see what it is that you find isn’t working. Learn from them, and make sure you don’t make the same mistakes.

    6 – Think about the seasons

    It’s very easy to go out one day and take photos of a particular place, then forget it exists, but what about thinking about other times of the year. Some places will look better in summer than they do in winter. Spring could be a time with lots of flowers, while autumn will give you colourful trees.

    Photographing the same place throughout the year can give you a different feeling to your images every time you go there.

    It is also a good idea to think about where you want to take photos, then consider what will be the best season to show it off. The mountains can look sparse and uninspiring in the summer, but in winter they are covered in snow; it adds a different dimension.
    leanne-cole-ten-tips-landscape-1050

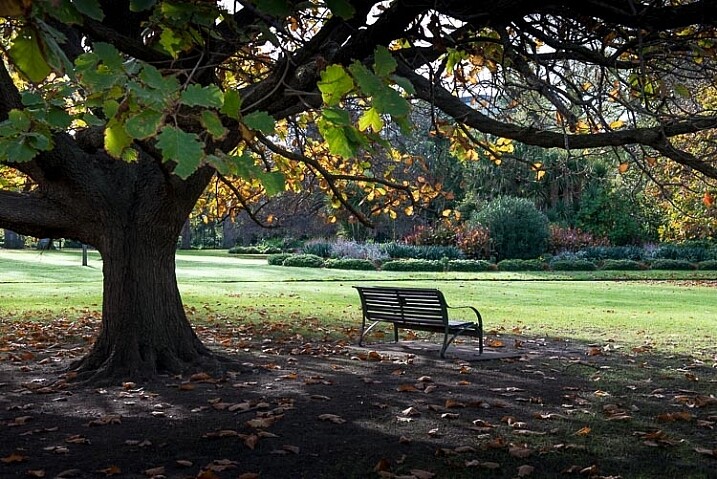
    Autumn can bring lots of color to your landscape photography.

    7 – Look for the smaller landscape

    When you are out, it is very easy to put on a wide angle lens, and take all your photos with it. Most landscapes are wide vistas showing the scene that is before you. But, there are other ways to show what is there. Look around for objects or flora that you can use in the foreground. This is especially good if the subject is in the distance. It can give something interesting in front of your image.

    Try taking a zoom or macro lens with you. You might be able to photograph something like the flora. Don’t just zoom right in on flowers that may be growing on it, try considering the whole plant and where it is situated. It can you give it some context as to its environment. This can help you tell a whole other story at times.

    leanne-cole-ten-tips-landscape-7351

    Flowers trying to grow in sand helps to tell the story of the location.

    8 – What equipment do you need

    You don’t need anything special to photograph landscapes, a camera with a decent lens is enough. You can use a compact camera just as well as a DSLR, it is really up to you.

    If you are using a DSLR then you probably want a wide angle lens, or something a bit longer. Landscape photographers tend to use wide angles more, though many also use up to 200mm lenses as well. You don’t need the best camera that is available, and often it’s the lens choice that will give you the best results.

    A sturdy tripod is good to have. The best advice is to get the best you can afford, don’t skimp on the price, you will regret it later if you do. A remote shutter release is a great piece of kit to have as well, or you can use the self-timer on your camera.

    When you progress, and as you get more skilled at landscapes, the equipment list tends to grow. You will find yourself wanting items like filters for long exposures or better lenses. The list can be endless.

    9 – Tripod: when to use or not

    There is an opinion that if you are a serious landscape photographer, then you will always use a tripod, no matter what. If you are not, then you can’t be sincere about your craft.

    It’s one way of looking at it. But, so many new and experienced photographers, find it can be limiting, or stifle your creative flow; that you can’t move around easily when taking your photos.

    The short answer to this is that you have to feel comfortable when you are doing photography, so there is nothing wrong with not using a tripod. Though you also have to accept that, at times, you may not get the sharpest images – so it’s a trade-off.

    If you are shooting at night then a tripod is a must, especially if you don’t want noisy photos. A tripod means you can use the best settings on your camera to get the highest quality image.

    10 – Look for the story

    There is no denying that some places you go to will seem boring, and you will wonder why on earth you went there. It’s one of those times when you will want to consider other tips here, but one tip that can really help is to find the story of the area.

    Consider where you are, and why you went. Is there some history that you can see that still remains? How can you incorporate that into the image to show the story?

    In many places in Victoria, Australia, you can travel to a town and find very little there. The only thing there might be grain silos, and fields of crops in various stages of growth. Look at the silos up close, and see if you can photograph how long they have been standing there. Look for how they are used. There will always be railway tracks next to them, so shoot how they lead you to the silos (see tip #1 above). Maybe do one from a distance showing the silos standing tall in a flat country. The story becomes all about the silos and that countryside.

    Landscape photography is wonderful, and what you can take photos of is endless. Think about all the tips here and they should help you do your best landscape photography.

    Please share any other tips you have for landscape photography, and your images in the comments below. If you use some of the tips, let me know how they worked out for you.

    googletag.cmd.push(function() {
    tablet_slots.push( googletag.defineSlot( “/1005424/_dPSv4_tab-all-article-bottom_(300×250)”, [300, 250], “pb-ad-78623” ).addService( googletag.pubads() ) ); } );

    googletag.cmd.push(function() {
    mobile_slots.push( googletag.defineSlot( “/1005424/_dPSv4_mob-all-article-bottom_(300×250)”, [300, 250], “pb-ad-78158” ).addService( googletag.pubads() ) ); } );

    The post 10 Tips for Better Landscape Photography by Leanne Cole appeared first on Digital Photography School.


    Digital Photography School
  • 5 Tips for Striking Getting Ready Shots of Brides

    The Bride in her wedding dress, shy and tense, beautiful and alluring. She provides quite a conundrum for a wedding photographer. How does one work towards capturing the emotions that often rush over the bride as she prepares for holy matrimony?

    DPS2

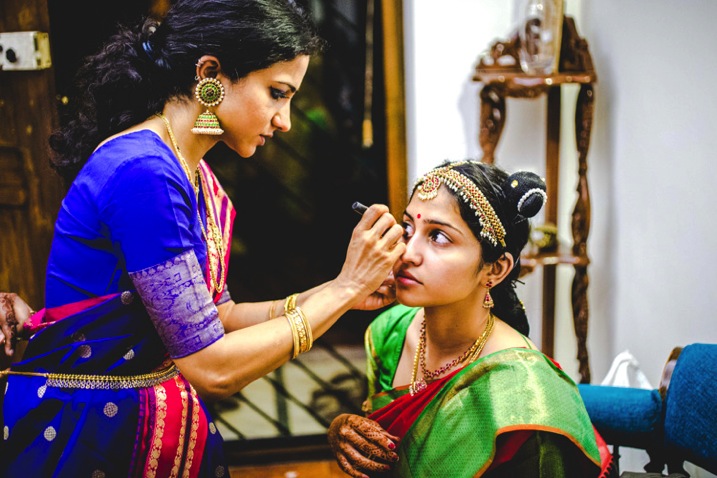
    Over the years that I’ve shot weddings in India, I’ve come to appreciate the Bridal getting ready session. This is the calm before the storm when the bride will look her best, and it is the least interrupted time the photographer has with the bride. Below are a few tips and tricks I’ve honed that help me capture my brides at their best in some pre-wedding getting ready photos:

    1. Work with the most important person in the room.

    The bride typically gets ready in a room in the presence of the make-up artist and supportive sister(s) and friend(s). In this group, the most important person is the make-up artist. Work with him or her to understand their work flow. Is she left handed or right handed? What is the order in which she does her stuff? Does she schedule her breaks??
    All this information is critical for you to capture the best angles, and moments, in the getting ready process. You don’t want to interrupt another wedding professional when she is in her zone. Respect her and together you can make the bride look her best and capture the process.

    DPS1

    2.The Three Perspective Rule

    Every wedding photographer has been taught to capture the subject from multiple perspectives. While I agree with this, I believe there are three specific perspectives that are critical for capturing the bride getting ready. They are:

    The Top Down

    These shots provide a god view of the process and often help focus the viewer’s eye on a specific aspect of the process. Below is a top-down of the eye liner getting done. A lot of clutter in the room (weddings are messy !) can be worked around and simple moments like the addition of lipstick or the adjustment of a dress can be shown with a certain dramatic flourish.

    DPS3

    The Bride’s View

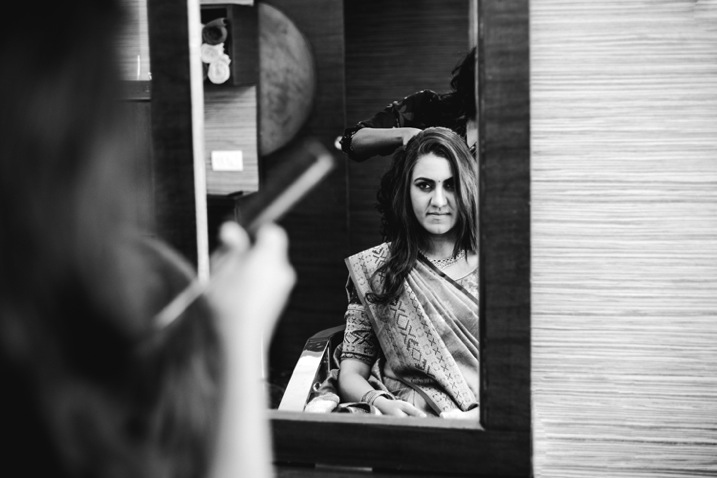
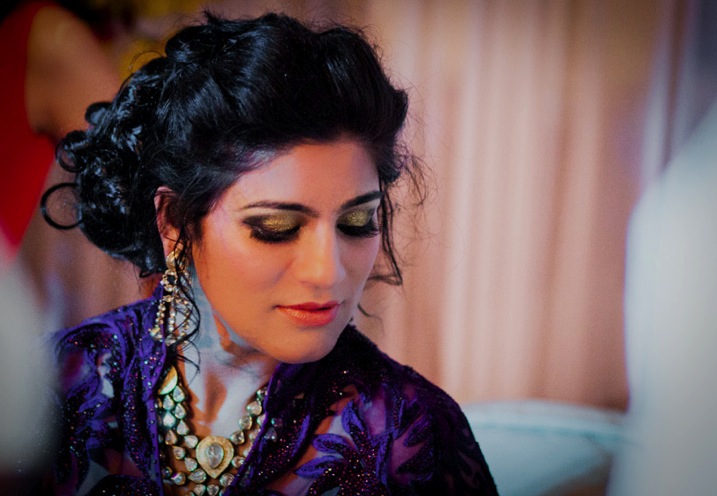
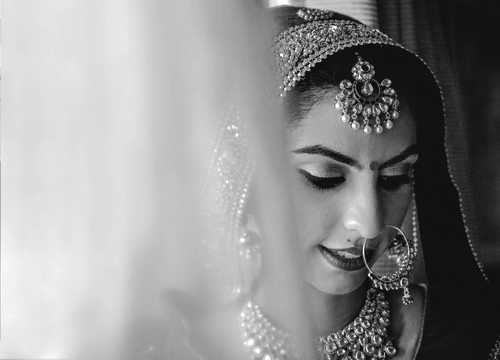
    Do not forget that the most important person after the make-up artist is the bride. It’s important to capture this session from her perspective too. Get down to her level if she is sitting. Imagine what she is going through. Follow her eyes to see what is capturing her precious attention. Make use of a mirror to capture her in a moment of self-reflection. Below is a picture of bride when she is just looking at herself while her friends are helping her with her earrings.

    DPS4

    The Fly on the Wall

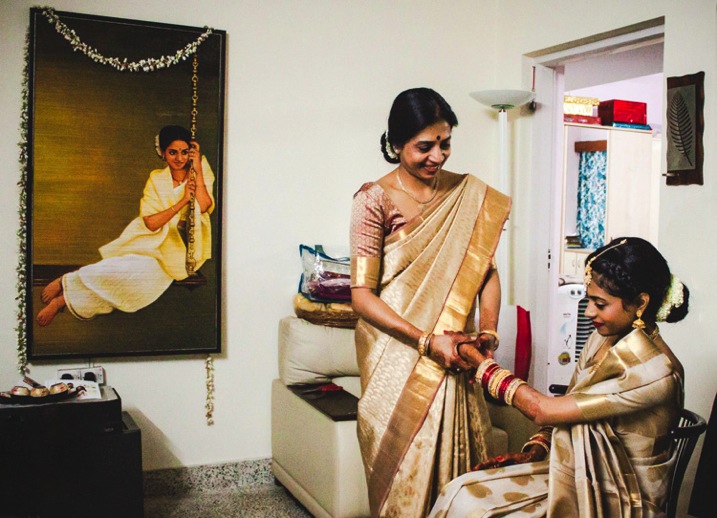
    Remember that clutter I mentioned? That is part of weddings. They are like the handwritings of the bride and her sisters. Try going to the corner of the room with a wide angle lens and capture the confusion and chaos in all its glory. Get on a chair and view the room from above and try to spot what is adding color and personality to the room. Maybe it’s the jewellery spread carelessly on the bed. It could be the mother happily putting bangles on the bride’s arm, or maybe the groom trying to look through the window (it’s happened!).

    DPS5

    3. Expect the Unexpected

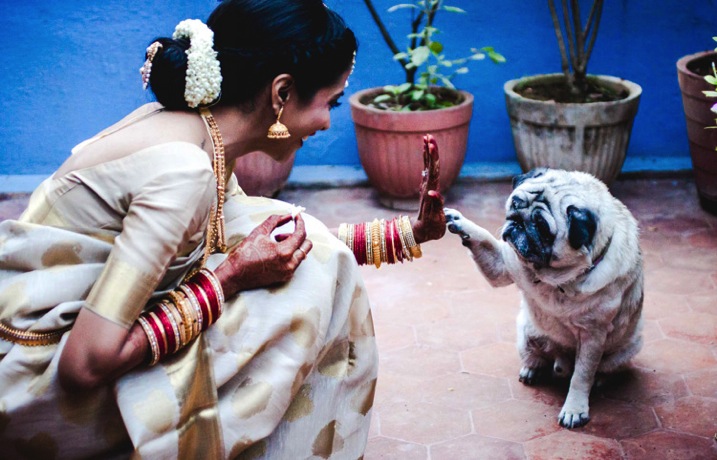
    Wedding photographers should approach the weddings with the attitude of a journalist looking for a scoop. Still, during the getting ready time, it’s easy to let your guard down as everything seems pre-planned, and in motion. Some of my most candid pictures have been taken in moments of delightful serendipity. Below are pictures from different weddings.

    DPS6

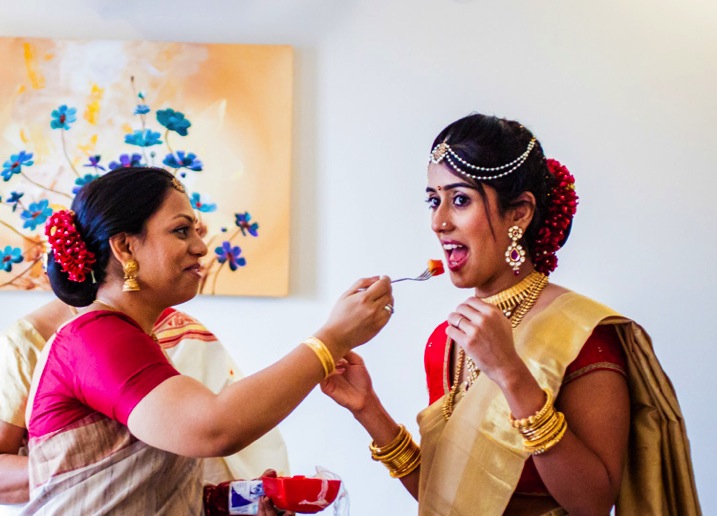
    A sister-in-law feeding the bride minutes before she stepped out

    DPS7

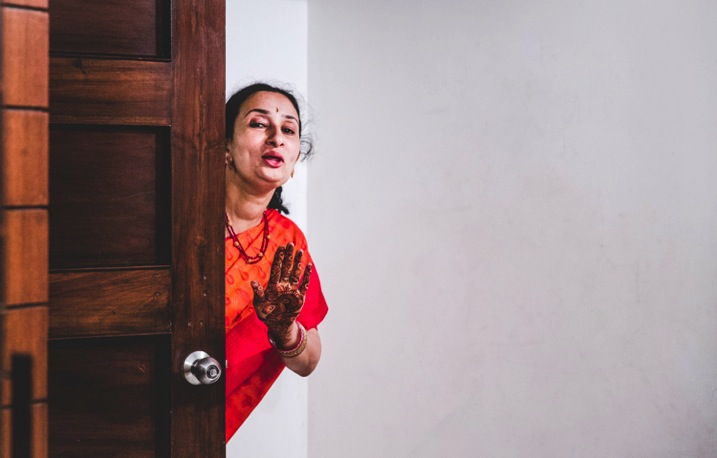
    The bride’s aunt reminding her that she has just five minutes to go

    DPS6b

    And then sometimes the pet just walks in to say the final goodbye!

    4. The Trousseau and Trinkets

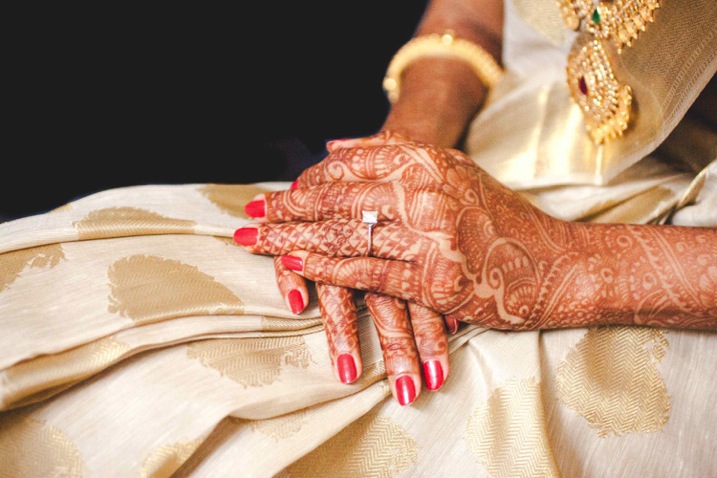
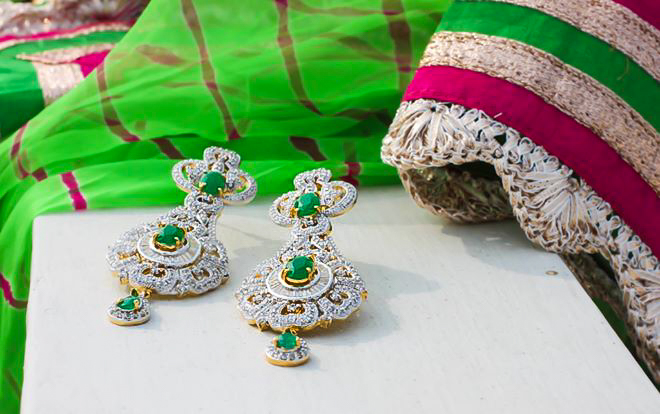
    There are brides that wear a simple white silver bracelet, and others that wear elaborate gold chains, adorned with peacock and mango motifs, that were made nearly a century ago for their grandmother’s wedding. The Wedding Trousseau and the accompanying trinkets say a lot about the personal choice of the bride and her traditions. It is important to capture them with respect, and a certain sensitivity, as these hold meaning for a family more that what we as a person viewing in from outside can appreciate.

    These items could simply be the Wedding Trousseau itself, which the bride, her sister, and friends would have spent weeks agonizing over, and probably spent many woman-hours putting together.

    DPS8b

    DPS8 DPS9


    DPS9b

    5. Lights, Camera, Action!

    Light – what else is there for a photographer to contemplate? The challenge doing portraiture for a bride getting ready is that the event sometimes occurs in a small compact bedroom, studio, or dressing room at the temple, church, or hotel where the wedding is taking place.

    It’s important to understand what the sources of lights in the room are, and perfectly professional to ask the make-up artist and bride to reorient themselves, or the way they face to make the pictures look better.

    Be prepared to use white curtains to bounce of light from your flash or shoot from outside the room through a window to get light right!

    DPS10 DPS11

    I hope you find these tips helpful, whether you are doing wedding photography as a professional, or at a friend or relative’s wedding. Please share your own tips and comments below, as well as your images.

    googletag.cmd.push(function() {
    tablet_slots.push( googletag.defineSlot( “/1005424/_dPSv4_tab-all-article-bottom_(300×250)”, [300, 250], “pb-ad-78623” ).addService( googletag.pubads() ) ); } );

    googletag.cmd.push(function() {
    mobile_slots.push( googletag.defineSlot( “/1005424/_dPSv4_mob-all-article-bottom_(300×250)”, [300, 250], “pb-ad-78158” ).addService( googletag.pubads() ) ); } );

    The post 5 Tips for Striking Getting Ready Shots of Brides by Manvi Gandotra appeared first on Digital Photography School.


    Digital Photography School
  • 5. November 2015

    Das Bild des Tages von: Frank M.

    © Frank M.

    Im Ausblick: Fotojournalismus, nervende Fragen und Steve McCurry.
    kwerfeldein – Fotografie Magazin | Fotocommunity

  • PIX 2015: Chasing light with Joe McNally

    Over the span of a 35-year career as a professional photographer, Joe McNally knows what it means to chase light. Known for his work with studio and off-camera lighting, McNally is just as well-versed in the art of natural light as he is artificial. In his PIX 2015 talk, he discusses the choices he makes about lighting to help bring out the most from his location and subject. Read more
    Articles: Digital Photography Review (dpreview.com)

  • The More the Merrier!Group Photo Tips and Ideas

    What’s better than a photo of a loved one?

    A group photo of a BUNCH of loved ones!

    But simply standing around and saying cheese? Yawn. We rounded up group photo ideas that will have everyone running, dancing, and more.

    Whether you’re shooting pics of your pals or preparing for family holiday cards, you’ll get a kick out of these ideas and their unique results!

    (…)
    Read the rest of The More the Merrier!
    Group Photo Tips and Ideas (658 words)


    © Taylor for Photojojo, 2015. |
    Permalink |
    No comment |
    Add to
    Group Photo Tips and Ideas”>del.icio.us

    Post tags:


    Photojojo