Blog

  • 5 Tips for Doing Photography from a Hot Air Balloon or Biplane

    Do you do most of your shooting with your feet firmly planted on the ground? Camera shake is a basic concept that directs you to take a strong stance, brace your elbows, and keep that camera as still as possible. But what if you are not on the ground? What if you are up in the air? For myself, I would say that 95% of my photography happens on land, and while I get to do some underwater scuba photography sometimes, and that shooting from the sky is something I have only done a couple of times. But I hope that the lessons I have learned will help you, when and if you have that rare opportunity to get up off the ground and photograph the world from new heights.
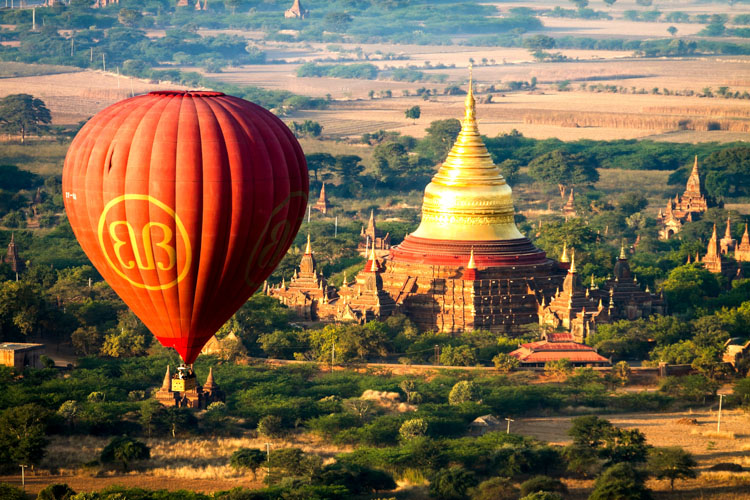
    001 Title

    These tips are inspired by a balloon flight that I had in Bagan, Myanmar. Despite growing up with one of the world’s largest balloon festivals in my backyard (Albuquerque, New Mexico), I had never been in one. I have helped many land, but never been up in a balloon. So in Bagan, when an opportunity presented itself, I couldn’t think of a better way of seeing the over 2,000 temples of the area from the air. Also, I will show some photography examples from a single engine prop plane flight over the Bay Area, California.

    So here are my five tips for doing photography from midair:

    1. There’s limited space – so chose wisely

    In anything defying gravity, whether it be a balloon or a plane, space is always limited. Before going up, there should be a safety briefing, and the pilot has the final say. So talk to the pilot and see if you can get a spot on the corner, or if he knows the best place from which to get a photos. It may not even be where you expect.
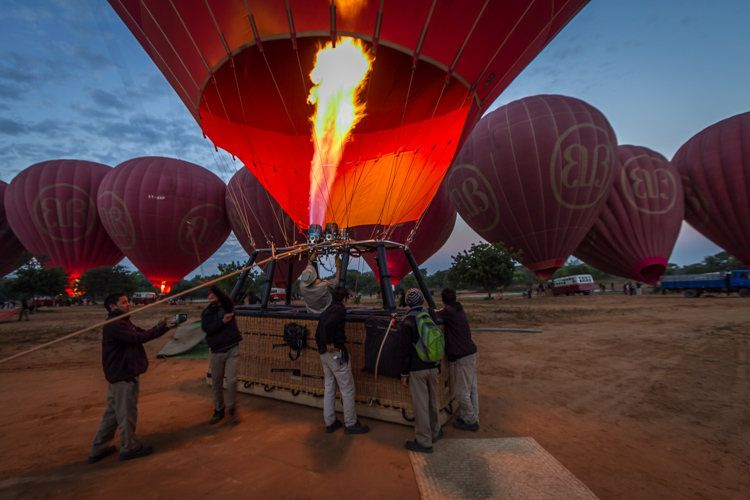
    002 Limited space

    2. The changing light conditions – be prepared

    Most balloon flights start before sunrise, for both romantic notions, along with better flying conditions. But for a photographer that makes our job all the more difficult to capture the early morning darkness, turning into blue, then golden hour, and finally full daylight. So we have four different lighting conditions that need to be captured. If you bring a tripod leave it on the ground. It may be good for a sunrise picture, but getting the balloons or airplanes ready requires work. So there are lots of moving parts, and when you are in the air, you will definitely not need it.

    The tip is really that there are many variables regarding light conditions.  I know it is a little obvious, but in a balloon (or airplane) you are not in a stable environment.  You will be dealing with multiple light conditions in a limited time and it is not so easy to just wake up the next day and fly again, so you need to be prepared for anything.

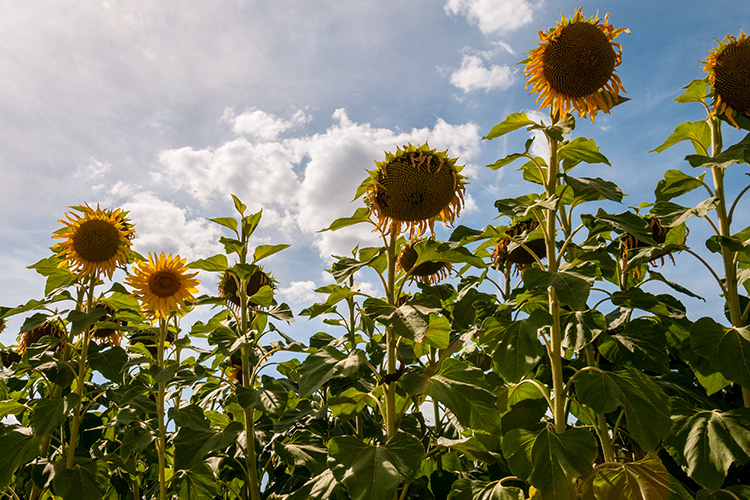
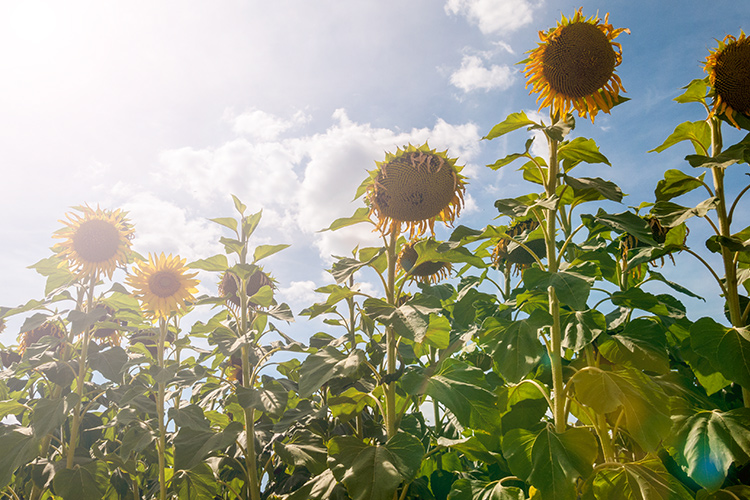
    Bring a flash for fill. Use a gel on your flash to balance the blue or orange natural light. The fill flash is for the people in the balloon. During flight the balloon rotates, thus there are many times when the sun is at your back, being able to fill the shadows with some light is beneficial.
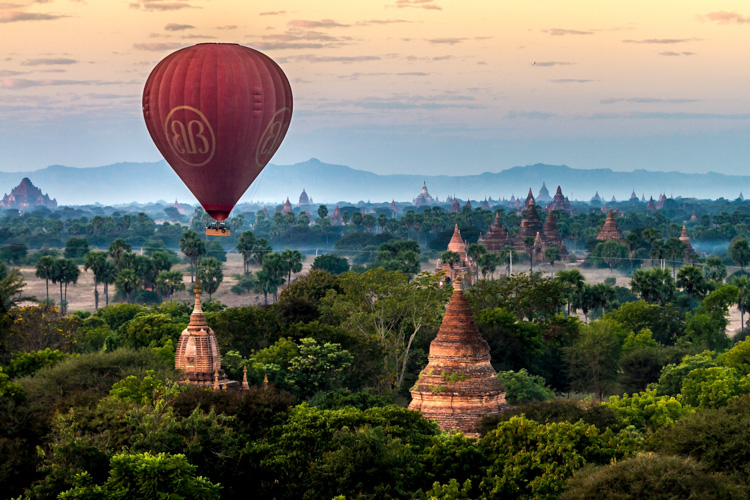
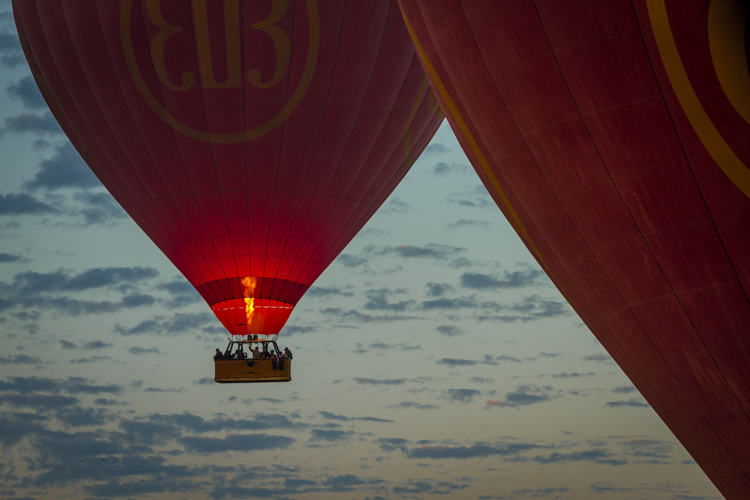
    003 Changing light 2

    003 Changing light

    3. Camera – bring a second one along if possible

    While I am not a gear junky, this is one place where it is nice to have another camera on hand. The confining space and the dynamic conditions (take off, spinning, turning, landing, etc., along with the changing light) make an extra camera really handy to have to be able get a range of shots in a limited space, in a limited amount of time. There are really not many options for doing that without having multiple cameras.

    4. Lenses – take a long one

    So what lenses to put on your cameras, is the next logical question. My first tip with lenses would be to bring a long telephoto. I have seen too many people with a 16-35mm lens try get the whole landscape, but when you are up high, you can get everything in frame with a longer lens. At 16mm the features of the landscape become minuscule from the air. It may seem strange to you to use a longer focal length lens for landscapes, but they are your good friend when floating or flying.
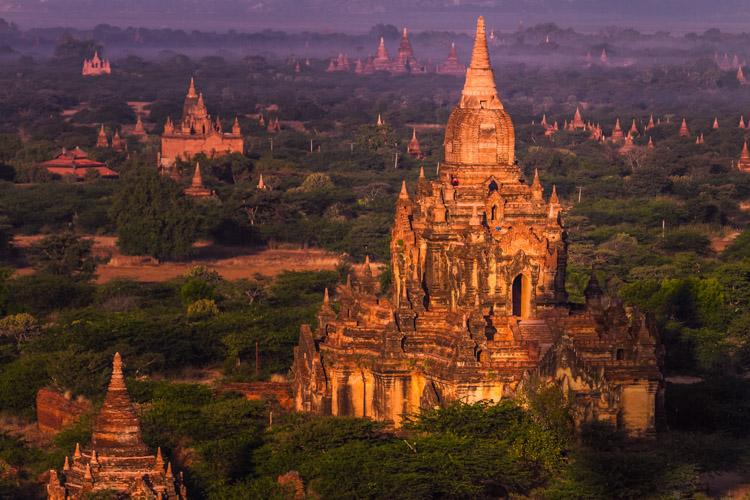
    004 Lens 150mm

    150mm lens

    5. Don’t forget to just enjoy the trip

    Balloons are to airplanes, as sailboats are to motorboats – they are quiet and hover calmly. It’s a bit surreal that it’s just a pocket of air that so delicately hoists you off the ground and drifts with the wind. It’s so smooth, so enjoy it!

    Let me give you a breakdown of what I found worked for me, and if you have your own ideas please share them in the comments below.
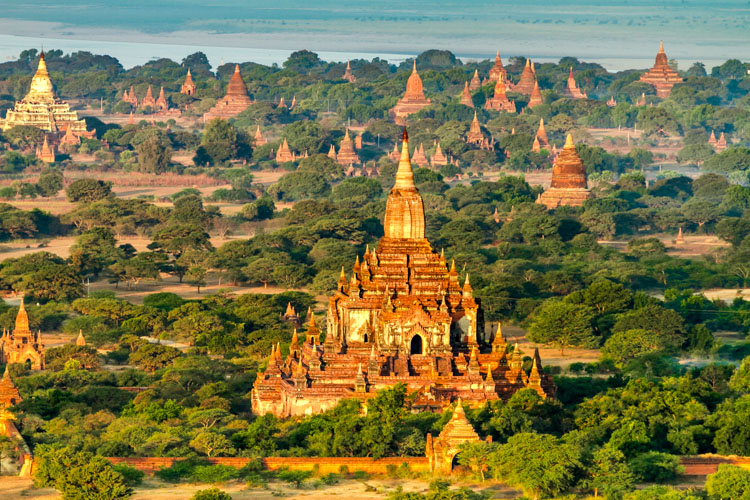
    004 Lens 200mm

    My two cameras where a Canon 7D and a G-12. I brought two lenses with me, an equivalent 16-35mm lens, which stayed in my bag once we loaded up, and a 70-200mm. I brought a Canon 430ex II flash that was mounted on the hot shoe of my Canon G-12 (no need for it to be on the 70-200 when you are floating way up in the air). The flash was used primarily as fill light when the balloon would spin into the sunset with the sun behind. Thus, the basket, pilot and other passengers wouldn’t be black silhouettes or the background being totally blown out. I used a ¼ CTO gel to balance the orange morning sun.

    Using my 70-200mm lens I was able to compress the background while still encompassing the landscape. In this case using a higher f-stop could help for clarity of both foreground and background. However, depending on when you actually get up in the air, you might want some more speed while keeping your ISO down. You also need to remember that you are moving. On the other hand, while directly over a subject a little less depth of field can be used, so a larger aperture. Takeoff and landing would be the best times to get some nice landscapes, but inside the balloon safety is first, and we were instructed to have our cameras secured. Thus, after takeoff get ready to start shooting before you are just way too high.
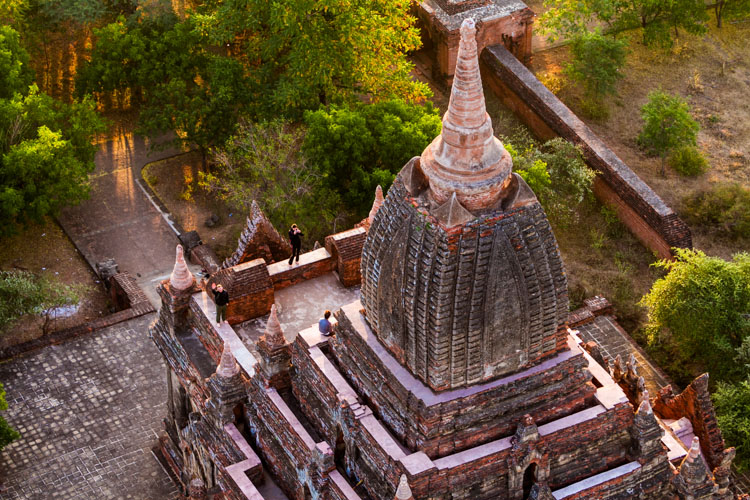
    005 Zoom in

    While having coffee and getting instructions from our pilot I asked a question, made a joke (that was not about safety), and hinted at a corner spot. The pilot, in my case, goes up every day during the winter months, and was no fool when it came to understanding my intention. So what do you know, he assigned me first, right in the corner. Whether he did it for a tip or for photography sake, I have no idea, but it worked in my favor. Instead of only a 180 degree view, I saw more like 270 degrees and that was 25% more options. I took it.

    So go out there and get up in the air, land safely, and see the world from a new perspective. After all, photography is about perspectives and new horizons. Change your perspective of the world down here.
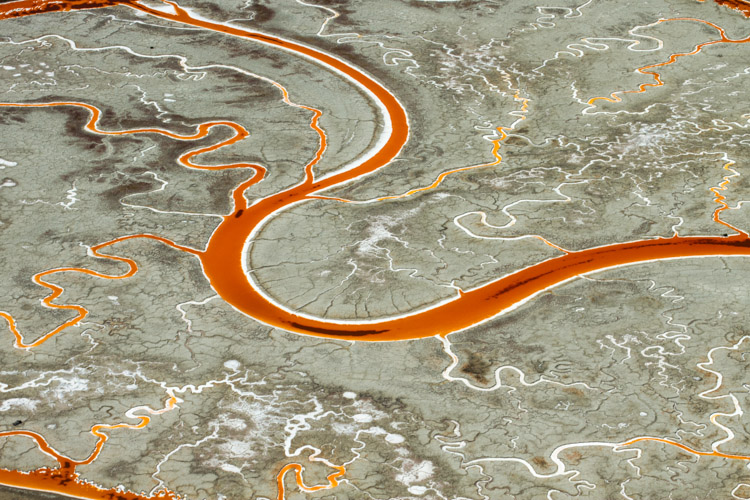
    006 Salt Ponds of San Fransisco Bay Areal Photo from Single Engine Prop Plane

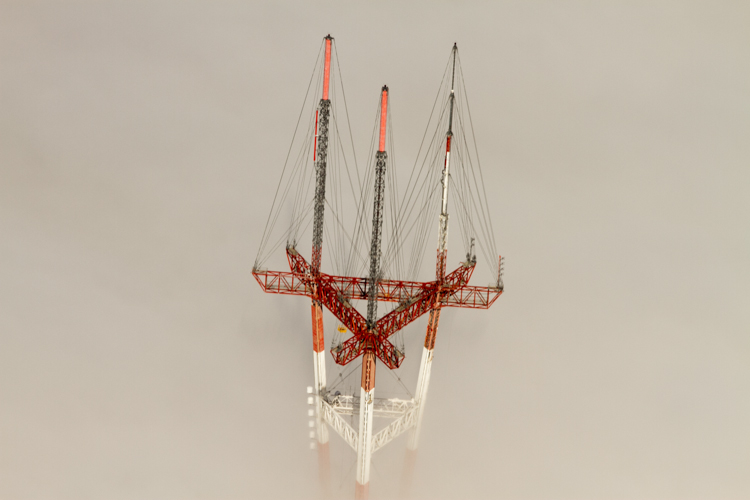
    007 Sutro Tower San Fransisco 170mm from Single Engine Prop Plane

    Seeing things in a new way can only make you understand your time on the ground that much better. As photographers a common goal we all share are the amazing visuals that we capture and create. So create from above, and share your thoughts in the comment section below.

    googletag.cmd.push(function() {
    tablet_slots.push( googletag.defineSlot( “/1005424/_dPSv4_tab-all-article-bottom_(300×250)”, [300, 250], “pb-ad-78623” ).addService( googletag.pubads() ) ); } );

    googletag.cmd.push(function() {
    mobile_slots.push( googletag.defineSlot( “/1005424/_dPSv4_mob-all-article-bottom_(300×250)”, [300, 250], “pb-ad-78158” ).addService( googletag.pubads() ) ); } );

    The post 5 Tips for Doing Photography from a Hot Air Balloon or Biplane by Branson Quenzer appeared first on Digital Photography School.
    Digital Photography School

  • Creating a Lens Flare Effect and Dust Particles in Photoshop

    This article isn’t about how to magically transform your images using Photoshop. The real magic of Photoshop is trying to convince the viewer that no effects were added at all, and that the image was captured in camera. Photoshop can add that little extra to your imagery. Conversely, it can also ruin an image if it’s overdone.

    I shoot to capture the best possible image as I can get at the time, but more often than not, time is not on my side. If I am shooting for a client, time is money. Deadlines and strict schedules are uppermost when dealing with a client. When shooting outdoors, I am dealing with natural light which is constantly changing and weather conditions, which may force me to shoot faster or abandon the shoot completely.

    So, when I get to look at my image(s) on the computer, I take the time to critically review them. As I shoot RAW, I need to apply basic post-processing to all my images. In some cases, I may need to add an extra enhancement, but that will depend on the image and what I need it to say.

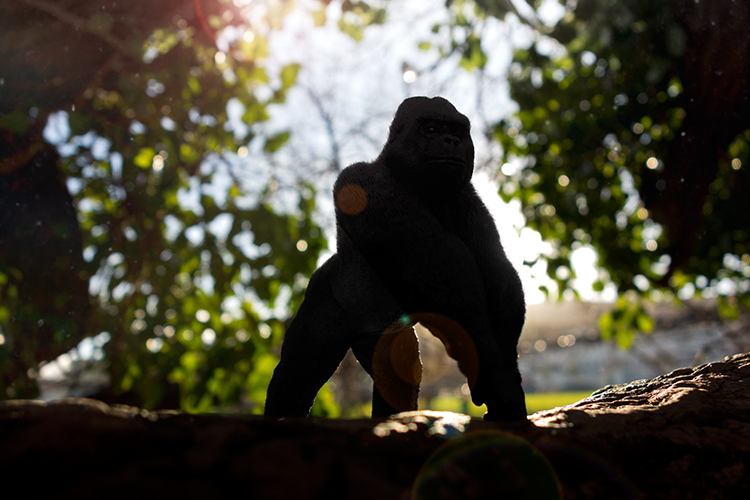
    Gorilla-with-lens-flare-and-dust-particles

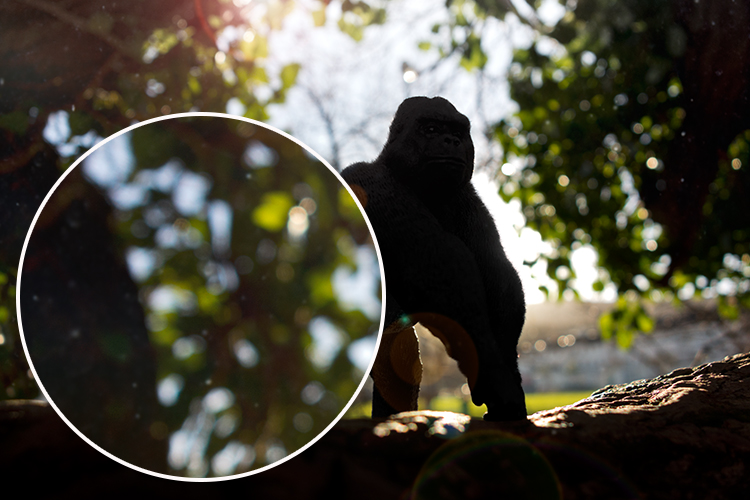
    Lens Flare and dust particles added using Photoshop

    This is the power of post editing. To be able to add an enhancement to the image, to give it that extra drama or a desired effect that you wanted to convey in your image in the first place. It can be as subtle as adding dust particles, or a bit more dramatic such as a lens flare effect. Both of these effects, whether you use one or both together, can add that little bit of oomph!

    When applying any Photoshop effects, It’s not just about technique, although the know-how is important, but it is the application which is key:

    • How to execute the technique – different methods to achieve the same end result
    • When to use it – some images suit this technique over others
    • By how much?
    Before

    Before

    After

    After

    The above may sound quite obvious and fundamental, but I can’t stress it enough, especially if you are new to creating effects in Photoshop.

    • HOW = the technique. I will demonstrate how to create a lens flare effect non-destructively in Photoshop using the Lens Flare filter. I will also describe how to create your own simple custom dust particle brush. Plus, I’ll show you my own unique in-camera method to capture dust particles.
    • WHEN = you deciding if this technique will work on the particular image in question. Just because you know how to use a technique doesn’t mean you have to apply it to every image. Yes, by all means practice on your images until you have refined the process.
    • HOW MUCH = knowing how little of the technique to apply – less is more. Don’t be afraid to reduce the opacity on the layer that you have applied the technique on.

    This is where beginners can get carried away when learning post-processing techniques in Photoshop, for the first time. As tempting as it is, you want to show off your new skill and see the effect on your image in a dramatic way, try and keep it subtle.

    What is Lens Flare?

    Flare is particularly caused by a very bright light sources either in the image – which produces visible artifacts – or shining into the lens but not in the image – which produces a haze. Most commonly, this occurs when shooting into the sun (when the sun is in frame or the lens is pointed in the direction of the sun), and is reduced by using a lens hood or other shade. – as seen in Wikipedia

    If applied well, the lens flare effect really does convey that good-feeling summer shot.

    The Lens Flare Filter in Photoshop

    Filter-render-lens-flare

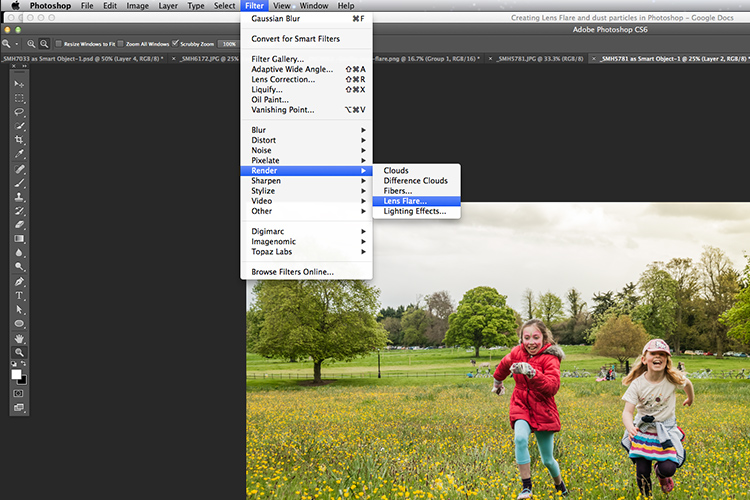
    The Lens Flare filter is found under Filter > Render > Lens Flare.

    The Lens Flare is found under Filter>Render>Lens Flare. However, this doesn’t work in the same way as an Adjustment Layer, as in non-destructively. The effect works directly on the image itself. It also won’t work on an empty layer. So, create a new layer above the image and fill it with black. Change the blend mode to Screen. Go up to the Menu Bar and go to Filter > Render > Lens Flare.

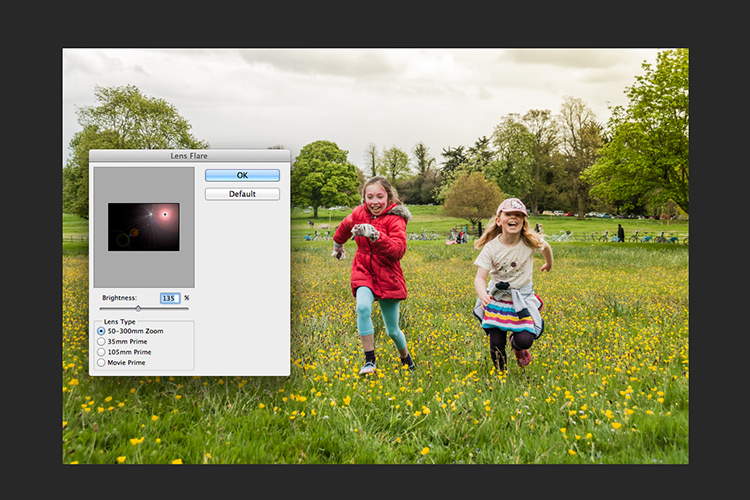
    As you can see in the image below, a small pop up dialog box appears with a preview window, and shows the four different types of lens flare available. Click inside the preview window to move the Lens Flare to whatever position you want.

    Filter-render-lens-flare

    The Lens Flare dialog box.

    50-300mm-zoom-lens-flare

    This is the 50-300mm zoom Lens Flare effect on a layer filled with Black.

    105m-prime-lens-flare

    This is the 105mm Lens Flare effect on a layer filled with Black.

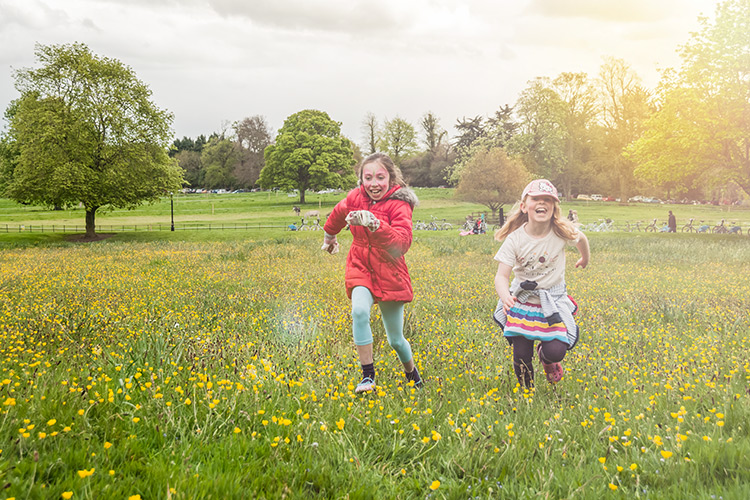
    Becky-and-Amy-with-lens-flare-applied

    Lens flare applied

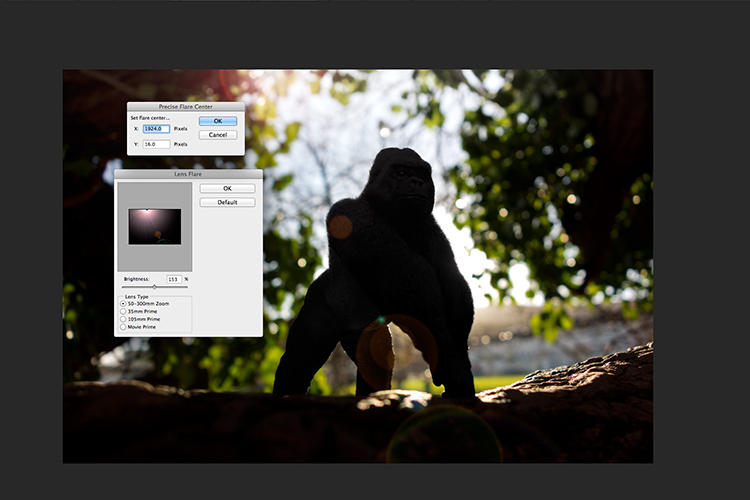
    Tip: To get a more precise position for the lens flare, bring up the Info Panel, and move your cursor over the spot on your image where you want the flare to be positioned. The x and y coordinates tell you the exact position in pixels. When you have the Lens Flare dialog box open, click on the preview window while holding down the Alt/Option button, and the precise Flare Center dialog box appears. Type in the x and y coordinates and click OK.

    Gorilla-precise-flare-center

    The precise Flare Center dialog box appears when you click on the preview window of the Lens Flare while holding down the Alt key on a Mac (Option on PC).

    How to create your own custom dust particle brush in Photoshop

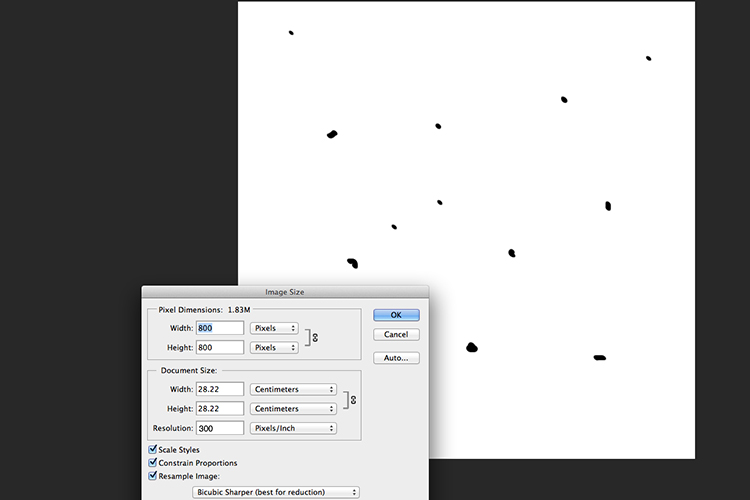
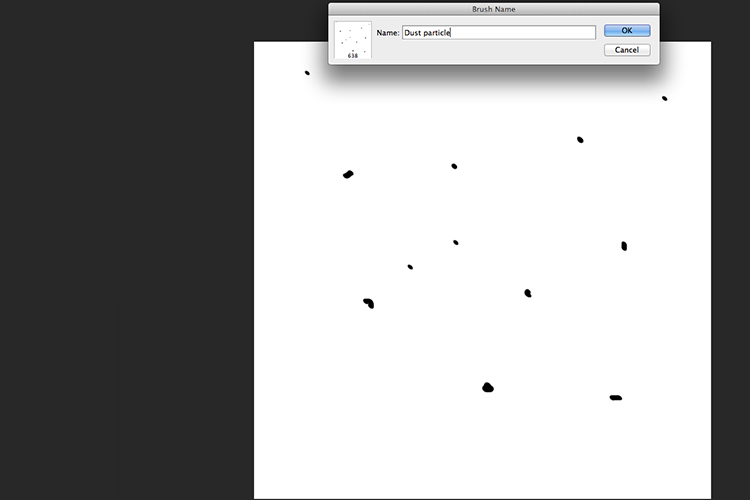
    To create your own custom dust particle brush in Photoshop is relatively simple. Open a new document in Photoshop, I made mine 800×800 pixels on a white background, set the dpi to 240 or 300. Use a small brush, hardness set to 25%, and use the color black. Create random small dots on the canvas. Not too many. Go up to the Menu Bar > Edit > Define Brush Preset. Type the name of your new brush and click OK.

    creating-new-document-custom-dust-particle-brush

    Create a new document with a white background 800px x 800px.

    naming-dust-particle-custom-brush

    Go to Edit > Define Brush Preset and name your new custom brush.

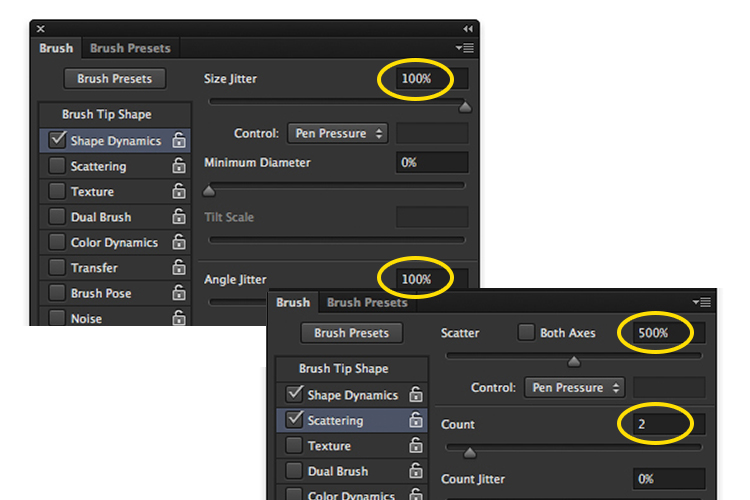
    Before you start using your brush, you need to change a few properties of the brush so that it behaves like dust particles. Go up to Window > Brush. This brings up the brush dialog box. Use the following brush settings (see below screenshots also) Change the spacing to 100%, click on the Shape Dynamics box and move the Size Jitter and the Angle Jitter sliders to 100%. Next click on the Scattering tick box. I moved the Scatter slider over to 500%. Tick on Both Axes. Keep the Count Jitter at 2.

    custom-brush-settings

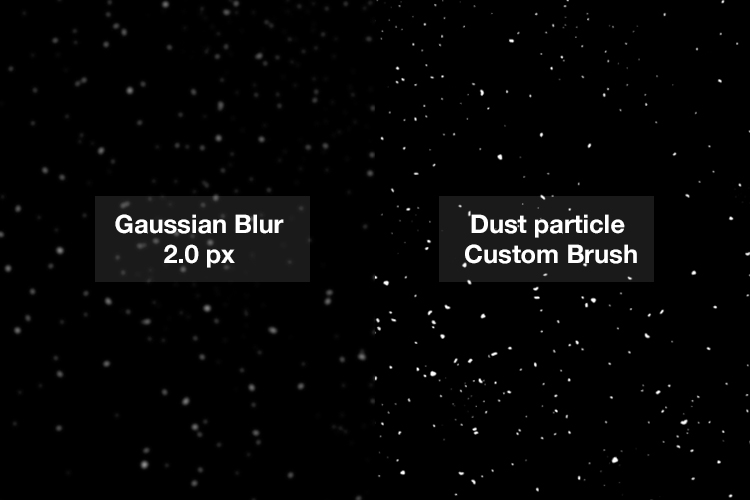
    Create a new blank layer over your image and fill it with black. Using the custom brush, set to white, start creating dust particles across the canvas. Change the blend mode to Screen and now you can see the dust particles as white specks. Add some Gaussian Blur and reduce the opacity down to around 75%. You can always add a new layer to build up the effect too.

    Dust-particles-with-custom-brush

    How to create dust particles in-camera

    I have to admit, this technique made me smile. I had been wracking my brains for a while for a possible solution to capture dust in-camera. The other morning, I got up early, as usual, to get my girls off to school. I looked out the kitchen window, the skyline was a lovely orange from the sun.

    I then noticed all the specks (dirt) on the window and I had an eureka moment, I grabbed my camera and I focused on the specks using an aperture f/4. I also underexposed it by two stops. I wanted the specks to show through a dark background. I brought this image into Photoshop and applied a Levels Curve Adjustment to darken the image even more. I placed this image on the photo of the Gorilla. I then changed the blend mode to screen. I added some Gaussian Blur and reduced the opacity. Not bad for what is essentially dirt on a window.

    Dust-particles-on-a-window

    Dust and dirt particles on a window.

    small-toy-plastic-gorilla

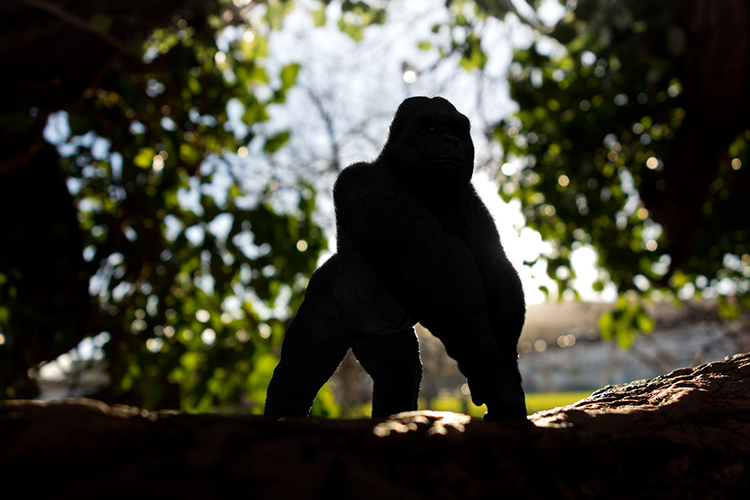
    The image of the Gorilla without the Lens Flare effect and dust particles.

    zoomed-in-dust-particles

    Zoomed in area to show the dust particles I took of my own window!

    Disclaimer: I had to persist with dirty windows for weeks in the name of photography. That’s my story and I am sticking with it!

    Have you got a technique for creating your own flare or dust particles in Photoshop? If so, please share in the comments below.

    googletag.cmd.push(function() {
    tablet_slots.push( googletag.defineSlot( “/1005424/_dPSv4_tab-all-article-bottom_(300×250)”, [300, 250], “pb-ad-78623” ).addService( googletag.pubads() ) ); } );

    googletag.cmd.push(function() {
    mobile_slots.push( googletag.defineSlot( “/1005424/_dPSv4_mob-all-article-bottom_(300×250)”, [300, 250], “pb-ad-78158” ).addService( googletag.pubads() ) ); } );

    The post Creating a Lens Flare Effect and Dust Particles in Photoshop by Sarah Hipwell appeared first on Digital Photography School.

    Digital Photography School

  • Week in Review: The flagships are here! The flagships are here!

    Week in Review: The flagships are here!

    It’s been a busy week here as three high profile cameras have come sailing through our doors in (roughly) the past seven days: the Pentax K-1, the Canon EOS-1D X II and the Nikon D500. As a result, lots of studio work and samples made their way onto the site. And in an exciting plot twist, we actually had some decent weather! In early May! In Seattle! Let’s recap, shall we?

    Week in Review: The K-1 impresses early

    We waited a long time for the Pentax K-1 to arrive. And let’s not even start on how long Pentax shooters have been waiting for full-frame digital. Here at last, the K-1 has already impressed us in the studio. And we don’t have to wonder any longer what the camera’s Pixel Shift mode will be like – so far it’s nothing short of spectacular.

    Week in Review: Nikon D500 on the town

    Fate smiled upon Seattle last weekend and bestowed us with summer-like weather, which is by no means guaranteed on any day before July 4th around here. The Nikon D500 had already made its way through our preliminary round of studio tests so plenty of shooting out and about was in order for Nikon’s APS-C flagship, and that’s just what happened. 

    Week in Review: Canon’s revamped sport shooter arrives

    Completing the triple threat is Canon’s update to its full-frame sports shooter, the EOS-1D X II. And with a new 20.2MP sensor, improved 61-point AF system and 14 fps shooting with AF, it is a thing to behold. We’re just getting started and have plenty of fast-action shooting to do with the 1D X II, but for starters we took a look at its performance in our studio tests. In short, we saw a slight dip in high ISO performance compared to its rivals, but the 1D X II shows a marked improvement in dynamic range. Check out the full results for yourself.

    Week in Review: Samyang throws an AF curveball

    It was a quiet week in terms of new gear but Samyang surprised us with its first ever autofocus lenses: a 50mm F1.4 and 14mm F2.8. They’ll debut for Sony FE and no pricing has been made public yet, but we’re optimistic that this means more AF Samyang lenses are in the works.

    Week in Review: Round ’em up

    We rounded up the current crop of 1″ sensor long zoom compacts to help make the tough job of picking a camera a little easier. If you want something pocketable or want to shoot for the moon, you’ll find it in this group.

    Week in Review: Sony on a winning streak

    It’s pretty much a given that every camera maker is selling fewer cameras than they were in the past. Financial reports have tended to follow the same trend of bad news in recent years too, but Sony seems to have found a path through the darkness. In its latest financial year, the company’s imaging division posted some impressive gains in income, even with a decrease in sales.

    Until Elon Musk can find a way to get average schmoes like us into orbit, this neat footage from a GoPro on a rocket might be as close as we get. The HERO4 took a ride on UP Aerospace Inc.’s SL-10 rocket and made a quick roundtrip return back to Earth with a NASA-designed capsule. 

    Articles: Digital Photography Review (dpreview.com)

  • 4K from Space: ISS astronauts shoot 3D movie of planet Earth

    Astronauts based on the International Space Station have been working as movie makers to help create a 3D film featuring the planet Earth as viewed from space. A Beautiful Planet was shot in 4K using Canon’s cinema camera system, and will be shown in IMAX theaters from the end of the month. The film includes dramatic views of the planet lit up at night as well as overhead perspectives on weather systems and the Northern Lights.

    A Beautiful Planet IMAX® Trailer

    Footage for the film was collected by six space station astronauts over the course of three missions from November 2014, after Canon EOS C500 and EOS-1D C cameras were delivered to the ISS via an unmanned supply ship with a collection of lenses. Made in association with NASA, the film aims to educate viewers about Earth, but also to highlight the effects humanity has on the planet.

    For more information on the film and where you can see it visit the IMAX website.

    Press release

    IMAX® Film ‘A Beautiful Planet’ Features “Out Of This World” Canon 4K Imagery

    Using Canon Cameras and Lenses, Teams Shooting from the International Space Station Capture Breathtaking Images of Our Planet from a Vantage Point Few Get to See

    MELVILLE, N.Y., April 14, 2016 – The future of 4K filmmaking is looking up — in fact, all the way to space. A Beautiful Planet, the latest 3D space documentary from acclaimed filmmaker Toni Myers and IMAX Entertainment, made in cooperation with NASA, will premiere in IMAX in New York on April 16 and was shot primarily in space using Canon cameras and lenses.  The film will be shown to the public exclusively in IMAX® and IMAX® 3D theaters beginning April 29.

    The Canon EOS C500 4K Digital Cinema Camera and EOS-1D C 4K cameras were transported from Earth to the International Space Station (ISS) in November 2014 via an unmanned supply ship, and were received by NASA astronaut Terry Virts, astronaut Samantha Cristoforetti from the European Space Agency and Cosmonaut Anton Shkaplerov. This was the first time that 4K cameras were brought aboard the space station for a commercial film project. During a six-month mission at the ISS, Virts, Cristoforetti and Shkaplerov worked closely with NASA astronauts Kjell Lindgren, Butch Wilmore, Scott Kelly, and Kimiya Yui of the Japan Aerospace Exploration Agency (JAXA) to take turns using Canon’s advanced digital cameras and lenses to film footage of lightning storms, the continents, volcanoes, coral reefs and bright city lights on Earth for the film. One of the film’s greatest and most dramatic highlights, the striking imagery of the Northern Lights–or the aurora borealis– was captured by NASA astronaut Kjell Lindgren. These awe-inspiring images were previously unattainable in such stunning resolution.

    The Canon EOS C500 4K (4096 x 2160-pixel) Digital Cinema Camera is capable of originating uncompressed RAW output for external recording to meet the demands of premium cinematic productions and other top-quality production markets. It features a Super 35mm, 8.85-megapixel CMOS image sensor, DIGIC DV III Image Processor and an expansive range of recording and output options specifically for 4K and 2K image acquisition. The compact, lightweight Canon EOS-1D C Digital SLR camera delivers outstanding video performance and provides video recording at 4K (4096 x 2160-pixel) or Full HD (1920 x 1080-pixel) resolution to support high-end motion picture, television production and other advanced imaging applications.

    ‘A Beautiful Planet’ joins Canon at NAB
    A gallery of still images taken on the ISS with the Canon EOS-1D C camera and Canon lenses during the shooting of the film will be shown at the Canon booth # C4325 at the National Association of Broadcasters (NAB) trade show, April 18-21, 2016 in Las Vegas, NV. During NAB, the film’s Director of Photography, James Neihouse, ASC, will speak at Canon’s stage on the challenges and benefits of shooting in space. Joining him will be Marsha Ivins, a consultant on the film, former NASA astronaut, and a veteran of five space shuttle missions. Neihouse has worked on more than 30 IMAX films including Space Station 3D and Hubble 3D and trained more than 25 shuttle and space-station crews on the intricacies of large-format filmmaking.

    The documentary, A Beautiful Planet was produced, written, and directed by Toni Myers, and is narrated by Academy Award®-winning actress Jennifer Lawrence.

    About A Beautiful Planet
    A Beautiful Planet is a breathtaking portrait of Earth from space, providing a unique perspective and increased understanding of our planet and galaxy as never seen before. Made in cooperation with the National Aeronautics and Space Administration (NASA), the film features stunning footage of our magnificent blue planet — and the effects humanity has had on it over time — captured by the astronauts aboard the International Space Station (ISS). From space, Earth blazes at night with the electric intensity of human expansion — a direct visualization of our changing world. But it is within our power to protect the planet. As we continue to explore and gain knowledge of our galaxy, we also develop a deeper connection to the place we all call home. From IMAX Entertainment and Toni Myers — the acclaimed filmmaker behind celebrated IMAX® documentaries Hubble 3D, and Space Station 3D — A Beautiful Planet presents an awe-inspiring glimpse of Earth and a hopeful look into the future of humanity.

    Articles: Digital Photography Review (dpreview.com)

  • TIME names Kodak and Polaroid cameras two of the ‘most influential gadgets’ in history

    TIME Magazine has published its list of ‘the 50 most influential gadgets of all time,’ and included among them is the Kodak Brownie Camera (#8) and the Polaroid Camera (#27). According to the publication, the list is ordered by each gadget’s influence on subsequent technologies and devices, such as the Brownie camera that helped bring photography ‘into everyday use.’

    The Kodak Brownie Camera, launched in February 1900, was priced at $ 1 and used inexpensive film, making it possible for anyone to capture snapshots of daily life. The low price and subsequent ease by which anyone could get into photography boosted film sales for Kodak, but that was only a small part of the Brownie’s role in our history and its influence on our future. Says TIME, the Brownie camera ‘helped capture countless moments and shape civilization’s relationship to images.’

    Arriving later on (and further down the list) is Polaroid and its OneStep Land instant camera launched in 1977. This model holds the distinction of having been the first affordable and easy to use camera of its kind, says TIME, going on to become so popular that the influence of its ‘square-framed, often off-color snaps’ lives on today in apps like Instagram.

    Are the Brownie and Polaroid cameras deserving of their spots on the list? Let us know what you think in the comments.

    Via: TIME Magazine

    Articles: Digital Photography Review (dpreview.com)

  • How to Take Low Key Lighting Portraits

    Low key lighting when taking portraits is an effective technique that can leave you with some beautiful images.

    Low key lighting portrait

    In this video Gavin Hoey explains how to set up a low key lighting portrait in a small home or portable studio. It really is achievable with a relatively simple setup.

    If you give some low key lighting portraits a go we’d LOVE to see your results in comments below.

    Further Low Key Lighting Portrait Reading

    Interested in learning more? Here’s some tutorials in our archives on low key lighting.

    • How to Create Dark Moody Low-Key Portraits with Minimal Gear
    • Get an Invisible Black Background to Your Portraits – Shooting Anywhere
    • Setting The Mood With Low Key Lighting
    • Low-Key Lighting for Dramatic Portraits
    • Low Key Lighting Portrait Example

    googletag.cmd.push(function() {
    tablet_slots.push( googletag.defineSlot( “/1005424/_dPSv4_tab-all-article-bottom_(300×250)”, [300, 250], “pb-ad-78623” ).addService( googletag.pubads() ) ); } );

    googletag.cmd.push(function() {
    mobile_slots.push( googletag.defineSlot( “/1005424/_dPSv4_mob-all-article-bottom_(300×250)”, [300, 250], “pb-ad-78158” ).addService( googletag.pubads() ) ); } );

    The post How to Take Low Key Lighting Portraits by Darren Rowse appeared first on Digital Photography School.

    Digital Photography School

  • Weekly Photography Challenge – Reflections

    First have a look at these: 24 Reflective Mirror Images to Make You Look Twice, then think about how you’re going to tackle this week’s challenge:

    Javier Díaz Barrera

    By Javier Díaz Barrera

    Weekly Photography Challenge – Reflections

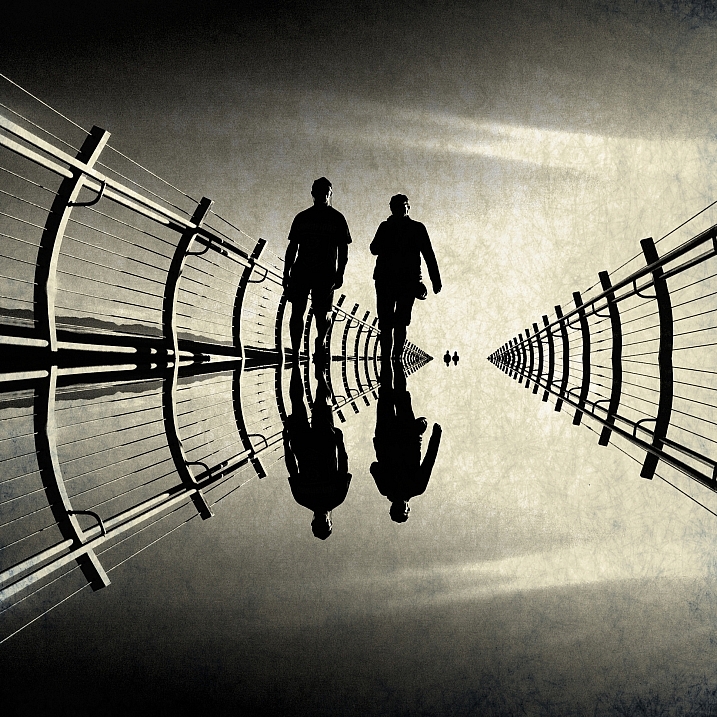
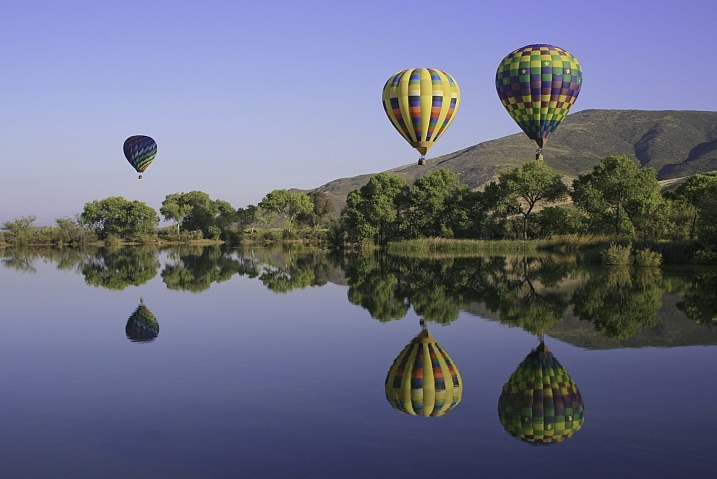
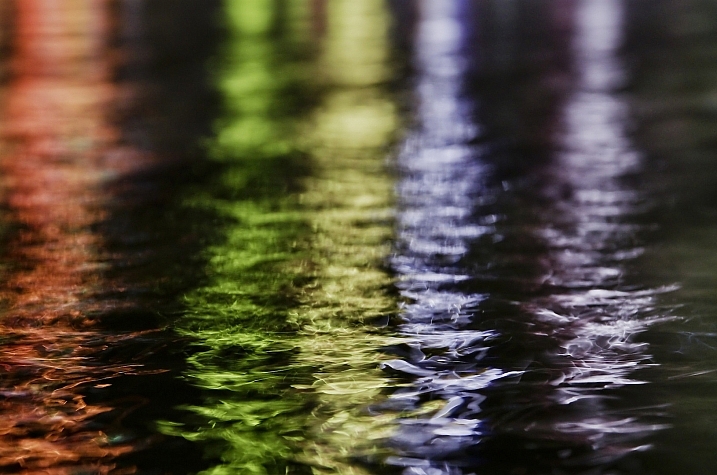
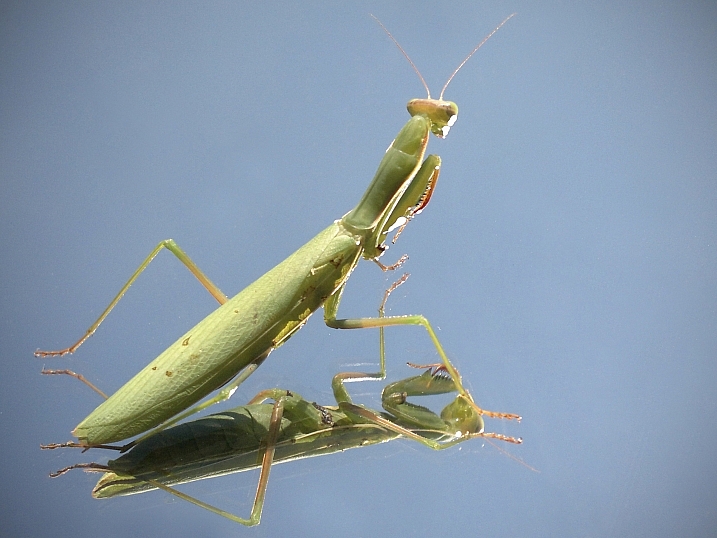
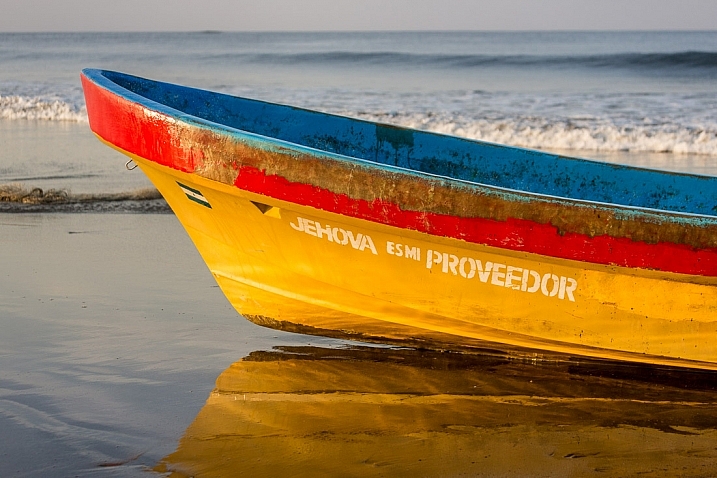
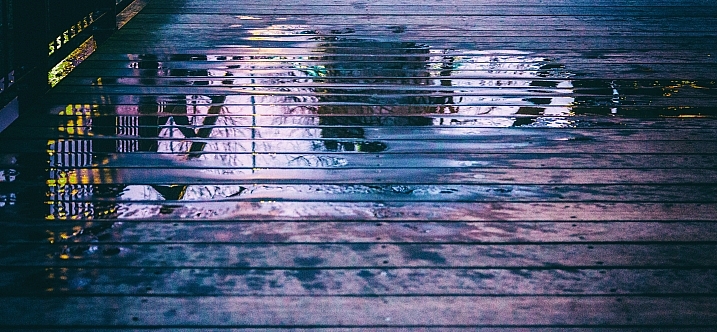
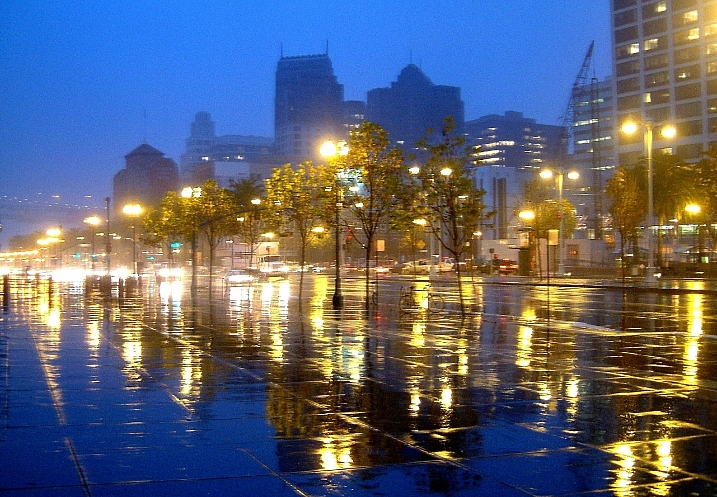
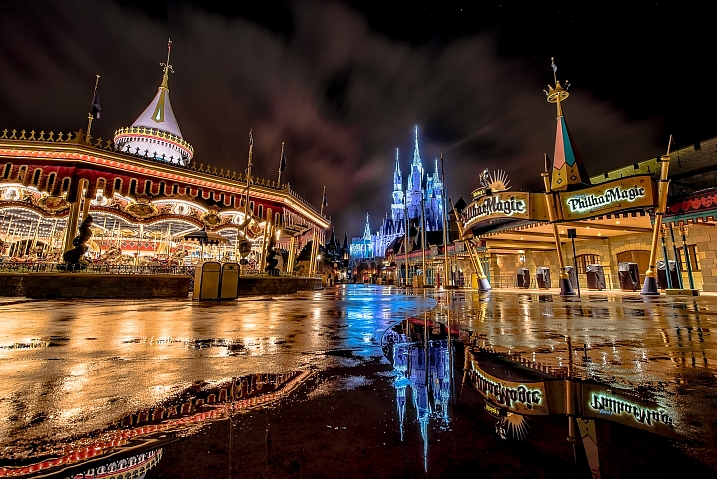
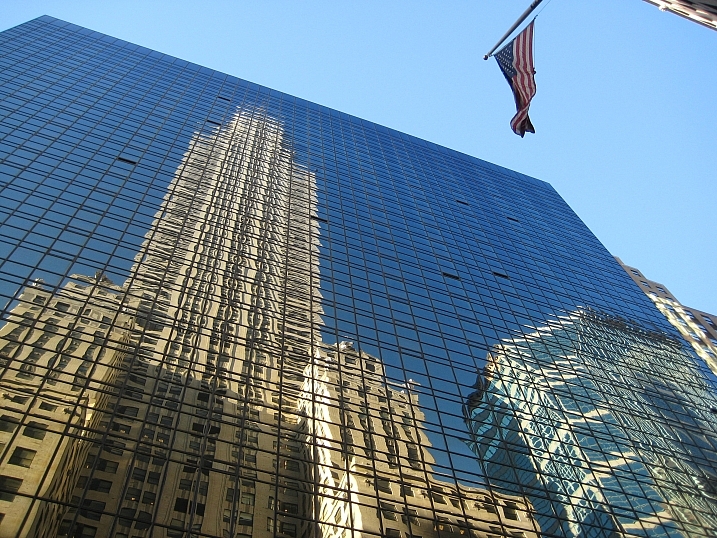
    Reflections can be made by anything that is smooth and glasslike: water, glass, windows, a puddle, plastic, etc. Look for unlikely sources and different camera angles, make your own puddles – get creative. Wander around your area and look for things that reflect.

    But – remember to still keep in mind all the things that make a good photo:

    • Good composition
    • Good light
    • A clear subject
    Gary Ullah

    By Gary Ullah

    Eduard Díaz I Puig

    By Eduard Díaz i Puig

    Tanyanat Pichitwong

    By Tanyanat Pichitwong

    Roman Boed

    By Roman Boed

    Share your images below:

    Simply upload your shot into the comment field (look for the little camera icon in the Disqus comments section) and they’ll get embedded for us all to see or if you’d prefer upload them to your favourite photo sharing site and leave the link to them. Show me your best images in this week’s challenge. Sometimes it takes a while for an image to appear so be patient and try not to post the same image twice.

    Wolfgang Staudt

    By Wolfgang Staudt

    Danna § Curious Tangles

    By danna § curious tangles

    googletag.cmd.push(function() {
    tablet_slots.push( googletag.defineSlot( “/1005424/_dPSv4_tab-all-article-bottom_(300×250)”, [300, 250], “pb-ad-78623” ).addService( googletag.pubads() ) ); } );

    googletag.cmd.push(function() {
    mobile_slots.push( googletag.defineSlot( “/1005424/_dPSv4_mob-all-article-bottom_(300×250)”, [300, 250], “pb-ad-78158” ).addService( googletag.pubads() ) ); } );

    The post Weekly Photography Challenge – Reflections by Darlene Hildebrandt appeared first on Digital Photography School.


    Digital Photography School

  • Play-Doh People: Manipulated Portraits Mimic Old School Horror Movies

    [ By Steph in Art & Photography & Video. ]

    play doh people main

    Lumps of modeling clay in shades that match human flesh are globbed into the hollows of what should be faces in this series of portraits mixing photography with sculpture. Artist José Cardoso gets under the viewer’s skin with visuals that disturb and fascinate, perhaps prompting some to reach up and ensure that their own faces are still intact after checking out the entire collection.

    play dough people 4

    play dough people 3

    play doh people 2

    play doh people 10

    play doh people 11

    play doh people 13

    Warped and distorted, with ragged edges, holes from poking fingers and glimpses of bone-like foreign objects embedded within, the Play-Doh takes the place of ordinary features, completely obscuring them or making it seem as if some careless child’s hand has ripped them away. There’s no hint of an attempt at modeling an actual representation of a face – just lumps. (The ones with bits of hair and dirt in the dough are especially cringe-worthy.)

    play doh people 5

    play doh people 6

    play doh people 8

    play doh people 7

    play doh people 9

    The series is deliberately reminiscent of the special effects in old school horror movies, especially those of David Cronenberg, and it’s easy to see that influence here. As scary as they may have been at the time, when we look back at films like Naked Lunch, The Fly, Videodrome and Shivers we can see that they clearly made use of a whole lo to rubber and clay to achieve those gory effects. In comparison, Cardoso’s work is quite restrained, but its subtlety is startlingly effective.

    Share on Facebook


    [ By Steph in Art & Photography & Video. ]

    [ WebUrbanist | Archives | Galleries | Privacy | TOS ]


    WebUrbanist

  • 24 Reflective Mirror Images to Make You Look Twice

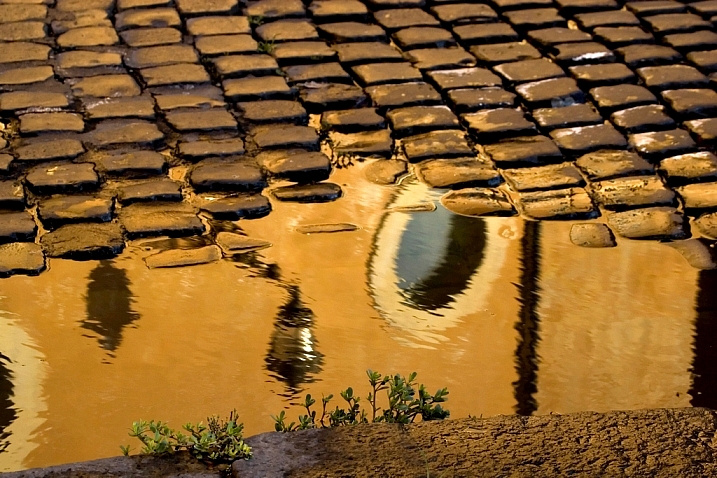
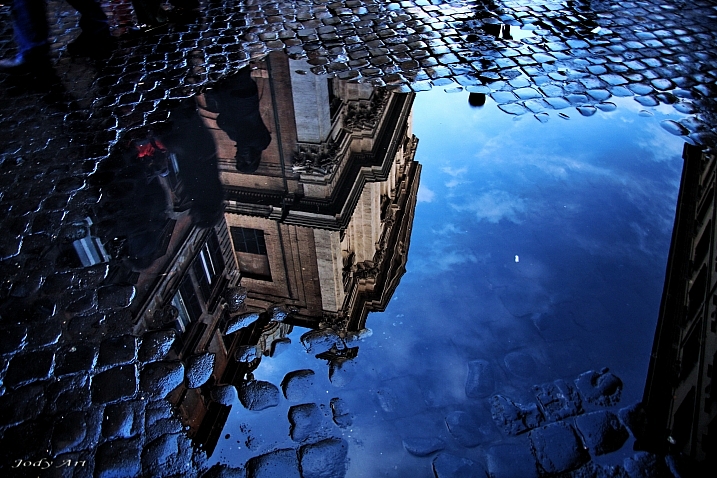
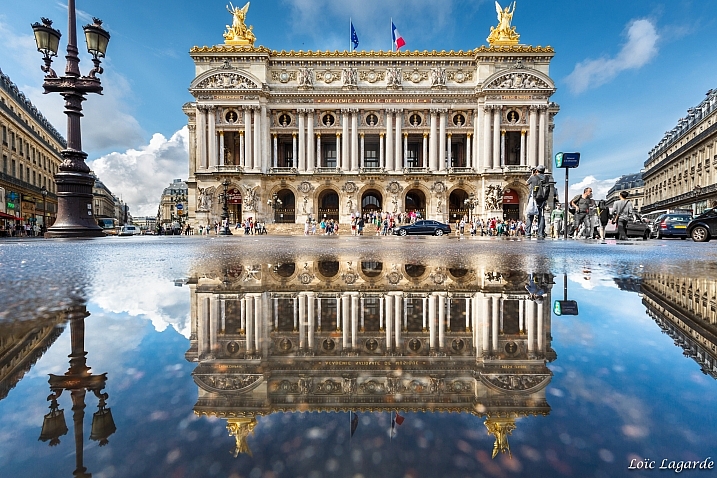
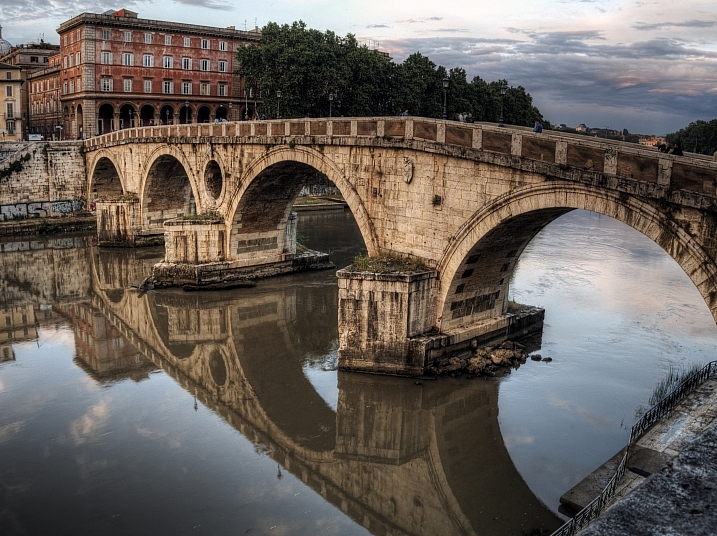
    Kids love a good puddle to splash in – photographers love them for a different reason – reflections.

    In this collection of images have a look at how these photographers captured reflective surfaces in creative ways:

    Darlene Hildebrandt

    By Darlene Hildebrandt

    Nick Kenrick

    By Nick Kenrick

    Theophilos Papadopoulos

    By Theophilos Papadopoulos

    Karol Franks

    By Karol Franks

    Jos Van Wunnik

    By Jos van Wunnik

    Highlights6

    By highlights6

    ANDY ARCIGA ( Www.arcigaandy.com )

    By ANDY ARCIGA ( www.arcigaandy.com )

    Jon Wallach

    By Jon Wallach

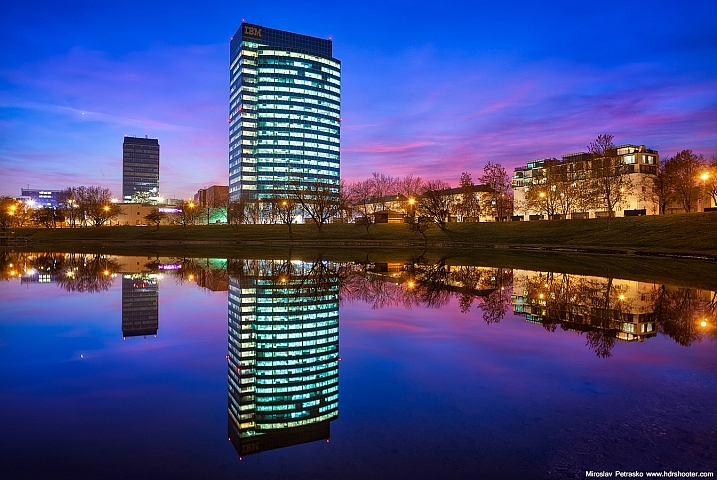
    Miroslav Petrasko

    By Miroslav Petrasko

    ?Jin Mikami?

    By ?Jin Mikami?

    Mario

    By Mario

    Darlene Hildebrandt

    By Darlene Hildebrandt

    Stefano Corso

    By Stefano Corso

    Jody Sticca

    By Jody Sticca

    Loïc Lagarde

    By Loïc Lagarde

    Neil Howard

    By Neil Howard

    Davide D'Amico

    By Davide D’Amico

    Thomas Hawk

    By Thomas Hawk

    ?ethan

    By ?ethan

    Brett Kiger

    By Brett Kiger

    Phil Whitehouse

    By Phil Whitehouse

    Thomas Hawk

    By Thomas Hawk

    Roman Kruglov

    By Roman Kruglov

    Moniek Van Rijbroek

    By Moniek van Rijbroek

    googletag.cmd.push(function() {
    tablet_slots.push( googletag.defineSlot( “/1005424/_dPSv4_tab-all-article-bottom_(300×250)”, [300, 250], “pb-ad-78623” ).addService( googletag.pubads() ) ); } );

    googletag.cmd.push(function() {
    mobile_slots.push( googletag.defineSlot( “/1005424/_dPSv4_mob-all-article-bottom_(300×250)”, [300, 250], “pb-ad-78158” ).addService( googletag.pubads() ) ); } );

    The post 24 Reflective Mirror Images to Make You Look Twice by Darlene Hildebrandt appeared first on Digital Photography School.


    Digital Photography School

  • Two in one: LG G5 camera review

    DPReview smartphone reviews are written with the needs of photographers in mind. We focus on camera features, performance, and image quality.

    $ (document).ready(function() { SampleGalleryV2({“containerId”:”embeddedSampleGallery_4023333010″,”galleryId”:”4023333010″,”isEmbeddedWidget”:true,”standalone”:false,”selectedImageIndex”:0,”startInCommentsView”:false,”isMobile”:false}) });

    The LG G5 succeeds last year’s G4 and is the first LG smartphone with a dual-camera setup. With an F1.8 aperture and optical image stabilization, the main 16MP module is very similar to the G4 in terms of specification and provides a 78-degree angle of view which is in line with most current high-end smartphone cameras.

    But here’s where things get interesting: the second lens comes with an F2.4 aperture and 8MP sensor and captures a 135-degree super wide-angle image. In the camera app you can switch between lenses via a button, and when using the digital zoom the camera switches seamlessly between the two modules. As before, the autofocus is assisted by a laser that measures the subject distance.  

    There is also an optional camera grip that should make the G5 particularly appealing to mobile photographers. The G5’s 2,800mAh battery is removable and slots into the device from the bottom. The latter clips away when a release button is pressed which allows you to attach a number of replaceable modules, one of which is the CAM Plus camera grip. It comes with an additional 1,200mAh of battery capacity and offers power, shutter, video and zoom buttons. It also lets you lock exposure and provides a more comfortable grip. We’ve put the G5 and the CAM Plus grip through its paces. Read our full review to find out how they performed.

    Key Photographic / Video Specifications

    • 16MP main camera
    • F1.8 aperture
    • Optical image stabilization
    • 8MP secondary super wide angle camera with F2.4 aperture
    • 8MP, F2.0 front camera
    • 4K video
    • 120 fps 720p slow motion video
    • Optional camera grip with shutter button and control dial

    Other Specifications

    • 5.3-inch 1440p display
    • Snapdragon 820 chipset
    • 4GB RAM
    • 32GB internal storage
    • microSD support
    • 2,800 mAh battery

    Our 9-page review

    We’ve considered every aspect of the LG G5 with the photographer in mind. We examined the user interface of the native camera app and its special features. We experimented with the camera’s performance when taking stills and video, and had a play with the device’s many special feature modes. Click any of the links below for more information of specific functions and continue to our conclusion for a final summary of our findings.

    • Page 2: Design and Hardware
    • Page 3: Camera Operation
    • Page 4: Camera Features
    • Page 5: Camera Features cont.
    • Page 6: Image Quality and Performance
    • Page 7: Image Quality Wide Angle
    • Page 8: Video Mode
    • Page 9: Conclusion and gallery

    Articles: Digital Photography Review (dpreview.com)