Blog

  • How Using Your Smartphone Camera Can Help Improve Your Photography

    One of the triumphs of digital photography is that it has become accessible to more people, across more and more devices. Cameras are no longer standalone devices; as the technology allows the camera to be smaller and smaller, it can be built in to other devices that you may have on you more often than a dedicated camera, such as a smartphone. Cameras in smartphones, and other devices like tablets for example, are producing images of an increasingly higher standard. Their low-light performance is improving, and manufacturers are constantly improving upon the dynamic range, autofocus, and lens quality.

    Photographer Chase Jarvis said that, “The best camera is the one that’s with you” – so why not use your smartphone or tablet camera more often? There are restrictions on smartphone cameras over their DSLR or mirrorless camera brethren – their low light and AF performance still have quite a lot of catching up to do, the lenses cannot be changed, and you also have far less control over what settings (ISO, shutter speed, aperture) are used. But it is also these very restrictions that can help you improve your photography when you are using your DSLR, mirrorless, and even compact cameras.

    Puddles, and other reflections, can make for interesting subjects.

    Puddles, and other reflections, can make for interesting subjects.

    So how can these restrictions help your photography? Simple, you have less to think about! You no longer have to worry if you have the correct settings dialled into get the exposure you want – you’re phone will work that out. You do have some say in the overall exposure; you can control how bright/dark the image turns out, but that’s it! Worried you don’t have the right lens for the photo you want? Too bad. With your phone you can’t change it, even if you wanted to. There’s another thing you don’t have to worry about.

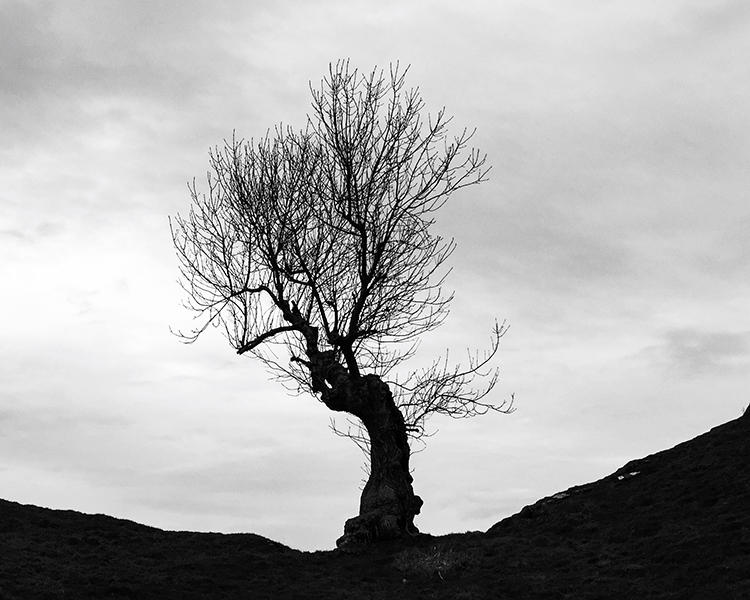
    You can’t control the camera settings. You can’t change your lens, and you generally have poor Autofocus (at least, poor continuous AF). So how can you take great photos with a smartphone? You need to think less about what you cannot control and more about what you can control. For example, no matter what camera you have, you can always control the composition. You can decide from which angle you take a photograph – will you take it down low, looking up or up high, looking down – and which direction you stand in relation to the light. Photographing toward the light can create stunning silhouettes, so looking for striking shapes will help here. You have full control over how close, or how far, from the subject you stand. You dictate what you include in the frame, and what you omit. All of these elements work to make images more interesting, and by removing the control over some of the more technical features as mentioned earlier, you now have more time to consider the compositional elements.

    Controlling Focus and Exposure

    Focussing and exposing on the candle has made the background go very dark. This works well to isolate the subject more.

    Focussing and exposing on the candle has made the background go very dark. This works well to isolate the subject more.

    Across most smartphones, touching the screen on the area you want in focus, will make the phone focus on that area. In addition, this is also where the phone will take its exposure reading. There are some camera apps available that will allow you to focus on one area and have the phone take its exposure reading elsewhere. You may also be able to increase or decrease the exposure of the image. How to do this will depend on the phone you are using, but for iPhone users, after tapping the screen to focus, sliding your finger up/down will alter the exposure compensation.

    Another image taken with the sun behind. This time, the light makes the bottle glow.

    Another image taken with the sun behind the subject. This time, the light makes the bottle glow.

    Creating Shallow Depth of Field

    Despite many newer smartphones having fast apertures (the iPhone 6 and 6s use an f/2.2 lens), their tiny sensor sizes make getting that nice creamy background bokeh a little more challenging, than with other cameras. If you’re unaware, generally the larger the sensor, the easier it is to create stunning bokeh. However, if you have a little understanding of depth of field, then you can create images from your smartphone with a blurry background. You can achieve this by reducing the distance between your subject and the phone, and increasing the distance from your subject to the background.

    Make Your Images Pop

    Post-processing is another tool that we have in our arsenal as photographers to make an image more striking. Introduce that to your phone photos. There is a plethora of apps available that give you varying levels of control with the post-processing phase.

    Some apps, like VSCO, have a vast range of filters that you can apply to images, and allow you to tweak areas, such as highlights and shadows, to get a different look. Other apps like Adobe’s Lightroom works much like the desktop variant, allowing to develop your images with a more natural touch. Photoshop and Photoshop fix (Note: it is called Photoshop Mix for Android) are both from Adobe and offer varied editing options that are fantastic at polishing up images in the final stages. Personally, I use Lightroom and Photoshop fix on my content now. However, in the past I used SnapSeed and found that to be great fun to use, too. It’s up to you which editing app you decide to employ, and how involved with it you become.
    Smartphone-17

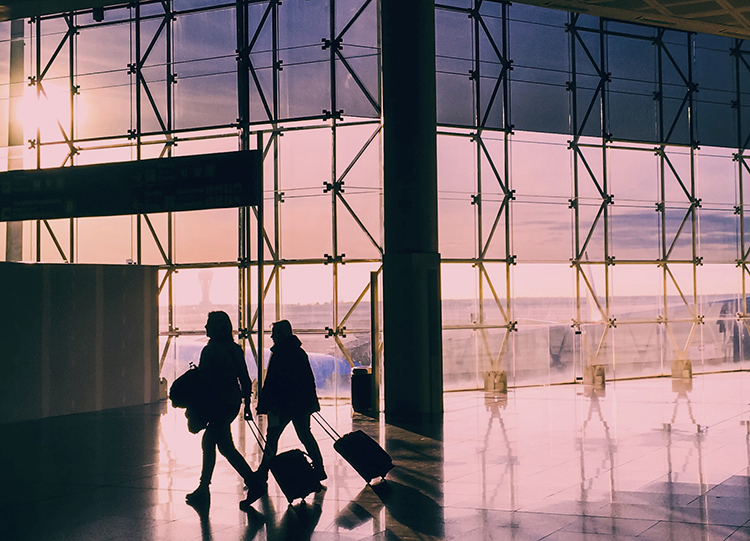
    Again, looking for clean shapes to create a striking silhouette in an airport.

    Looking for clean shapes to create a striking silhouette in an airport.

    Other Tips to Consider

    • Take a lot of photos: Sometimes things happen fast. Don’t be afraid of taking a lot of photos. The perfect shot isn’t going to come with every single click. The trick is to take more photos than what you really need, then pick the best one from the bunch. If you do this, then you will have more to choose from, and a higher chance of getting one that stands out.
    • Learn how to see light and how it interacts with its environment: Light is the most important object in a photograph. It doesn’t matter what camera you’re using, how well you know how to use it, or how amazing your subject is; it all counts for nothing without light. You’ll often hear photographers talking about the Golden Hour, which is early in the morning and again in the evening when sun is lower, softer and the light is more directional.
    • If you’re photographing with the sun behind you, know how that will make your subject look. Do you want to light up their entire face, for example? Or do you want to shoot from the side? If you move so the sun is behind the subject, then consider photographing them silhouetted. If the light source is behind the subject, the foreground will always be darker than the background. The way you position your subject – or wait until the light is right for your subject – is how you make an image more creative and stand out.
    • Watch your background: Something that is often overlooked in an image is the background. A bad background can bring a great subject down. You need to think about your photo and what makes it interesting. If the subject you’re photographing is to be the only thing in the photo, then you should use a nice clean background, that isn’t going to draw away people’s attention from the main subject. However, backgrounds can also add to an image, and are great for environmental portraits.

    I loved the peacefulness of the light here and the silhouette of the palm tree.

    I loved the peacefulness of the light here and the silhouette of the palm tree.

    Here, I photographed toward the light and decided to include the flag on the right to add a little more interest.

    Here, I photographed toward the light and decided to include the flag on the right to add a little more interest.

    Conclusion

    Whilst there are many limitations to using the camera in your smartphone, or indeed a tablet, it can help teach you how to work around limitations, and still create striking images. Their quality is clearly not going to be as high as a dedicated camera’s quality will be, however, it’s still a lot of fun to be able to capture a great image on a device with such limitations.

    Below are some more images that I have taken with my iPhone. Feel free to share some images you’ve taken on your smartphone or tablet in the comments below, as well as your favorite camera and processing apps.

    Smartphone-2

    I found the leaves of this plant to be quite striking. By photographing from a very low perspective, I was able to make my subject pop out more against a plain blue sky. The position of the sun also creates interest as the light kicks off edges.

    Smartphone-5

    The in-built panorama feature of my phone worked well to create this image.

    Smartphone-8

    Another image where the panorama mode worked quite well.
    Smartphone-9

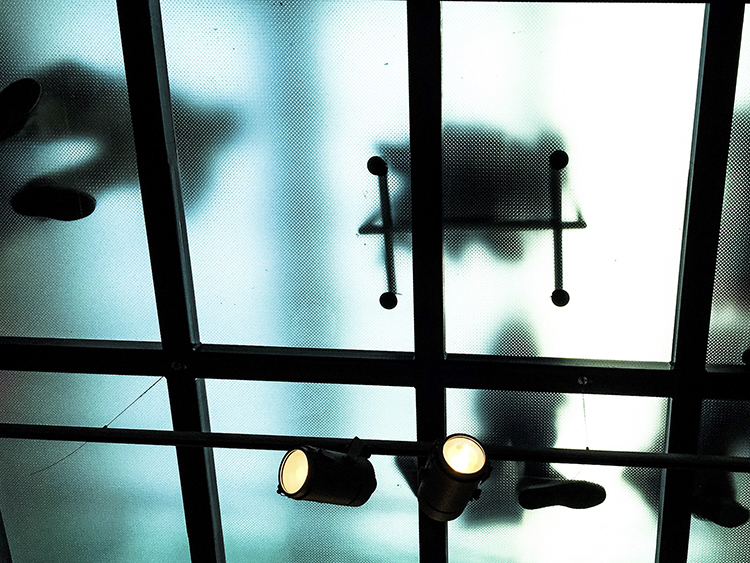
    Don’t be afraid to look up! In this image, the floor above me was frosted glass and made for some interesting shapes.
    Smartphone-10

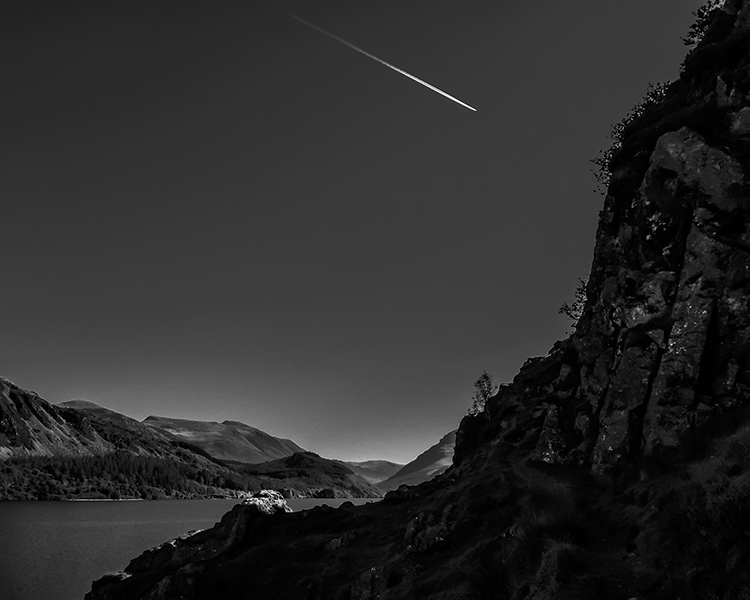
    Converting this image to black and white has given it an almost unearthly feel to it.

    Smartphone-12

    Photographed looking straight down. Simple images often work best not just with smartphones, but in photography in general.
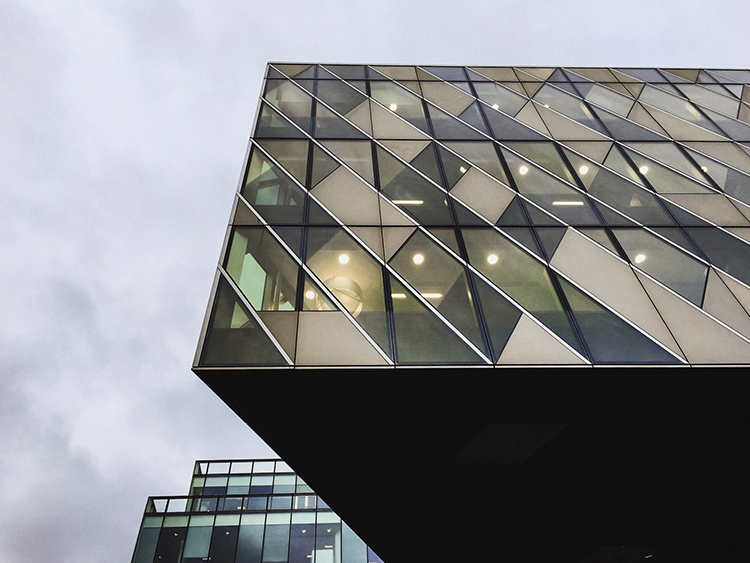
    Smartphone-13

    The clean lines of these buildings create some interest.
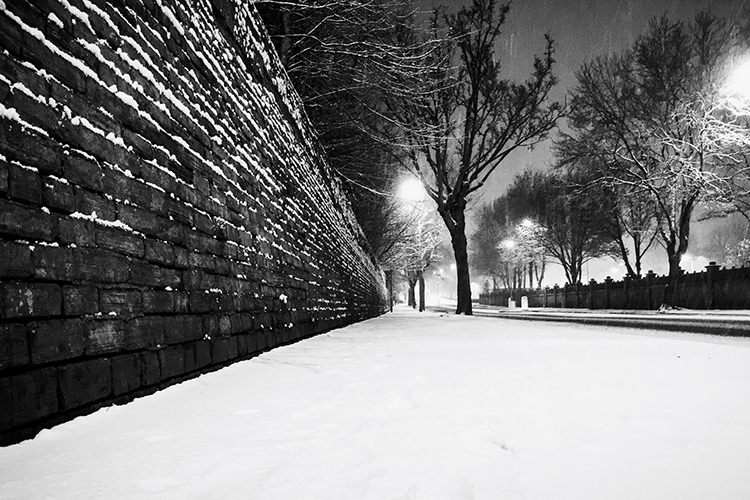
    Smartphone-14

    Again, photographing down low I was able to show an every day scene from a different perspective.
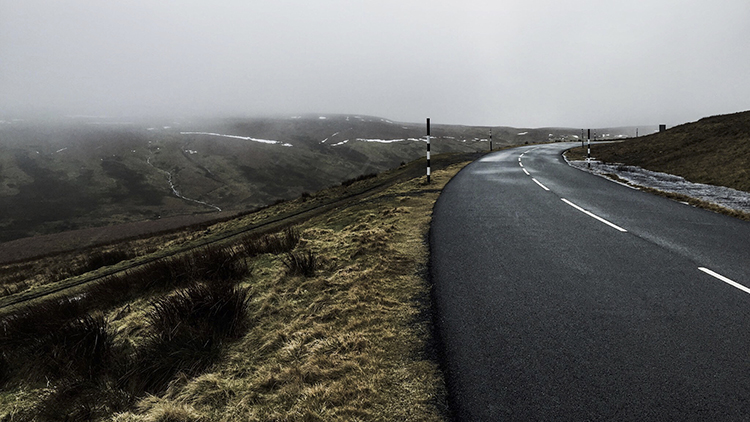
    Smartphone-19

    The same principles used in this image will work very well on any camera. The road in this image creates a sense of depth.
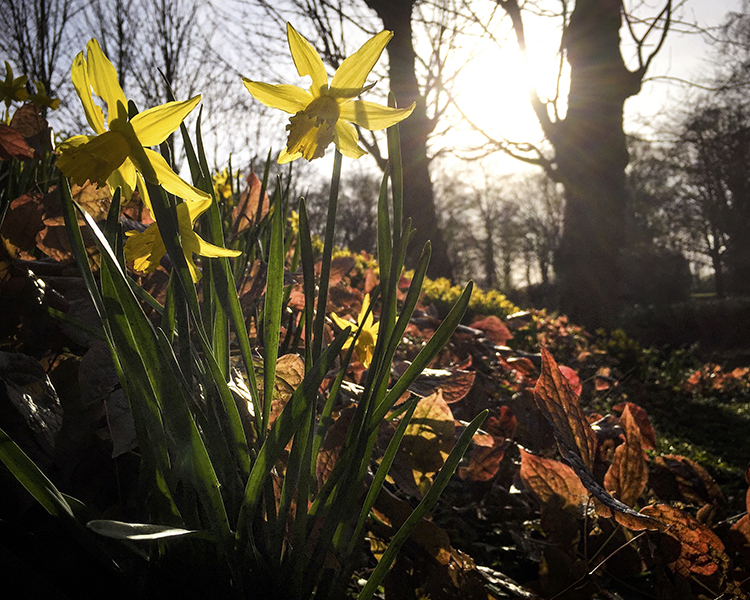
    Smartphone-20

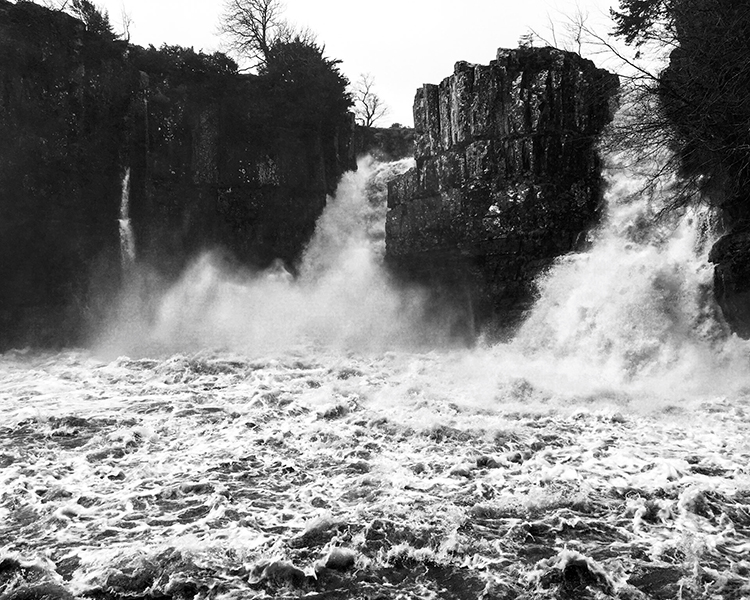
    The quality and direction of light help make this image. These are qualities you should always look for; no matter what camera you are using.
    Smartphone-18

    googletag.cmd.push(function() {
    tablet_slots.push( googletag.defineSlot( “/1005424/_dPSv4_tab-all-article-bottom_(300×250)”, [300, 250], “pb-ad-78623” ).addService( googletag.pubads() ) ); } );

    googletag.cmd.push(function() {
    mobile_slots.push( googletag.defineSlot( “/1005424/_dPSv4_mob-all-article-bottom_(300×250)”, [300, 250], “pb-ad-78158” ).addService( googletag.pubads() ) ); } );

    The post How Using Your Smartphone Camera Can Help Improve Your Photography by Daniel Smith appeared first on Digital Photography School.


    Digital Photography School

  • Corel AfterShot Pro 3 launches with new touchup tool, recovery algorithm

    Corel has launched AfterShot Pro 3, the latest version of its photo editing software. The newest version brings several added features and updates, including a Lens Correction Development Kit for creating custom lens corrections, an in-app plugin manager, and a few new and improved tools for touching up photos.

    AfterShot Pro 3 is equipped with a completely new Highlight Recovery algorithm, and as such Corel claims the Highlight Recovery Range slider can pull more tones and details from overexposed Raw photos. Joining the new algorithm is the addition of ‘comprehensive watermarking,’ including the ability to watermark in batches, rotate the watermark’s angle, adjust its size, and alter its transparency. 

    Another new editing tool is Blemish Removal & Correction, which aims to eliminate the need to use a separate app like Photoshop to remove blemishes and perform other touchups and small corrections. Photo presets can also be applied via the new in-app preset library; both premium and free presets are offered.

    Finally, AfterShot Pro 3 features a new modular delivery system for providing updated and new Raw profiles more quickly than the previous software version. With this, new camera profiles are available to download in-app as soon as they’re released by the company’s development team.

    Corel AfterShot Pro 3 is available in English, German and Japanese through the product’s website; Windows, Mac and Linux are supported. The price for new customers is $ 79.99 USD/CAD, while existing customers can upgrade to the newest version for $ 59.99 USD/CAD.

    Via: MarketWired

    Articles: Digital Photography Review (dpreview.com)

  • Advanced Accessibility: 12 Futuristic Wheelchair Designs & Concepts

    [ By Steph in Technology & Vehicles & Mods. ]

    future wheelchairs off road 1

    Technological advancements could enable wheelchair users to stand up to reach high objects, zoom around on sandy and snowy landscapes, power up hills without an assistant and even climb stairs. Lightweight materials like carbon fiber, user-friendly adjustable components, seats customized to the user’s body measurements and electronic features like LED lights, collision sensors and built-in heating systems make these mobility solutions cooler and more functional than ever.

    Go Wheelchair: Custom 3D-Printed for Each User
    future wheelchair go

    future wheelchair go 2

    3D printing technology can customize the dimensions of a wheelchair to a specific user’s body measurements as well as giving them a choice of colors and additional components. The appearance can be specified with an app, and the finished product could be delivered in two weeks. “With the Go Wheelchair, we saw an opportunity to really progress the manual mobile category for users with disabilities, and to use 3D-printing technology to solve significant and meaningful problems,” says designer Benjamin Hubert of Layer.

    Ultra-Tough Carbon Fiber Wheelchair

    future wheelchair carbon black

    future wheelchairs carbon black 2

    future wheelchair carbon black 3

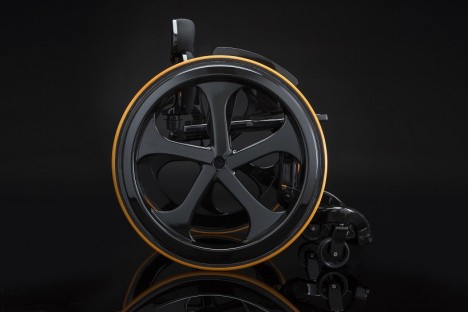
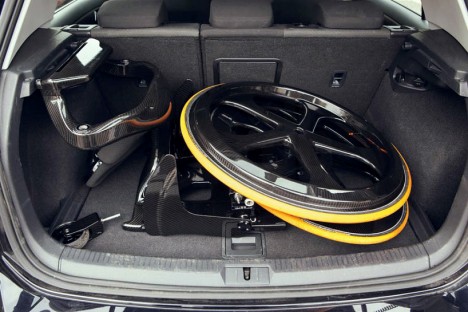
    “I felt what wheelchairs were horrible medical devices, and couldn’t understand why companies didn’t advance their wheelchairs in the same way bike companies did with their products, says designer Andrew Slorance, who suffered a spinal injury at the age of 14. His desire for a better-looking, higher quality chair led him to create the ‘Carbon Black,’ which adds a lot of bike-like functionality including an optional LED system for night time travel. Minimal and lightweight, the wheelchair is made of carbon fiber and can be quickly and easily dismantled and reassembled for travel.

    Off-Road Wheelchair for Adventurers

    future wheelchairs off road 1

    future wheelchairs off road 2

    future wheelchairs off road 3

    future wheelchairs off road 4

    No sandy shore or snow-covered field is off limits when you’re in the Ziesel, an off-road outdoor mobility solution with 4-season rubber tracks and a high precision joystick. Made for exploring cross-country skiing tracks, hiking trails, beaches and dunes, the high performance chair by Mattro even has a fully automated heating system and can transport heavy loads on a trailer.

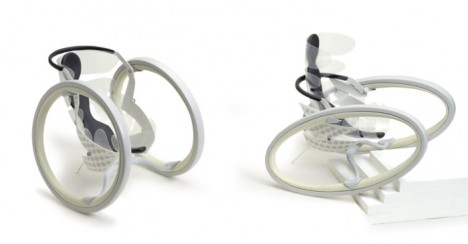
    Transformable Wheel Chair by Caspar Schmitz
    future wheelchair transformable 1

    future wheelchair transformable 2

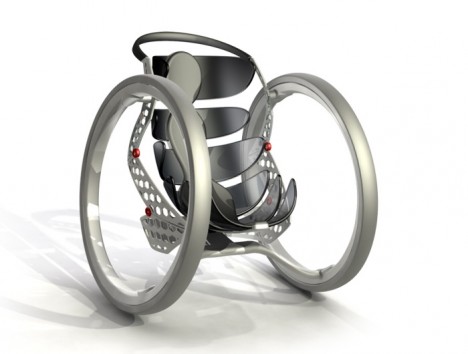
    With flexible wheels that adapt to a variety of ground conditions, the lightweight and durable polyurethane Transformable Wheel can climb stairs and handle other rough terrain. While this design is just a concept, it’s an intriguing take on multifunctional wheelchairs that give users more independence.

    Next Page – Click Below to Read More:
    Advanced Accessibility 12 Futuristic Wheelchair Designs Concepts

    Share on Facebook


    [ By Steph in Technology & Vehicles & Mods. ]

    [ WebUrbanist | Archives | Galleries | Privacy | TOS ]


    WebUrbanist

  • 8 Tips to Avoid Crowds at Popular Landscape Locations

    Photographing popular tourist destinations can at times be a great challenge. Hundreds of people are walking within your frame, and regardless of the direction you’re facin,g it’s nearly impossible to capture an image without people in it.

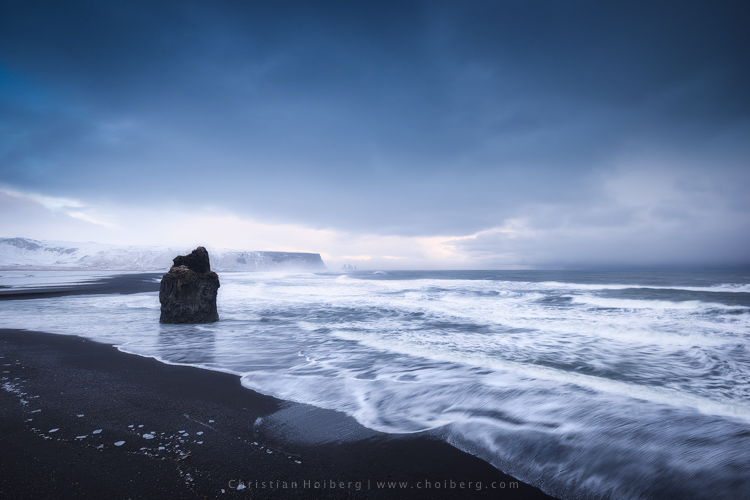
    1

    I often visit beautiful landscapes, many of which are popular among tourists, even though I prefer to shoot more unique locations, and enjoy photographing in quite areas where it’s nothing but nature and me. So when I visit extremely crowded landscapes, I get slightly stressed. But these touristic places are popular for a reason.

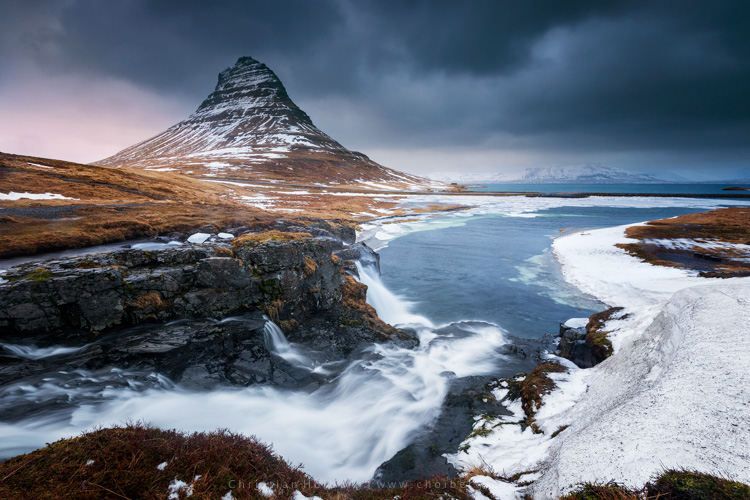
    When I visited the famous Svartifoss, Iceland a few weeks back, I left without taking more than a couple snapshots, most with my phone. Even though the roughly 40 minute long hike is considered challenging by some, I was amazed to see the amount of people gathered around the waterfall, not to mention the bunch of tripods placed all over. It seemed to be impossible to take the classic image with the river leading up towards the falls, as a group of tourists had occupied the entire place.

    Even though it might seem impossible to take professional looking landscape images from these places, there are ways to avoid the crowds and enjoy them alone. It all comes down to planning and prioritizing.

    1 – Choose the Hour Wisely

    If you’re into landscape photography you may already know that the best time to photograph is during the Golden Hour. This is the time of the day where the sun’s position in the sky is at the lowest, which creates a soft light ideal for photography.

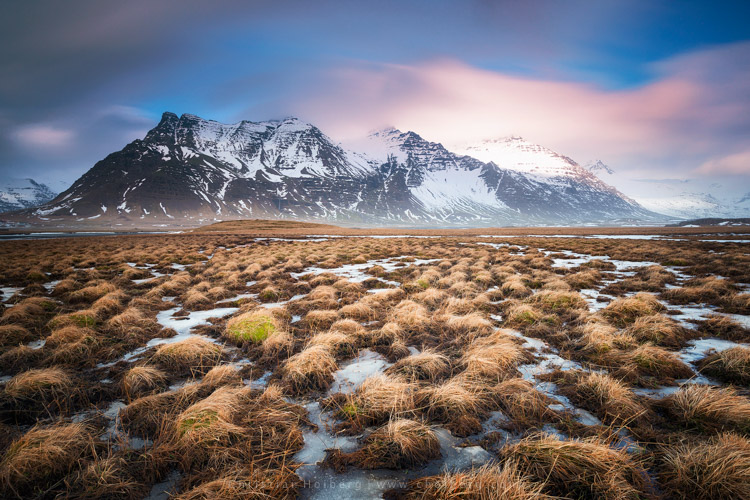
    2

    2 – Wake Up Early

    Since many tourists aren’t dedicated photographers, most of them won’t be awake and out in nature for sunrise. Normally they prefer spending a couple extra hours in bed and having breakfast at the hotel.

    3

    This is a great advantage for us who wish to capture the beautiful landscapes in optimal light. It’s rare that you meet large crowds this early in the morning, but you may meet a fellow photographer or two. Usually most photographers, and non-photographers, that are up for sunrise try not to get in each other’s way.

    About one or two hours after sunrise, depending on what time of the year it is, the first busses filled with tourists begin to arrive. This gives you a lot of time to enjoy these places, and take the images that will be difficult to capture when it gets annoyingly crowded.

    3 – Enjoy the Sunset

    It’s no secret that it’s more normal to be awake for sunset than for than sunrise. Accordingly the crowd will be a larger during this hour, and if you’re photographing close to a large town it might even be very crowded. Since I’m a landscape photographer and this article is mainly focused on avoiding crowds at popular landscape destinations, I won’t get into cityscapes, etc.

    4

    What you will see when you are photographing landscapes during sunset is that most people present are fellow photographers. Most normal tourists tend to head back towards the town or hotel, for dinner or other activities.

    4 – Photograph the Night Sky

    If you haven’t photographed landscapes at night yet, I strongly recommend you try it. Be aware though, as it is highly addictive!

    Images captured during the night can often be quite different than what you normally see from these touristic locations, since the majority of people prefer to sleep at this time. I would say the lack of sleep is part of a landscape photographer’s life (for both beginners and professionals).

    5

    Another benefit of photographing at night is that you might witness certain astrological events, such as meteorite showers, or the northern lights in the northern hemisphere. Be sure to bring something warm to drink as it may get chilly throughout the night.

    5 – Choose the Month Strategically

    I know that getting vacation days outside the normal holidays might not be possible for everyone, and some locations are definitely best to visit during certain times of the year. But, visiting during low-season is the best method to avoid the crowds.

    6

    If you want to photograph events such as the Tulip Festival in the PSNW (Washington/Oregon), or the Cherry Blossom in Japan, you have to visit during a specific time of the year, and most likely it’s going to be crowded with both photographers and tourists. While the tips above still will be beneficial, you will most likely not be at these places alone.

    However, if you’re not photographing a specific event, visiting during low season can be a great choice. Not only will you avoid the biggest crowds, you may also be rewarded with some unique scenery and weather.

    7

    I’ve visited Iceland during low season a couple times, and the results have been great. Yes, it has been challenging with the harsh weather but when the light is good, it’s GOOD!

    6 – When the Crowds Won’t Leave

    But what if you’re not able to go during low season, sunrise, or sunset? What if there is still a large crowd even during these times? Should you just give up and head back home? Of course not! There’s always a solution, so don’t worry.

    7 – Use a Neutral Density Filter

    While I won’t get too into the technical aspects of Neutral Density Filters, they allow you to use a longer shutter speed. By placing the dark piece of glass in front of your lens, you need a longer shutter speed to get the correct amount of light to reach the camera sensor. Just be sure to bring a tripod, I doubt you will be able to hold your camera completely still for several seconds or minutes.

    8

    Why it’s Beneficial to use an ND Filter at Crowded Locations

    When you are using a long shutter speed, all motion within the frame will become blurred. The longer your shutter speed is, the less visible people will be. In fact, if you set the shutter speed to a couple minutes, you may even completely remove all people from your image.

    8 – Stack Multiple Images

    Stacking multiple images is another method to remove crowds from your pictures. This is a little more advanced than using an ND Filter, and requires that you have an image editing software such as Adobe Photoshop. Let’s do this step by step:

    1. Take a set of images from the exact same position. Ideally you should use a tripod so that the frame is the same on each image. Try to take 20-25 images with an interval of roughly 20 seconds. Having this interval will allow people to move a little between each shot.
    2. Import the images to your computer.
    3. Open Photoshop
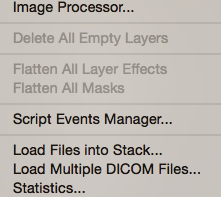
    4. Click File > Scripts > Statistics
    5. Choose Median as your Stack Mode in the box that appears, and check the box for “Attempt to Automatically Align Source Images”.
    6. Go to YouTube and watch funny videos until Photoshop is done processing…
    7. When the image is done, zoom in to 100% and look for any spots where the script wasn’t able to do a perfect job. If you find such spots select the Spot Removal Tool and carefully heal these places.

    9

    This is a great technique to remove people from your images. My experience is that the script works well on 99% of images, and even on the remaining 1% it does a decent job.

    Final Words

    I think most of us have experienced being frustrated due to the large crowds more than once. Personally I think it’s important to remain respectful to both fellow photographers and other tourists when we are at these popular places. Sometimes all you need is a little patience.

    10

    On another note, the best way to avoid the crowds is to go somewhere less known. I know it’s scary for many to go explore new locations, as you already know how beautiful the popular spots are, but the best images are often taken at less known locations.

    What do you do when photographing these popular locations?

    googletag.cmd.push(function() {
    tablet_slots.push( googletag.defineSlot( “/1005424/_dPSv4_tab-all-article-bottom_(300×250)”, [300, 250], “pb-ad-78623” ).addService( googletag.pubads() ) ); } );

    googletag.cmd.push(function() {
    mobile_slots.push( googletag.defineSlot( “/1005424/_dPSv4_mob-all-article-bottom_(300×250)”, [300, 250], “pb-ad-78158” ).addService( googletag.pubads() ) ); } );

    The post 8 Tips to Avoid Crowds at Popular Landscape Locations by Christian Hoiberg appeared first on Digital Photography School.


    Digital Photography School

  • Canon PowerShot SX620 HS brings 25x optical zoom to pocketable form

    $ (document).ready(function() { SampleGalleryV2({“containerId”:”embeddedSampleGallery_1212701134″,”galleryId”:”1212701134″,”isEmbeddedWidget”:true,”standalone”:false,”selectedImageIndex”:0,”startInCommentsView”:false,”isMobile”:false}) });

    Canon has announced a refresh to its compact superzoom lineup in the form of the PowerShot SX620 HS. It offers a 25x optical zoom covering an equivalent 25-625mm range, outdoing the 25-450mm equiv. range of its SX610 predecessor. The SX620 maintains a 20.2MP sensor, 3″ 922k-dot LCD, Intelligent image stabilization and built-in Wi-Fi with NFC.

    The Canon PowerShot SX620 HS will be offered in your choice of black, red or silver for $ 279.99 and will be available later this month.


    Press release:

    SHARE MEMORIES ON THE GO WITH NEW COMPACT, CONNECTED POWERSHOT SX620 HS DIGITAL CAMERA

    Latest Canon PowerShot Digital Camera Provides Impressive Image Quality and Zoom Range in a Compact Size 

    MELVILLE, N.Y., May 11, 2016 – Canon U.S.A., Inc., a leader in digital imaging solutions, introduced today the new Canon PowerShot SX620 HS digital camera – ideal for individuals looking for a convenient, easy-to-carry compact digital camera capable of producing high-quality photos and videos. This new camera boasts a 20.2 Megapixel* CMOS imaging sensor and a powerful 25X Optical Zoom lens (25-625mm equivalent) in a form factor that will easily fit in a pocket or purse, making it an ideal camera for those passionate about photography to capture gorgeous imagery no matter where they are. 

    The camera’s built-in wireless capabilities make it convenient to share images and videos on the go, and its powerful 25X optical zoom lens makes it ideal for those wanting to zoom in and out of the action. The Canon PowerShot SX620 HS digital camera is a great companion for those looking to visually document their daily adventures and easily share their experiences as they explore new places and do new things. 

    As the successor to Canon’s PowerShot SX610 HS digital compact camera, the Canon PowerShot SX620 HS digital camera also features:

    • An Intelligent Image Stabilizer (IS) that helps optimize image stabilization for virtually shake-free images in a variety of shooting conditions
    • Built-in Wi-Fi®** and Near Field Communication (NFC™)***  to allow for easy sharing and transferring of images and videos to a personal computer or other compatible devices such as the Canon Connect Station CS 100
    • 20.2 megapixel* CMOS sensor with DIGIC 4+ Image Processor to help deliver stunning image quality, even in low light
    • The ability to capture spectacular 1080p Full HD video
    • Large 3.0-inch (approximately 922,000 dots) LCD to allow for easy viewing, even from a wide angle
    • Hybrid Auto mode that allows for recording up to four seconds of video before each image that is captured, then automatically combines each clip and still into a quick video recap of the day
    • Smart AUTO mode which intelligently selects the proper settings for the camera based on pre-defined shooting situations to help create the best possible image
    • Creative Shot mode that uses composition, color and lighting from an original image to create unique images with an artistic flair
    • An Auto Zoom feature that, when enabled, makes the camera automatically zoom in on subjects and help keep them in focus

    Canon’s PowerShot SX620 HS digital camera, available in black, red and silver, is scheduled to be available in May 2016 for an estimated retail price of $ 279.991

    1 Availability, pricing and specifications are subject to change without notice.  Actual prices are set by individual dealers and may vary.

    * Image processing may cause a decrease in the number of pixels.

    ** Compatible with iOS® versions 7.1/8.4/9.0, Android™ smartphone and tablet versions  4.0/4.1/4.2/4.3/4.4/5.0/5.1.  Data charges may apply with the download of the free Canon Camera Connect app. This app helps enable you to upload images to social media services. Please note that image files may contain personally identifiable information that may implicate privacy laws. Canon disclaims and has no responsibility for your use of such images. Canon does not obtain, collect or use such images or any information included in such images through this app.

    *** Compatible with Android smartphone and tablet versions 4.0/4.1/4.2/4.3/4.4/5.0/5.1.

    Canon PowerShot SX620 HS specifications

    Price
    MSRP $ 279
    Body type
    Body type Compact
    Sensor
    Max resolution 5184 x 3888
    Other resolutions 4:3 (5184 x 3888, 3648 x 2736, 2048 x 1536, 640 x 480), 16:9 (5184 x 2912, 3648 x 2048, 1920 x 1080, 640 x 360), 3:2 (5184 x 3456, 3648 x 2432, 2048 x 1368, 640 x 424), 1:1 (3888 x 3888, 2736 x 2736, 1536 x 1536, 480 x 480)
    Image ratio w:h 1:1, 4:3, 3:2, 16:9
    Effective pixels 20 megapixels
    Sensor photo detectors 21 megapixels
    Sensor size 1/2.3" (6.17 x 4.55 mm)
    Sensor type BSI-CMOS
    Processor DIGIC 4+
    Color space sRGB
    Color filter array Primary color filter
    Image
    ISO Auto, 80-3200
    White balance presets 5
    Custom white balance Yes
    Image stabilization Optical
    Image stabilization notes Intelligent IS
    Uncompressed format No
    JPEG quality levels Superfine, fine
    File format
    • JPEG (Exif v2.3)
    Optics & Focus
    Focal length (equiv.) 25–625 mm
    Optical zoom 25×
    Maximum aperture F3.2–6.6
    Autofocus
    • Contrast Detect (sensor)
    • Multi-area
    • Center
    • Selective single-point
    • Tracking
    • Single
    • Continuous
    • Face Detection
    • Live View
    Autofocus assist lamp Yes
    Digital zoom Yes (4X)
    Manual focus Yes
    Normal focus range 5 cm (1.97)
    Macro focus range 1 cm (0.39)
    Number of focus points 9
    Screen / viewfinder
    Articulated LCD Fixed
    Screen size 3
    Screen dots 922,000
    Touch screen No
    Screen type TFT LCD
    Live view Yes
    Viewfinder type None
    Photography features
    Minimum shutter speed 15 sec
    Maximum shutter speed 1/2000 sec
    Exposure modes
    • Hybrid Auto
    • Creative Shot
    • Scene
    • Program
    Scene modes
    • Portrait
    • Smile
    • Wink Self-timer
    • Face Self-timer
    • High-speed Burst
    • Handheld Night Scene
    • Low Light
    • Fireworks
    • Long Shutter
    Built-in flash Yes
    Flash range 4.00 m (with Auto ISO)
    External flash No
    Flash modes Auto, on, slow synchro, off
    Drive modes
    • Single
    • Continuous
    • Self-timer
    Continuous drive 2.5 fps
    Self-timer Yes (2 or 10 secs, custom)
    Metering modes
    • Multi
    • Center-weighted
    • Spot
    Exposure compensation ±2 (at 1/3 EV steps)
    Videography features
    Resolutions 1920 x 1080 (30p), 1280 x 720 (30p), 640 x 480 (30 fps)
    Format MPEG-4, H.264
    Microphone Mono
    Speaker Mono
    Storage
    Storage types SD/SDHC/SDXC card
    Connectivity
    USB USB 2.0 (480 Mbit/sec)
    HDMI Yes (micro-HDMI)
    Microphone port No
    Headphone port No
    Wireless Built-In
    Wireless notes 802.11b/g/n with NFC
    Remote control Yes (via smartphone)
    Physical
    Environmentally sealed No
    Battery Battery Pack
    Battery description NB-13L lithium-ion battery & charger
    Battery Life (CIPA) 295
    Weight (inc. batteries) 182 g (0.40 lb / 6.42 oz)
    Dimensions 97 x 57 x 28 mm (3.81 x 2.24 x 1.1)
    Other features
    Orientation sensor Yes
    GPS None

    Articles: Digital Photography Review (dpreview.com)

  • Canon 600EX II-RT boosts recycle times for top-of-the-line Speedlite

    $ (document).ready(function() { SampleGalleryV2({“containerId”:”embeddedSampleGallery_2878417558″,”galleryId”:”2878417558″,”isEmbeddedWidget”:true,”standalone”:false,”selectedImageIndex”:0,”startInCommentsView”:false,”isMobile”:false}) });

    The Canon Speedlite 600EX II-RT updates the manufacturer’s top-shelf flash unit with faster recycle times. The unit still offers wireless shooting via radio and optical transmission, but improves flash recycle times by 1.1 to 1.5x when using AA batteries and up to 2x with a new CP-E4N add-on battery pack.

    The flash provides a 197ft/60m guide number, consistent with its predecessor, and the zoom flash head covers a range of 20-200mm. It can control up to 5 groups of compatible flash units, offers a weather- and dust-resistant design and boasts ‘simplified’ button and dial operation.

    Expected in June 2016, the Canon Speedlite 600EX II-RT will cost $ 579.99.


    Press release:

    ACCESSORIZE THIS SPRING WITH THE CANON SPEEDLITE 600EX II-RT FLASH AND CANON EF-M 28MM f/3.5 MACRO IS STM LENS WITH BUILT-IN MACRO LITES AND IMAGE STABILIZER

    MELVILLE, N.Y., May 11, 2016 – Spring is all about having the right look and Canon U.S.A., Inc., a leader in digital imaging solutions, is giving photographers of all levels two new options that can improve their creativity and versatility; the Canon Speedlite 600EX II-RT flash and the Canon EF-M 28mm f/3.5 Macro IS STM lens. 

    Photographers looking to take rapid-fire flash images will appreciate the improved recycling time in the new Canon Speedlite-600EX II-RT flash. Those looking to explore the world of macro photography will appreciate the stylish compact look of the new Canon EF-M 28mm f/3.5 Macro IS STM lens, the first EF-M Macro Lens for the Canon EOS M Camera System, which features Image Stabilization and a pair of built-in miniature Macro Lites to enhance image quality during close-up photography. 

    The Canon Speedlite 600EX II-RT flash Offers Improved Recycling Time and More

    The Speedlite 600EX II-RT flash is compatible with most EOS cameras. It replaces Canon’s top-of-the-line Speedlite 600EX-RT, and improves recycling time by approximately 1.1 to 1.5 times* during continuous flash shooting when using AA batteries and up to 2 times* when adding the new optional Compact Battery Pack CP-E4N.  

    Additional Speedlite 600EX II-RT flash features include: 

    • Zoom flash head covers wide focal length range of 20–200mm; maximum guide number is 197 ft./60m at ISO 100, making Speedlite 600EX II-RT flash the most powerful flash unit in the EOS system.
    •  Wireless flash shooting support is available for both radio and optical transmission with compatible Canon Speedlites, offering users greater functional range when using flash.
    • Multiple flash system support allows control of up to five groups of compatible Canon Speedlites. 
    • Dust- and water-resistant body for reliable operation in harsh environments.
    • Flash-readiness indicator on the display panel, simplified button and dial operation and variable manual flash output.
    • New, specially designed accessories supplied include a built-in bounce adapter, plus SCF-E3 hard-type color filter sets, and a soft case. The new Compact Battery Pack CP-E4N is available as an optional accessory for faster recycling time and more flashes per charge.
    • Illuminated dot matrix LCD panel for enhanced display information, including flash mode and usable distance ranges plus C.Fn (Custom Function) and P.Fn (Personal Function) settings.

    First Macro Lens in the Canon EF-M lens series

    Photographers looking for a compact, lightweight macro lens should look no further than the Canon EF-M 28mm f/3.5 Macro IS STM lens, the first Canon Macro Lens specifically designed for the EOS M Camera System.

    The new lens features a pair of built-in miniature Macro Lite electronic flash units that illuminate close-up subjects as needed, helping to freeze movement, enhance color accuracy and provide a better sense of depth and dimension. Two curved flash units surround the front element of the lens, with the ability to illuminate both simultaneously, or one at a time. Users are also able to adjust the brightness of the Macro Lites between “bright” and “dim” settings.  

    The standard focusing range of the Canon EF-M 28mm f/3.5 Macro IS STM lens extends from infinity to life-size (1 time). Additionally, a Super Macro Mode allows shooting at even higher magnifications up to 1.2 times. This feature allows you to capture smaller details that really make your subjects stand out against the background. 

    Additional features of the Canon EF-M 28mm f/3.5 Macro IS STM lens include: 

    • Hybrid IS, the same feature as found on Canon EF 100mm f/2.8L Macro IS USM Lens, helps reduce camera shake for enjoyable handheld photography.
    • Stepping motor (lead screw-type STM) helps provide smooth and quiet focusing operation when taking photos, and near-silence when shooting videos.
    • One UD lens and two aspherical lenses** help deliver outstanding image quality at all distance settings by reducing chromatic and spherical aberrations.
    • Angle of view similar to a 45mm standard lens (35mm equivalent) provides flexible image capture of various subjects and scenes at macro distances and beyond.
    • Tapered lens top shape makes it easy to capture high-quality images at close range without casting shadows.

    The Canon Speedlite 600EX II-RT electronic flash unit is scheduled to be available through authorized Canon dealers in June 2016 for an estimated retail price of $ 579.991. Canon’s EF-M 28mm f/3.5 Macro IS STM lens is scheduled to be available through authorized Canon dealers in June for an estimated retail price of $ 299.991.

    1 Availability, pricing and specifications are subject to change without notice.  Actual prices are set by individual dealers and may vary.

    * Based on Canon’s standards. As compared to the Speedlite 600EX-RT.

    ** Among autofocus lenses for interchangeable lens cameras. As of May 11, 2016, based on Canon’s research.

    Articles: Digital Photography Review (dpreview.com)

  • Bright idea: Canon debuts EF-M 28mm F3.5 Macro with built-in LEDs

    $ (document).ready(function() { SampleGalleryV2({“containerId”:”embeddedSampleGallery_7401393305″,”galleryId”:”7401393305″,”isEmbeddedWidget”:true,”standalone”:false,”selectedImageIndex”:0,”startInCommentsView”:false,”isMobile”:false}) });

    Canon is introducing the first macro lens for its EF-M mount. The EF-M 28mm F3.5 Macro IS STM provides two user-controllable built-in LED macro lights and offers true 1:1 reproduction along with a 1.2x super macro mode.

    The EF-M 28mm is just the fifth lens for its EOS M system and will provide a 45mm equiv. angle of view on the mirrorless crop-frame bodies. It uses an STM motor and offers a hybrid image stabilization for a claimed 3.5 stop compensation. Shipping in June, it will cost $ 299.99.


    Press release:

    ACCESSORIZE THIS SPRING WITH THE CANON SPEEDLITE 600EX II-RT FLASH AND CANON EF-M 28MM f/3.5 MACRO IS STM LENS WITH BUILT-IN MACRO LITES AND IMAGE STABILIZER

    MELVILLE, N.Y., May 11, 2016 –Spring is all about having the right look and Canon U.S.A., Inc., a leader in digital imaging solutions, is giving photographers of all levels two new options that can improve their creativity and versatility; the Canon Speedlite 600EX II-RT flash and the Canon EF-M 28mm f/3.5 Macro IS STM lens. 

    Photographers looking to take rapid-fire flash images will appreciate the improved recycling time in the new Canon Speedlite-600EX II-RT flash. Those looking to explore the world of macro photography will appreciate the stylish compact look of the new Canon EF-M 28mm f/3.5 Macro IS STM lens, the first EF-M Macro Lens for the Canon EOS M Camera System, which features Image Stabilization and a pair of built-in miniature Macro Lites to enhance image quality during close-up photography. 

    The Canon Speedlite 600EX II-RT flash Offers Improved Recycling Time and More

    The Speedlite 600EX II-RT flash is compatible with most EOS cameras. It replaces Canon’s top-of-the-line Speedlite 600EX-RT, and improves recycling time by approximately 1.1 to 1.5 times* during continuous flash shooting when using AA batteries and up to 2 times* when adding the new optional Compact Battery Pack CP-E4N.  

    Additional Speedlite 600EX II-RT flash features include: 

    • Zoom flash head covers wide focal length range of 20–200mm; maximum guide number is 197 ft./60m at ISO 100, making Speedlite 600EX II-RT flash the most powerful flash unit in the EOS system.
    •  Wireless flash shooting support is available for both radio and optical transmission with compatible Canon Speedlites, offering users greater functional range when using flash.
    • Multiple flash system support allows control of up to five groups of compatible Canon Speedlites. 
    • Dust- and water-resistant body for reliable operation in harsh environments.
    • Flash-readiness indicator on the display panel, simplified button and dial operation and variable manual flash output.
    • New, specially designed accessories supplied include a built-in bounce adapter, plus SCF-E3 hard-type color filter sets, and a soft case. The new Compact Battery Pack CP-E4N is available as an optional accessory for faster recycling time and more flashes per charge.
    • Illuminated dot matrix LCD panel for enhanced display information, including flash mode and usable distance ranges plus C.Fn (Custom Function) and P.Fn (Personal Function) settings.

    First Macro Lens in the Canon EF-M lens series

    Photographers looking for a compact, lightweight macro lens should look no further than the Canon EF-M 28mm f/3.5 Macro IS STM lens, the first Canon Macro Lens specifically designed for the EOS M Camera System.

    The new lens features a pair of built-in miniature Macro Lite electronic flash units that illuminate close-up subjects as needed, helping to freeze movement, enhance color accuracy and provide a better sense of depth and dimension. Two curved flash units surround the front element of the lens, with the ability to illuminate both simultaneously, or one at a time. Users are also able to adjust the brightness of the Macro Lites between “bright” and “dim” settings.  

    The standard focusing range of the Canon EF-M 28mm f/3.5 Macro IS STM lens extends from infinity to life-size (1 time). Additionally, a Super Macro Mode allows shooting at even higher magnifications up to 1.2 times. This feature allows you to capture smaller details that really make your subjects stand out against the background. 

    Additional features of the Canon EF-M 28mm f/3.5 Macro IS STM lens include: 

    • Hybrid IS, the same feature as found on Canon EF 100mm f/2.8L Macro IS USM Lens, helps reduce camera shake for enjoyable handheld photography.
    • Stepping motor (lead screw-type STM) helps provide smooth and quiet focusing operation when taking photos, and near-silence when shooting videos.
    • One UD lens and two aspherical lenses** help deliver outstanding image quality at all distance settings by reducing chromatic and spherical aberrations.
    • Angle of view similar to a 45mm standard lens (35mm equivalent) provides flexible image capture of various subjects and scenes at macro distances and beyond.
    • Tapered lens top shape makes it easy to capture high-quality images at close range without casting shadows.

    The Canon Speedlite 600EX II-RT electronic flash unit is scheduled to be available through authorized Canon dealers in June 2016 for an estimated retail price of $ 579.991. Canon’s EF-M 28mm f/3.5 Macro IS STM lens is scheduled to be available through authorized Canon dealers in June for an estimated retail price of $ 299.991.

    1 Availability, pricing and specifications are subject to change without notice.  Actual prices are set by individual dealers and may vary.

    * Based on Canon’s standards. As compared to the Speedlite 600EX-RT.

    ** Among autofocus lenses for interchangeable lens cameras. As of May 11, 2016, based on Canon’s research.

    Canon EF-M 28mm F3.5 Macro IS STM specifications

    Principal specifications
    Lens type Prime lens
    Max Format size APS-C / DX
    Image stabilisation Yes (3.5 stops)
    Lens mount Canon EF-M
    Aperture
    Aperture ring No
    Optics
    Elements 11
    Groups 10
    Special elements / coatings One UD and two aspherical elements
    Focus
    Minimum focus 0.09 m (3.54)
    Maximum magnification 1.2×
    Autofocus Yes
    Motor type Stepper motor
    Full time manual Yes
    Focus method Extending front
    Distance scale No
    DoF scale No
    Physical
    Weight 130 g (0.29 lb)
    Diameter 61 mm (2.4)
    Length 46 mm (1.79)
    Sealing No
    Colour Graphite
    Hood supplied Yes
    Hood product code ES-22

    Articles: Digital Photography Review (dpreview.com)

  • Huawei launches Honor V8 with 12MP dual-camera module

    Huawei has announced the V8, the new flagship in the Chinese manufacturer’s Honor series of devices. Consumers can choose from different display and processor options but the camera module is the same on all variants. The Honor V8 features a dual-camera setup that looks very similar in terms of specifications to the one found on the Huawei P9, but has to make do without the P9’s Leica branding.

    Both 12MP sensors come with a 1.76-micron pixel-size and are coupled with a 6-element lens with F2.2 aperture. There is also a dual-LED flash and the AF-system is laser-assisted. As on the P9, the front camera offers an 8MP sensor and F2.4 aperture. 

    In terms of display resolution customers get to choose from Full-HD or Quad-HD but all displays measure 5.7-inches and come with 2.5HD curved glass. The Android 6.0 operating system with Huawei EMUI 4.1 skin is powered by an octa-Core Kirin 950 or 955 chipset. RAM is 4GB on all models but the model with the higher-resolution screen comes with 64GB of storage while the Full-HD variant has to make do with 32GB.

    Energy on all models is provided by a 3,500mAh battery that is charged via a USB Type-C connector. In China the Full-HD base model will retail for approximately $ 350 while to the top-end version with QHD-screen and 64GB storage will set you back approximately $ 439.

    Via: GSM Arena

    Articles: Digital Photography Review (dpreview.com)

  • How to Create Compelling Wide-Angle Portraits Using One Off-Camera Flash

    What are your most memorable moments as a photographer? As a travel photographer, my short list of stand-out moments include wandering alone in Namibia’s dead tree forest, photographing sunbeams from the top of a cliff in China, and capturing the Aurora Borealis on the coast of Iceland.

    1 Colombian Girl

    However, a year ago all of those amazing locations and moments were trumped by spending 30 minutes photographing a little girl outside her home near Villa de Leyva, Colombia (pictured above). This was the first time the girl had her portrait taken, let alone by a foreigner. With all the confidence of an experienced model, she literally stole the show that day. I believe the session is an important memory for her and instantly became my top moment photographing to date.

    Ironically, two years ago I would not have even bothered taking this picture. I was focused on landscape and outdoor travel scenes. Also, if I’m honest with myself, I was somewhat intimidated by using artificial lighting and working with people as subjects. In April of 2014, I gave environmental portraiture a shot and have never looked back. It is now an important focus of my work.

    This article will provide some guidance on how you can create images like the ones you see here, using a wide-angle lens and just one off-camera flash. But first, let me let you in on a little secret – it’s not that difficult.

    Getting things right in camera is the important first step, which is the focus of this article. Processing your images is equally important, but I’ll cover that in a future article. So, let me start by providing you with the core techniques, then get into equipment and settings.

    2 Smoking Guy

    Use a (Relatively) Wide-Angle Lens

    Lens choice is critically important in portraiture. Most portrait photographers reach for their 85mm or 105mm lens when heading out on a shoot. These focal lengths give a nice, realistic look to the subjects. However, I find myself drawn to portraits that have a surreal look to them, and include extra context that helps tell a story. Also, wide-angle lenses require you to shoot close to your subject, which also brings your viewer into the scene.

    So, the first step is to leave your 85mm or 105mm in the bag, and grab a wide-angle lens. Most of the portraits you see here were created at 24mm using a full frame camera (use a 16mm for the same view if your camera has a cropped sensor). For me, this focal length is the perfect blend of reality and distortion. If you shoot much wider, elements closer to the lens, such as arms and hands, look too big or elongated. Also, wider focal lengths mean a much bigger background, which is usually not desirable.

    3 Dockworker Ships

    Choose a Compelling Subject

    Your subject is paramount. The Indonesian dockworker above is amazing. I spent 20 minutes photographing this guy and really had a difficult time choosing the best image. On the other hand, you could spend all day photographing me on the same dock, in front of the same ships, and have nothing but tossers at the end of the day.

    I look for people that have experienced life. The ideal subject has a particular interesting quality about him or her, that makes them stand out from the rest. However, my subjects also have an everyday person quality about them. Finding subjects can be challenging, especially if you live in the suburbs of Chicago, like I do. I am a travel photographer and usually find my subjects in rural areas overseas. However, there are great subjects everywhere.

    Clothing is critically important. If your 90-year old rural villager is wearing a hat that says, “I Love New York”, then you will want to politely ask him to take it off, or at least turn it around for the picture. The point is, don’t let out-of-context clothing ruin or weaken your shot.
    4 Smiley Guy

    Choose a Complementary Background

    Your image is only as strong as the weakest part of it, which is often the background. This is because, as photographer Jim Zuckerman puts it, “The world is a compositional mess”. There are two important qualities you want out of your background:

    First, at the very least, your background must be non-distracting. Although you can easily isolate your subject with a longer focal length, the background becomes a major consideration with wide-angle portraits. Beginner, and even intermediate photographers, can overlook even some obvious distractions in the background. You have probably seen them before: trees that look like they are growing out of the subject’s head, patchy spots of bright light in the scene, colorful objects, straight lines and geometric shapes. You essentially don’t want anything that competes with your subject for attention.

    The image of the Indonesian dockworker below is non-distracting, but not much more. He is essentially standing in front of a shipping container, so this image won’t win any awards for its background. Nevertheless, it is still a good picture because of the strength of the subject.

    5 Dockworker Container

    Second, whenever possible, include a background that complements your subject by providing a context. I’ve shot many images with simple non-distracting backgrounds. But, my favorite pictures are those with a background that tells a story about the subject. This is why I love shooting in places like rural China and Indonesia. These countries have many ancient villages that provide opportunities for amazing backgrounds, such as in the image below.

    6 Chinese Guy Hat

    I like to keep all evidence of modernity out of the background. I don’t like plastic stuff in my pictures. I don’t include modern looking buildings or cars. Instead, I prefer rural areas with weather-beaten buildings. Of course, this all depends on what you are after. The important thing is that the background complements the subject and does not distract from it.

    Shoot in the Right Lighting Conditions

    Because the majority of the background is not lit by the flash, many of the same outdoor photography lighting principles hold true, even if a flash is being used. Try shooting either early or late in the day (when the sun is low in the sky) or in overcast conditions. I actually prefer overcast conditions, but still shoot relatively early or late in the day.

    Put Your Subjects at Ease

    I don’t hire models, so some subjects work well and others not as well. What you want to avoid is a picture of your subject standing flat-footed, straight up and down, and holding a fake smile.

    To help avoid this, it is a good idea to start your session by gaining their interest and confidence. If you have some images you’ve shot and processed, show them to give him or her an idea of what you are looking for, and hopefully peak their interest. This should communicate immediately that you are not looking for them to just stand there and smile. It should also show that the posing expectations will be basic.

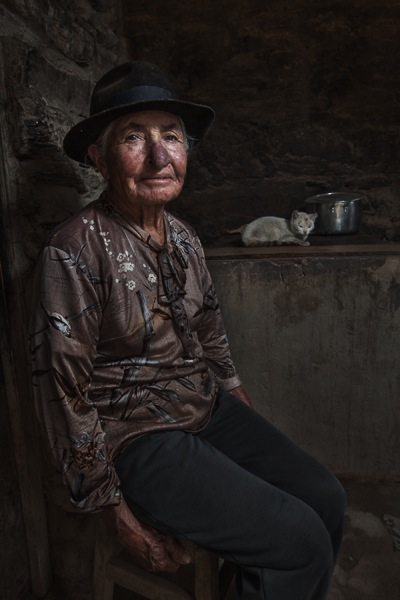
    7 Colombian Lady Cat

    Posing and Composition

    Because I am shooting wide, I get quite close to my subjects and warn them ahead of time about this. For me, the eyes are a critically important part of the picture and must be very sharp. I focus on the closest eye, and re-focus frequently as I move around the subject slightly.

    I generally ask him or her to look directly at the camera and not to smile, although not always. I then start moving slightly left or right, asking them to keep their head still and just follow the camera with their eyes. I usually shoot from slightly below eye level. I have them stand or sit at an angle to the camera. If the subject is standing, I have them put their weight on the back foot.

    I like to include the subject’s hands in the composition. With a wide-angle lens, their hands in the foreground will look large, so try to strike a balance with the hands being prominent, but not too large. You can do this by simply positioning the hands closer to or farther away from the lens relative to their body.

    8 Chinese Girl Laughing

    Equipment and Settings

    The Camera

    Your camera should be equipped with an internal or external flash trigger to control your off-camera flash. Here is how I set things up:

    • Start by leaving your flash or trigger initially turned off.
    • Set your camera to manual mode.
    • If the session is outdoors, I try for settings of ISO 100, f/7.1 and a shutter speed of around 1/160. You can adjust your f-stop and shutter speed to your preference, but keep in mind that you cannot go faster than your camera’s maximum flash sync speed.
    • Make the necessary adjustments to slightly underexpose the background by 1/3 to 2/3 stop. I usually start by adjusting shutter speed, but go no slower than 1/60 and no faster than 1/160. If necessary, I will then adjust my f-stop to f/5.6 at the widest. Then, and only then, will I start bumping up the ISO.
    • If you are indoors, you need to start with a higher ISO as a first step, and then make your adjustments to shutter speed and f-stop in the same manner.

    9 Chinese Woman

    Lighting

    For 90% of my portraits, I use a single off-camera flash, diffused with an umbrella or softbox. The most important rule with flash is “don’t ruin your shot,” which is usually done by putting too much flash on your subject. Instead, you want to get a decent balance of natural and artificial light, so that the flash is undetectable to the untrained eye, but lights your subject brighter than the underexposed background.

    Now, turn your flash and trigger on:

    • Set your off-camera flash to manual mode.
    • I typically position the flash at a 45-degree angle to the subject, about 2-3 feet (slightly less than a meter) away, higher than their head, angled downward.
    • I usually start with 1/16 flash power when outdoors, and adjust from there until the subject stands out from the background, but does not look like they have been blasted with flash.

    Post-Processing

    You need to get things right in camera first. But, you will need to use a variety of post-processing techniques to get the effect you see in these images. I’ll coverthe techniques I use to process environmental portraits in a future article.

    Thank you for reading, please share your wide-angle portraits and questions in the comments below.

    googletag.cmd.push(function() {
    tablet_slots.push( googletag.defineSlot( “/1005424/_dPSv4_tab-all-article-bottom_(300×250)”, [300, 250], “pb-ad-78623” ).addService( googletag.pubads() ) ); } );

    googletag.cmd.push(function() {
    mobile_slots.push( googletag.defineSlot( “/1005424/_dPSv4_mob-all-article-bottom_(300×250)”, [300, 250], “pb-ad-78158” ).addService( googletag.pubads() ) ); } );

    The post How to Create Compelling Wide-Angle Portraits Using One Off-Camera Flash by Ken Koskela appeared first on Digital Photography School.


    Digital Photography School