Blog

  • 1956 Stereo-Nikkor 3.5cm F3.5 lens auction goes live on eBay

    A Stereo-Nikkor 3.5cm F3.5 lens said to be in mint condition has been put up for auction on eBay. This speciality lens was designed for the Nikon S-Mount rangefinder to produce stereoscopic 3D images on a single photograph. The lens is being offered as part of a full kit that also includes a brown Nikon leather case, a Nippon Kogaku lens cap, original silica gel, Nikon Stereo Prism, and original Nikon Stereo L 38 filter.

    According to the eBay seller, there’s a chip in the prism’s glass and ‘very tiny scratches’ on the lens, but otherwise the items are said to be in excellent condition. Unfortunately, not much information about the Stereo-Nikkor exists; the product was introduced in December 1956 and discontinued in 1961 or 1962, according to Mir.com. Estimates place Stereo-Nikkor manufacturing at between 100 and 200 units during its brief production.

    Though the auction currently has $ 1,125 in bids, it has not reached its minimum reserve amount. The product is located in Vienna, and has a $ 300 shipping rate.

    Via: PetaPixel

    Articles: Digital Photography Review (dpreview.com)

  • Brooks Institute announces closure

    The California-based Brooks Institute, which offered degrees in photography, media and visual arts for 70 years, announced that it will close its doors this fall. In a statement released by the institute, the for-profit college cites the negative impact of recent stricter guidelines on career college programs introduced in 2011.

    The guidelines require that at least 35% of for-profit institution graduates be repaying their student loans, in addition to meeting debt-to-earnings requirements. Colleges that operate for profit are targeted in particular, as students who attend them represent a disproportionally high number of student loan borrowers, and in 2011 they accounted for 46% of student loan dollars in default.

    As of January of this year, Brooks Institute calculated the cost of its 3-year professional photography Bachelor’s degree at $ 81,330 for tuition and fees, with an additional $ 10,000 in books and supplies. Brooks stated that the median amount borrowed for the program was $ 15,584 in Federal loans, and that the job placement rate was 80%.

    For the time being, classes continue at Brooks for currently enrolled students, and the college says it will continue offering administrative support through the end of October. 

    Articles: Digital Photography Review (dpreview.com)

  • Announcing the Winners of the Corel AfterShot Pro Editing Software

    A huge thank you to everyone who entered our recent contest to win one of 10 copies of Corel’s AfterShot Pro 3 Photo Editor Software. This was an “After” themed competition, and so many of you shared your beautiful photographs, that we encourage everyone to go back and scroll through the comments section to view these wonderful images.

    ASP3-Logo.png

    As a bonus to the entire dPS Readership, Corel is offering a 30% discount on their AfterShot 3 leading Photo Editing Software for a limited time, and you’ll also receive FastFlick Instant Slideshow Maker for free! Just click here.

    Yet again, the response was absolutely wonderful! But now, onto the winners! Drum roll please, and the winners are:

    The Winners of the Corel After Photo Contest for 10 copies AfterShot Pro 3 Photo Editor Software are…

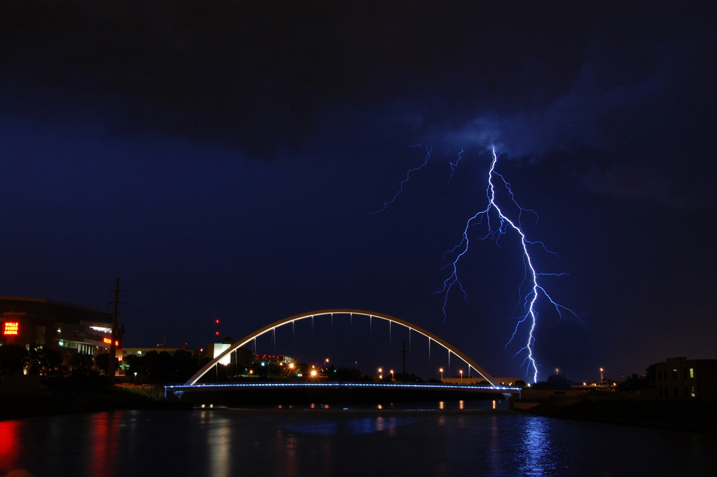
    Winner 1: Huston Traviss

    Winner 1 Pic 717

    Used the AfterShot Pro 3 free demo to finally fix a lightning picture of mine that was close but not perfect because of a raindrop on the lens. In 5 minutes I fixed something that was bothering me for months. If given a copy of this wonderful software, I would be able to finally salvage shots that are slightly off that I’d normally delete.

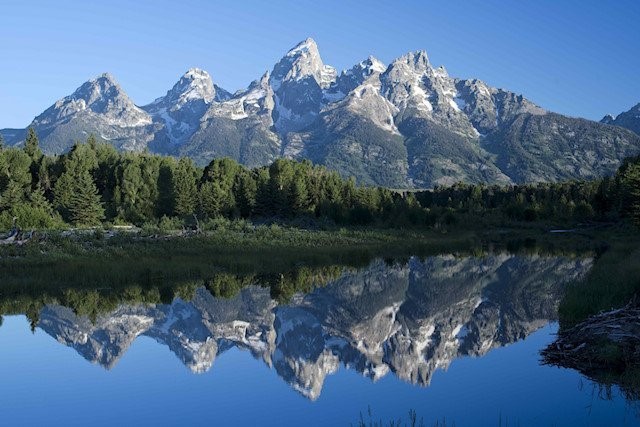
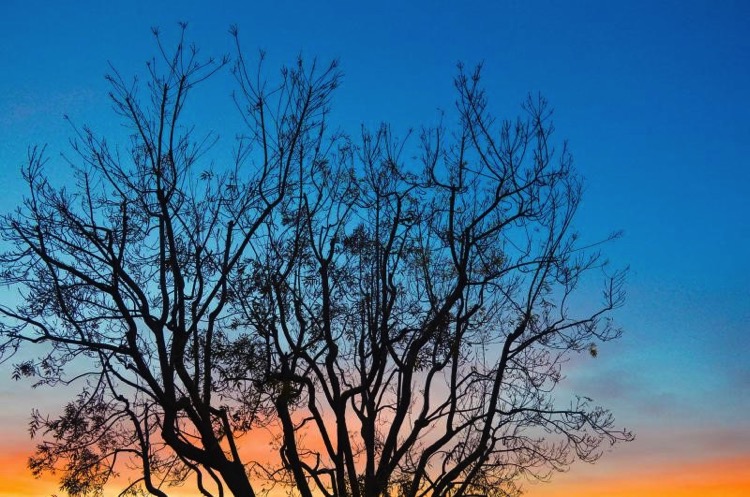
    Winner 2: Glenn Lancaster

    Winner 2 Pic

    I picked this sunrise picture of the Grand Tetons to edit with AfterShot for one reason – I captured this picture with my Nikon D800 using a 50mm lens and a UV filter. The RAW file (.NEF) is 74 MB, and with some of the other post-production programs I use, there is a huge download time, but AfterShot opened the file in the shortest amount of time.

    I use Adobe Lightroom (LR) 6, Creative Suites 6, Elements 14 and DXO Pro 10 to edit my photography and with that knowledge base, judging a new post-production editing program is based on experience and not guess work. The format of AfterShot appears to be directly off the layout of LR, so if you’re familiar with Adobe programs, the learning curve will be near zero.

    In reality I find LR non-user friendly for beginners, especially importing files, AfterShot has a direct system of importing and exporting files. AfterShot has a simple editing sequence, with a color engine generator slightly clearer & cleaner than LR. Bottom line – if you’re looking for a post production editing program for less $ $ $ and you don’t need hundreds of different selections to confuse your efforts, AfterShot is the answer.

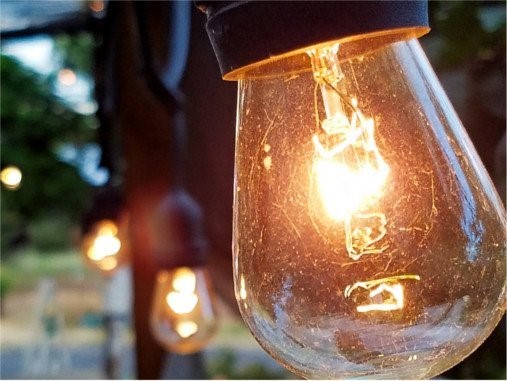
    Winner 3: Jayme Hunt

    Winner 3 pic 2

    I have to say that I’d never even heard of this software prior to reading this article. I did go ahead and download the trial, specifically to see what could be done with a low-light shot of lights. I certainly wasn’t expecting much. However, it warmed the whole scene up and made my photo look much more the way I envisioned it in my head! The presets produced some stunning visuals, but, in the end, I played with the histogram and produced exactly what I was after.

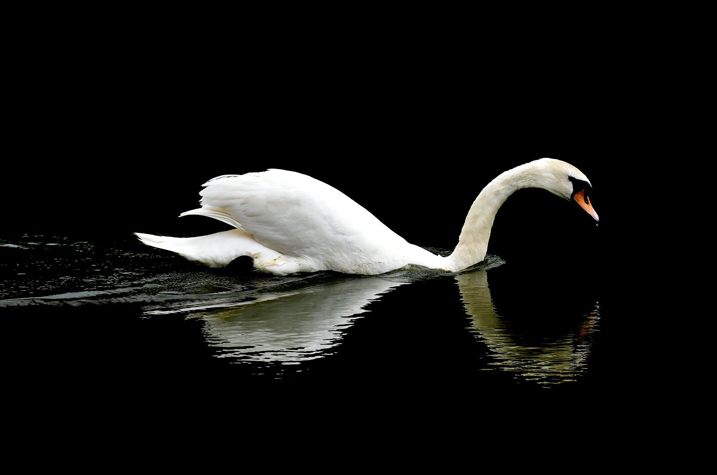
    Winner 4: Andy Dines

    Winner 4 Pic 717

    I use Lightroom as part of my job as a graphic designer but AfterShot Pro 3 really appeals to me for my own personal photography use, for the improved file opening times. Typically I can be loading several hundred photos at a time and this will make such a difference. Here is my ‘after’ photo.

    Winner 5: Zabi Zafari

    Winner 5 Pic

    Well this is a very nice software! When I first started out with Lightroom, it was nearly impossible to learn how to use any part of the program… But AfterShot is an extremely user friendly, simple yet powerful software, that almost anyone can use. The tools are right there, the histogram is great and much more refined compared to LR. And oh my, I have a MacBook pro from 2014 with 8 GB of ram and a SSD, yet Lightroom lags when opening, importing, exporting and saving files which is not convenient at all.

    As they say for professionals, time is money and AfterShot is the real deal. The photo I have taken is with a standard 18-55 mm lens from my backyard, I edited in AfterShot and it gave me amazing results! great job to my friends at Corel.

    Winner 6: Chris

    Winner 6 Pic 717

    I have moved from Windows to Linux and have used AfterShot Pro 2 (edited the above image). Linux has some pretty good open source software but I find AfterShot works well for my needs. Very easy learning curve going from Lightroom to AfterShot. The price is more reasonable too!

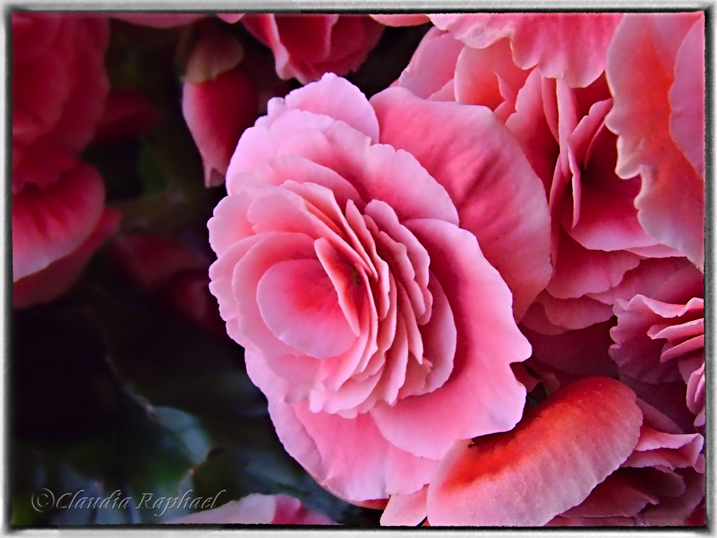
    Winner 7: Claudia Najhar Raphael

    Winner 7 Pic 717

    I have AfterShot 2, and now I’m trying the AfterShot Pro 3, and so far I’m enjoying! There are some useful new features that make a lot of difference for me when editing my photos. I’m used to Corel products, since I’ve been using PaintShop since version X4, and AfterShot 2, and for me they work better than Lightroom or Photoshop. I like the fact that I don’t have to import my photos to edit, it makes everything much faster, and I directly export them as batch to finish my editing in PSP X8. …I call my photo After party, because that was a beautiful flower gift that’s been given to me. I edited in AfterShot [Pro 3] and finished in PaintShop Pro X8.

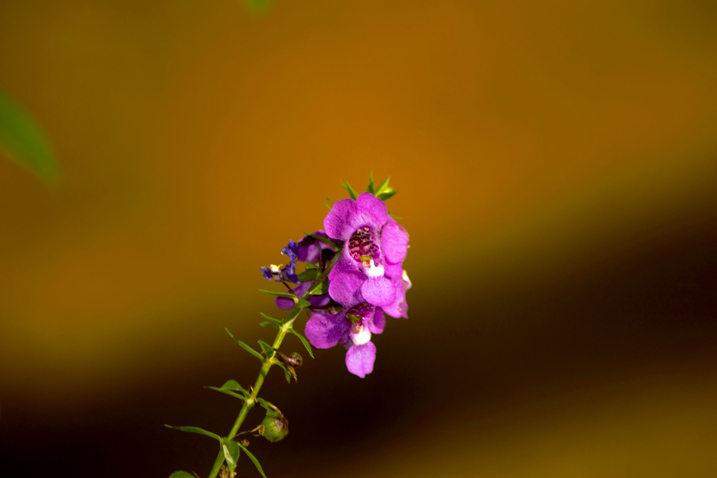
    Winner 8: Dennis Fisher

    Winner 8 Pic 717

    Well this little program made this little flower pop. A program for times when you thought you got it right but didn’t.

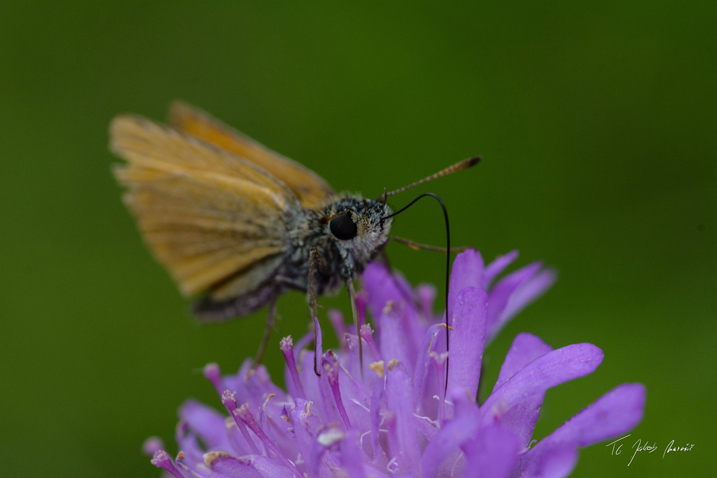
    Winner 9: Jakob Maruši?

    Winner 9 Pic 717px

    Most of the time I shot macro photos of flowers and animals. For this contest I picked one of [my] newer photos of a tiny butterfly who was just having dinner. I would use AfterShot to mainly correct colors and composition…

    Winner 10: Jake Nunnelee

    Winner 10 Pic 2

    …I downloaded AfterShot Pro [3] and picked this image. I did some tweaking and made this picture look 10 times better using this program. I would love to win Corel AfterShot Pro! It would make editing pictures so much easier.

    We were all very happy with the entries. You made us smile, but most importantly, you made us want to do more of what we do; provide you quality information and guidance to become a better photographer. We were so pleased to see that you came from every part of the world. Thank you all for your entries!

    Again, for those of you that didn’t win, Corel is offering a 30% discount off their AfterShot 3 leading photo editing software for a limited time, AND, you will also receive FastFlick Instant Slideshow Maker for FREE!

    Click HERE to receive your discount and free FastFlick.

    The Winners will be emailed with details of how to collect their prize. Please make sure to look for our email. Thank you again for all the wonderful submissions and to Corel for sponsoring this competition.

    ASP3 Logo

    Learn more about AfterShot Pro 3 HERE.

    Disclaimer: Corel is a paid partner of dPS.

    googletag.cmd.push(function() {
    tablet_slots.push( googletag.defineSlot( “/1005424/_dPSv4_tab-all-article-bottom_(300×250)”, [300, 250], “pb-ad-78623” ).addService( googletag.pubads() ) ); } );

    googletag.cmd.push(function() {
    mobile_slots.push( googletag.defineSlot( “/1005424/_dPSv4_mob-all-article-bottom_(300×250)”, [300, 250], “pb-ad-78158” ).addService( googletag.pubads() ) ); } );

    The post Announcing the Winners of the Corel AfterShot Pro Editing Software by Darlene Hildebrandt appeared first on Digital Photography School.


    Digital Photography School

  • Simply Creative Use of Space: 14 Modern Japanese House Designs

    [ By SA Rogers in Architecture & Houses & Residential. ]

    garage home

    High-density neighborhoods with heavy foot traffic and tiny plots of land in Japan force architects to come up with some clever space-saving, privacy-protecting residential layouts. Strategically placed windows, curving floors, translucent panels and hidden terraces are among the innovative tricks in play to maximize daylight and views of the sky while dissuading peeping toms and making the most of every inch of available space.

    Compact House by Takuro Yamamoto

    compact house 1

    compact house 2

    compact house 3

    compact house 4

    compact house 5

    For a client who wanted plenty of outdoor space in a dense Tokyo neighborhood without sacrificing privacy or building a big wall around the property, architect Takuro Yamamoto faced every window in this three-story home toward the wall of an open-ended, box-shaped terrace. “Through the process of designing this house, we tried to prove that having a rich private external space was important for making a crucial difference in the quality of life inside the house, as well as obtaining various possibilities of external activity. Considering that the client’s original request was having a big terrace for doing yoga freely under the sun, connecting the terrace to the living room and the bedroom with big windows was the best way to offer fresh air and daylight to the internal spaces – like having respiratory organ to let the house breathe.”

    Re-Slope House by Tomohiro Hata

    re-slope house 1

    re-slope house 2

    re-slope house 3

    re-slope house 4

    The massive windows on either side of this house on a slope by Tomohiro Hata are strategically located to direct views to the sky and a small back garden, encouraging cross-breezes and bringing slanted rays of light straight through the home. A wooden insert delineates the interior spaces, creating platforms, stairs and small rooms, so the residents can enjoy varying degrees of daylight and privacy.

    Daylight Catcher House by La Riviére Frank Architects

    daylight catcher house

    daylight catcher house 2

    daylight catcher house 3

    daylight catcher house 4

    Four ‘ears’ sticking out of the roof of this house act as daylight catchers for the interior, keeping it from becoming too dark for a client who wanted maximum privacy. The home is set up to be wheelchair-accessible with space for gardens and parking spots for two cars while staying at a single story for earthquake protection, all on a small budget. The four vertical windows allow daylight to diagonally penetrate the home, blocking views of the interior from outside while enabling views of the sky from within.

    Boko Deko Curved Floor House by Mitsuharu Kojima Architects

    boko deko house 1

    boko deko house 2

    boko deko house 3

    boko deko house 4

    Soundproof walls and one big window facing the sky protect this home from noisy neighbors and a busy street. Mitsuharu Kojima Architects came up with the highly unusual solution of a curving, green carpet-covered floor that gently slopes toward the wall of windows. The residents can choose to move their furniture around this space freely, lounging in the sun or staying in the shade. Storage is built into two walls full of cabinets and hidden rooms on either side, including loft-like lounge spaces.

    Light Grain House by Yoshiaki Yamashita

    light grain house

    light grain house 2

    light grain house 3

    light grain house 4

    A perforated steel facade lets little dots of light into the otherwise windowless front of this home in Osaka by Yoshiaki Yamashita. The clients, a young couple with a child, wanted natural light and ventilation as well as a high level of privacy. Two external terraces hidden within the outer envelope of the house act as giant skylights for the middle level, where the living space is located.

    Next Page – Click Below to Read More:
    Simply Creative Use Of Space 14 Modern Japanese House Designs

    Share on Facebook


    [ By SA Rogers in Architecture & Houses & Residential. ]

    [ WebUrbanist | Archives | Galleries | Privacy | TOS ]


    WebUrbanist

  • Canon EOS 80D vs Sony a6300: vying for the stills/video hybrid crown

    Introduction

    The Sony a6300 and Canon EOS 80D are visually very different cameras. One looks like Canon DSLRs always have, the other looks a lot like Sony’s original NEX line of mirrorless cameras.

    Yet, despite their clearly distinct roots, dig a little deeper and you find hints of convergent evolution. The on-sensor phase detection of the a6300 helps it offer autofocus that can compete with DSLRs, while the dual-pixel design of the EOS 80D helps it offer better live view operation and focus than any previous Canon DSLR.

    What’s true of both is that they’re their maker’s offering for the stills enthusiast who might want to try their hand at video. In many respects they’re still as different as they are similar, but their relative strengths and weaknesses aren’t necessarily quite as you’d expect. All of which can make it hard to know which one to choose…

    DSLR vs Mirrorless

    Some of the differences between the cameras come down to the fact that one is a DSLR while the other is mirrorless. No matter how much technology closes the gap in performance between the two systems, the DSLR structure allows the provision of a TTL optical viewfinder, while a mirrorless camera is more likely to include an electronic viewfinder.

    Many people, in part as a consequence of familiarity, prefer an optical viewfinder, but there are advantages to each approach. The a6300’s viewfinder is able to show a corrected preview when working with the super-flat S-Log gamma profiles, as well as being able to overlay focus peaking and exposure warnings into its viewfinder, in a way that can’t be done with an optical viewfinder. This is on top of the ability to visualize the exposure and white balance of the final image.

    Finally, an electronic viewfinder need not be constrained by the size of the sensor format, as the optical view of a DSLR’s mirror is. In this instance, the a6300’s finder is around 20% larger than that of the Canon. Its fast refresh means it’s better able to help you follow the action than ever before.

    DSLR vs Mirrorless

    However, one of the traditional advantages of a mirrorless camera is that they can be smaller and the a6300 certainly has the edge in that respect. Its kit zoom may not be the best-loved or most consistent lens on the market, but it does a great job of keeping the size of the overall package down.

    There’s a well worn adage that the best camera is the one you have with you and all but the most dedicated photographers are likely to find the a6300 much more convenient to carry with them. Disregarding macho nonsense about carrying the weight of a DSLR, the a6300’s much smaller form factor may well be the difference between you keeping a camera with you and only bringing it along when you expect to need it.

    That said, the 80D’s optical viewfinder means it doesn’t have to have its screen on all the time. This certainly helps towards it having a CIPA battery rating 2.4x greater than the Sony (960 shots per charge, vs 400 on the Sony or 350 through the electronic viewfinder).

    Handling

    Some of the differences between the two cameras don’t directly stem from the DSLR/mirrorless distinction. There are plenty of mirrorless cameras that offer DSLR-like control points, but the a6300 doesn’t follow that path.

    While Sony has increasingly stepped away from its innovative but simplistic NEX interface, the a6300 doesn’t offer the level of at-your-fingertips control that you’d usually get for this much money. There are two command dials but both of them are operated with the same digit, and the one on the rear face of the camera requires you to move your hand out of a shooting grip (which makes it unnecessarily fiddly). The camera does at least give plenty of customization of its buttons and Fn menu, so you can choose which options to get fast and semi-fast access to, but there remain features we want access to that are unassignable, and we’ve sometimes found ourselves running out of assignable buttons. I don’t think even its most strident supporter would consider the a6300’s handling to be amongst its strengths. 

    By contrast, the Canon does a great job of blending its well-worn stills control layout with a simple but effective level of touchscreen control, making the 80D a much more engaging and direct-feeling camera to shoot with. Yes, it’s very traditional approach, but it works well for stills and has been adapted pretty well for shooting video, too. And I doubt many people would have guessed that it’d be Canon, rather than Sony, that brought touchscreens to its enthusiast cameras first.

    Autofocus

    The days of being able to simply say ‘DSLRs are better at focusing’ is long gone, but that isn’t to say that all cameras are now equal – different technologies have different areas of strength.

    The EOS 80D’s through-the-viewfinder focus is generally good when shooting approaching subjects but seems to struggle at the camera’s highest frame rate. The hit rate falls further if the camera has to track subjects moving around the frame. Like most DSLRs, it can also exhibit some focus imprecision on close-up, shallow depth-of-field photos.

    By comparison, the a6300 offers excellent autofocus in a lot of circumstances. Its subject tracking is generally very good and will follow a single, clearly defined subject around the frame as it moves, though it’s not reliable enough to use in lieu of manually positioning the AF point over a subject. This is a pity because, without a touchscreen or joystick, the manual positioning of an AF point is rather slow and clunky.

    Eye AF, which you’ll need to assign to a custom button to gain access to, is superb though. Point the camera at your subject, hold down the Eye AF button and the camera will generally stick to its target well, even as you and your subject move around. It’s particularly good with fast primes where you can be fairly confident of your subject’s eye being perfectly sharp. That said, it’s not without its limitations, jumping off to other subjects from time to time.

    However, the EOS 80D is based around a Dual Pixel AF sensor, which means it can offer depth-aware phase detection autofocus across much of its sensor if you’re willing to use the rear LCD and shoot in Live View. This is especially good at identifying and following faces (or other objects) within the scene, meaning it can compete pretty effectively with the a6300’s Eye AF mode, even with a fast prime lens.

    a6300 – the videographer’s choice

    What really sets the two cameras apart is their approach to video. Not just in terms of specifications, but how you shoot. The Sony has the upper-hand on paper, since it can shoot 4K video, but it’s not as simple as all that.

    The a6300 is very well equipped when it comes to video. It can shoot UHD 4K at up to 100 Mbps. It includes adjustable zebra patterns for helping you set exposure. It also includes focus peaking and during-capture magnification to help you confirm and adjust focus, and it also offers a huge variety of video-centric gamma responses including Log curves and a mode that gives an ITU 709 preview while shooting log. 

    Which is lovely, if you know how to make use of all of those things. And knee, and master pedestal. But, while it can be fun to learn, it’s a little daunting at first. Of course you can ignore these options and shoot autofocus if you want but, while good, AF is not immune from refocusing off to infinity. And, without a touch screen, moving the focus point is impractical.

    The Sony can sometimes, especially in warm conditions, overheat before reaching its 29:59 limit. This and the more involved shooting technique needed to get the very best from the its frankly stunning 4K quality means isn’t suited to every type of shooting. Its 1080 is also oddly disappointing. But if you put in the work, it’s sensational.

    EOS 80D – the still photographer’s video cam

    The EOS 80D is a really interesting camera, when it comes to video, and its limitation to 1080 shouldn’t see you write it off. The Canon can’t compete with the Sony’s video quality or its laundry list of support features. But what it does offer are simple autofocus and ease-of-use.

    The 80D’s dual pixel autofocus really comes into its own for video shooting. Touch on the screen and the camera will refocus with absolute confidence. Set a target and the camera will keep your subject in focus. You can dictate the focus speed and be confident that the camera will do what you want, without the constant wobble or occasional catastrophic mis-focus that most of its rivals will deliver.

    Of course, being a DSLR, you can’t resort to using the viewfinder when it’s bright outside.

    The footage isn’t great, even by the standards of 1080 video, but it’s more than usable and is just so easy to shoot. The lack of exposure monitoring tools is also a pain, but overall, the 80D a great camera for stills shooters who want to shoot video without having to learn how.

    Lens choice

    While Canon’s APS-C lineup isn’t quite as comprehensive as its offerings for full frame, it’s still pretty comprehensive, especially when you include those full frame lenses that remain useful on the smaller format. The native APS-C range includes a variety of zooms at different price levels, an a 24mm F2.8 STM prime if you’re trying to keep the overall size down.

    The same can’t be said for Sony’s E-mount lineup. There are some useful lenses, including stabilized 35 and 50mm primes for APS-C and a 28mm F2 that makes an effective normal, but it’s certainly worth checking that the lenses you need exist, affordably, in the Sony range before you commit to the system.

    That said, the short flange-back distance of the E-mount means that all sorts of lenses can be adapted to work on the Sony (some of them with AF), which is especially valuable for video work.

    Overall

    It might seem tempting to draw the conclusion that you buy the Sony for video and the Canon for stills, but it’s not quite that clear-cut. The ease of shooting video with the Canon, along with the very capable autofocus of the Sony mean that both cameras have something to offer in what  you might otherwise assume to be the other’s areas of strength.

    The a6300 has a slight edge in terms of image quality and huge advantage in terms of video quality. However, the EOS 80D is undeniably a more enjoyable camera to shoot with. It would be hard to choose a winner in terms of autofocus (heretically it’s the 80D’s live view AF that keeps it in the hunt), meaning a lot of it comes down to personal priorities.

    If you want probably the most capable camera that’s easy to keep with you, then the Sony is the easy choice. But if you want a more traditional or hands-on shooting experience and still want some of that stills/video flexibility, then the Canon might be the better choice.

    Yet again, the simple idea that most modern cameras are great is true. But that doesn’t mean they’ll all be equally good for you.

    Articles: Digital Photography Review (dpreview.com)

  • Shoot for Love

    Hello there, It’s been a hot minute since I updated this page, but that doesn’t mean I haven’t been shooting and sharing how I make what I make! Kaestle and […]
    Jake Garn Photography

  • Review of the Tamron 85mm F1.8 Di VC USD Lens

    There has been, and likely always will be, a lingering debate among professional photographers and amateur photo enthusiasts, about whether or not a third party lens can be every bit as good as the native glass produced by your camera’s manufacturer.

    There is often a margin of compromise between cost and quality. Over the last five years or so, that margin has become increasingly slim. It’s become so small in fact, that we find ourselves living in an incredible time when these third party lenses are equalling the performance of high end lenses, in terms of optical performance and build quality.

    Lens 7

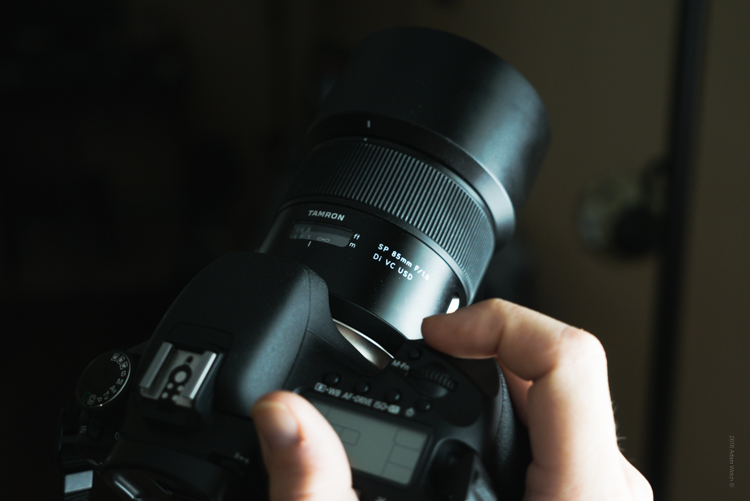
    To date, very few lenses I have evaluated have exemplified this coming of age of lens manufacturing, more so than the Tamron 85mm F1.8 Di VC USD. It is intended to be used with full-frame dSLR’s, as well as APS-C bodies (it becomes 136mm equivalent). This lens embodies what could be called a levelling of the playing field, in terms of cost versus performance. Recently, Tamron announced their intentions to re-energize, and improve their lens offerings with increased image quality, and more reliable build. During this review I was amazed at just how much punch Tamron has been able to deliver with their 85mm f/1.8.

    First Impressions

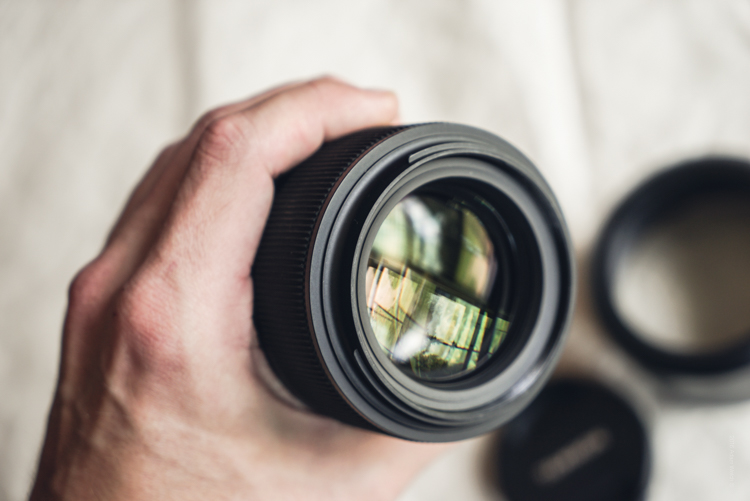
    After breaking open the box I found the lens, along with hood, to be very well cradled in its packaging.

    Lens 1

    Lens 3

    Lens 5

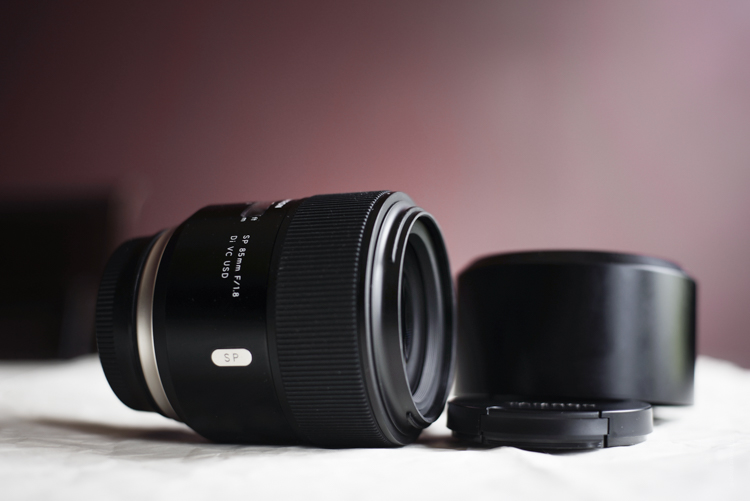
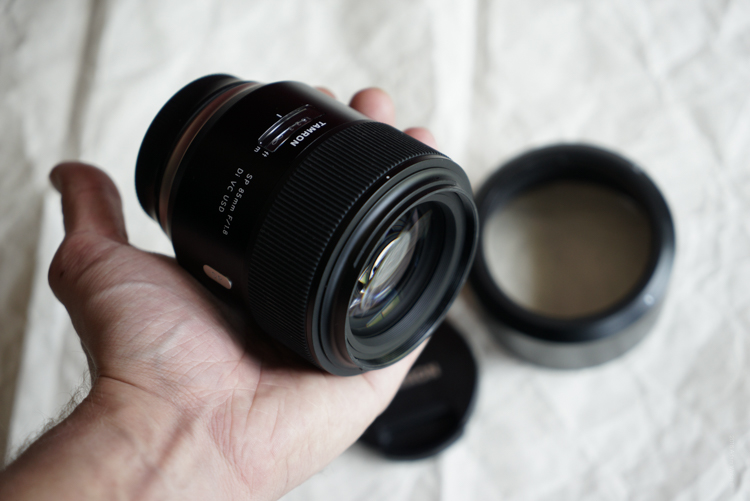
    At first feel, the Tamron 85mm f/1.8 seemed hefty, with a solid weight. Not overly heavy at 24.7 ounces (700 g), but certainly not light either. You will definitely know this lens is on your camera. The look of the lens is clean and classic.

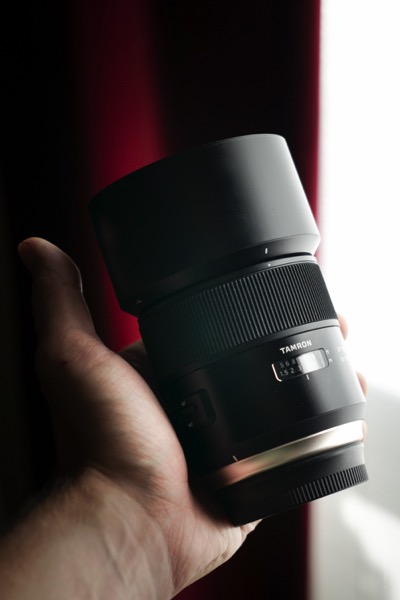
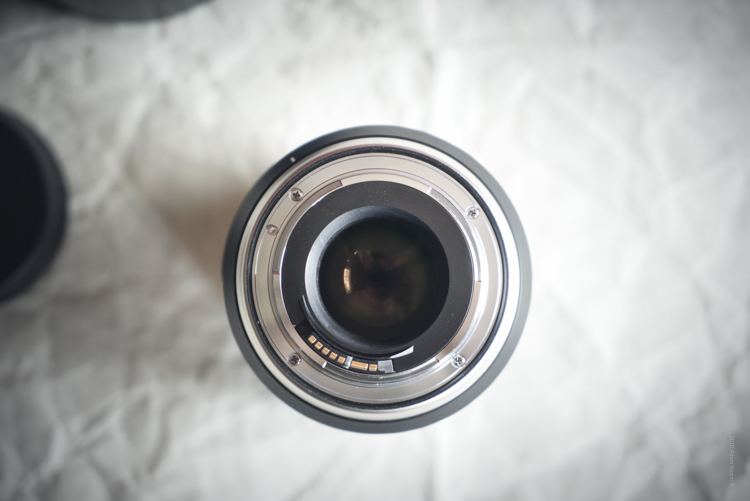
    The lens body itself is nicely finished in matte black, while Tamron has added some silver-toned accents; most notably of which is the new metallic ring at the base of the body around the mount. The focus ring is pleasantly rubberized, and feels very comfortable to the touch. There is also a voucher for a free download of SilkyPix, Tamron’s post processing software, included with the lens purchase.

    Build Quality

    As I said, the most noticeable physical aspect of this lens is its weight. Which isn’t a bad thing, and it strikes a balance when compared to other similar lenses: the Canon EF 85mm f/1.8 and the Canon EF 85mm f/1.2 L which come in weighing 14.99 oz (425 g) and 36.16 oz (1.025 kg) respectively. Keep in mind that neither of those two lenses sports image stabilization(more on this feature later). Overall, the Tamron just feels serviceably solid. The focus ring is firm and extremely smooth when turning. All the markings and accents are very well executed and the focus indicator window is nicely done.

    Lens 2

    Lens 4

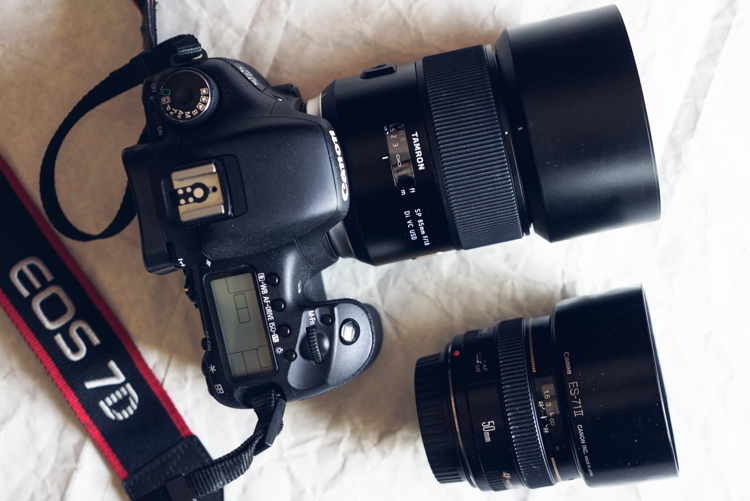
    Here are the Tamron 85mm F1.8 mounted to a Canon 7D Mk1 alongside another excellent prime, the Canon EF 50mm F1.4 (below) for a size comparison.

    85 and 50

    The VR( image stabilization) and AF/MF switches are well placed for easy operation, and they switch on/off firmly. The included barrel-type lens hood looks great without screaming “Hey! Look at me!” and locks on securely with ease.

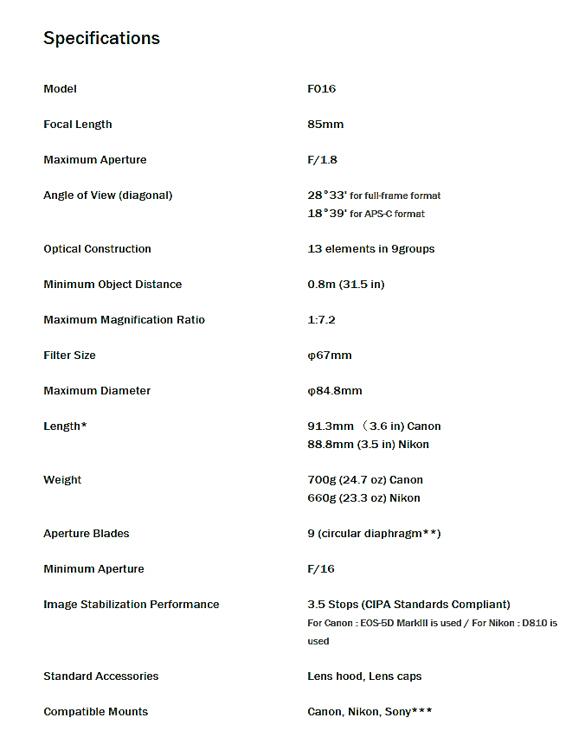
    Here’s the official specification sheet from Tamron

    Spec Sheet

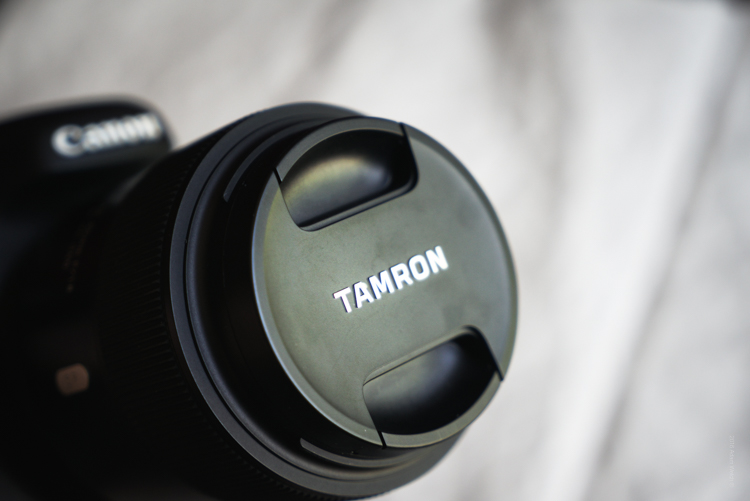
    One thing which I’ve always found so pleasing about Tamron, albeit a small detail, is their attention to their lens cap ergonomics. I know, I know – it’s just a lens cap. But it’s a very important element of any lens that is intended to be used extensively. I mention it due to the fact that Tamron lens caps have a very deeply recessed front pinch.

    Cap

    Very much of my work centers around adventure and outdoor photography, where the elements aren’t always cooperative. Being able to take the lens cap on and off without fear of dropping (even with gloved hands) is a huge advantage in those kinds of situations. Small detail? Yes. An important detail? Very much so. It’s a feature that my fellow landscapers and outdoor photographers will greatly appreciate.

    Now, back to your regularly scheduled review.

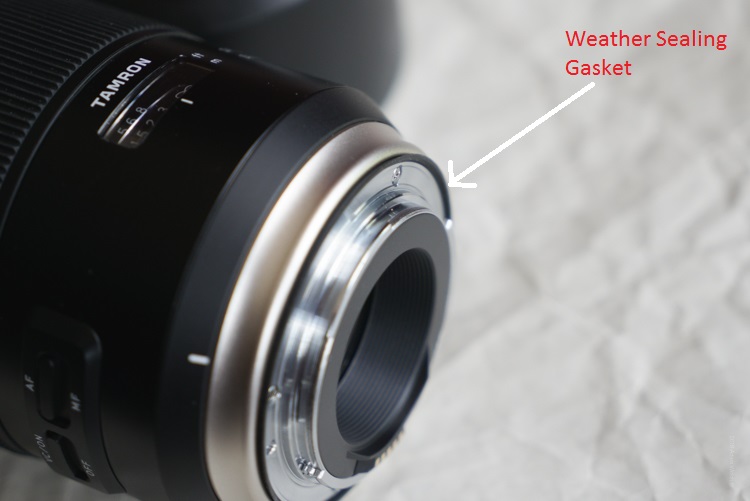
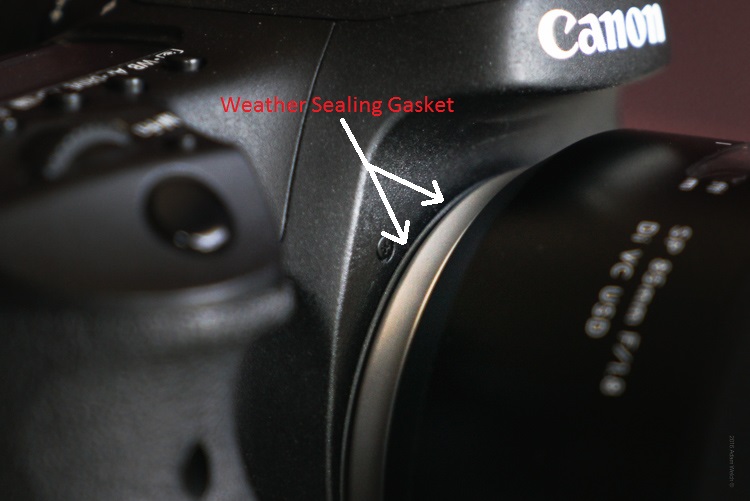
    If you look closely at the lens you might notice a small black rubber gasket at the area of the lens mount.

    Seal 1

    Seal 2

    This is part of the advanced steps Tamron has made to improve the resistance of their lenses to the elements. Though not as readily visible as the seal on the lens mount, the entire lens design has incorporated increased weather sealing on the areas between the focus ring and lens barrel. This means better long term service and protection from the grit and grime, often found when making photographs in the outdoors, where dust and moisture make themselves an unwelcome nuisance.

    Image Quality

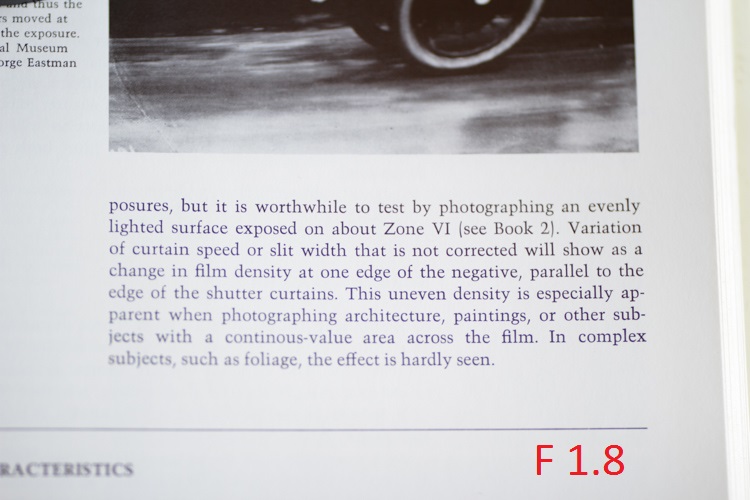
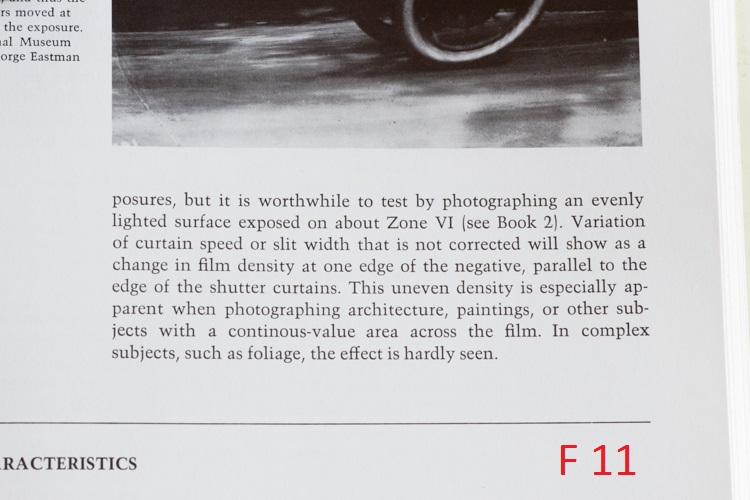
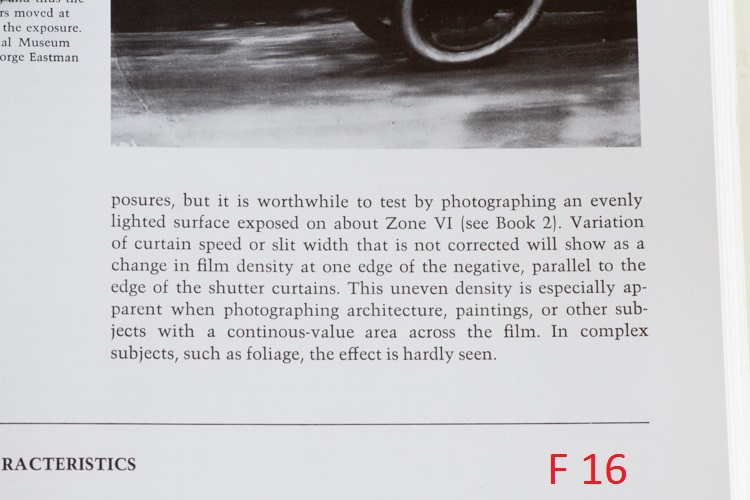
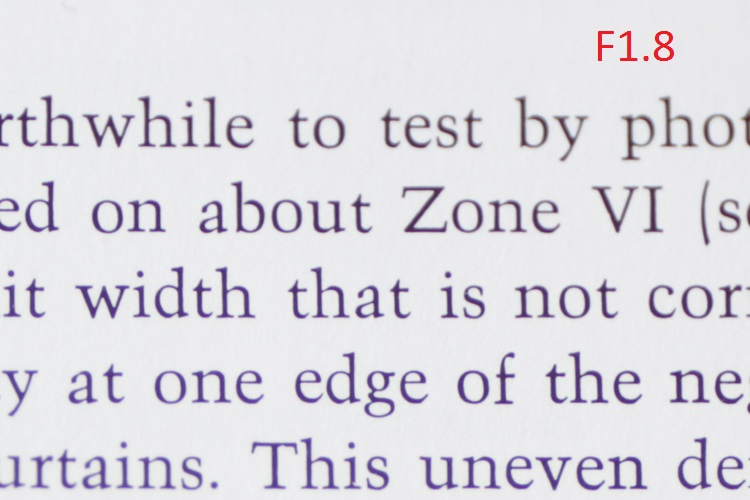
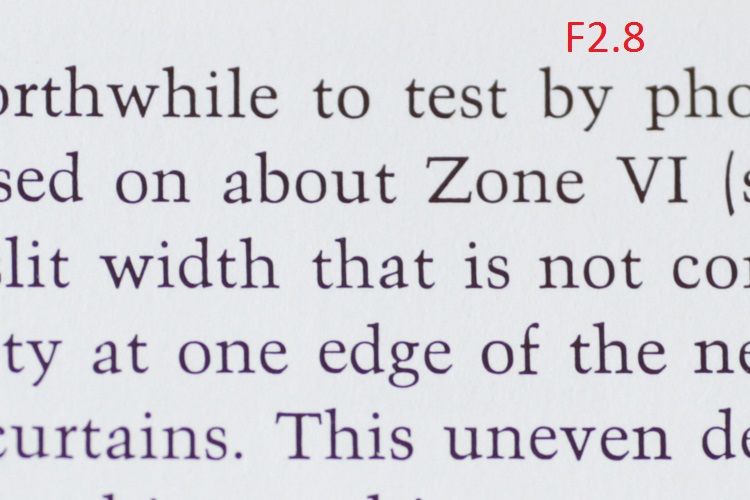
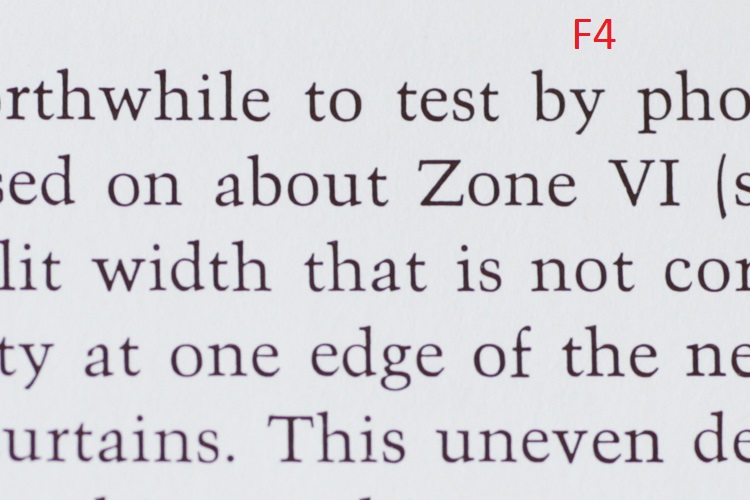
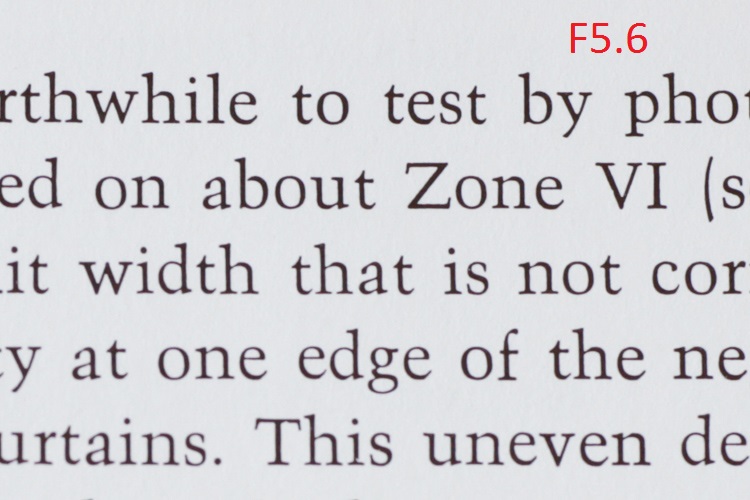
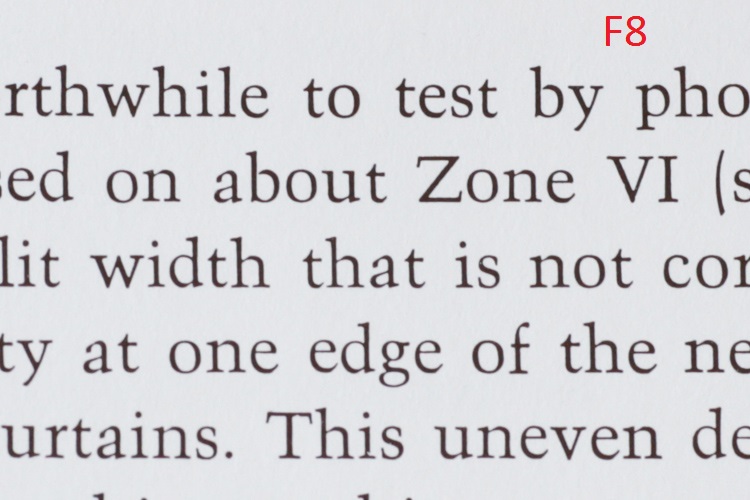
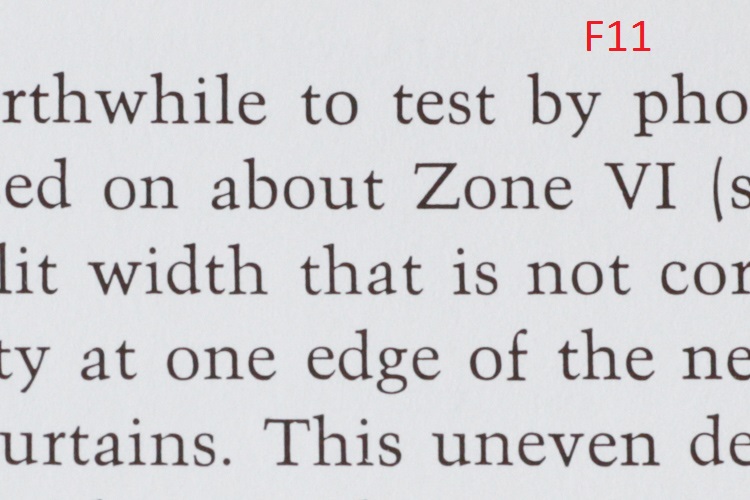
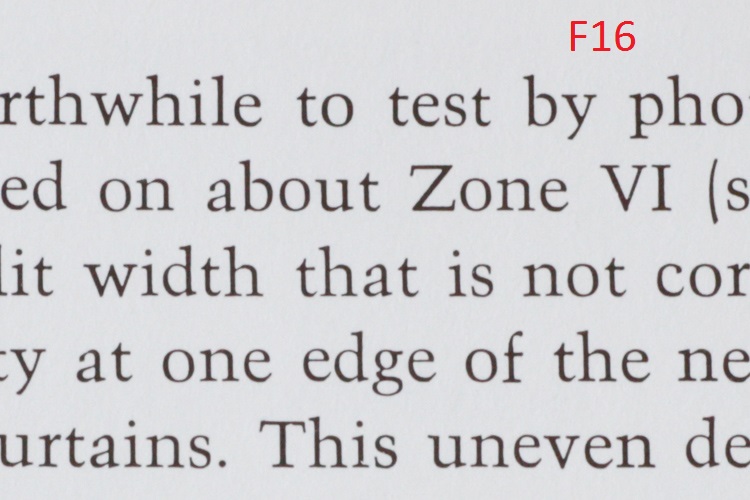
    The 85mm F1.8 is intended to be a medium telephoto lens, that offers decent compression for portrait work, as well as true to life color rendition. In all these things, Tamron has excelled. I was excited to see that the lens performed very well, and was very sharp through the complete f/1.8 to f/16 aperture range. The corners were a little soft at f/1.8 but became crisp at f/4 and beyond. Overall sharpness was best observed from f/4 to f.8, with f/5.6 seeming to be the sweet spot of this review model.

    Admittedly, I was very impressed with the sharpness, but the color performance is a point where this lens truly shines. Colors come through well saturated, with only moderate chromatic aberrations at wide apertures (past f/2.2 becomes very good) and contrast is wonderfully bold.

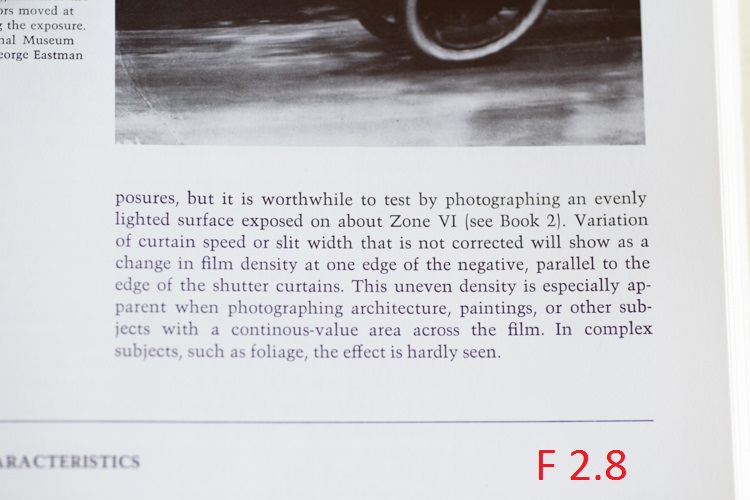
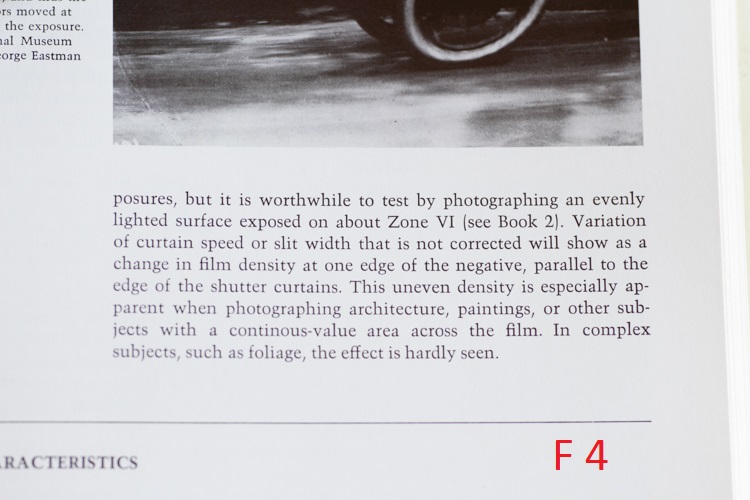
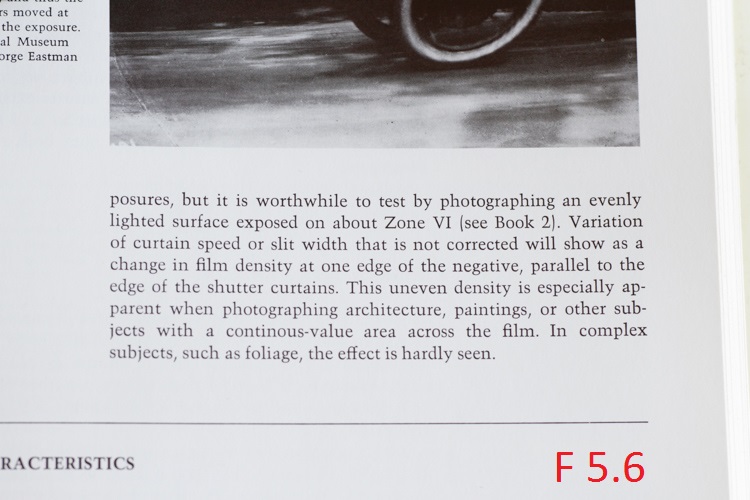
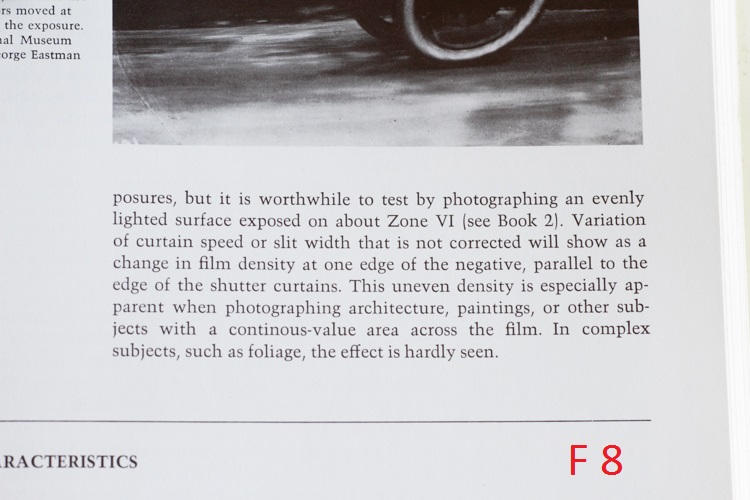
    This is a series of uncropped images, showing the performance across common apertures from f1.8 through f/16.

    F1 8

    F2 8

    F4

    F5 6

    F8

    F11

    F16

    Now, have a look at that same set after being cropped to approximately 1:1.

    F1 8 Zoom

    F2 8 Zoom

    F4 Zoom

    F5 6 Zoom

    F8 Zoom

    F11 Zoom

    F16 Zoom

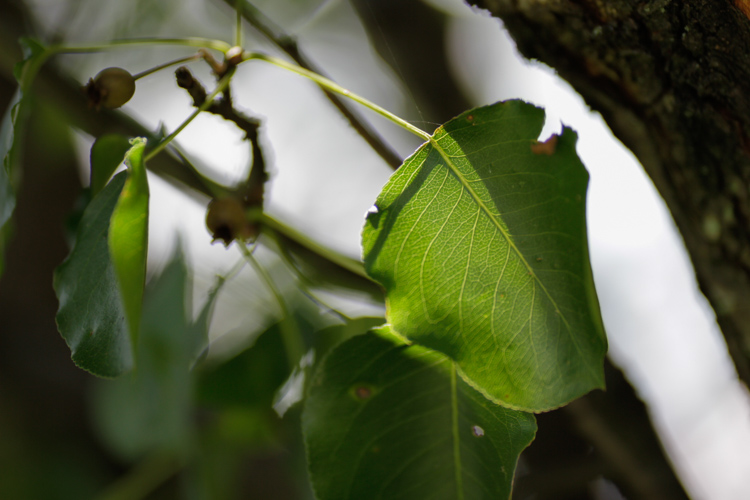
    The nine curved aperture blades produce a creamy bokeh, which portrait shooters will love. I especially loved the bokeh produced at the largest aperture of f/1.8. In some situations it even hinted at a faint swirling effect, reminiscent of the selectively loved/hated Helios 44-2.

    In any case, you will no doubt be pleased with the background blur of your images. Taken alongside the great color and contrast, the 85mm f/1.8 will consistently produce quality images with good sharpness, in a wide range of situations.

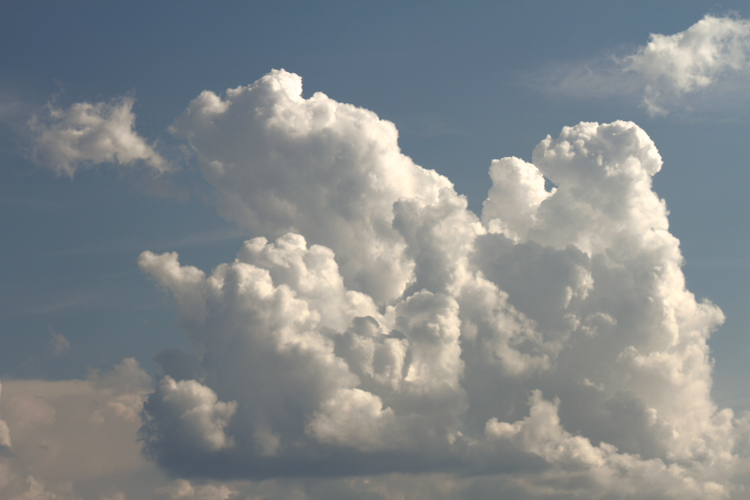
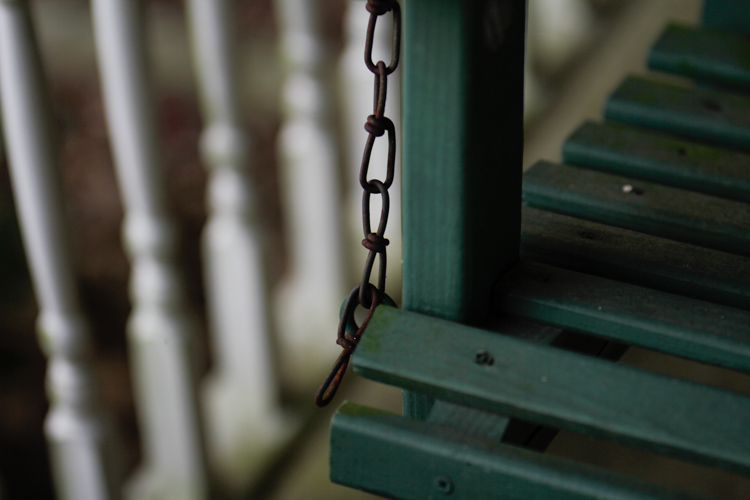
    Here are some additional sample images made with the Tamron 85mm F1.8.

    Hand

    Leaf

    Coffee

    Clouds

    Lime

    Swing

    Autofocus and Image Stabilization Performance

    This is the part of the review that I could not wait to write about in regard to the 85mm F1.8. The autofocus of this lens is fast, accurate, and quiet. The ultrasonic motor drive produced very little vibration during autofocusing, which was great. I’m a big time fan of having the final say with my focusing. Tamron has included a full-time manual override capability, which definitely allows greater control for pinpoint adjustments when needed, without having to switch the AF/MF switch to manual.

    The autofocus tracked very accurately when shooting moving subjects as well. Overall, the AF performance of the lens is top notch.

    The image stabilizer on this lens is an absolute marvel. In most cases, vibration reduction technology is useful, but for me, it’s never been a make or break selling point when I shop for lenses. With the 85mm – I must say that I am thoroughly impressed. The image stabilization performance of the lens is one of, if not the best, I have ever encountered. Tamron states that the 85mm F1.8 was the first 85mm fast-prime to include the technology (as of January 2016). The VR (vibration reduction) makes shooting at what might be considered impractically slow shutter speeds in sub-optimal light, very possible. This is great for street photographers, and really anyone who finds themselves needing to keep their ISO in check, who also frequently encounters low light conditions.

    VR Off

    This is an image shot handheld at 1/10 second with VR turned off.

    VR On

    Here we see the almost magical impact of the image stabilizer once the VR is switched on.

    Generally, I base the majority of my exposures around the Reciprocal Rule (1/focal length) so at 85mm I wouldn’t normally go slower than 1/80th of a second, or 1/60th on a good day. The fact that I was able to pull off this measure of sharpness at 1/10th of second, means that the image could have been made with an even slower shutter speed, while still maintaining acceptable clarity. This means a lower ISO can be used in situations when it would previously not have been possible. Tamron has hit the VR out of the park with the 85mm F1.8.

    Final Verdict

    What you’ll like:

    • Outstanding sharpness through entire aperture range.
    • Great color and contrast performance.
    • Build quality is great.
    • Improved weather sealing helps control moisture and dirt problems< ./li>
    • The VR performance is outstanding. Image stabilization level: Jedi.

    What you might not like:

    Well, it’s difficult to list anything here. An extremely scrutinous shooter might mention the weight and moderate chromatic aberrations at f/1.8 as drawbacks, but both fall very safely in the range of what would be considered acceptable for most uses.

    Closing Thoughts

    It’s difficult for a lens to leave a reviewer without having any real negatives. Still, the Tamron 85mm F1.8 appears to have done just that. There were no issues encountered that would warrant inclusion. The fact is that the optically quality is superb, and the build is very solid.

    Taking into consideration the fast autofocus, and the incredible image stabilization, it truly is a tough lens to beat at this price (around $ 749 USD). Add in the beefed up weather protection, and you are left with a beast of a mid-range telephoto lens, which will excel at portraiture and street photography, while holding its own during adverse shooting conditions in the outdoors.

    4.5 out of 5 Stars

    googletag.cmd.push(function() {
    tablet_slots.push( googletag.defineSlot( “/1005424/_dPSv4_tab-all-article-bottom_(300×250)”, [300, 250], “pb-ad-78623” ).addService( googletag.pubads() ) ); } );

    googletag.cmd.push(function() {
    mobile_slots.push( googletag.defineSlot( “/1005424/_dPSv4_mob-all-article-bottom_(300×250)”, [300, 250], “pb-ad-78158” ).addService( googletag.pubads() ) ); } );

    The post Review of the Tamron 85mm F1.8 Di VC USD Lens by Adam Welch appeared first on Digital Photography School.


    Digital Photography School

  • 6 tips for better wildflower photos

    Tips for better wildflower photos

    Shooting wildflowers can be an intimidating endeavor, especially if you’re looking to capture grand scenes and vistas. Navigating the crowds, finding the perfect composition and nailing the shot can all be overwhelming. But it doesn’t have to be that way – in this article I’ll help you navigate these challenges so you can enjoy the experience and make the most of peak wildflower season.

    Choose the right gear for the job

    This isn’t a one-size-fits-all gear list as it really depends upon how much hiking you have to do to get to your desired location. That being said, I’ve highlighted some of the most important items from my kit in this list.

    • Tripod: A sturdy tripod is a must if you plan on focus stacking, it also comes in handy if your shooting in conditions that require slightly longer shutter speeds.
    • Lenses: When I’m out shooting wildflowers I always try to cover a focal length of 16-300mm. The majority of my compositions fall in the 16-35mm range, but you never know when you may want to snap an abstract shot or try something new when you’re out in the field.
    • Headlamp: You may not plan on staying out late, but loosing track of time while shooting an amazing sunset is very easy to do.
    • CPL: The sky in your composition will benefit a great deal from using a circular polarizer and the vegetation’s rich colors will be brought out as well.
    • Bug/Bear Spray: This may sound trivial but if you’re shooting anywhere in the mountains this is a must. Watch out for ticks as well when you’re out shooting. Bears aren’t always an issue, but in certain areas they can be a problem so it’s definitely best to check trip reports and stay well informed.
    • Well stocked backpack: A camera backpack or your favorite hiking backpack with a first aid kit, water, extra batteries, wireless remote, cleaning cloths, tripod tools, extra layers (Gortex jacket etc.) and snacks is a must. Anytime you go hiking it’s a great idea to be prepared for anything in the field.
    • Maps/GPS: I always bring a map or a guide book in addition to a GPS unit with me to areas that I’m not familiar with.

    Check flower reports and scout locations

    Before heading out into the field I always make sure to scout out locations and check on the condition of the flowers I’m intending to photograph.

    • Check local wild flower reports online – hiking trip reports are great places to look for wild flower updates
    • Aim to photograph the flowers when they are just starting to peak; this is where checking reports pays off. Staying slightly ahead of the curve will ensure that you will be able to photograph the flowers when they are looking their best.
    • Talking with other local photographers is a great way to network and to get an idea of what the flower shooting conditions are like in your area of interest.
    • Scout your location to determine what areas are best for sunrise, sunset and day/night time shooting. Figure out how many miles you’ll be hiking and plan accordingly.
    • Remember to give yourself plenty of time to drive to your location, hike in, take photos and hike out.
    • Mark the areas that you’re interested in shooting on a map or set waypoints on a GPS to give yourself a guide of sorts to roughly follow while you’re out in the field.

    Find your composition

    Choosing your composition can feel like a tricky task – especially with the added element of flowers thrown into the mix. Here are some helpful tips that can make the process a bit less overwhelming.

    • Look for flowers just approaching the peak of their bloom: once you have found a nice patch of flowers make sure that they can be incorporated into your composition effectively.
    • Add depth through layers: flowers can add a really nice foreground element to your photo so try to fill the lower 1/3 to lower 1/2 of your frame with them to give your photo lots of FG interest and depth. Focus stacking is one way to achieve this look.
    • Let the flowers be your leading line: sometimes nature can provide you with nice patterns and colors to lead your eye through the frame to your focal point. Look for flowers that can provide that ‘line’ to your focal point or that offer depth through layers.
    • Don’t let the conditions dictate whether or not you choose to go out and shoot: shooting in foggy and challenging weather conditions can offer up some amazing and unique results!
    • Shoot in both landscape and portrait orientations: don’t get too set on one composition, move around and experiment! This is something that I have to continually remind myself to do.

    Get creative: go abstract

    When you find yourself surrounded by fields of gorgeous flowers it’s very easy to become overwhelmed and bogged down by the seemingly endless photographic possibilities. Finding abstract compositions requires some work, but the results can be very rewarding.

    • Take a step back and look for subtle opportunities to photograph the flowers and vegetation themselves.
    • Look for different kinds of texture and layering in the vegetation.
    • Let the plants and flowers become your composition.
    • Look for natural leading lines, patterns, curves and turns in the plant life.
    • Pay attention to complementary colors and patterns as color can add a great deal of interest to your photo.

    Etiquette

    This isn’t something that’s discussed very often in landscape photography, but I think that it’s especially applicable for this type of shooting.

    • Show up early and find your composition: One of the biggest issues that I see in the field is dealing with people fighting for compositions. If another photographer was there before you, then respect their space and look for different compositions. Remember that a wide-angle lens covers a lot of real estate, so keep that in mind when looking for alternative compositions. Get there first and you will be rewarded with lots of options for outstanding compositions.
    • Respect the Flowers: This almost goes without saying, but never pick the flowers and move them to improve your composition – this happens more often than you would care to believe. Also, take care not to sit on or trample the meadows when composing your shot(s).
    • Tread Lightly: Chances are that if you’re shooting wildflowers you will find yourself off trail at some point. Follow game trails and stick to paths that have already been well traveled. Never create your own trail through a meadow unless you have no other options and always tread lightly. These areas have very fragile ecosystems and see a great deal of foot traffic, so it’s important to practice sustainability.
    • Leave No Trace: Surprisingly this is still a huge issue. The bottom line is; if you pack it in, pack it out – don’t leave anything behind.

    Articles: Digital Photography Review (dpreview.com)

  • Urban Camo: Bus & Train Fabrics Turned into Wearable Textiles

    [ By WebUrbanist in Art & Sculpture & Craft. ]

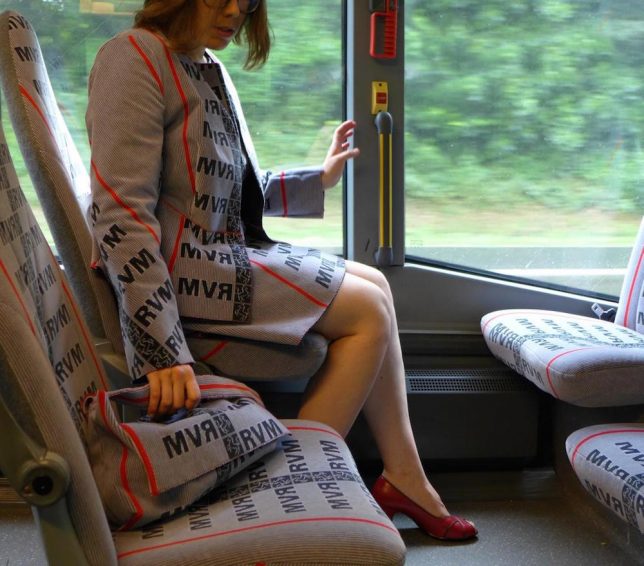
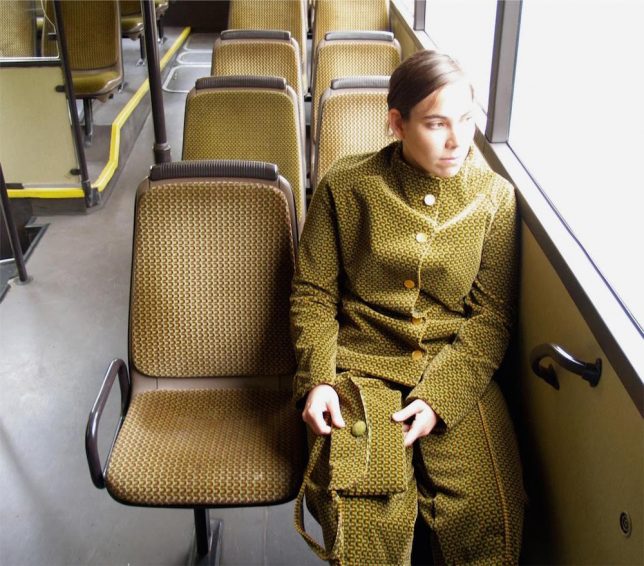
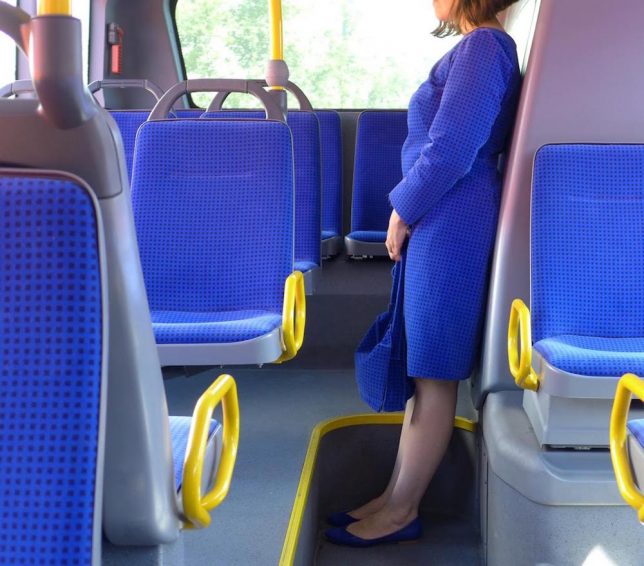
    fabric matching transit dress

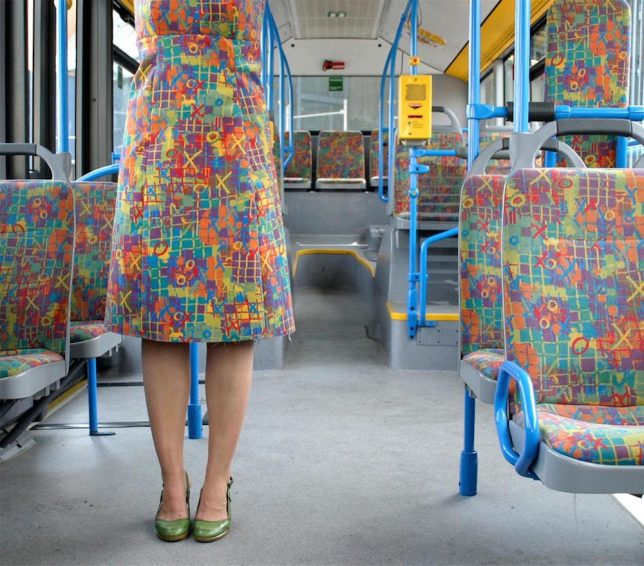
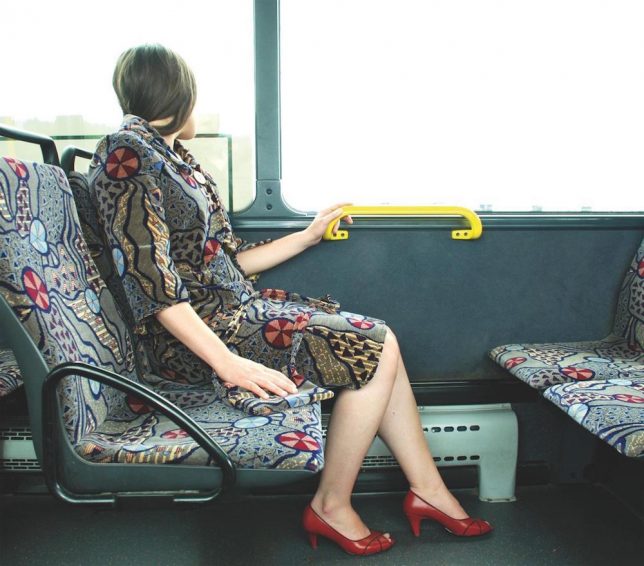
    Transportation system patterns, right down to seat cloth details, are designed to last and look good even when stained by dirt and spilled drinks over time, making them an oddly suitable choice to turn into apparel.

    transportation camouflage germany

    Of course, what looks best under those strained conditions can also look downright strange when turned into suits for human wearers, as Germany artist Menja Stevenson explored firsthand.

    fabric cloth outfit artist

    “No matter how many subway lines, buses, trams, trains, and other public conveyances we ride, we are rarely left with a positive impression of the upholstery,” writes David Gibson of the BBC in discussing this art project. “As sure as roses are red and violets blue, transport fabric is a multihued graphic abomination, possibly crawling with pathogens.”

    matching cloth

    Stevenson contacted transportation officials and managed to get large enough sections and samples sent her way in order to start making her distinct urban outfits.

    transit suit outfit

    “For many years I had to take the bus to the academy where I studied art,” says the artist. “Such a pattern, like a lot of everyday things, imprints itself into our memory unconsciously without being actually perceived.Through my intervention the beholder (or passenger) becomes aware of the ‘invisible’ fabric.”

    urban outfit

    Of course, by outfitting herself in transit-mapping fabrics, Stevenson goes from being invisible to highly visible, inevitably generating conversations from curious onlookers who notice her fitting in while standing out (via Colossal).

    Share on Facebook


    [ By WebUrbanist in Art & Sculpture & Craft. ]

    [ WebUrbanist | Archives | Galleries | Privacy | TOS ]


    WebUrbanist

  • I Don’t Carioca: Awesome Abandonments Of Rio de Janeiro

    [ By Steve in Abandoned Places & Architecture. ]

    abandoned-rio-1a

    Rio de Janeiro may host the 2016 Olympics but Brazil‘s most picturesque and second-most populous city also boasts a host of infamous abandoned buildings.

    abandoned-rio-1d

    Perhaps the most notorious and obvious abandonment in Rio de Janeiro, the 37-story Torre Abraham Lincoln (also known as Torre H) sticks out of western Rio’s Barra da Tijuca district like a sore thumb. Sealed off by plywood hoardings and guarded by round-the-clock security to keep squatters out, the Oscar Niemeyer-designed apartment building is collectively owned by its roughly 250 (out of 454) individual unit owners… who have owed property taxes on their units for decades though they’ve never moved in.

    abandoned-rio-1c

    abandoned-rio-1b

    abandoned-rio-1e

    The second of a proposed 76 residential apartment buildings meant to transform Barra da Tijuca before the advent of unrestrained development, Torre H has sat frozen in time since 1972 when construction was halted due to concerns about the building’s structural integrity. The neighboring Torre Charles de Gaulle, fully occupied and functional, offers a clue of what a utopian Rio de Janeiro might have looked like.

    Above & Beyond

    abandoned-rio-2a

    You’d think a hotel built in the mountains overlooking metro Rio de Janeiro would be a sure thing… and you’d be wrong, at least in this case. Modern Brazil brings us this stark image of an abandoned hotel that once offered unparalleled views but is now itself the focus of visual interest.

    No Park King

    abandoned-rio-4a

    abandoned-rio-4b

    Park Albanoel is an abandoned Christmas-themed fun park located in Itaguai, just west of metro Rio de Janeiro. The park was the brainchild of the late entrepreneur Albano Reis, known affectionately as Santa Claus Quintino. Unfortunately, however, the founder’s heirs did not share his vision and the park is now home to four families invited to homestead there by the owners.

    abandoned-rio-4c

    abandoned-rio-4c

    abandoned-rio-4d

    Unfortunately for those families, the park’s swampy and low-lying landscape is also home to mosquitoes carrying the Dengue fever virus. Kudos to Flickr user chrisgj6 for posted the above images taken at Park Albanoel in mid-August of 2013.

    Next Page – Click Below to Read More:
    I Dont Carioca Awesome Abandonments Of Rio De Janeiro

    Share on Facebook


    [ By Steve in Abandoned Places & Architecture. ]

    [ WebUrbanist | Archives | Galleries | Privacy | TOS ]


    WebUrbanist