Blog

  • Sort of Subterranean: 15 Partially Underground Modern Home Designs

    [ By SA Rogers in Architecture & Houses & Residential. ]

    RD house 2

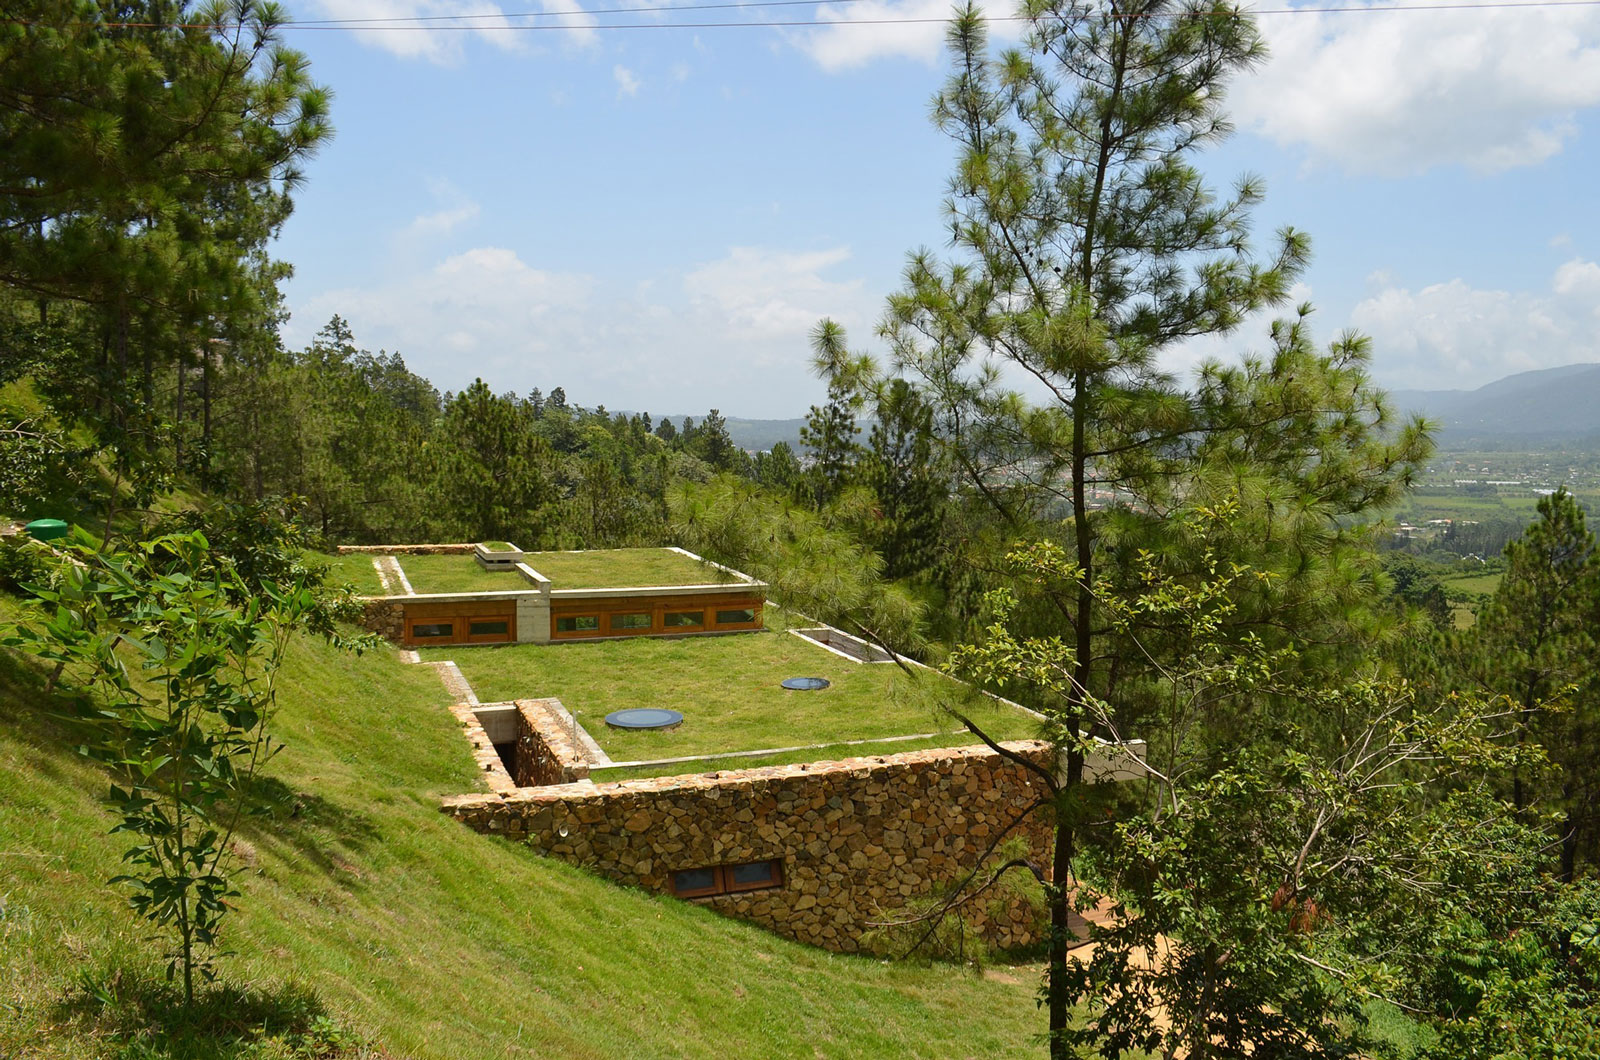
    While fully subterranean homes can feel like grim bunkers, homes built partially into hills, cliffs and bluffs peek out from underground through glassy ‘eyes’ to gain daylight access and views of their surroundings. These covert residences are naturally camouflaged from several angles, blending into the landscape while still enjoying sun-dappled swimming pools, terraces and courtyards.

    Underground Pavilion by Act Romegialli

    underground pavilion

    underground pavilion 2

    underground pavilion 3

    underground pavilion 4

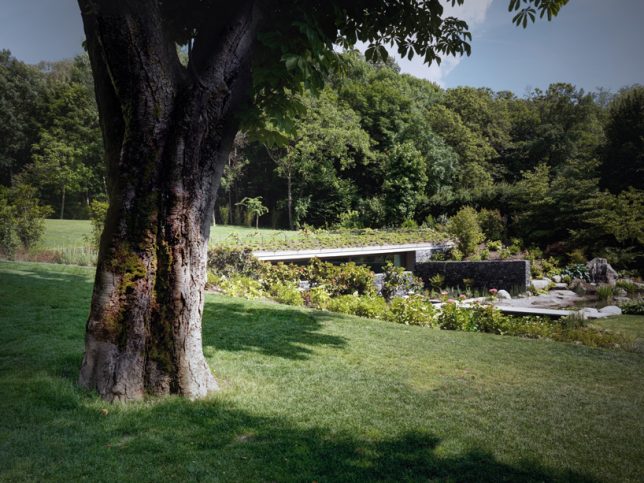
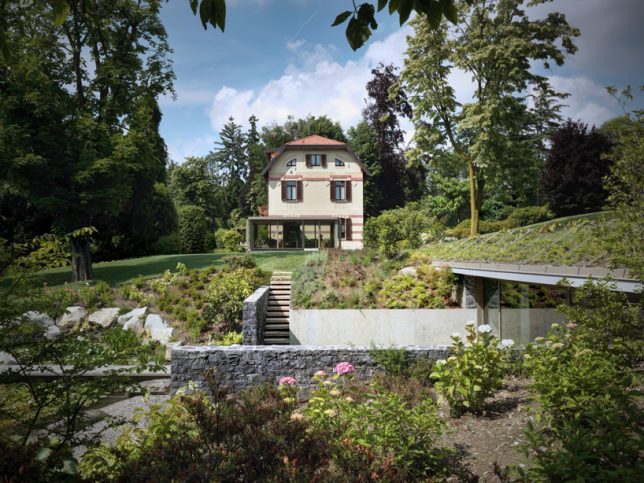
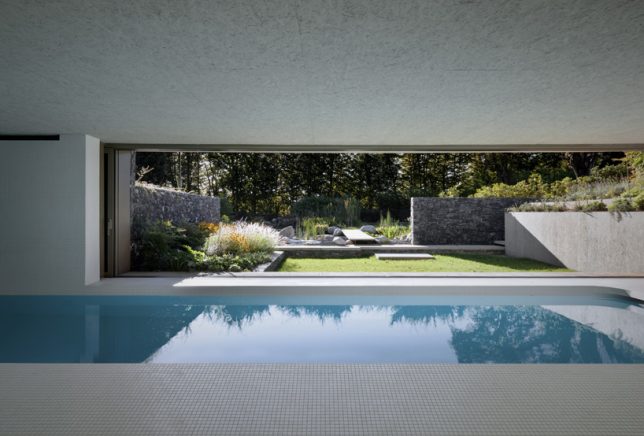
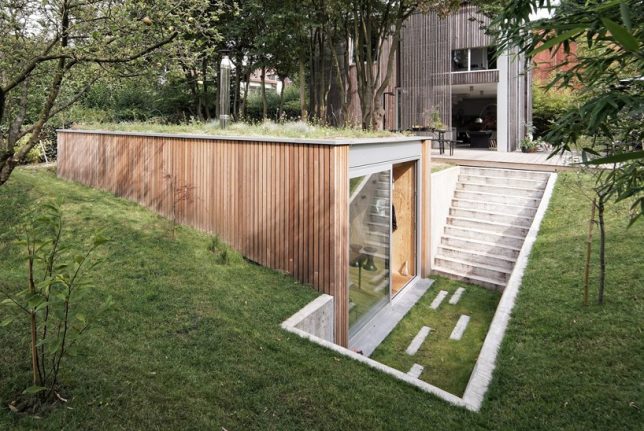
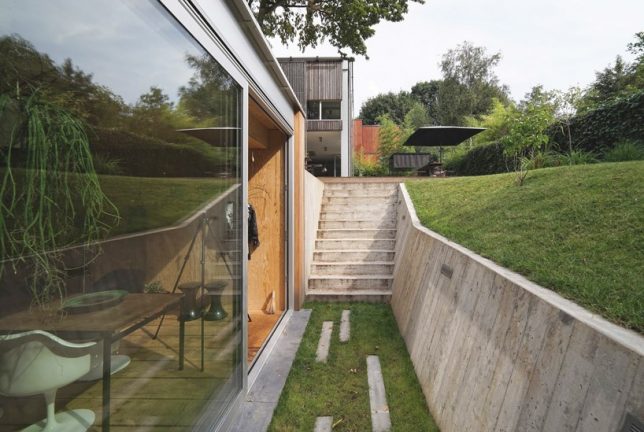
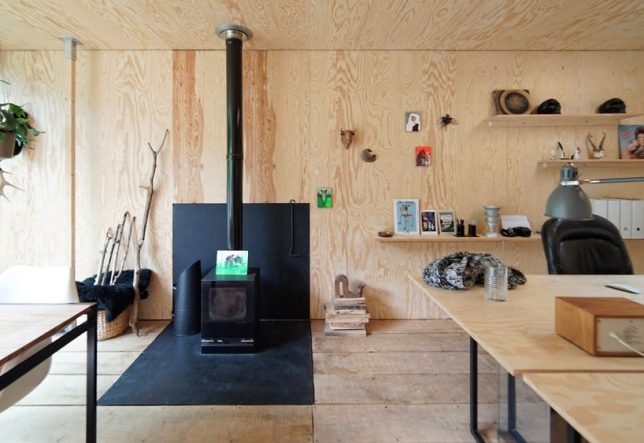
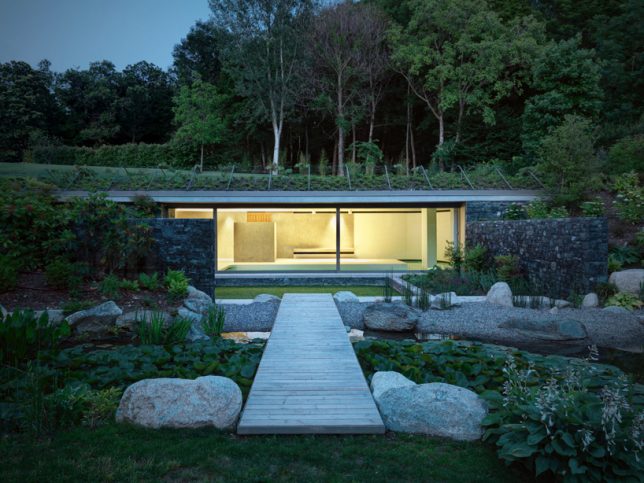
    An addition to a traditional home in Northern Italy sits beneath the surface in the backyard, disguised by a green roof, with its ample glazing looking out onto an artificial pond. Local architecture firm Act Romegialli connected the new wing of the home to the original structure with an underground tunnel and placed an indoor swimming pool and gym inside the addition.

    Two Single-Family Homes in Paraguay by Bauen

    paraguay homes 1

    paraguay homes 2

    paraguay homes 4

    paraguay homes 5

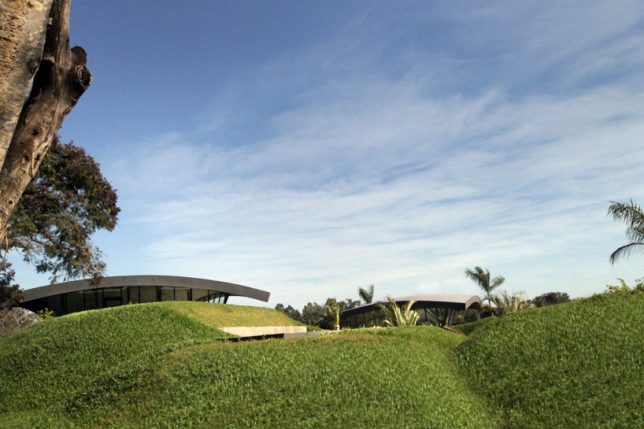
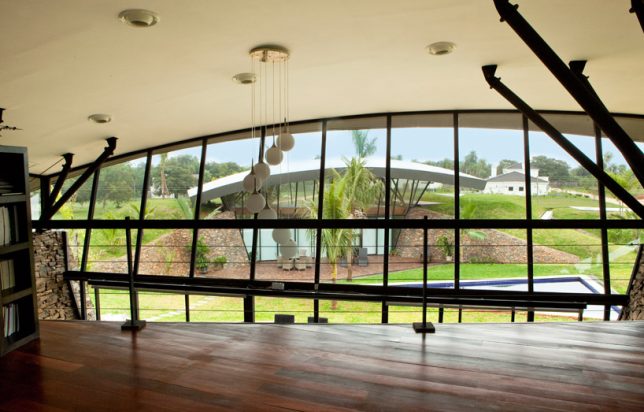
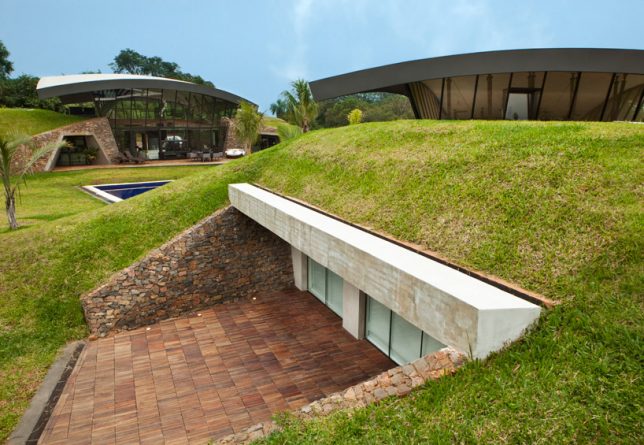
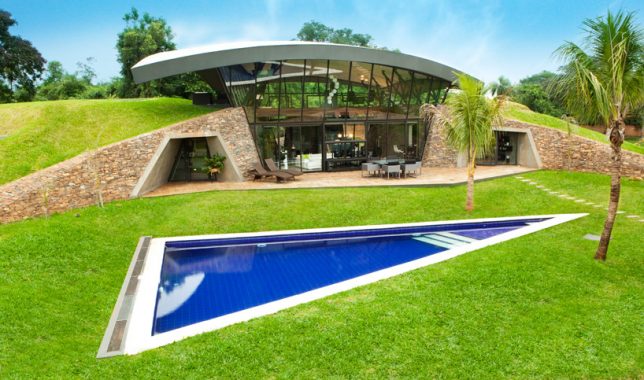
    Twin arcs protrude above grassy hills concealing the bulk of ‘two single-family homes’ by Paraguayan firm Bauen. The architects terra-formed the artificial hills and filled in voids between them with triple-height glass enclosures. Both of the luxurious homes look out onto a shared swimming pool. The roofs of the homes mirror the shape of the hills, and from afar, they’re barely visible.

    Casa del Acantilado by Gilbartolomé Architects

    dragon house 1

    dragon house 3

    dragon house 2

    dragon house 4

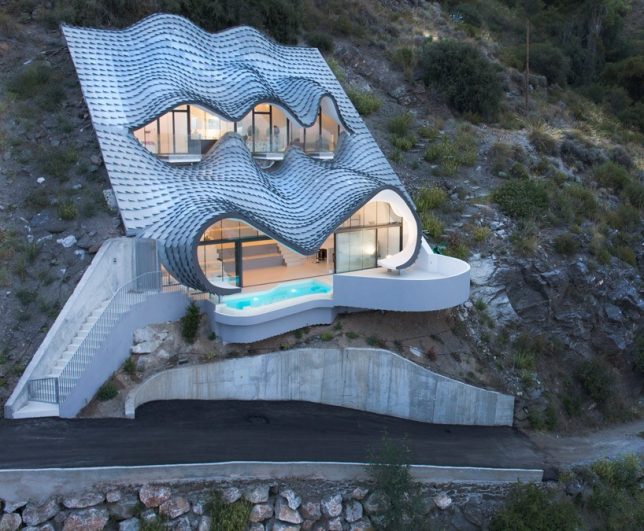
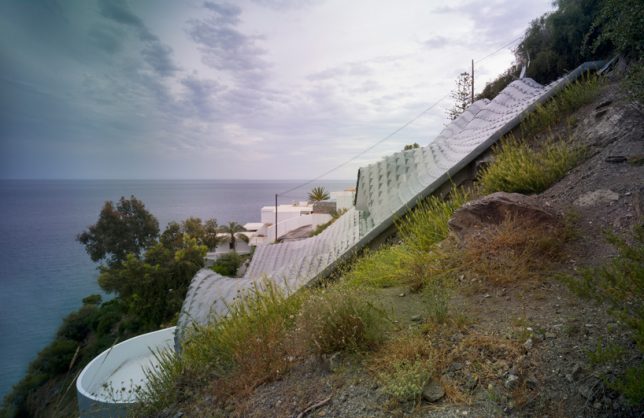
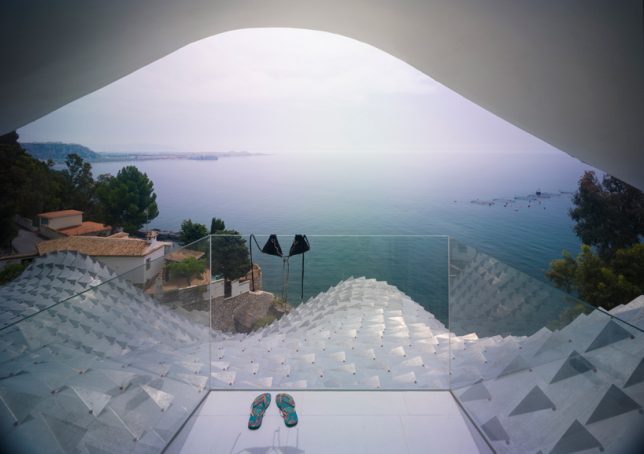
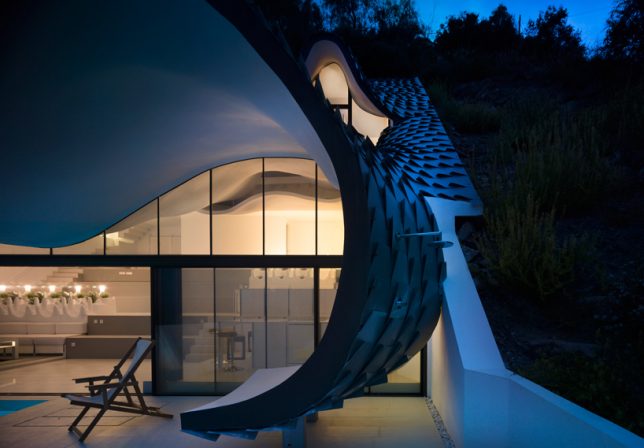
    ‘Dragon House’ by Gilbartolomé Architects takes a challenging site and transforms it into something truly spectacular, with a curvilinear tiled roof resembling scales on a reptilian hide. The home itself is built into a cliff overlooking the Mediterranean Sea in Granada, Spain, with three ‘eyes’ leading out onto glass-walled balconies to take in the views. The interior is spread across two levels, and the living room segues into a cantilevered terrace with a swimming pool.

    Casa Brutale by OPA

    casa brutale

    casa brutale 2

    casa brutale 3

    casa brutale 4

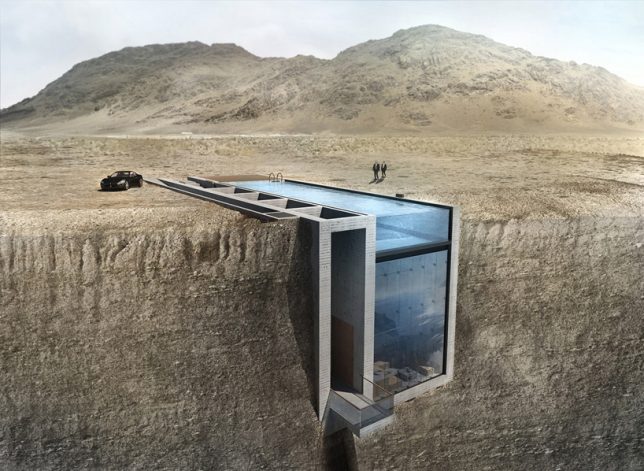
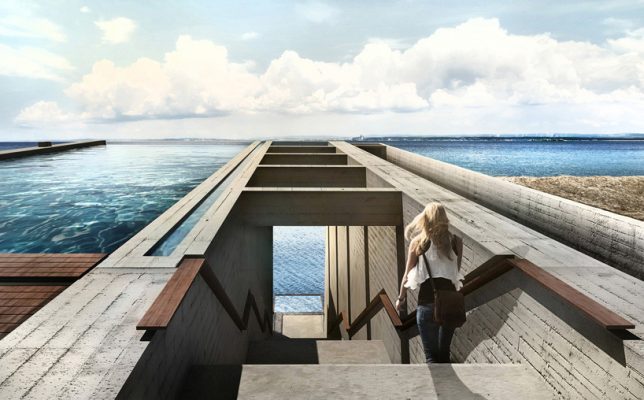
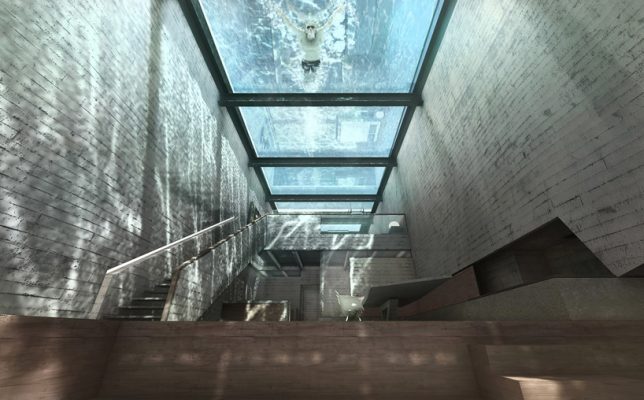
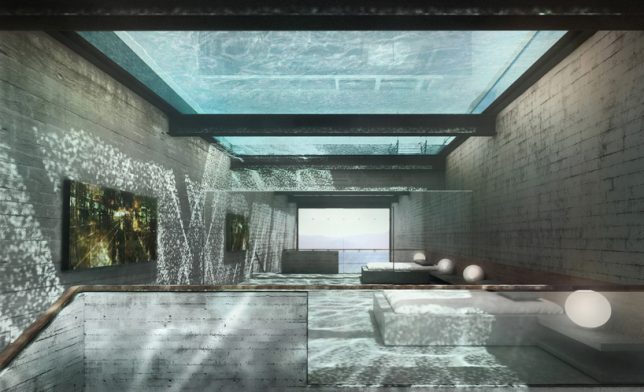
    Set to be built into the cliffs of Beirut soon, rather than overlooking a sea as seen in these renderings, Casa Brutale by OPA instantly went viral upon its debut for its dramatic design, with nothing but its swimming pool and stairs visible from surface level. The glass-bottomed pool acts as a giant watery skylight for the entire underground home, which looks out onto the valley from a narrow glazed facade.

    Pam and Jenny House by L’escaut

    pam and jenny house

    pam and jenny house 2

    pam and jenny house 3

    pam and jenny house 4

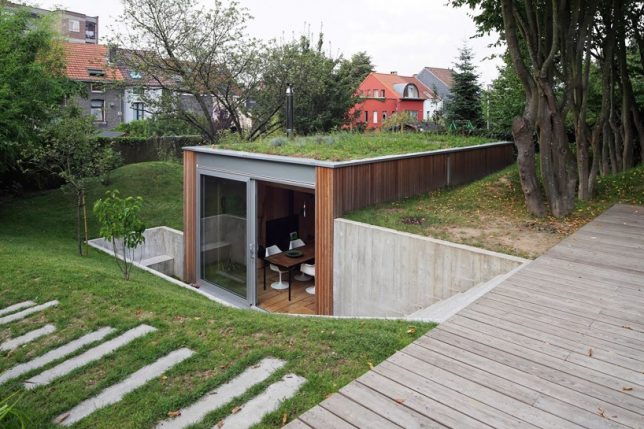
    Positioned at waterline height within a garden, the ‘Pam and Jenny House’ by L’escaut is mostly subterranean but peeks out full-height glazing into a recessed courtyard to fill the space with light and make it feel larger. Seen from the main house, this addition looks like no more than a series of grassy plains.

    Next Page – Click Below to Read More:
    Sort Of Subterranean 15 Partially Underground Modern Home Designs

    Share on Facebook


    [ By SA Rogers in Architecture & Houses & Residential. ]

    [ WebUrbanist | Archives | Galleries | Privacy | TOS ]


    WebUrbanist

  • How to do Digital Blending in Photoshop to Create a Composite Photo

    Normally when talking about digital blending, people will first think of exposure blending. That is correct, but it can do more than that. There is several situations where digital blending can be very handy. Not only can it help create a better photo, it also eases you in your shooting experience. In this article, I will share how I use a digital blending in Photoshop to create a much more interesting composition.

    digital blending

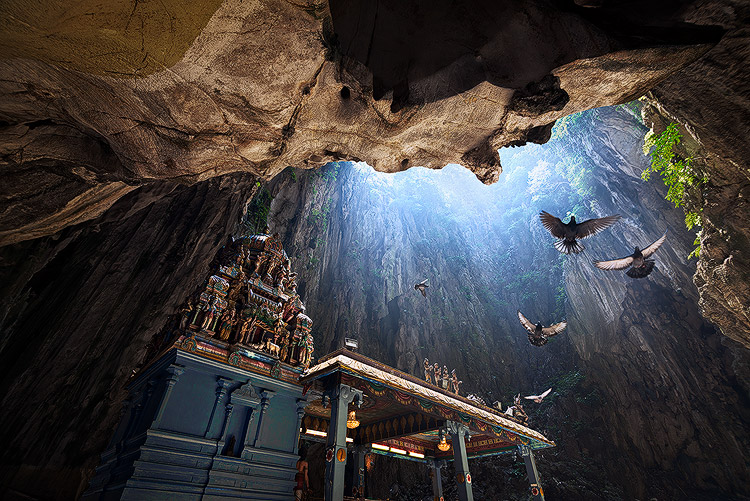
    I took the photo above of Batu Cave in Malaysia. I chose to add a few pigeon photos from a series that I captured, and blended them all together into a single photo with the digital blending technique.

    Select images

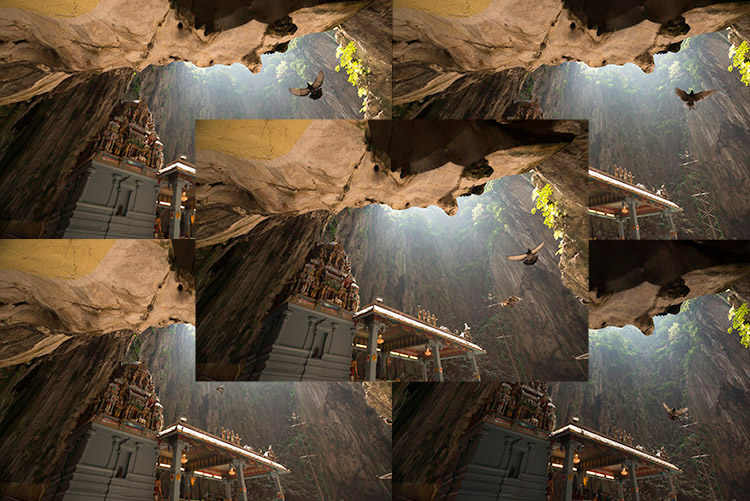
    Here are the raw photos that I going to use. You can see that there are pigeons in different locations in each of the photos.

    digital blending Photoshop

    Open Photoshop

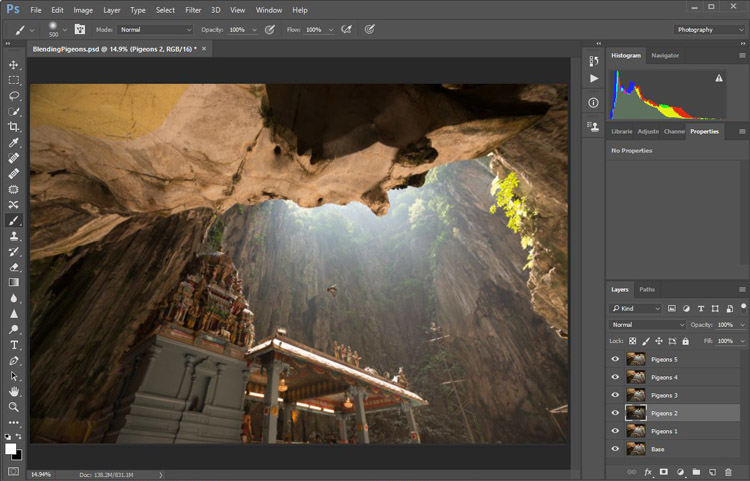
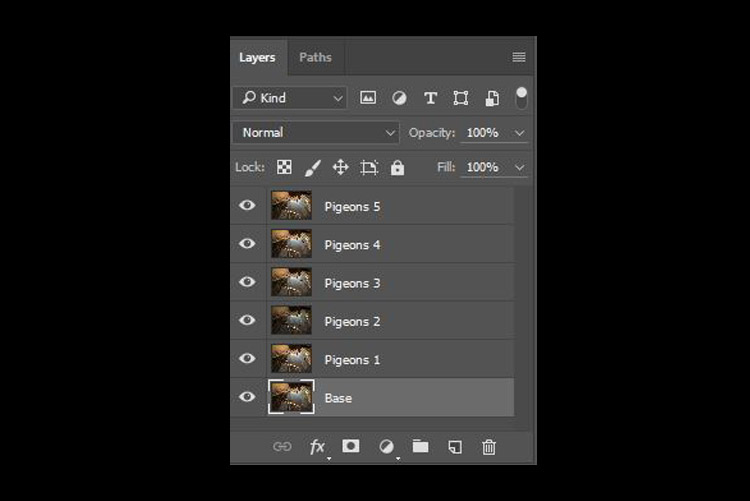
    Next with Photoshop open, I load all the photos into one place as different layers. You can rename them if you want, as I did here.

    digital blending in Photoshop

    Back up for a second: How the shots were done

    Notice there’s a “base” layer at the bottom. That image was captured with different camera settings compared to the pigeon shots. I do this because normally before capturing any additional photos such as the pigeon images, I will first take a few photos with the BEST camera settings for that situation. In this case, that was ISO 100, aperture of f/8, 1/30th of a second shutter speed.

    However, the 1/30th shutter speed was too slow to capture any photos of pigeons. So I needed a faster shutter speed which ended up with camera settings of; ISO 800, f/5, and 1/640th of a second. This allowed me to freeze the movement of the pigeons, but at the same time, it also generated more noise in the photos (ISO 800 compare with ISO 100) and a slightly more shallow depth of field (f/5 compared with f/8) resulting in a softer background.

    So the ideal scenario is to have them both together in one final image. Using the digital blending technique you can have the best image quality photo with lesser noise and better focus, and then blend in only the pigeons from later photos. The pigeons will appear to have more noise than other areas of the photo but only in very small areas and you can do a separate Noise Reduction just for the pigeons if needed.

    Shooting sequence

    Here is the shooting process in sequence, to give you a better picture:

    1. Decide on a composition.
    2. Take your photo with the best (optimal) camera settings for the scene.
    3. Without moving your composition, change the camera settings to capture anything that looks interesting to you. For example; animals, people that able to bring out the atmosphere of the place such as monk praying in a temple, or even any lifeless objects such as trains or boats, or anything else you can think of or notice in the scene.

    Photoshop steps

    Step #1 – Turn off some layers

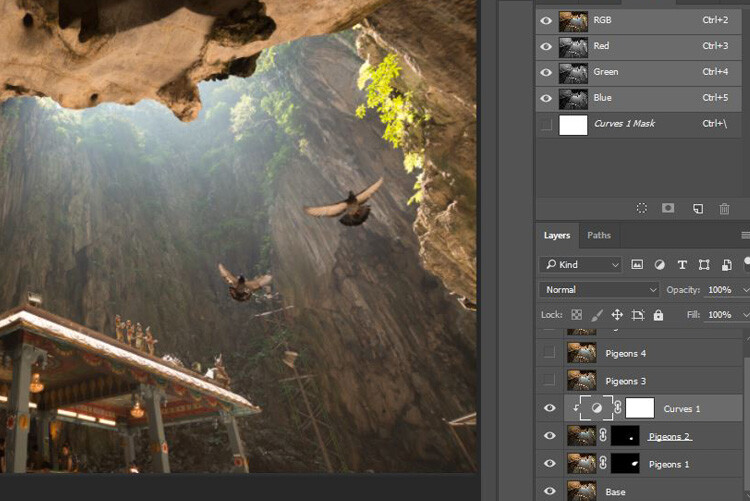
    Back in Photoshop, you will see there is an “Eye” icon beside each layer. This means that all these layers are visible. Temporary, let’s hide all the pigeon photos first by clicking on the “Eye” icon to uncheck each layer. Leave only two visible, the Base and Pigeons 1 layers.

    digital blending

    Step #2 – Add a layer mask

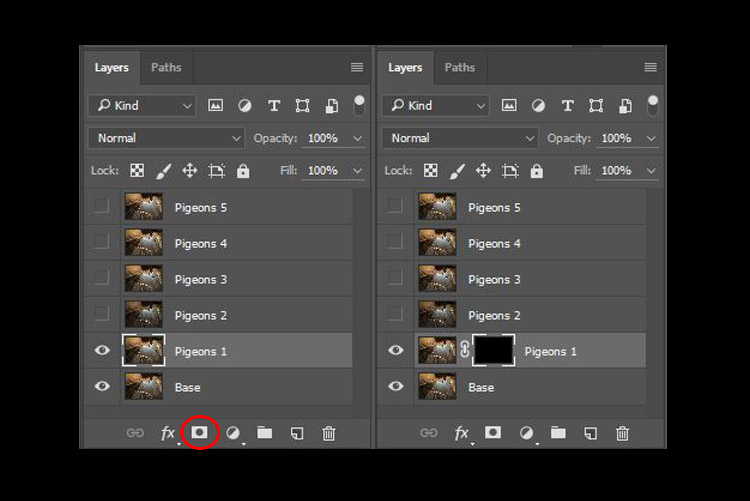
    Next, select the Pigeons 1 layer and while holding down the Alt key, click on the “add layer mask” icon (circled in the red in the photo below left). You shall have a black rectangle appear at the right side of the layer, as seen in the photo below right. This is to add a reverse layer mask on your layer, the black mask means it is hiding what is currently in this layer. If you don’t hold the Alt key when you click on the icon, it will create a white mask which will reveal what is currently in the layer.

    digital blending layer mask

    Step #3 – Paint on the mask to reveal the bird

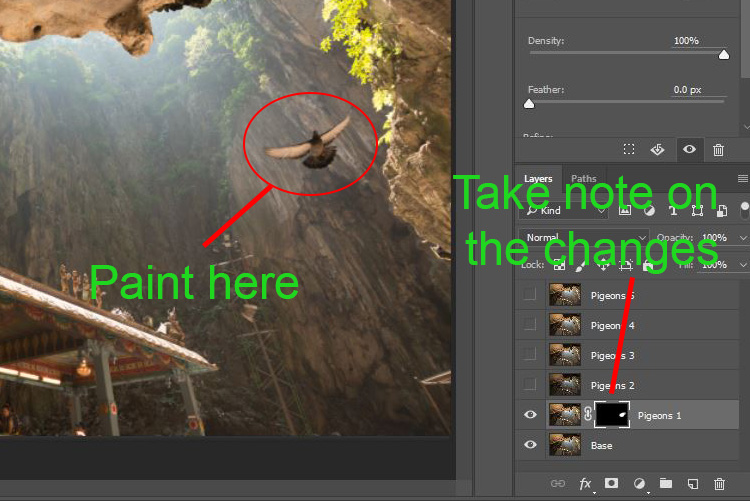
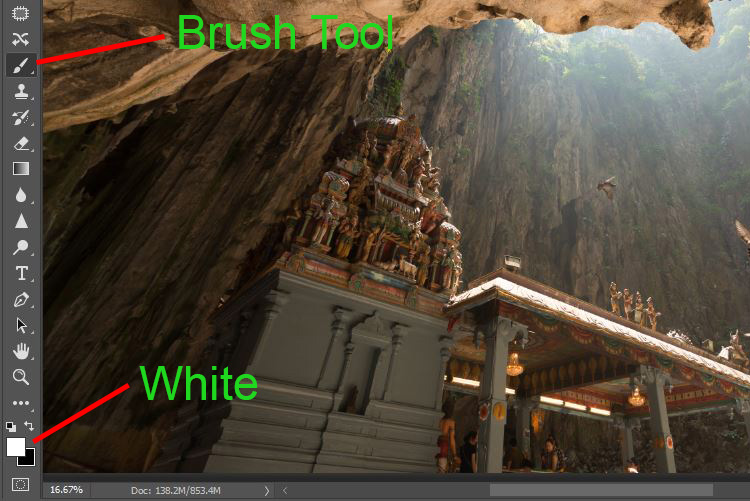
    Now we have a black mask. To blend in only the pigeon from that layer, we will need to select the Brush Tool and paint on the mask in white over the pigeon’s area. Note: A black mask means hiding and white means revealing the layer.

    digital blending Photoshop

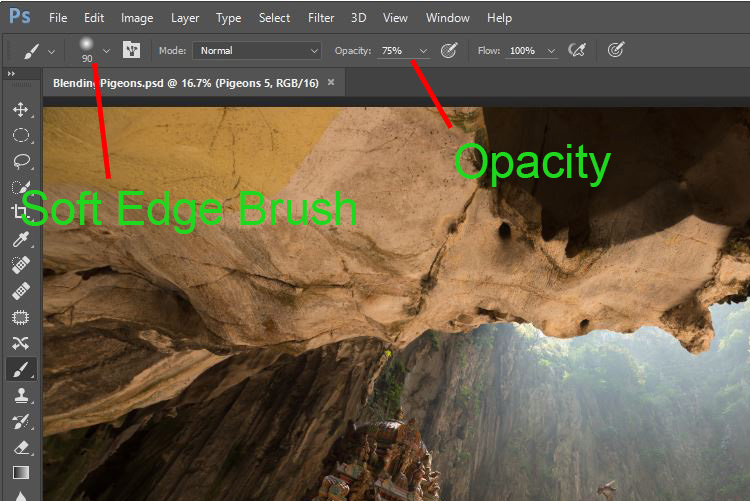
    After selecting the Brush tool, make sure you are using a soft edged brush, and the opacity is set to about 75%. The opacity will affect how much of your painting result will be applied. Using opacity at 100%, you only need to paint once to fully reveal that particular area. However at 75 % or lesser opacity, you will need to repeat the painting few times in order to achieve the 100% effect. It is slower, but at the same time it create a smoother edges and the layer is better blended to the original image.

    digital blending brush tool

    Notice when you do the painting, the mask on the layer also reflects your painting result. Congratulations, now you have the first pigeon blended in! Let’s repeat the same process for the next layer.

    digital blending Photoshop

    Step #4 – Repeat on next layer

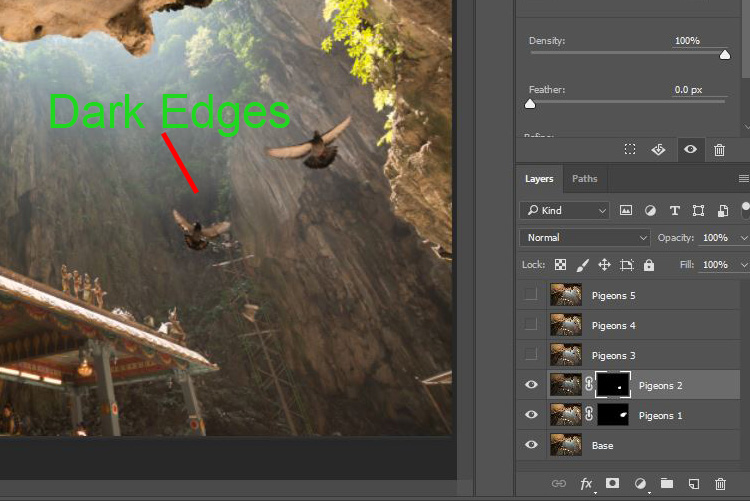
    By performing the same steps on the “Pigeons 2” layer, you will now have the second pigeon added. But wait, something is not right. Do you notice that the second pigeon has dark edges surrounding it? Why?

    digital blending Photoshop

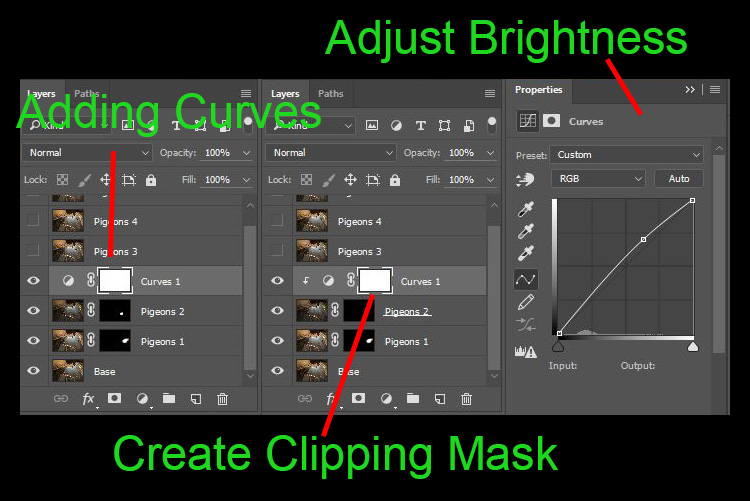
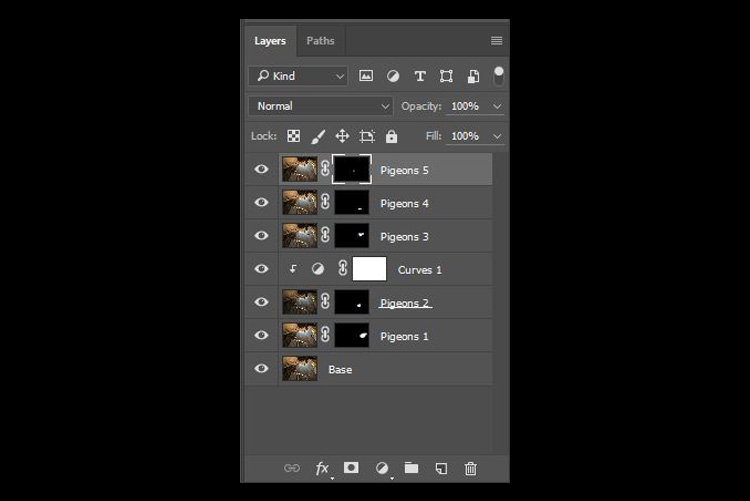
    This is because even at the same camera settings, the lighting conditions may have changed during the shooting process. This image was captured when there were clouds blocking the sun and it dimmed the light in the cave. Instead of solving this by doing some really precise masking (by zooming in and brushing carefully on the edge of the pigeons, which can be a tedious process), let’s try adding a Curves adjustment layer.

    Before doing any adjustment with the curve layer, right-click on it and choose “create clipping mask”. This will make sure whatever adjustment is done here will only affect the layer below it. Now add some brightness by slightly pulling the curve up, as shown below right.

    digital blending Photoshop

    The surroundings of the second pigeon looks much better now. Other than using a Curve, you can do this on any other adjustment layers such as color balance adjustment layer to correct the tone of the particular layer, if the white balance is not equal with the background.

    digital blending Photoshop

    You can see the bird blends in much better now with the Curve applied.

    Step #5 – Complete masking on all layers

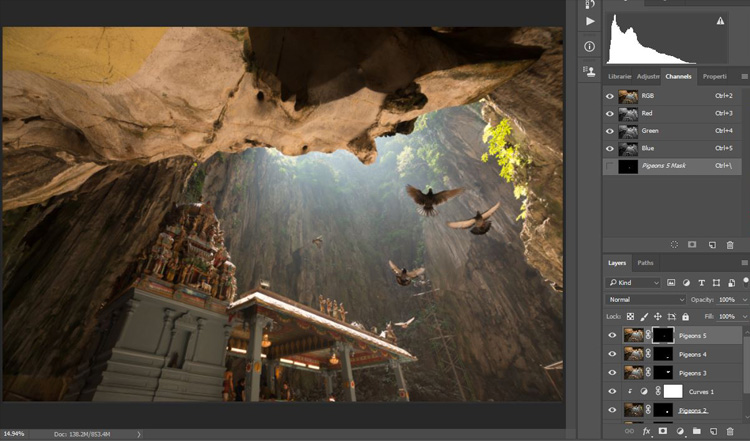
    Let’s continue with the rest of the layers. The masking results will look like the photo below once you have done the blending process.

    digital blending Photoshop

    Finally

    Here is the final output of the digital blending. Now you can perform any other post-processing adjustments from here by applying contrast, changing color balance, sharpening, or any other process that you think is necessary to enhance your photo.

    digital blending Photoshop

    I hope you have enjoyed this article, and it gives you some ideas or inspiration. If you have any questions or suggestions, feel free to leave a comment below.

    googletag.cmd.push(function() {
    tablet_slots.push( googletag.defineSlot( “/1005424/_dPSv4_tab-all-article-bottom_(300×250)”, [300, 250], “pb-ad-78623” ).addService( googletag.pubads() ) ); } );

    googletag.cmd.push(function() {
    mobile_slots.push( googletag.defineSlot( “/1005424/_dPSv4_mob-all-article-bottom_(300×250)”, [300, 250], “pb-ad-78158” ).addService( googletag.pubads() ) ); } );

    The post How to do Digital Blending in Photoshop to Create a Composite Photo by Grey Chow appeared first on Digital Photography School.


    Digital Photography School

  • dPS Writer’s Favorite Lens – the Canon 100-400mm f/4.5-5.6 L-Series Lens

    Last August I bought the Canon 100-400mm f/4.5-5.6L IS II USM L-series lens for myself as a birthday gift. Since then it’s been in almost constant use as I’ve photographed horses and wildlife in Arizona, Florida, Georgia, Illinois, Nevada, and Utah. I’ve made more than 14,000 images with it in the last five months! Read on to learn more about why I love this lens so much.
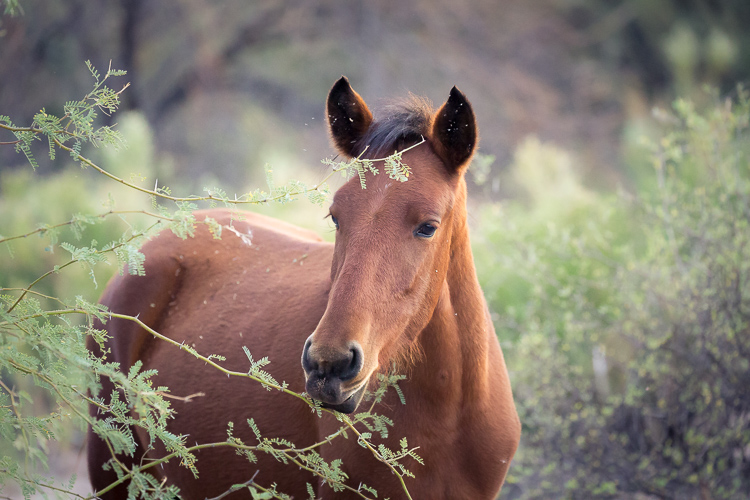
    Favorite Lens Canon 100-400mm

    Salt River wild horse yearling with ferns – 5D Mark III, Canon 100-400mm @ 248mm, 1/350th, f/5.6, ISO 8000.

    Canon 100-400mm f/4.5-5.6L IS II USM technical specs:
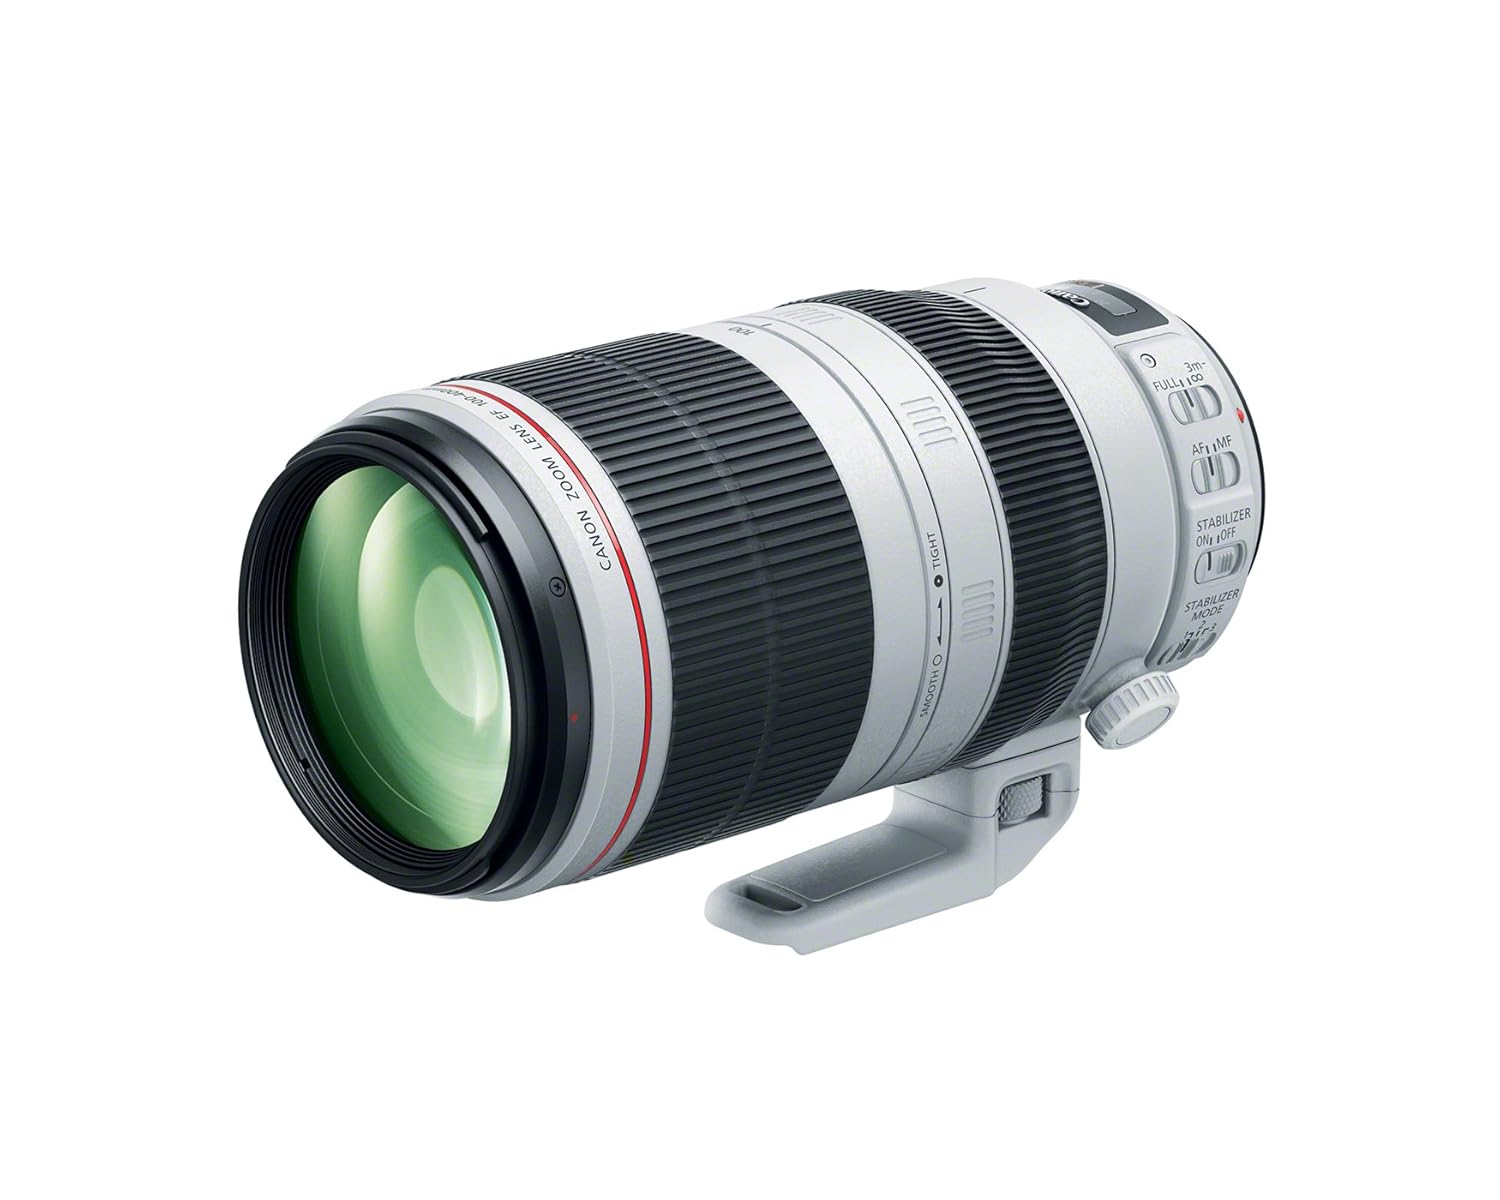
    • Focal Length: 100-400mm
    • Maximum Aperture: f/4.5-5.6, variable
    • Minimum Focusing Distance: 3.2 feet (0.98m)
    • Zoom: Rotation
    • Filter Size: 77mm
    • Weight: 3.62 pounds (1.64kg)
    • Price: $ 2,049.00 USD (at the time of writing this article)

    Compared to the Canon 200-400mm

    Compared to other lenses of similar focal length the Canon 100-400mm is a bargain, especially since there’s no sacrifice to image quality. Compare it to the Canon flagship telephoto lens, the 200-400mm f/4 which is a whopping $ 10,999. The 100-400mm lens is a moderate $ 2,049. Of course, the 100-400mm is one to two stops slower than the 200-400mm but for an $ 8,800 price reduction, I can handle the loss. I think you probably can too.
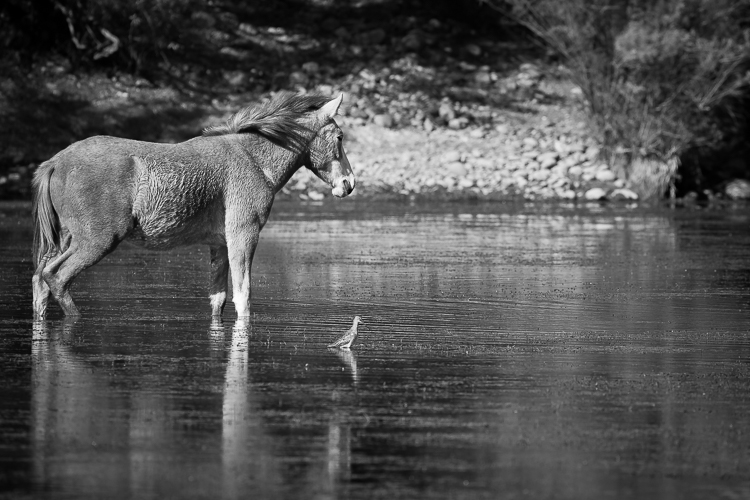
    Favorite Lens Canon 100-400mm

    Salt River wild horse with bird, monochrome – Canon 5D Mark III, 100-400mm lens @ 400mm, 1/1000th, f/8, ISO 500.

    Those of you who know long lenses also know that the 200-400mm has a built-in 1.4x extender. Sold separately, those are about $ 500 so if you invest in one (and you should) your savings between the two lenses is now $ 8,300. In other words, you still save a small fortune by shooting with the 100-400mm lens instead of the 200-400mm.

    Lastly, the 200-400mm weighs in at almost 8 pounds (3.63 kg). By shooting with the 100-400mm, you also save your back, neck, hands, and shoulders from a lot of wear and tear. I personally can’t hand hold an 8-pound lens, which means to use the 200-400mm I’d also have to carry a heavy monopod with a gimbal head. My always-aching upper body thanked me for buying the 100-400mm instead.
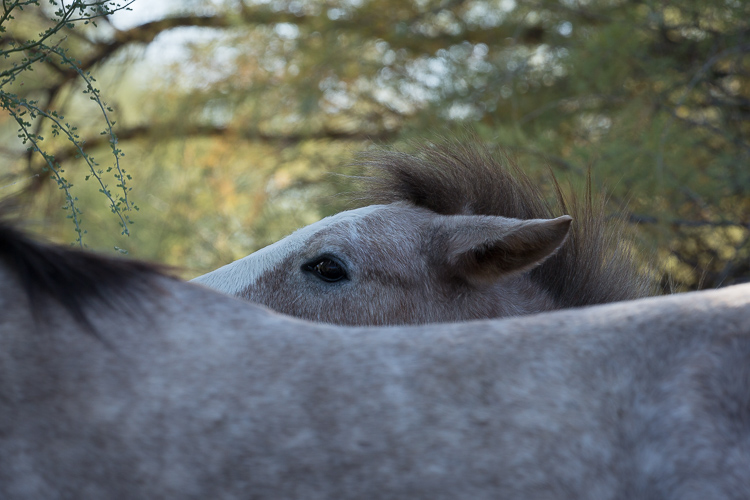
    Favorite Lens Canon 100-400mm

    Peeking Salt River wild foal – Canon 5D Mark III, 100-400mm lens @ 340mm, 1/350th, f/8, ISO 500.

    Practical size

    For a telephoto lens of its focal length, the 100-400mm is a relatively compact, hand-holdable, and practical lens. I can attach it to my Canon 7DII or Canon 5DIII camera bodies and shoot with it all day long without using a monopod or tripod. The combination with either camera weighs in at about 6 pounds (2.72 kg). Note that that’s a whole 2 pounds (907g) less than just the weight alone of the 200-400mm lens. It’s a lot of focal length, in a fairly small package.
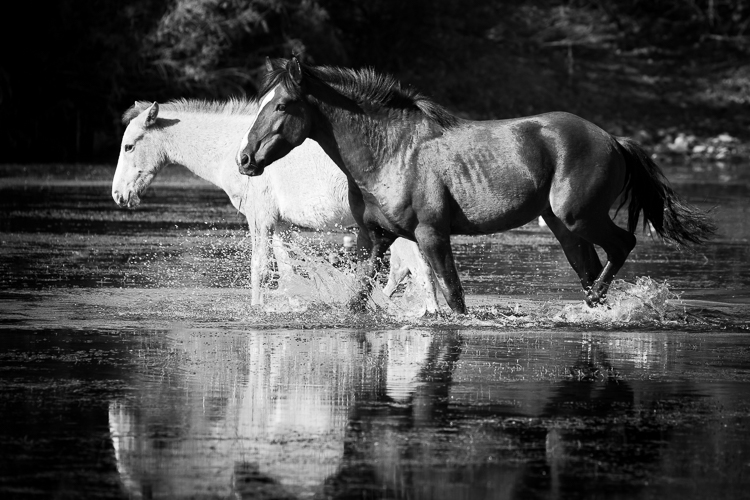
    Favorite Lens Canon 100-400mm

    Splashing Salt River wild stallion, monochrome – Canon 5D Mark III, 100-400mm lens @ 278mm, 1/750th, f/6.7, ISO 500.

    The 100-400mm lens also easily fits into my Kata backpack (now manufactured by Manfrotto). When I pack for an equine and wildlife photography trip, I cram the 100-400mm, 70-200mm, 24-105mm, extender, both my camera bodies, laptop, hard drives and a slew of accessories into this bag. Yes, it’s a great bag and holds a lot for its size but the point is, the 100-400mm fits in it. Larger lenses like the 200-400mm would not.
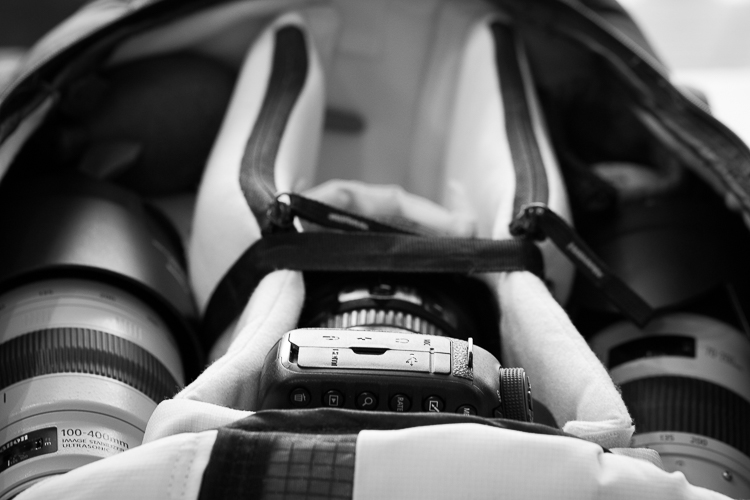
    The 100-400mm is on the left; accessories like batteries, cards, and a rocket blower fit in the same divider, tucked in at the top of the bag. 7DII is in the middle with 24-105mm attached, the open divider is for the 5DIII camera body (which I used to take the pic). 70-200mm lens is on the right; 1.4x extender fits in the same divider in its own little case, tucked in at the top of the bag.
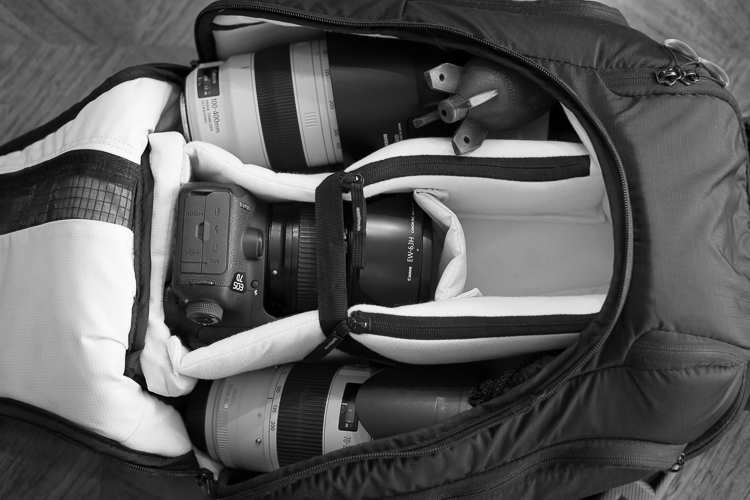
    Same arrangement, top view.
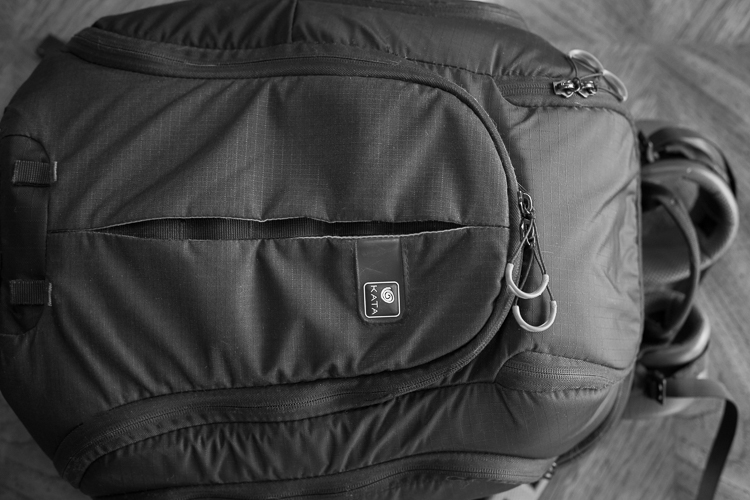
    Bag zips!

    Features of the Mark II version

    If you’ve shot with the original 100-400mm lens, the Mark II has some great new features and I’d recommend upgrading. The original was more of a pumping action when you extended it. The Mark II extends with a twisting action. Twisting to extend is faster and easier to use than the original mechanism. There’s also a ring that you can tighten or loosen, increasing or decreasing the torque on the twisting mechanism. In other words, if you want to rapidly zoom in and out, you loosen the ring to reduce the torque. If you want to keep the lens zoomed at a specific focal length, or locked into its most compact position, you can tighten the ring and increase the torque.

    It’s a very intuitive motion. As you use the lens, you’ll find your hand easily moves from the rubber grip used to adjust the focus to the grip used to extend the focal length and to the adjustment ring.
    Favorite Lens Canon 100-400mm

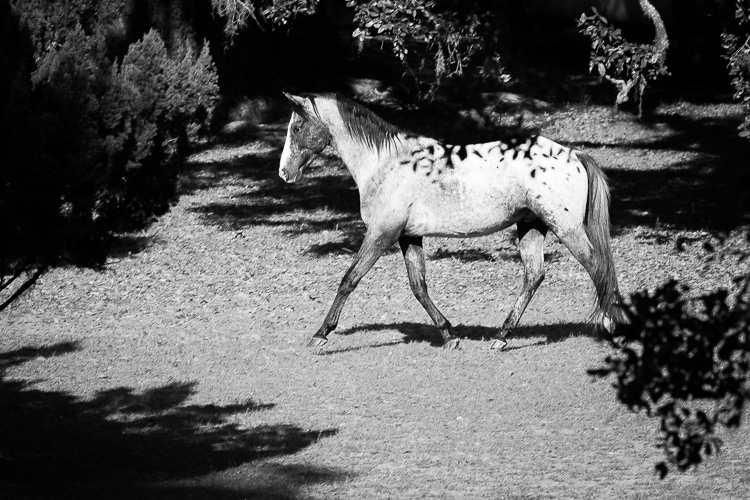
    Cumberland Island wild horse in the live oak shadows, monochrome – Canon 5D Mark III, 100-400mm lens @ 400mm, 1/350th, f/9.5, ISO 320.

    Built to last

    The Canon 100-400mm lens is also built to last. The metal, weather-sealed build is why I always invest in original, L-series Canon lenses. I trip, I fall, I drop things. It’s just part of who I am. When I invest in a lens that I plan to use all the time, it can’t be a fragile little thing that needs to be babied. It has to be able to withstand my clumsiness plus dusty, desert winds, and driving snowstorms.
    Favorite Lens Canon 100-400mm

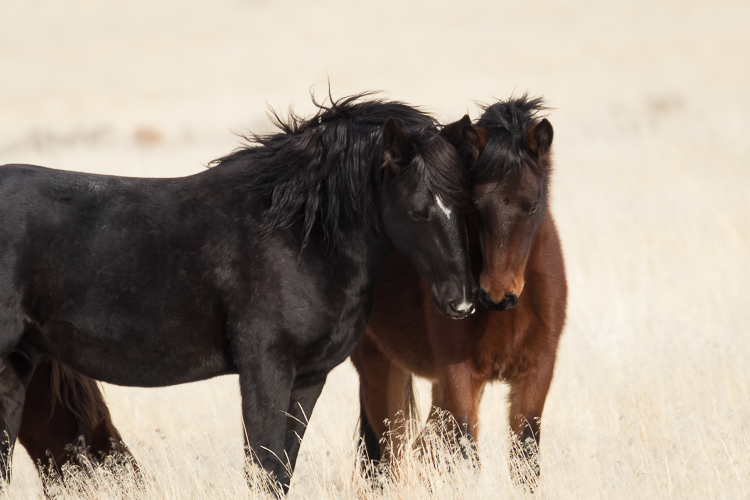
    Antelope Valley wild horse snuggles – Canon 7D Mark II, 100-400mm lens with 1.4x III extender @ 560mm, 1/200th, f/8, ISO 200.

    Just a few weeks ago I was shooting in very snowy, wet, conditions in Nevada. When I made it back to the car, I was soaked. My camera and lens were also dripping with melting snow. I toweled everything off and had a moment of panic when the inside of the lens fogged just a tiny bit. Happily, 15 minutes later, the slight condensation dissipated. If the lens hadn’t had such excellent weather sealing, that snow storm might have ended my shoot. A lens with a cheaper build may have been out of commission for days.
    Favorite Lens Canon 100-400mm

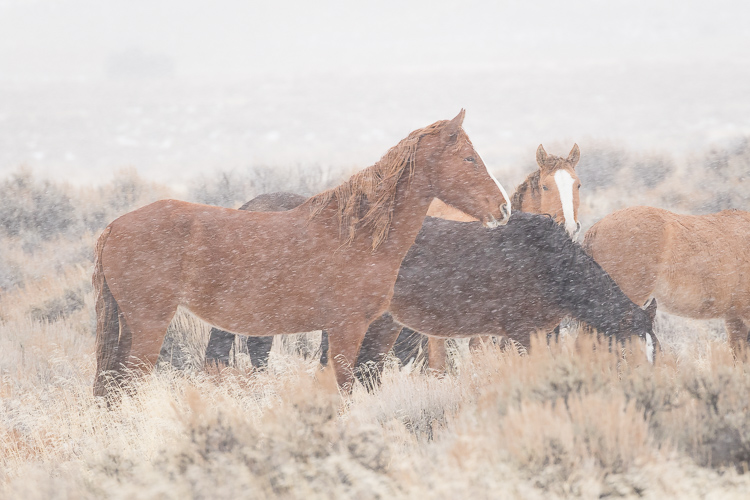
    Wild horse blizzard in Antelope Valley – Canon 7D Mark II, 100-400 @ 400mm, 1/250th, f/9, ISO 800.

    Superfast autofocus

    This lens focuses quickly, especially on my 7DII. I rarely miss a fleeting moment. I’ve actually captured images other people in my group are surprised to see. I credit that both to the fast focusing ability and the maneuverability of the 100-400mm lens.
    Favorite Lens Canon 100-400mm

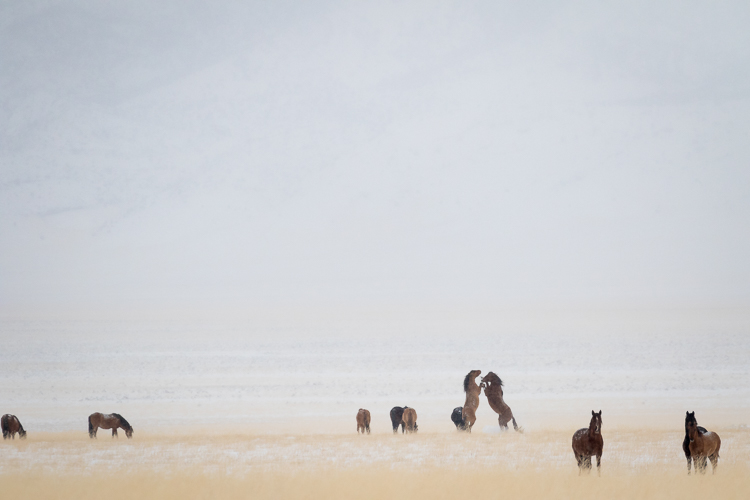
    Antelope Valley wild horses snow globe – Canon 7D Mark II, 100-400mm with 1.4x III extender @ 560mm, 1/4000th, f/8, ISO 1000.

    On occasion, I do have trouble focusing due to low contrast. Let’s face it, that happens to all of us. With this lens, I pull back a bit to 200mm or 300mm, grab the manual focus ring and dial in until I start to feel like I have an edge. Once I do, I use back-button focus to lock in sharpness. Once I’m focused, I zoom back to 400mm. The focus holds through this transition and I grab the shot. It’s quick and magical. None of the other long lenses I’ve used have quite the same intuitive feel for focusing.
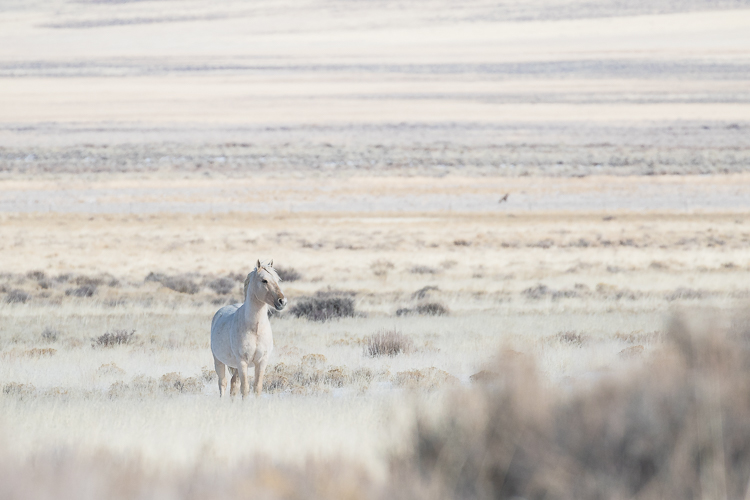
    Favorite Lens Canon 100-400mm

    Antelope Valley winter white wild stallion – Canon 7D Mark II, 100-400 @ 400mm, 1/4000th, f/5.6, ISO 500.

    Flexibility

    One of my favorite aspects of this lens is its flexibility. I use all focal lengths and apertures of this lens without hesitation. For a standard 100-400mm, I attach it to my full frame 5DIII. For a little extra reach, I attach it to my crop sensor 7DII.

    On a crop sensor, the effective focal length of the 100-400mm increases to 160-640mm (1.6x). If I need even more reach, I add the Canon 1.4x Extender and the effective focal length on my 7DII increases to 224-896mm. The extender also increases the total weight by about 8 ounces, but I don’t even notice it.

    Note: For Canon crop sensor cameras, multiply the focal length by the 1.6x crop factor to determine the effective focal length. Read more here: Crop Factor Explained.

    With the Canon 1.4x Extender
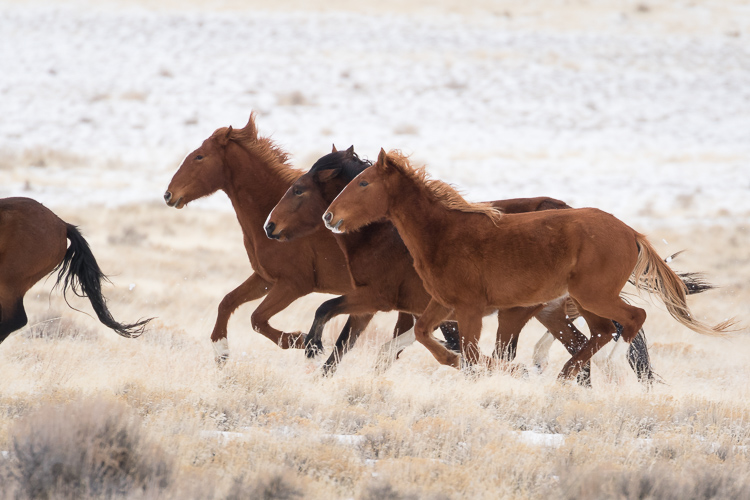
    Favorite Lens Canon 100-400mm

    Antelope Valley band of wild horses running in the snow – Canon 7D Mark II, 100-400mm with 1.4x III extender @ 560mm, 1/1000th, f/8, ISO 1000.

    I love using an extender with this lens. At 400mm, the minimum aperture is f/8, which is my preferred wildlife setting anyway. Autofocus is still blazing fast, although it is limited to the center focus point when the extender is attached. I haven’t seen a significant loss of quality or sharpness with the extender. Since I can still handhold this combination, even if there was a slight loss, I’d be more than okay with it. A slight loss of sharpness is always preferred (in my book at least) to missing a shot because you were fiddling with your tripod or just didn’t have the reach you needed.

    Note: Read more about extenders here: The Pros and Cons of Using Teleconverters (Extenders) on your DSLR.

    Stability
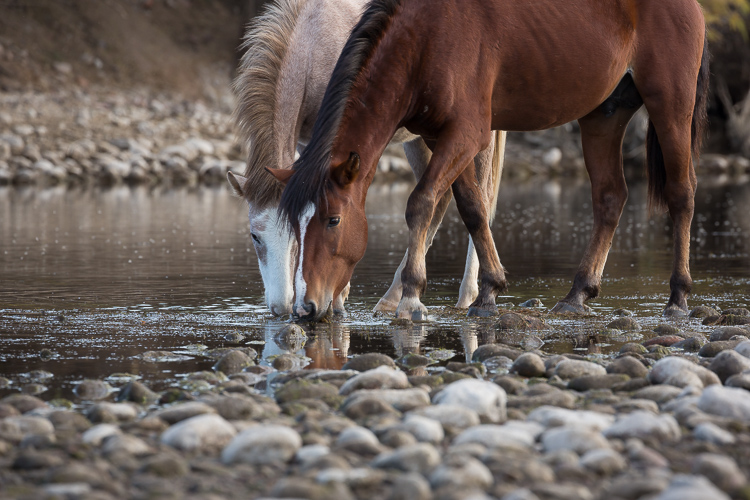
    Favorite Lens Canon 100-400mm

    Salt River stallion and son eating eel grass in the river – Canon 5D Mark III, 100-400mm @ 400mm, f/9.5, 1/125th, ISO 320.

    My job as a photographer is to put myself in the right place at the right time, to find the beauty once I’ve put myself in that place, and to understand the light and compose my image. My gear gives me the technical boost I need to pull all that off.

    I’m going to be honest here, I’ve rarely shot with third-party lenses. I can’t compare Canon lens IS (Image Stabilization) to other brands. But, what I can tell you is that when I find myself shooting at 400mm with a 1.4 extender at a relatively slow shutter speed of 1/250th, it’s not my steady hands ensuring that my shot is in focus – it’s Canon’s. Their IS in this lens is like a super power. It is exactly the technical boost I need to make the images I want to make.

    Even works for panoramas
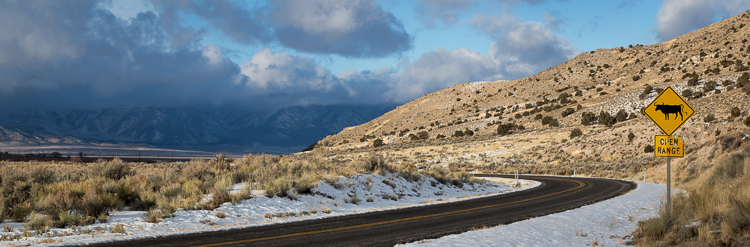
    Favorite Lens Canon 100-400mm

    Ely County Nevada Open Range, panorama – Canon 7D Mark II, 100-400mm @ 100, 1/320th, f/11, ISO 250.

    I’ve even used this lens to create panoramas – handheld, no less. If I’m using the 100-400mm and I see a gorgeous vista, I set the lens to 100mm. I create a very secure hold by pressing together my elbows and locking them into my chest. Then I slowly click my way through the scene. Lightroom or Photoshop both do an amazing job of stitching and correcting perspective issues. If you’re a landscape photographer you might be horrified at this method but if you’re a wildlife photographer, it’s truly another practical tool in your photographic arsenal.

    Image quality
    Favorite Lens Canon 100-400mm

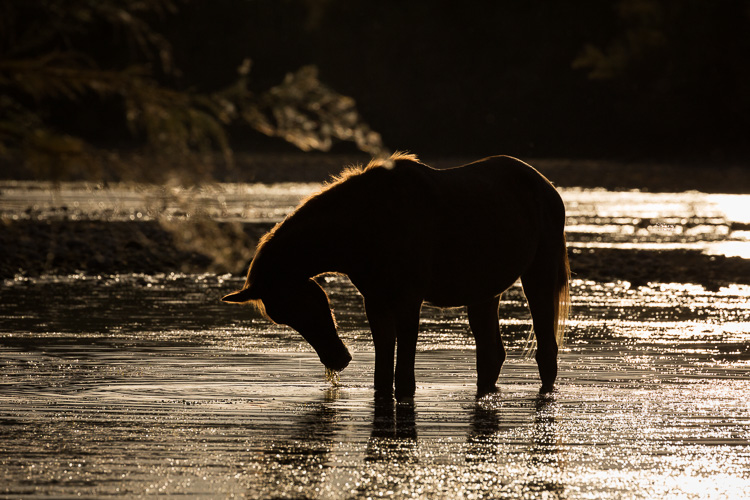
    Salt River wild mare silhouette at sunset – Canon 5D Mark III, 100-400mm lens @ 400mm, 1/8000th, f/11, ISO 600.

    With all this technical talk, you might be wondering why I haven’t said all that much about image quality. I’ve included over a dozen images here and I hope that speaks for itself. Details render crisply. I haven’t discovered any artifacts or unusual aberration in any of the 14,000+ images I’ve shot with this lens.

    In wildlife images, I prefer a creamy blurred background rather than a bubbly bokeh background since I find that big, bokeh circles detract from my subject. This lens renders the sort of backgrounds that I prefer.
    Favorite Lens Canon 100-400mm

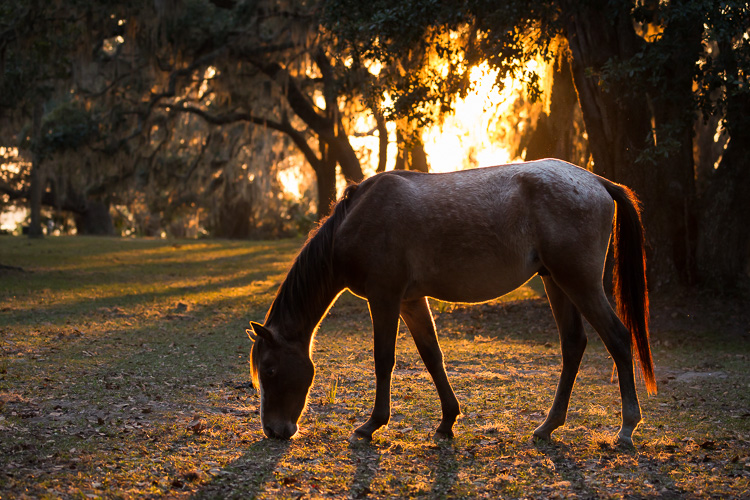
    Backlit Cumberland Island wild horse at sunset – Canon 5D Mark III, 100-400mm lens @ 100mm, 1/500th, f/4.5, ISO 2000.

    Shooting into the sun for a backlit image produces just the right amount of lens flair. Shooting with the sun at my back or off to my side produces just the right amount of contrast. With bright overcast skies, the lens still shapes the light beautifully.

    The Canon 100-400mm lens renders color in a very neutral way. While it’s fun that some lenses render brighter or more vivid colors, I prefer to have a more neutral starting point when I begin to edit my RAW images.

    Over to you

    In all, this is the absolute best birthday gift I’ve ever given myself. I even wish I’d bought it before I upgraded my 70-200mm.

    What about you? Have you used either the original or Mark II version of the Canon 100-400mm lens? Or do you have another favorite telephoto zoom lens? Share your feedback on your favorite lens with the dPS community in the comments below.

    Shop for the Canon 100-400mm lens here:
    • Amazon.com
    • B&H photo.com
    Favorite Lens Canon 100-400mm

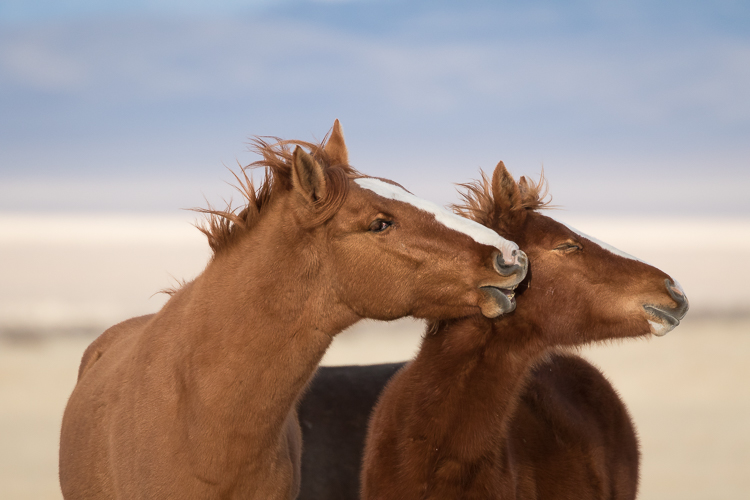
    Mom!! – Canon 7D Mark II, 100-400mm lens with 1.4x III extender @ 560mm, 1/1250th, f/8 ISO 800.

    googletag.cmd.push(function() {
    tablet_slots.push( googletag.defineSlot( “/1005424/_dPSv4_tab-all-article-bottom_(300×250)”, [300, 250], “pb-ad-78623” ).addService( googletag.pubads() ) ); } );

    googletag.cmd.push(function() {
    mobile_slots.push( googletag.defineSlot( “/1005424/_dPSv4_mob-all-article-bottom_(300×250)”, [300, 250], “pb-ad-78158” ).addService( googletag.pubads() ) ); } );

    The post dPS Writer’s Favorite Lens – the Canon 100-400mm f/4.5-5.6 L-Series Lens by Lara Joy Brynildssen appeared first on Digital Photography School.


    Digital Photography School
  • Ouroborus Buildings: Artist Loops Infinite Skyscrapers Back on Themselves

    [ By WebUrbanist in Art & Drawing & Digital. ]

    unfinished design

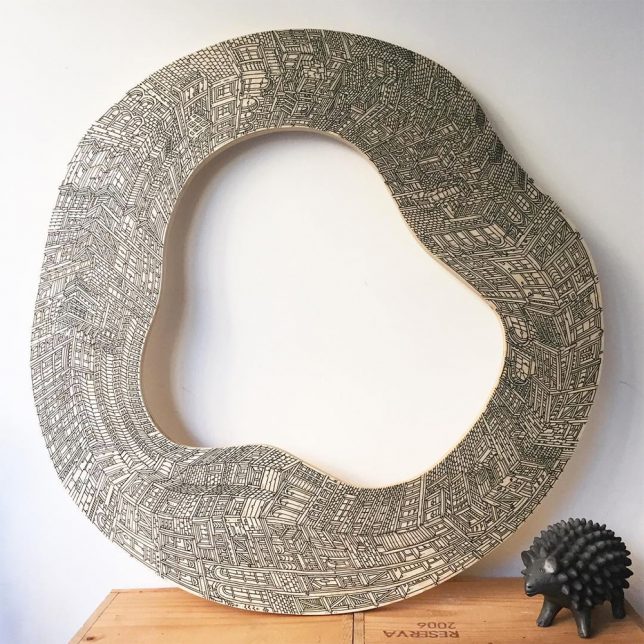
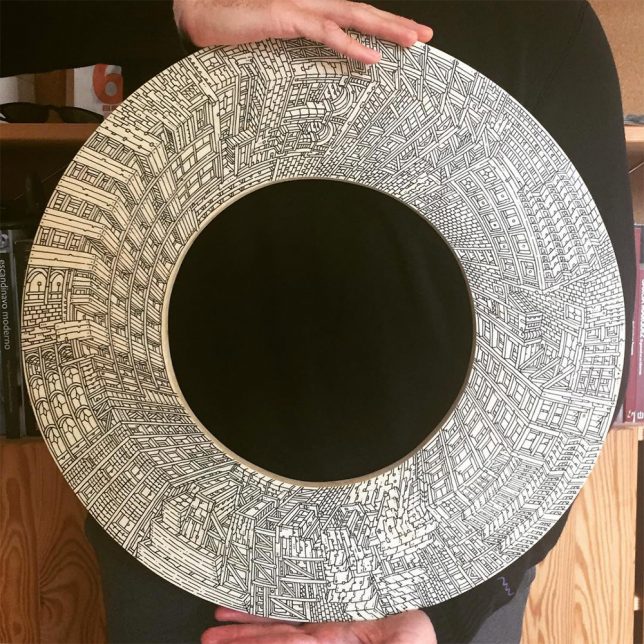
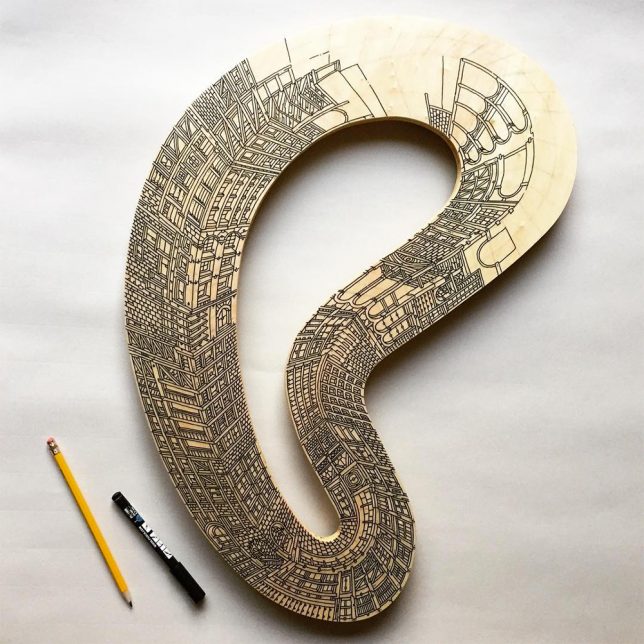
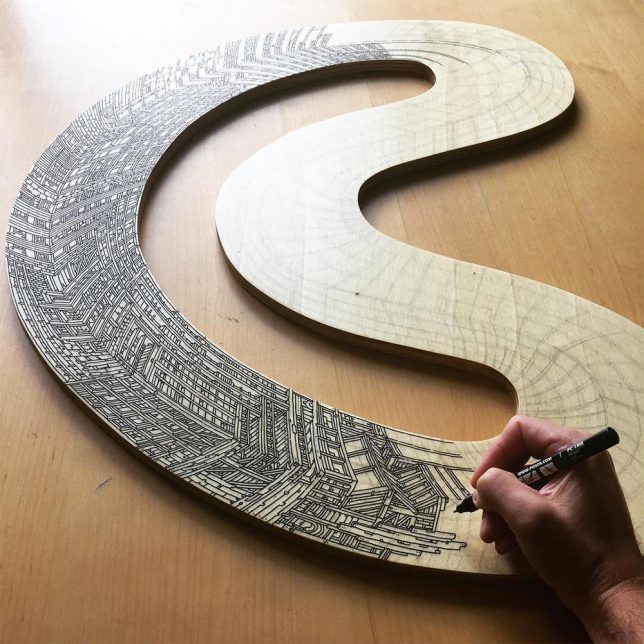
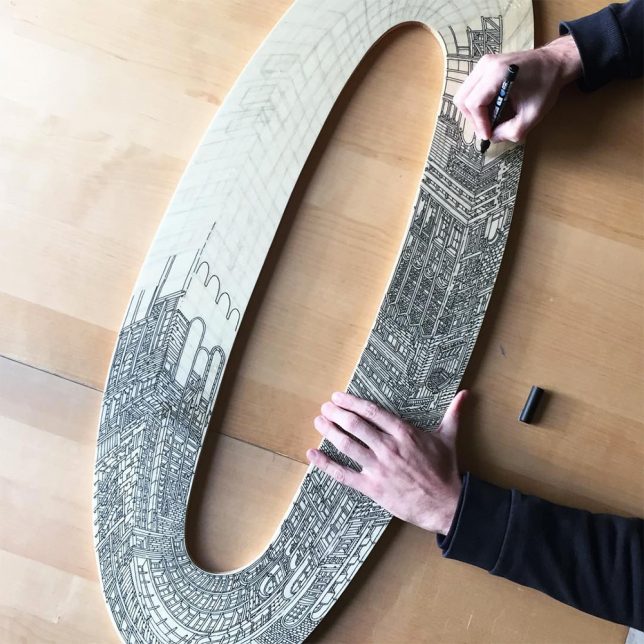
    What would architecture look like if it had no beginning or end, no ground floor as starting point nor rooftop terminus? Artist Vasco Mourao explores exactly that question in his series Ouroboros, so named after the mythical dragon/serpent forever eating its own tail.

    spiral skyscraper

    plywood drawing

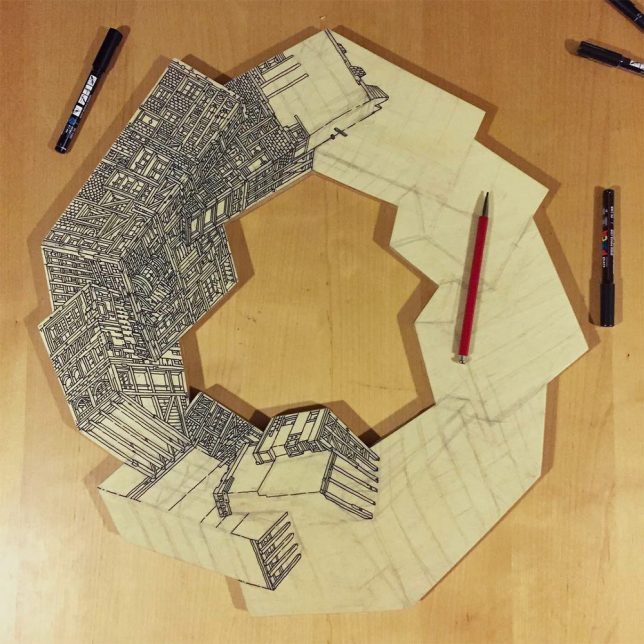
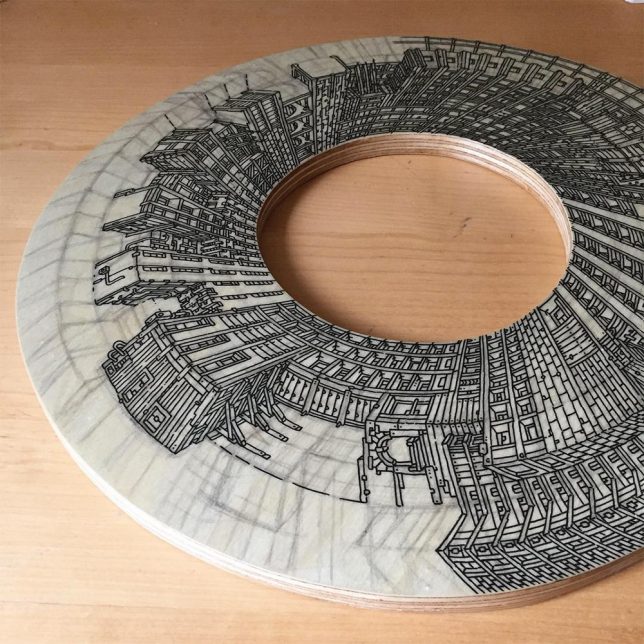
    The Barcelona-based artist (an architect by training) illustrates his impossible-sounding seems on curved and angular cuts of plywood shaped into loops.

    looped architecture

    detail image

    His work indirectly addresses a key transition point in the history of architecture as well — a time when concrete, steel and glass were first combined to make taller structure possible but before the Modernists rendered these buildings sleek and simple.

    circular cut

    unfinished design

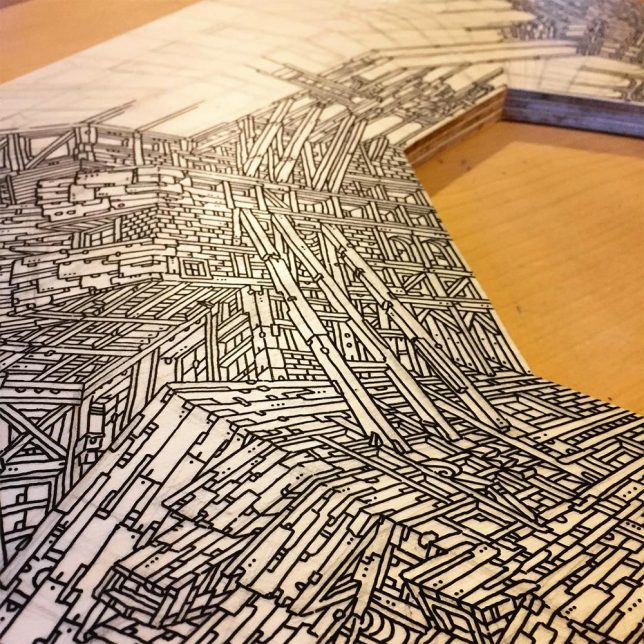
    Like early skyscrapers (featuring stretched Gothic decor and wood-inspired details), his designs extrapolate conventional materials and decorative approaches skyward. Their aesthetic is also reminiscent of places like Kowloon Walled City, where densification drove particularly strange connections between different structures.

    deep loop

    work in progress

    skateboard

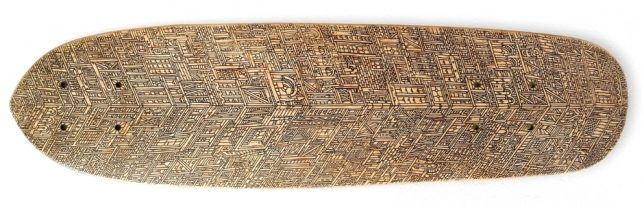
    Meanwhile, Mourao also draws other cityscapes on different surfaces as well, from large-scale surrealistic murals to the bottoms of skateboards, often reprising similar themes of infinity-evoking architecture.

    Share on Facebook


    [ By WebUrbanist in Art & Drawing & Digital. ]

    [ WebUrbanist | Archives | Galleries | Privacy | TOS ]


    WebUrbanist

  • 5 Creative Exercises to Help Make You a Better Photographer

    It’s tempting to think you need a new piece of photography equipment to become more creative. While sometimes it’s true, (macro photography, for example, is much easier with a macro lens) creativity works best within restraints.

    Creative photography exercises

    So, how do you become more creative without buying more gear? Here are some ideas to take you out of your comfort zone and give you new skills to master.

    1. Find a new subject

    Every photographer has a favorite subject and others that they photograph rarely, if at all. For me, that would be any kind of still life, including food photography. The first challenge is to find a new subject. It should be something that you haven’t photographed before. Even better if it helps you learn new photography techniques.

    For example, are you a landscape photographer who has never taken photos at night? Then set yourself the challenge of taking some great photos of the night sky. You won’t need any extra gear – just the desire and drive to learn a new skill.

    Once you’ve found a new subject ask yourself the question, “How can I take this to the next level?”

    For instance, in my case (using the earlier example of food photography) it’s easy to go to a restaurant or cafe, order some food, and take a photo of it. There’s hardly any work involved as it’s the chef’s responsibility to make the dish look good, as this photo below shows.

    Creative photography exercises

    It’s a lot harder to do the same yourself at home. Preparing the dish from scratch and presenting it properly so it looks delicious is much more difficult. But you’ll learn a lot more about food photography from the process.

    2. Find themes and projects

    A theme is a connection between photos. One way to identify the themes running through your work is to pick your favorite 10-20 photos taken in the last 12 months. Examine your choices analytically. What subjects are you photographing the most? What lenses do you use most often? Are your favorite photos color, black and white, or a mixture of the two?

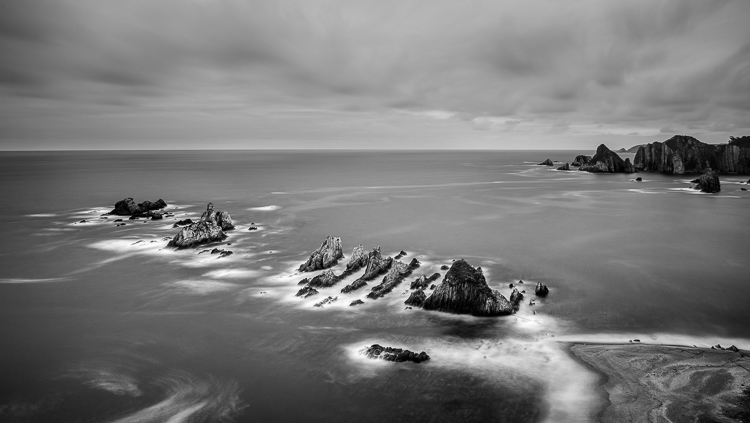
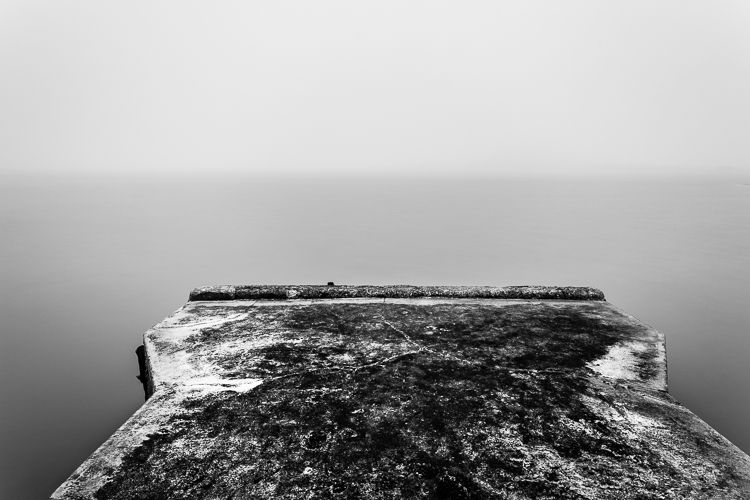
    You are looking for themes that help you decide what you want to photograph next. When I did this exercise I saw that two themes dominated – long exposures and street photography. This is a long exposure photograph from Spain.

    Creative photography exercises

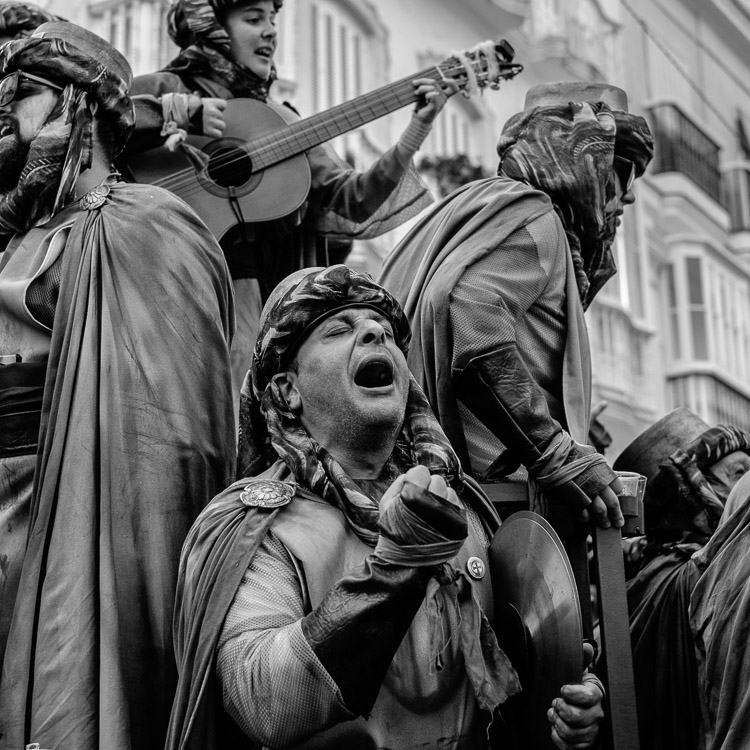
    This is a street portrait taken at Carnival in Cadiz.

    Creative photography exercises

    As a result, this coming year I will find some new locations for long exposure photography, and more cultural events to photograph. The idea is to build a body of work around an interesting theme. The project will grow as you pursue it.

    3. Find new light

    Let’s say you are a portrait photographer who works in natural light. You like to be on location with your models at the end of the day and work during the golden hour.

    If this is you, what other types of light could you shoot in? If you normally shoot outdoors, what about an indoor location? If you like working on sunny days, how about a cloudy or rainy day?

    I lived in Wellington, New Zealand for several years. There were only two or three foggy days during that time. It was a new type of light for me – here’s one of the photos I took in the fog.

    Creative photography exercises

    You can apply this to any genre of photography. Think about the type of light you prefer to work in, and then change it around by trying something different.

    4. Use the wrong lens

    The earlier exercise of picking your best images from the previous 12 months should highlight the lenses you prefer to use for your favorite subjects. What happens if you try something different?

    The idea here is to use the wrong lens for the job, or at least a lens you’re not accustomed to using.

    Imagine, for example, that you are a photographer who only ever uses telephoto lenses to shoot portraits. What happens if you use a wide-angle lens instead? How can you make it work? Yes, the portrait will look horrible if you get too close to your model with a wide-angle lens. But what about taking a more environment approach? The model becomes part of the scene and the wide-angle lens helps you capture it. The exercise will force you to see differently and find creative ways to use unfamiliar equipment.

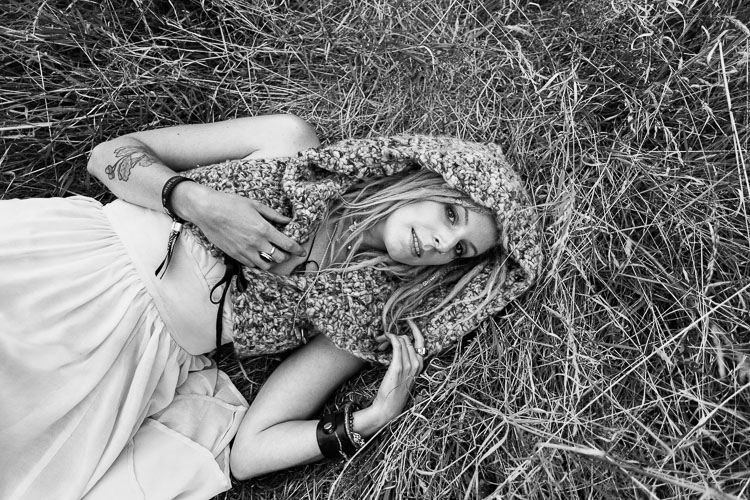
    But what about taking a more environmental approach? The model becomes part of the scene and the wide-angle lens helps you capture it. The exercise will force you to see differently and find creative ways to use unfamiliar equipment. I made this portrait with a 24mm lens. It’s okay, but the distortion means it probably wasn’t the best lens to use.

    Creative photography exercises

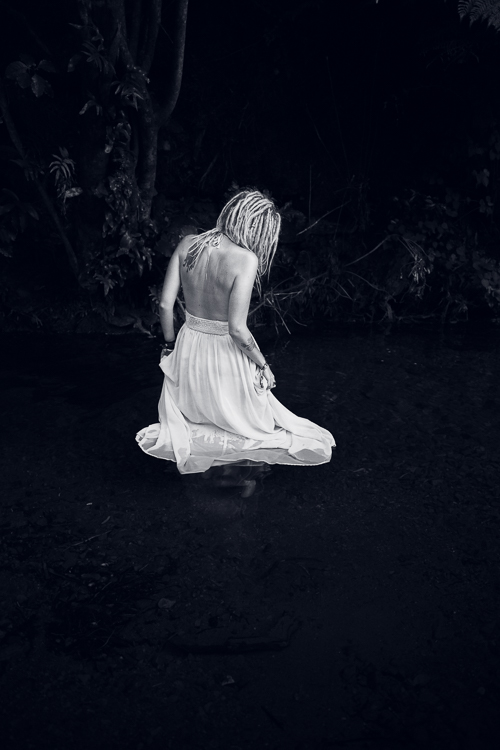
    Here’s another photo, taken with the same lens. I used it to photograph the model in a natural environment and it worked much better.

    Creative photography exercises

    Conclusion

    Hopefully, these creative exercises will help you become a better photographer. Feel free to adapt and combine them. For instance, what happens if you shoot a new subject with the wrong lens in a new type of light? You won’t know until you try it, but you’ll have fun finding out.


    If you enjoyed this article and would like to learn more about the creative side of photography then please check out my ebook Mastering Photography.

    googletag.cmd.push(function() {
    tablet_slots.push( googletag.defineSlot( “/1005424/_dPSv4_tab-all-article-bottom_(300×250)”, [300, 250], “pb-ad-78623” ).addService( googletag.pubads() ) ); } );

    googletag.cmd.push(function() {
    mobile_slots.push( googletag.defineSlot( “/1005424/_dPSv4_mob-all-article-bottom_(300×250)”, [300, 250], “pb-ad-78158” ).addService( googletag.pubads() ) ); } );

    The post 5 Creative Exercises to Help Make You a Better Photographer by Andrew S. Gibson appeared first on Digital Photography School.


    Digital Photography School
  • Last Dance: A Dozen Hustled & Bustled Abandoned Discos

    [ By Steve in Abandoned Places & Architecture. ]

    abandoned-disco-1a

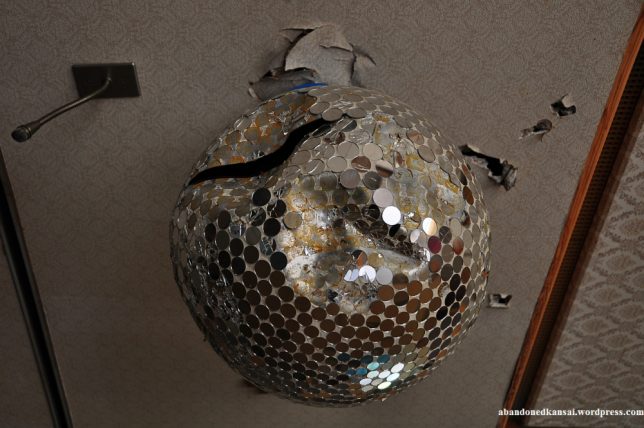
    Disco ducks and dancing queens can no longer shake their booties since these dozen decrepit abandoned discotheques took down their mirror balls.

    abandoned-disco-1c

    abandoned-disco-1d

    The 1970s haven’t aged well and the various labels applied to the much-maligned decade haven’t helped its rep: The Me Decade, the Malaise Era and the Age of Disco don’t evoke a wealth of fond memories. Even worse, Disco music and discotheques somehow managed to outlast their best-before-date in many places, notably Europe.

    abandoned-disco-1b

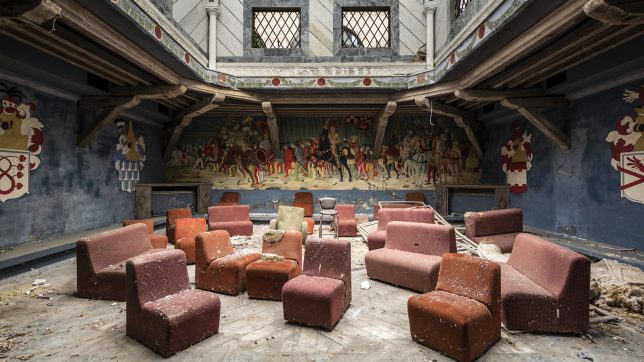
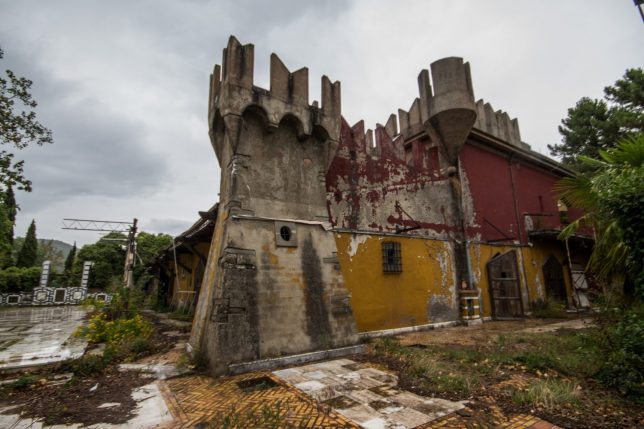
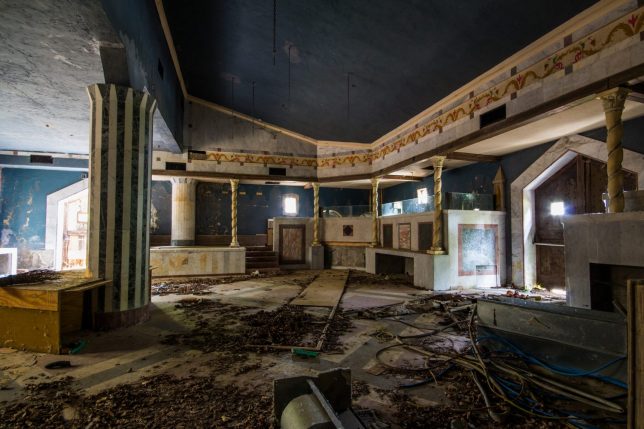
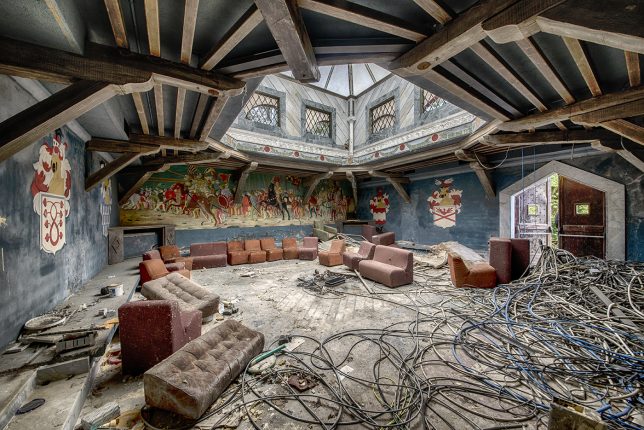
    Take the Discoteca Excalibur, an Italian disco housed in a fake medieval castle. The dance hall was only open for a few years in the early 1990s, and again in 2004-05. Boogie knights!

    Don’t Leave Me This Way

    abandoned-disco-2b

    abandoned-disco-2c

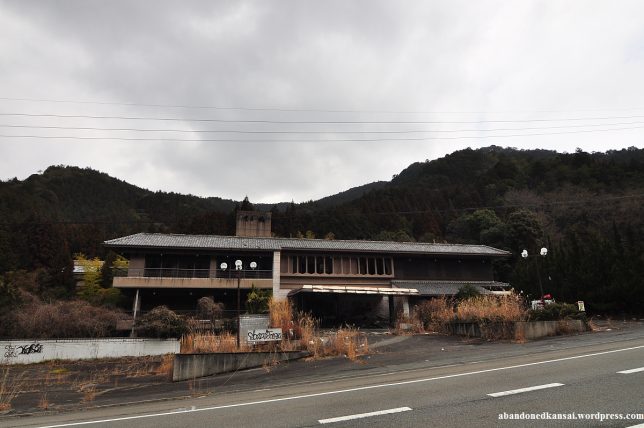
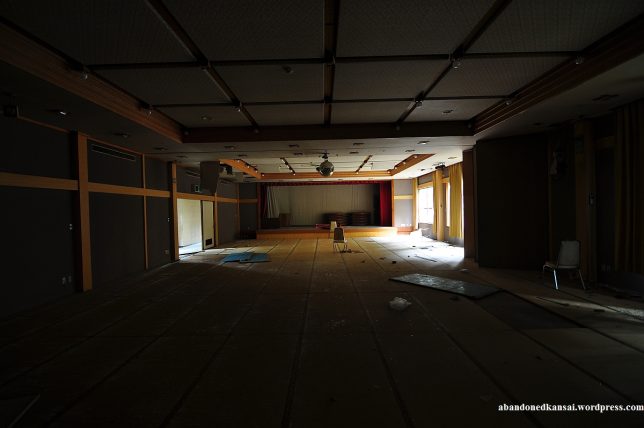
    A disco by any other name, still sucks it would seem. Take the Good Omen Garden, a once-thriving dining & dancing emporium near Osaka, Japan. Building it out in the boondocks was neither a good omen nor a wise business decision.

    abandoned-disco-2a

    abandoned-disco-2d

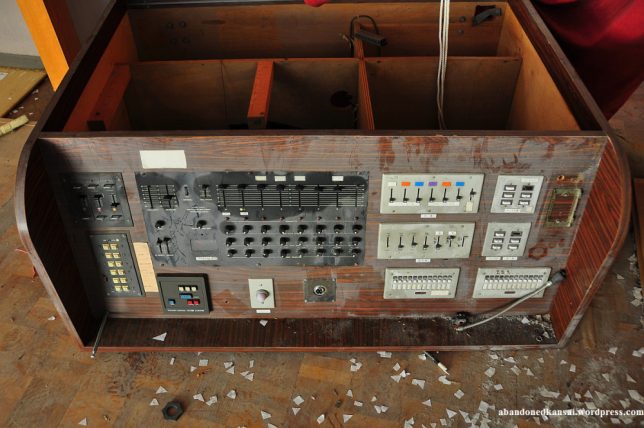
    Like many Japanese urban and rural abandonments, the Good Omen Garden displays a creepy “frozen in time” look with tons of fixtures and decor pieces left in situ, if not totally unmolested. Urbex explorer Florian from Abandoned Kansai ventured inside back in November of 2012 and lived to show & tell the tale.

    I Will (Not) Survive

    abandoned-disco-4a

    abandoned-discoe-4b

    abandoned-disco-4f

    abandoned-disco-4e

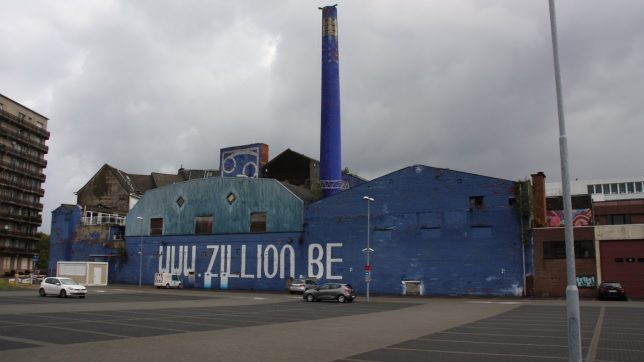
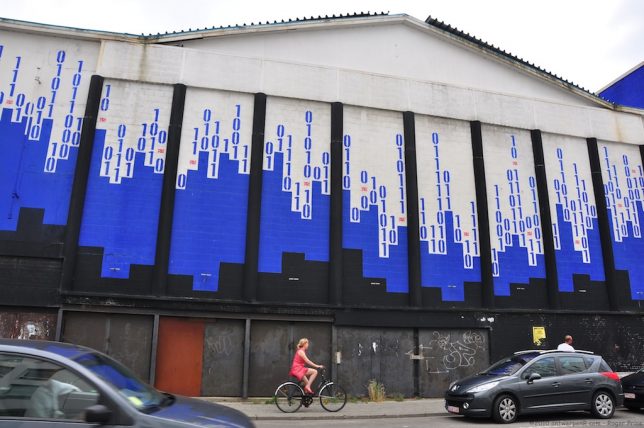
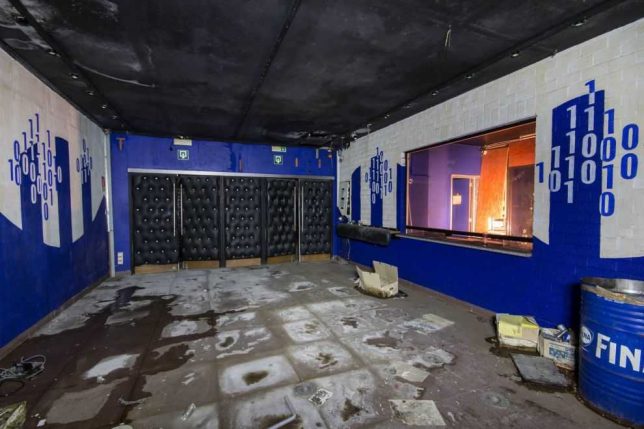
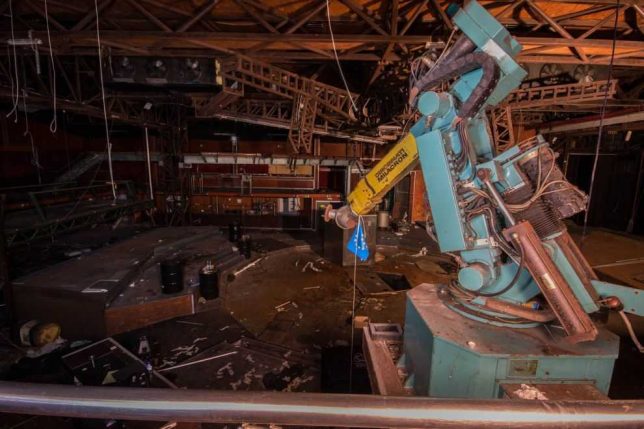
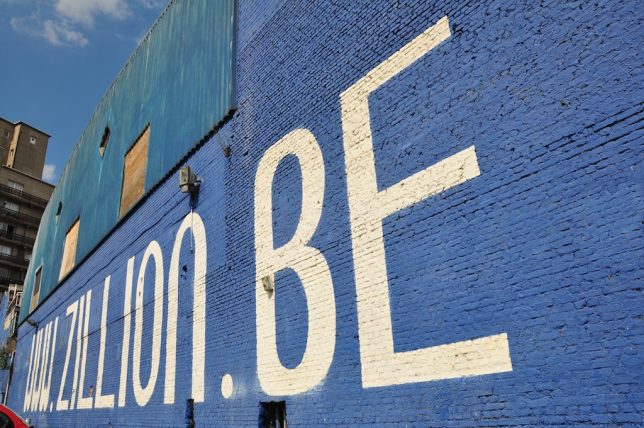
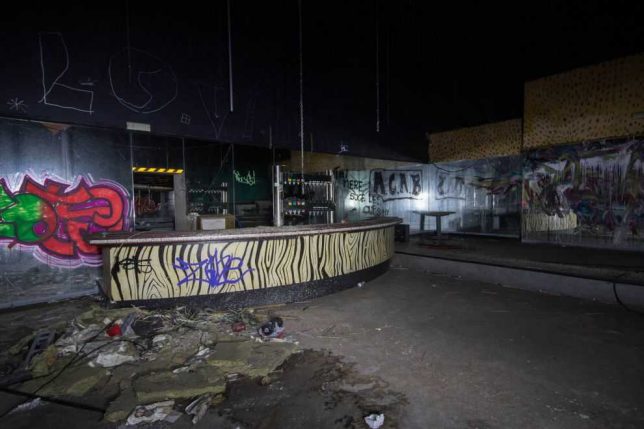
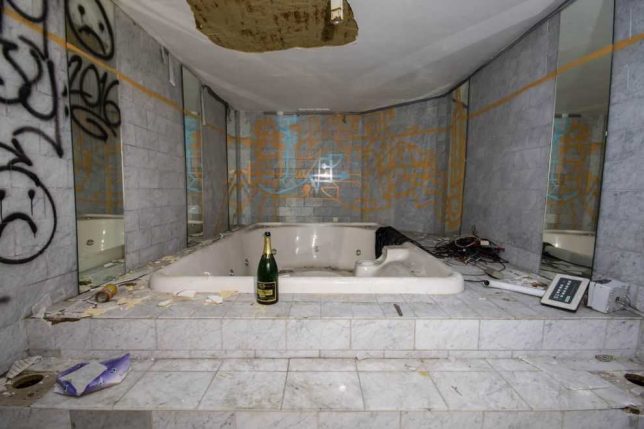
    When Club Zillion in Antwerp, Belgium opened in October of 1997, it did so with a bang courtesy of an indoor fireworks show, smoke blowers, confetti cannons, and programmed industrial robots. The place’s main claim to fame was a hydraulic dance floor that not only rotated, it rose and dipped in tune with the music.

    abandoned-disco-4c

    abandoned-disco-4d

    abandoned-disco-4g

    Club Zillion closed with a whimper in 2001: its owner was convicted of human trafficking and did time while city authorities plotted the demise and demolition of the so-called “blue cancer”. Thanks to YouTubers Bros of Decay, you can take a twelve-minute video tour filmed in November of 2016, mere weeks before Club Zillion was razed. Images above courtesy of Flickr user Roger Price (antwerpenR) and Urban Treasure.

    Lipps Unincorporated

    abandoned-disco-3a

    abandoned-disco-3d

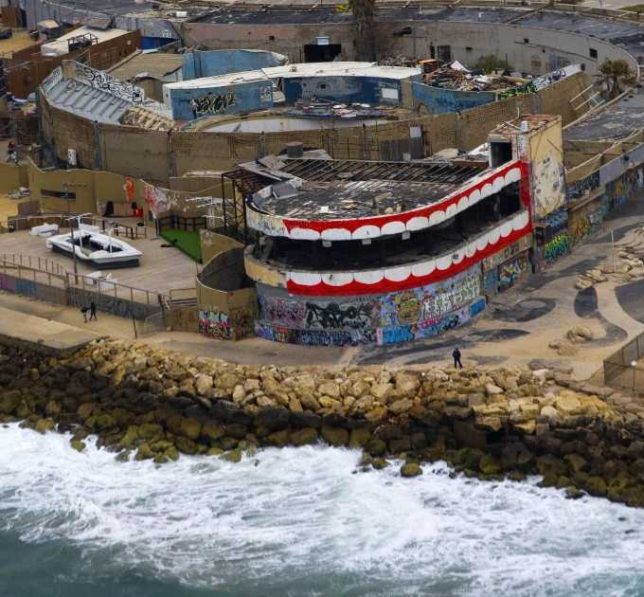
    The abandoned Dolphinarium discotheque in Tel Aviv, Israel looked kinda cool and funky from the get-go thanks to its distinctive curved facade. Long abandoned by 2015, the former nightclub proved to be an irresistible template for Israeli street artist Dede, who re-imagined the building as a gargantuan set of wind-up chattering teeth – key included.

    abandoned-disco-3c

    abandoned-disco-3b

    “Without any doubt this is the biggest art challenge I have ever had,” explained Dede. “I’ve had this vision for almost a year now.” With visions like this, who needs hallucinogens?

    Next Page – Click Below to Read More:
    Last Dance A Dozen Hustled Bustled Abandoned Discos

    Share on Facebook


    [ By Steve in Abandoned Places & Architecture. ]

    [ WebUrbanist | Archives | Galleries | Privacy | TOS ]


    WebUrbanist

  • Create a Portfolio That Shows the Photographer as Well as the Photographs

    portfolio-review

    When it comes to telling their own story in images, photographers often struggle. While their photos and galleries may be memorable and unique their websites and portfolios are too frequently dull, derivative and, to a buyer who sees one slideshow after another, instantly forgettable. Instead of showing who they are, the websites become a collection of what they’ve shot, a series of images with no connection to the person who took them or the photographer the buyer will be booking.

    According to one expert, it’s only when photographers see their websites and their portfolios not as marketing devices intended to show their skills and range but as autobiographies — as an opportunity to tell their own stories and show who they are — that they stand out and win jobs.

    “The best portfolios, to me, are materially self-portraits regardless of the subject matter,” says Allegra Wilde. “This is not about a romanticizing the suffering or narcissistic artist. The kind of imagery I am talking about is much less likely to be forgotten by the viewer, or in the case of the pros, the buyer.”

    For Wilde, who started her career selling ad space at Workbook before becoming the company’s Director of Talent and Agent Branding, a portfolio (and now a photographer’s website) should flow. The presentation should have a rhythm, match the work and, most importantly, tell the story of the photographer.

    It Takes a Hero to Be a Successful Photographer

    That’s not something that all photographers want to do — or think of doing as they create a site to pitch for work. Building a website that doesn’t just show pictures but shows who you are means putting yourself as well as your images on display. The personal projects become more important as they reveal the questions you address in your images, the aesthetic that attracts you, the messages you want your photos to communicate and the way you want them to speak. Buyers are invited to judge the photographer and their interests as easily as they judge the quality of their work. It’s not a display that makes all photographers comfortable.

    “The most successful photographers (or any other artists for that matter), always take some kind of leap into discomfort,” says Wilde. “Usually this level of discomfort is rooted in their own personal ‘exposure,’ or fear that no one will like their images or hire them. These heroes of photography, (yes, I call them ‘heroes,’ because it takes enormous courage to do this) make images from a very naïve place, usually self-reflective and quite emotionally ‘naked.’”

    After operating a couple of private online forums — one for photography and illustration agents; the other for ad agency photo editors and buyers — Wilde now runs Eyeist, her own photography review service. The company employs a team of photographers, buyers and photography business experts to examine photographers’ websites and portfolios, and recommend improvements. Photographers can register and upload images for free then book a review when they’re ready. They’ll be asked for “tons of info” about their images, their aims for the review and their development as a photographer before they select (or ask for) a reviewer and choose the kind of review they want. The fees range from $ 100 for a basic review consisting of an audio commentary critiquing up to 30 images to $ 350 for help with editing and sequencing a series of images so that it showcases the scope and storyline of a project. So far the company has provided around 200 reviews for photographers who range from students, emergent photographers and enthusiasts to full-time professionals.

    The reviewers look at whether the words the photographer is using to describe his or her images actually match the images they’re showing. Often, says Wilde, the two things differ so the reviewer will focus first on repairing that disconnect. They’ll then start thinking about suggesting ways in which the photographer can create images that help them achieve their goals, change those goals or address their presentations and marketing.

    Reviewers Reignite a Photographer’s Passion

    The result should be not just a plan that a photographer can follow to improve their appearance, but a renewed interest in creating images that have something to say.

    “It wasn’t enough to give the photographer a road map for improvement. You have to ignite (or re-ignite) their passion about their own work,” says Wilde. “That way, they have a much better internal sense of how to make progress and become much more open to creative ideas that they might not have entertained before.”

    None of these recommendations, says Wilde, compare to the sort of congratulatory comments that you’ll find placed by friends or family at the bottom of a Flickr set or a Facebook album. Those comments might make you feel good but they won’t point out the flaws that are preventing you from winning work.

    Overall, Eyeist’s reviewers tend to find two mistakes in photographers’ presentations. The first is the tendency of photographers to aim at a particular market or follow a popular style in the hope that joining the crowd will bring success. In fact, says, Wilde, it just brings them more competition. And the second is not pushing their images hard enough or spreading them widely enough so that both the photographer and the photographs connect with the right buyers.

    “I know this sounds crazy in this day and age of photo sharing, social and business networking with photographs, but many photographers either undersell their work by not marketing it enough, or, by overselling it — by first dumbing down the work (making it more generic to follow the marketplace), and/or by constantly promoting and posting their images and assignments without any personal context,” says Wilde. “This makes it hard for the viewer, and especially the buyer, to ‘invest’ in the work, and to engage with the photographer personally as a possible collaborator.”

    At a time when social media has made branding personal, photographers are going to have to learn to step out from behind their cameras and put themselves on display. They don’t have to shoot self-portraits but the way they show their work has to be about them as much as about the subjects of their images.


    Photopreneur – Make Money Selling Your Photos

  • OnePlus 3T camera review

    $ (document).ready(function() { SampleGalleryV2({“containerId”:”embeddedSampleGallery_0539296174″,”galleryId”:”0539296174″,”isEmbeddedWidget”:true,”standalone”:false,”selectedImageIndex”:0,”startInCommentsView”:false,”isMobile”:false}) });

    OnePlus is a relatively new player in the mobile device market, but following the launch of the OnePlus One in 2014 it has very quickly gained a lot of momentum through a simple strategy: offer high-end hardware at mid-range prices.

    The latest model, the OnePlus 3T, is no exception. At a current price of $ 439 you get Qualcomm’s top-end chipset Snapdragon 821 and a whopping 6GB of RAM in the processing department. Add 64GB of internal storage in the base model to the mix and the 3T does not have to worry about comparisons to the flagship models from Samsung, Sony, Apple and the rest of the bunch.

    On paper, the camera module is not quite on the same level as the powerful processing components but still looks very promising. A 1/2.8″ 16MP sensor is combined with an F2.0 aperture, phase detection and optical image stabilization. DNG Raw support, 4K video and manual control over shutter speed are all on board as well and selfie-shooters will be interested in the front camera that offers a whopping 16MP resolution.

    Key Photographic / Video Specifications

    • 1/2.8” 16MP CMOS sensor with 1.12µm pixels
    • F2.0 aperture
    • AF with on-sensor phase detection 
    • Optical image stabilization
    • LED flash
    • 4K video at 30 fps
    • 720p slow-motion at 120fps
    • Manual controls and Raw-support
    • 16MP front camera, 1.0 µm pixels, F2.0, 1080p video

    Other Specifications

    • 5.5″ 1080p Full-HD AMOLED screen
    • Qualcomm Snapdragon 821 chipset
    • 6GB RAM
    • 64/128GB storage
    • 3,400mAh battery
    • Fingerprint reader

    DPReview smartphone reviews are written with the needs of photographers in mind. We focus on camera features, performance, and image quality.

    Articles: Digital Photography Review (dpreview.com)

  • Blackmagic Web Presenter makes it easy to use any camera for live webcasting

    Have you ever wanted to use your DSLR, mirrorless, or other high quality camera for live video streaming on platforms like Facebook Live, Skype, or Periscope? If so, you’ve probably discovered how challenging it can be to get some of these programs to work with something other than a webcam or smartphone camera.

     
    This week, Blackmagic Design announced what appears to be a great solution to this problem. The Blackmagic Web Presenter is a device that captures video from any camera and relays it to your computer, making the video appear as though it originates from a webcam. Blackmagic claims that it should work with Mac, Windows, Linux, and even Chromebook computers automatically without installing any drivers.
    The Web Presenter supports video output from cameras up to Ultra HD resolution. The device scales output signal down to 720p for web streaming using Teranex conversions, which should result in very high quality scaling. It supports both HDMI 2.0 and 12G-SDI connections, and also includes XLR and component audio-in.
     
    If you’ve longed to use your favorite DSLR or mirrorless camera instead of a mediocre webcam or smartphone for live webcasts, the Web Presenter looks like it could be a great option.
     
    The Blackmagic Design Web Presenter is available now for $ 495.
     
    Press release:

    Blackmagic Design Announces New Blackmagic Web Presenter

    Now it’s possible to make any SDI and HDMI video source appear as a USB webcam for high quality streaming on the internet.

    Fremont, California – February 6, 2017 – Blackmagic Design today announced the new Blackmagic Web Presenter, which allows customers to use their professional SDI and HDMI video sources with streaming software and services such as YouTube Live, Facebook Live, and more.

    Featuring 12G-SDI and HDMI connections, Blackmagic Web Presenter will down convert any SD, HD and Ultra HD sources and make them look like a 720p USB webcam. As all streaming software works with webcams, Blackmagic Web Presenter also makes it easy to work with any streaming software, but with dramatically higher quality. Streaming in 720p ensures customers get the quality of HD and a 16:9 aspect ratio, but with very low data rates so uplinking streams to the internet is easy from any computer.

    Blackmagic Web Presenter can also live switch programs using its built in 2 input production switcher when the optional Teranex Mini Smart Panel is installed, making it a full live production solution for location broadcast.
    Blackmagic Web Presenter is available now for US$ 495 from Blackmagic Design resellers worldwide.

    Blackmagic Web Presenter is the fastest and easiest way to get high quality video directly on the web for a new generation of web broadcasting. It replaces expensive and hard to set up dedicated streaming encoders and lets customers or broadcasters use professional cameras to stream high quality video through their favorite software and websites. Because Blackmagic Web Presenter looks like a simple webcam, any webcam compatible software will be able to capture this USB video and audio from any broadcast quality source without the need for additional drivers.

    Blackmagic Web Presenter is designed for both the high end broadcaster as well as a new generation of web broadcasters. Traditional broadcasters can use Blackmagic Web Presenter to get content online quickly to a global audience from any location. AV professionals can create high quality live streams of seminars and conferences, educators can stream school performances and recitals to family members around the world, and gamers can share their gameplay with massive online communities of players.
    Blackmagic Web Presenter also completely revolutionizes online webinars because customers can use it as a full featured, professional live production switcher simply by adding the optional Teranex Mini Smart Panel. That means they can create webinars using multiple sources so the finished program looks better and is far more dynamic than ever before.
    Blackmagic Web Presenter features Teranex conversions that provide high quality image scaling for incredible looking web video. Incoming SD, HD and Ultra HD sources are automatically converted to 720p and output via USB to the computer for streaming on the internet. Converting sources to 720p is ideal for streaming because it delivers HD resolution and incredible quality at the lowest possible data rate. If the streaming software detects a slow internet connection, it can command Blackmagic Web Presenter to reduce the frame rate to 20, 15, 10 or even 5 frames per second.
    Customers using Blackmagic Web Presenter don’t need to install any additional drivers because it is a standard UVC and UAC compatible USB video device. That means Mac, Windows, Linux and even Chromebook computers will automatically recognize Blackmagic Web Presenter as a standard webcam. This allows customers to use professional cameras to get far superior video quality, while maintaining compatibility with all of their existing software because the computer sees it as a simple webcam. Blackmagic Web Presenter works with software such as Open Broadcaster and XSplit Broadcaster, as well as popular sites like YouTube Live, Facebook Live, Skype, Twitch.TV, Periscope and more.
     
    When used with the optional Teranex Mini Smart Panel, Blackmagic Web Presenter can be used as a broadcast quality, 2 input live production switcher. The panel adds push button controls, an LCD screen and spin knob for quickly cutting between sources. Blackmagic Web Presenter features re-synchronization on the HDMI input, so cutting between sources is always smooth and glitch free. For example, customers can connect an SDI camera and an HDMI laptop, and then use the front panel to switch between them while broadcasting live on the internet, complete with smooth, professional looking dissolves.

    Blackmagic Web Presenter features 12G-SDI and HDMI 2.0 connections for working with all formats up to 2160p60, loop out to send the input signals back out to other devices such as a projector, and a program output to send full resolution SDI to a recorder or monitor. It also has XLR and RCA HiFi inputs for connecting microphones and other audio devices, along with a built in 90V – 240V AC power supply so customers don’t have to carry around extra power bricks or cables.

    Blackmagic Web Presenter is portable enough to take anywhere so customers can broadcast wherever there’s an internet connection. The compact 1/3 rack unit size is perfect for equipment racks and can be placed alongside other equipment such as Teranex Mini Converters, HyperDeck Studio recorders and even ATEM Television Studio HD.
    “Blackmagic Web Presenter lets customers create incredible looking online broadcasts using their professional SDI equipment and HDMI sources such as cameras, laptops and gaming consoles,” said Grant Petty, CEO, Blackmagic Design. “The exciting part about it is that there are no drivers, it just works with all of the most popular webcam software and sites such as Open Broadcaster, XSplit Broadcaster, YouTube Live, Twitch.TV, Facebook Live and more. Plus, it can be turned into a full featured live production switcher simply by adding a Teranex Mini Smart Panel. Blackmagic Web Presenter is revolutionary because it makes global broadcasting available to anyone, which has been our dream for a long, long time!”
    Blackmagic Web Presenter Key Features

    • Converts any SDI or HDMI source to USB webcam video in 720p HD format.
    • No drivers required, works with popular streaming software such as Open Broadcaster, XSplit Broadcaster, YouTube Live, Facebook Live, Periscope, Twitch.TV and more.
    • Supports all SD, HD and Ultra HD input sources up to 2160p60.
    • 12G-SDI input with 12G-SDI loop output.
    • 12G-SDI program output, ideal for recording masters when doing live switching.
    • HDMI 2.0 input with independent HDMI loop output.
    • HDMI video input re-sync for live switching.
    • XLR balanced mic/line level audio input.
    • Consumer HiFi connections for 2 channels of audio input.
    • Teranex quality down converter.
    • Built in 2 input switcher when used with optional Teranex Mini Smart Panel.
    • Desktop design or can be rack mounted using the Teranex Mini Rack Shelf.

    Availability and Price

    Blackmagic Web Presenter is available now for US$ 495 from Blackmagic Design resellers worldwide.
     

    Articles: Digital Photography Review (dpreview.com)

  • Flat metalenses now work with a range of colors

    Harvard researchers have made advancements in development of a flat lens known as a metalens – for the first time, it can work with a continuous range of colors rather than one at a time.

    Research has been ongoing at the University’s School of Engineering and Applied Sciences, showing last summer that it was possible to create a lens 100,000x thinner than glass that could focus light in the visible spectrum. This metalens uses an array of titanium dioxide nanopillars to direct light, eliminating the need for additional curved glass layers to correct for chromatic aberration caused by traditional lenses. In fact, engineers were even able to design a metalens with reverse chromatic dispersion, showing that such technologies can really break away from the constraints imposed by traditional optical methods.
    Varying the shape, size and height of the nanopillars used by the metalens allows it to focus wavelengths from 490nm to 550nm, or from blue to green. This is a promising step toward potentially using flat lens technology in anything from smartphone cameras to VR headsets. 

    Articles: Digital Photography Review (dpreview.com)