
Tag: Website

  • Make a Photo Website with Lightroom and Koken

    Photography website created with Koken

    We’ve already looked at how you can use Lightroom Collections to organize your images and how to upload your photos directly from Lightroom to Flickr and 500px using Lightroom’s Publish Services.

    But did you know that there’s a way to upload photos directly to your own photo website from Lightroom? Before I explain precisely how to do that let’s think about the advantages of such a method:

    • You can decide which images to add to your website while in Lightroom. Decision made, it takes only a few seconds to add them to the appropriate Published Collection and publish them to your website.
    • Removing images is just as simple, just remove them from the Published Collection.
    • You can add watermarks to your images in Lightroom. If you change your watermark design, it’s easy to republish all the photos with the new design.
    • You can upload photos to a private album on your website for someone else to view, without having to use the standard Lightroom Web module formatting.

    This is where Koken comes in

    Interested? The software you need to do this is called Koken (rhymes with spoken). The best way to think of Koken is as WordPress for photographers. Like WordPress, it is a free CMS (content management system) and you need your own domain name and hosting plan to use it. But whereas WordPress can be adapted to all kinds of uses, Koken is designed to do one thing only: build websites for creative individuals with portfolios, such as photographers, artists and graphic designers.

    Make a Photo Website with Lightroom and Koken

    You can learn more by going to the Koken website, where you will also be able to download the free software and try it out if you have a domain name and hosting plan.
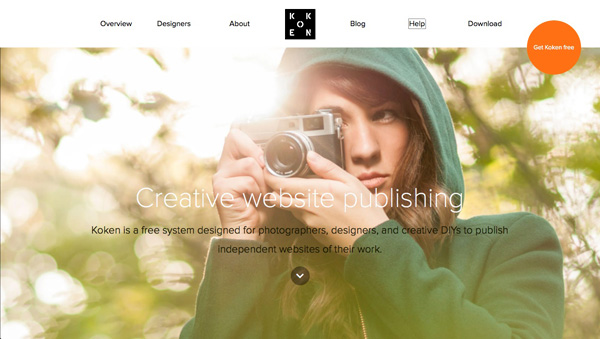
    Koken website

    But before you do, there are a few things you should know:

    • The main advantage of WordPress over Koken, for the purpose of creating a photography portfolio website, is that there are lots more themes available for WordPress. Koken, at the moment, has eight built-in themes (which you can see here). However, the themes in Koken are easier to modify, although you will need to be familiar with HTML and CSS to do so. You can also create your own Koken themes if you have the know how, and they are starting to appear on some of the websites that sell WordPress themes.
    • The main advantage of Koken over WordPress is that Koken integrates with Lightroom’s Publish Services, enabling you to upload photos directly from Lightroom. This is a huge benefit to Lightroom users.
    • You do not have to own Lightroom to use Koken. You can install the software and upload photos from your computer’s hard drive, just as you can in WordPress.

    Koken close-up

    Here’s a closer look at the Koken interface. But first, let me show you how it works in Lightroom. As you can see in the screenshot below, you can create Published Collections containing the photos you want to use on your website. Lightroom lets you know if you have added new photos, or made changes to existing ones. Click the Publish button to update your website.
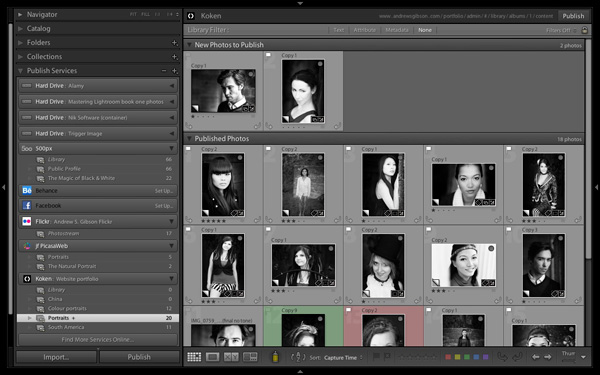
    Lightroom interface

    Then in the Koken interface (accessed through a web browser) you can view the photos, change title, description and keywords, and rearrange the order in which they are displayed.
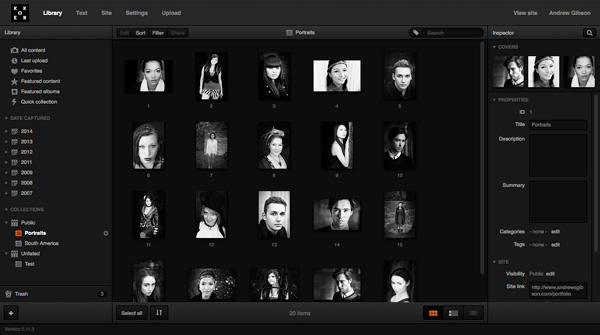
    Koken interface

    You can also create static pages (such as an About page) and blog entries (called Essays) in Koken:
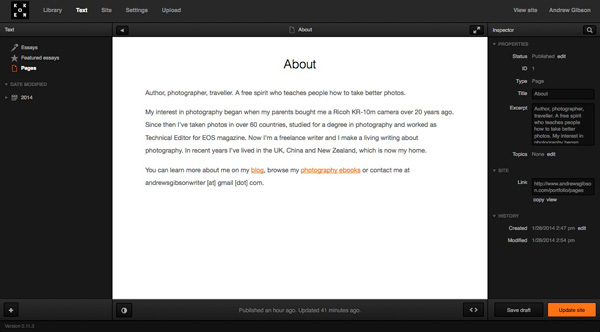
    Koken interface

    The verdict

    I’ve only used Koken for a short while, but I’m impressed by how easy it is to use, especially with Lightroom’s Publish Services. The exciting thing about Koken is that the software is in its early days – I’m sure the system will grow as the developers improve it and more themes become available.

    To get an idea of the sort of thing you can do with Koken, you can check out my portfolio pages (created with a modified version of the Boulevard theme) and the Koken demo site to see the built-in themes in action.

    For more Lightroom articles try these:

    • Why Lazy Photographers Should Use Lightroom Smart Collections
    • 3 Lightroom History Tips
    • Using Smart Previews in Lightroom 5
    • Make Lightroom Faster by Using DNG

    Mastering Lightroom Book One: The Library Module
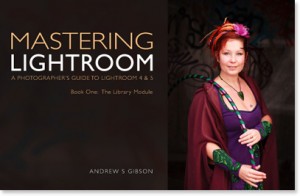
    Mastering Lightroom ebookMy latest ebook Mastering Lightroom Book One: The Library Module is a complete guide to using Lightroom’s Library module to import, organize and search your photo files. You’ll learn how to tame your growing photo collection using Collections and Collection Sets, and how to save time so you can spend more time in the Develop module processing your photos.


    The post Make a Photo Website with Lightroom and Koken by Andrew S. Gibson appeared first on Digital Photography School.


    Digital Photography School

  • IM Creator: The Free Website Builder That Any Photographer Would Kill to Have!

    At Photodoto, we understand professional photographers perfectly. We know that one of the most important tools that professional photographers can have is a sharp, modern and attractive website. Without one, your professional life becomes so much harder and, naturally, less visible. So, by all means, get one! What better way to get one, though, than your very own free website Continue Reading

    The post IM Creator: The Free Website Builder That Any Photographer Would Kill to Have! appeared first on Photodoto.


    Photodoto

  • MotoCMS Giveaway: Win 1×3 Professional Photography Website Template (Worth $139 Each)

    Here on Photodoto, we know for sure what the biggest dream of every photographer is – it’s a professional, stunning portfolio website! Let your dreams come true! We’re pleased to announce a MotoCMS giveaway where all of you have a chance to win one of three premium website templates from our partners MotoCMS, spiced up with their powerful admin panel. Continue Reading

    The post MotoCMS Giveaway: Win 1×3 Professional Photography Website Template (Worth $ 139 Each) appeared first on Photodoto.


    Photodoto

  • SmugMug launches totally redesigned website

    New-SmugMug-Gallery-Style---SmugMug.jpg

    Photo sharing site SmugMug has rolled out a totally redesigned website, which was ‘rebuilt from the ground up’. The look-and-feel of the site is radically different, and somewhat resembles the recently redesigned Flickr. Some of the new features on SmugMug include a large selection of default templates for the consumer, plus the ability for pros to create their own custom designs. Organizing photos has been much improved as well, with a new drag-and-drop interface.  Follow the link to see what the new SmugMug looks like.

    News: Digital Photography Review (dpreview.com)

  • Your Photography Website Might Need This

    Photocrati has spent many days coming up with very educational and detailed virtual classes. Two are currently available; one on your overall photography website and the other specific to SEO.

    SEO is often overlooked or thought to be a waste of time, but Photocrati has made it a point to tell you why it is well worth the time.

    Photocrati has recently launched two interactive courses on the Udemy education platform. Here are some details:

    udemy_courses

    For $ 97, Supercharge Your Photography Website teaches you the fundamentals of getting your photography website going and how to optimize it for your customers and business success.

    You will learn about: Hosting, WordPress, Website basics, Plugins, Themes, Layouts, Galleries, Pages, Blogging, Social Media and more.

    For $ 49, SEO for Photographers dives into the SEO of your photography website and how you can implement the basic, most crucial SEO techniques into your website.

    You will learn about: What and Why, On and Off Site, Meta Tags, Link Building, Local SEO and more.

    In the graphic below, you can see how blogging plays a roll in your site’s rankings.

    blogging-impact

    With Google’s  new Author Rank algorithms, blogging and social media is more important than ever.  To learn more about this, check out the courses and get started today.

    • Supercharge Your Photography Website
    • SEO for Photographers

    Thanks and good luck.

    dslrBlog

  • Dreamweaver CS6 Create your first website

    This tutorial introduces you to the concept of an Adobe Dreamweaver CS6 site and shows you how to set up the project files for the Check Magazine sample website. In Dreamweaver, a site generally consists of two parts: a collection of files on a local computer (the local site) and a location on a remote web server to which you upload files when you’re ready to make them publicly available (the remote site). You use the Dreamweaver Files panel to manage the files for your site.

    The most common approach to creating a website with Dreamweaver is to create and edit pages on your local drive, and then upload copies of those pages to a remote web server for viewing on the web. In this tutorial, you’ll learn how to set up only the local site so you can begin building web pages right away. Later, after you’ve completed the website, you’ll learn how to create a remote site so that you can upload your files to a web server.

    In this first part of the series, after a brief introduction to Dreamweaver sites you will complete the following tasks:

    • Set up your project files
    • Define a local folder

    Note: The screen shots for this tutorial series are from the Dreamweaver Creative Cloud 12.1 update. However, the instructions apply equally to the original version of Dreamweaver CS6. You should also be able to follow the instructions on Dreamweaver CS5 or CS5.5.

    Understanding Dreamweaver sites

    In Dreamweaver, a site organizes on your local computer all the documents associated with your website and lets you track and maintain links, manage files, share files, and transfer your site files to a web server. Think of your Dreamweaver site as the “bucket” that contains all of the files and assets for your website.

    A typical Dreamweaver site has at least two parts:

    • Local Folder: This is your working directory. Dreamweaver refers to this folder as your local site. The local folder is usually a folder on your hard drive.
    • Remote Folder: This is where you store your files on the computer that is running your web server. The computer running the web server is often (but not always) the computer that makes your site publicly available on the web.

    In some circumstances, you might have more than one remote folder. For example, if you work in a team environment, all members of the team might upload their files to a common testing server before they are deployed on the live website. Also, it’s normal to set up a testing server when developing websites that use a server-side technology, such as Adobe ColdFusion or PHP. Since Dreamweaver CS5, you can define multiple remote and testing servers for each site. However, only one of each can be active at any given time.

    To get started you simply need to give your site a name, and tell Dreamweaver where you want to store the files on your local computer. Dreamweaver CS6 automatically prompts you for further information about the site setup only when it’s needed.

    For more information about Dreamweaver sites in general, see Site management in Dreamweaver Help.

    Set up your project files

    When you create a local site, you can place any existing assets (images or other pieces of content) in the local site’s root folder (the main folder for the site). That way when you add content to your pages, the assets are there and ready for you to use.
    The sample files for this article contain assets for the sample website you’ll build in this tutorial series. The first step is to copy these assets to an appropriate folder on your hard drive:

    1. Decide where you want to store your website files on your hard drive. The folder can be anywhere on your computer, but the less buried it is the easier it is to find later. For example:
      • On Windows, you can use C:\Sites
      • On Mac OS X your home folder already includes a folder named Sites.
    2. Download and unzip the first_website_pt1.zip sample files from the link at the top of this page if you haven’t done so already. Copy the check_cs6 folder into the Sites folder.
    3. You will use the check_cs6 folder as the root folder (main folder) for your Dreamweaver site.

    Note: The local root folder of your Dreamweaver site is normally the main or top-level folder for your website. It usually corresponds to a folder named public_html, www, or wwwroot on your remote server. For example, if you have a website at www.example.com, and have a file named news.html in the root folder, its URL is http://www.example.com/news.html. The normal practice is to give your local root folder the same name as the website without the top-level domain (such as .com or .org). For example, I store the files for my website at http://foundationphp.com in a folder named foundationphp on my local hard drive.

    Define the local site folder for the Check Magazine site

    You must define a Dreamweaver local site folder for each new website you create. Dreamweaver needs to know where your site files are to create all the internal links correctly, and to update them when you move files to a different location within your site.
    Next, set up the site for this tutorial series, and define as your local site folder the check_cs6 folder you copied into your Sites folder:

    1. Start Dreamweaver and choose Site > New Site. The Site Setup dialog box appears.
    2. For the Site Name, type Check Magazine as the name of the site. The name is used internally by Dreamweaver to identify the site. It doesn’t matter if it contains spaces.
    3. Click the folder icon next to Local Site Folder to browse to and select the check_cs6 folder (see Figure 1).
    4. site

      Figure 1. Defining the local site folder for the Check Magazine site.

      Note: The file paths might differ, depending on where you created the Sites folder on your hard drive.

      Click Save. That’s it!

      The Files panel in Dreamweaver now shows the new local root folder for your current site (see Figure 2). The file list in the Files panel acts as a file manager, enabling you to copy, paste, delete, move, and open files just as you would on a desktop.

      assetts

      Figure 2. List of files in the Files panel

    For more information about how the Files panel works, see Managing files and folders in Dreamweaver Help.

    Best practices for naming files and folders in a website

    A typical website contains a large number of files and folders. For ease of maintenance, it’s important to organize them logically. Create separate, appropriately named folders for images, videos, style sheets, and external JavaScript files. Also keep the following points in mind:

    • File and folder names in websites should never contain spaces or any of the following characters: /\?%*:|”<>.
    • Although other special characters are permitted, it’s generally a good idea to use only alphanumeric characters, hyphens, and underscores.
    • Most file and folder names end up as part of a web page’s URL, so keep them short, but meaningful. Long URLs are difficult for users to remember and type into browsers on a mobile device.

    The vast majority of websites are hosted on Linux servers, which are case-sensitive. Using all lowercase letters for file and folder names avoids problems with files not being found.

    Where to go from here

    Now that you have finished defining your site, you can begin building your web pages by following the steps in the next tutorial in this series, Part 2: Creating the page structure.

    Any suggestions, ideas? Feel free to comment on this article!

    Back to Top

    BlogPhoto

  • How To Create Photography Website That You Can Be Proud Of

    Without this post you will either overpay for your photography website or perhaps just go with the solution which is at best “okay” rather than “outstanding“. In fact there are lots of “IT guys” among photographers, but still the vast majority doesn’t have any clue about where to start. And so it happens: You stumble upon a brilliant photo and Continue Reading

    The post How To Create Photography Website That You Can Be Proud Of appeared first on Photodoto.


    Photodoto

  • Kid Icarus Uprising – Launch / Website Walkthrough, Story, Characters, and More!

    Kid Icarus Uprising – Launch / Website Walkthrough, Story, Characters, Equipment, AR Cards, Online, and More! This is a video of LeftyHeat and our very own VGH Affiliate MykleTheHuman taking a look at the official Kid Icarus Uprising Website in honor of the Launch on March 23, 2012 . Lefty and Mykle then showcase everything you need to know about the game in order to get ready for the Let’s Play of Kid Icarus Uprising on VideoGameHeat. Be sure to subscribe for updates: www.youtube.com Special Guest / VGH Affiliate: www.youtube.com www.youtube.com Note: All Games and Trademarks are Copyright of Their Respective Owners. Let’s Play Kid Icarus Uprising Kid Icarus Games on the Nintendo 3DS Madussa and Pit Pit is back New Levels in Kid Icarus Uprising It’s a me Pit
    Video Rating: 4 / 5

  • 45 Photography Website Templates For Photographers Using WordPress

    The WordPress community is filled with thousands of photography website templates.  Some must be paid for, however the majority are free.

    Photographers are looking for the same things: beautiful design, home or landing page, blogging, gallery control, and the ability to sell works.

    Features of photography website templates include:

    • Gallery management
    • NextGEN Gallery integration
    • Gallery styles
    • Social integration
    • Photography SEO features
    • Private galleries
    • Responsive capabilities
    • Fullscreen style
    • Contact forms
    • eCommerce integration
    • Widget areas

    Photography Website Templates

    So how about we get right to it, shall we?

    Photocrati

    photography themes

    Poise

    poise

    Noblesse

    Noblesse

    PhotoPics

    PhotoPics

    Gleam

    gleam

    Sideways

    Sideways

    Pacifico

    Pacifico

    Project 10

    Project10

    Amplify

    Amplify

    Leviathan

    Leviathan

    Shutter

    Shutter

    Limitless

    limitless

     Touchfolio

    touchfolio

     Grid

    gridthemeresponsive

    Panoramica

    panoramica

    Architekt

    architekttheme

    Pegasus

    wordpress-photo-gallery-theme

    The Wedding

    the-wedding-wordpress-theme

    Marriage

    marriage-wordpress-theme

    Announcement

    Announcement-wordpress-theme

    Wedding Album

    wedding-album-wordpress-theme

    Batik

    wedding-card-wordpress-theme

    Adam & Eve

    modern-wedding-wordpress-theme

    Mr. & Mrs.

    mr-mrs-wordpress-wedding-theme

    MJ

    wedding-website-template

    Retro

    retro-wordpress-wedding-theme

    Landscape

    Landscape Website

    Pixel Happy

    PixelHappy Web Template for Photographers

    Deep Focus

    Deep Focus Photographer Template

    Statua

    Website Templates for Photographers

    Photoland

    Website Templates for Photographers

    PhotoNexus

    Photography Website

    Invictus

    Photography Website

    Village

    Photo Gallery Template

    Anan

    Photo Gallery Template

    Core Minimalist

    Web Templates for Photographers

    Photorific

    Websites for Photographers

    MediaReel

    Websites for Photographers

    Chocolate

    Chocolate Template

    PhotoPurePress

    Photographer Website Template

    Kin

    Photographer Website Template

    Specere

    Photographer Website Template

    Zoom

    Photography Website Templates

    Galleria

    Photography Website Templates

    Viewfinder

    photography website templates

    As you see, there are endless possibilities of WordPress themes for photographers.  So the question is – which will you pick?


    dslrBlog

  • Rob Galbraith puts Digital Photography Insights website on hiatus

    rg_site_logo.jpg

    Photography expert Rob Galbraith has said he is putting his well-respected ‘Digital Photography Insights’ website into ‘deep hibernation mode,’ as he accepts a photojournalism teaching role. Galbraith has become known as an engaging and knowledgeable writer, particularly from the sports and photojournalism perspective, and was one of the first people to identify and begin to characterise the autofocus problems with the Canon EOS-1D Mark III. The site will remain accessible but will no longer be updated. We would like to wish him every success in his new role at Southern Alberta Institute of Technology.

    News: Digital Photography Review (dpreview.com)