Tag: Section

  • Flickr announces major update to Galleries section

    It’s been fairly quiet around Flickr since it was taken over by SmugMug but now the image sharing platform has announced a major update to its galleries section. The new Flickr galleries come with a redesigned user interface and a number of new tools to “facilitate your creativity.”

    In a post on the Flickr Blog the company says that “Flickr’s galleries have long been one of the tools available to our community for visual storytelling, though they have gotten dusty over time as the rest of the site progresses.”

    The new layout has been designed for larger screen sizes and resolutions than the previous version and the maximum number of photos in galleries has been increased from 50 to 500. To facilitate work with large numbers of photos you now batch add them to a gallery directly from your Favorites.

    “By explicitly connecting Faves to gallery creation, we’re making your workflow simpler when you’re curating your favorite works from other Flickr members,” Flickr says.

    On the galleries list page you’ll now find a triptych of photos for each gallery (the cover photo and the two most recent images), plus some metadata.

    You can still select any image from the gallery to use it as the cover, edit title and description and reorder images. Galleries can also be shared “with an intuitive share sheet that will improve the presentation of your galleries on other social networks.”

    If you are a Flickr user, head over to the Flickr galleries page to check out the redesign and new features.

    Articles: Digital Photography Review (dpreview.com)

  • How to Use Upright Guided Tools in Lightroom’s New Transform Section

    In their latest release of Lightroom 6.6 (or CC 2015.6 if you are using the Creative Cloud subscription package), Adobe has added a new feature, allowing us photographers to straighten our images even easier than before.
    Dps LR Transform 01

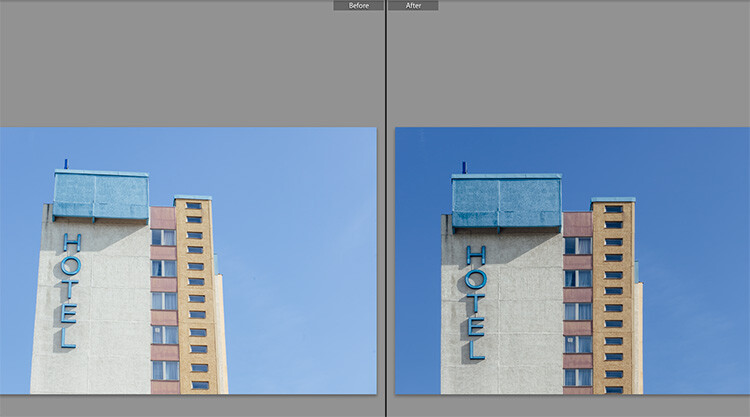
    The image above is a typical example of a photo that can use some straightening. A tall building, shot from the ground, will always look tilted or skewed (unless you have the budget to buy a tilt-shift lens, designed to overcome these issues right in camera).

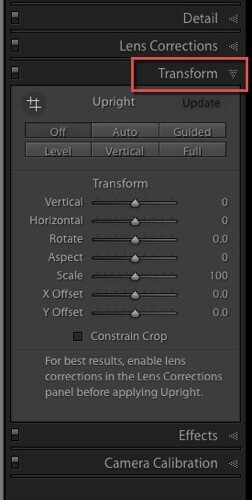
    The latest update of Lightroom comes with a new Transform section

    For these purposes, Adobe Lightroom had already offered an Upright feature within the Lens Corrections tab in its Develop module. In the newest version 6.6/CC 2015.6, this feature was extended, and is now in its own section called Transform.
    Tansform panel LR

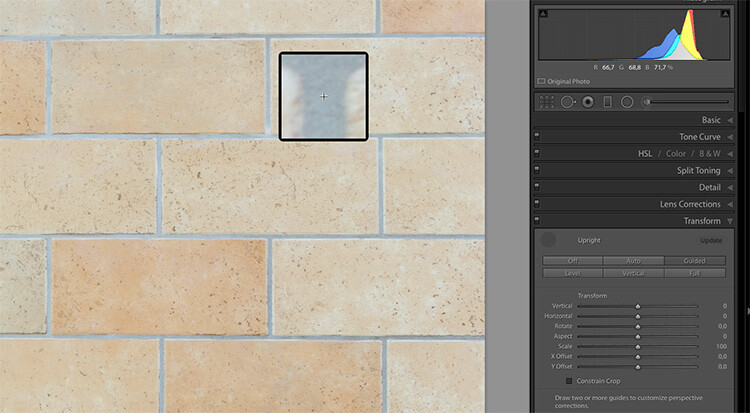
    In this new Transform section, some of the known Upright features from the old Manual section can be found again. The image shown below is a good and easy sample to test the new features. I shot it slightly tilted against the wall, and there is also a slight barrel distortion visible, due to the mild wide angle lens used.
    Dps LR Transform 03

    Most interesting for us is the new Guided button, that allows us to show Lightroom which lines we want to have straightened. When you click on this button, Lightroom allows you to draw lines on the image, that show the software where and how you think your image is supposed to look straight.
    dps-LR-Transform-04c

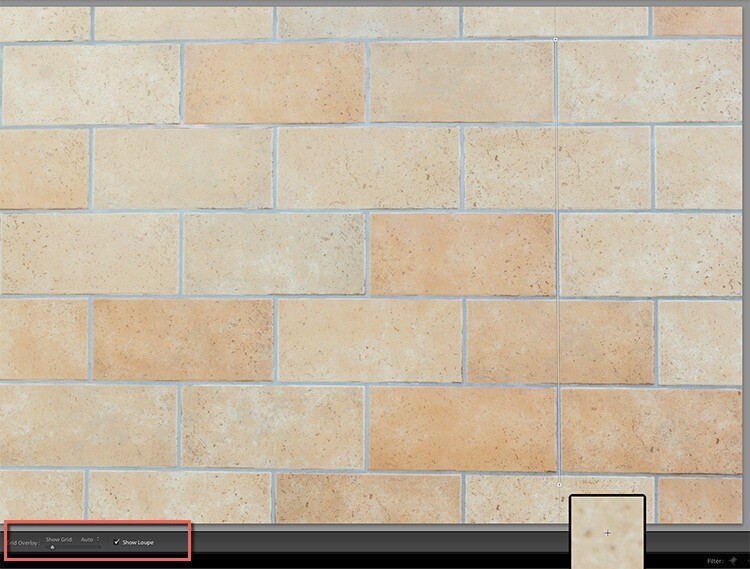
    When you turn on the Show Loupe checkbox below the image (if you don’t see that on your screen hit T on your keyboard to toggle the toolbar), you can now move the mouse over the image, and Lightroom will close in on the details you are hovering over. This can help you find the perfect spots to click on, and make your lines.

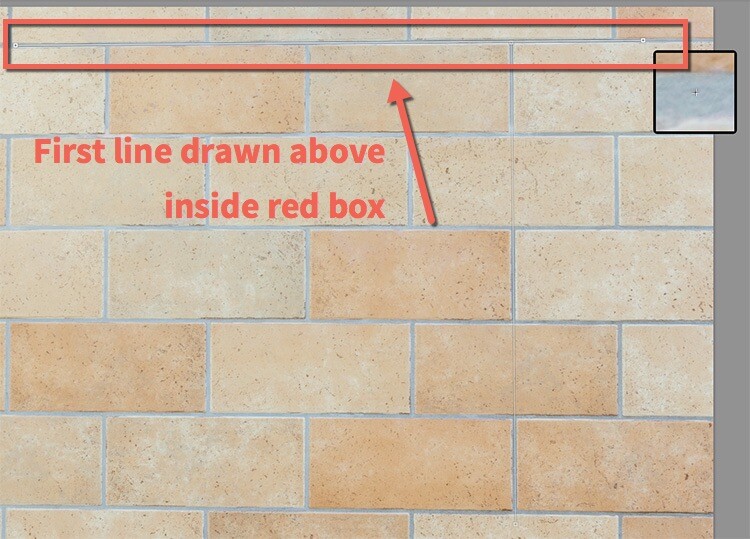
    The first click (click and hold it down) starts a new line that now moves along with your mouse. Move the line to a second spot in the image (and let go of the mouse) and Lightroom will have drawn the first line. You can click on both of the endpoints of this line if you want to correct it.
    dps-LR-Transform-05c

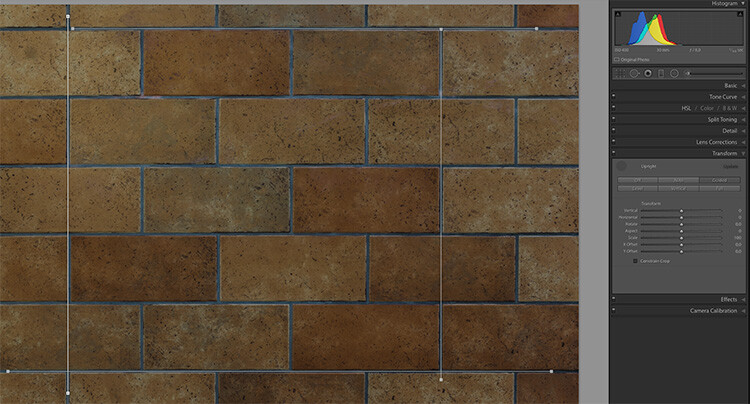
    As soon as you draw a second line, Lightroom starts correcting the image. The best way to use this tool is to draw one vertical, and one horizontal line at the start. You may notice the improvement already in this but if you look closely, not all of the tilt, nor the distortion, has been corrected yet.

    You can then draw two more lines (it accepts up to four guide lines in total) to help Lightroom catch the last perspective issues and resolve them.
    Dps LR Transform 06

    Bonus tip: To make the lines more visible, I have temporarily reduced the Exposure value for the image, as you may notice in the last image (above). As the lines are thin and white, I found it easier to use when I darkened the photo to allow for good contrast with the tool.

    Example image – correct a building tilt

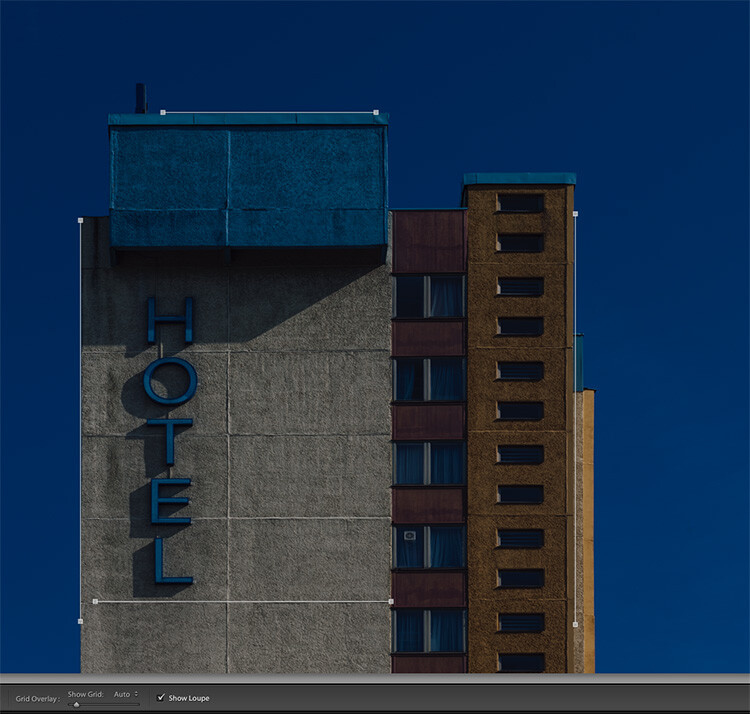
    Now, I will show you how I used the guides in the architectural image I showed on top of this article. Once again I have lowered the exposure to show the lines. As you can see, I have used two vertical and two horizontal lines, each of them way off the center of the image, to get the best results of this new feature.
    Dps LR Transform 07

    Finally, you might want to use the sliders to change the Aspect, Scale and the X and Y Offset to compensate for the changes in perspective that might turn the objects in your image into looking slightly wider or slimmer form, than would be seen in real life.

    Additional tool tips for using Guided Upright

    Adobe found the Guided Upright tool to be valuable enough to define a keyboard short cut for it. Shift-T will bring you to this tool directly from either the Develop module or even from the Library.

    If you ever wish to reset the upright guides, or the whole Transform section, you can right-click into the image while using this tool. Lightroom will show two settings on top of the context menu offering you the option to reset the guides only, or all Transform settings.
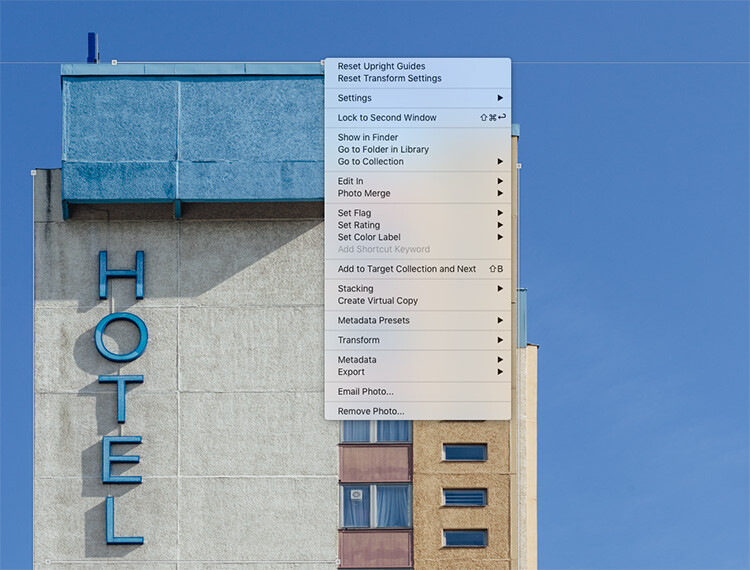
    Dps LR Transform 08

    Do you shoot architecture? Has this been a feature you’ve found useful? How have you applied it to your images? Let us know in the comments below. If you have any questions post them there as well.

    googletag.cmd.push(function() {
    tablet_slots.push( googletag.defineSlot( “/1005424/_dPSv4_tab-all-article-bottom_(300×250)”, [300, 250], “pb-ad-78623” ).addService( googletag.pubads() ) ); } );

    googletag.cmd.push(function() {
    mobile_slots.push( googletag.defineSlot( “/1005424/_dPSv4_mob-all-article-bottom_(300×250)”, [300, 250], “pb-ad-78158” ).addService( googletag.pubads() ) ); } );

    The post How to Use Upright Guided Tools in Lightroom’s New Transform Section by Michael Zwahlen appeared first on Digital Photography School.


    Digital Photography School

  • Urban Nest: New Round Amphitheater Section for High Line

    [ By WebUrbanist in Architecture & Public & Institutional. ]

    high line new nest

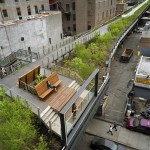
    New York’s elevated park is expanding in new directions both physically and proverbially, its new addition a stark circular shift from the overall linear nature of the existing spaces.

    high line new york

    high line green seating

    Situated at the intersection of West 30th Street and 10th Avenue, the lush green Spur is at the heart of the new High Line section, providing a fresh kind of urban gathering, interaction and performance space.

    high line current rail

    high line vegetation trees

    Converting more disused rail tracks into raised green space, the nest-like bowl of seating and vegetation provides both background sound relief from the surrounding city and views back out onto its streets below.

    high line site plan

    high line rail yards

    high line bowl nest

    Designed by James Corner Field Operations in collaboration with Diller Scofidio + Renfro, this pivotal turning point (quite literally a bend in the overall plan of the park) features woodland grasses, maples, perennials and ferns. The rest of the park bends up into the rail yards at this key point, wrapping back west across Manhattan toward the Hudson River.

    Share on Facebook


    [ By WebUrbanist in Architecture & Public & Institutional. ]

    [ WebUrbanist | Archives | Galleries | Privacy | TOS ]


    WebUrbanist

  • Section drawing editing tutorial using Adobe Photoshop CS5

    A tutorial video to explain how to edit your archaeological section drawing using Adobe Photoshop CS5 to prepare your image from scan to publishing. Visit www.luketctaylor.com for more information.

  • Section drawing editing tutorial using Adobe Photoshop CS5

    A tutorial video to explain how to edit your archaeological section drawing using Adobe Photoshop CS5 to prepare your image from scan to publishing. Visit www.luketctaylor.com for more information.
    Video Rating: 5 / 5

  • SketchUp: Creating section animations with scenes

    www.sketchupfordummies.com This video accompanies Google SketchUp for Dummies, by Aidan Chopra.
    Video Rating: 4 / 5

  • Awesome Gold Section Intro (3D-HD)

    Awesome Goldsection Animation intro. Actual description of what do we do and how do we do that. Includes some unproduced commercial, musical and other video content snippets. 12” will look nicer with anaglyph eyewear on =.) because it involves 3D and our beloved Blake the Flying fish.
    Video Rating: 4 / 5

  • Police Stop and Search Section 44 Terrorism Act – Photography – I’m a photographer not a terrorist

    Police Stop and Search Section 44 Terrorism Act – I’m a photographer not a terrorist. The Gherkin London. Photography hostile reconnaissance. Corporate police.
    Video Rating: 4 / 5

    Whenever star chef Ferran Adrià creates a new dish it gets captured on film exclusively by photographer Francesc Guillamet. To date hes photographed 1500 different dishes by the star chef in his restaurant El Bullí on the Costa Brava.