Tag: Rainbow

  • How to Make and Photograph Rainbow Water Droplets on a CD

    Do you enjoy doing a nice experiment, that gives you colorful photographs? In this article, you’ll discover how you can create a photo of rainbow water droplets using simple household objects and your imagination. The technique uses the principles of refraction and applies it in an easy to use way.

    A nice experiment to do while it’s raining outside, create your own water drops and photograph them in an experimental way. So it’s time to setup your home laboratory, and photograph droplets on a CD!

    colorful CDs - How to Make and Photograph Rainbow Water Droplets on a CD

    You can make some captivating rainbow colors by using this technique.

    What you need to photograph water droplets on a CD

    As mentioned, you’ll need just some simple household items to carry out this photo of rainbow water droplets. You’ll also need some camera equipment as well!

    • CD – This is what’s needed to create the rainbow effect, make sure the shiny surface is clean.
    • Water dropper – Any simple dropper will do, you could use an eye dropper perhaps.
    • A glass of water – You’ll need a supply of water handy.
    • A flashlight – Any flashlight or headlamp will work for this technique.
    • A camera – Your camera must be capable of doing long exposures.
    • A macro lens – This works best with a macro lens or a camera with a built-in lens capable of close-up photography.
    • A tripod – This is a long exposure technique, so you will need a tripod.
    • External shutter release – In a pinch, you could use the camera’s self-timer, but an external shutter release will be better.
    How to Make and Photograph Rainbow Water Droplets on a CD - gear needed for this technique

    These are the items you’ll need for this technique.

    The method

    The following describes the simple method you’ll need to follow when creating this style of photo. The most important thing is you’ll need a dark room.

    1. Place your CD on a flat surface, this can either be a tabletop or the floor.
    2. Add water droplets to the surface of the CD using the dropper. Make sure they make a nice pattern.
    3. Now put your camera on the tripod.
    4. Position the camera and tripod so that the camera is looking straight down onto the CD.
    5. Focus the camera using manual focus and live view. Keep the camera in manual focus so that you retain the focus position. If your camera is on autofocus, when you turn the light off and hit the shutter, you will lose the focus.
    6. Your camera should be set to expose for around 20-30 seconds, the aperture will need to be around f/10-14. This aperture allows for both the long exposure and keeps the depth of field for the water droplets wide enough to ensure they’re all focused.
    7. Now switch the light off. Ensure the room is as dark as possible, so avoid one where there might be light seeping in from outside.
    8. Hit the shutter or trigger to begin the exposure.
    9. Turn your flashlight on. Make sure the light does not shine up directly into the lens element, use a lens hood if you have one.
    10. Keep the angle of the light roughly vertical and slightly down towards the surface.
    11. Now circle the light source around the CD, and let the magic happen! Adjust the length of time you do this for depending on how bright you wish the photograph to be.
    12. Repeat and adjust as necessary. You may wish to try different angles for the torch (flashlight), the higher the torch the more light you’ll see on the reflective surface of the water drop. Using different camera angles may also work well too.
    How to Make and Photograph Rainbow Water Droplets on a CD - camera setup

    The basic setup for this photo looks like this. It will of course be dark when you expose the image.

    Other water droplet experiments

    This is not the only way to photograph droplets, there are in fact a host of different methods out there. Here is a brief list you could also try out.

    • Water droplet – Taken using water dripping into a tub, and captured using a strobe. This is a great technique to try out.
    • Water droplets on glass – Use refraction to make amazing photos with water drops, and repeating patterns.
    • Water droplets after the rain – This one you’ll need to go outside for. Photographing droplets on flowers or spiderwebs always looks nice.
    How to Make and Photograph Rainbow Water Droplets on a CD - color water drops

    There are lots of other ways you can photograph droplets. This is taken with droplets on glass.

    Start creating your water droplet photos!

    Photographing droplets is a lot of fun, and I hope you enjoy trying out this idea. Have you ever tried photographing droplets before? Did you use a CD to do it, or one of the other methods mentioned in this article.

    As always I’d love to see your images in the comments section, together with any comments you may have.

    How to Make and Photograph Rainbow Water Droplets on a CD

    Using closer framing, or different angles can change the look of the photo.

    How to Make and Photograph Rainbow Water Droplets on a CD

    Changing the angle of the flashlight to a higher angle means you’ll catch the light reflection on the CD’s. Play with it until you get the look you like.

    The post How to Make and Photograph Rainbow Water Droplets on a CD appeared first on Digital Photography School.


    Digital Photography School

  • How to Add a Rainbow to Your Images Using Photoshop

    A rainbow is a meteorological phenomenon that needs many specific conditions to come together in order to appear, which is why they are not that easy to come across. They are, however, a beautiful and evocative sight, and they are associated with different cultural and even religious meanings.

    For all these reasons you might want to have a rainbow in your image even when there isn’t one, not to worry though, here’s an easy way to create them in Photoshop.

    Rainbow landscape

    Choosing the right image

    Because of its significance and symbolism, you can incorporate a rainbow into almost any scene. However, if you want it to look natural it’s important that you choose a scenario in which it would be possible to see a rainbow in real life. To do so, you first need to understand how rainbows are formed.

    When sunlight passes through a droplet of water it gets refracted and what we originally perceived as white light is now spread out into a band of colors called spectrum. Once it’s dispersed, we are able to perceive seven different colors in that light: red, orange, yellow, green, blue, indigo, and violet. This is what we call a rainbow.

    Rainbow with reflection

    Because it needs sunlight and water drops in the air, a common place to find a rainbow is near a fountain or a waterfall. This is what I’ll use to show you how to do it in Photoshop.

    Getting started in Photoshop

    Once you have your image opened in Photoshop, add a new empty layer by going to the top Menu > Layer > New Layer. A window will pop-up, you can name it “rainbow” just to keep things organized and then Click OK.

    New Rainbow Layer

    Then select the Gradient tool from the tools panel and a set of settings appear on the top bar as part of the options to adjust the gradient. On the left side of that top bar there is the Gradient Editor; if you open the menu for that by clicking on the down arrow, another window will pop-up with different gradient colors and styles. On the right of it, there is a gear icon that you can click on for more settings. From that menu, you need to choose the one called Special Effects.

    Special Effects - rainbow photoshop

    Creating the rainbow

    A window appears to ask you if you want to replace current gradients with those from Special Effects. You need to agree to it so that a new set of gradients appears.

    Replace Gradients - rainbow

    From those select Russell’s Rainbow and adjust the width of each color to your liking with the slider.

    Russell Rainbow

    Shape the rainbow

    A rainbow is theoretically a circle. However, it’s almost impossible to see it complete, only in rare circumstances from a plane. Usually, we see only a part of a rainbow and maximum the top half. In any case, you need to give it curviness. To achieve this just select the Radial Gradient from the top menu.

    Curve rainbow photoshop

    Then you can use any of the tools from the Menu > Edit > Transform options to rotate, distort or scale the rainbow.

    Transform rainbow

    Blend it to look more natural

    Finally, to incorporate the rainbow into the image naturally, you can change the Layer Blend Mode from the drop-down menu you’ll find on top of the layers window. Select the Screen mode and move the slider to control the opacity.

    You can also soften the edges to make it more believable by going to Menu> Filters > Blur > Gaussian Blur and move the Radius slider until you are satisfied with the result.

    Blur rainbow

    Then you just have to erase (hide) the parts that are overlapping the landscape by adding a layer mask and using the eraser tool. Note: make sure you are erasing on the mask, not the actual layer.

    Erase rainbow

    Conclusion

    There you have it, a perfectly natural rainbow that can appear anytime when the sunlight passes through raindrops. It’s frequently seen after showers and rainstorms or near a fountain or waterfall. As long as you are looking opposite the sun and are at a low altitude angle.

    Splash Rainbow

    If you are more interested in the symbolic sense of the rainbow, you don’t have to worry so much about it looking natural. According to different cultures and periods in time, rainbows have been associated with different things.

    For Christians, it’s found in the Bible after the big flooding as a covenant from God that water will no longer kill mankind, as a symbol of love. A different interpretation originated in ancient Europe as a legend that says that a leprechaun can be found at the end of the rainbow and if you can stare at it long enough, it will tell you where its pot of gold is hidden. And in contemporary cultures, a rainbow has been picked for the flag of the LGBT community as a sign of pride and symbolism of diversity.

    Rainbow in the rain

    In this case, I used it with this purpose by adding a rainbow to this photo from an Amsterdam’s Gay Pride Parade where it conveniently was raining so it would have been possible to see one. And you, how are you going to use this technique? Please share with us in the comment section below.

    The post How to Add a Rainbow to Your Images Using Photoshop by Ana Mireles appeared first on Digital Photography School.


    Digital Photography School

  • How to Photograph a Rainbow

    Wanna learn alchemy?

    Then listen up because there’s photography gold at the end of this rainbow.

    More specifically, we’re gonna show you three ways to create a rainbow and then photograph it.

    Pick up a tip or two and you’ll be gold baby, solid gold.
    (…)
    Read the rest of How to Photograph a Rainbow (248 words)


    © laurel for Photojojo, 2017. |
    Permalink |
    No comment |
    Add to
    del.icio.us

    Post tags:


    Photojojo

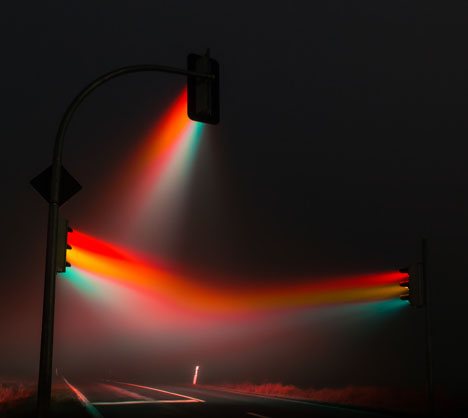
  • Street Light Art: Traffic Signals Emit Surreal Rainbow Streams in Hazy City

    [ By SA Rogers in Art & Photography & Video. ]

    lucas-zimmermann-traffic-lights-5

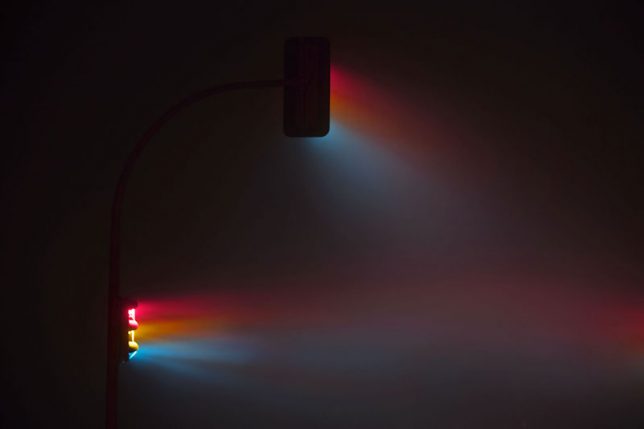
    It’s almost a cliche at this point to highlight the beauty that can be found in everyday items, like that scene in the movie ‘American Beauty’ where Wes Bentley and Thora Birch stare at a plastic bag waving around on a sidewalk like it’s the Mona Lisa. But sometimes, it just can’t be helped. Have you ever gazed at a traffic light and marveled at the accidental art it was producing? You’re about to.

    traffic-lights-eries-3

    lucas-zimmerman-traffic-lights

    lucas-zimmerman-traffic-lights-2

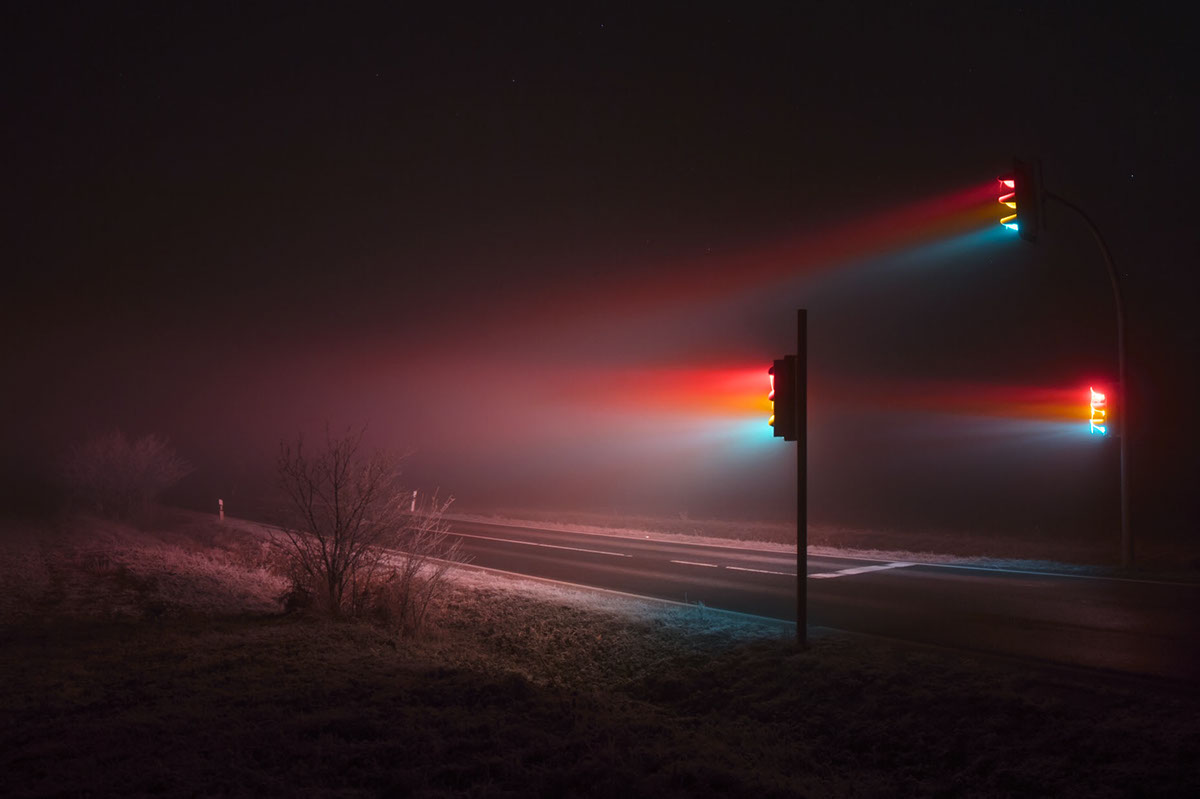
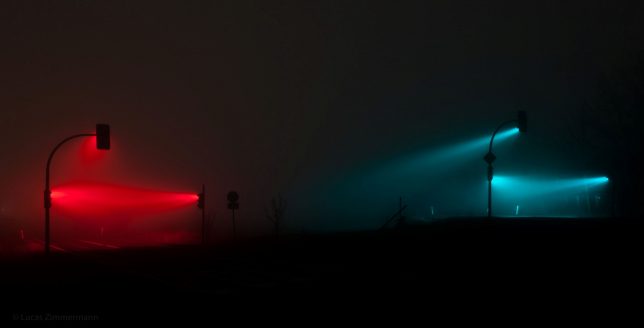
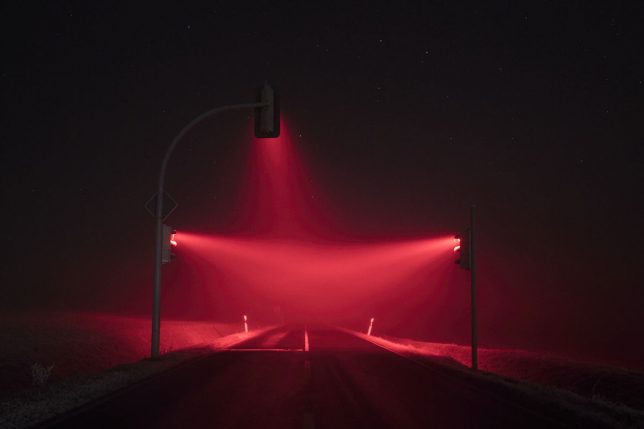
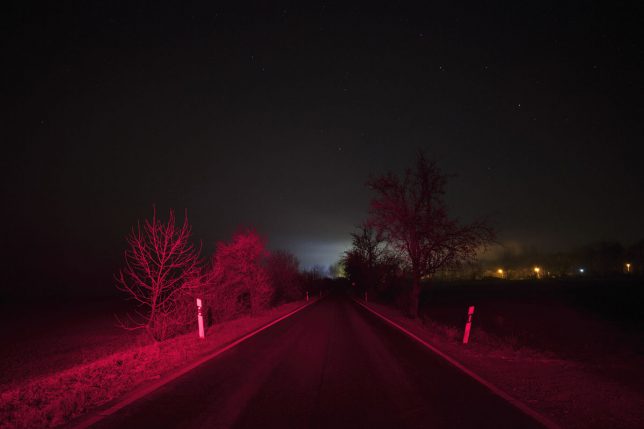
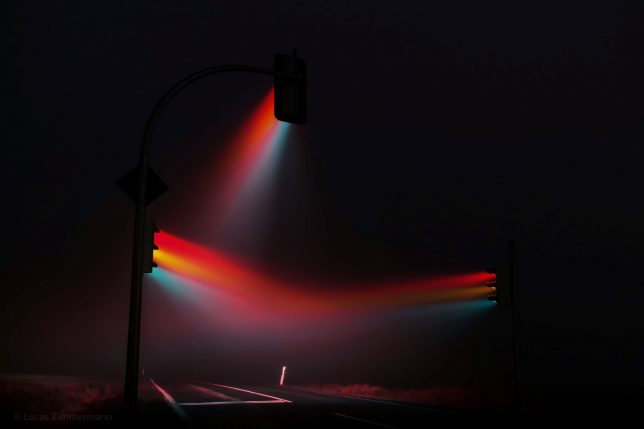
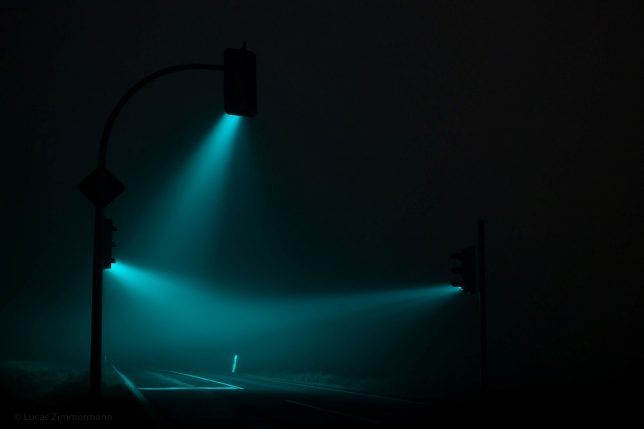
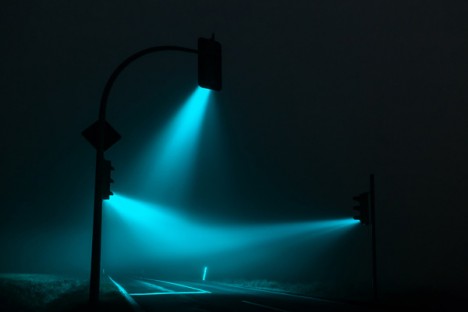
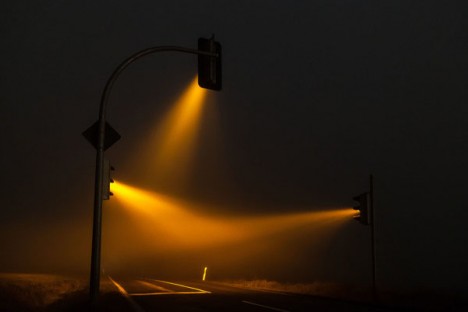
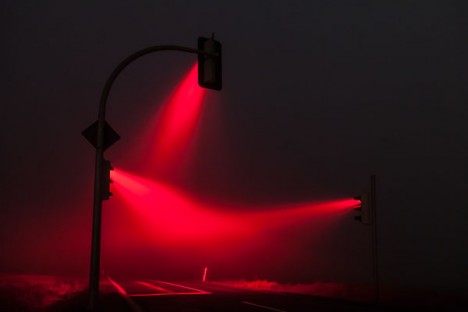
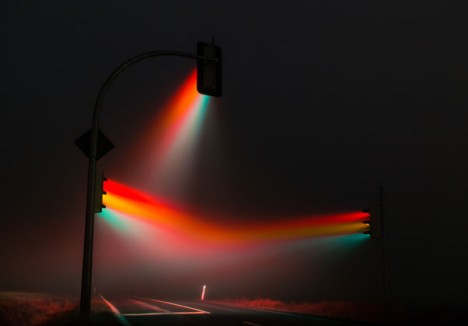
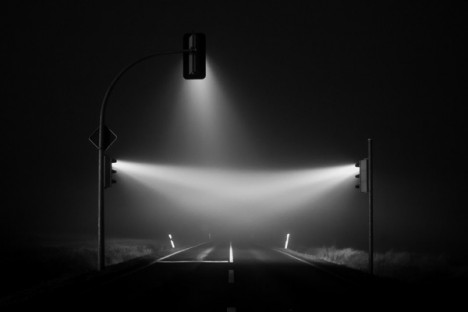
    Being such a humble and unremarkable object, installed at countless intersections in countless cities, the traffic signal is an unlikely subject of the internet’s flighty attentions, but the magic here is really in photographer Lucas Zimmermann’s vision – and in the fog that clings to the town of Weimar, Germany.

    lucas-zimmerman-traffic-lights-3

    lucas-zimmerman-traffic-lights-6

    lucas-zimmerman-traffic-lights-7

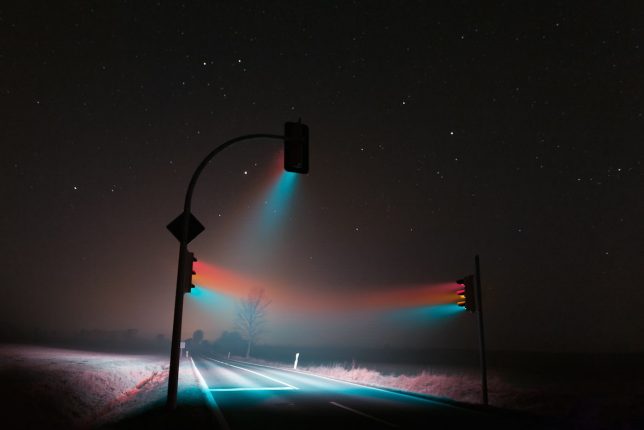
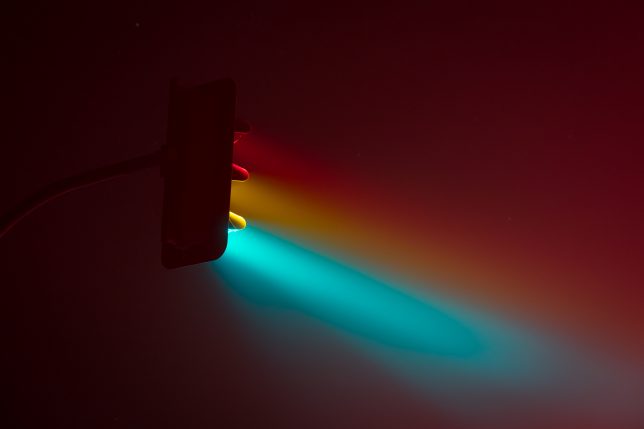
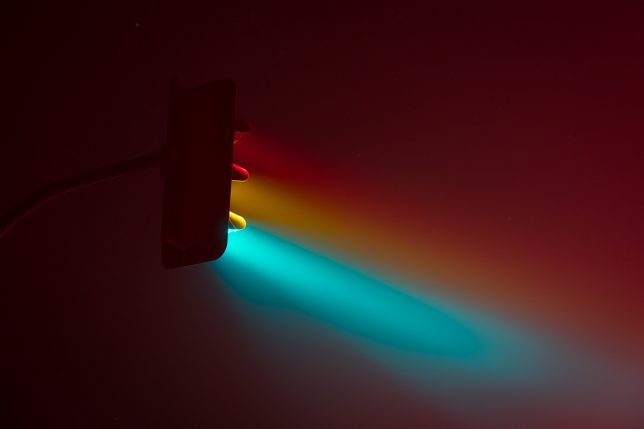
    Zimmermann first captured his ‘Traffic Lights’ series on a particularly hazy night, noting that the light streaming from the red, yellow and green lamps was stretching out into rainbows. He wondered how the effect would be enhanced by long-exposure photography, and the results show the streams of light almost seeming to take physical form.

    lucas-zimmerman-traffic-lights-8

    traffic-lights-series-1

    traffic-lights-series-2

    “I have been waiting for two long years to finally go out again and progress on my traffic lights series,” says Zimmermann. “It was worth the wait.”

    The new addition to the series is just as striking as the first, supporting Zimmerman’s belief that photography can show us things we might otherwise overlook, “such as a simple traffic light on the street.”

    Share on Facebook


    [ By SA Rogers in Art & Photography & Video. ]

    [ WebUrbanist | Archives | Galleries | Privacy | TOS ]


    WebUrbanist

  • Rainbow Connection: Huge Mural Spans 200 Houses on Hillside in Mexico

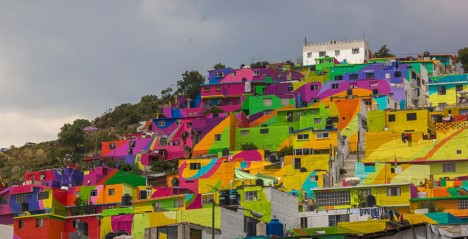
    painted town after

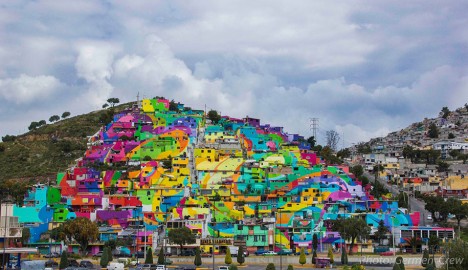
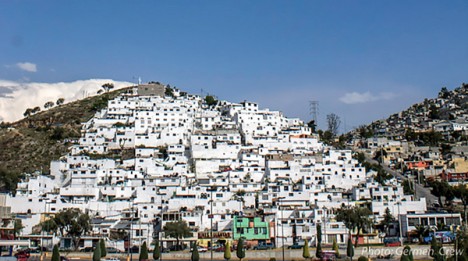
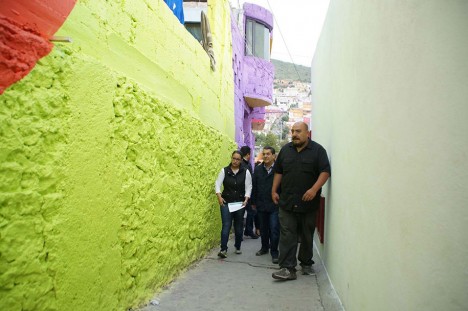
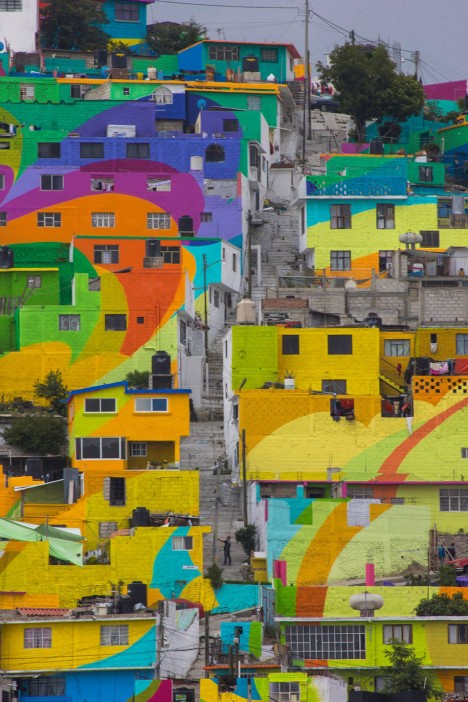
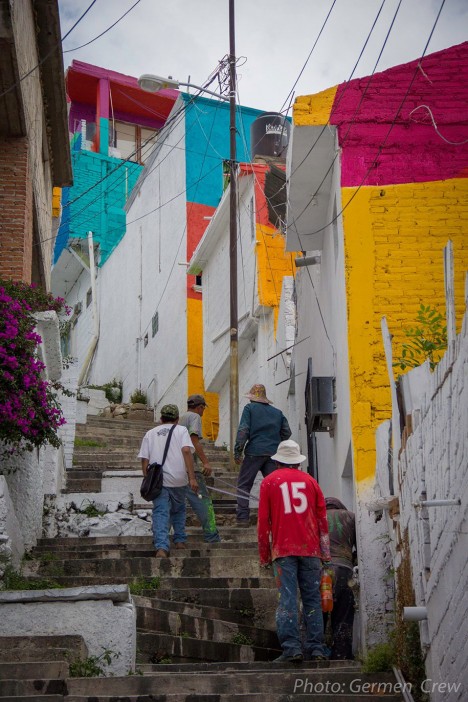
    Representing an enormous collective effort, this remarkable mural manages to look complete from a distance while, upon closer inspection, brightening 209 houses occupied by 452 families, impacting the lives of 1808 residents of this hillside community.

    painted town before

    painted town hillside

    Even more remarkably, the color selections for different sections (totalling over 200,000 square feet of paint) were worked out in conjunction with those occupying the houses of Palmitas, who were asked about their favorite colors and included in the design scheme. The project has been credited with reducing youth violence and local crime rates while creating jobs for the area.

    painted town tour

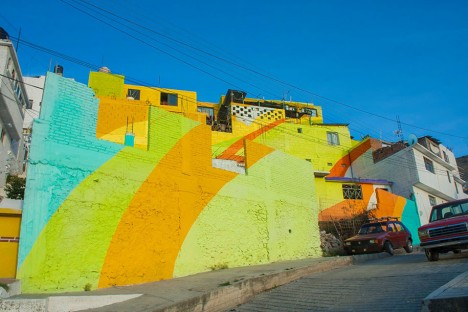
    painted wall house closeup

    The group orchestrating this massive undertaking is called Germen Crew, self-named after germs, the seeds of ideas and art. Led by Mibe, a street artist from nearby Mexico City, the group sees itself as much as collection of community organizers and facilitators as artists or creators.

    painted town mexico

    For them, residents provide multiplier effects strengthening project, process and outcome and making for a much different endeavor than murals made under the radar by individuals. In turn, the artists used a simple pallet of conventional and replicable paint colors, making it both easy to maintain but also enabling those in the neighborhood to turn doing so into a collaborative activity.

    painted town steps

    Like the Favela Project in Rio or Blue Town of Morocco, there are secondary benefits for the locals as well, including projected increases in tourism. In the case of the latter, the strange site of a single-colored town brought in close to 100,000 visitors in the six months following its completion. This project was completed with support from regional governments as well as the national government of Mexico


    WebUrbanist

  • Rainbow Nests: What Wasps Build with Colored Construction Paper

    [ By WebUrbanist in Art & Sculpture & Craft. ]

    colored wasp nests

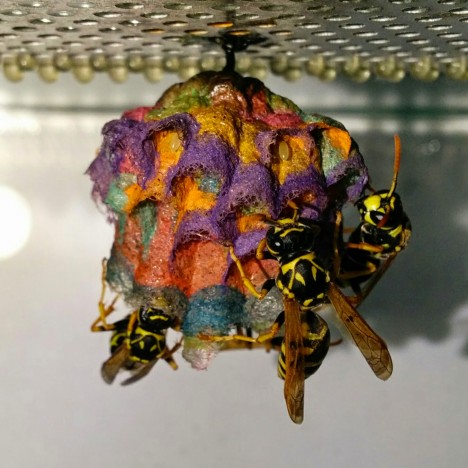
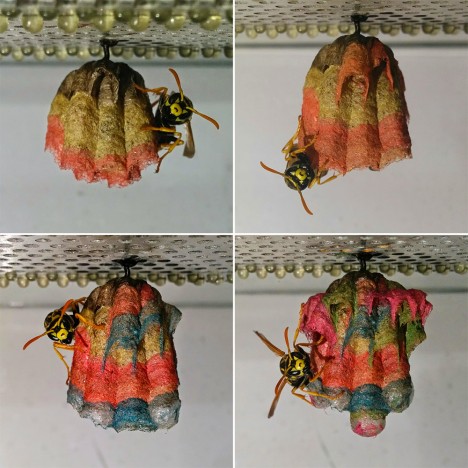
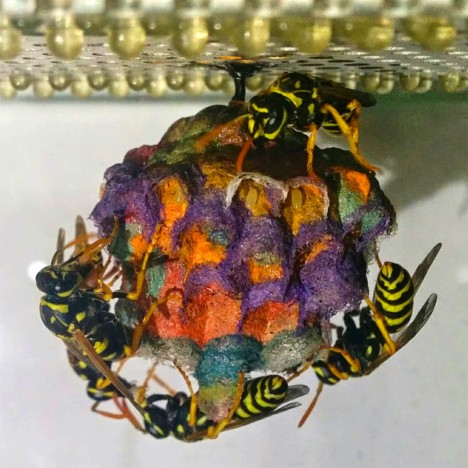
    Worker wasps build with the materials available in their environment, including different hues and shades of paper, which can lead to radical rainbow homes when properly apportioned.

    colored paper creations

    Biology student Mattia Menchetti began giving a group of European paper wasps a variety of colored papers in a specific sequence in order to facilitate their creation of colorful nests.

    colored wast colony

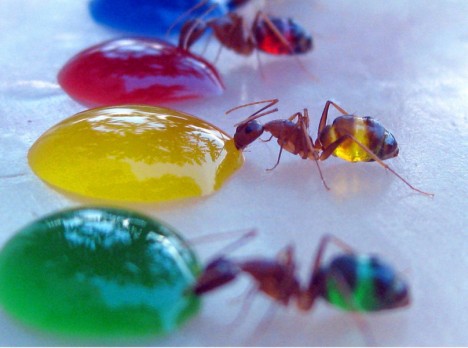
    The effect is quite compelling, but wasps are not the only creatures that can take on colors from their surroundings and incorporate them – bees and ants have been known to as well.
    bee honey france mandm

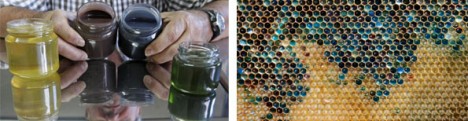
    In one instance, an M&M production plant in France was found to be responsible for changing the color of honey created by a local bee hive. Apparently, the honey tasted fine, but of course, putting such oddly colorful honey on the market is a tough sell.
    colored ant drink

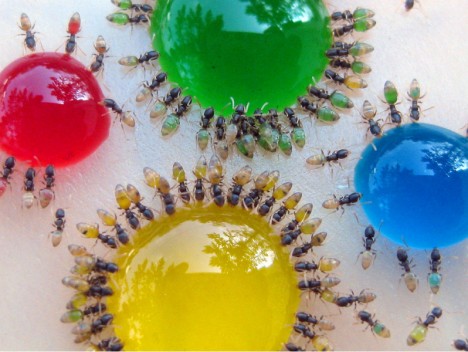
    In another instance, we can see the effects of giving colored sugary water to translucent ants, whose bodies then take on the spectrum of looks found in their drinks.

    colored ant colony

    In this case, a scientist named Mohamed Babu from Mysore, India shot a series of photos of the colony consuming this liquid sugar water (via Colossal).

    Share on Facebook


    [ By WebUrbanist in Art & Sculpture & Craft. ]

    [ WebUrbanist | Archives | Galleries | Privacy | TOS ]


    WebUrbanist

  • Rainbow Rail: 5,000 Neon Lights to Line Underside of Chicago “L”

    [ By WebUrbanist in Art & Installation & Sound. ]

    wabash lights large

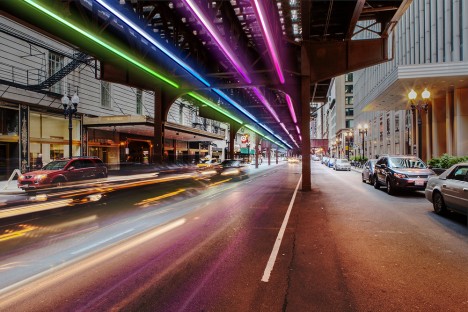
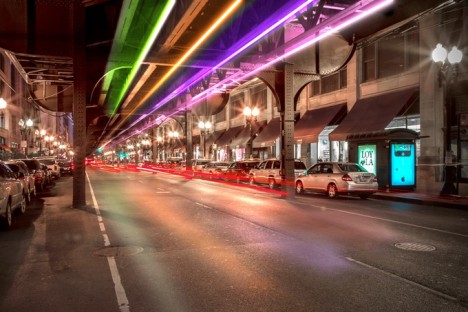
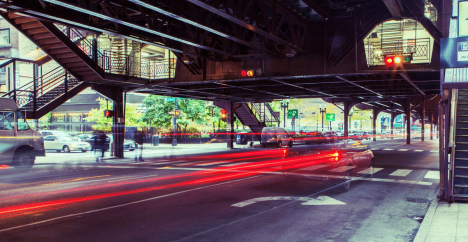
    Designed to be suspended below Chicago’s elevated rail system, hovering above cars and pedestrians, this 5,000-tube neon lighting installation aims to bring bright colors to drab railway tracks, using illumination to bridge the dark gap formed by overhead infrastructure.

    wabash lights rendering

    A set of elevated rails forming a rounded rectangle in the heart of the city, the Chicago Loop defines the downtown experience. Physically, visually and audibly, this nexus of sometimes-subway lines creates a circuit of transit over and under which vast numbers of people travel each and every day. Despite its centrality and functionality, the Loop has little presence in terms of the city’s public image, at least it until The Wabash Lights came along.

    wabash lights neon art

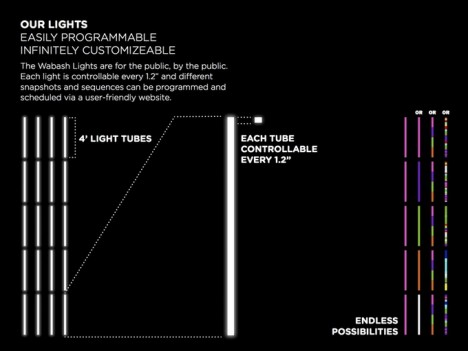
    The main aim is to activate this shady pseudo-circular zone, turning it from an ignored void into a enjoyed space. The first phase of the project has already been successfully funded on Kickstarter and the next step will be a limited-scale test implementation of the technology. The lights are highly programmable and infinitely customizable, able to cycle through sets of colors and form complex patterns.

    skys the limit art

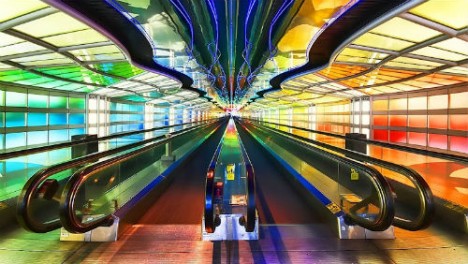
    It is hard to avoid drawing a comparison with another highly-visible and quite popular neon project in Chicago, namely: the neon light tunnel (Sky’s the Limit by Michael Hayden) connecting Concourses B and C at Terminal 1 in the O’Hare International Aiport, “a mile-long kinetic light sculpture composed of 466 neon tubes [reflected from above by] 23,600 square feet of mirror.”

    wabash street

    The duo behind the idea, Seth Unger and Jack C. Newell, are well-suited to the endeavor, with backgrounds in design, branding and creative strategy on the one hand, filmmaking and public art on the other. Together, they are looking to involve citizens from start to finish, looking to them for feedback as well as funding.

    wabash lights technology

    More on the project from its creators, using “LED light tubes to transform an iconic piece of Chicago infrastructure into a canvas for a dynamic, interactive experience, serving as a catalyst for a re-energized Wabash Avenue. Working with the Chicago Transit Authority, Chicago Department of Transportation, and City Government, we have received approval to install a small section of lights on the Wabash Ave tracks to troubleshoot design, interactivity, and test how vibration from the “L”, temperature changes, and the wear and tear of the city affect our hardware.” (Hat tip to Chris B and James B).

    Share on Facebook


    [ By WebUrbanist in Art & Installation & Sound. ]

    [ WebUrbanist | Archives | Galleries | Privacy | TOS ]


    WebUrbanist

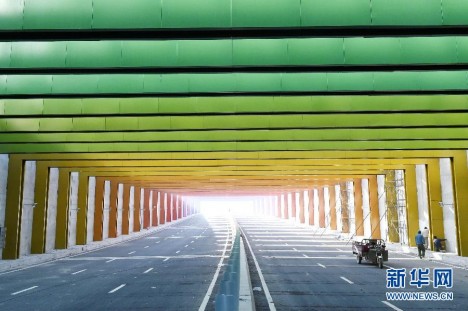
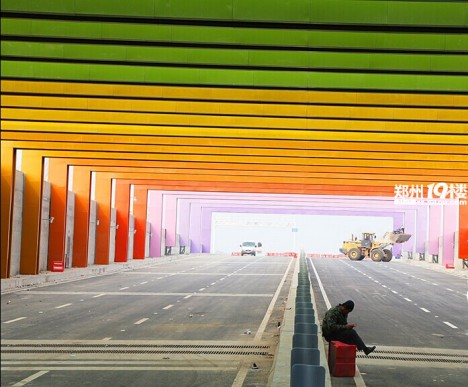
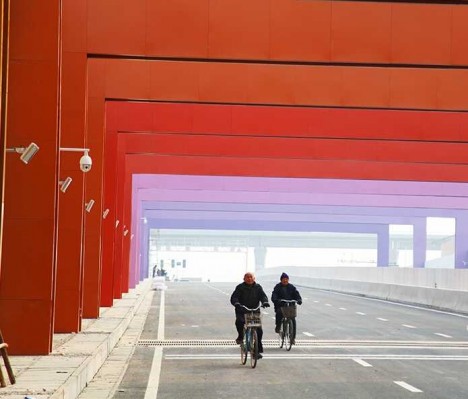
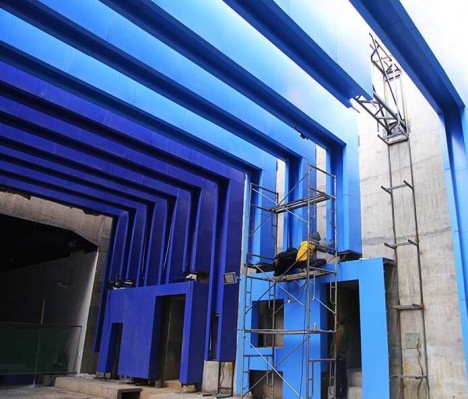
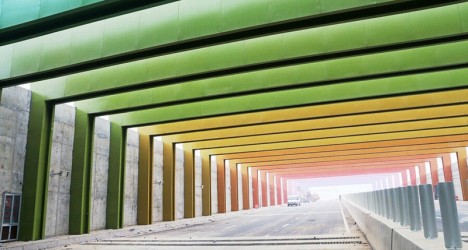
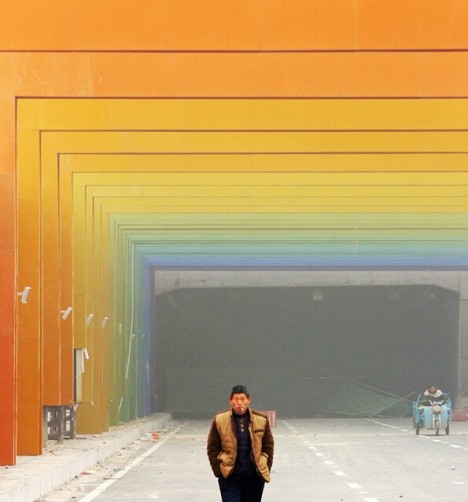
  • Prism Break: China’s Eye-Soothing Rainbow Road Tunnel

    [ By Steve in Architecture & Cities & Urbanism. ]

    China Rainbow Tunnel 2
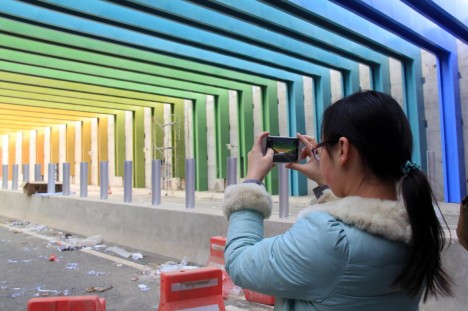
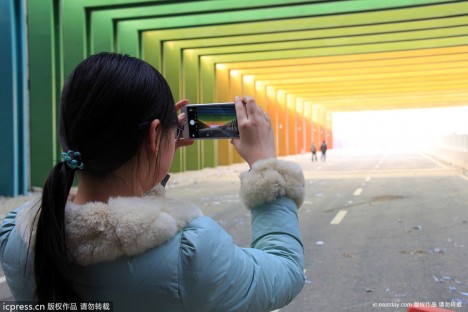
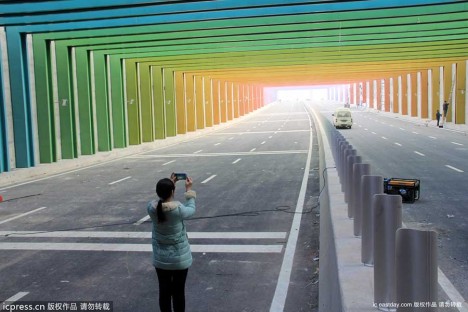
    A 1,000-foot long rainbow underpass in Zhengzhou, China is designed to help drivers’ eyes adjust from daylight to a artificial lighting and back again.

    China Rainbow Tunnel 2b

    China Rainbow Tunnel 2a

    Break out the Skittles, it’s time to drive the rainbow! Well, almost… the Cheng Avenue rainbow tunnel isn’t quite ready for prime time though it’s already cost Zhongmou County a pot of gold – about 100,000,000 yuan (about $ 16 million) and counting.

    China Rainbow Tunnel 6

    China Rainbow Tunnel 8

    China Rainbow Tunnel 8b

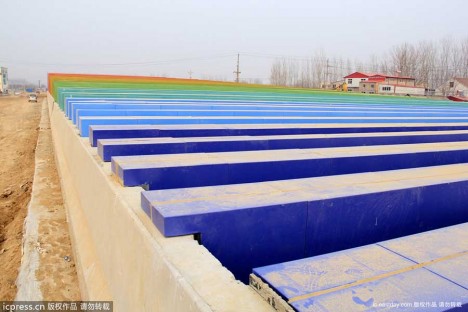
    The tunnel (actually a shallow underpass) is located about 50 meters north of the S223 Provincial Highway intersection just outside Zhengzhou in China’s east-central Henan province. The area around the project appears rather dry and drab; the soil radiating the pale yellow hue of dust blown eastward by strong winds scouring the Gobi Desert.

    China Rainbow Tunnel 9a

    China Rainbow Tunnel 9

    China Rainbow Tunnel 7b

    China Rainbow Tunnel 7a

    If civic planning authorities intended to alleviate the visual monotony by injecting some color into the landscape, a 400-meter (1,312 ft) long “rainbow tunnel” is one way to do it. No matter if some bureaucratic committee can’t decide on a single hue: the rainbow tunnel has got ‘em all!

    Next Page – Click Below to Read More:
    Prism Break Chinas Eye Soothing Rainbow Road Tunnel

    Share on Facebook


    [ By Steve in Architecture & Cities & Urbanism. ]

    [ WebUrbanist | Archives | Galleries | Privacy | TOS ]


    WebUrbanist

  • How To Paint With Light using Rainbow Flash Filters

    Extra photos for bloggers: 1, 2, 3

    Hey you! Yes, hue!

    Color your world one photograph at a time by painting with light.

    Our guide will show you how to amp up your photos with color in a flash, without any fancy equipment or software.

    Follow the light, friends. A whole chroma of possibilities await.

    Learn How To Light Paint With Rainbow Photo Filters

    WHY IT’S COOL

    You’ve always wanted to take these photos but didn’t have the know how – ’til now. Also, color rules! Beige drools.

    INGREDIENTS

    before

    • Colorful Flash Filters (like these, or any see-through colored plastic)
    • Camera or Phone Camera
    • Tripod
    • Flashlight
    • External Flash
    • A room that is nice and dark

    GET SET

    To give yourself enough time for these effects, set your camera’s shutter speed to around 5 seconds (5″) and adjust the aperture and ISO accordingly. You can either do this on your camera’s Manual (M) mode (you set the aperture), or Time Value (TV) mode (it’ll choose aperture for you).

    To make sure your image is sharp, mount your camera on a tripod or put onto a flat surface. Using the self timer option is also a good idea, to avoid shaking your camera when you press the shutter button.

    COLOR CAMERA ACTION

    beforePress that button and get ready. When the shutter opens, you’ve got 5 seconds to work!

    Fire the flash to the left of your subject with your first colored filter, then (QUICKLY!) switch filters and fire a second flash to the right of your subject. Experiment with even more flashes in different part of the scene for an even more psychedelic result.

    If you don’t have an external flash, don’t despair. You can use a bright flashlight by turning it on and off quickly.

    DRAW SOME ATTENTION

    beforeTime to get your drawing on, Da Vinci.

    Grab your flashlight (or your phone’s flashlight mode) and cover it with a color filter (we used 2 flashlights with different color filters simultaneously to get this effect).

    While the shutter is open, do a dance and move your arms around like crazy. Or write a message, or draw a love heart. Either or.

    GHOST FACES

    beforeEver thought your photos need more of you? We’ve got your back. Or front.
    Starting from one side of the scene, fire the filter covered flash (or flashlight) around your subject’s face, then ask them to move sideways. Repeat with different colors until you run out of time and/or space.

    Ooooohhhhoohh.

    TAKING IT FURTHER

    • Combine flash to light up your face and flashlight to draw at the same time
    • This app for your phone can be used in the same way as a flashlight + filter. Use it to draw or hold it still over the part of the scene you want to illuminate in color
    • Flash filters aren’t just reserved for your flash or flashlight. For a super quick and easy effect, just slip a filter right in front of your lens

    © Erika for Photojojo, 2014. |
    Permalink |
    No comment |
    Add to
    del.icio.us

    Post tags:


    Photojojo

  • Lucky Rainbow: Time Lapse Pics of Traffic Light Piercing Fog

    [ By WebUrbanist in Art & Photography & Video. ]

    time lapse light

    The right place, proper timing and a keen eye conspired to help a photographer capture this eerie nighttime phenomena at a crossroads outside of Weimar, Germany.

    rainbow night light green

    rainbow night light yellow

    rainbow night light red

    German photographer Lucas Zimmermann found and shot this intersection at each stage of the its cyclical change, capturing green, yellow and red.

    rainbow light full spectrume

    He also went a step beyond the sequential with one particularly impressive shot spanning the entire cycle, creating a rainbow in the mist.

    rainbow light black white

    His other work spans from the rural United States to the streets of Beijing, but usually focuses on people over places – this set, however, proved a worthy exception.

    Share on Facebook


    [ By WebUrbanist in Art & Photography & Video. ]

    [ WebUrbanist | Archives | Galleries | Privacy | TOS ]


    WebUrbanist