The Following is an excerpt from the SLR Lounge Lightroom Preset System v5 and accompanying workshop from the Lightroom Workshop Collection v5. The Lightroom Preset System is designed to take you from Ordinary to Extraordinary photos in just a few seconds and clicks.
In this article we’re going to do a headshot retouch to show how capable Lightroom is. Of course for a professional headshot retouch Photoshop is necessary, but Lightroom is also surprisingly capable. We’re going to utilize one of our “Soft Portrait” presets, similar to the one we used in our Color Portraiture with Retouch and Enhancement Tutorial, and then we’re going to utilize our brush presets to make our retouches. The complete written tutorial is below, and you can also watched the video tutorial at the end of this article.
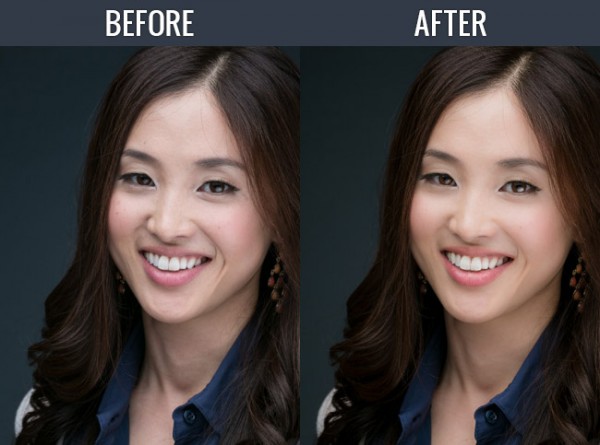
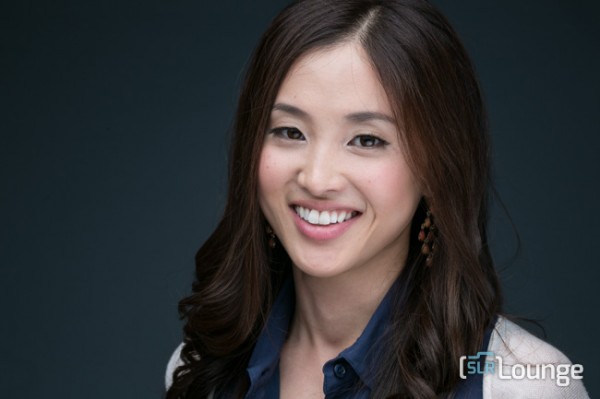
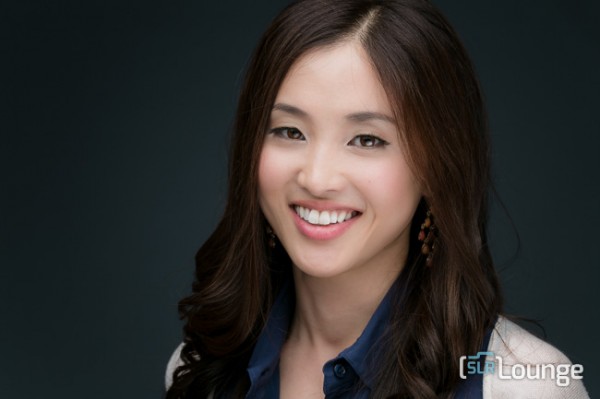
Here’s a sneak peak at what our image will look like before and after the retouch.
Read the Written Tutorial
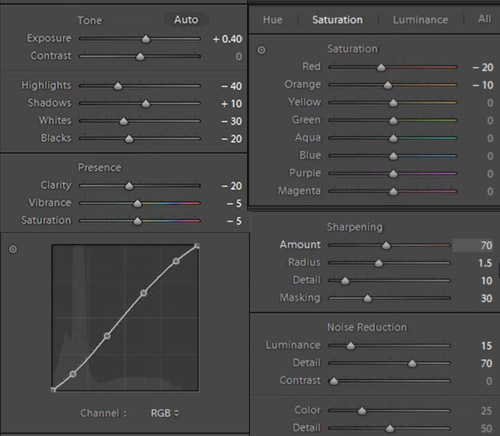
The first thing we’re going to do is select our “01-10 BASE – SOFT: 11a. Extra Soft – Skin Desat” which will soften the skin by decreasing the Clarity and adjusting the Noise Reduction settings. The preset also adjusted the Red and Orange in our HSL, lowering them slightly so we get desaturated skin tones. We also added a little bit of contrast using the “03-40 ADJUST – SHADOW BLACKS: 43 Darken – Light (+10,-20)” preset. The Tone Curve is set in s subtle “S” shape, giving us a slight contrast boost, and we have our standard amount of Sharpening applied to this photo. We’re going to set our Color Temperature to 4900 and add +0.40 to the Exposure to give the skin a nice bright look. For those that don’t have the Preset System, here are what our Develop Settings look like after our presets and adjustments are applied.
The first brush adjustment we’re going to be making is for her skin. We’re using our “21 Skin Softener” preset, and you can see settings of our brush in the photo below. These settings will smooth skin without destroying skin texture. We want to make sure we’re only applying this brush to the skin, and you can press “O” to bring up the overlay so you can see exactly where the brush is being applied as shown below. You can also delete areas of brush application by holding down “alt on a PC or “opt” on a MAC to erase the adjustments.

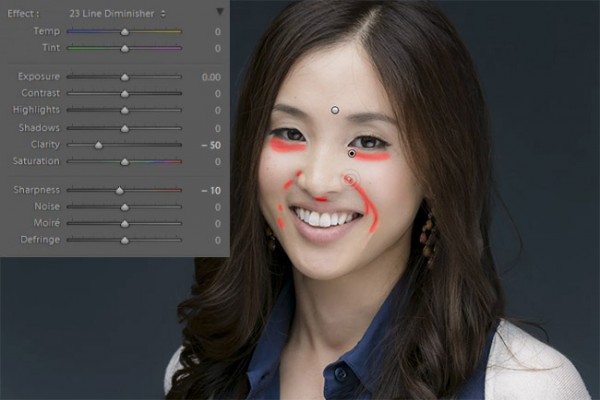
Moving on, we’re going to hit “New” to make new brush adjustments, and we’re going to select our “23 Line Diminisher” preset. We want to diminish some of the smile lines and lines under the eyes. This part of the retouch should be subtle, diminishing the lines and not removing them completely. Once again, you can see the brush preset settings and the area of affect in the image below.
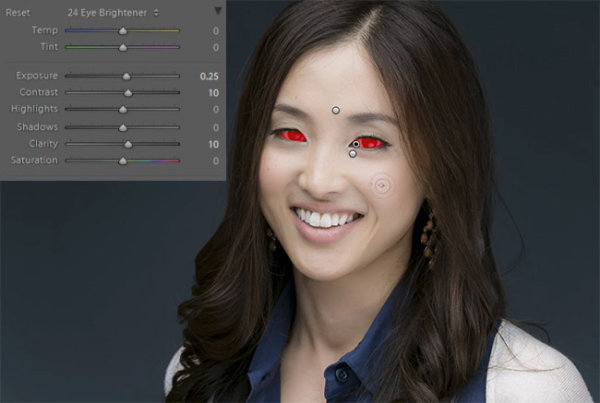
Now we’re going to hit “New” and select the ”24 Eye Brightener” preset. We’re going to brighten up the eyes and we want it to be subtle because if the eyes are too bright it will have an abnormal look. The best way to check if eyes are too bright is to simply zoom out to a thumbnail view and check to see if the eyes look like they are glowing or unusually bright based on the surrounding tones.
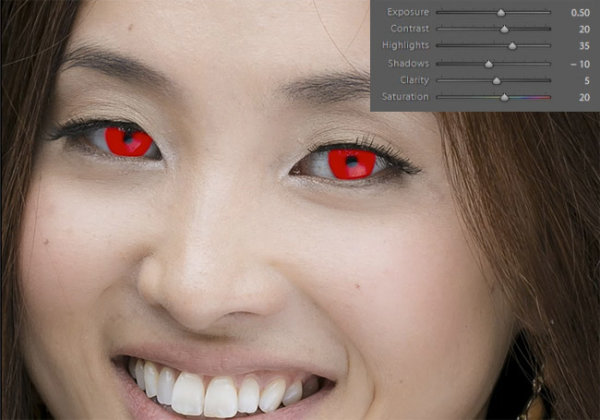
Furthering our edit on the eyes, we want to brighten up the iris’ to add nice colors to them and to exaggerate some of the nice catch light. We’re using our “25 Iris Enhancer” and we want to make sure we’re only making adjustments on the iris’ and nothing else.
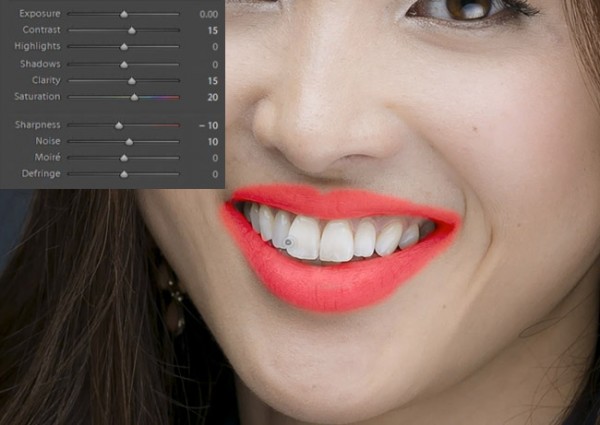
Now we’re going to move onto our lips. Our “26 Lip Enhancer” preset adds nice color and contrast to the lips.
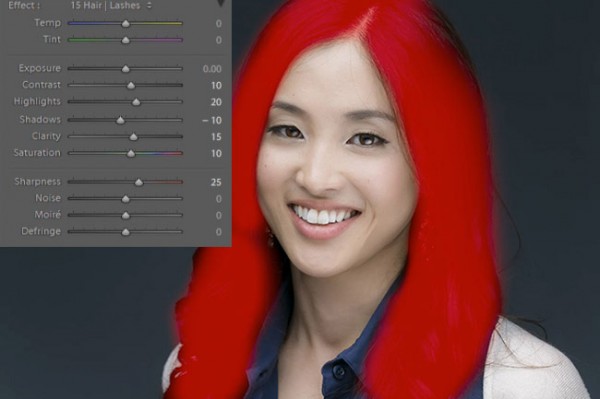
The last brush we’re going to use is for the hair. With our “15 Hair | Lashes” preset, we’re going to pull out some nice color and texture from her hair.
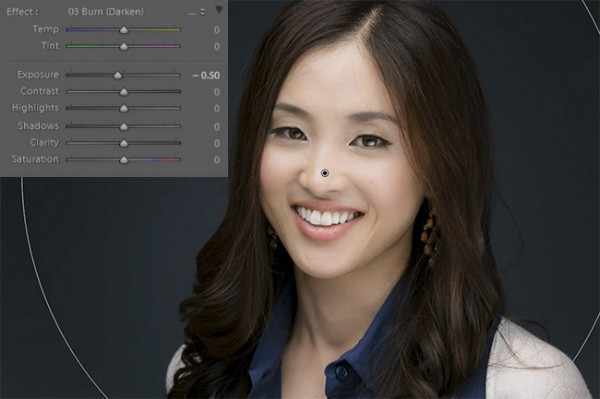
At this point we’re done with our retouches. If you like you can do some additional blemish removal. When doing blemish removal we recommend keeping blemishes that are apart of their look. The last thing we’re going to do is add a Radial Filter with the Exposure set to -0.50.
And now we are left with our final image. Here’s a before and after of our portrait.
Before
After
Watch the Video Tutorial
[EMBED VIDEO HERE]
If you would like to see exactly how all of the settings and adjustments were applied, please watch the video below from the SLR Lounge YouTube Channel.
Conclusion and Learn More
We hope you all enjoyed this tutorial. If you are interested in learning more or purchasing the SLR Lounge Lightroom Preset System v5 or the newly released Lightroom Workshop Collection v5, please click any of the links in this article.
Post originally from: Digital Photography Tips.
Check out our more Photography Tips at Photography Tips for Beginners, Portrait Photography Tips and Wedding Photography Tips.
How to Professionally Retouch Portraits in Lightroom
You must be logged in to post a comment.