Tag: Photographers

  • DPReview exclusive: Lytro Illum in the hands of five leading photographers

    Lytro-Kyle.jpg

    In conjunction with the announcement of what Lytro is calling its ‘professional-grade light field camera’, the Illum, the company put its new product in the hands of five leading photographers. Today, Lytro has exclusively released a promotional video to DPReview that takes us behind the scenes as five ‘creative pioneers’ discover what they can do with this innovative new technology. See the video

    News: Digital Photography Review (dpreview.com)

  • Walmart sues photographer’s widow

    Walmart_exterior.jpg

    In an article on the PPA website, the organization claims Walmart is ‘bullying’ a small Arkansas photographic studio. The Walton family wants intellectual property rights to photographs a small photography studio took of the family before Walmart grew into one of the biggest retailers in world. The defense argues the photographer’s family owns copyrights to all the images. Learn more

    News: Digital Photography Review (dpreview.com)

  • The Ultimate Photographer’s Guide to Photo Contests That Are Worth Your Time

    The Internet has brought an influx of photo contests. It seems like every blogger, photographer and “momtog” is putting up a photo contest. As a serious photographer, how can you know which ones to submit to, and if you do choose to submit to one, how to maximize your chances of winning? Here is everything you need to know about Continue Reading

    The post The Ultimate Photographer’s Guide to Photo Contests That Are Worth Your Time appeared first on Photodoto.


    Photodoto

  • 20 Awe-Inspiring Photographers to Follow on Behance

    Behance is an awesome place to find creative photography portfolios and to draw inspiration from. But with so many of them to browse through, it’s really hard to find a place to start. That’s why I’ve collected 20 awe-inspiring photographers to follow on Behance. Here you’ll find fabulous fashion photography and breathtaking landscape shots. Scroll down to enjoy these brilliant Continue Reading

    The post 20 Awe-Inspiring Photographers to Follow on Behance appeared first on Photodoto.


    Photodoto

  • A New Photographer’s Guide to Composition

    Recently I wrote a New Photographer’s Guide to Camera Settings. Once you become comfortable with your camera settings, the next step is to learn the rules of good composition and design for your photography.

    So here are the 10 most important tips to take into account when framing your scene. Your guide to composition.

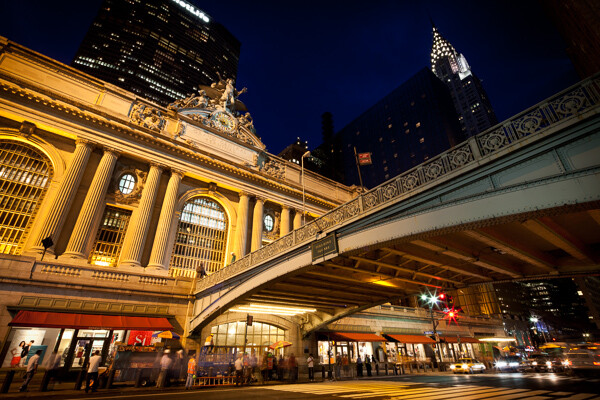
    Grand Central and Chrysler Building, NYC.

    Grand Central Terminal and Chrysler Building, NYC

    #1 How will the viewer’s eyes flow through the scene?

    I prefer to think about composition as if it is a game to please the eyes, and if you want to please the eyes, they need something to do and somewhere to go. When creating an image you want to think about the path that the viewers eyes will take through the scene, and whether this will be a fluid path or a jarring path.

    • Fluid Path – an image with leading lines, such as a road or stream, or an image with a foreground, middle ground, and background, which leads your eyes gradually from one level to the other.
    • Jarring path – an image with multiple, well spaced subjects for the eyes to bounce around between. Since there would be no lines leading between the objects in this type of image, they must be well spaced within the scene.

    If you look at the photo above, the eyes are led directly to the Grand Central statue in the top left one third line in the scene, particularly because most people read from top to bottom and left to right.   The eyes are then led over to the Chrysler Building Spire and down to the detailed bridge.  These three elements make a triangle shape to lead the eyes through, however, the bridge acts as a very important element of the composition, keeping the eyes from leaving the scene and leading them back into the image, where they can either head up towards the statue or down to the people and cars on the street.

    #2 Watch the Edge of your Images

    Continuing from tip #1 above , for an image to feel balanced the edges of the image should be balanced. The eyes have a natural tendency to want to fall off an image through its edges. By putting elements in the corners you stop and catch the attention of the eyes, pushing them back into the scene. This is why landscape images often have small branches of trees or foliage in the top corners of the sky, and why vignetting is commonly used.

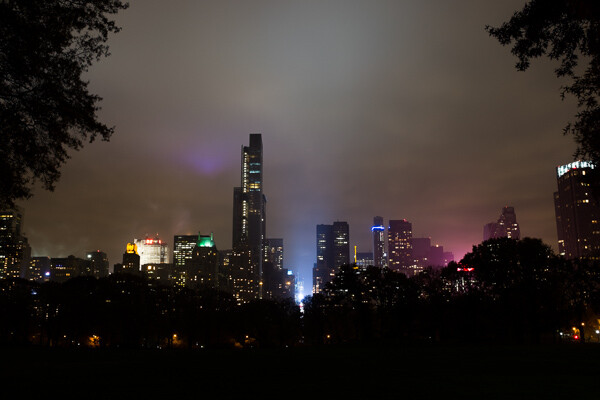
    Central Park South, NYC.

    Central Park South, NYC

    Notice the branches in the top corners that function to keep the eyes in the frame. The corner elements often work even more effectively when only part of them is showing.

    #3 Rule of Thirds Versus Centered Images

    The rule of thirds is more of a suggestion than a rule. I’ve seen people take it to the extreme, but there are so many instances where a centered or different composition is preferable.

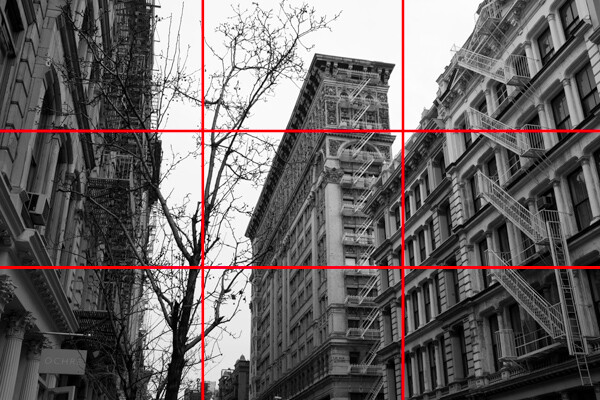
    The rule of thirds refers to placing your main subject, or subjects, at one of the four one-third intersections in your photo, which you will notice in the second image below. This feels more pleasing to the eyes and it also allows you to simultaneously focus on a foreground subject on one side, while having a significant amount of space for an interesting background to balance out the scene.

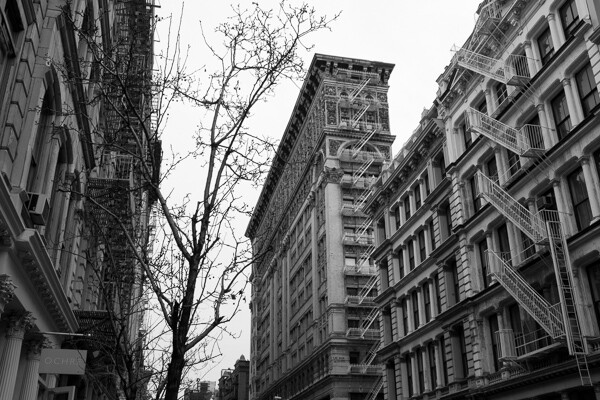
    Silk Exchange Building, NYC.

    Silk Exchange Building, NYC

    Rule of Thirds.

    Rule of thirds

    In the above photo, while not exactly on the one third line (it’s not a rigid rule), you can see the building is balanced out by the tree on the corresponding one third line. The buildings on the each edge act as leading lines and have the added purpose of acting as edge frames to keep the eyes within the scene.

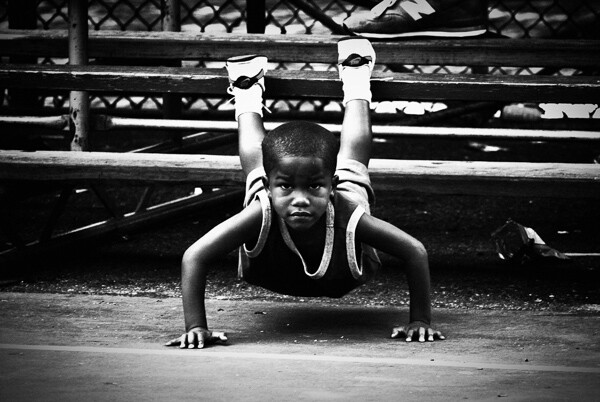
    However, don’t be afraid of placing your main subject in the center. A centered subject can block everything else out of the scene and make you focus only on the most important element. This works especially well with a strong facial expression or look in the eyes. In addition, this works for symmetrical scenes, which can feel extremely balanced.

    Rucker Park, NYC.

    Rucker Park, NYC

    #4 Horizontal – Vertical or Skewed

    Whether to capture an image horizontally, vertically, or slightly skewed is always a tough decision. There are many reasons to photograph both horizontally and vertically, however I often find that photographers have a tendency to rely more on one format.

    Horizontal images often feel more natural to look at because they mimic the way that our eyes see the world. They also allow you to to fit more elements into your image and they provide an easier format for the eyes to flow through the image.

    A vertical format can be beneficial when you want to get in closer and focus on a single subject or a tight area. It is a way to simplify your photo and get rid of any elements that might take attention away from your main subject.

    When you are creating a horizontal or vertical image you want to make sure that your lines are straight.  If they are slightly off, the image will not feel balanced. However, sometimes you will want to skew your subjects at an angle. Skewing your subjects so the scene is neither horizontal nor vertical adds interest and energy to the photo. It promotes a spontaneous feeling and the lack of balance can actually be a pleasing to the viewer.

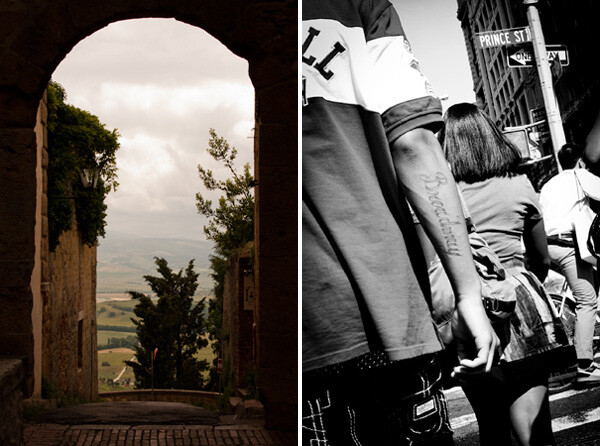
    4-vertical_vs_skewed2

    Tight, classic, vertical shot vs. energetic, skewed, detail shot

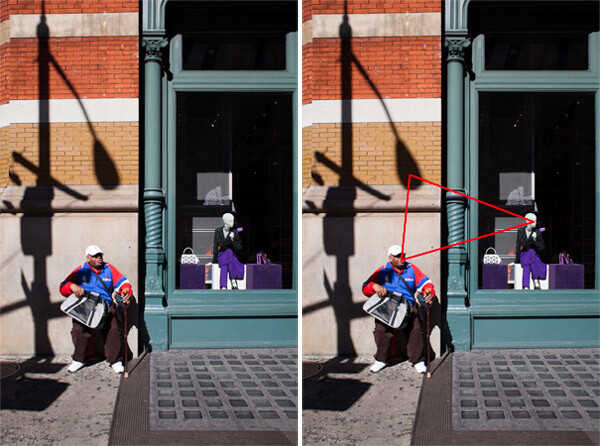
    #5 Triangles and the Number Three

    The triangular shape can be very important to good composition in photography. This does not refer to having the actual shape in an image but a relationship between three objects that create a triangle within the scene.

    As long as the three objects are able to balance each other out, this is pleasing to the eyes because it creates a constant path through the scene.

    5-Prada_Store2

    Prada store, SoHo, NYC

    #6 Perspective

    The height from which you shoot can be a significant factor in how your images appear. If you want to emphasize height and power in a scene, get low to the ground and tilt the camera slightly up. People will look more important and prominent, and objects like trees or mountains will look even larger.

    Shooting from a high camera angle on the other hand makes everything feel smaller and diminished in power. If the shooting height becomes extreme enough the image can even tend to take on an abstract and graphic feeling.

    When photographing people, always pay attention to the camera angle.  Sometimes raising or lowering the camera slightly can make a big difference.

    #7 Minimalist Versus Maximalist

    Minimalist refers to keeping a photograph very simple, such as an image with a single subject and a pleasing and calm background. This can create a very powerful and graphic design.  There is power in the simplicity.  Valerie Jardin, recently wrote a good article on minimalist photography.

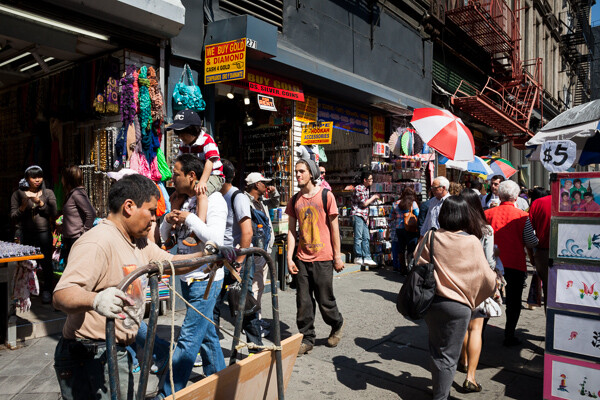
    Maximalist on the other hand refers to a chaotic image, with a lot of elements competing with, and playing off of each other. However, within the chaos there is balance. This type of image is very hard to create in a balanced way, but when it works it can be a delight for the eyes that allows a viewer to explore through the scene.

    Canal Street, NYC.

    Canal Street, NYC. Balance in the chaos

    The image above would not work if the subjects were not all spread out evenly throughout the scene.

    #8 Color

    Color is a vital aspect of design. A strong color on your main subject can add extra emphasis, while a strong color in an insignificant element can ruin the balance of a photo.

    There is a large trend these days towards strong and unrealistic colors in photography, similar to the movies or on instagram. Strong colors do a better job of catching our attention at first, but muted colors can be just as interesting and create just as much of a mood as strong colors, if not moreso.  Explore desaturating your images slightly.

    Each color has its own properties and ability to create mood within an image. A red tint can add a warm and energetic feeling to a photo, while a blue tint can make a scene seem either calm or cold and sterile. As portrait photographer Dan Winter’s states, “Green is an inherently calming and inviting color, and is tied to our natural surroundings.” Winters uses green for many of his portraits.

    Here are some ways that colors can play off each other to add balance:

    • Complementary colors (colors on the opposite side of the color wheel)
    • Analogous colors (colors next to each other on the color wheel)
    • Different colors in similar shades
    • The same color in different shades
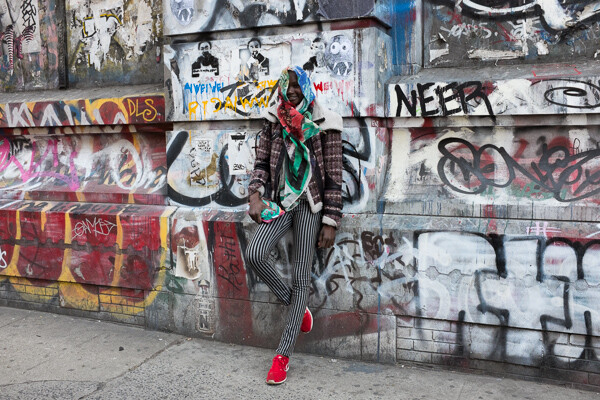
    Spring and Bowery, NYC.

    Spring and Bowery, NYC

    #9 Getting Close and Filling the Frame

    This is a very important concept. Figure out what is significant in the frame, get close, and only capture that. Cut everything else out and envelope the main subject. If the most interesting part of a person is their eyes, then capture the eyes up close.

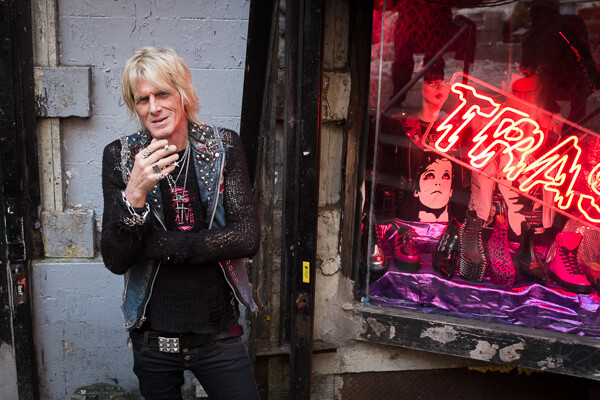
    Shop Owner, Trash and Vaudeville, NYC.

    Shop Owner, Trash and Vaudeville, NYC

    #10 Uniqueness and Breaking the Rules

    Learn these rules and practice them, but keep in mind that sometimes you must break the rules. Be unique whenever possible. There is nothing more pleasing to the eye than something that is different.

    Do you have any additional tips you’d like to add to this list? Please share in the comments, with example images if you have some.

    The post A New Photographer’s Guide to Composition by James Maher appeared first on Digital Photography School.


    Digital Photography School

  • ‘Dedicated’: A Nikon D4s video about photographers using the D4s

    Screen_Shot_2014-04-03_at_3.32.22_PM.png

    Photographer Corey Rich’s most recent project, titled ‘Dedicated’, is a video detailing the working lives of three other notable photographers – Dave Black, Robert Beck and George Karbus – using Nikon’s latest flagship camera, the D4s. Along with the final cut of ‘Dedicated’, a making-of video that shows the 21-day whirlwind tour to capture the footage and interviews for the documentary project was released. See video

    News: Digital Photography Review (dpreview.com)

  • A New Photographer’s Guide to Camera Settings

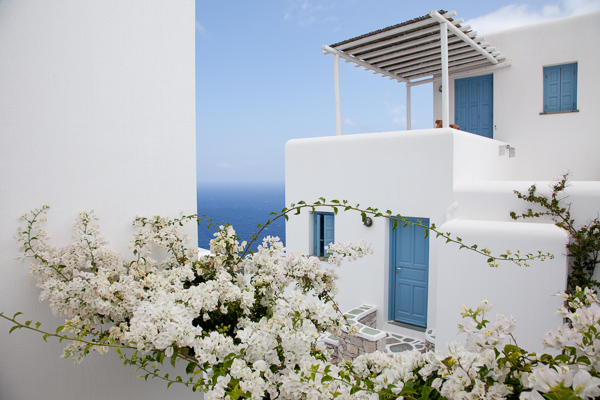
    Folegandros, Greece.

    Folegandros, Greece – 24mm focal length at f/11

    Without experience, looking at the endless functions and dials on a camera can seem daunting, and it is at first, especially with many of the newer digital cameras that have about 5,000 functions (I’m looking at you Nikon).

    Luckily, you only have to learn the major functions at first to significantly improve your photography. It might take a few reads through the content below, but it does not take long to learn the most important abilities of your camera to significantly improve your photography.

    Depth of Field

    Before we delve into the settings, you first need to understand depth of field. The term refers to the area in front of, and behind the subject, that the camera is focused on that is acceptably sharp. We use the term acceptably sharp because as you get further from the object you are focusing on, the sharpness gradually declines.

    Another way to think of depth of field is as a range of sharpness. A shallow depth of field refers to a small range of acceptable sharpness, while a deep depth of field refers to a large range of acceptable sharpness in an image.
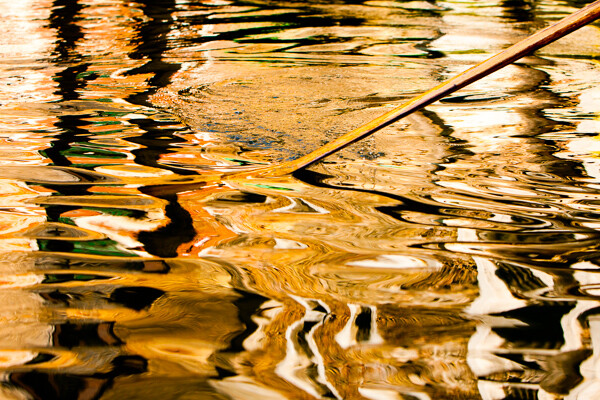
    Venice, Italy.

    Venice, Italy – 70mm focal length at f/5.6. This image has a fairly shallow Depth of Field; the oar and wave are sharp, while the rest is out of focus.

    When standing at the same distance away from your scene, there are three ways to alter the depth of field:

    1. Changing your aperture setting
    2. Changing the focal length on your camera (i.e. 24mm versus 200mm lens) will give you the appearance of more depth of field.  Technically, this is an optical effect due to the magnification, but it will create the appearance of more depth of field.
    3. Changing the focus distance. Focusing on a closer subject will give you less depth of field than focusing on a subject at a distance.

    Focal Length (wide-angle versus telephoto)

    Changing your focal length alters the relationship in size between the foreground objects and the background objects. It also affects the appearance of depth of field due to the change in magnification.

    Wide angle:   a wide angle lens (i.e., 28mm) will make foreground subjects larger in comparison to the background. This allows you to have a main subject that is prominent in the foreground while simultaneously fitting in more of the background, since it is proportionally smaller. When standing at the same distance from your subject, there is the appearance of more depth of field throughout the frame with a wide angle lens than with a telephoto lens when the same aperture is used.
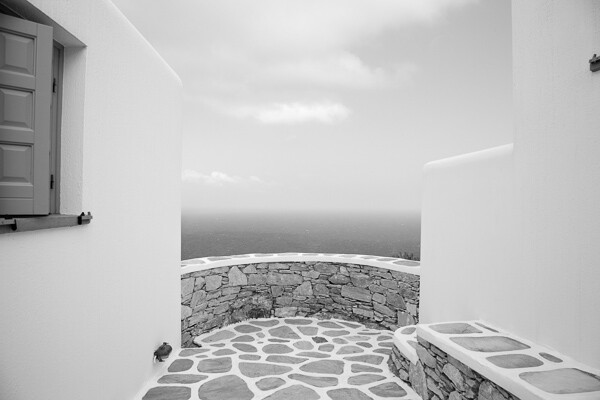
    Folegandros, Greece

    Folegandros, Greece – 24mm focal length at f/11. Notice the size of the foreground stones in relation to the middleground stones.

    Telephoto:  a telephoto lens will compress and tighten the view. The longer the focal length, the larger the background objects will appear in comparison to the foreground objects. This makes the background objects look closer to the foreground objects than with a wide-angle view.

    While not a steadfast rule, portraits are often thought to be more flattering when a slightly telephoto lens is used (around 80mm to 120mm), which will compress a person’s features. If you photograph someone with a large nose at close distance with a 17mm lens, that nose will look gigantic when compared to the subject’s ears.
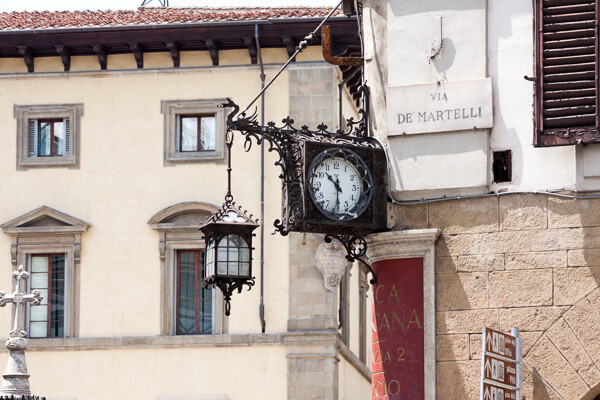
    Florence, Italy.

    Florence, Italy – 170mm focal length at f/6.3

    ISO

    Before you learn about the Aperture and Shutter Priority modes, you need to understand ISO. The ISO setting is a way to change the sensitivity of your camera’s sensor to light.

    ISO is the first setting you should set when you walk out the door and you should always be aware of what it is set at. Practice altering it, because once you get familiar with ISO you will change it constantly.

    A lower ISO number (100, 200, or 400) means that the camera sensor will not be as sensitive to light but the quality of the image will be to the best of the camera’s ability. Low ISO images will have little to no digital noise. The best times to shoot with a low ISO are in strong daylight, when using a tripod, or when using studio lights.

    A high ISO number (800, 1600 or 3200) means that the camera sensor will read more of the light, but the tradeoff is that the images will have digital noise. Higher ISOs are generally used when the light is not ideal and one does not have a tripod. You should review your camera’s ISO abilities to find the upper limit that you are comfortable using. Higher end cameras typically have a stop or two more ISO ability than entry level cameras.
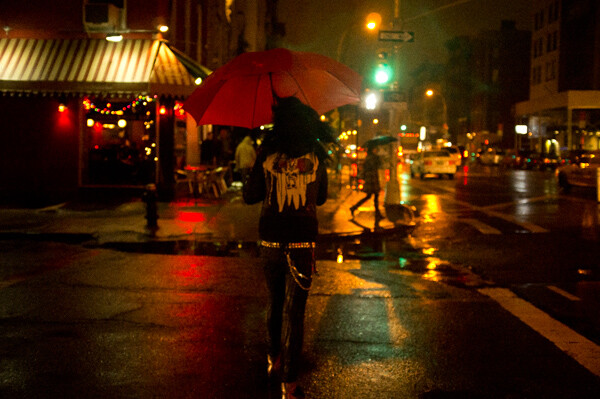
    East Village, NYC.

    East Village, NYC ISO 3200. – grainy, but beautiful

    The key here is to not be afraid to raise your ISO. Its capability has improved so much that many cameras can shoot at ISO 800, 1600, and 3200 or even higher for some. It is much better to have the ideal shutter and aperture settings when creating an image than having the ideal ISO setting. Grain is beautiful, while bad aperture and shutter settings are not.

    Once your ISO is set, you will then have to figure out whether you want to shoot in Aperture Priority or Shutter Priority mode.

    Aperture Priority (A/Av)

    The aperture is the hole in the lens that allows light to enter the camera. The term f-stop (i.e. f/2.8, f/3.5 … f/16) is a number that refers to the size of the aperture opening, where f/2.8 is a much larger opening than f/16. Using Aperture Priority Mode will allow you to alter your f-stop and the camera will then use its internal light meter to choose a corresponding shutter speed to expose the scene correctly.

    A “smaller” aperture (which refers to a larger number, such as f/16) will allow for a deeper depth of field in a scene but will allow less light to enter the camera.
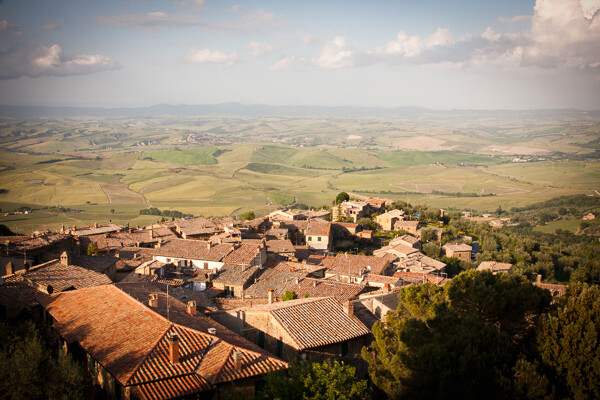
    Montalcino, Italy.

    Montalcino, Italy 28mm focal length at f/14.  The small aperture yields a deep depth of field.

    The photo above is an example of this type of deep depth of field, which occurs with a small aperture. The chimney in the foreground is perfectly sharp and both the mid-ground and background are very sharp.

    A “larger” aperture (which refers to a smaller number, such as f/2.8) will create a shallow depth of field (with more bokeh, or out of focus blur) and will allow more light to enter the camera.
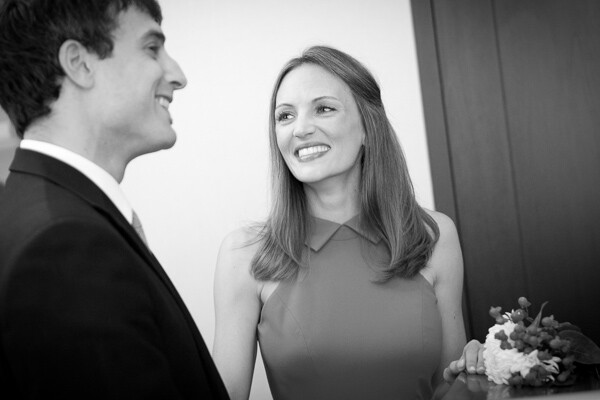
    63mm Focal Length at F2.8.

    63mm focal length at f/2.8 in a dark setting. The large aperture yields a very shallow depth of field.

    The primary reason to shoot in Aperture Priority mode is to control your depth of field and it is a common way of shooting for portraiture and for event and wedding photography, especially in situations where the events are held in venues with low levels of light.

    While the above photograph looks bright, it was taken in a fairly dark room. Because it is shot at f/2.8, only the bride’s eyes are perfectly sharp. When photographing with a shallow depth of field, always make sure the most important element is in focus.

    Shutter Priority (T/Tv)

    Shutter speed is the speed at which the camera’s shutter opens and closes to allow light to reach the sensor or film. Using the Shutter Priority mode will allow you to set your ideal shutter speed, while the camera will pick a corresponding aperture to expose the scene correctly.

    A faster shutter speed (a smaller fraction, such as 1/320th of a second) will allow less light to reach the sensor but will freeze your subject’s motion or offset the camera shake when your camera is handheld. 1/320th and faster is an ideal setting to freeze motion in people.
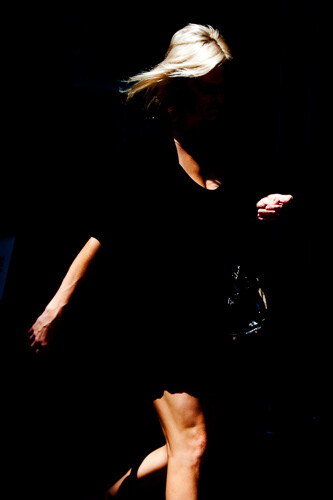
    SoHo, NYC.

    SoHo, NYC 1/320th of a second with an 80mm focal length

    A slower shutter speed (a larger fraction, such as 1/8th of a second) will allow more light to reach your sensor and, if slow enough, will create blur in an image. Depending on the rate of motion of your subject, anywhere from approximately 1/30th to 30 seconds and more will introduce noticeable motion blur. A tripod is recommended when introducing blur into your scene, although it is possible to handhold the camera and achieve a sharp background and blurred subject if the subject is moving fast enough.
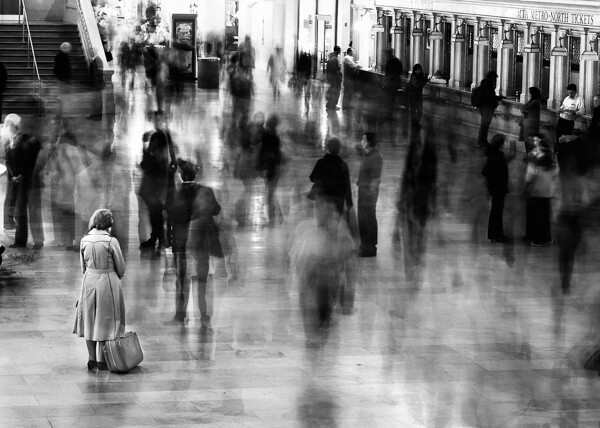
    Grand Central, NYC.

    Grand Central, NYC 6 seconds at f/8. The woman is sharp because she remained motionless.

    *Important:  to offset blur caused by handheld camera shake, the shutter speed must be at least 1 over the focal length. So if your focal length is 100mm, your shutter speed should be at least at 1/100th of a second. Add some leeway into that rule when you can, so 1/125th or 1/160th at 100mm will be safer. When using cropped sensors (such as APS-C or micro-4/3rds), the real focal length is the important number. If your APS-C camera sensor has a 1.6x crop, a 100mm lens will have the equivalent of 160mm view, leading you to need at least 1/160th of a second to achieve sharpness.

    The main reason to shoot in Shutter Priority is to freeze or introduce motion into your scene. I use this mode primarily when traveling, exploring, at dusk when I’m handheld and the light is low, or shooting street photography.

    Manual Mode (M)

    Manual mode allows you to set the shutter, aperture, and ISO settings without the camera’s interference. This is a difficult way to shoot because you need to know the strength of the light to set your camera accordingly, but even if you do not want to photograph this way it can be worth practicing in manual mode to help you better understand light.

    Manual mode is ideal when you use a tripod and have the time to fine tune the exposure. It is also good in situations where the lighting is consistent, such as on overcast days, photographing indoors, or when using strobe lights or flashes.
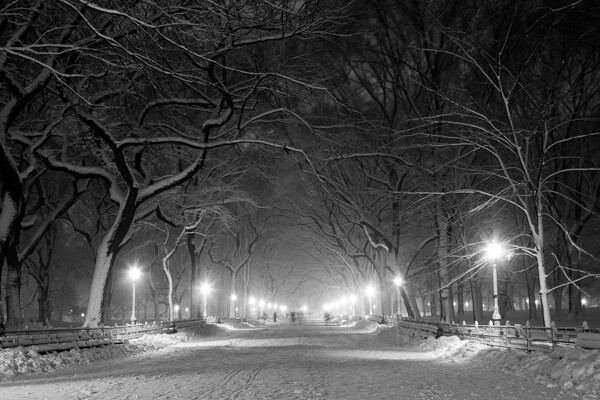
    Poets' Walk, Central park, NYC.

    Poets’ Walk, Central Park, NYC 15 seconds at f/11, ISO 100. 28mm focal length on tripod.

    However, the Shutter Priority and Aperture Priority modes are very important to use, particularly in situations where the lighting is variable. On a sunny day where you are shooting both into and away from the sun, it is beneficial to use these modes because it is usually not practical to continually change your manual settings every time you alter your direction. Let the camera do some of the work.

    Exposure Compensation (+/-)

    Exposure compensation is the +/- mode on your camera that is used when you are in the Aperture or Shutter Priority modes. Increasing the exposure to the plus side will brighten a photo and decreasing it towards the minus side will darken a photo.

    This is especially helpful when you are in an overly bright or dark situation that can fool the camera’s light meter, such as a scene with a lot of bright sky or a scene in a dark alleyway. The camera will read these levels and try to turn these overly bright or dark situations into gray. We typically do not want that.

    When capturing a bright scene, cameras will read all the bright areas and calculate that it needs to darken the photo to achieve the correct exposure. You would need to raise the exposure compensation to offset this. When photographing in a dark alleyway, cameras will try to brighten the blacks to gray, leading you to need to offset this by lowering the exposure compensation.
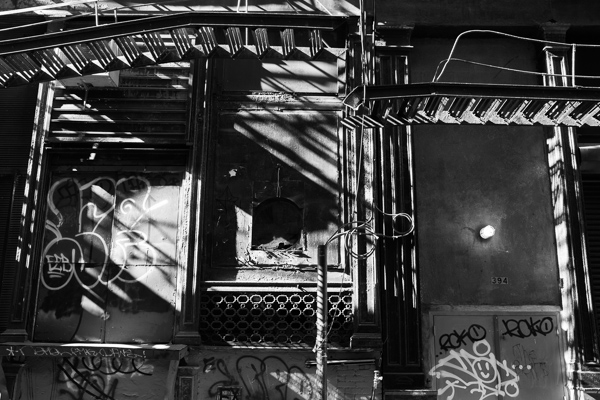
    Cortlandt Alley.

    Cortlandt Alley, NYC – The camera’s light meter slightly overexposed the image
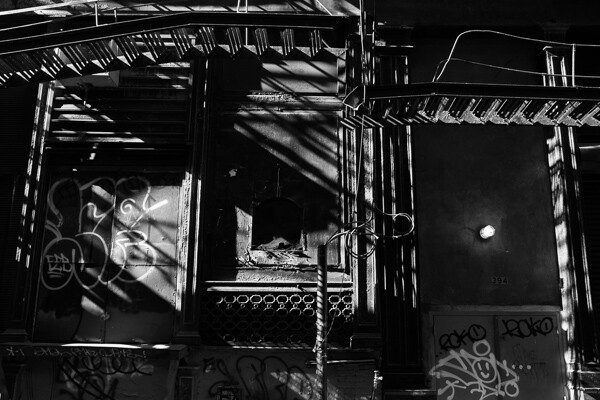
    Cortlandt Alley.

    Cortlandt Alley, NYC –  Correctly exposed

    Bonus – White Balance

    Focus on the above settings first, but once you feel comfortable with them, the next step is to study up on white balance.

    The post A New Photographer’s Guide to Camera Settings by James Maher appeared first on Digital Photography School.


    Digital Photography School

  • Moonbow Photographers in Action

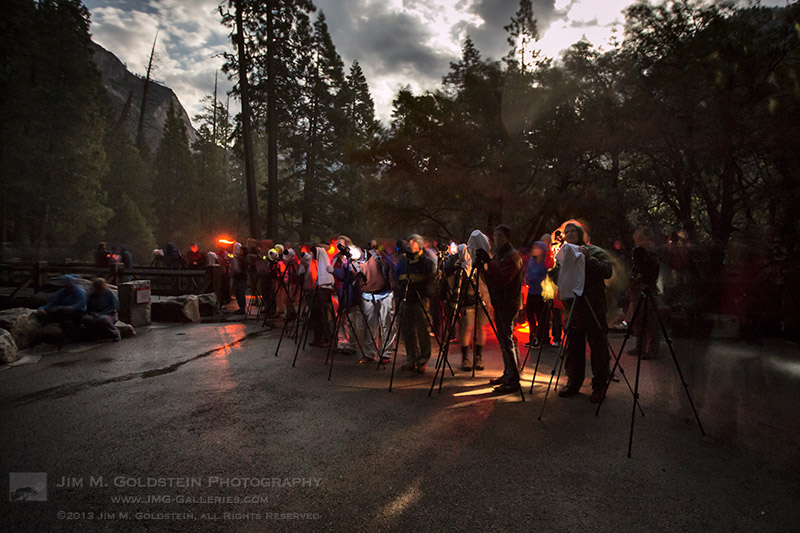
    Most years I venture out to photograph moonbows in Yosemite National Park, but this year I’m wondering if conditions will make it worth while. The extreme drought conditions across the state of California have resulted in low snow levels across the Sierras.  While I’m sure there will be enough snowmelt to keep Yosemite’s falls flowing the question is for how long and at what intensity. We’ll have to wait and see if there is a great but short period to photograph moonbows or if a slow and steady melt will result in consistently poor conditions. Time will tell.

    Copyright Jim M. Goldstein, All Rights Reserved

    Moonbow Photographers in Action

    The post Moonbow Photographers in Action appeared first on JMG-Galleries – Landscape, Nature & Travel Photography.


    Related Stories

    • Moonbow Photographers in Action – Enclosure
    • Celestial Influences: Petroglyphs and Star Trails
    • Celestial Influences: Petroglyphs and Star Trails – Enclosure
    Feed Ads by FeedBlitz
    powered by ad choices


    JMG-Galleries

  • 10 Crazy-Cool iPad Accessories for Photographers

    Many smartphone gadgets in the market these days take full advantage of all the mobile devices we carry. There are high-tech gadgets for hikers, pet lovers, health junkies, graphic designers and the kitchen. There are even wearable accessories. Today, I’d like to share with you a list of 10 cool, iOS-enabled iPad gadgets for photographers. iPad is a comfortable tool Continue Reading

    The post 10 Crazy-Cool iPad Accessories for Photographers appeared first on Photodoto.


    Photodoto

  • 500px Prime goes live, photographers now get 70% not 30%

    Screen_Shot_2014-03-07_at_4.37.16_PM.png

    A few weeks ago we reported on the announcement of 500px ‘Prime’ a licensing service built into the popular photography website that was designed to allow users to make some cash from their images. Originally, the service was set to offer photographers a 30% cut of image sales at a minimum price per image of $ 250. A lot of photographers weren’t happy with the 70/30 split but now Prime is live, the terms have changed and photographers are being offered 70%, with new ‘flat rate $ 250 pricing. Click through for more details. 

    News: Digital Photography Review (dpreview.com)