One of the big disadvantages of taking long exposures with DSLR cameras is the introduction of noise especially when higher ISO settings are used. Camera manufacturers have addressed this by using Dark-Frame Subtraction, but taking advantage of Dark-Frame Subtraction (DFS) isn’t always possible. If you’re shooting a sequence of images either for a night time-lapse or startrail photo DFS will introduce unwanted gaps or breaks. If you’re shooting extremely long exposures then your camera battery might not last long enough to complete your exposure, the dark-frame exposure and record the exposure to your memory card. In regard to my pursuit of low-light or night photography for extreme long-exposures, star trails and time-lapses I’ve resorted to shooting without Dark-Frame Subtraction / Long Exposure Noise Reduction and addressing the noise in post-production.
The Technique
Here’s the technique I employ to manage the digital noise and hot pixels in my extreme long exposure photographs:
- Import & Edit in Lightroom
After each shoot my photos are imported into Adobe Lightroom where I post-process my image to my personal taste adjusting exposure, black/white levels, vibrance, clarity, curves, etc. Note: if you’re curious about the file formats I work with read DNG, RAW and JPEG: What I Use & Why - Lightroom Noise Reduction
Toward the end of my post-processing I remove chromatic and luminance noise in Lightroom “Develop > Detail” module. To remove chromatic (color) noise it’s not uncommon that I crank the “Color” adjustment all the way to 100 leaving only dust or grain like noise that is white. (see images below) - Open Image in Photoshop
In Lightroom I right click on my image and “Edit In > Photoshop”. This opens my file with all my Lightroom edits applied in Photoshop. - Duplicate the “Background” Layer
When my photo is opened in Photoshop a single layer appears titled “Background”. I duplicate this layer which by default is named “Background copy”. - Dust & Scratches
To the “Background copy” layer (the top layer) I apply “Filters > Noise > Dust & Scratches”. A dialogue box will open allowing you to specify how drastically or minimally you want to apply the filter. This filter will remove noise by blurring the photo. Ideally you want to keep the Radius as low as possible and the Threshold as high as possible. Once doing this your image will look quite blurry and seemingly useless. - Employing the Blending Mode “Darken”
To the “Background copy” layer, that has had the “Dust & Scratches” filter applied, I change the blending mode to “Darken”. Magically this will allow the sharper lighter elements of the layer below to show through while keeping the noise free darker elements of the top layer. Once done the last signs of digital noise are removed.
Here’s How It Looks
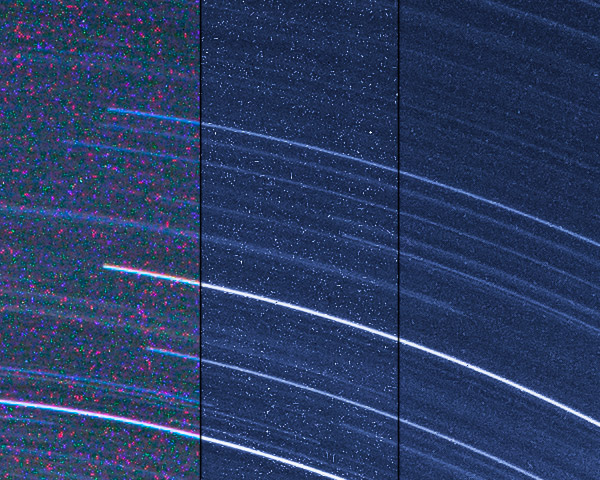
To show an extreme example below are 1 to 1 crops of The Ancients a 91 minute single exposure taken on my Canon 5D Mark II.
1:1 crop in Lightroom straight out of the camera
Note the seemingly horrific amount of chromatic noise appearing as splotchy colors.

1:1 Crop in Lightroom after color noise reduction
With the Color slider at 100% all that is left are millions of white specks

1:1 crop with noise
Even with chromatic noise removed it would seem there are too many white specks to make this a useable image

1:1 crop without noise
Applying Dust & Scratches and Blending it with the original image magically removes the white specks.

1:1 crop with comparing final vs noise
The same image showing the before and after to highlight the stark difference
1:1 crop from RAW import to Final
What does the end result look like on a web sized image?
Web version with noise

Web version without noise

For web display the improvement may be marginal, but for prints this technique will make a notable improvement. My lone disclaimer is that your mileage may vary with this technique depending how much noise your camera produces, how long your exposures are and what ISO setting you use.
Copyright Jim M. Goldstein, All Rights Reserved
Removing Noise from Non-Dark Framed Long Exposures
The post Removing Noise from Non-Dark Framed Long Exposures appeared first on JMG-Galleries – Landscape, Nature & Travel Photography.
Related Stories
- Removing Noise from Non-Dark Framed Long Exposures – Enclosure
- Photo Term Series #21: Dark-Frame Subtraction
- Photo Term Series #21: Dark-Frame Subtraction – Enclosure
You must be logged in to post a comment.