Microsoft has announced the latest model in its Surface line of tablets, the Surface 3. The big news here is that, unlike its predecessors which were running Windows RT, the new model comes with a full version of Windows 8.1. This means, like on the more expensive Surface Pro models, you can install and run any Windows application including Adobe Photoshop or Lightroom, making the Surface 3 a real alternative to a conventional PC. Read more
Tag: full
-
Full Moon Photography Using The Photographer’s Ephemeris 3.0
 The latest release of The Photographer’s Ephemeris (TPE) releases even more tools to help us photographers get the shots we want. There is just too much for one article, so I am going to focus on a personal favorite subject – full moon photos.
Before handy apps like TPE, LightTrac and PhotoPills, figuring out where the moon might be on any given night took some educating. Pile on top of that the desire to know when the moon was behind, or next to, a specific feature, natural or man-made, and the calculations were beyond anyone lacking a degree in mathematics. But now, it’s all so much easier. Let me show you how I plan on getting a shot of the full moon behind Seattle’s Space Needle this May.
I’ll be using the iPad version of the app which allows for adding in a subject height. Nearly the same functionality is available with the Desktop and Android versions of the app, but the location of items may shift a little. With the desktop and Android version you will not be able to manually add in the subject height but can, using the Pythagorean theorem (and there are plenty apps for it), add in the angle you need.
Pre-planning
To get started, I have decided I want to get a shot of the full moon behind Seattle’s Space Needle. It’s a subject that lends itself well to moon photos. I had a shot in mind that I later confirmed possible after viewing Tim Durkan’s fine example from last year.
Laying out the steps before I open the app, my process will look like this:
- Find a location where I can see the Space Needle, and one which faces mainly South or West (because of hills, I know shooting to the East is hard and the moon will not appear to the North of the Needle because of being in the Northern Hemisphere).
- Plot out my location and the location of the Space Needle.
- Account for elevation change and the height of the Needle.
- Let the program do its magic.
- Record my findings and make actual plans.
Finding your location
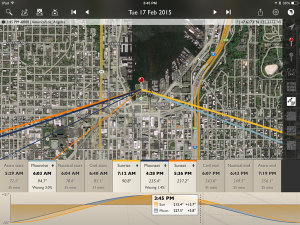
Loading the app brings up a fairly full featured screen.
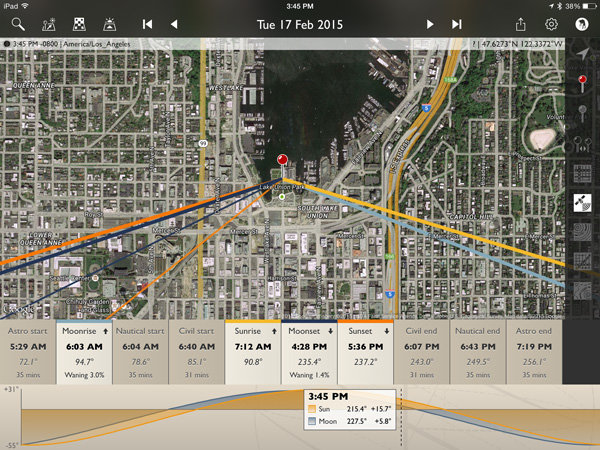
To center the map on your intended location, simply move the map around with your finger until the crosshairs are over your location. You can then tap on the inside of the crosshairs or tap the red observer pin that looks like this:
I placed the location in a park near the shore of Lake Union, a place I know with good visibility of the Needle about 3/4 of a mile away. This will give me a good apparent size relationship of moon to Needle. Many locations can be scouted by using Google Street View.
Next, mark the location of the Space Needle. TPE has a decent search feature, you can use it to quickly find many natural and man-made features around the planet. Just click on the magnifying glass in the upper left and type Space Needle.
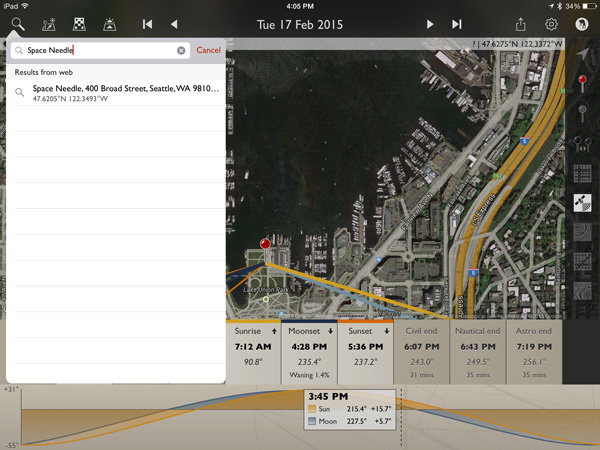
Now click the Space Needle entry itself and you’ll see three options appear.
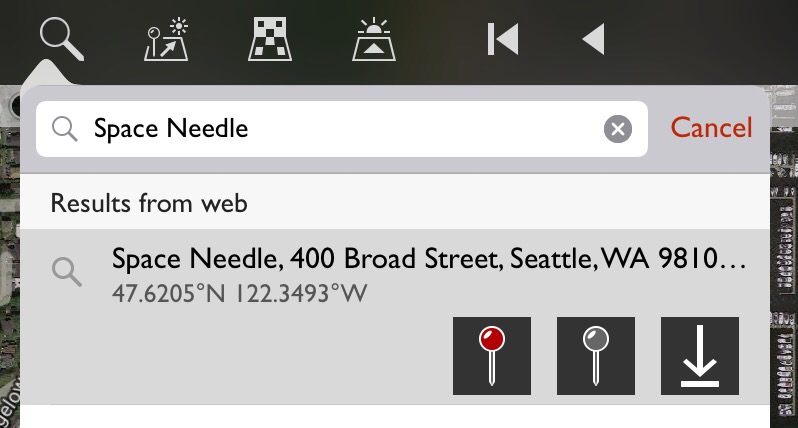
In order from left to right, these buttons allow you to: center the map on the location as your primary location, set this location as your secondary location (the item you wish to photograph), and the third is an option to save this item as a favorite, making future recall easy without searching. You will want to click on the gray map pin to set the Space Needle as the secondary location.
 Using geodetic information
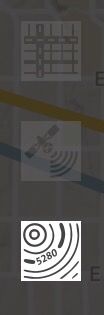
To make things easier to see, click on the Google Terrain map set – an option on the right side of the screen that looks like this (image right)
Now the map is a little cleaner and after zooming out you can see the red pin where I’ll stand and the gray pin at the location of the Space Needle. Those orange and blue lines simply show location of the sun (orange) and moon (blue) when they rise, set and current location.
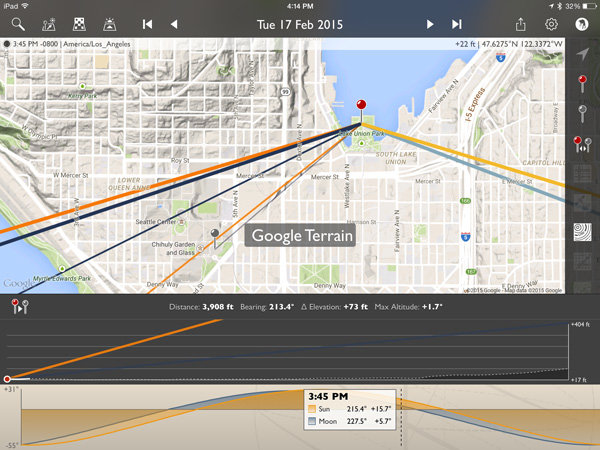
Notice that the lower display also changed? It now shows the elevation different between the two points, with distance (3,908 feet – can also be set to metric), bearing (213.4 degrees), elevation change (73 feet) and the angle at which you are looking, be it up or down (+1.7 degrees). There is also a nice plot between the points showing elevation differences.
This is great! But it only gives the elevation change at ground level. I need to add in the height of the Space Needle to position the moon properly. A quick wikipedia search tells me the Needle is 605 feet tall.
Click on the Shadow and Elevation tool at the top left of the screen, just to the right of the Search feature. Where it mentions “Secondary object height” put in 605 feet for the Space Needle.
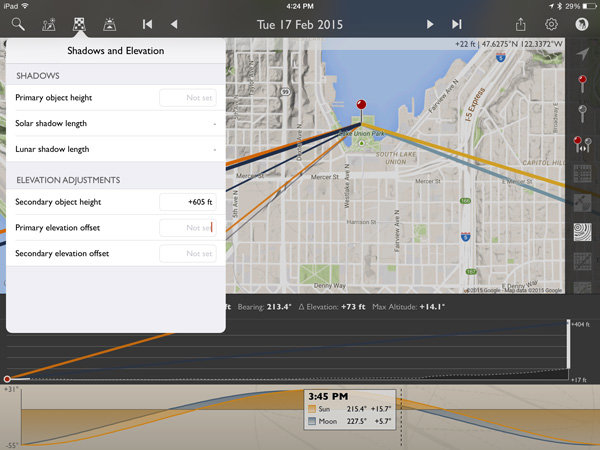
Now on the elevation plot at the bottom of the screen there is a big white bar, representing the height of the Space Needle, on the far right. Perfect!
Magic time
Now let’s have TPE do the heavy lifting and tell us when the moon will be perfectly behind the Space Needle, place the event on our calendar and go find other things to shoot!
Click on the Visual Search button, it is the one immediately to the right of the Search button on the top left. You will get a drop down that with all kinds of information. Click on the word “Moon” at the top and then “Full” and your screen will look like this:
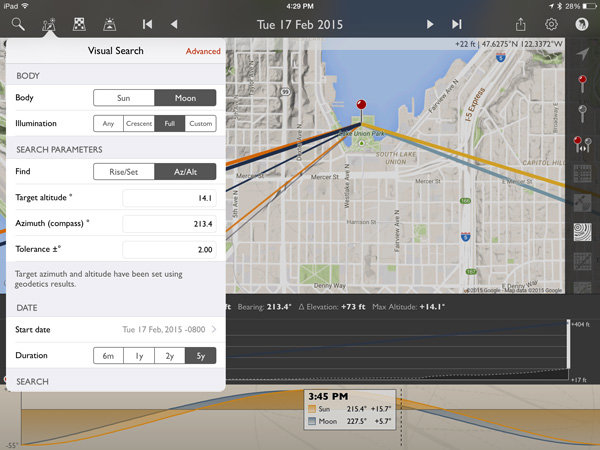
The app has filled in the target altitude (14.1 degrees), compass azimuth or bearing (213.4 degrees), and tolerance (2 degrees) for us!
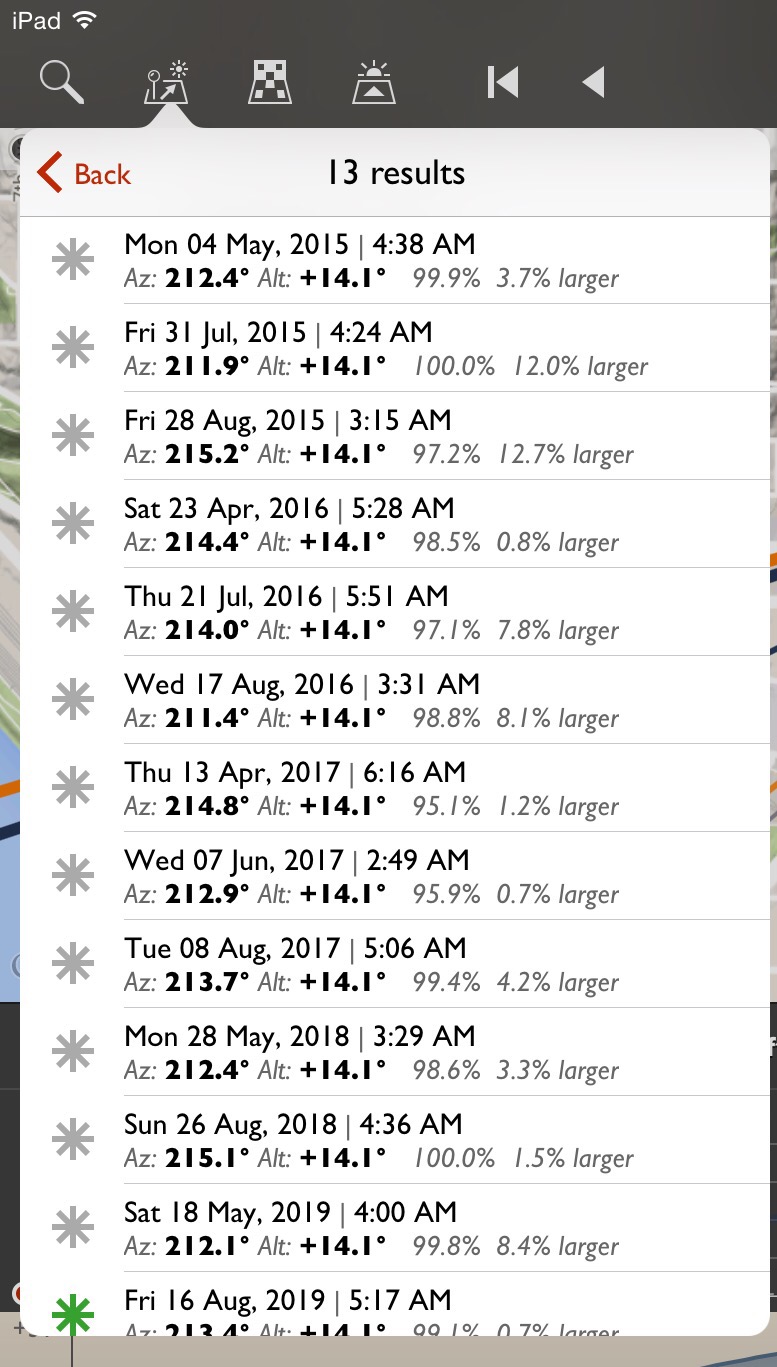
For a first run, to get a full moon centered over the top of the Space Needle, click on the Duration you would like (I picked 5 years in this example) and then Perform Search. You will see a list of results that look like this:
Saving results
What does all that mumbo-jumbo mean? Quite simply, those are all the dates and times (and exact location of the full moon and how full it will be) that fall within a two degree margin of our requested position. You will notice the one at the bottom for August 16, 2019 has a green asterisk; this simply means the moon will be within .5 degrees of the request.
Clicking on the top item for May 4th, 2015 will make the map mimic the conditions at that exact time. Double tap the elevation profile at the bottom and it will show the Altitude Profile where you can see the full height of the Space Needle on the right (tall white bar) and the level of the moon in dotted blue.
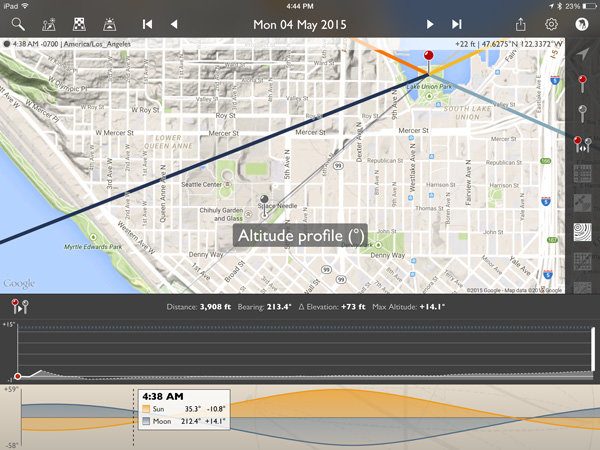
All lined up! We’re now ready to save this information on our calendar or send it to a friend if we like. Click the share button on the upper right and you will see the option for adding to calendar as well as messaging, emailing, etc.
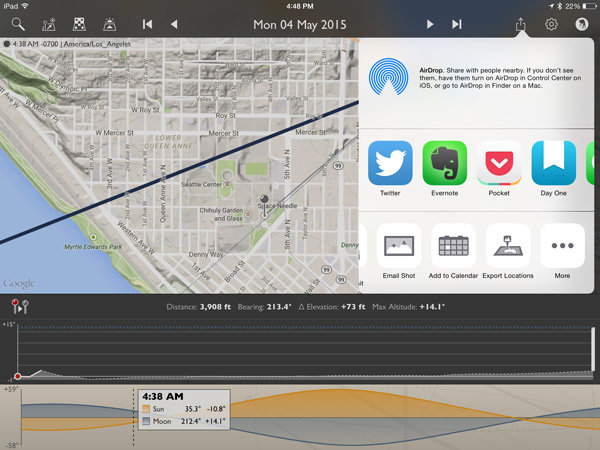
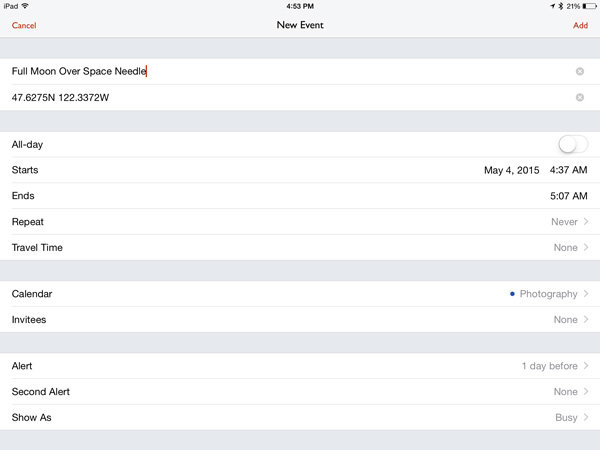
Here’s the calendar add-item screen.
The location is set to the Primary Location in the app. You may want to adjust the time so you arrive early, as it defaults to the exact moment pictured in the app.
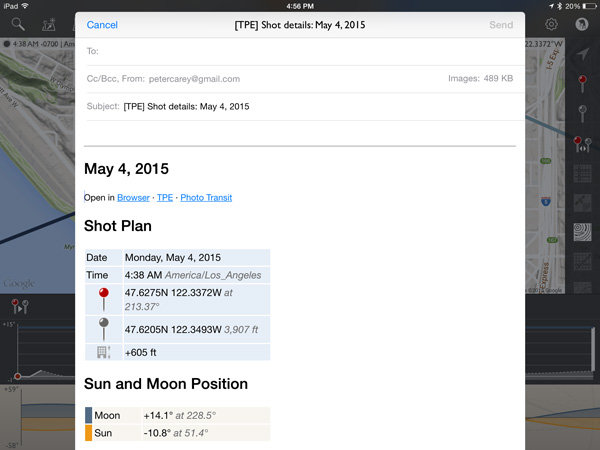
The email option includes all the pertinent information to share the details with a friend. It will attach a map and the recipient can open the information in the TPE (if they have it) or on the web browser version.
Conclusion
I left a lot of information out of this article because TPE simply has too many options to describe here. At its most basic though, it is excellent for placing the moon over various subjects.
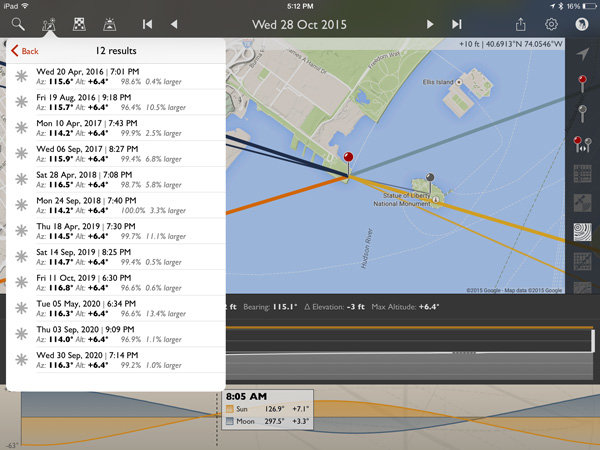
How about a full moon over the Statue of Liberty?
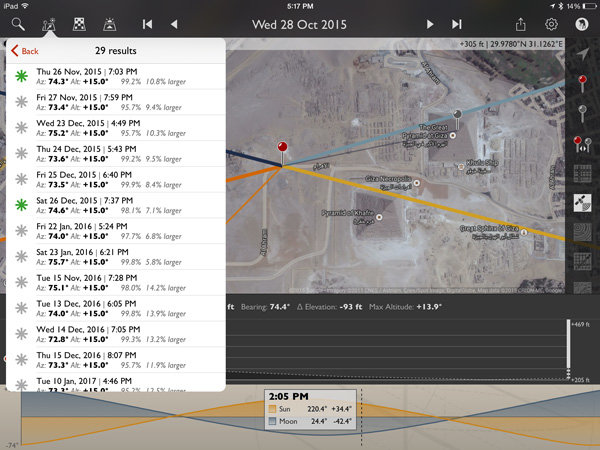
Or the Great Pyramid of Giza?
All it takes is a quick Wikipedia search for an object’s height and about two minutes in TPE to plan that moon shot you have been dreaming of!
For those wishing to explore further, TPE’s documentation is fairly complete and worth the read to unlock a wealth of photo planning power.
How can you use this tool in your photography?
googletag.cmd.push(function() {
tablet_slots.push( googletag.defineSlot( “/1005424/_dPSv4_tab-all-article-bottom_(300×250)”, [300, 250], “pb-ad-78623” ).addService( googletag.pubads() ) ); googletag.pubads().enableSingleRequest();
googletag.pubads().disableInitialLoad();
googletag.pubads().collapseEmptyDivs( true );
googletag.enableServices();
} );googletag.cmd.push( function() { googletag.display( ‘pb-ad-78623’ ); } );
googletag.cmd.push(function() {
mobile_slots.push( googletag.defineSlot( “/1005424/_dPSv4_mob-all-article-bottom_(300×250)”, [300, 250], “pb-ad-78158” ).addService( googletag.pubads() ) ); googletag.pubads().enableSingleRequest();
googletag.pubads().disableInitialLoad();
googletag.pubads().collapseEmptyDivs( true );
googletag.enableServices();
} );googletag.cmd.push( function() { googletag.display( ‘pb-ad-78158’ ); } );
The post Full Moon Photography Using The Photographer’s Ephemeris 3.0 by Peter West Carey appeared first on Digital Photography School.
-
Spring Photography Tips: Capturing the Full Bloom
Spring is a great season to capture different images. Here are some spring photography tips to help you capture the flowers, birds and animals for this colorful season. Spring is all about color, new life and lots of daylight. For a photographer there is nothing better than having a whole new world of landscape come alive to be captured through Continue Reading
The post Spring Photography Tips: Capturing the Full Bloom appeared first on Photodoto.
-
Fished to Freedom: Deserted Mall Full of Fish to be Demolished
[ By WebUrbanist in Abandoned Places & Architecture. ]
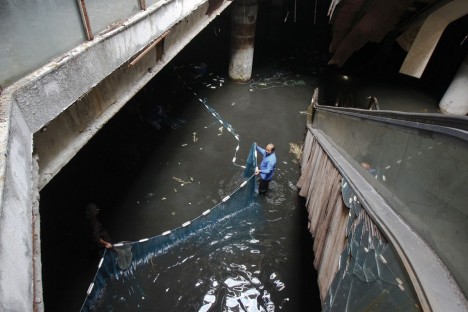
Though the circumstances of their liberation seem somewhat more political than practical, the thousands of fish set to be freed into the wild may not care much about the reasons for the positive change in venue either way.
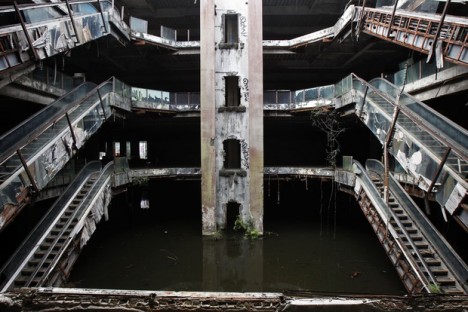
The ruins of the New World Mall in Bangkok, Thailand, were initially introduced by area vendors to a mixture of tilapia, carp and catfish after their roof collapsed, for indirectly obvious reasons: the stagnant water that subsequently collected in the void space had become breeding ground for mosquitoes.
The resulting informal fishery was fueled by tourists who came to see the strange site, which in turn captured the attention of the local government – as it turns out, abandoned buildings are not what most places want to be known for.
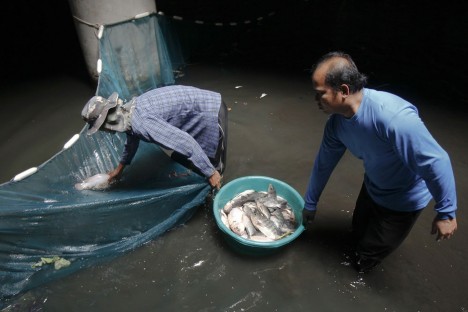
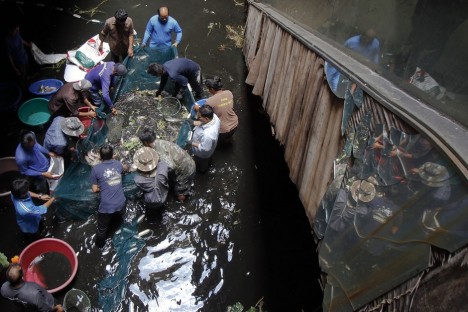
Presumably due to the high profile of the case, the fish are being treated with great care: caught in nets, they are being rounded by Bangkok Metropolitan Administration staff and sent to various lakes and streams around the region.
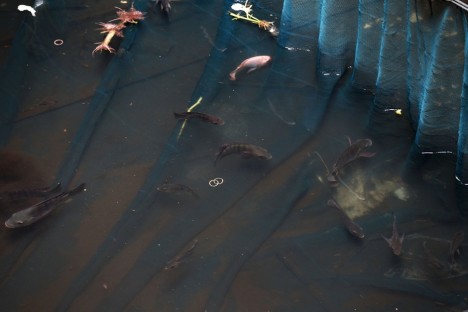
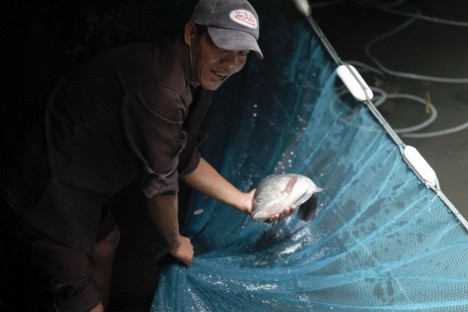
As to the structure itself: officials have called for its demolition and a court has ordered the corporation behind the failed structure (which never got proper permits) to pay for the draining, destruction and cleaning of the site. Update and images via CityLabs.
Want More? Click for Great Related Content on WebUrbanist:
Metro Koi: Thousands of Fish Occupy Abandoned Bangkok Mall
Built, closed, partially demolished, boarded up and ultimately deserted, the New World Mall in the capital city of Thailand has become home a strange and …
Click Here to Read More »»

24 Revealing Photos & Stories of Deserted Buildings
What is it about the cracking paint, the crumbling brick and the ominous silent of abandoned buildings that attracts urban explorers interested in building …
Click Here to Read More »»

Animal House: Woodland Creatures Adopt Deserted Cabins
These interior photos by Kai Fagerström depict wild forest inhabitants who have made derelict human-owned dwellings their own – domestic …
Click Here to Read More »»


[ By WebUrbanist in Abandoned Places & Architecture. ]
[ WebUrbanist | Archives | Galleries | Privacy | TOS ]
-
High-end full frame roundup (2014)
Which high-end full-frame camera should I buy? This roundup contains the majority of current full-frame camera offerings available. Full-frame cameras have image sensors as large as a frame of 35mm film, and for good reason: larger sensors offer the potential for better image quality, low light performance, and dynamic range. If you want a drastic upgrade to the image quality of your phone, or portraits with superior subject to background separation, it’s hard to beat what full-frame offers.
-
Modular Micro-Pad: 85 Sq Ft Loft Full of Slide-Out Surprises
[ By WebUrbanist in Design & Fixtures & Interiors. ]

Using a system of large sliding doors and functional-filled drawers to transform a maid’s quarters into a whole home, this small-footprint apartment in Paris gives a (much more positive) new meaning to the phrase ‘hole in the wall’.


Sleeping, cooking, eating, washing and storage are all packed into 8 square meters using a system of unfolding flat-pack furniture items, hidden spaces and dual-purpose built-ins, custom-designed by Kitoko Studio.


Like a Swiss Army Knife writ large, many items serve more than one use, like a staircase for climbing up to bed that also has built-in shelves that tuck back into the wall.


The kitchenette and bathroom are as compact as can be, packing essential plumbing into the tightest spaces possible in order to maximize the still-limited open space at the center of the design.


Bright white walls with minimal decor help the space feel lighter and more open despite its necessarily-cramped nature and odd wedge-shaped configuration.
Want More? Click for Great Related Content on WebUrbanist:
Split & Slide: Modular Dividers Make 3 Rooms in Single Space
Complimenting a flexible open area on one side of this apartment are a series of suspended separators that provide storage but also move along rails, opening …
Click Here to Read More »»
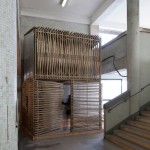
Modular Retrofit: Bamboo Micro-Homes in Deserted Factories
A pragmatic twist on visionary plug-and-play architecture, this project combines a cheap and fast-growing material with existing (abandoned) infrastructure to …
Click Here to Read More »»

Elastic Living: Sliding Shelves Hide Modular Rooms
Slide out the kitchen or bedroom when you need it and file it away when you’re done with this clever transforming modular interior series.
Click Here to Read More »»
[ By WebUrbanist in Design & Fixtures & Interiors. ]
[ WebUrbanist | Archives | Galleries | Privacy | TOS ]
-
Nikon D800 Review- The King Of Full Frame?
The Nikon D800 is a professional full frame camera from Nikon that features a whopping 36,3 megapixels, the autofocus system from the D4, and dual card slots. But is Nikon’s lightest full-frame DSLR capable of delivering the image quality and dynamic range that Nikon promises? Let’s find out… Here’s a quick rundown of the important specs and features: 36,3 MP Continue Reading
The post Nikon D800 Review- The King Of Full Frame? appeared first on Photodoto.
-
Zeiss launches Loxia full frame lenses for Sony E-mount
German optical manufacturer Zeiss has announced a new range of lenses called Loxia, designed for full frame cameras using the Sony E mount – essentially the Sony Alpha 7 series at the moment. The Loxia 2/35 and Loxia 2/50 are based on the company’s existing 35mm f/2 Biogon and 50mm f/2 Planar lenses from the ZM range. Read more
-
Tamron officially launches 28-300mm F3.5-6.3 full frame superzoom

Tamron has officially launched its 28-300mm F/3.5-6.3 Di VC PZD superzoom lens (Model A010) for full frame SLRs. A near-twin of the 16-300mm F3.5-6.3 for APS-C, it’s distinguished from the previous model by featuring an ultrasonic-type ‘Piezo Drive’ autofocus motor, splashproof construction and more-compact design with a 67mm filter thread. It’ll be available in Canon and Nikon mounts on June 26th for $ 849.
-
Full speed ahead: Sony a6000 Review

The Sony a6000 offers some considerable advantages over its Sony NEX-6 predecessor. It has a 24.3 megapixel APS-C sensor and an updated hybrid AF system with 179 phase-detect and 25 contrast-detect points. Also included is a built-in 1.44 million-dot EVF and a tilting 3.0-inch display with 921,600 dots. With an impressive AF system, fast 11 fps continuous shooting with subject tracking and lots of extras, the a6000 is poised very competitively in the mirrorless class. Read the review