Introduction
This tutorial is a demonstration of the SLR Lounge Lightroom 4 Preset System. With over 200 presets, the LR4 Preset System has been critically acclaimed as the most powerful and intuitive preset system available for Lightroom 4, click the link above to learn more/purchase. DPS users can get 10% off by using the DPS10 coupon code.
Overview
This is a step-by-step tutorial that will show you how to take a portrait and create to create a high contrast black and white portrait, as well as a film-like black and white portrait.
Lightroom 4 Preset System Mixology
If you own the SLR Lounge Lightroom 4 Preset System, this effect can be achieved in around 10 seconds. If you don’t own the preset system, please skip to Step 1 to learn how to do it manually.
High-Contrast Black & White Portrait
1. MY MIXOLOGY > 00 Standard Import
2. MY MIXOLOGY > 13 Standard B&W (Soft | Portrait)
3. BASE ADJUSTMENTS > 45 Medium Darken (Blacks)
Filmic Black & White Portrait
1. MY MIXOLOGY > 00 Standard Import
2. MY MIXOLOGY > 13 Standard B&W (Soft | Portrait)
3. ANTIQUE CURVES > 41 B&W (Vintage Punch)
4. BASE ADJUSTMENTS > 42 Neutral (Blacks)
5. BASE ADJUSTMENTS > 33 Light Boost (Contrast)
6. SPECIAL EFFECTS > 23 Medium (Film Grain)
The Original Image
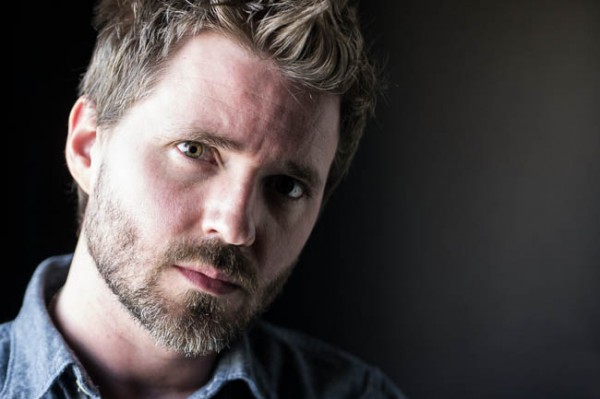
Step 1. Removing Dust and Particles from Our Image
Whenever we are preparing images for printing, we always run a Dust Correction Curve check to make sure that we don’t have any noticeable dust on our image. The great thing about this curve is that it is also useful in detecting dandruff on dark clothing in addition to any other distracting dust or flecks in the scene. We do this by applying the 82 Advanced Dust Correction Curve temporarily.
For those that don’t have the Lightroom 4 Preset System, here is what the curve looks like.
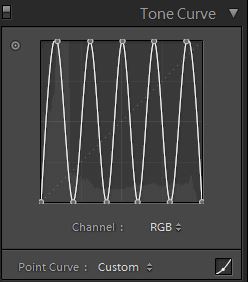
The spikes and troughs on the curve creates a super high contrast (and frankly quite wonky) look to our image which helps in detecting hard to see spots, dust, flecks and anything else that might be distracting as you can see below:
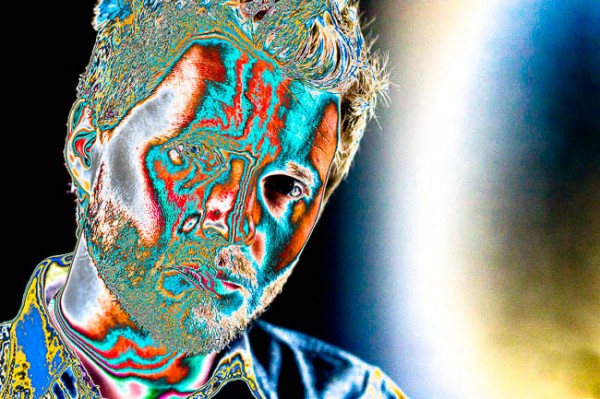
From here, we will select the Spot Removal Tool (Q) to remove any distracting elements.
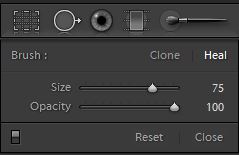
Once we have finished, we will simply reset the Curve (without resetting the Spot Removal adjustments that we just made).
Step 2. Applying Our Basic Adjustments
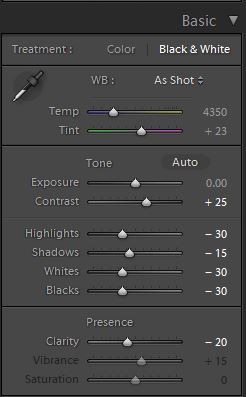
At this point, we need to first convert our image to Black and White by hitting “V”. Since this is a portrait, we will want to smooth out highlights on our skin tones, add contrast, and make other Basic Panel adjustments necessary for our Portrait. We are going to smooth skin tone highlights by decreasing our Highlights and Whites, while adding additional contrast by reducing our Shadows and Blacks. In addition, to further boost contrast, we will also adjust the Contrast slider. Finally, to further smooth the skin, let’s decrease Clarity. Your final Basic Panel adjustments should mirror the following:
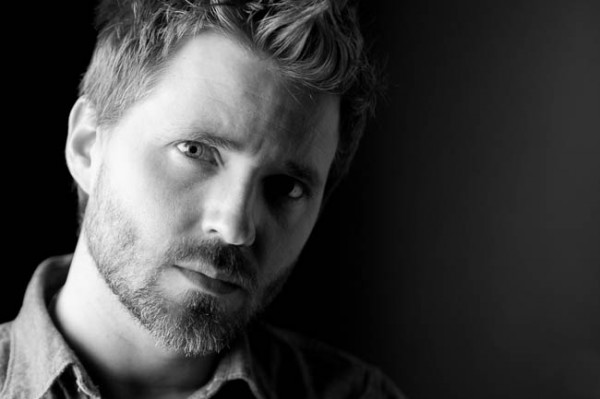
Your image should now look like the following:
Step 3. Adding Additional Contrast via Curves
The adjustments made to smooth out our highlights are leaving our image just a bit flat. Rather than adding additional contrast with the Contrast slider, we are going to do so with the Tone Curve so that we have more control over where the contrast is added.
Make sure that you are using the Point Curve mode by clicking on the Curve icon at the bottom-right of the panel.
Using a custom Tone Curve, we will dial in a subtle contrast boosting “S” curve that looks like the following:
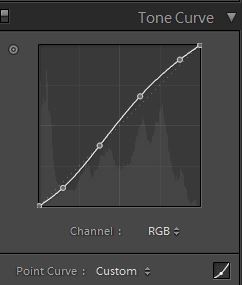
This adjustment is quite subtle, so let’s move on to the next step.
Step 4. Sharpening and Noise Reduction
Normally, if you are using the SLR Lounge Preset System, the Sharpening are automatically applied. Here is what we typically apply to our image:
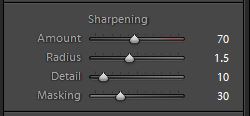
We also want to add Noise Reduction because we may have added some noise when we opened up the Shadows and Blacks. The key here is to balance out Noise Reduction and Sharpness so you can smooth out the skin while retaining the fine details in the hair and eyes. We use this setting for Noise Reduction:
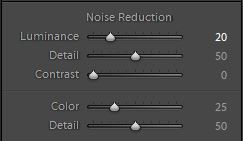
Finally, let’s add some Lens Vignetting at +30 Amount and +30 Midpoint simply to even out edge to edge brightness.
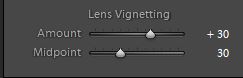
That is all the settings that we use to create our High-Contrast Black and White Portrait. Your image should look similar to the image below:

Now we are going to create a black and white image with a filmic look. At this point, let’s create a Virtual Copy of our image so we can retain both black and white versions by hitting CTRL+’ on Windows and CMD+’ on Mac.
Step 4. Applying Our Basic Adjustments
Compared to the High-Contrast Black and White Portrait, the filmic black and white portrait is going to have less contrast. Additionally, the blacks are lifted by zeroing out Blacks and Shadows. The Highlights, White, and Clarity are still lowered in order to smooth out the skin tone. We also want to keep Contrast at +25 in order to retain contrast across the tonal range.
Your Basic Panel adjustment should look like this:
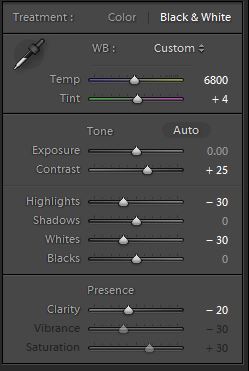
Your image should look like the following:
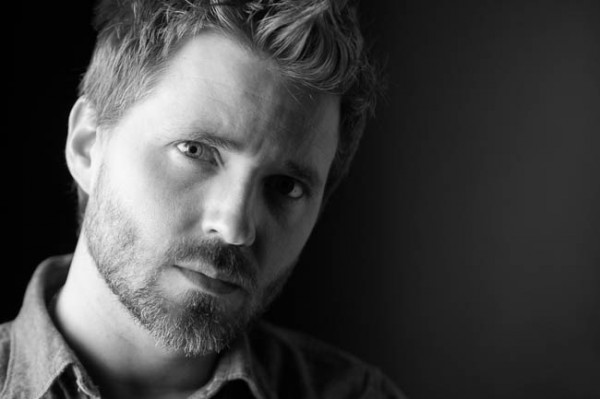
Step 5. Clipping The Blacks & Whites with Curves
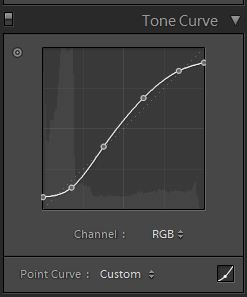
The Tone Curve is the key to achieving the filmic look that we are looking for. In order to limit the dynamic range on both the blacks and whites, we are going to clip both ends. Additionally, we are going to increase the shape of the ”S” curve in order to push the contrast outward towards the shadows and highlights. This will also compress the highlights and the shadows, as well. Your Tone Curve should look similar to this:
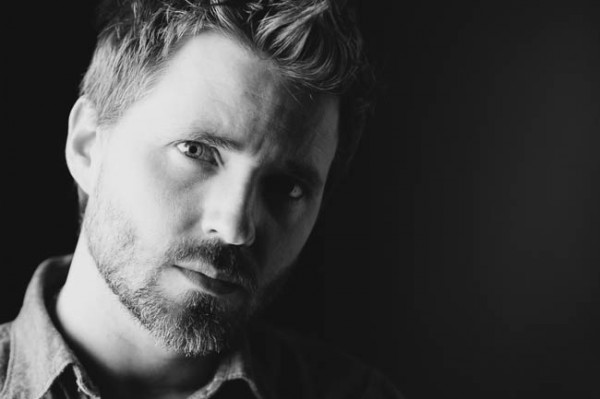
And your image should look like the following:
Step 6. Sharpening and Noise Reduction
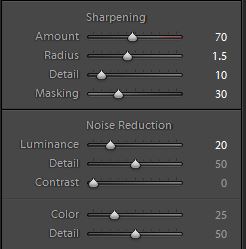
The Sharpening and Noise Reduction remain the same as the High-Contrast Black and White image, so your settings should look like the following:
Step 7. Darkening the Edges with Vignette
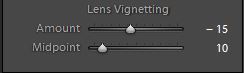
Instead of opening up the edges by adding a lighter Lens Vignette like we did with the High-Contrast Black and White, we are going to darken them instead. We are only darkening the edges subtly, so your Vignette should like this:
Step 8. Adding Film Grain
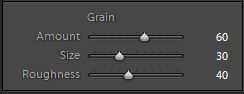
Finally, to achieve the filmic look for our Black and White portrait, we are going to add a medium amount of Grain to the image.
Here is the final image after we add the Film Grain:
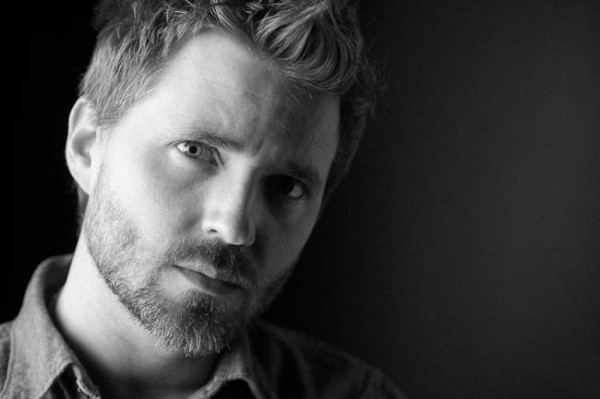
Final Before and After Images
Here are the before and after images comparing the original image against the High-Contrast Black and White image and the Filmic Black and White image that are created using the SLR Lounge Lightroom 4 Preset System.
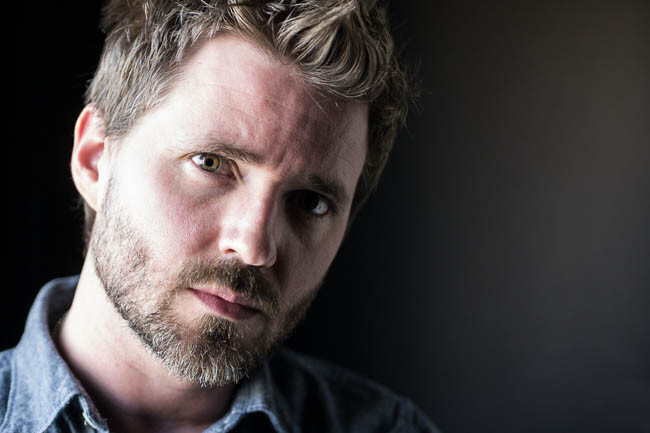
Original
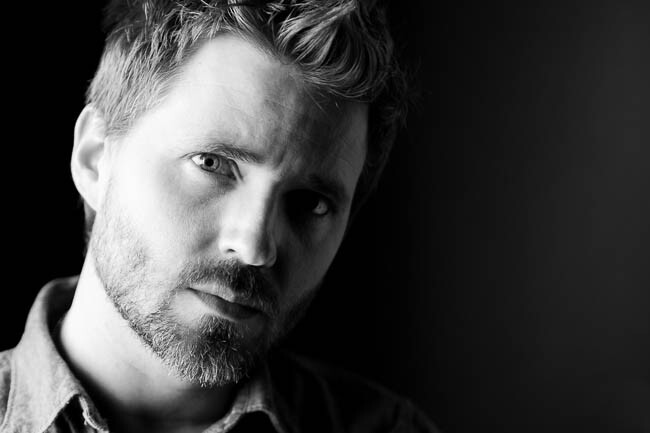
High Contrast Black and White
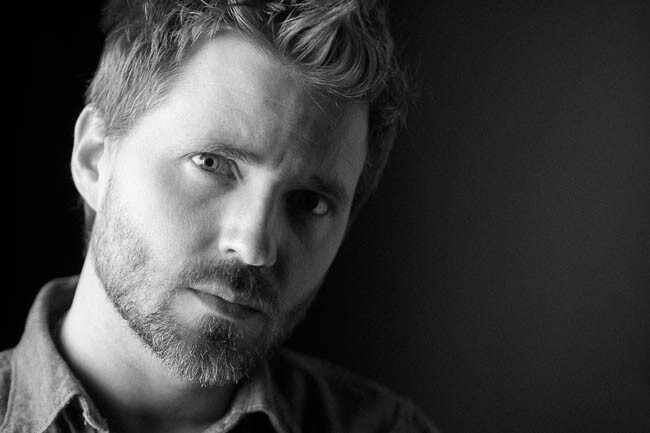
Filmic Black and White
The Lightroom 4 Preset System
The SLR Lounge Lightroom 4 Preset System is designed to enable users to achieve virtually any look and effect within 3-5 simple clicks. From basic color correction, vintage fades, black & white effects, tilt-shift effects, faux HDR, retouching, detail enhancing, and so much more. The sky is the limit with what has been dubbed the most powerful and intuitive preset system available. Click the link above to learn more/purchase.
Post originally from: Digital Photography Tips.
Check out our more Photography Tips at Photography Tips for Beginners, Portrait Photography Tips and Wedding Photography Tips.
How to Create a Black & White High-Contrast and Filmic Image in Lightroom 4


Digital Photography School


