RSS
 

Posts Tagged ‘Edges’

Cutting Edges: Layered Back-Lit Paper Art Gets Deep & Dark

09 Apr

[ By WebUrbanist in Art & Sculpture & Craft. ]

paper art cave people

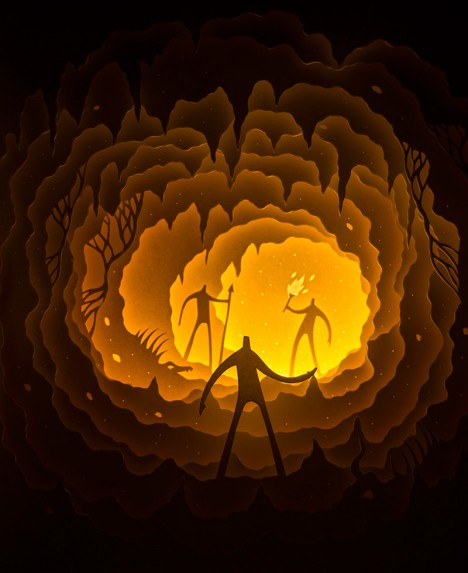
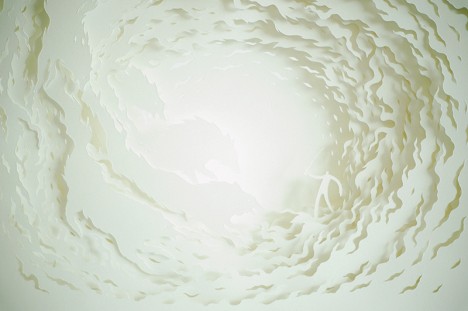
Together, Hari & Deepti (Deepti Nair and Harikrishnan Panicker) turn sets of two-dimensional cutouts into vivid and haunting three-dimensional dioramas, often set in shadowy fantasy spaces.

paper above and underground

paper sunken ship sea

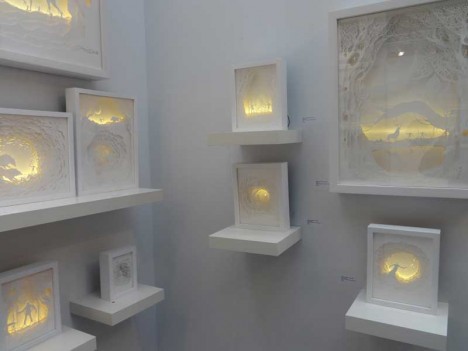
Despite the darkness of their subject matter, in ordinary lighting conditions there is almost nothing to be seen of these pieces. The work waits in the shadows, so to speak, popping out when you turn out the lights and turn on the LEDs inside each individual light box.

paper artist in context

paper art daylight

paper cut out art

Loosely analogous to a book, perhaps, the story plays out in the space between the pages, each one individually flat but, together with illumination, adding up to something more than the sum of its parts.

paper art fantasy scene

paper art on display

While most of their works are relatively small, a recent project challenged them to build at a much bigger scale, creating an entirely monstrous (pun intended) New York cityscape (shown below).

paper artist giant sized

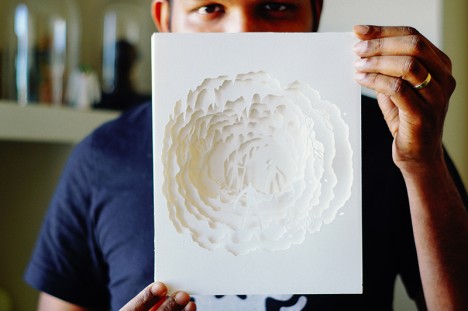
From the artists: “Paper is brutal in its simplicity as a medium. It demands the attention of the artist while it provides the softness they need to mold it in to something beautiful. It is playful, light, colorless and colorful. It is minimal and intricate. It reflects light, creates depth and illusions in a way that it takes the artist through a journey with limitless possibilities.”

Share on Facebook


[ By WebUrbanist in Art & Sculpture & Craft. ]

[ WebUrbanist | Archives | Galleries | Privacy | TOS ]


WebUrbanist

 
Comments Off on Cutting Edges: Layered Back-Lit Paper Art Gets Deep & Dark

Posted in Creativity


How to Sharpen Image Edges in Photoshop

18 Oct

How to Sharpen Image Edges in Photoshopopener

If you’re a Lightroom user you’ll know that in Lightroom you can mask the sharpening you apply to an image so it is applied to the edges in the image only. This same feature is not yet available in Photoshop and the sharpening filters there are applied to the entire image rather than just edge detail.

However you can achieve a reasonable approximation of the Lightroom masking feature in Photoshop using the Photoshop Find Edges filter. The benefit of this is you can apply more sharpening to the image than you would do without the masking effect and areas of flat color like skies and skin tones won’t be sharpened. Here’s how to do this.

How to Sharpen Image Edges in Photoshop

Once you have finished processing your image in Photoshop, flatten the image to a single layer or make a single layer of the edited image by adding a new layer at the top of the Layer palette and press Ctrl + Alt + Shift + E (Command + Option + Shift + E on the Mac) to create a flattened version of the image on that layer.

Duplicate the flattened layer twice.

How to Sharpen Image Edges in Photoshop 1

Target the topmost layer – you will create your sharpening mask from this layer. Choose Image > Adjustments > Desaturate to convert it to black and white then choose Filter > Stylize > Find Edges to isolate the edges in the image.

How to Sharpen Image Edges in Photoshop 2

Choose Image > Adjustments > Invert to invert the colors so that what is black is white and vice versa.

Choose Image > Adjustments > Levels and adjust the mask so that it shows white in the areas that you want to sharpen and black in those areas that you do not want to sharpen.

How to Sharpen Image Edges in Photoshop 3

Once you have a good mask, blur its edges slightly by choosing Filter > Blur > Gaussian Blur and apply a 1 or 2 pixel blur to it. When this is done, hide the sharpening mask layer by turning its visibility icon off in the Layer palette.

Now target the second topmost layer in the image and click the Add Layer Mask icon at the foot of the Layer palette.

How to Sharpen Image Edges in Photoshop 4

Click the mask thumbnail on this layer to target it and choose Image > Apply Image to open the Apply Image dialog. From the Layer dropdown list select the layer that contains the hidden sharpening mask, and click Ok.

How to Sharpen Image Edges in Photoshop 5

Click on the image thumbnail on this layer to target it and apply your sharpening to this layer – use Smart Sharpen or Unsharp Mask as desired. When you set the slider values, view the result on the image and not using the preview in the sharpening dialog. The preview in the dialog doesn’t take into account the mask you have applied – the image itself does. Click Ok when you’re done.

How to Sharpen Image Edges in Photoshop 6

To compare the before and after result of sharpening the image with an edge mask, Shift + Click on the mask layer thumbnail to disable it and see the image as it would look sharpened and without the masking effect. Click the mask thumbnail again to enable the mask again. You can discard the hidden mask layer now, if desired as it is no longer needed.

While this sharpening mask takes some effort to create once you’ve done it a few times you will find the process quite straightforward and some of its creation can be automated using Actions.

Post originally from: Digital Photography Tips.

Check out our more Photography Tips at Photography Tips for Beginners, Portrait Photography Tips and Wedding Photography Tips.

How to Sharpen Image Edges in Photoshop

The post How to Sharpen Image Edges in Photoshop by Helen Bradley appeared first on Digital Photography School.


Digital Photography School

 
Comments Off on How to Sharpen Image Edges in Photoshop

Posted in Photography


Darkening Edges Of Eyes Photoshop Lesson 4

01 Feb

www.1stoptutorials.com – Hey everyone in this tutorial and the next we are going to be looking in to some techniques in darkening the edges of eyes. We need to make sure we dont go to crazy with this otherwise it will not look real. When doing things like this we dont have to be too concerned in making a mistake as we can use a mask and also lower down the opacity to make it not look so strong. Let me know how you get on. Thanks everyone
Video Rating: 4 / 5

www.essential-photoshop-elements.com With Photoshop Elements it only takes a few quick steps to achieve the Grunge Effect
Video Rating: 5 / 5