Tag: Characters

  • How to Turn Your Kids into Star Wars Characters Using Photoshop

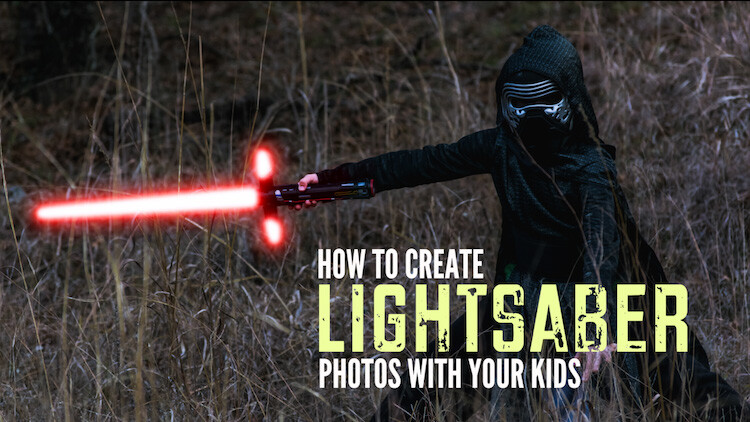
    Do your kids love Star Wars? Do you love photography? If so, here’s a great opportunity to join forces and turn your kids into Star Wars heroes or villains by giving them the ultimate Star Wars weapon, the lightsaber.
    How to Turn Your Kids into Star Wars Characters Using Adobe Photoshop

    All you need to awaken the force are these three steps:

    1. The setup
    2. Capturing the shot
    3. Light up your sabers using Photoshop

    BONUS tip – The Jumping Jedi

    Step #1 – The Setup

    For the setup, you will want to make sure that the photographs of your kids look as close to a Star Wars scene as possible. Don’t just take a picture of your kids wearing a t-shirt standing in the kitchen. Luke Skywalker doesn’t light up his lightsaber in a kitchen. Your kids will have a lot of fun getting into character, so spend some time on the setup.

    Costumes

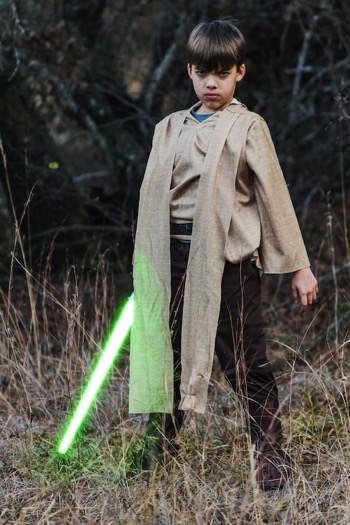
    You can buy costumes for your kids on Amazon. Here are the costumes used in this tutorial.

    • Luke Skywalker
    • Rey
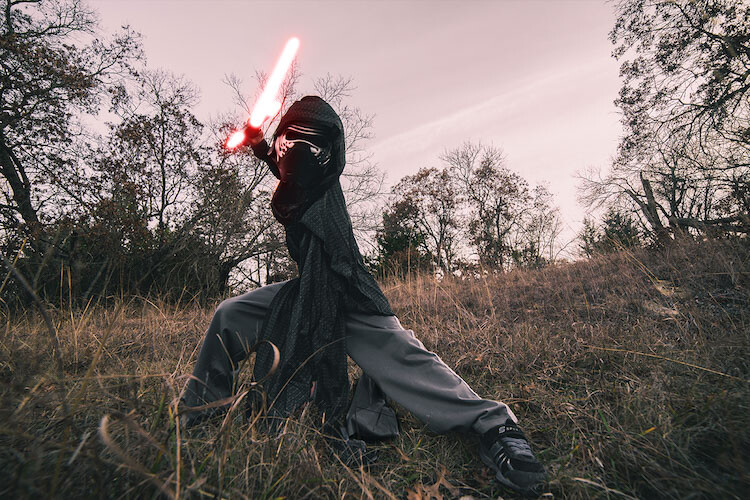
    • Kylo Ren
    • Lightsabers
    • Total customs cost ~ $ 40-70

    Location

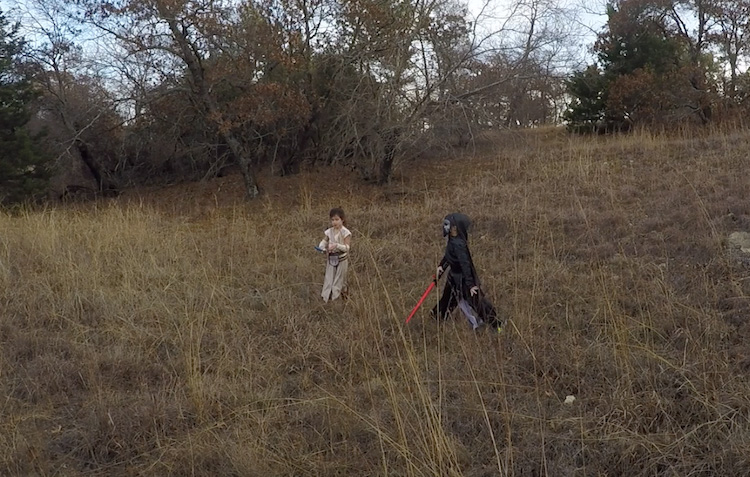
    For the location, you will want to find a place that looks like it could be a scene in any of the Star Wars movies. The easiest location to use would be a park with trees, and no noticeable man-made objects in sight.
    2 Location - How to Turn Your Kids into Star Wars Characters Using Adobe Photoshop

    Step #2 – Capturing the Shot

    Action shots

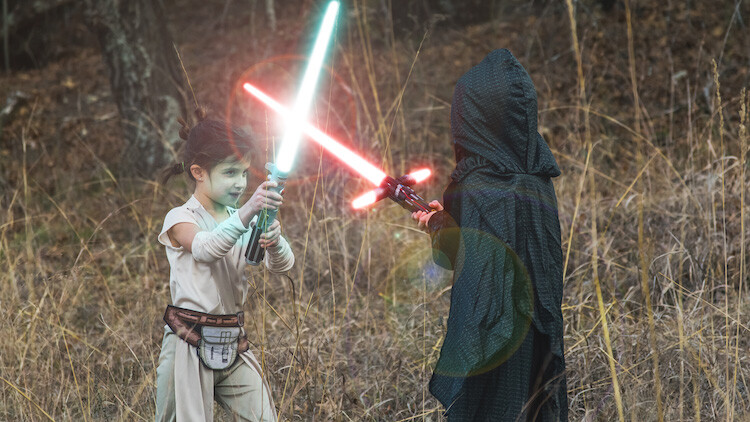
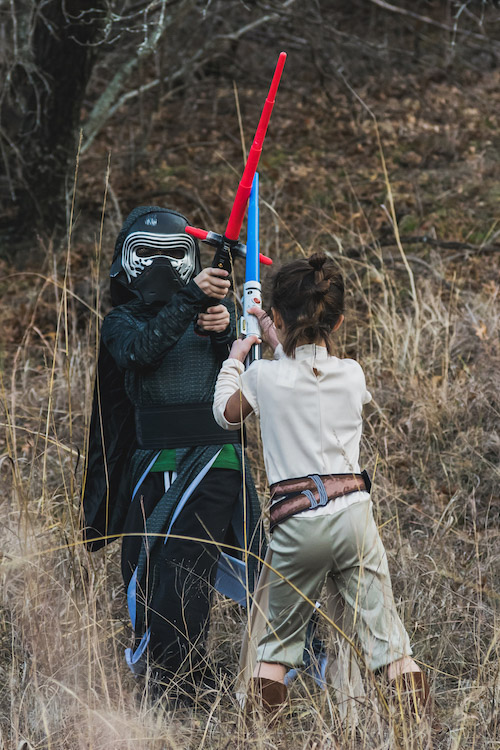
    For action shots of a lightsaber battle, you will want to use a fast shutter speed of at least 1/500th of a second, and set your camera to continuous (burst) shooting mode. This will allow you to freeze the action of the battle and take multiple shots in sequence to ensure you capture the best of the action.
    4 Action shot - How to Turn Your Kids into Star Wars Characters Using Adobe Photoshop

    Shutter speed was 1/800th of a second.

    Portraits

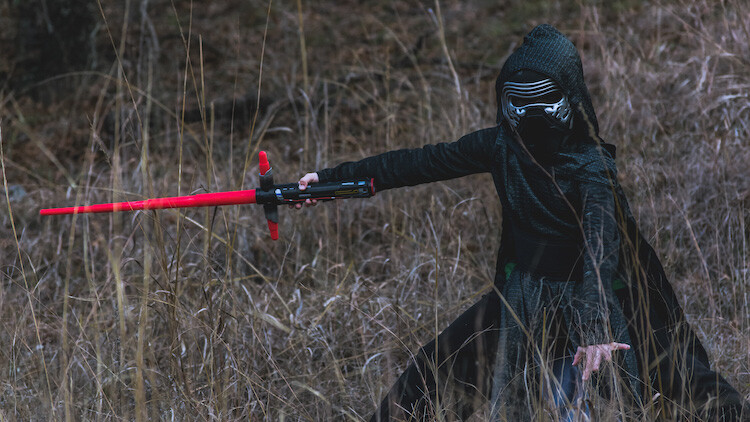
    For the portraits, give your kids some epic poses to follow. To give you ideas for creative poses, do a Google images search for the Star Wars character of your choice. This will also help your child get more into the character. For example here are some for Rey.
    5 Portrait pose - How to Turn Your Kids into Star Wars Characters Using Adobe Photoshop

    Do basic edits to the image

    After you capture the image, you will need to make a few adjustments to the image to make it stand out. This can be done in Adobe Lightroom and is the final step before your photo is ready to go into Photoshop for the lightsaber effect.

    For the look of Star Wars, a few basic edits, such as increasing the contrast and the clarity will help give it a rough and grungy look that Star Wars is known for.
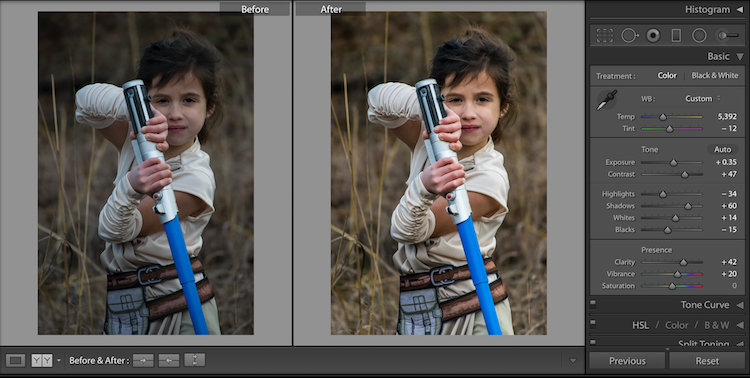
    6 Before After Lightroom Edit Star Wars

    Notice the differences between the before and after of this image by making a few basic edits in Adobe Lightroom.

    Step #3 – Light your sabers up in Photoshop

    Adding the lightsaber effect is the last and final step in making turning your kid into the Star Wars character of their dreams. This process should take about five minutes per photo once you have done it a few times.

    Part 1: Prepare the layer

    Start by creating a duplicate layer by pressing CTRL/CMD + J.
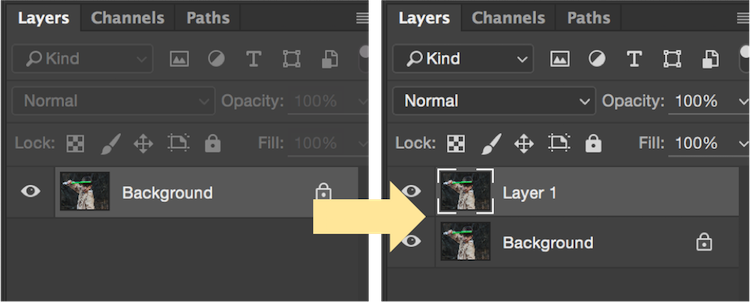
    8 Duplicate layer - Star Wars character in Photoshop

    Select the icon to create a new fill or adjustment layer, and from that menu select Hue/Saturation. Then, move the lightness slider to -100 to make it black.
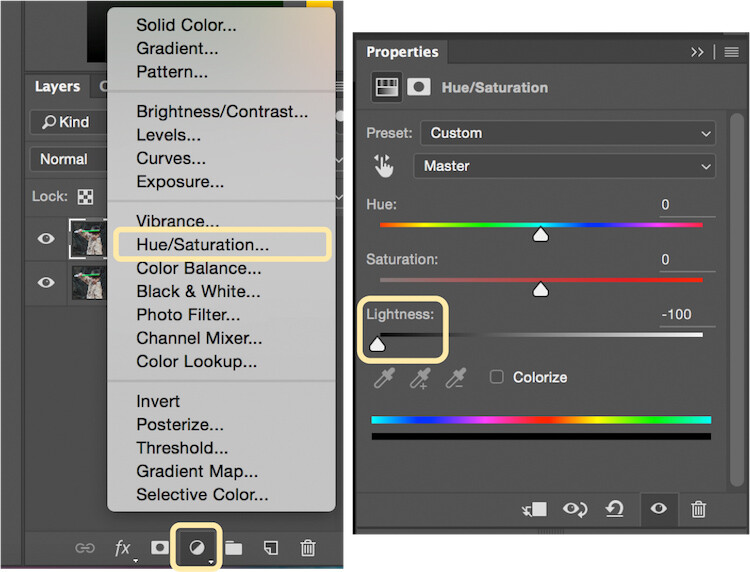
    9 Hue Saturation

    Select CTRL/CMD + E to merge the adjustment layer and duplicate layer. Next, set the blending mode drop down to Screen.
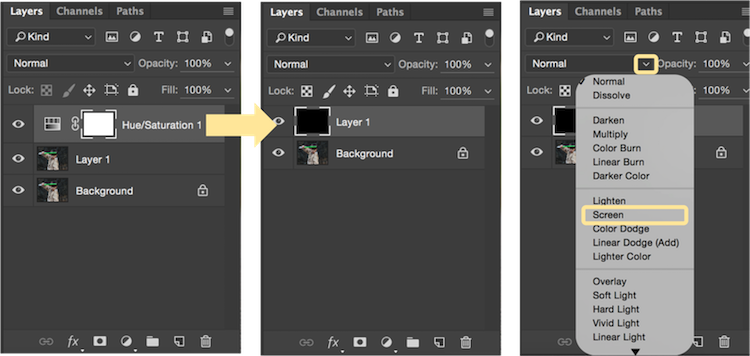
    10 merge and screen Star Wars

    At this point, your layers are prepped and ready to add the lightsaber.

    Part 2: Add the lightsaber by using the brush tool

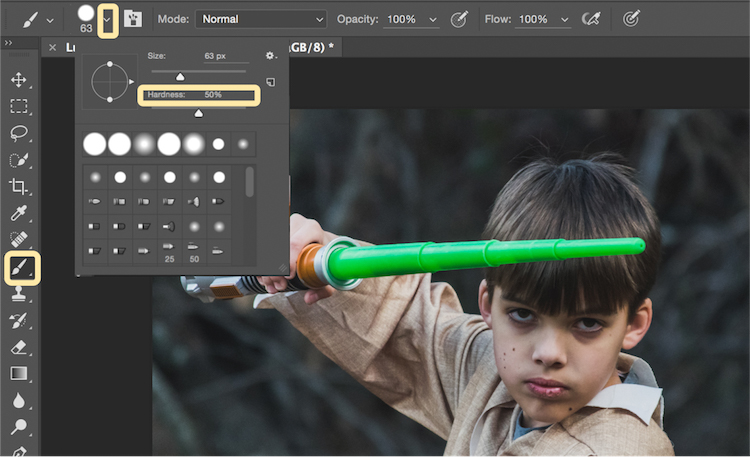
    Select the brush tool, and adjust the size and hardness of the brush. The size of your brush will vary based on the size of the lightsaber and your image. Set the hardness of the brush to approximately 50%.
    11 brush selection

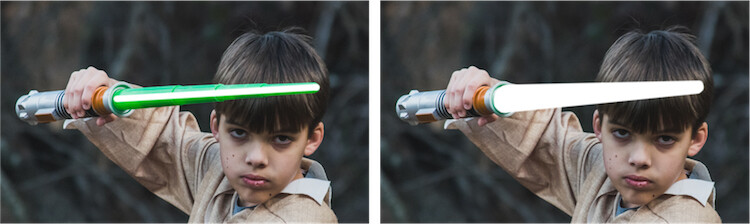
    Begin to add your lightsaber using brush strokes. Select the end point of the lightsaber, then hold down shift, and click the other end of the lightsaber to draw a straight line. Repeat these lines multiple times to fill in the lightsaber with brush strokes. You will likely need to add free-form brush strokes around the base of the lightsaber to fill it in.
    12 draw the saber

    Illuminate the lightsaber

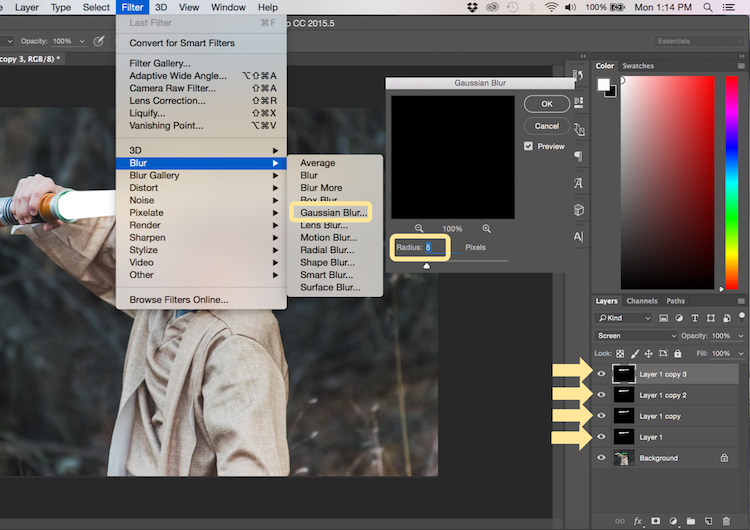
    The next step allows you to illuminate the lightsaber. Create three duplicate layers of the lightsaber by selecting CTRL/CMD + J three times. For each layer, you will then select Filter > Blur > Gaussian Blur. But, each layer will be set to a different radius setting. For this image, we used 5, 15, 35, 75 for each respective layer. Note, that the amount of Gaussian Blur needed may vary based on the size of your image. Adjust these numbers as needed to ensure you have a nice glow from the lightsaber.
    13 Gausian Blur

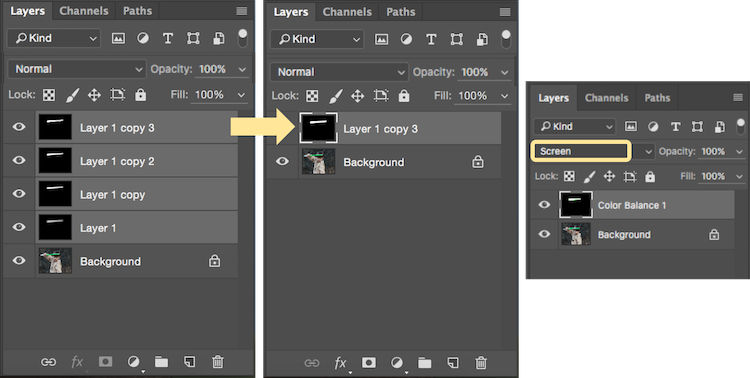
    Select all of the duplicate layers (do not select the background), and merge them into one layer by pressing CTRL/CMD + E. Then set the blending mode to Screen.
    14 Merge and Screen

    Add color to the lightsaber

    It’s now time to add color to your lightsaber. Select the icon to create a new fill or adjustment layer, and choose the option for Color Balance. Activate the clipping mask so that you only add color to the lightsaber, not the entire image. You can choose any color of your choice, but in this example, we are working with green.

    You will want to add the color selection to each option for Shadows, Midtones, and Highlights. Adjust the color slider up or down based on the color preferences for your lightsaber. For this photo, we set shadows, midtones, and highlights to green at around +65.
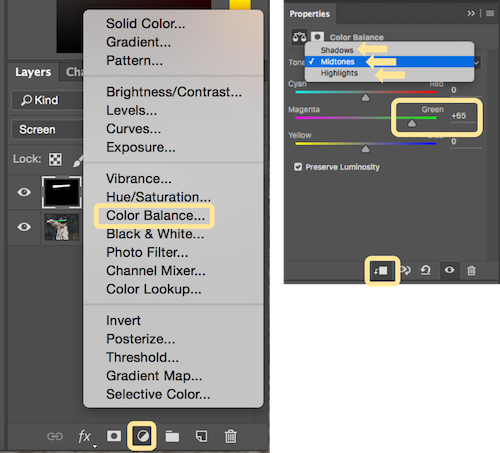
    15 Color Lightsaber

    Your lightsaber is now complete, but there is still one more important step to get a realistic photo. You need to add some glow to the subject from the illumination coming off of the lightsaber.

    Part 3: Add the reflective glow from the lightsaber

    Select the background or base layer. Click the icon to create a new fill or adjustment layer, and choose the option for Color Balance. Choose the same color as you used for your lightsaber, but this time as you adjust the color for Shadows, Midtones, and Highlights, it will work best if you emphasize the color around the highlights more than the shadows or Midtones. For this photo, we used Shadows +32, Midtones +38, and Highlights +70
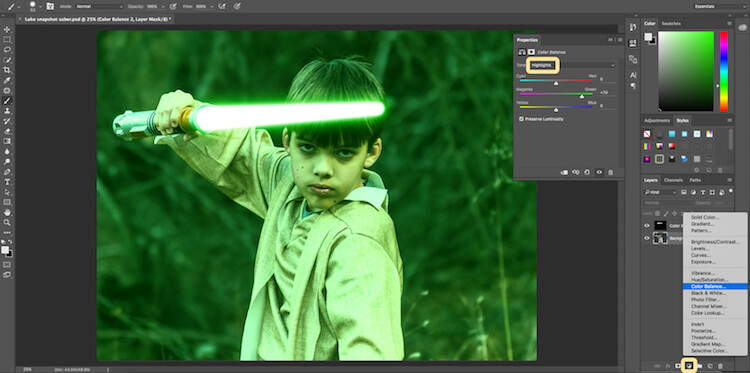
    16 Color for Glow

    Add a vector mask and then select CTRL/CMD + I to hide all of the color balance. Select the brush tool, and make it a soft edge brush with an opacity around +18. This will allow you to brush in a soft reflection of glow to parts of the image that make it look realistic.
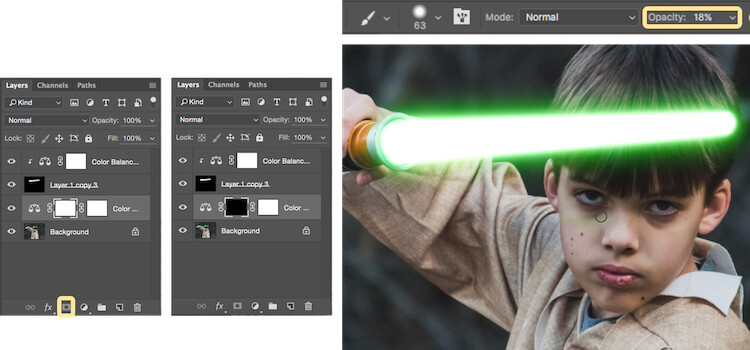
    17 Brush in glow reflection

    Bonus – Jumping Jedi

    A bonus tip that you may want to use in your Star Wars photo shoot is a jumping Jedi. With a few simple tricks, you can give the illusion of your Jedi jumping high into the air over a swinging lightsaber.

    First, make sure you use a tripod as you will need the camera to be completely stationary for two different shots. You can have your Jedi jump off a chair at the same time that his enemy swings his lightsaber. Then remove the chair and capture a shot of the exact same scene, but this time without the chair or characters in the shot (tripod use is important for image alignment later).

    The second shot should be empty with the exception of the background because it will allow you to take the chair out of the original picture to create the illusion of a jumping Jedi.
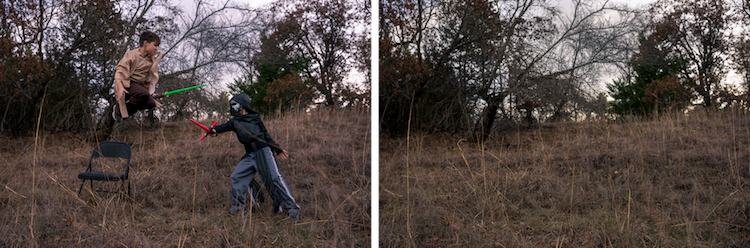
    19 Jumping jedi tripod shots

    Here’s how it’s done in Photoshop.

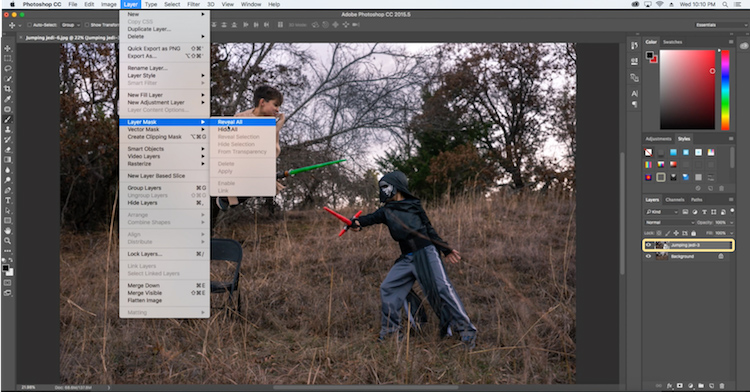
    Start by opening both photos as layers. You will want the empty background shot to be set as the base layer and the action shot as the top one. Select the top layer of the action shot, and click Layer > Layer Mask > Reveal all.
    20 Jumping Jedi mask

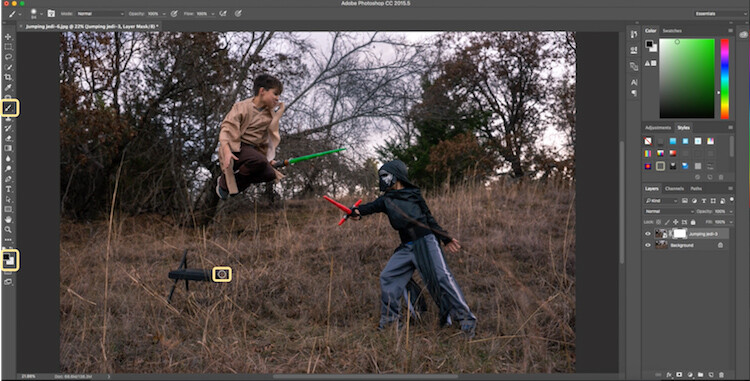
    Select the brush tool, and make sure that your foreground color is set to black, which will allow you to brush away the top layer to reveal some of the base layer. If your foreground color is set to white as opposed to black you can switch it to black by clicking X. Simply brush over the chair (make sure you are painting on the mask NOT the layer) to make it disappear.
    21 Jumping Jedi brush away

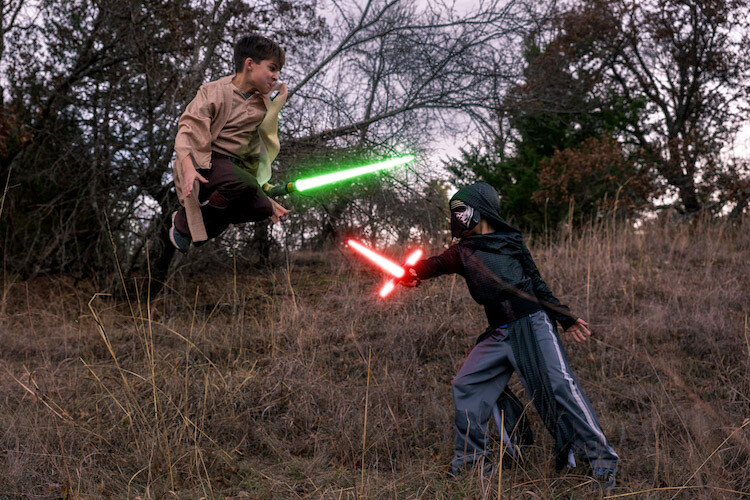
    Add the lightsaber effect from above, and you have the illusion of a jumping Jedi.
    22 Final photo Jumping Jedi

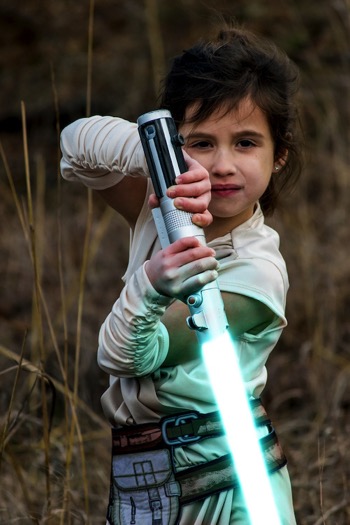
    Below are some additional examples of the final images from this Star Wars project to give you additional ideas for action shots and portraits to bring your characters to life.
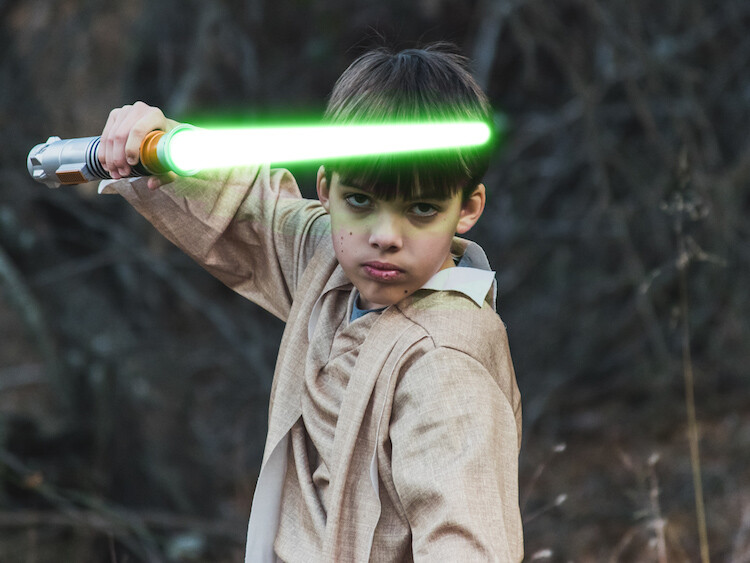
    28 Final photo Rey portrait 29 Final Photo Luke portrait

    30 Kylo Ren Red

    27 Final photo saber battle

    Finally

    You can watch this whole process in the follow short video as well:

    Note: thanks to my co-author on this article, David Kahl.

    Try to awaken the force in your family by giving them a lightsaber and following this tutorial. In addition, leave a comment with any other fun photography projects that you have captured with your kids or family. Share your images if you give this a go, we’d love to see them!

    googletag.cmd.push(function() {
    tablet_slots.push( googletag.defineSlot( “/1005424/_dPSv4_tab-all-article-bottom_(300×250)”, [300, 250], “pb-ad-78623” ).addService( googletag.pubads() ) ); } );

    googletag.cmd.push(function() {
    mobile_slots.push( googletag.defineSlot( “/1005424/_dPSv4_mob-all-article-bottom_(300×250)”, [300, 250], “pb-ad-78158” ).addService( googletag.pubads() ) ); } );

    The post How to Turn Your Kids into Star Wars Characters Using Photoshop by Paul Fontanelli appeared first on Digital Photography School.
    Digital Photography School

  • How to Turn Your Kids into Star Wars Characters Using Photoshop

    Do your kids love Star Wars? Do you love photography? If so, here’s a great opportunity to join forces and turn your kids into Star Wars heroes or villains by giving them the ultimate Star Wars weapon, the lightsaber.

    How to Turn Your Kids into Star Wars Characters Using Adobe Photoshop

    All you need to awaken the force are these three steps:

    1. The setup
    2. Capturing the shot
    3. Light up your sabers using Photoshop

    BONUS tip – The Jumping Jedi

    Step #1 – The Setup

    For the setup, you will want to make sure that the photographs of your kids look as close to a Star Wars scene as possible. Don’t just take a picture of your kids wearing a t-shirt standing in the kitchen. Luke Skywalker doesn’t light up his lightsaber in a kitchen. Your kids will have a lot of fun getting into character, so spend some time on the setup.

    Costumes

    You can buy costumes for your kids on Amazon. Here are the costumes used in this tutorial.

    • Luke Skywalker
    • Rey
    • Kylo Ren
    • Lightsabers
    • Total customs cost ~ $ 40-70

    Location

    For the location, you will want to find a place that looks like it could be a scene in any of the Star Wars movies. The easiest location to use would be a park with trees, and no noticeable man-made objects in sight.

    2 Location - How to Turn Your Kids into Star Wars Characters Using Adobe Photoshop

    Step #2 – Capturing the Shot

    Action shots

    For action shots of a lightsaber battle, you will want to use a fast shutter speed of at least 1/500th of a second, and set your camera to continuous (burst) shooting mode. This will allow you to freeze the action of the battle and take multiple shots in sequence to ensure you capture the best of the action.

    4 Action shot - How to Turn Your Kids into Star Wars Characters Using Adobe Photoshop

    Shutter speed was 1/800th of a second.

    Portraits

    For the portraits, give your kids some epic poses to follow. To give you ideas for creative poses, do a Google images search for the Star Wars character of your choice. This will also help your child get more into the character. For example here are some for Rey.

    5 Portrait pose - How to Turn Your Kids into Star Wars Characters Using Adobe Photoshop

    Do basic edits to the image

    After you capture the image, you will need to make a few adjustments to the image to make it stand out. This can be done in Adobe Lightroom and is the final step before your photo is ready to go into Photoshop for the lightsaber effect.

    For the look of Star Wars, a few basic edits, such as increasing the contrast and the clarity will help give it a rough and grungy look that Star Wars is known for.

    6 Before After Lightroom Edit Star Wars

    Notice the differences between the before and after of this image by making a few basic edits in Adobe Lightroom.

    Step #3 – Light your sabers up in Photoshop

    Adding the lightsaber effect is the last and final step in making turning your kid into the Star Wars character of their dreams. This process should take about five minutes per photo once you have done it a few times.

    Part 1: Prepare the layer

    Start by creating a duplicate layer by pressing CTRL/CMD + J.

    8 Duplicate layer - Star Wars character in Photoshop

    Select the icon to create a new fill or adjustment layer, and from that menu select Hue/Saturation. Then, move the lightness slider to -100 to make it black.

    9 Hue Saturation

    Select CTRL/CMD + E to merge the adjustment layer and duplicate layer. Next, set the blending mode drop down to Screen.

    10 merge and screen Star Wars

    At this point, your layers are prepped and ready to add the lightsaber.

    Part 2: Add the lightsaber by using the brush tool

    Select the brush tool, and adjust the size and hardness of the brush. The size of your brush will vary based on the size of the lightsaber and your image. Set the hardness of the brush to approximately 50%.

    11 brush selection

    Begin to add your lightsaber using brush strokes. Select the end point of the lightsaber, then hold down shift, and click the other end of the lightsaber to draw a straight line. Repeat these lines multiple times to fill in the lightsaber with brush strokes. You will likely need to add free-form brush strokes around the base of the lightsaber to fill it in.

    12 draw the saber

    Illuminate the lightsaber

    The next step allows you to illuminate the lightsaber. Create three duplicate layers of the lightsaber by selecting CTRL/CMD + J three times. For each layer, you will then select Filter > Blur > Gaussian Blur. But, each layer will be set to a different radius setting. For this image, we used 5, 15, 35, 75 for each respective layer. Note, that the amount of Gaussian Blur needed may vary based on the size of your image. Adjust these numbers as needed to ensure you have a nice glow from the lightsaber.

    13 Gausian Blur

    Select all of the duplicate layers (do not select the background), and merge them into one layer by pressing CTRL/CMD + E. Then set the blending mode to Screen.

    14 Merge and Screen

    Add color to the lightsaber

    It’s now time to add color to your lightsaber. Select the icon to create a new fill or adjustment layer, and choose the option for Color Balance. Activate the clipping mask so that you only add color to the lightsaber, not the entire image. You can choose any color of your choice, but in this example, we are working with green.

    You will want to add the color selection to each option for Shadows, Midtones, and Highlights. Adjust the color slider up or down based on the color preferences for your lightsaber. For this photo, we set shadows, midtones, and highlights to green at around +65.

    15 Color Lightsaber

    Your lightsaber is now complete, but there is still one more important step to get a realistic photo. You need to add some glow to the subject from the illumination coming off of the lightsaber.

    Part 3: Add the reflective glow from the lightsaber

    Select the background or base layer. Click the icon to create a new fill or adjustment layer, and choose the option for Color Balance. Choose the same color as you used for your lightsaber, but this time as you adjust the color for Shadows, Midtones, and Highlights, it will work best if you emphasize the color around the highlights more than the shadows or Midtones. For this photo, we used Shadows +32, Midtones +38, and Highlights +70

    16 Color for Glow

    Add a vector mask and then select CTRL/CMD + I to hide all of the color balance. Select the brush tool, and make it a soft edge brush with an opacity around +18. This will allow you to brush in a soft reflection of glow to parts of the image that make it look realistic.

    17 Brush in glow reflection

    Bonus – Jumping Jedi

    A bonus tip that you may want to use in your Star Wars photo shoot is a jumping Jedi. With a few simple tricks, you can give the illusion of your Jedi jumping high into the air over a swinging lightsaber.

    First, make sure you use a tripod as you will need the camera to be completely stationary for two different shots. You can have your Jedi jump off a chair at the same time that his enemy swings his lightsaber. Then remove the chair and capture a shot of the exact same scene, but this time without the chair or characters in the shot (tripod use is important for image alignment later).

    The second shot should be empty with the exception of the background because it will allow you to take the chair out of the original picture to create the illusion of a jumping Jedi.

    19 Jumping jedi tripod shots

    Here’s how it’s done in Photoshop.

    Start by opening both photos as layers. You will want the empty background shot to be set as the base layer and the action shot as the top one. Select the top layer of the action shot, and click Layer > Layer Mask > Reveal all.

    20 Jumping Jedi mask

    Select the brush tool, and make sure that your foreground color is set to black, which will allow you to brush away the top layer to reveal some of the base layer. If your foreground color is set to white as opposed to black you can switch it to black by clicking X. Simply brush over the chair (make sure you are painting on the mask NOT the layer) to make it disappear.

    21 Jumping Jedi brush away

    Add the lightsaber effect from above, and you have the illusion of a jumping Jedi.

    22 Final photo Jumping Jedi

    Below are some additional examples of the final images from this Star Wars project to give you additional ideas for action shots and portraits to bring your characters to life.

    28 Final photo Rey portrait 29 Final Photo Luke portrait

    30 Kylo Ren Red

    27 Final photo saber battle

    Finally

    You can watch this whole process in the follow short video as well:

    Note: thanks to my co-author on this article, David Kahl.

    Try to awaken the force in your family by giving them a lightsaber and following this tutorial. In addition, leave a comment with any other fun photography projects that you have captured with your kids or family. Share your images if you give this a go, we’d love to see them!

    googletag.cmd.push(function() {
    tablet_slots.push( googletag.defineSlot( “/1005424/_dPSv4_tab-all-article-bottom_(300×250)”, [300, 250], “pb-ad-78623” ).addService( googletag.pubads() ) ); } );

    googletag.cmd.push(function() {
    mobile_slots.push( googletag.defineSlot( “/1005424/_dPSv4_mob-all-article-bottom_(300×250)”, [300, 250], “pb-ad-78158” ).addService( googletag.pubads() ) ); } );

    The post How to Turn Your Kids into Star Wars Characters Using Photoshop by Paul Fontanelli appeared first on Digital Photography School.

    Digital Photography School

  • 11 Amazing Photos Pokémon Go Characters Fit Perfectly In

    While Pokémon Go is quickly becoming a new fitness, it’s no wonder that Pokémon characters are now among the most popular photography subjects. Well, most of such photos are just screenshots meant to show the Pokémon rather than carry any photographic appeal. However, the game is just a few days old (right, days!), so it’s probably won’t be too long Continue Reading

    The post 11 Amazing Photos Pokémon Go Characters Fit Perfectly In appeared first on Photodoto.


    Photodoto

  • 11 Amazing Photos Pokémon Go Characters Fit Perfectly In

    While Pokémon Go is quickly becoming a new fitness, it’s no wonder that Pokémon characters are now among the most popular photography subjects. Well, most of such photos are just screenshots meant to show the Pokémon rather than carry any photographic appeal. However, the game is just a few days old (right, days!), so it’s probably won’t be too long Continue Reading

    The post 11 Amazing Photos Pokémon Go Characters Fit Perfectly In appeared first on Photodoto.


    Photodoto

  • Depth-Defying Art: 3D Chalk Characters Blend into City Streets

    [ By WebUrbanist in Art & Street Art & Graffiti. ]

    chalk hidden mouse

    Bringing a certain subtly and sense of humor back to three-dimensional chalk art, David Zenn creates highly-contextual scenes using an array of animal characters, all interacting with urban environments.

    crack dog rescue

    For decades, he has used chalk and charcoal to feature pieces that tie into their surroundings, relating to anything from fallen flowers to cracks in the sidewalk.

    interactive chalk figures copy

    Rats, bears, lizards, dogs and other less-identifiable animalian hybrids can be found lounging around, floating balloons or hiding in imagined holes, like refugees from a wild children’s book.

    trapped cat

    chalk mouse warrior

    chalk mouse player

    wall mice

    reading light

    Over time, a cast of regular characters has evolved, appearing in different places, telling a story through each sequential work of art. Some of his archival prints are for sale, as well as his book Temporary Preserves (via Colossal).

    Share on Facebook


    [ By WebUrbanist in Art & Street Art & Graffiti. ]

    [ WebUrbanist | Archives | Galleries | Privacy | TOS ]


    WebUrbanist

  • Phonetikana: Embedding English into Japanese Characters

    [ By WebUrbanist in Design & Graphics & Branding. ]

    phonetikana phonetic japanese alphabet

    Nothing gets lost in translation with these embedded English pronunciations, tied directly into the Japanese typographic style Katakana. While the letterforms of Katakana create an effectively phonetic alphabet, its characters are still difficult for some foreigners to read, at least until now.

    word

    p8

    Like many design solutions, this one looks easy in retrospect: simply tuck an English-legible phonetic articulation guide using a capped alphabet inside the Japanese characters. The result: Phonetikana, a potentially very powerful tool for communication, teaching and learning, or even signage in places like international airports or multinational conventions.

    p3

    p4

    From the creators: “Multiple trips to Japan and constant frustration at being unable to read the language has sparked off an unusual typographic project at johnson banks. Earlier in the year we started seeing if we could combine the English language and Japanese script in some way.”

    p9

    p7

    p5

    p6

    The firm went a step further as well, embedding words and phrases inside symbols to create a children-legible introductory guide to Japanese, reinforcing connections between each sound and symbol set. Meanwhile, the hybrid typography remains a work in progress, but definitely on the right linguistic track.

    Share on Facebook


    [ By WebUrbanist in Design & Graphics & Branding. ]

    [ WebUrbanist | Archives | Galleries | Privacy | TOS ]


    WebUrbanist

  • Your Neighbor Darth Vader: Doorbells for Fictional Characters

    [ By Steph in Art & Street Art & Graffiti. ]

    the ringer 1

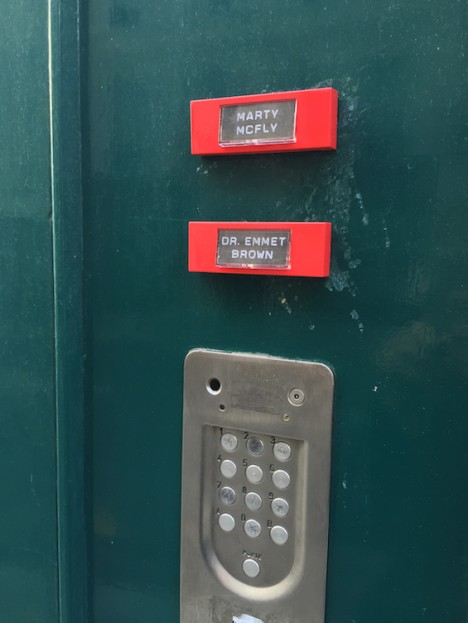
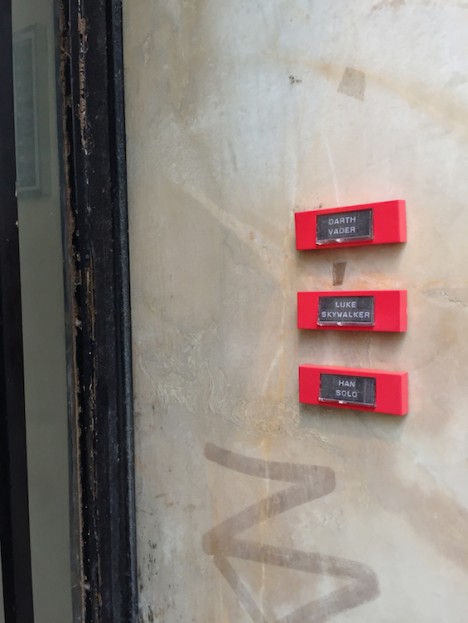
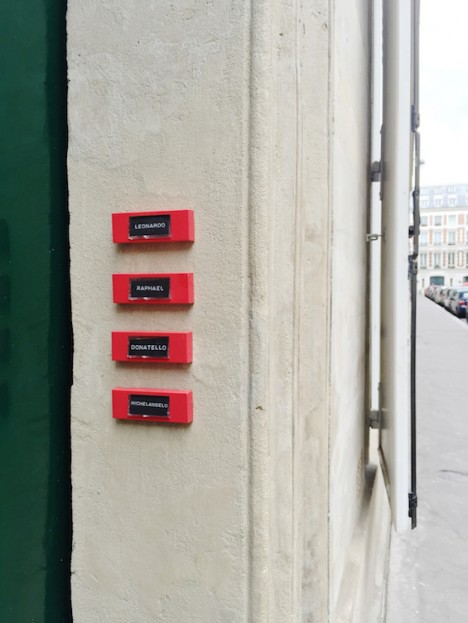
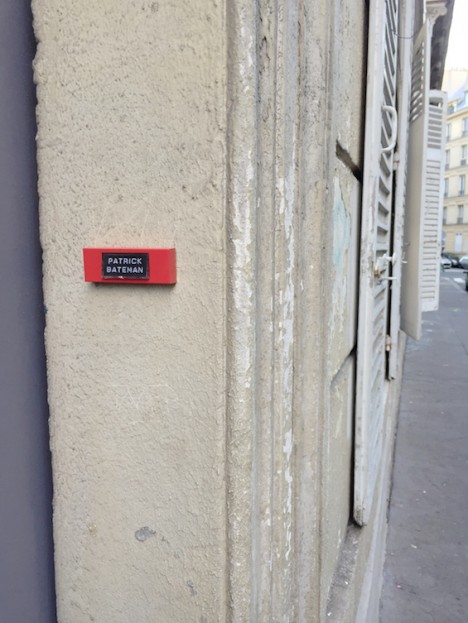
    Only particularly perceptive passersby would even notice that they’re standing outside the residences of Marty McFly, Luke Skywalker and the Teenage Ninja Turtles, as labeled on doorbells and mailboxes on the streets of Paris. These subtle guerrilla installations by street artist Le Sonneur will make you wonder what could happen if you actually rang the bell.

    the ringer 2

    ‘The Ringer’ is presented in four sets. The first, Everyday Heroes, makes icons like Superman, Batman, Doc Brown, Darth Vader and Han Solo seem more accessible, as if they might actually appear at any moment if you press the button.

    the ringer 3

    the ringer 4

    But you might not want to come face-to-face with most of the names featured in the Neighbors Charming series, which include Patrick Bateman from American Psycho, Alex Delarge from A Clockwork Orange and Hannibal Lecter.

    the ringer 5

    the ringer 6

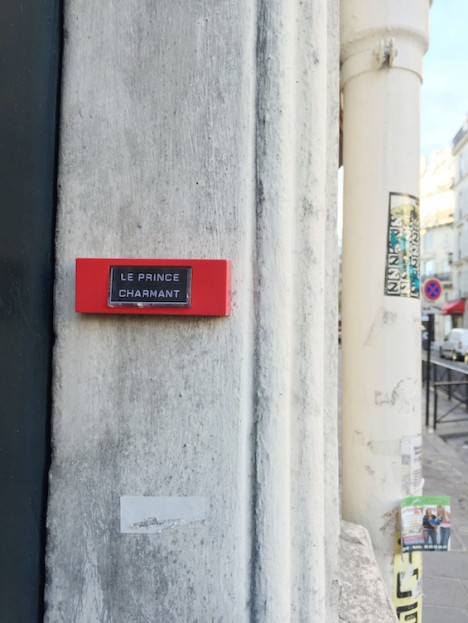
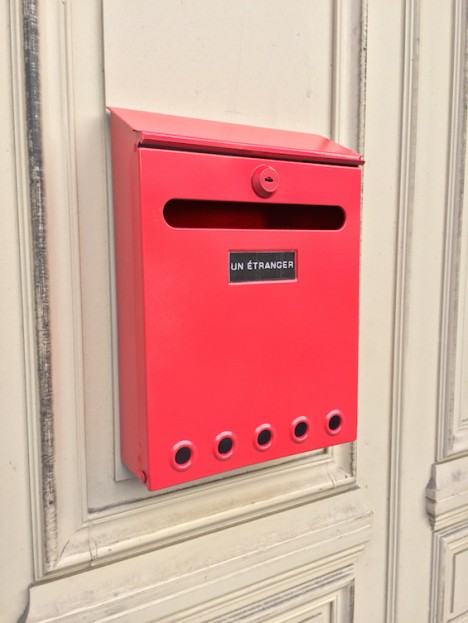
    The Lovers series makes these fictional residents overly familiar with labels like ‘My love,’ ‘Prince Charming’ and ‘A pretty girl’ while the Boxes series takes the opposite tact with complete anonymity, telling you only that ‘A man’ or ‘A stranger’ live inside.

    Share on Facebook


    [ By Steph in Art & Street Art & Graffiti. ]

    [ WebUrbanist | Archives | Galleries | Privacy | TOS ]


    WebUrbanist

  • The City’s a Playground for Cartoon Characters by OakOak

    [ By Steph in Art & Street Art & Graffiti. ]

    oakoak urban interventions 1

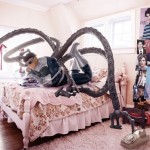
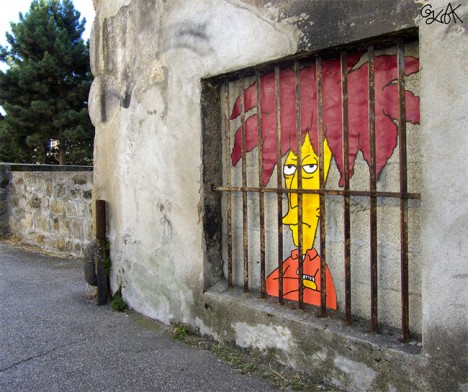
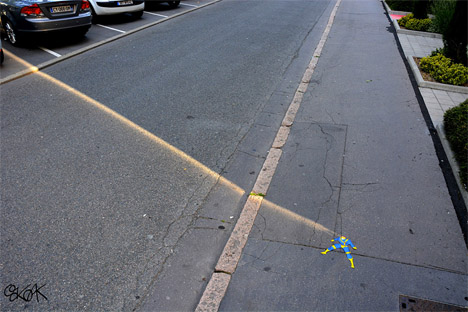
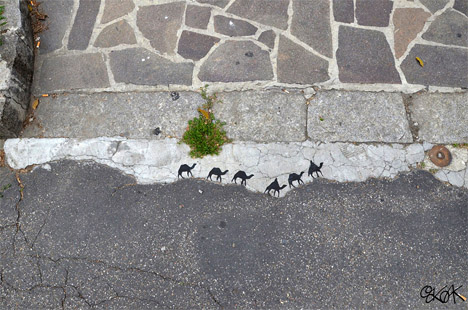
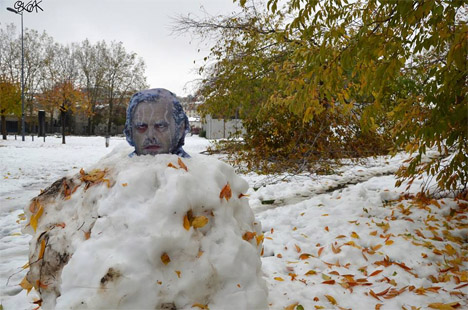
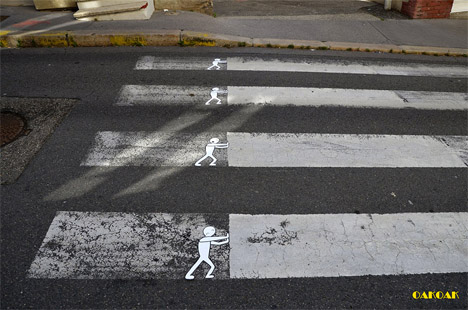
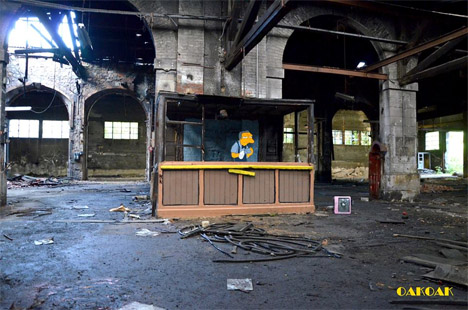
    Anything from a crooked cinder block to an ephemeral beam of light falling across the street can inspire a playful interactive scene by French street artist OakOak, making passersby stop and smile. Whether by temporary paper cut-outs or more permanent graffiti, the artist transforms ordinary urban settings in fun and unexpected ways.

    oakoak urban interventions 2

    oakoak urban interventions 3

    OakOak wanders the streets seeing creative possibilities in virtually every quirk and imperfection, turning what could be seen by others as urban blight into playful works of art that might only stick around for a day or so, but still manage to brighten people’s day.

    oakoak urban interventions 4

    oakoak urban interventions 5

    oakoak urban interventions 9

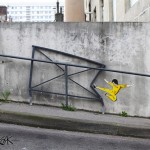
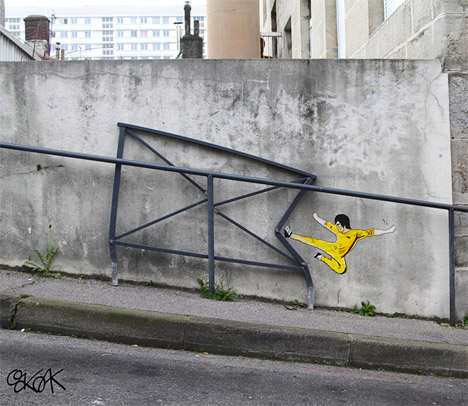
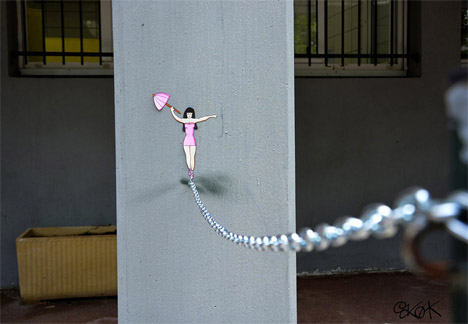
    Little Bruce Lee figures bend metal poles or break through concrete and trapeze artists prepare to tightrope across chains. A stain on a wall might become a stream of genie-producing smoke emitted from a magic lamp, or a sewer grate could become a snail shell.

    oakoak urban interventions 6

    oakoak urban interventions 8

    Says OakOak of his hometown of St. Etienne, “I like this city, her atmosphere, and I wanted it to look nicer. It was an industrial city with many coal mines; now it’s in regeneration and still quite poor. But it’s easily travelled by foot with awkward aspects ideal for art. I saw shapes everywhere, and wanted to realize them.”

    Share on Facebook


    [ By Steph in Art & Street Art & Graffiti. ]

    [ WebUrbanist | Archives | Galleries | Privacy | TOS ]


    WebUrbanist

  • Kid Icarus Uprising – Launch / Website Walkthrough, Story, Characters, and More!

    Kid Icarus Uprising – Launch / Website Walkthrough, Story, Characters, Equipment, AR Cards, Online, and More! This is a video of LeftyHeat and our very own VGH Affiliate MykleTheHuman taking a look at the official Kid Icarus Uprising Website in honor of the Launch on March 23, 2012 . Lefty and Mykle then showcase everything you need to know about the game in order to get ready for the Let’s Play of Kid Icarus Uprising on VideoGameHeat. Be sure to subscribe for updates: www.youtube.com Special Guest / VGH Affiliate: www.youtube.com www.youtube.com Note: All Games and Trademarks are Copyright of Their Respective Owners. Let’s Play Kid Icarus Uprising Kid Icarus Games on the Nintendo 3DS Madussa and Pit Pit is back New Levels in Kid Icarus Uprising It’s a me Pit
    Video Rating: 4 / 5