Month: November 2012

  • Light’s Out: Seven More Eerie Abandoned Lighthouses

    [ By Steve in Abandoned Places & Architecture. ]
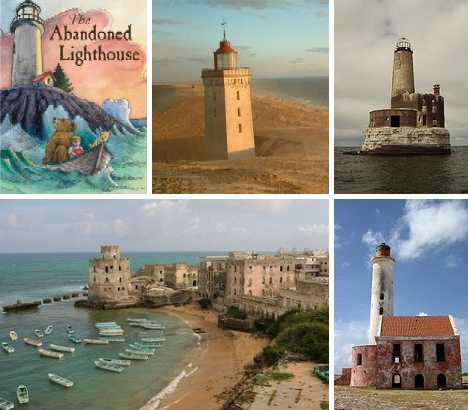

    Is a lighthouse still a lighthouse when the light goes out and no one’s left to call it home? These 7 scenic sentinels slowly succumbing to the endless onslaught of wind and waves stand – barely – as solitary reminders of a time when fog-piercing lighthouse beams guided wayward mariners from the cold clutches of the devil and the deep blue sea.

    Mys Aniva, Sakhalin, Russia
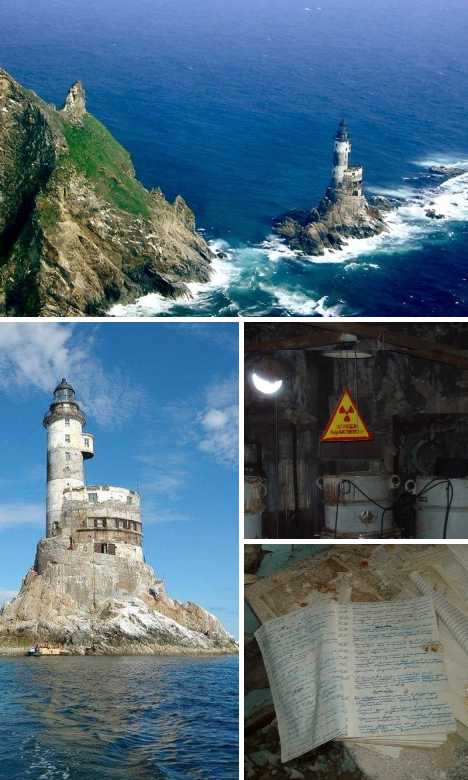
    (images via: Flavorwire and English Russia)

    Built under extremely difficult conditions on a formerly jagged rock just off the southeastern-most cape of Sakhalin island, the Mys Aniva lighthouse has seen a lot of history over its 3/4 of a century lifespan. Japan ordered the lighthouse built in the late 1930s when Sakhalin was divided between that country and the USSR. Sometime after the Soviets seized the whole of Sakhalin at the end of World War II, they installed an RTG (Radioisotope Thermoelectric Generator) to supply electricity to the lamp – yes, this was a nuclear-powered lighthouse!
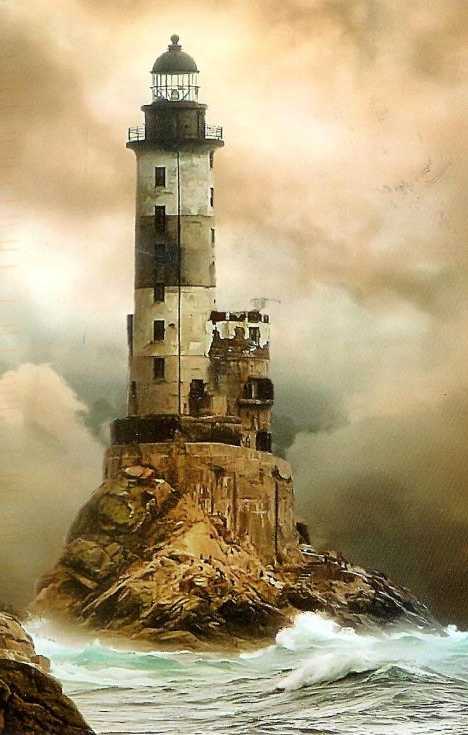
    (image via: Remembering Letters and Postcards)

    The fall of communism in the early 1990s led to a decade of near-chaos with funds for all purposes in short supply. The Mys Aniva lighthouse, isolated though it was and is, has been looted and ransacked for its metal fittings though luckily its RTGs were removed before the unofficial salvage crews arrived.

    Grand Harbor Lighthouse on Fish Fluke Point, Canada
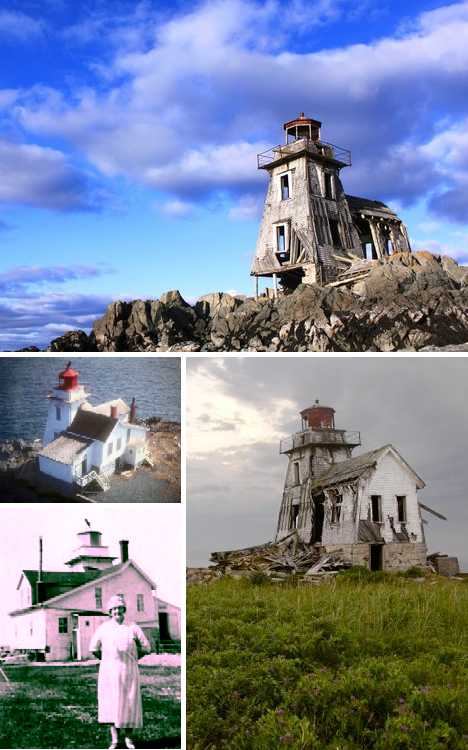
    (images via: National Geographic, Lighthouse Friends and Robert Williams Photography)

    The Grand Harbour Lighthouse and attached keeper’s house at Fish Fluke Point on Ross Island, New Brunswick, Canada has been in a state of slow-motion collapse since 1963 when the station was closed. The once-picturesque lighthouse’s degeneration was accelerated by the great Groundhog Day Gale of 1976 but though it may make an excellent setting for a horror movie the lighthouse itself refuses to implode.
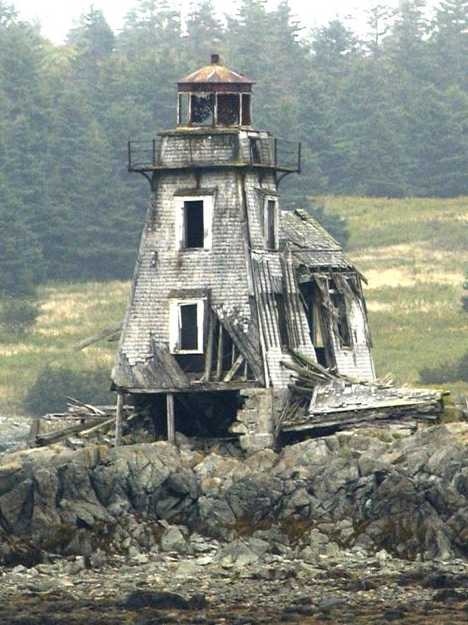
    (image via: Swallowtail Keeper’s Society)

    Opened in the fall of 1879, the Grand Harbour Lighthouse was a low-budget affair from the get-go: one of the early keepers was issued a hand-operated foghorn to be used as required. Cheap or not, the wood-framed complex has lasted longer than many stone structures of similar age. At this point it’ll take a superstorm of, say, Sandy-like intensity to finally knock its lights out for good.

    Klein Curacao Lighthouse, Curacao
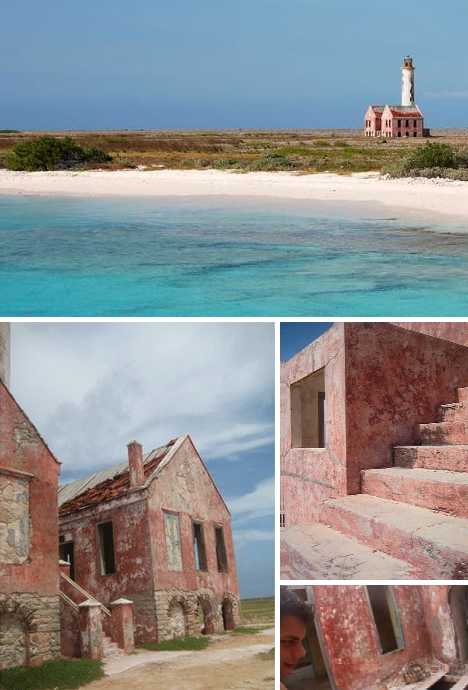
    (images via: Curacao-TravelGuide.com, Debi van Zyl and Foter)

    The Caribbean island of Curacao bore witness to the golden age of exploration, pirates, treasure-ships and more – and it’s got plenty of shipwrecks to prove it. In 1850 a lighthouse was constructed on the tiny, (3 km2 or 1.2 square mile) island of Klein Curacao situated 10 kilometers (6.2 miles) south-east of the mother island.
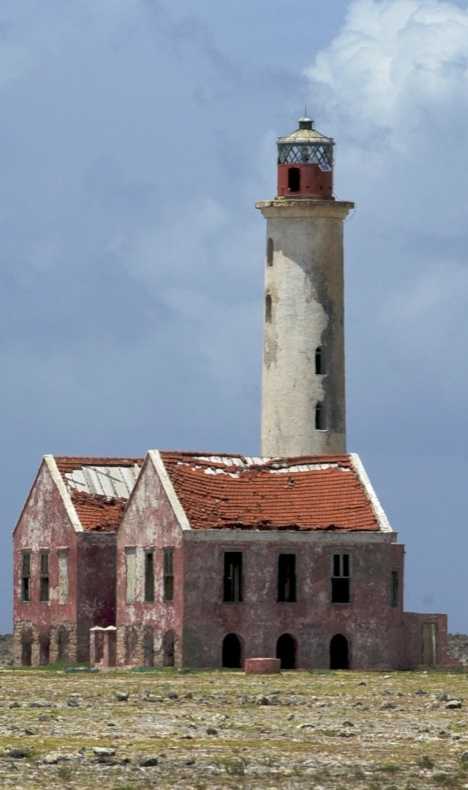
    (image via: Gordon_C)

    In 1877 a powerful hurricane destroyed the original lighthouse and in 1879 a stronger replacement was built. This lighthouse was subsequently storm-damaged and repaired again in 1913. Though the lighthouse had been abandoned decades ago and had been left to decay, the light itself was recently reactivated and an automatic solar-powered LED beacon was installed.

    Waugoshance Light, Michigan, USA
    (images via: Waugoshance Lighthouse Preservation Society and Beaver Island Jewelry)

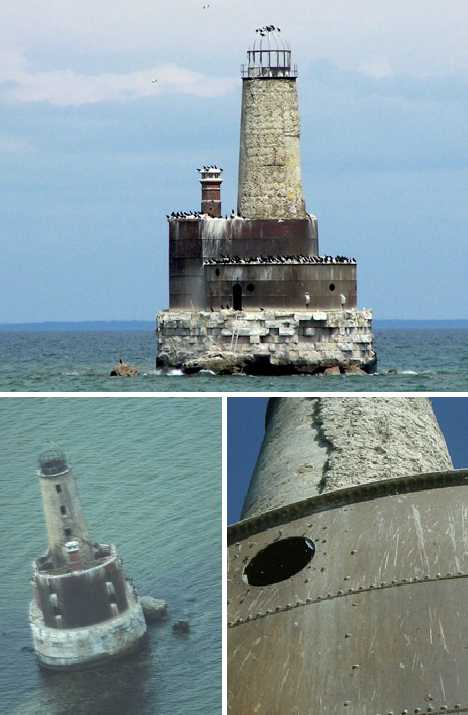
    Not all lighthouses stand on the seashore; lakes need lighthouses too! Especially great lakes like, er, the Great Lakes where shipping (and shipwrecks) have been commonplace for several centuries. Take the late, great Waugoshance Light for instance. Built in 1851 to replace a lightship guiding ships through a treacherous area of the Straits of Mackinac, the Waugoshance Light was the first Great Lakes lighthouse to be surrounded on water on all sides.
    (image via: Divemi)

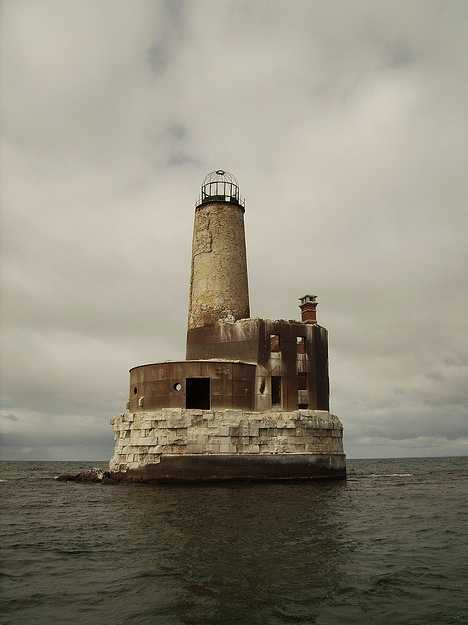
    The Waugoshance Light was built of brick and covered with iron plating – built to last, it was. Unfortunately, the creation of deeper draft ships that had to use the Gray’s Reef passage saw the building of the White Shoal Light and the Grays Reef Light. The Waugoshance Light was decommissioned in 1912 and was used as a gunnery target by the U.S. Navy during World War II. That anything still remains of this rugged feat of engineering after more than 160 years is remarkable to say the least.

    Mogadishu Lighthouse, Somalia
    (images via: Dissident Nation and National Geographic)

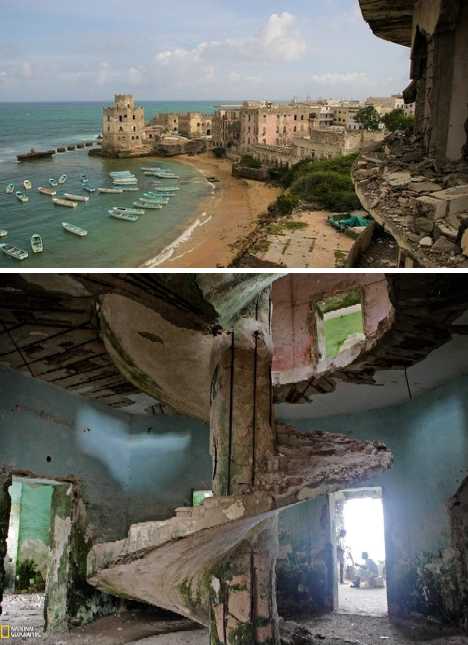
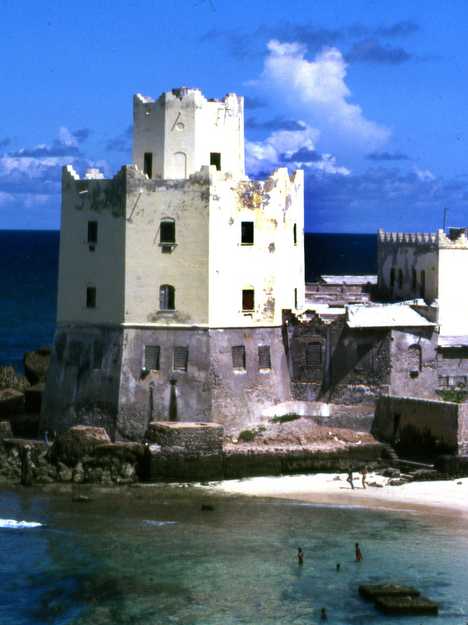
    Though shattered by two decades of on & off civil war, the Somali city of Mogadishu has a long and prosperous history based on sea trading. The country’s network of ports appealed to Italian colonizers during the latter quarter of the 19th century and with the establishment of Italian Somaliland extensive infrastructure was built. One of the outstanding and surviving examples is the Mogadishu Lighthouse, or the ruins thereof.
    (image via: Frankkeillor)

    Its light long dimmed and its open spiral staircase on the verge of collapse, the lighthouse serves these days as a shady retreat for fishermen, gamblers and partakers of the aromatic stimulant shrub called qat.

    Rubjerg-Knude Fyr, Denmark
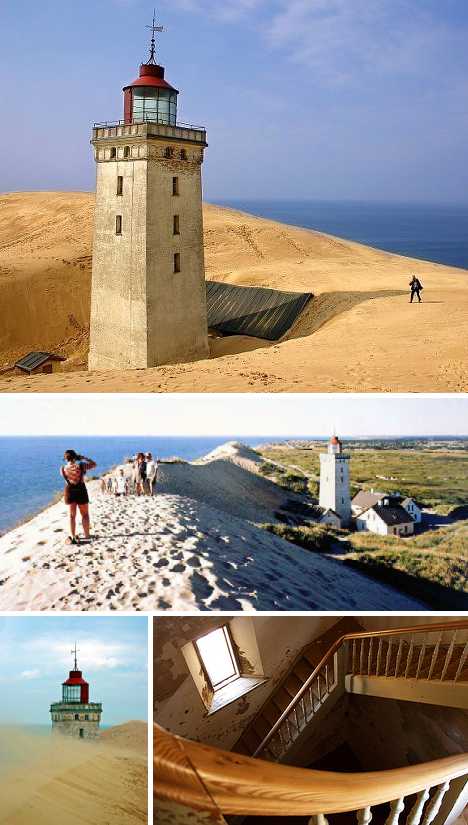
    (images via: Environmental Graffiti/Anders Hollenbo, CIB W78 and ForoCoches)

    When the Rubjerg Knude Lighthouse in Jutland, Denmark first fired up its lamp on December 27th of 1900, its builders were confident its location atop Lønstrup Klint 60 meters (200ft) above sea level would keep it out of the reach of windblown sand dunes that had made any seaside construction untenable. Though in time the dunes would not be denied, it would take almost 70 years for the lighthouse to be rendered inoperable and a further 35 for all the buildings in the complex to be abandoned altogether.
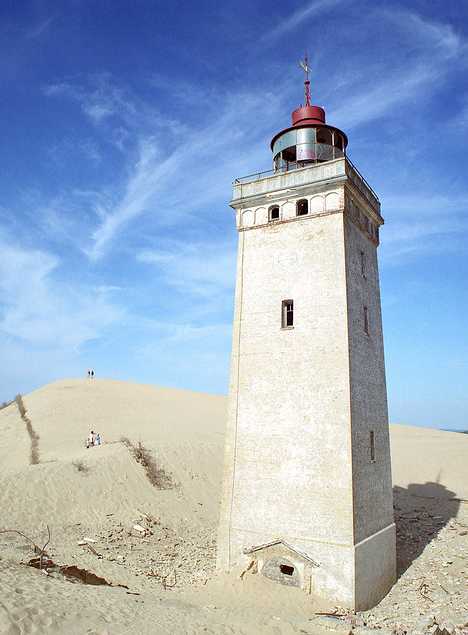
    (image via: Mariorei)

    One might think a lighthouse nearly subsumed by sand dunes would be located in the Middle East, North Africa, basically anywhere but Denmark! Live & learn, constant readers and potential lighthouse builders. It’s somewhat ironic a lighthouse constructed to help those who sail the waves would be wrecked by windblown waves of sand.

    Great Isaac Cay Lighthouse, the Bahamas
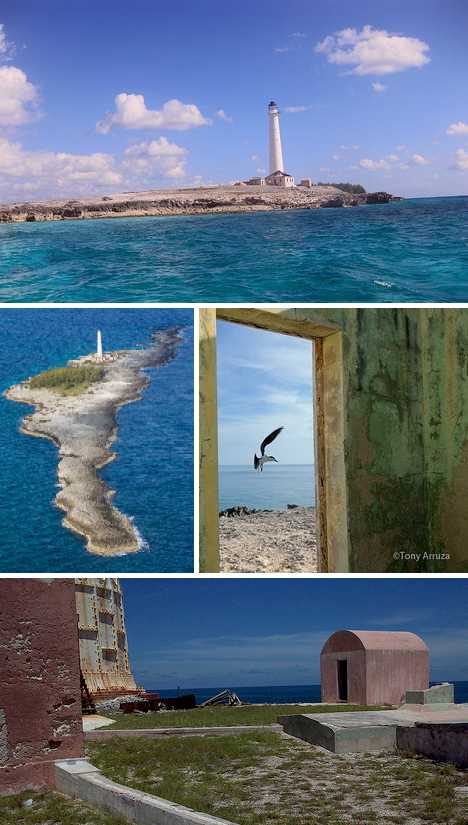
    (images via: Megali.ST, FKA, Tony Arruza Photography and Joyous!))

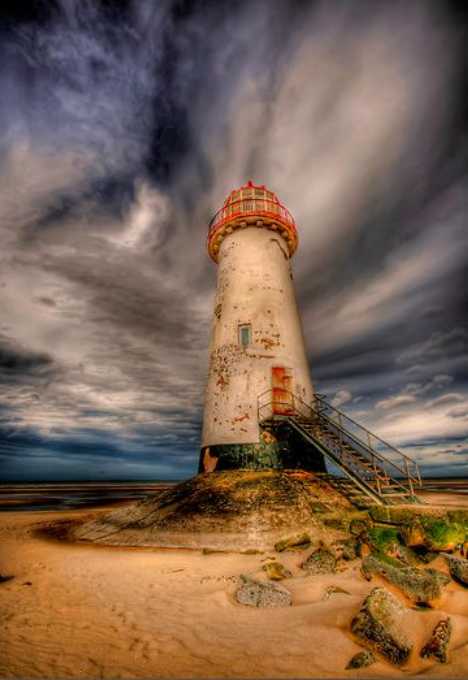
    The Great Isaac Cay Lighthouse was built in 1859 on tiny Great Isaac Cay in the Bahamas. The 152ft-tall tower is surrounded by a small group of decrepit and decaying outbuildings abandoned after the lighthouse’s last two keepers mysteriously vanished in 1969.
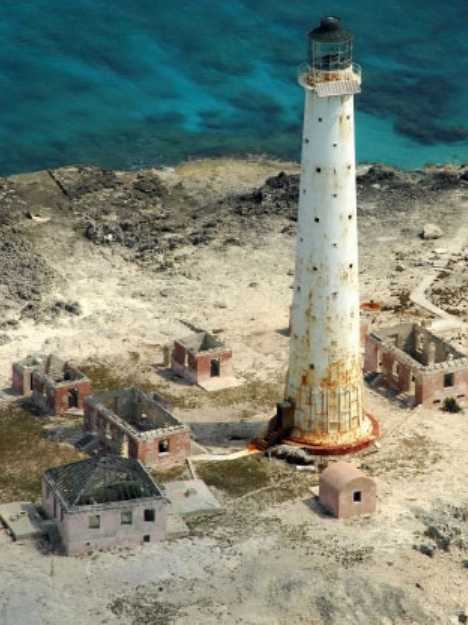
    (image via: Artificial Owl)

    The lighthouse still functions using an automatic lighting mechanism as it is still needed as a navigational aid. That’s just as well – the lighthouse has acquired a reputation for being haunted by the ghosts of shipwrecked ship passengers. It’s said that when the full moon shines, the spectral shades of a mother and child shipwrecked off the island in the late 19th century can be heard bemoaning their fate.

    (image via: Michael John Grist)

    The first to go were the keepers, made redundant by automated power generators. Next were the lighthouses themselves, relegated to superfluousness when GPS navigation offered ship captains accurate positioning any time of day, whatever the weather. Often built in isolated locations beset by the harshest of environments, these relics of a more romantic age are gradually giving up the ghost, ravaged by the same seas they sought to make safer for sailors. Last one to leave, please shut the door and turn out the light.


    Want More? Click for Great Related Content on WebUrbanist:
    Lost at Sea: Seven Beautiful Abandoned Lighthouses

    These seven abandoned and inactive lighthouses represent marine history, and stand as tall, quiet beacons to what once was.
    20 Comments – Click Here to Read More »»



    14 Amazingly Beautiful and Historic Lighthouses From Around the World: Part Seven in an Eight-Part Amazing Houses Series

    What is it about lighthouses that captures our attention? Is it the history behind these relics of a less technologically-advanced age? Is it the quaint charm of the towers?
    8 Comments – Click Here to Read More »»


    Share on Facebook


    [ By Steve in Abandoned Places & Architecture. ]

    [ WebUrbanist | Archives | Galleries | Privacy | TOS ]


    WebUrbanist

  • #6 – Correcting and Enhancing Colour

    Color correcting & enhancing, selective colour, lab colour mode, and tips/tricks!
    Video Rating: 0 / 5

  • VTL Promo3 – MoCap Classes

    2009 Promotional Documentary of the new VTL classes. The Virtual Theatricality Lab is now offering MoCap classes for students to become a certified “Motion Capture Systems Technician”. Learn the new techniques for VFX production of feature films and game design with MoCap! The course work utilizes the Optical MoCap system used for films like “Christmas Carol”, “Beowolf”, “Avatar”, and many more.

  • The Continuum – Halloween Short Film – “So Pretty”

    A Halloween fright fest. Vampires in the modern world. What would it really be like? Take a trip on the night train in this short film produced for Stage 5 TV and find out why the cursed don’t sparkle. Al Lougher is a British writer, director and photographer currently living in Miami and has produced and directed many music videos and short films as well as corporate videos and commercials. Al won an award in 2001 for his short “I Am Peter Cushing” and is currently working on a feature to shoot and debut in 2013. The Continuum is Stage5TV’s new anthology show for gamers. Each week we will feature an exciting new short film, extending across the realms of fantasy, science fiction, comedy, drama, animation, live-action and everything in between. Be sure to subscribe to the stagefivetv Youtube channel for all the latest videos in the Continuum series and more content created for gamers and geeks everywhere. See other videos in the Continuum series… The Green Ruby Pumpkin – www.youtube.com See other videos from Stage 5 TV… Project Cosplay Episode 1 – www.youtube.com Stage 5 TV in social media: Facebook – facebook.com Twitter – twitter.com How to become a vampire. How to make friends with a vampire. How to survive halloween. How to get your girlfriend to stop reading Twilight. Sponsored by Red 5 Studios and Firefall. More information can be found on Firefall at www.firefallthegame.com

  • How to do Interior Photography by Lok

    Because Kai is on leave (again), Lok has decided to make a little video about how to do interior photography with a Nikon 24mm PC lens and D700 in the new DR office. Pricing Reference: Nikon D700 – www.digitalrev.com Nikon PC-E 24mm – www.digitalrev.com

  • Nice Visual Art photos

    Some cool visual art images:

    TodaysArt 2008 – Compagnie Retouramont
    visual art
    Image by Haags Uitburo
    Like last year Hotel Mercure served as the backdrop for one of the most spectacular performances during TodaysArt. This year dancers of the Compagnie Retouramont performed a choreography in mid-air, turning the vertical structure of the hotel in a support for movement to spread out. Colluding with the architectural material the dancers built an ethereal architecture, turning our everyday spaces into a playground for expressions.

    Every year, for one weekend, the TodaysArt Festival transforms the city centre of The Hague into an inspiring stronghold of creativity and audiovisual experiences. This year, over 200 artists will contribute to the festival, where many different art disciplines are represented, such as film, modern dance, visual art, photography and music.

    TodaysArt 2007 – United Visual Artists – Tryptich
    visual art
    Image by Haags Uitburo
    marie-II at the installation Tryptich by United Visual Artists. UVA are a multidisciplinary arts company combining art direction, production and software engineering. They create responsive, immersive and sculptural light-based environments. At the TodaysArt Festival 2007 they presented three brooding presences that respond to the movements of people approaching them, creating a visceral experience of sound and light.

    During the third edition of the TodaysArt Festival (September 21th and 22th 2007) the city centre of The Hague functioned as one big festival terrain, with performances both in the public domain and on several indoor stages. Interactive installations, projections and acts used the city centre as a stage and transformed The Hague into an inspiring stronghold of audiovisual experiences. The program consistsed of more than 200 artists from over 25 countries, representing nearly every art discipline imaginable and putting The Hague on the international map as the stage par excellence for contemporary creativity.

    See where this picture was taken.

    art-2010-27
    visual art
    Image by dietmut
    art-2010-27k/6.10.-22.10

  • Sex Sunday – Cant Get A Boner!

    Watch my livestream 😀 – www.twitch.tv Animation – www.youtube.com Virginity! – www.youtube.com Follow me on twitter – twitter.com —————— Subscribe us here – www.youtube.com Get 10% Discounts on Kontrol Freeks using the Promo Code “HaZeXD” www.kontrolfreek.com Facebook Fanpage – www.facebook.com Follow Jenks On Twitter ! – twitter.com Follow Josh On Twitter – Twitter.com Follow me on Twitch – www.justin.tv Please Dont Forget To Rate And Comment On This Video ! 😀
    Video Rating: 4 / 5

    If you enjoyed the video please spend a second to throw a like :] it helps a lot. www.youtube.com TWITTER: twitter.com tags: Pokemon Conquest Nobunaga’s Ambition english Playthrough Walkthrough Warlord of the Aurora Eevee Oichi Nobunaga Dragnor anime character Nintendo DS Gameplay Video Game Black White Soulsilver Diamond Pearl 3DS Pokémon (Business Operation) Gold Wifi Platinum Battle Animation Silver Crystal Emerald Cartoon NDS 720p today tgn partnership ???????????? ????? ??? ??????????? ??? ??? ???
    Video Rating: 4 / 5

  • Photoshop: Retouching workflow strategies | lynda.com

    This specific tutorial is a single movie from chapter one of the Photoshop CS3 Portrait Retouching Essentials course presented by lynda.com author Chris Orwig. Watch more at www.lynda.com The complete course has a total duration of 10 hours and 19 minutes. Photoshop CS3 Portrait Retouching Essentials table of contents: Introduction 1. Retouching Roadmap 2. Correcting Color and Tone 3. Cleaning Up Images in Camera Raw 4. Cleaning Up Images in Photoshop 5. Structural Image Enhancements 6. Reducing and Removing Wrinkles 7. Enhancing Eyes 8. Enhancing Eyelashes and Eyebrows 9. Improving Hair 10. Improving Faces and Bodies 11. Fixing Teeth 12. Improving Makeup 13. Enhancing Skin 14. Softening Skin Conclusion

  • FX Lens Performance On DX DSLR Digital Cameras – Viewer Question

    www.artoftheimage.blogspot.com – Nikon FX Lens Performance On Nikon DX DSLR Digital Cameras – Viewer QuestionCheck out the new Art of the Image Recommended Photography Gear List at http PS If you have kids or know someone with kids, check out my latest online book, “Diary of a Nerd King” at www.nerdkingdiary.com. It’s funny and it’s FREE! Please pass it along… thanks! PSS If you have toddlers or small children, check out http for my children’s ebooks for Kindle, iPad, iPod, iPhone, laptops, etc! Please pass it along… thanks!

  • Practical White Balance and Why You Should Learn It!

    Why are Oranges … Orange ?

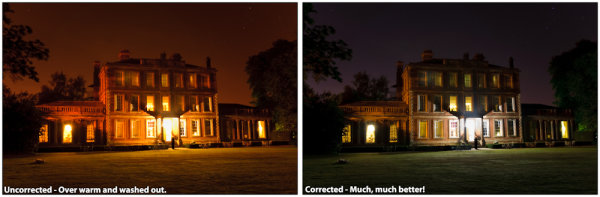
    White balance can be a tricky subject to master and as a beginner I found both the concept and application difficult. Getting to grips with white balance was a landmark in my early learning, gone were the days of funky looking indoor shots and chilly looking portraits, from then on the world of warm sunsets and natural skin tones lay at my feet. It’s amazing how different an image can look with and without white balance correction applied and consequently the impact on your images can be profound. The basics of white balance adjustment are relatively simple, what takes more time is training your eye to know when you’ve got it right. In doing this you will not only improve the quality of your images but will also save a whole load of time. Here to help you is a basic run down of practical white balance.

    What is White Balance?

    Despite what we see the actual colour of light is hugely variable. The fact that we generally don’t perceive these shifts in daylight colour is testament to the incredible job the human eye and brain does in adjusting how we see. Our cameras on the other hand are at best dumb instruments and need to be told what colour the light we are shooting is. Ever take a shot of a landscape, but was disappointed to find that the final scene looked orange? Ever used some fill flash for a portrait only to discover the subject to has a blue cast? All of these problems can be fixed using good white balance correction.

    Who is this Kelvin Dude?

    The colour (sometimes called the ‘temperature’) of light is measured using the ‘Kelvin Scale’. The scale itself was discovered using clever physics experiments, which looked at the wavelengths of light produced by heating black objects to different temperatures. Its definitely useful to know that there is a scale for measuring white balance but all you really need to remember is that the lower numbers equal warmer or redder light with higher the numbers relating to cooler or blue light. Importantly you shouldn’t worry about remembering any of this, its useful knowledge to have but to date I have never needed to know the exact white balance setting of my camera so I doubt you will do either.

    See the difference?

    In Camera White Balance

    The exact method for setting white balance varies from camera to camera but generally the fastest way to do this is by using one of the standard preset values. Simply dial in the white balance correction and hey presto your camera is instantly seeing in a different colour light.

    You can pretty much set any specific white balance value you like however in the vast majority of situations the presets are more than adequate. Given that you can fix pretty much anything in post processing why bother doing anything in camera at all? You might be tempted to place your trust in your cameras ‘Auto White Balance’ feature and whilst its tempting, the applied white balance can shift noticeably from shot to shot and wont necessarily get it 100% right either. Imagine having to adjust the white balance on your whole set of holiday snaps, not great.

    So now you’re convinced, here to help you is a run down of the major presets and when to use them:

    • Auto White Balance – Basically handing over the white balance correction to the computer in your camera.  In the main pretty good but is set each shot so can change from picture to picture.  Good to use if you are in a hurry.
    • Daylight – A nice mid temperature setting for use in normal daylight.  
    • Cloudy/Indoors – For use in slightly cooler conditions (e.g. an overcast day), has the effect of warming the image up just a bit.
    • Shade – For coller light than the cloudy setting (e.g. dusk or early mornings), warms up the image much more than either daylight or cloudy.  Can also be good for adding extra warmth to normal conditions.
    • Incandescent – Great for indoor shots under artificial lights (e.g. from non flourescent bulbs which can be very warm).  Cools down the image.
    • Fluorescent – For use under strip light conditions, will warm up the image to compensate for the cold and slightly green light produced by these sources.
    • Flash – Warms up light from flash guns which is cool but more blue than flourescent light.

    Post Processing

    The ability to accurately apply white balance correction is one the major advantages of shooting in RAW format. If you don’t know about or don’t shoot in RAW format, don’t worry you can still make adjustments to other image types albeit not with quite as much flexibility.

    For RAW images you have the option to either select one of the available preset values (which will be the same as those available in your camera) or if you wish make a manual adjustment.

    Manual White Balance Adjustments

    Learning to manually adjust white balance is a great skill to practice as it’s probably the best way to train your eye to recognize the ‘right’ white balance value. The actual adjustment is fairly simple and uses only two controls (although the method for adjusting these will vary according to your post processing software):

    • Temperature – How warm or cold the image is, think of this as adding orange or blue to the shot.
    • Tint – Basically how much green or pink is in the image.

    Here is a three step recommendation for manually adjusting white balance. Don’t forget you can select a preset value first and then ‘fine tune’ the result manually afterwards.

    1. Adjust the temperature of the shot, ask yourself is the image too warm or too cold and increase/decrease the temperature value accordingly.
    2. Adjust the image tint, does it look took green or too pink? Look for objects in the image to help you judge this. Good references are skin tones which can either look a bit flush or green round the gills if not corrected properly.
    3. Compare the before and after image (most software will let you turn the white balance correction on and off). Repeat if necessary.

    Don’t forget there is no such thing as a right or wrong white balance, if the shot looks how you want it to then that’s good enough.

    Generally white balance corrections can also be applied in batches so if you find a setting which works well and all the shots have been taken in the same light using the same settings you can save a lot of time by applying corrections in bulk.

    Conclusion

    No matter how you do it, making sure you pay attention and manage the final white balance of your shots is an incredibly powerful way to improve the feel and look of your photos. So much of the mood and drama of a photo is conveyed through the colour and quality of light captured and therefore taking those extra few moments to get it right is well worth the trouble. Despite what you may have been told you, getting this right either in camera or postproduction needn’t be a trauma. Hopefully the few hints and tips in this post should point you in the right direction and could make the difference between your next shot leaving you red faced or feeling blue.

    Post originally from: Digital Photography Tips.

    Check out our more Photography Tips at Photography Tips for Beginners, Portrait Photography Tips and Wedding Photography Tips.

    Practical White Balance and Why You Should Learn It!


    Digital Photography School