RSS
 

Posts Tagged ‘Walk’

Lightroom Walk Through – Event Photography Workflow with Phil Steele

12 Apr

Phil Steele is a well-known and respected photography educator. In this video tutorial he walks you through exactly how he works through the post-processing of an event he has just shot.

Learn tips on importing, rating, culling, organizing in Collections, exporting, and delivering the photos as Phil goes through his entire event photography workflow step by step.

If you enjoyed that and want more you can check out Phil’s courses here:

  • How to Shoot Headshots and Portraits on a Budget with Small Flashes
  • Photoshop Basics for Photographers
  • Lightroom Made Easy
  • Event Photography course

googletag.cmd.push(function() {
tablet_slots.push( googletag.defineSlot( “/1005424/_dPSv4_tab-all-article-bottom_(300×250)”, [300, 250], “pb-ad-78623” ).addService( googletag.pubads() ) ); } );

googletag.cmd.push(function() {
mobile_slots.push( googletag.defineSlot( “/1005424/_dPSv4_mob-all-article-bottom_(300×250)”, [300, 250], “pb-ad-78158” ).addService( googletag.pubads() ) ); } );

The post Lightroom Walk Through – Event Photography Workflow with Phil Steele by Darlene Hildebrandt appeared first on Digital Photography School.


Digital Photography School

 
Comments Off on Lightroom Walk Through – Event Photography Workflow with Phil Steele

Posted in Photography


2,300 Floating Flowers: Interactive Garden Makes Way as You Walk

01 Apr

[ By WebUrbanist in Art & Installation & Sound. ]

floating plants experienced together

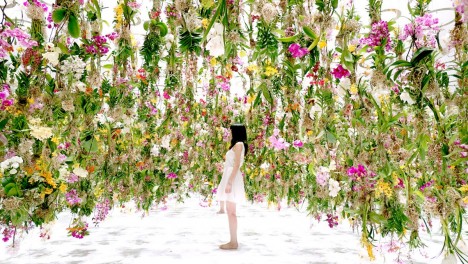
Responding to the movements of visitors passing through the space, this immersive work of installation art puts you in a private bubble in the midst of dense hanging garden – except this remarkable bubble that moves with you.

teamlab floating flower installation

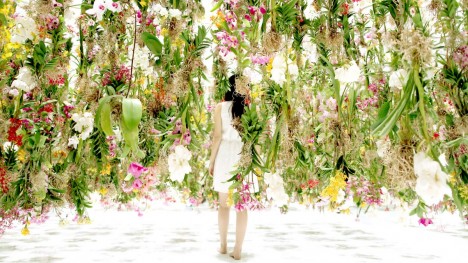
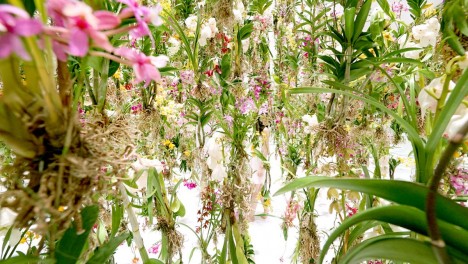
The Floating Flower Garden by TeamLab, a Japanese art collective, is on display in Tokyo, having been extended due to popular demand. Suspended from above, the plants are pulled up or dropped down to both envelop visitors but also given them hemispheres of personal space amid the floating foliage.

floating flower art installation

The idea is to make each guest part of the installation, allowing them to separate from friends and experience it alone or to move in groups and see how the computer system responds in realtime.

floating solo alone forest

Meanwhile, the digital setup is not the only piece that changes things over time: “these flowers are alive and growing with each passing day. Each flower has a partner insect and the scent of the flowers becomes stronger at the time that the insect is most active, as a result the scent of the air in the garden space changes according to the time of day, morning, noon, and evening.”

floating walking bubble interactive

TeamLab believes technology elevates art, but their work also places into pre-modern knowledge and ancient ideas of spatial awareness originating in Japanese philosophy and religion, including Zen gardens. More from the artists: “When a viewer gets close to this flower-filled space, the flowers close to the viewer rise upwards all at once, creating a hemispherical space with the viewer at its center.”

floating garden immersive space

“In other words, although the whole space is filled with flowers, a hemispherical space is constantly being created with the viewer at its center and the viewer is free to move around wherever they want. If many viewers get close to one another, the dome spaces link up to form one single space. In this interactive floating flower garden viewers are immersed in flowers, and become completely one with the garden itself.”

Share on Facebook


[ By WebUrbanist in Art & Installation & Sound. ]

[ WebUrbanist | Archives | Galleries | Privacy | TOS ]


WebUrbanist

 
Comments Off on 2,300 Floating Flowers: Interactive Garden Makes Way as You Walk

Posted in Creativity


Walk Through and Review of Autopano Giga – Image Stitching Software

14 Mar
A six image photostitch of BC Place in Vancouver

A six image photostitch of BC Place in Vancouver

My first image editing software was Photoshop Elements 6 and the photostitching function was really erratic to say the least. I was doing real estate and architectural photography and needed a reliable and accurate tool that could quickly and properly stitch images together. I tried a few, but was not happy with all the results. The software was difficult to use and the results were irregular.

Then I heard about Autopano. I downloaded a trial and was pretty amazed at how quickly, and more importantly, accurately the software stitched scenes together that other pieces of software had not been able to. The stitching was seamless and effortless. I was impressed with the ease of use and the speed at which the software worked. I had found my tool of choice, Autopano Giga. Autopano Giga is a tool that is made by a company called Kolor. They develop image stitching software, pano tour software and 360 degree software, they are a specialist photography software company.
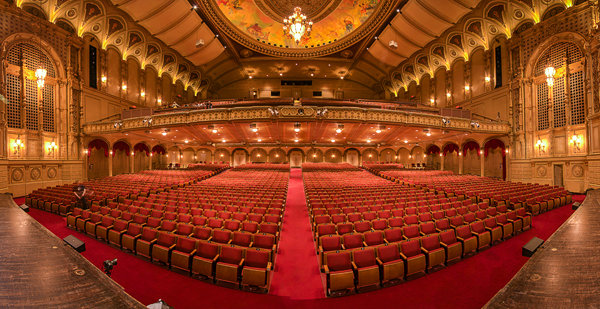
5 shot photo stitched image of the Orpheum Theatre, Vancouver BC

Five shot photo stitched image of the Orpheum Theatre, Vancouver BC

The first step in making effective panoramic images is knowing how to photograph them. That is beyond the scope of this article so for the purpose of this review we’ll assume you have some panoramic images already shot and want to stitch them.

Time to stitch

For the image stitching part of this process, I am going to be referring to the interface in Autopano Giga. This product works extremely well. It has been rated as one of the best stitching packages available. I have used it to stitch some pretty crazy panos together and it has been able to process almost anything I have thrown at it. I have done normal photostitches and I have done some multi-row stitches too. Autopano Giga has handled these with ease, and in some cases I have been pretty surprised how well it worked.

Let’s look at how this process works in Autopano Giga:
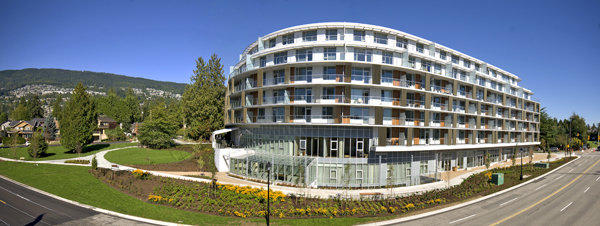
Panoramic images work well for architectural photography

Panoramic images work well for architectural photography

  1. Open Autopano Giga and on the first screen that you see, click on the second icon from the left to select your images to be stitched.
  2. Navigate to the images that you have processed and select them.
  3. Click on Detect on the top left hand side of the screen.
  4. Autopano Giga will now scan your images and do a preliminary stitch. This preview stitched image will be displayed on the right hand side of the screen that is open. This process may take a few minutes.
  5. Once the preview image is displaying, click on the Edit button (right-hand side of the screen) this will open the image in the Autopano edit screen. This is where you want to check the image to see that it has stitched together properly, and verify that there are no errors on the image.
  6. There are a number of options here, below is a high level overview of the most important functions
Detection and preview screen in Autopano Giga

Detection and preview screen in Autopano Giga

Autopano functions on the edit screen:

Autopano has a number of options you can use to render your panoramic image. These projections help with distortion and skewing. Below is an explanation of the most commonly used projections.

  • Spherical – The spherical function allows any panorama to be assembled. It is a commonly used option for building panoramic images.
  • Planar or rectilinear projection – This is a good choice if the angle is low. It’s recommended for architectural shots because it is the only mode that does not curve lines that are deemed to be straight lines. Sometimes if the angles are too extreme there may be a loss of sharpness, so just be aware of that.
  • Cylindrical projection – This projection can be used up to 360° (horizontally).
  • Mercator projection – The mercator projection can also be used up to 360° (horizontally). The effect of stretching up and down, the image may seem to become distorted.
  • Pannini projection – Keeps vertical lines vertical and straight radial lines. This can give a strong sense of perspective on views whose horizontal field of view is wide, and has a single and central vanishing point. It can however makes horizon lines seem curved. This can be corrected in the sliders that pop-up when you are editing in this projection.
  • Little planet projection – The Stereographic projection (also called fisheye projection) can be used to create a little planet. A right way up panorama achieves a planet effect and a backward panorama (180° rotation) makes a tunnel effect. Allows you to create an original view of a panorama, mainly using equirectangular panoramas (360°x180°). Using this projection with panoramas, whose horizontal field of view is less than 330°, is neither aesthetic nor usable.
  • Hammer projection – This projection is similar to a flattened world map, mainly used in astronomy applications. I use this for cityscapes too as it can correct some perspective distortion.
  • Orthographic projection – This is the view point of a sphere, whose panorama is viewed from afar, mapped to the outside and not inside like most other projections.
  • Mirror ball projection – This projection is the result of a visualization of the whole panorama on a spherical mirror, like looking into a crystal ball.
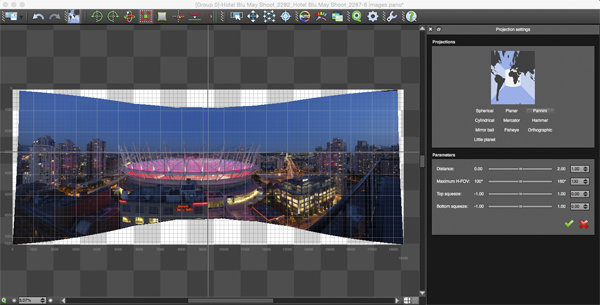
Projection function in Autopano Giga

Projection function in Autopano Giga

 Some of these projections are more useful than others. You may find that you will end up using only two or three. A good idea is click on each of them to see how they affect your image. The key factor in choosing a projection is in how the it affects your image visually. Does it work for the subject matter? Does the image look correct? Is the perspective distortion correct? Ask yourself these questions as you experiment with the projections.

Once you are happy with your projection and the way the image looks, you can now save the image to a folder on your computer.

Rendering

This is the process of saving your panorama.It is called rendering because the software needs to perform the final stitching and edits to your image. On the rendering screen, you will need to take note of the following:
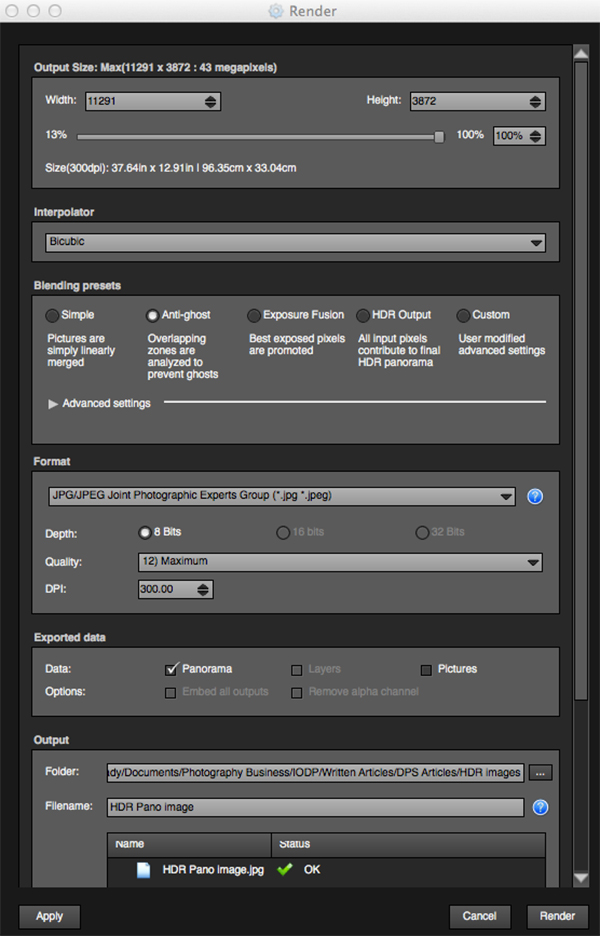
Render and Save screen on Autopano Giga

Render and Save screen on Autopano Giga

Interpolator – The interpolator is the method used to assemble the pixels of your panoramic image, and will determine the quality and sharpness of your image. There are a few different options here, but the most commonly used option is Bicubic. The others are useful for advanced stitching.

Blending settings – The purpose of the blending settings is to allow combining of the overlapped sections of your panoramic to look smooth and seamless. You will notice the following presets:

  • Simple – This is fast, but it is possible that defects may be seen where the areas overlap.
  • Anti-ghost – Conserve the image’s strong characteristics (stops, lines, curves) when mixing while automatically removing objects that have moved
  • Exposure fusion – To be used if the panorama was created with a set of bracketed shoots. Keeps the best of different exposures.
  • HDR output – To be used by users who wish to create a “.hdr” format file in order to create post-production or special effects. Don’t use this on these images if they have already been processed as HDR images.
  • Custom – This is enabled when you manually change the parameters and they no longer correspond to a profile.

On the advanced settings, I generally leave that on the default.

Some of the features that I appreciate in Autopano Giga are as follows:

Exposure and colour blending – The software works hard at sorting out colour and exposure in the blended images. In the past, one of the worst problems with photo stitching was that sometimes the colour or exposure drifted and there was banding in the scene where the light or colour changed. This is a non-issue in Autopano Giga.

Panoramic detection – Sometimes I have shot more than a few panoramic images. When I get back to my computer, I can’t always see or remember which images were which. No problem, you can simply point Autopano Giga to a folder and it will detect all panoramics in that folder.

You can shoot freehand – The software has some really good functionality built-in that can work out multiple viewpoints. So, if you shoot a panoramic without using a tripod or a pano head, the software will be able to detect the scene and make adjustments for it, within reason. Nice to have though, I have shot many handheld panoramic and then dropped them into Autopano and they stitched quite easily.

Format

This section allows you to determine the format in which you want your image to be saved. The two formats I use most are TIFF and JPEG. TIFF is an uncompressed file (which means all the information is still in the file, this is great if you are planning to print the image large) The downside to TIFF is that the files are big. JPEG is a compressed format, that means that some image information has been discarded, the quality will still look the same to the naked eye, but if you print a JPEG image up really big, you may notice some image degradation. Depending on your final output and your space constraints you can choose the format that works best for you. Take the quality up to 12 and set the DPI to 300. This will ensure that you have the best quality image saved.

Output

On this screen, the software needs to know where to save your panoramic and what you want to call it. Choose your destination folder and name the file. Once this is done (it sounds more complicated than it is) click on the render button and the software will begin rendering your image. Depending on the size of the files being stitched, this rendering process can take a few minutes. Once complete, a screen will pop-up to let you know that the image is now rendered.

Edit the final image in Lightroom or Photoshop

Your image is now stitched together, but the final step in the process is to edit the image in your choice of editor. You may want to correct any perspective distortion in Photoshop using the transform tools. If your panoramic image is of a cityscape you will want to make sure that your horizon line is straight and that the buildings are vertical in relation to the horizon. From there you can follow your normal image editing workflow. Once you are done, you will have a fantastic, high resolution, panoramic image.
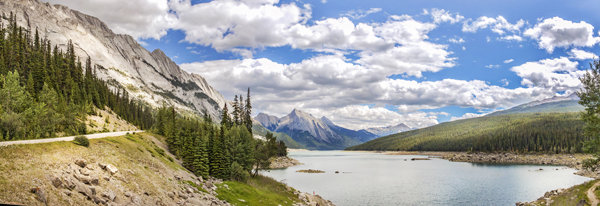
Final edited panoramic image of Medicine Lake in the Canadian Rockies

Final edited panoramic image of Medicine Lake in the Canadian Rockies

My comments on Autopano Giga

Autopano giga has made my editing and processing time much quicker and easier. I do a fair amount of panoramic photography, and the time saving when using this software is significant. I have used it to photograph landscape scenes, hotel rooms, building exteriors and architectural photography. It works exceptionally well in all of those areas. If you make sure that you overlap the images enough, it will stitch your images with ease.

The editing process in Autopano Giga is also very easy to use. Simply click on the projections to see how your image looks, make a choice, and you are done. You can make some technical adjustments within the editing area, but I recommend only doing that if it is absolutely essential.

The perspective control of Autopano Giga is fantastic. For the most part, the final stitched images look correct and I almost never pick up an error on the stitch. It is always a good idea to zoom in to the image to make sure that there are no issues like duplicated areas or bad stitches. This is not normally a problem if your overlap is good.

Autopano Giga is a great tool and if you enjoy shooting panoramic images, download a trial and see how it works for you. Panoramic photography is a lot of fun, I am always excited when I see the final stitched image, very often it is not what I was expecting and thats part of the excitement of these types of images. Having a tool that takes the frustration out of the process is a great advantage. So, go out there and experiment.

googletag.cmd.push(function() {
tablet_slots.push( googletag.defineSlot( “/1005424/_dPSv4_tab-all-article-bottom_(300×250)”, [300, 250], “pb-ad-78623” ).addService( googletag.pubads() ) ); googletag.pubads().enableSingleRequest();
googletag.pubads().disableInitialLoad();
googletag.pubads().collapseEmptyDivs( true );
googletag.enableServices();
} );

googletag.cmd.push( function() { googletag.display( ‘pb-ad-78623’ ); } );

googletag.cmd.push(function() {
mobile_slots.push( googletag.defineSlot( “/1005424/_dPSv4_mob-all-article-bottom_(300×250)”, [300, 250], “pb-ad-78158” ).addService( googletag.pubads() ) ); googletag.pubads().enableSingleRequest();
googletag.pubads().disableInitialLoad();
googletag.pubads().collapseEmptyDivs( true );
googletag.enableServices();
} );

googletag.cmd.push( function() { googletag.display( ‘pb-ad-78158’ ); } );

The post Walk Through and Review of Autopano Giga – Image Stitching Software by Barry J Brady appeared first on Digital Photography School.


Digital Photography School

 
Comments Off on Walk Through and Review of Autopano Giga – Image Stitching Software

Posted in Photography


A Walk on the Wild Side: A Collection of Wildlife Photography

12 Sep

Nature is an amazing thing. This week I share with you some images of wildlife, animals in nature. Some may have been taken on nature preserves or even in a zoo, but if the image is well done and we can’t tell kudos to the photographer.

If you do any wildlife photography you’ll appreciate how difficult it is to get the perfect shot. So enjoy these and be inspired.

Photograph ONCE in a LIFETIME by Marina Cano on 500px

ONCE in a LIFETIME by Marina Cano on 500px

Photograph beautiful dolphin jumping from shining water by Vitaliy Sokol on 500px

beautiful dolphin jumping from shining water by Vitaliy Sokol on 500px

Photograph Winter Ponder by Kyle Moffat on 500px

Winter Ponder by Kyle Moffat on 500px

Photograph Tiger C L A W S by yudi lim on 500px

Tiger C L A W S by yudi lim on 500px

Photograph Happy Fox by Roeselien Raimond on 500px

Happy Fox by Roeselien Raimond on 500px

Photograph Evil Dark Angel by Harry  Eggens on 500px

Evil Dark Angel by Harry Eggens on 500px

Photograph Norwegian Caribou by Ole C. Salomonsen on 500px

Norwegian Caribou by Ole C. Salomonsen on 500px

Photograph Baby owl by Limm yangmook on 500px

Baby owl by Limm yangmook on 500px

Photograph Swan on a Mission by Roeselien Raimond on 500px

Swan on a Mission by Roeselien Raimond on 500px

Photograph Let me have a Smell first by Julian Rad on 500px

Let me have a Smell first by Julian Rad on 500px

Photograph Thirsty Squirrel by Julian Rad on 500px

Thirsty Squirrel by Julian Rad on 500px

Photograph Surprise! by Simon Roy on 500px

Surprise! by Simon Roy on 500px

Photograph Bye Bye by Massimiliano Orpelli on 500px

Bye Bye by Massimiliano Orpelli on 500px

Photograph Dust by Chris Fischer on 500px

Dust by Chris Fischer on 500px

Photograph Beauty by Chris Fischer on 500px

Beauty by Chris Fischer on 500px

Photograph Awful Close by Chris Fischer on 500px

Awful Close by Chris Fischer on 500px

Photograph Bolivian Flamingos by Pedro Szekely on 500px

Bolivian Flamingos by Pedro Szekely on 500px

Photograph Wild sunset. by Patrick Galibert on 500px

Wild sunset. by Patrick Galibert on 500px

Photograph for you by Gabriele Tenhagen-Schmitz on 500px

for you by Gabriele Tenhagen-Schmitz on 500px

Photograph Golden eagle having a discussion with Red fox by Yves Adams on 500px

Golden eagle having a discussion with Red fox by Yves Adams on 500px

Photograph Midnight in Svalbard by Yves Adams on 500px

Midnight in Svalbard by Yves Adams on 500px

Photograph Vulnerable by Marina Cano on 500px

Vulnerable by Marina Cano on 500px

Photograph Arctic Fox (Vulpes lagopus fuliginosus) by Einar Gudmann on 500px

Arctic Fox (Vulpes lagopus fuliginosus) by Einar Gudmann on 500px

Photograph Csodaszarvas by Just Smile Photography on 500px

Csodaszarvas by Just Smile Photography on 500px

Photograph Skua by Einar Gudmann on 500px

Skua by Einar Gudmann on 500px

Photograph African Perforator by Marsel van Oosten on 500px

African Perforator by Marsel van Oosten on 500px

Photograph Facebook Update by Marsel van Oosten on 500px

Facebook Update by Marsel van Oosten on 500px

Photograph Run on the water by Marco Carmassi on 500px

Run on the water by Marco Carmassi on 500px

Photograph King Of The Night by Marsel van Oosten on 500px

King Of The Night by Marsel van Oosten on 500px

Photograph Midnight Shake by Marsel van Oosten on 500px

Midnight Shake by Marsel van Oosten on 500px

Photograph Lions, Masai mara by pekka Järventaus on 500px

Lions, Masai mara by pekka Järventaus on 500px

Photograph Morning Lion by Andrew Schoeman on 500px

Morning Lion by Andrew Schoeman on 500px

Photograph Serengeti Sunset by Brian Tarr on 500px

Serengeti Sunset by Brian Tarr on 500px

The post A Walk on the Wild Side: A Collection of Wildlife Photography by Darlene Hildebrandt appeared first on Digital Photography School.


Digital Photography School
 
Comments Off on A Walk on the Wild Side: A Collection of Wildlife Photography

Posted in Photography


Samurai Girl Composite: Behind the Scenes Post Production Walk Through

29 Aug

by Tom Di Maggio

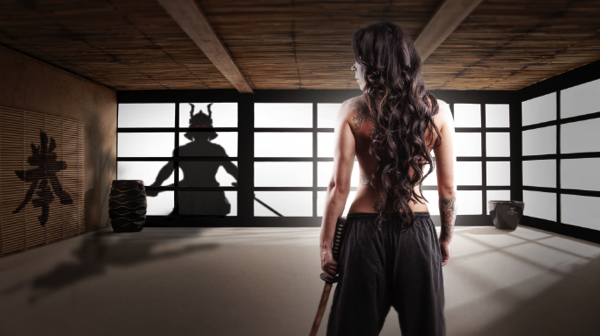
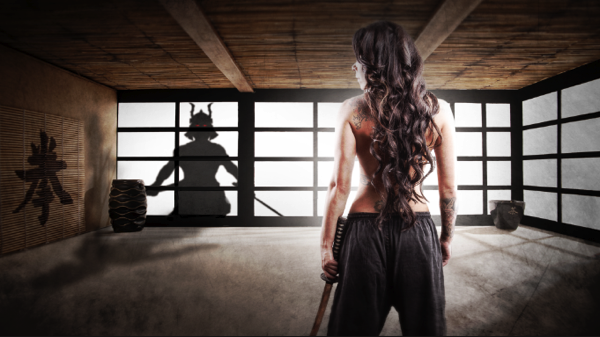
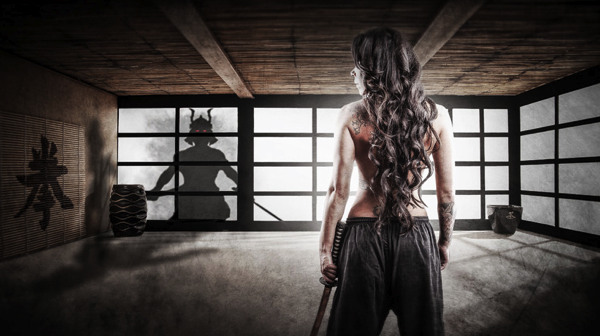
In this article I’ll show you how the “Samurai Girl” picture was done step by step. In addition there is a speed art video at the end of the article that shows the whole process from start to end in a 05:47 minutes Youtube video. It should make the whole process clearer.

Feel free to send me your questions via email at tom@purple-monkey.com

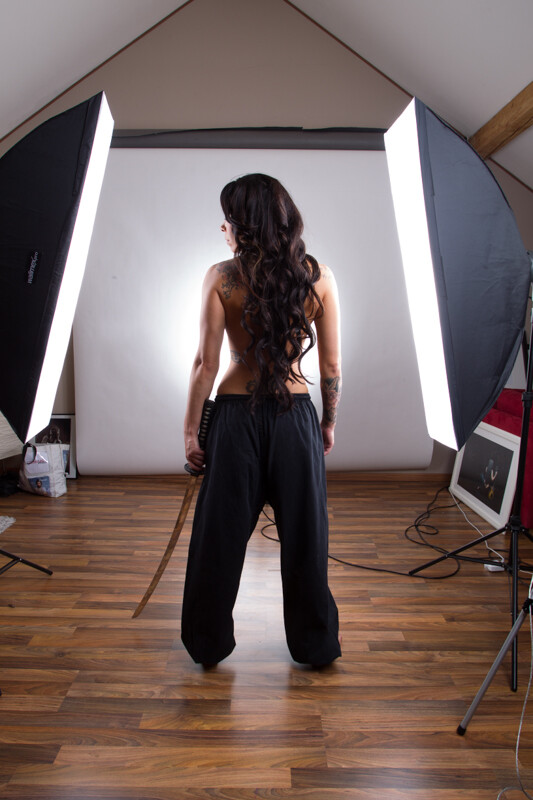
1 Base Image Jessica

Here is the image as it was shot. Before I start to extract the subject I use a technique to create that look on my models that consists of 6 Layers. I will write a separate tutorial on that topic, as it will deviate too much from the point of this tutorial.

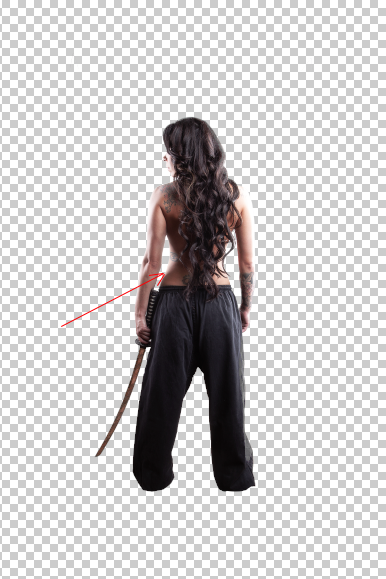
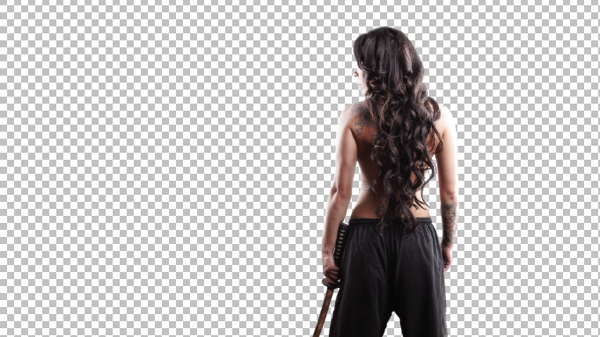
2 Model Liquify copy

I started with cutting out Jessica from the background. When you know that you are going to extract the subject for a photo manipulation or composite, make sure you shoot them on a background that will create an nice contrast around the edges. It will make your life a lot easier for the extraction process. The method I use to extract my subjects varies a lot depending on the need and the situation. The tools I usually use are the Pen Tool, Brush, Refine Edge, Lasso, Quick Selection and the Blending Option effects. In this case I used a mixture of Pen Tool, Brush and Refine Edges.

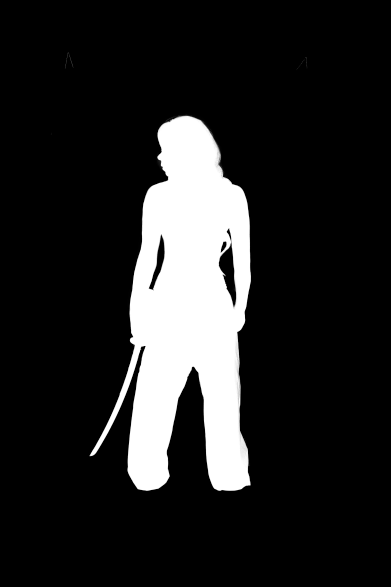
3 Mask

Here is a picture of the finished mask. I like to check the mask for imperfections by “Alt” clicking on the layer mask.. What I also do a lot is to check the mask against a white and a black background. I will usually show you all the imperfections on the mask especially fringing. If the extraction looks good against both backgrounds, then you can be sure that you won’t need many adjustments anymore against your final background.

4 Integrate into Image

I usually work on picture in the 16:9 format. Sometimes I quickly sketch my ideas on a piece of paper or on the iPad. I basically gives me an idea about the composition of the image. As soon as Jessica was extracted from the background I moved her over to the canvas using the move too. I scaled her down and positioned here approximately. I slightly corrected her position once the background was inserted.

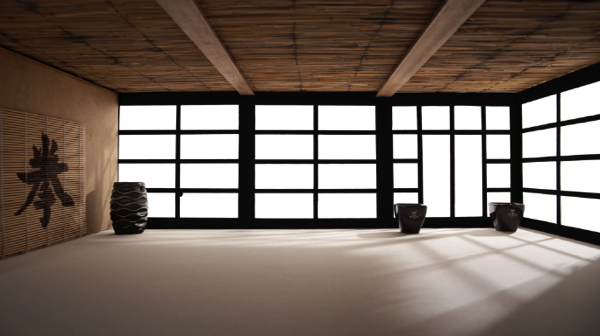
5 Original BG

At this point I also imported my background in order to see what color corrections would be needed to integrate Jessica into it. When I opened the stock image for my background I saw some things that would need modification.

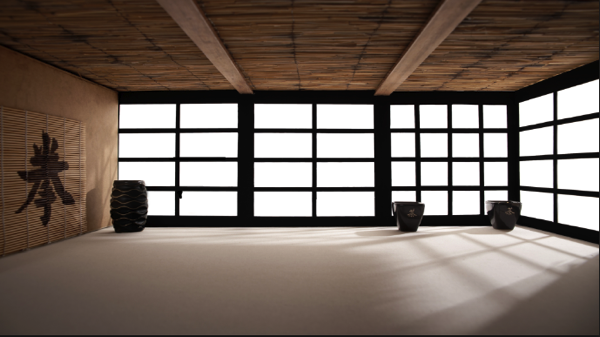
7 Corrected Bg

I didn’t like the doors on the right side as it would look weird when Jessica would be in position. So I just added some horizontal bars to solve that issue.

6 Gradient for Model

The first step I used to integrate Jessica was a Gradient map. The colors I used for the shadows was a sample of the wooden door frame (very dark brown) and for the highlights I used a sample of the Tatami. I lowered the opacity to about 45% to achieve an acceptable value. It’s important when you use this method that you use colors that are already present in the palette of the image.

8 Samurai

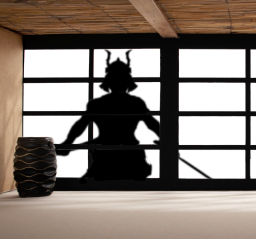
Next step was to integrate the Samurai. I’ve build the Samurai out of several stock photos and used an adjustment layer to darken it to complete black. I used a layer mask to hide the wooden frame of the window.

9 Samurai Eyes

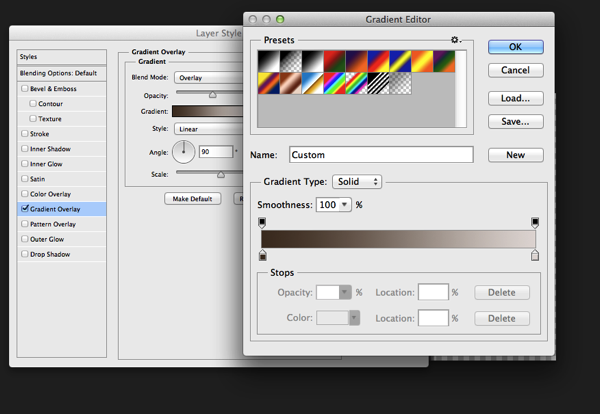
In order to make it more realistic I’ve added a dirty texture on top of the Samurai with a blending mode Overly and I slightly blurred him, since what we actually see is a shadow on the fabric. I then added the eyes with the brush tool and some subtle outer glow effects.

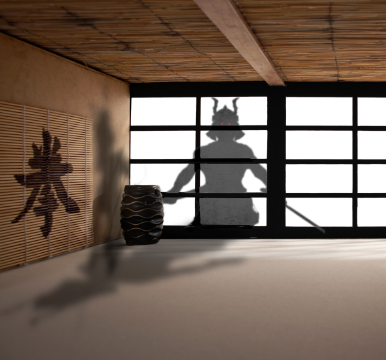
Next step was to create the shadows on the floor and the wall. I duplicate the Samurai Layer and used distort and warp to adjust it’s shape. I also painted the shadows onto the barrel, in the original picture the barrel was brightly lit from the right side. Since the Samurai is standing in front of it, the light source would be blocked.

13 Overlay Color

To blend everything together I use a simple technique that is not well known out there. I merge all the Layers together onto a new Layer ( Shift+Ctrl+Alt+E (PC) or Shift+Command+Option+E (Mac) ) and then use the Blur Average Filter. Switch the blend mode to overlay and reduce the opacity until the color matches. I then used the Tilt-Shift filter to align the average depth of field of Jessica to the background.

14 tilt Shift and Light

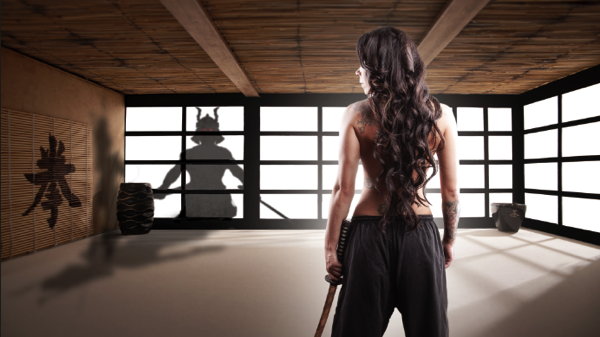
Finally I created a new layer on top of it change it’s blending mode to overlay and painted with a soft black brush around the samurai and around Jessica in order to direct the viewers eye through the picture. A last step was to lay a grungy texture in overlay over the whole image and reduce it’s opacity quite a bit.

15 Final

I try to do a maximum in Photoshop in terms of light and shadows. But when I finish an image I always have some fun in Lightroom with some presets or simply play around with the sliders. Some times I end up not using any of it, but most of the time I find some settings that adds value to the overall image. Now there is no secret to this, I just play around with Clarity, Blacks, Temperature, and Contrast until I see it going somewhere. In this case I added some contrast, quite a bit of Clarity and slightly desaturated the image.

16 Final LR

Here’s the video of the whole process dialed up to about 1000%

Check out more of Tom Di Maggio’s work at his websites at TomDiMaggio.com, Purple-Monkey.com” and on Facebook.

Post originally from: Digital Photography Tips.

Check out our more Photography Tips at Photography Tips for Beginners, Portrait Photography Tips and Wedding Photography Tips.

Samurai Girl Composite: Behind the Scenes Post Production Walk Through


Digital Photography School

 
Comments Off on Samurai Girl Composite: Behind the Scenes Post Production Walk Through

Posted in Photography


Walk on Water: Hydro-Floors Hide Secret Swimming Pools

18 Jun

[ By WebUrbanist in Design & Fixtures & Interiors. ]

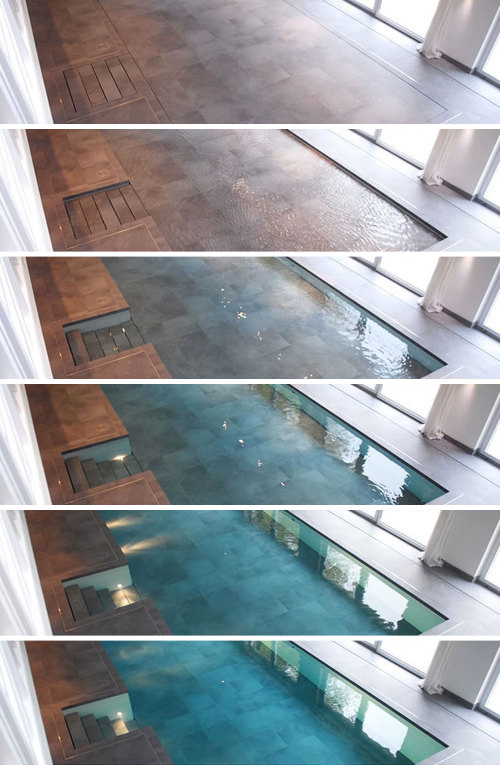
hidden pool on demand

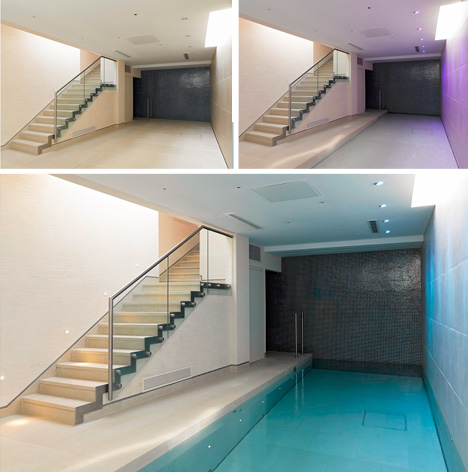
Adding a swimming pool or hot tub means displacing something else – usually a outdoor lawn, yard or deck or dedicated room inside a house. But what if you could have the best of both worlds: a usable space or surface replaced by a body of water when you want it?

hidden pool deck deployed

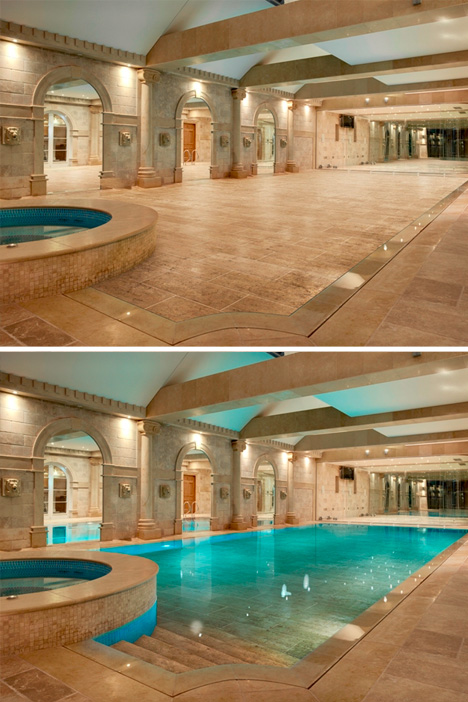
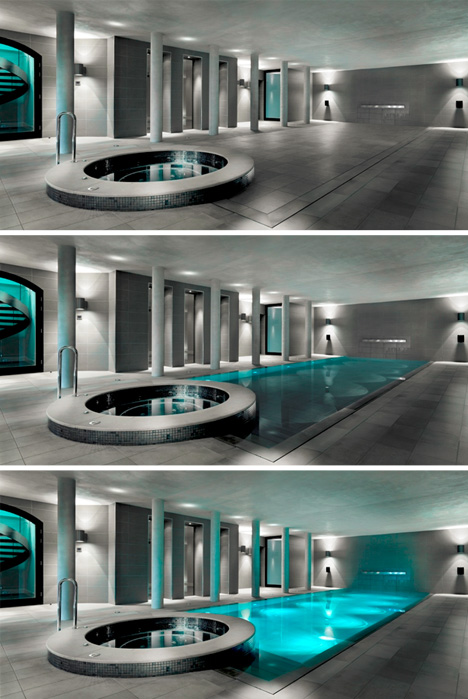
These designs effectively let you walk on walk on water, in a sense, thanks to dynamic and on-demand functionality right beneath your feet. Designers of the exterior and interior swimming and wading pools (as well as hot tubs) shown here include companies like Hydrofloors (images above) and Agor (video below).

At the push of a button, decking descends autometically and water fills in the void left behind – conceal, reveal, rise and repeat as desired, turning a cocktail into a pool party and back again.

hidden indoor swimming pool

Depending on the nature of user needs, the mechanically-controlled platforms lower to become pool bottoms but also steps down into the resulting water.

hidden movable floor tub

Aside from issues of cost (and one can only imagine how expensive such custom solutions must be – there are no list prices), the question that remains, of course, is: how hard is it to clean and maintain? Perhaps if you have enough money to afford to build one of these liquid luxury machines, that price point is moot.

Share on Facebook


[ By WebUrbanist in Design & Fixtures & Interiors. ]

[ WebUrbanist | Archives | Galleries | Privacy | TOS ]


WebUrbanist

 
Comments Off on Walk on Water: Hydro-Floors Hide Secret Swimming Pools

Posted in Creativity


Sideways Street Art: Muralist Makes Figures Walk on Walls

15 May

[ By WebUrbanist in Art & Street Art & Graffiti. ]

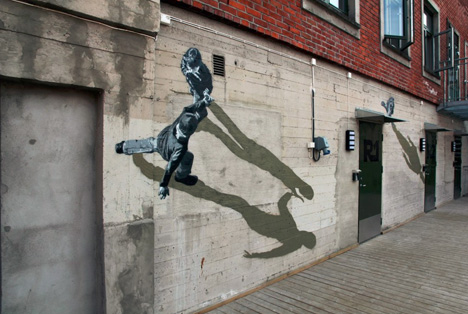
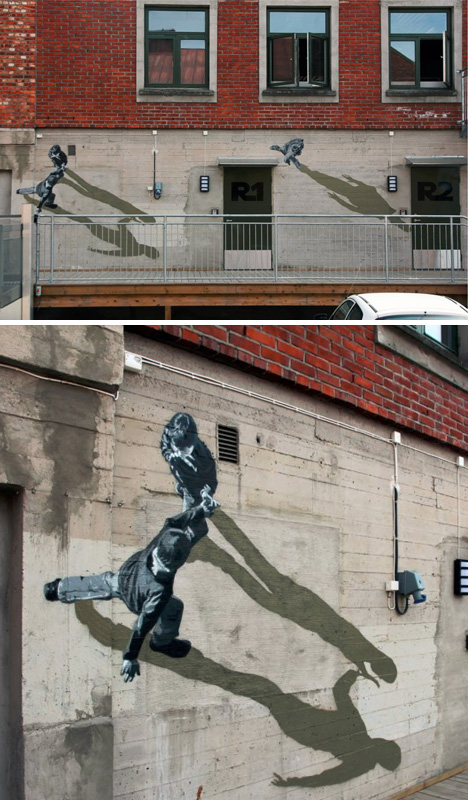
wall walking mural figures

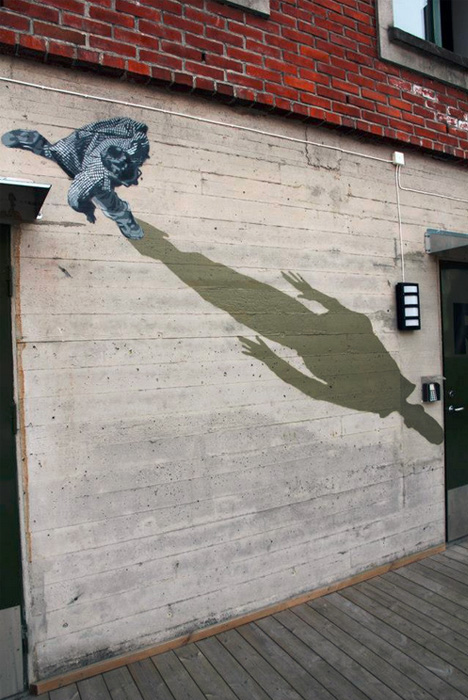
These layered creations are surprisingly realistic, even in black and white, thanks in part to their scale and reinforced by their shadows, but also due to the ordinary nature of the sidewalk scenes being depicted.

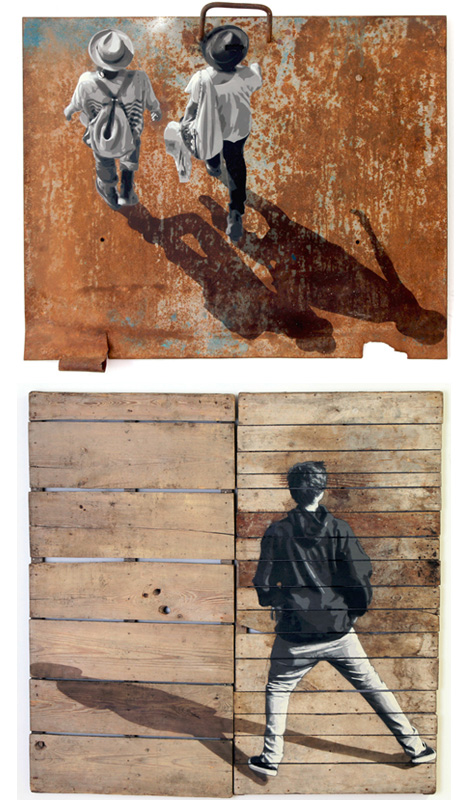
wall mural stencil art

Strøk (Anders Gjennestad) is a stencil artist and mural maker from Norway with works in various contexts, from city streets to suburban galleries.

wall gallery street artwork

Some of his gallery works repeat the same themes and similar scenes on scrap objects, from wooden pallets to metal doors, to those he presents on building walls.

wall sketch photo realistic

From the creator’s website: “His hand-cut, multi-layered stencils create photo-realistic imagery with depth and detail that [are] complex, tactile and mentally engagement. The placement and choice of material … painted on rusty metal, gritty walls, shiny glass”


Share on Facebook


[ By WebUrbanist in Art & Street Art & Graffiti. ]

[ WebUrbanist | Archives | Galleries | Privacy | TOS ]


WebUrbanist

 
Comments Off on Sideways Street Art: Muralist Makes Figures Walk on Walls

Posted in Creativity


Winter Walk Along the Poudre River in Fort Collins

11 Jan

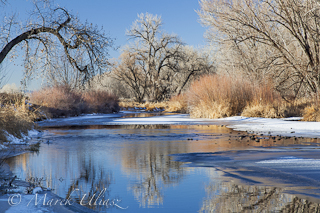
All my local paddling waters are covered by ice. Even the Horsetooth Reservoir is partially frozen as seen in this recent picture of the Inlet Bay. So, it’s time for more hiking, biking and inline skating or driving to the South Platte River which is open and flowing.

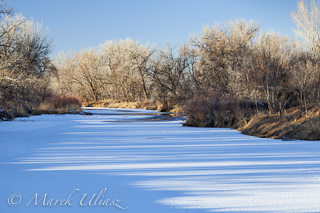
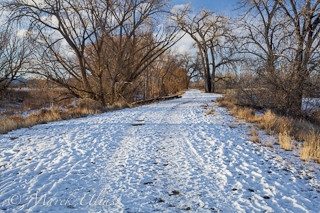
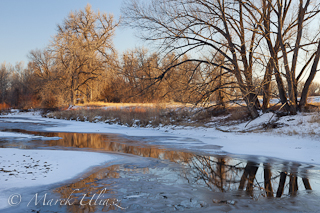
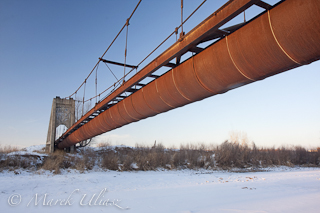
Here is a little gallery of pictures shot during winter time along the Cache la Poudre River in Fort Collins. They came from favorite natural areas, Arapaho Bend and Riverbend Ponds or just from the Poudre biking trail.

Cache la Poudre River, Fort Collins winter river in Colorado
winter road - Riverbend Ponds Natural Area Cache la Poudre River in winter
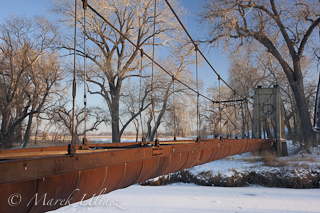
rusty flume suspended over a river old rusty aqueduct across a river

These images are available for licensing as royalty free digital downloads starting with $ 2 directly from my stock photography portfolio. Recently, I started to sort my Colorado portfolio into several galleries. It should not be surprising that three of them are related to water:


Horsetooth

Horsetooth

Horsetooth Reservoir and Horsetooth Mountain Open Space near Fort Colorado – a great area for water sports, hiking, climbing, trail running, and mountain biking. It is my favorite local destination for kayak, canoe and SUP paddling.


Cache la Poudre River

Cache la Poudre River

Pictures from the Poudre Canyon as well as pictures of the river as seen from biking trails in Fort Collins and downriver all the way to Greeley and confluence with the South Platte River.

water

Water

Water issues mostly in Colorado – river diversion, irrigation, ditches, water pollution. Many pictures in this gallery are shot from a kayaker perspective.

Related posts:
Fort Collins and Northern Colorado Pictures in My Stock Photography Portfolio
Fort Collins from Winter Hiking the Horsetooth Rock Trail
Horsetooth Reservoir in Winter Scenery
Riverbend Ponds in Late Fall Scenery
Paddling the Poudre River at Nix Natural Area in Fort Collins


paddling with a camera

 
Comments Off on Winter Walk Along the Poudre River in Fort Collins

Posted in Photography


2011 Toronto Natural Hair & Beauty Show – Runway Walk Practice Pt2

06 Dec

Runway Walk for the Toronto Natural Hair Dancehall Couture show Friday September 16th 2011 7 PM at the Vue.
Video Rating: 5 / 5

 
Comments Off on 2011 Toronto Natural Hair & Beauty Show – Runway Walk Practice Pt2

Posted in Nikon Videos