RSS
 

Posts Tagged ‘Ruin’

Avoid These 4 Post-Processing Mistakes That Can Ruin Your Images

25 Jul

Post-processing is a particularly sensitive topic and there’s always a certain amount of processing versus non-processing discussions that take place after articles on the topic. It’s not hard to understand since how you choose to process your images is your artistic choice.

There’s not necessarily a right or wrong way to go about it but, that being said, there are certain “mistakes” that I notice quite regularly, especially amongst beginning photographers who aren’t quite able to achieve the looks they want.

Some of these mistakes are obvious while others, not so much. What they have in common, though, is that they are mistakes that most of us are guilty of making or have made at some point. Let’s dive in.

1. Not Considering Color

Let’s start with a mistake that the majority of us are or have been making, and one which isn’t necessarily that obvious to all of us: failing to understand color harmonies.

Color harmonies might be easier to control as portrait or studio photographers but as landscape photographers, we have to work with the conditions nature gives us. Sometimes, our job is to find order in the chaos and highlight the most interesting aspects of the landscape. Indeed, it’s not an easy task.

Avoid These 4 Post-Processing Mistakes That Can Ruin Your Images - person in red jacket on a hill

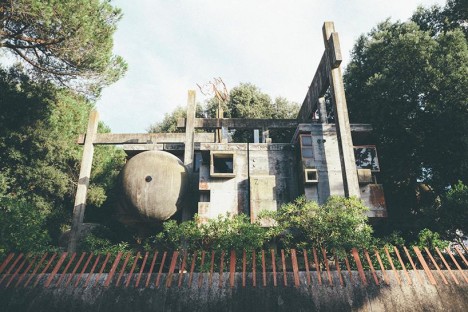
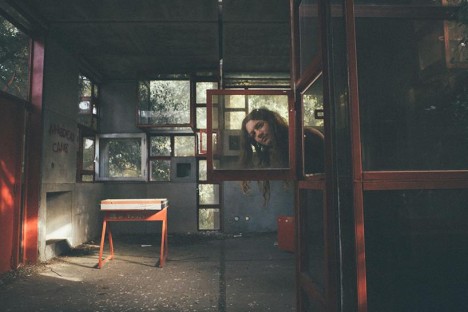
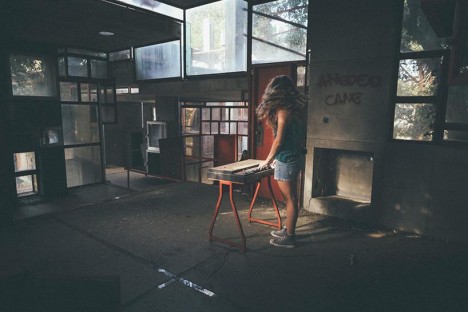
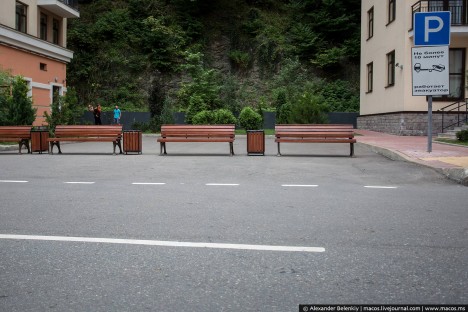
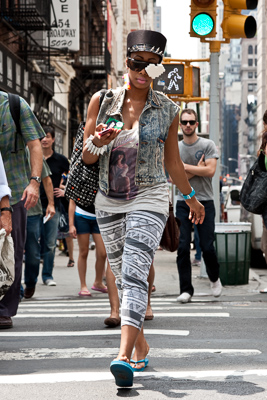
In this image, I desaturated the blues to keep the focus on the person walking down the hill.

The discussions can quickly become controversial as we start talking about working with colors in nature. I’m not here to say what you should or shouldn’t do but I’ll give you a couple of ideas on how you can work with color in post-processing:

  1. Use the HSL sliders in Lightroom/Camera RAW to adjust the hues of certain colors to create a better color harmony in the image.
  2. Rhe HSL sliders can also be used to desaturate colors that are too dominant and take unnecessary attention away from the main subject.
  3. Use techniques such as Luminosity Masks or Saturation Masks in Photoshop to selectively work on the brightness, saturation and contrast of specific areas within an image.

The goal when working with colors should be to only highlight those that are in harmony with each other. I often bring out a color wheel to check that the colors in an image are in harmony and if I need to desaturate (or saturate) any of them.

Avoid These 4 Post-Processing Mistakes That Can Ruin Your Images - photo with alpenglow mountain scene

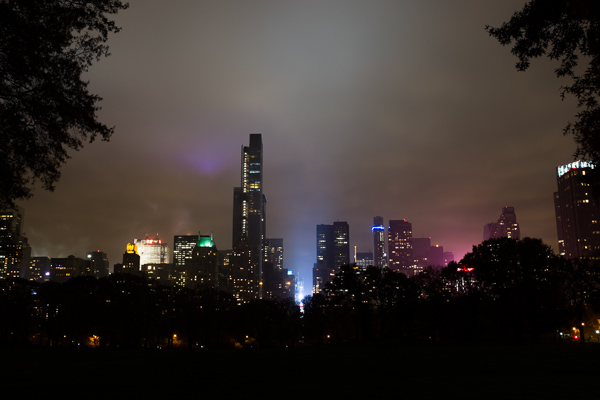
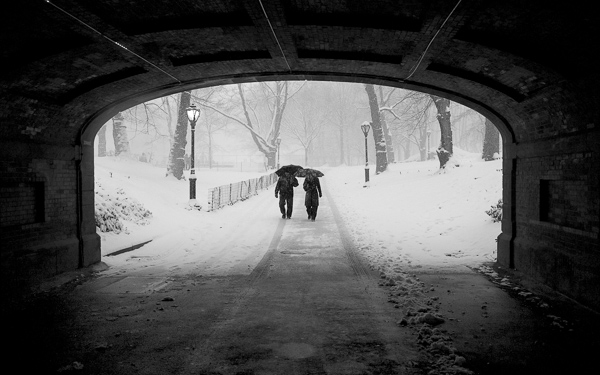
Notice how all the colder tones are slightly desaturated and darkened to enhance the focus on the glowing mountain.

2. Only Making Global Adjustments

This brings us to mistake number two: you only make global adjustments. In other words, each adjustment you make is applied to the entire image.

Let’s say that you want to increase the green grass in one of your summer images. The traditional way of boosting the color is by using the Saturation slider. However, that will increase the saturation of the entire image and will in most cases lead to an oversaturated image; which results in visual chaos rather than a pleasant experience when viewing it.

In mistake number one, I briefly mentioned using the HSL sliders for making adjustments. By using this panel you’re able to affect only one specific color rather than the entire image. By using the Green Saturation slider you can target only the green colors and make an adjustment to only those hues.

Avoid These 4 Post-Processing Mistakes That Can Ruin Your Images - lighthouse and green field or hill

It’s not only when adjusting the saturation that you should work selectively though. Personally, I make selective adjustments (often through Luminosity Masks in Photoshop) when working with color, contrast, brightness and pretty much any other adjustment you can think of.

3. Clarity at 100%

You might not want to hear this but increasing Lightroom’s Clarity slider to 100% is rarely a good idea, especially when it’s added globally. While I agree that adding clarity can often give an extra pop to the image as it brings out a lot of nice textures and details, it does more harm than good when it’s applied to the whole image. It also adds a significant amount of noise and lowers the overall quality of the file.

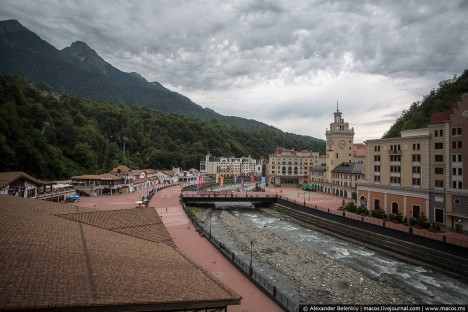
Let’s look at an example. In the image below I have increased the clarity to 100%. (Besides that, no other adjustments were made). I do like how it brought out a lot of texture in the mountain but the foreground now contains just as much texture and it’s competing with the mountain to grab your attention. In fact, the moss in the foreground is the natural place to look as it’s both bright and crisp.

mountain scene cloudy - Avoid These 4 Post-Processing Mistakes That Can Ruin Your Images

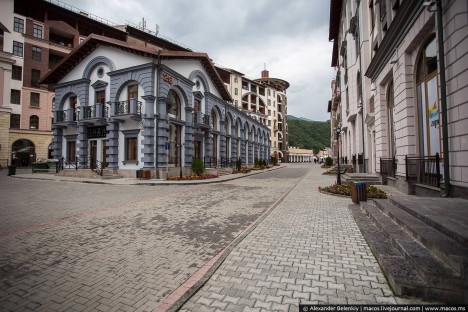
If instead, I only add clarity to the mountain by using a Gradient Filter you’ll see that it makes a big difference compared to the image above. There’s still nice texture in the mountain but the foreground is now less crisp and working as a natural leading line.

Note: I prefer to rather use a mask in Photoshop and add it to only the mountain, as a gradient filter adds it to more places than what I want. But you can now use the brush tools to edit your gradient filter in LR as well.

Avoid These 4 Post-Processing Mistakes That Can Ruin Your Images - same scene different edit

Clarity only applied to the mountain.

Keep in mind that you want the most important areas of the image to be the sharpest. Naturally, the viewer’s eyes are guided to the sharpest parts of the image. Also, there’s no point in adding clarity to soft surfaces such as a blue sky or silky water. These are often better left alone.

4. Leaving Dust Spots

Unless you’ve got a brand new camera or you’re a superstar when it comes to having clean equipment, it’s likely that you’re going to have at least a few dust spots on your images. This is especially true if you regularly photograph in rough conditions including wind, snow, rain, and sand.

Removing dust spots is super easy and takes no more than a few minutes, so really there is no excuse not to do so. You have to admit, it looks quite unprofessional if a beautiful image has a bunch of dust spots in the sky. Would you hang that on your wall?

Keep in mind that if you enlarge and print your images, even the smallest dust spots become visible. Therefore, it’s a good practice to zoom in 100% on the image to look for any possible dust spots. When you find one, simply use Lightroom’s Spot Removal Tool and move on to the next.

It can be tedious work if you’ve got an extremely dirt lens but it’s something that needs to be done.

Avoid These 4 Post-Processing Mistakes That Can Ruin Your Images

Turn on “Visualize spots” to help you find dust.

Conclusion

To end this I want to say one final thing: the most important is that you’re happy with the images you capture and process. If you like highly saturated images, go for it. If you like tilted horizons, good for you.

Stay true to your style and vision and create the art you want – don’t let anyone decide what your images should look like.

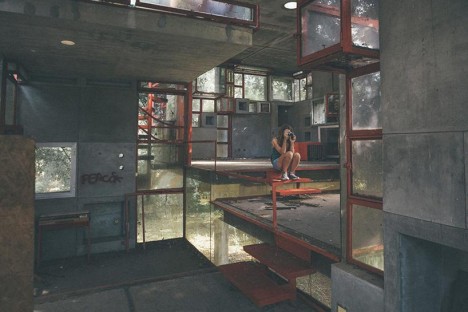
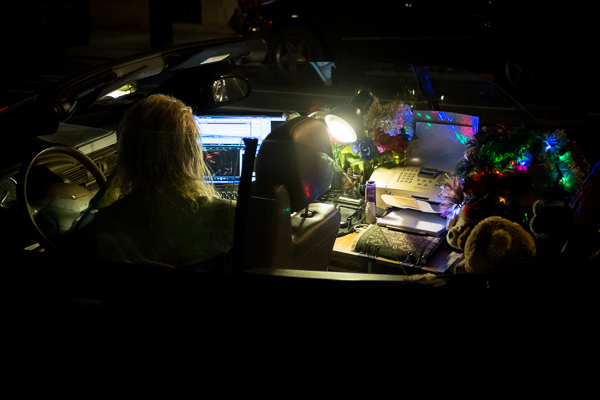
Using selective adjustments I was able to darken only the brightest part of the image

The post Avoid These 4 Post-Processing Mistakes That Can Ruin Your Images appeared first on Digital Photography School.


Digital Photography School

 
Comments Off on Avoid These 4 Post-Processing Mistakes That Can Ruin Your Images

Posted in Photography


Heathen’s Gate: Ingenious Overlay Reveals History of Ancient Roman Ruin

02 Jun

[ By WebUrbanist in Culture & History & Travel. ]

monumental

A pane of glass overlaid with a simple line drawing brings crumbling ruins to live at one of Austria’s most famous historical sites, reanimates a ruin near the Open Air Museum Petronell. When a viewer lines up the illustration with the structure, known as Heidentor (Heathen’s Gate), the image completes itself in a compelling yet entirely low-tech fashion.

historical military city

Located just east of Vienna, Carnuntum dates back to the the 1st Century A.D., when Roman soldiers expanded on an existing town 50,000 people to create a military encampment. Between 354 AD and 361 AD a huge triumphal monument was erected next to the camp and city. Contemporary reports suggest that Emperor Constantius II had it built to commemorate his victories.

historical military encampment

“When the remains of Carnuntum disappeared after the Migration Period the monument remained as an isolated building in a natural landscape and led Medieval people to believe it was the tomb of a pagan giant. Hence, they called it Heidentor.”

Preserving ancient historical sites is often a balance between stabilization and restoration; fully restoring can enhance the exterior appearance, but is costly and arguably diminishes the authenticity of a ruin. This approach strikes a balance, much like augmented overlays in digital history apps.

Share on Facebook


[ By WebUrbanist in Culture & History & Travel. ]

[ WebUrbanist | Archives | Galleries | Privacy | TOS ]


WebUrbanist

 
Comments Off on Heathen’s Gate: Ingenious Overlay Reveals History of Ancient Roman Ruin

Posted in Creativity


Inhabited Ruin: Modern Home Hidden Inside Abandoned Masonry Shell

07 Apr

[ By WebUrbanist in Architecture & Houses & Residential. ]

inhabited ruin

When the architect of this remarkable remodel was hired to create a new home for his clients, a derelict building on the site caught his eye and turned out to be the focal point of a marvelous design project.

ruin exterior

ruin side

Estudio Castillo Oli (images by Angel Baltanas) balances old and new in this hybrid project, inserting a contemporary dwelling into a stone-and-brick shell on the site.

window glazing

ourtyard inside

Part of the existing structural remnants were retrofit with modern windows and a roof to create interior spaces for the home while the rest were left up as a kind of fence for a semi-private exterior courtyard.

inner workings

view above

New ceramic tiles and timber framing matches the existing context while steel and glass add a modern touch. A glass wall between inside and outside spaces reduces the sense of separation between them.

window detail

timber modern

Inside, new walls are pulled back from window openings to reveal the old structure. Glass and trim likewise give space to old openings, preserving what was there. The net result is a gorgeous, rich and complex mixture of aged elements and new, creating something with a sense of time but also fit for modern living.

Share on Facebook


[ By WebUrbanist in Architecture & Houses & Residential. ]

[ WebUrbanist | Archives | Galleries | Privacy | TOS ]


WebUrbanist

 
Comments Off on Inhabited Ruin: Modern Home Hidden Inside Abandoned Masonry Shell

Posted in Creativity


Evolution of Decay: Watch American Buildings Fall Into Ruin Over 40+ Years

19 Nov

[ By SA Rogers in Abandoned Places & Architecture. ]

detroit-time-lapse-2

Architecture that was at its prime in the 1970s has slowly fallen into decline and often ruin thanks to decades of neglect, especially in America’s poorest and most racially segregated communities, including Gary, Detroit, Camden and Harlem. Many of these structures were historically significant, built between the late 1880s and the 1920s, but when no budget exists to care for them and entire cities are left behind by economic progress, the forces of nature and decay take over.

screen-shot-2016-11-18-at-10-01-16-am

In a potent visual representation of poverty in America’s urban centers and the loss of historic architectural character via demolition, Chilean-born photographer Camilo José Vergara has spent the last 40+ years documenting the downfall of dozens of structures and city streets. The resulting series, ‘Tracking Time,’ is a time-lapse in slow motion, photographing the same buildings once every few years.

screen-shot-2016-11-18-at-10-01-52-am

screen-shot-2016-11-18-at-10-02-16-am

One old shop in Harlem gets painted several times over, has its stained glass windows knocked out, loses a facade to an ugly garage door and is split up into multiple smaller businesses before finally being boarded over and transformed into a mini-mall-style church in 2014.

screen-shot-2016-11-18-at-10-21-00-am

screen-shot-2016-11-18-at-10-21-08-am \

screen-shot-2016-11-18-at-10-21-22-am

screen-shot-2016-11-18-at-10-21-30-am

screen-shot-2016-11-18-at-10-21-38-am

screen-shot-2016-11-18-at-10-21-50-am

screen-shot-2016-11-18-at-10-22-01-am

A massive brick building in South Bronx becomes modest row houses, while The Ransom Gillis House in Detroit (top) sinks into the ground, its bricks falling in clumps, the roof caving in, ivy and trees taking over. It’s almost completely obscured by greenery before a restoration brings it back to its former glory.

screen-shot-2016-11-18-at-10-00-54-am

But other stories aren’t so positive, since people care more about mansions than they do about public housing projects, row houses, and modest residential neighborhoods. Occasionally, Vergara ventures inside to show us that even though the facades still look beautiful, like that of the former Camden Free Public Library, the interiors are utterly destroyed.

screen-shot-2016-11-18-at-10-10-30-am

screen-shot-2016-11-18-at-10-10-40-am

screen-shot-2016-11-18-at-10-11-08-am

screen-shot-2016-11-18-at-10-11-24-am

screen-shot-2016-11-18-at-10-11-54-am

It can be a heartbreaking journey but also a fascinating one, watching some of these structures remain the same for many years while the world changes around them before transforming into something new. And some do manage to endure.

Share on Facebook


[ By SA Rogers in Abandoned Places & Architecture. ]

[ WebUrbanist | Archives | Galleries | Privacy | TOS ]


WebUrbanist

 
Comments Off on Evolution of Decay: Watch American Buildings Fall Into Ruin Over 40+ Years

Posted in Creativity


Photographer captures the ruin of Fukushima’s exclusion zone

14 Jul

Inside the Fukushima exclusion zone

An abandoned supermarket in Fukushima. Photo by Keow Wee Loong

Much of the area around Japan’s Fukushima Daiichi Nuclear Power Station has been closed to the public following the disaster that struck the region over five years ago. The earthquake and subsequent tsunami of March 11, 2011 caused a meltdown at the plant, and some 170,000 people were evacuated immediately from the Prefecture. The area closest to the plant has remained closed since then as the lingering radiation contamination continues to pose a health risk, but one curious photographer would not be deterred.

Keow Wee Loong, a Malaysian photographer currently based in Thailand, snuck into the zone with his fianceé to document the current state of Fukushima’s abandoned towns – and what was left behind. From a supermarket picked over by wild animals, forgotten laundry at a laundromat and a wall calendar forever frozen on March 2011, his photos show the eerie remains of daily life brought to an abrupt halt.

You can see more of his Fukushima photos and his photography on his Facebook page.

Inside the Fukushima exclusion zone

Structure collapse resulting from the magnitude 9.0 earthquake. Photo by Keow Wee Loong

Inside the Fukushima exclusion zone

Abandoned video rental store. Photo by Keow Wee Loong

Inside the Fukushima exclusion zone

CDs and videos still on the shelves. Photo by Keow Wee Loong

Inside the Fukushima exclusion zone

Merchandise litters the floor of an abandoned bookstore. Photo by Keow Wee Loong

Inside the Fukushima exclusion zone

Overgrown parking lot of an abandoned convenience store. Photo by Keow Wee Loong

Inside the Fukushima exclusion zone

Residents left laundry and 100 yen coins behind in this Fukushima laundromat. Photo by Keow Wee Loong

Inside the Fukushima exclusion zone

A calendar page showing the month of the disaster. Photo by Keow Wee Loong

Inside the Fukushima exclusion zone

A mall in the town of Tomioka. Photo by Keow Wee Loong

Inside the Fukushima exclusion zone

An abandoned supermarket that has likely been visited by wild animals in the area. Photo by Keow Wee Loong

Articles: Digital Photography Review (dpreview.com)

 
Comments Off on Photographer captures the ruin of Fukushima’s exclusion zone

Posted in Uncategorized


Et tu, Brutalism? ‘Experimental Home’ Now a Modern Roman Ruin

30 Dec

[ By WebUrbanist in Abandoned Places & Architecture. ]

experimental house ruins rome

Photographers traveling to photograph the ruins of Rome are generally so distracted by ancient remnants they naturally overlook this unique decaying structure on the outskirts of the city: the ‘Casa Sperimentale’ (Experimental House) created as a model to study interactions light, space and geometry at 1:1 scale.

experimental geometric brutalist abode

experimental home concrete sphere

Designer and shutterbug Oliver Astrologo sought out this decaying relic, which has gone into further decline since the death of its designer, Giuseppe Perugini, in the 1990s. A work of concrete, metal and class, the asymmetrical dwelling pushes out in unexpected directions and frames surprising spaces.

experimental playground study architecture

experimental scale model modernism

experimental window details

experimental desk interior design

As with many abandonments, signs of decay are showing, vandalism has further deteriorated the site and structure while wild plants continue to encroach as well. Figures in the photographs both help give the unusually-sized spaces and details a sense of scale, while also adding a layer of human emotion to the shots.

experimental circular bathroom window

experimental climber urban explorer

The building is a product of its times, drawing on planes-in-space Modernism and thick concrete Brutalism, almost as if famous architects from these stylistic traditions got together to make a pavilion or playground. And today, that is what it effectively is: a semi-enclosed space for urban explorers to climb and document.

Share on Facebook


[ By WebUrbanist in Abandoned Places & Architecture. ]

[ WebUrbanist | Archives | Galleries | Privacy | TOS ]


WebUrbanist

 
Comments Off on Et tu, Brutalism? ‘Experimental Home’ Now a Modern Roman Ruin

Posted in Creativity


Post-Olympic Abandonment: Sochi Already on the Road to Ruin

09 Sep

[ By WebUrbanist in Abandoned Places & Architecture. ]

sochi ghost town olympics

The Olympics have a long history of leaving a mixed legacy in their wake but the story of Sochi is particularly strange – it was never completely finished in the first place, and is already nearly abandoned less than a year after it hosted the Winter Games of 2014.

sochi art abandoned deserted

sochi remains building square

sochi abandoned after games

Already located in a remote area of Russia (albeit near the country’s largest resort area), it is perhaps no surprise that this Olympic Village would not be sustainable after serving as a venue. Russian photographer Alexander Belenkiy recently visited to document the deserted architecture of the area.

sochi ghost town river

sochi empty bridge scene

sochi sidewalk river place

His photos show what you might expect – empty streets, sidewalks, buildings and parking structures, many showing signs of degradation and disuse. Anyone who tuned into the media attention during and in the run-up to the games knows that the facilities were also in many cases shoddily constructed or incomplete to begin with.

sochi failed parking structure

sochi abandoned deserted place

Stylistically, the architecture is a strange mix of contemporary and chistorical with elements of rural-town traditionalism, resort-village detailing and decorative columns, colors and facades spanning and mixing various movements and periods. Without upkeep, though, these eclectic remixes may not be long for this world.

sochi russia 6 months

sochi after the games

sochi deserted city streets

TThis was Russia’s first time hosting the Winter Olympic Games, but it had to start largely from scratch: “The site of a training centre for aspiring Olympic athletes, in 2008, the city had no world-class level athletic facilities fit for international competition. To get the city ready for the Olympics, the Russian government committed a $ 12 billion investment package. According to some estimates, the investments necessary to bring the location up to Olympic standards may have exceeded that of any previous Olympic games. By January 2014 the construction costs had been reported to exceed the $ 50 billion mark, making it the most expensive Olympic Games in history.”

Share on Facebook


[ By WebUrbanist in Abandoned Places & Architecture. ]

[ WebUrbanist | Archives | Galleries | Privacy | TOS ]


WebUrbanist

 
Comments Off on Post-Olympic Abandonment: Sochi Already on the Road to Ruin

Posted in Creativity


Avoid These 10 Mistakes That Can Ruin Your Image Quality

08 Jul
Central Park South.

Central Park South.

How many times have you captured an amazing image only to view it on your computer, or as a print, and realize that you screwed something up along the way.

Unfortunately, the only way to stop doing a lot of these easy-to-make mistakes is to have an image ruined by them.  Once you screw up an image you’ll quickly learn not to make the same mistake again.

Here are the most frequent ways I see photographers ruining their images. Avoid these 10 mistakes that can ruin your images

1. Leaving Image Stabilization on when using a tripod

Everyone learns this tip too late. Image stabilizers (in your lens) usually make your images sharper by reducing camera shake. However, when your camera is on a tripod and perfectly still, the motor can actually cause shake! I know a few of you are shaking your head right now as I did when I learned this. If you couldn’t figure out why your tripod images weren’t perfectly sharp, this is usually the reason, although a strong wind or touching the tripod or camera while shooting can do this as well.

2. Not using a fast enough shutter speed

Lego Girl, SoHo.

Lego Girl, SoHo.

Unless you are on a tripod, to achieve a sharp shot your shutter speed needs to be at least 1 over your focal length.  So if you are shooting at 50mm your shutter speed needs to be at least 1/50th of a second (and I like to add a little leeway to that to be safe).  If you are on a cropped sensor, remember that a 50mm lens might be the equivalent of an 80mm or 100mm view, so make sure to adjust for that.

For moving subjects, 1/320th of a second is my ideal speed to freeze motion.  For fast moving objects such as cars or sports, I prefer an even faster shutter speed.

Be especially careful when shooting on Aperture Priority mode or in the auto settings, because it is easy for the camera to set the shutter speed to a setting that will introduce blur into your image without you noticing.  For this reason I frequently like to shoot in Shutter Priority mode.

3.  Not focusing exactly on the most important object, especially when shooting with a large aperture

If you are shooting with a small aperture, such as f/8 and above, you will often have leeway, but especially when shooting with a large aperture (like f/2), you need to make sure that the most important element in the image is the sharpest.  If this is not the case, it might not always be noticeable on the monitor, but it will show up when you make a print.

This is especially important when doing portraiture. Missing the sharpness on the eyes often means ruining the image.

Be especially careful when the element you are focusing on is small, because it will be very easy for the camera to focus on the area behind it instead. This is a mistake that is frequently made by newer photographers. In these tricky situations you need to pay attention to whether the autofocus is picking up the small element.

4. Not raising your ISO up higher when needed

In situations where the light is not strong and you need a fast shutter speed and a large aperture, don’t be afraid to raise your ISO. I see too many people afraid to go above ISO 200.  I use ISOs of 800, 1600 and even 3200 a significant amount. Many digital cameras, especially ones made within the last four years, can handle these ISOs.  Yes it will add noise to your photos, but in many cases you will notice that despite the noise, the technical quality of your images will be better. Noise can look very pleasing, especially on the newer digital cameras.

Mobile Office, Midtown.

Mobile Office, Midtown. ISO 3200

5. Moving while you shoot

This is my biggest pet peeve, by far.  I am normally a very calm person, but when I see this it makes me want to grab the photographer and shake them silly.  I see so many people that take photos without breaking their stride.  Stop your motion every time you take a shot, if even for a second!  Keep your hands still!  It’s not difficult.  Respect every image that you take enough to stop and think about it for a second, and your images will ultimately respect you when they turn out well in print.  Sorry, that is the end of my rant for the day.

6. Over-sharpening

Be careful of over-sharpening your photos. I see this happen all too often. Particularly with high resolution cameras with the right settings, your images often will only need a minimal amount of sharpness. If you overdo the sharpness it will actually have the reverse effect, making your image look fake or as if it was blown up to a larger size.

Couple in Snowstorm, Central Park

Couple in Snowstorm, Central Park

7. Resizing your images after you sharpen them

Sharpening should be the last step after you have sized the image to your final print size. If you sharpen your image and then resize them it will negatively affect the quality of your photo.

8. Not using the correct color space: ProPhoto RGB > Adobe RGB > sRGB

You should always keep your digital photo in the largest colorspace possible. While digital printers cannot yet print all of the colors in ProPhoto RGB, and many printing services prefer you to send them your files in Adobe RGB. When processing my RAW images to Tiff files I always convert them to the ProPhoto colorspace because it is the largest. Why not save your files with the most amount of color information possible?  Many cameras will allow you to set this in the settings.

However, did you know the sRGB is the best colorspace to show your images on the web? Yes, when printing your images it is best to keep them in ProPhoto or Adobe RGB, but when rendering them for viewing over the web, convert them to sRGB.

When you convert an image to a different colorspace, always make sure to do it as a copy of the original image. If you convert a ProPhoto image to sRGB and save it, you will not be able to retrieve that color information if you then convert it back to ProPhoto.

Bow Bridge in Fall, sRGB

Bow Bridge in Fall, sRGB.

Bow Bridge in Fall, Adobe RGB

Bow Bridge in Fall, Adobe RGB. A subtle but noticeable difference.

9. Not using exposure compensation (+/-)

When shooting in overly light or dark situations in Aperture Priority or Shutter Priority mode, the light will fool the camera’s sensor.  For instance, if you photograph in a dark alleyway, your camera’s sensor will try to overly brighten the scene, while if you capture an image with a lot of bright sky or white snow, the camera will try to overly darken the scene.

This is where your exposure compensation comes in.  It is a vital tool for any photographer, especially in tricky lighting situations.

10. Not resetting your camera

Take a look at your camera settings at the beginning of the day and frequently throughout a day of shooting. Some of the most common settings to forget to reset are a high ISO from the night before, your exposure compensation, your white balance setting, and checking your autofocus switch.

Final thoughts

A few final notes that must be mentioned.  With digital images, you can always fix many problems later in post-production. However, there is still no substitute for getting the image perfect in camera.  Processing is necessary in some way for every digital image, but the more extreme, the more you can damage the quality of your images.

It is tough to notice the effects of many of these mistakes when viewing the images on the web or on a monitor, but when you zoom in close to the details or make a print, especially a print of a decent size, these effects with be very noticeable.

The post Avoid These 10 Mistakes That Can Ruin Your Image Quality by James Maher appeared first on Digital Photography School.


Digital Photography School

 
Comments Off on Avoid These 10 Mistakes That Can Ruin Your Image Quality

Posted in Photography


3 Tips to Ruin Your Photo with a Watermark

22 Apr

Strange as it may seem: photographers, who should be highly creative persons with fine artistic taste tend to be bloody awful designers. But don’t get me wrong here. I’m not expecting someone to be able to design me an outstanding corporate logo just because he is a great photographer. But the massacre begins even at the level of watermarking their Continue Reading

The post 3 Tips to Ruin Your Photo with a Watermark appeared first on Photodoto.


Photodoto

 
Comments Off on 3 Tips to Ruin Your Photo with a Watermark

Posted in Photography


Ruin Academy: Urban Lab in an Abandoned Building

04 Apr

[ By Steph in Abandoned Places & Architecture. ]

Ruin Academy 1

Occupying an abandoned five-story apartment building in central Taipei, Ruin Academy is a living architectural laboratory where holes drilled in the walls let rain inside, plants grow from the floors and the bones of the structure serve as ‘compost’ for the future of the city. A collaboration between Finland-based Casagrande Laboratory and the Taiwanese JUT Foundation for Arts & Architecture, this project aims to “re-think the industrial city and the modern man in a box.”

Ruin Academy 3

Ruin Academy 2

Ruin Academy serves as a setting for workshops and courses for various Taiwanese and international universities in subjects like architecture, urban design and environmental art. The lines between the city and the building have been blurred with the removal of windows and interior walls, so bamboo and vegetables can be grown indoors. Students and professors sleep in ad-hoc dormitories. The mahogany elements of the interiors, like walkways and steps, are made to be rearranged as the inhabitants’ needs change.

Ruin Academy 5

Ruin Academy 4

“The Ruin Academy is looking at the ruining processes of Taipei that keep the city alive,” says Marco Casagrande on the Ruin Academy blog. The idea is that static urban structures aren’t a natural way of life, and that the ‘Third Generation City’ would mix nature with human construction in an ever-changing symbiosis. Restoring nature within cities, growing food indoors, and living in structures that constantly adapt and change is seen as a more organic way for humans to interact with our environment.

Ruin Academy 6

The Ruin Academy is just one of the many illegal, unsanctioned ‘parasite’ structures that have popped up on top of and around Taipei’s conventional modern buildings. Organic and often transient structures made of materials like bamboo or plastic sheeting sprout on the roofs of concrete skyscrapers and in abandoned lots, used as artist housing, urban farms, night markets and other social gathering places.

Share on Facebook


[ By Steph in Abandoned Places & Architecture. ]

[ WebUrbanist | Archives | Galleries | Privacy | TOS ]


WebUrbanist

 
Comments Off on Ruin Academy: Urban Lab in an Abandoned Building

Posted in Creativity