RSS
 

Posts Tagged ‘Personal’

Interview: Photographer Cath Simard talks about developing your own personal style

11 Aug

Introduction

Above: El Chaltén, located in the Argentine side of Patagonia, is known as the National Capital of trekking.

I first stumbled across Cath Simard’s work on Instagram and was instantly mesmerized by its beauty. Not only does the Canadian photographer capture stunning and unsullied locations around the globe, she’s developed a distinctive style. Every photographer serious about making a living with their work especially needs to focus on creating an aesthetic that makes them instantly recognizable.

Simard’s humble, down-to-earth demeanor and grace dealing with the occasional critic is also refreshing. I got a chance to catch up with the former model and find out how she got into photography, why she’s passionate about teaching others her methods, and how traveling solo altered her outlook.

What inspired you to get into photography?

Above: This campsite, located at an altitude well above 4,000 meters, was the perfect site to capture the night sky against the Andes Mountains in Peru.

I started in the creative industry as a model when I was 15 years old. I modeled for ten years and worked as an Art Director and fashion stylist for four years. I’ve always been attracted to the visual arts but I would have never thought I’d be a photographer one day. Then, back in 2014, I got tired of the fashion industry. I decided to sell all my belongings and buy a one-way ticket to Australia with very little money in the bank.

I did farm work for two years over there, documenting my journey with my iPhone. I was approached by an Australian bandana company to take photos of their products. I said yes, immediately, even if I had no experience using a camera or in professional shooting. I decided to purchase a Sony a6000 with a 35mm F1.8 lens and started photographing people wearing bandanas doing outdoor activities.

Why did you gravitate toward nature?

Above: After a long evening hike, the best was made of a foggy morning in the mountains of Peru.

After completing my farm work, I decided to go on a three-month solo trip covering Indonesia, Hawaii, and Western Canada. Never before had I seen such huge mountains as when arriving in Alberta. The feeling I got when I saw them for the first time is indescribable. It was in Alberta I discovered my passion for hiking and I was introduced to scrambling, which allowed me to access more remote areas and reach viewpoints that have never been photographed before.

I started to document my adventures and fell in love with photographing the mountains, specifically. It was the first time in my life I found something that made me feel whole and brought me so much joy and energy.

How were you inspired to grow into offering workshops?

Above: Here are the Cerro Yerupajá and Siula Grande mountains, in Peru, amongst other giants, captured between 2:00 and 3:00 am.

Three years ago, a company from Quebec (my hometown) asked me if I would be interested in teaching photography to a group of 10 people for one day. It was something I have never done before and I was curious to find out if it is something I’d enjoy, so I said ‘yes.’ That day was quite a revelation for me – the amount of excitement, satisfaction, and the feeling of accomplishment I got from teaching each student was indescribable. A new passion was born.

After this experience, I decided to combine my passion for teaching, hiking and traveling into unique international photography workshops for people to learn photography while completely immersing themselves in nature. I highly enjoy spending time with people that have similar interests, sharing my knowledge, and giving as much insight as possible so they can return home with images they are proud of.

Which photo are you most proud of and why?

Above: My favorite photo to date was captured at Jasper National Park in the Alberta province of Canada.

I don’t have one in particular but, in general, the images I’m the proudest of are the ones where I followed my own personal creative vision. They often involve a lot of physical work and perseverance. Being unique is also something I value and prioritize a lot, so I’d say that my favorite images usually have a unique and original compositional component or mood along with a great story behind them.

What gear are you using lately?

Above: I wanted to capture this ice cave in Iceland at night. Although I didn’t get Northern Lights when I took this particular image, I decided to composite it with a night sky I captured a couple of days before.

I use the Sony a7R III + 16-34mm F2.8 lens for 80% of my images. I also love the Sony 100-400mm F4.5-5.8 lens for tighter shots of mountain peaks and compression.

What is your favorite photo editing software?

Above: This image was taken with a drone at El Chaltén National Park. It’s important to note that you need a permit to fly inside the borders of a National Park, or you need to take off outside the border.

I used to say Lightroom Classic CC, but I’ve been experimenting much more with Photoshop over the last year. I like to combine both software programs for my editing.

You’ve traveled extensively. Do you have a favorite place? If so, why?

Above: My favorite image from 2019 was taken at Torres del Paine National Park in Chile’s Patagonia region.

I simply cannot choose between Patagonia and Peru. I love the variety in landscape and wilderness that Patagonia offers and the remoteness and untouched beauty of Peru. Both places demand that you put work into creating great images – especially Peru, since you need to trek in high altitude for many days to reach interesting viewpoints.

Any destinations you wish to visit?

Above: Also captured in El Chaltén, I challenged myself to get out of my comfort zone by creating something interesting out of an average foreground and backdrop.

I would love to explore Alaska – especially its giant snow-covered peaks, glaciers, lakes, and ice caves. It seems this part of the world has it all!

What grounds you and keeps you inspired?

Above: I spent all night photographing the Andes Mountains in Peru. Obviously the Milky Way doesn’t bend in an arch but I had some fun with compositing to create this effect.

Traveling solo multiple times allowed me to do discover hidden parts of myself through self-reflection and introspection. I think that introspection is essential for becoming a better person and it is the single most powerful tool for internal self-awareness and how to find true happiness.

When you take the time to become an expert, you make better decisions, you are more confident, you learn to respect your limits which all brings you closer to live the life you want. You worry less about what other people think of you, you become more empathic to others, and have a more positive attitude towards life.

This is definitely easier said than done. You need to find a time and space for this, and to me this happens whenever I’m alone hiking in the mountains. It’s like a meditation that grounds me and helps me get back to what’s important in life.

Other tools that help are self improvement books such as How to Win Friends and Influence People by Dale Carnegie and What to Say When You Talk to Yourself by Dr. Shad Helmstetter, to name a few.

What advice do you have for someone looking to develop their own style?

Above: A final perspective of El Chaltén, located in Patagonia.

Pick three photographers that inspire you and analyze their images. Why do they speak to you? Try to identify the elements that you like in their photos and look for them when you are shooting or editing. I do believe that imitating – not copying – is a great way to learn and find your own personal style.

Another thing is to listen and trust your creative instinct. For example, I started creating composites at a very early stage of my learning process. Compositing has always been a creative way for me to express myself but it has always attracted negative comments. I’ve often been told that my images were too contrasting, too blue or too Photoshopped.

If I would have left these comments get to me and influence the way I create, I would never be where I am today as an artist. The moral of the story for me is to ignore negative comments and only take constructive criticism from people you trust and who you know truly believe in you.

Lastly, developing your style takes time. A lot of a time. So be patient, learn new techniques and practice as much as you can.


Catherine Simard is a Canadian-born self-taught travel/landscape photographer and digital artist with a passion for the outdoors and the wilderness. She is a Sony Artisan of Imagery. Simard will be resuming workshops at various international destinations in 2021.

Articles: Digital Photography Review (dpreview.com)

 
Comments Off on Interview: Photographer Cath Simard talks about developing your own personal style

Posted in Uncategorized


Interview: how a box of negatives offered a very personal glimpse into the past

22 Mar
Joan Ruppert’s father, Joe Tortorici, pictured in the late 1930s. This image, along with many others, was discovered in a trove of negatives and contact prints given to Joan by her mother.

When Joan Ruppert was handed a box of film negatives by her mother, she had no idea what to expect. What she found was a precious glimpse into pre-war Chicago, and a priceless insight into her father’s early life.


Thanks for speaking to us Joan. Tell us about the shoeboxnegs project.

Many years ago my mother handed me a shoebox – literally – a shoebox full of negatives and said ‘Your dad used to take a lot of photographs, he was an avid photographer’. Which I really didn’t know, and I was actually kind of flabbergasted by that. I’d just started taking a darkroom class, and seeing that I was getting interested in photography, my mom suddenly remembered about this box of negatives.

As the images were coming off the scanner, I was amazed. I had no idea what I had

Years later I pulled them out, and put them on my flatbed scanner and I realized that none of them were going to fit into the standard holders. They were odd sizes – either too big, or too small, or too bumpy, or too curled.

So then I decided to learn how other people had approached similar tasks, and I discovered wet scanning, and I started working on that. As the images were coming off the scanner, I was amazed. I had no idea what I had.

So I put a website together to showcase the images, and then I really got excited about sharing them with the world.

Street portraits, showing life in Chicago, dominate the collection.

How much did you know about your father’s early life before you started working on these images?

He died when I was very young. What I know is that he was a city kid, his parents were born in Sicily, so he was first-generation. His family came from modest means, so I knew he didn’t have a lot of expensive cameras, or access to a proper darkroom or anything like that, so that was another mystery: Whose camera was he using? Was it his? I have no idea.

Shortly after Pearl Harbor he went into the Navy, and saw a lot of action, and when he came home I don’t know if he ever picked up a camera again.

The world of today is very different to 1939 – how different is Chicago, and life in general, as seen in those pictures compared to now?

There are things that are different, and things that are very, very similar. When the bulk of these pictures were taken, my dad had just graduated from high school, and he had this posse of six to eight guys, and apparently they just hung out of together, and did the usual crazy stuff – climbed up on billboards, mugged for the camera, pretended like they were boxing – and they took pictures.

In that way, to me, it all seems very similar to what teenagers do now. They hang out in groups, they check out the girls, they stand around by cars, things like that. That all feels very familiar.

What is very different is the access to the tools to record that experience. Everybody now has a camera with them all the time in their phone. And everybody is documenting what they’re doing. But back then it wasn’t nearly as common.

This image was created from a negative in very poor physical shape. Joan used image processing software to bring a lot of the more damaged negatives back to life.

From a technical point of view, what were the challenges you faced in digitizing those photographs?

One of the toughest things was actually culling the collection down. I came up with a method for culling, where on my computer I created a blank text document, which became my light table. And then I took my iPhone, and I put it in inverted colors mode. So with the negative pinned in front of the monitor, using my phone I was able to look at a positive image. So then I put them into categories: one star, two stars, and so on.

Once I had them categorized I started to do the wet scanning. I learned pretty quickly that some of the negatives were simply irredeemable. They were either badly underexposed, or overexposed, or too scratched. So that whittled it down even further.

Once I started to do the wet scanning, I used Photoshop and Capture One to get the most out of those negatives that weren’t optimal in terms of contrast, things like that, and pulled a lot out of them that I probably wouldn’t have been able to do in a traditional darkroom, or at least not as easily.

‘The Posse’, on the steps of Chicago’s Crane Tech High School: built in 1903 and still standing. The building’s exterior was the setting for many photos in the collection.

Looking at the pictures, it seems like you’re getting rid of some dust and scratches, but you’re leaving in things like drying marks, fingerprints on the negatives, and things like that. You’re not painting things out, or in?

Absolutely. My dad didn’t have an enlarger, so everything he printed was in the form of contact prints. I felt very married to that idea: of seeing the whole negative, in the same way as he did. The uneven edges, the thumbtack marks, things like that. I didn’t want to perfect them. That idea just didn’t appeal to me.

I felt that if I perfected them too much, there was a risk that some of their character, and some of the aspects of them that were thrilling to me, might be lost.

When you were doing the digital work, what kind of adjustments were you making?

A lot of it was dealing with contrast and mid-tones that had been lost, and trying to bring up as much detail as possible without over-sharpening. For example there’s one image, I call her ‘Sailor Girl’. She’s standing in front of a brick wall.

There’s no such thing as ‘batch’ on a project like this. Every one of them is a one-off

At first I didn’t see it, but after fiddling with the negative, I saw there was faint writing on the brick. I wanted to improve the negative enough that you can see there’s something there, but not sharpening to the point where you lose the feel of the photograph. I might have gone too far on some of the negatives, but it’s a judgement call.

And it was different for every negative. Every negative had its own personality, and every negative had its own needs and requirements. No two were the same. There’s no such thing as ‘batch’ on a project like this. Every one of them is a one-off.

‘Sailor girl’. The faint lettering on the brick wall was revealed during digital processing.

Aside from your father, how many of the people in these photographs are you able to identify?

Very few. My mom is in a couple of them, my uncle is in two, I’ve got a cousin who’s in one. The rest of the people, I have no idea who they are. I don’t know if the girls in the photographs are acquaintances, or old sweethearts, I have no idea. I don’t know anything about ‘the posse’ of his high-school friends, or what happened to them. I also don’t know who took the photos in which my father is pictured!

You want to fill in all these blanks, but the truth is I have no idea what he was feeling

Besides the technical challenges – which were actually kind of fun – the mental challenge for me was accepting the fact that there was a lot that I don’t know, and I won’t know. And resisting the temptation to fill in the blanks. It’s easy to start projecting, and thinking well, the pictures were taken in the really short time after high school, and before Pearl Harbor – did he feel a sense of freedom?

You want to fill in all these blanks, but the truth is I have no idea what he was feeling, and it’s not smart of me to try to make assumptions. I just have to let it be. I’ll never know.

When a project like this goes out into the world, there is a risk that people might start projecting their own feelings onto the images in a way that you may not recognize. Did you worry about that?

Yes, I did, and I do think about it. I thought a lot about contacting you, and other outlets about it because you do immediately lose control. I put a couple of the pictures up on my personal Facebook page, and some of what you mentioned – some of that started happening.

There was one image of the posse sitting in front of a billboard for a train route. And all these train people out there jumped on it, and they just wanted to talk about the train. Or they were saying how the kids in the pictures looked like a bunch of thugs, and because it was Chicago they must have been bad guys, or gangsters. Ascribing all of this stuff that had nothing to do with anything. You do lose control, and that’s concerning.

‘Quintessential Chicago’, in Joan’s words. And a favorite photo from the collection among train enthusiasts, apparently.

There’s a lot of politicization of nostalgia going around, these days.

I worry about that to some degree. There’s part of me that wonders if my father was here, would he be thrilled by all this or horrified by it? And I really don’t know. I don’t expect people to look at these pictures in the same way that I do, because it’s not their father, it’s my father. I talked to my brother and sister about it too, to make sure that they were OK with me making the pictures public.

People are going to fill in the blanks, because that’s what people do.

I know you’re reluctant to read too much into these images yourself, but do you feel like you know your dad a bit better than you did?

Yes, I do. I had just turned eight years old when he died. He was 43, and his hair was almost snow white. So I thought he was an old man. Now when I look at him, I see a teenager. He’s having fun. I do feel like with the photographs, I’ve been able to see some things that were important enough to him, that he captured them. I don’t know why they were important, but they were.

So on that level, I think I do understand him a little better. But if anything, I feel like I have a fresh batch of questions I would love to ask him if we were to meet again. That alone makes the project worthwhile.

Joan Tortorici Ruppert is a writer and television producer, based in Illinois.

You can see more images from her project at her website:

shoeboxnegs.com

Articles: Digital Photography Review (dpreview.com)

 
Comments Off on Interview: how a box of negatives offered a very personal glimpse into the past

Posted in Uncategorized


1,300 glass plates seized from Hitler’s personal photographer digitized by US National Archive

26 Apr
Adolf Hitler speaking at an undated rally.

Over a thousand glass plates showing Hitler’s rise to power and the Nazi leader throughout World War ll have been digitized by the US National Archive. The plates, some of which were broken into many parts, were the work of Hitler’s personal photographer Heinrich Hoffmann and were confiscated from the photographer by US troops at the end of the war.

According to The Washington Post special projects preservationist at the National Archive, Richard E Schneider, spent the better part of a year piecing together 1,270 images from a collection of 41,000 glass plates. The institution plans to make the pictures public soon when they will be released online.

Hoffman was the only photographer allowed to take Hitler’s picture, and the role made him extremely wealthy — he is said to have made over $ 35 million alone from the royalties on the picture of Hitler used on postage stamps during the Nazi era.

The pictures in the collection are all posed propaganda images used to develop Hitler’s public profile and to further the power of the Nazi party – even Hoffmann wasn’t allowed to take candid pictures. Some show Hitler on his own, while others show him speaking at rallies or posing with groups of senior party members, like Goebbels, Hess and Himmler.

Possibly one of the earliest published photos of Adolf Hitler, taken in 1923 when he was 34 years old.

Hoffmann was made Hitler’s official photographer in 1921 when Hitler took control of the Nazi party and the two became good friends. Eva Braun was Hoffmann’s studio assistant, and it was Hoffmann who introduced Hitler to her in 1929 – Hitler and Braun married the day before committing suicide in the closing stages of WWll.

After the war Hoffmann was arrested by the US Army and was sentenced to four years in jail for profiteering — including stealing and selling art works from Jewish families, museums and galleries. He died in 1957.

Articles: Digital Photography Review (dpreview.com)

 
Comments Off on 1,300 glass plates seized from Hitler’s personal photographer digitized by US National Archive

Posted in Uncategorized


Kim Jong-un allegedly fires personal photographer over ‘damage to Supreme Dignity’

30 Mar

North Korea’s Supreme Leader Kim Jong-un reportedly ‘purged’ his personal photographer, referred to only as ‘Ri,’ after he violated two rules related to photographing the dictator and briefly blocked a crowd’s view of him. In addition to being fired from his role as photographer, Ri was allegedly banned from the Workers’ Party of Korea.

News of the event first surfaced from Daily NK, a Seoul-based news website from Unification Media Group. The report claims Ri was punished for causing damage to Kim Jong-un’s ‘Supreme Dignity’ while photographing him on March 10 in the No. 10 election district.

In addition to blocking his neck from view with a camera flash, Ri allegedly violated two rules that barred photographers from capturing images and video directly in front of and within 2m / 6.5ft of Kim. The Korean Art Film Studio under which Ri had worked (and from which he was subsequently fired) edited the video to delete the scene featuring Ri and the ‘damages’ it caused to Kim’s ‘Supreme Dignity.’

Articles: Digital Photography Review (dpreview.com)

 
Comments Off on Kim Jong-un allegedly fires personal photographer over ‘damage to Supreme Dignity’

Posted in Uncategorized


Photographing Small Things – A Personal Voyage

10 Feb

The post Photographing Small Things – A Personal Voyage appeared first on Digital Photography School. It was authored by Mark C Hughes.

1 - Photographing Small Things - A Personal Voyage

Souvenir Mask

When you photograph an item for a marketing campaign, or to record its physical condition, it’s called product photography. This is a very specialized type of photography. While you may never be commissioned to photograph a commercial product, some of the techniques used in product photography may have relevance to your personal life.

Perhaps these techniques offer a solution to a problem many people don’t recognize – hanging on to reminders of people, places or events from the past.

2 - Photographing Small Things - A Personal Voyage

Ostrich Egg on a pedestal

A collection of small things

My wife’s uncle Larry recently passed away. Larry was an incredible guy and was a man of good taste. For a period of about 10 years during his late 60’s and 70’s, he traveled to many far-flung parts of this blue orb we call home. During his travels, he acquired an extensive collection of items that I reluctantly call souvenirs.

To Larry, these items represented mementos, memories and valued objects from his travels. Now that he has passed, any monetary value of these objects is unknown. The stories of their origin, that ultimately made them of personal value to Larry, have been lost. It is left to us to figure out what to do with his extensive collection. There are boxes and boxes of these things, most of which are unlabeled.

Going beyond Larry’s collection, when I look around my house, I see pieces of furniture that remind me of my long passed parents. Most of these are not functional, nor do they match my personal taste. I keep them around because they evoke memories. My wife came up with a novel idea that seemed to resonate with everyone: create a photographic series to preserve the memories that the collection of material objects represents. Perhaps more correctly, for me to create this collection. This digital photographic record would certainly occupy less space than the physical objects.

3 - Photographing Small Things - A Personal Voyage

Small figure on a black background

Combining approaches to product photography and archival photography

For this project, I am combining the approaches to product photography and archival photography. I am photographing the objects as though I am going to sell them, and recording the images from many perspectives so that the record of their existence is complete. We may also be able to use the resulting images to figure out if the objects have any value outside of our family. From there, we can decide what to sell, what to give away, and what to keep for ourselves and other family members.

4 - Photographing Small Things - A Personal Voyage

African Mask, a larger piece on a black background

To give you an idea of the project scale, I have 15 boxes containing between 10 and 20 objects each. So we are talking about 200 – 300 objects. Although I have made a dent in the collection, at the time of writing, I still have a long way to go. However, my workflow and objective are solidifying.

In doing product or archival photography, you need good, controlled light with limited shadows. Shadows are great for portraits and drama, but they detract from an image captured for archival purposes where you want to capture the object’s details. You also need to control reflections and ensure that the light appears to come from everywhere.

5 - Photographing Small Things - A Personal Voyage

This glass bowl with gold leaf gilding was highly reflective

Equipment

I considered using a studio strobe setup. It’s a great way to light things, but it can get complicated when dealing with smaller objects. It also takes up a great deal of space. It’s generally intended for bigger objects in larger spaces. I needed a more compact footprint that would allow me to do the photographs in my home when it was convenient for me.

6 - Photographing Small Things - A Personal Voyage

A small 24-inch lightbox for product photography

The collection I’m photographing contains objects ranging from 1 cubic inch to large, skinny objects that are almost 18-inches long. I decided it was worth investing in a small portable lighting cube designed for product photography. The 24-inch portable cube has reflective walls, LED lights, and a selection of backgrounds. It packs up into a skinny portfolio sized carrying case and provides flexibility to accommodate all of the objects in a relatively confined space.

I use the cube in conjunction with a small card table and my tripod. There are many brands of this type of set up, but for my purposes, I used the Promaster Still Life Studio 2.0.

7 - Photographing Small Things - A Personal Voyage

Lightbox interior with a black background and small box to elevate objects

Right from the start, a few challenges presented themselves. Some objects don’t stand well on their own, and some objects really benefit from sitting off the background to make them stand out more. Finding interesting supports or display blocks all of a sudden seemed important.

White balance

In addition, I discovered that I needed to get a baseline for white balance. When you use Auto white balance in this kind of environment, even if you are using a white background, color management becomes problematic. By establishing a baseline white balance, you can color correct all the images in post-production (provided you shoot RAW files) or in camera if you use and set a custom white balance.

Be careful when you use custom white balance settings on a camera that you use for other purposes. If you’re like me, you may forget that the white balance has changed which only creates problems with the other work.

8 - Photographing Small Things - A Personal Voyage

Some objects have their own stands

The portable studio has a set of LED lights at the top of the cube, a diffusion panel underneath the lights to make a bigger light, highly reflective side panels, and a set of backgrounds in white, black, grey, and light blue/grey. When you take a photograph there is a small hole (either in the front or the top) where you insert your lens, so the lighting is fairly even all around. It works pretty well. Most items are lit well right out of the gate.

9 - Photographing Small Things - A Personal Voyage

Choice of colors for backgrounds

Depth of field and exposure

Once you’ve set your white balance (either by using a grey card or a custom white balance), you need to consider the depth of field and exposure. The cubes are very well lit, so there’s plenty of light. This light dominates, and you don’t have to worry much about ambient light interfering with your white balance or exposure.

Because many of the objects I’m shooting in my project are small, I need to be close but not quite at a macro scale. Due to this factor, the depth of field becomes a big issue. If I shoot wide open, part of the object is out of focus. Shallow depth of field is necessary when you need to create separation from the background. In this project, the background is akin to seamless paper, which means I don’t need to create that separation. Instead, I can choose a wider depth of field to ensure that the entirety of the smaller object is in focus.

10 - Photographing Small Things - A Personal Voyage

To get a complete record of an object you need to see it from all sides

I come from a background in forensic engineering investigations. Here, I photographically documented objects to ensure the preservation of as much visual information as possible.

To capture your items, reasonable depth of field (maybe around f/8) should give the right amount of depth of field without diffraction effects. Of course, this depends on the size of the camera sensor.

Because I set the portable studio on a small card table, I can elevate all items I am photographing. When shooting stationary objects, use a tripod to set up the shots, and move the object relative to your camera. Due to the items being three dimensional and digital images are flat (2D), you need more than one image to capture each object adequately.

To be thorough, it is a good idea to capture around ten images. One from the front, back, two sides, four corners, top, and bottom. Depending upon the nature of the item or how complex it is, sometimes it’s fine to take fewer images. In this case, it works best to keep the camera in a great position, set for white balance, depth of field and exposure, and then to turn the item around.

11 - Photographing Small Things - A Personal Voyage

The depth of field helps show the incredible details of the objects

Labeling the items

In the next step, I labeled my items. You don’t want to photograph an item, only to never be able to find it again! My items were bubble wrapped, so I labeled the boxes with a letter and gave each bubble wrapped item a number. To keep track of all the items and their associated numbers, photograph the letter/number then photograph the item, labeling it with the number when finished with it. By putting an identifier at the beginning of the series of images for that item, you can easily see the name of the images plus the images together.  I have used this technique frequently for event photography as well.

Once I had all my images, I corrected the white balance and then ran the images through a batch process droplet to get the images the way I like them.

In the end, I have a great collection of images, and you can too. You can use either a website or a proofing gallery to look and share all the images. It makes it easier to manage all the images for all of the items.

12 - Photographing Small Things - A Personal Voyage

Lots of detail in this mask

Conclusion

Taking this approach to photographing meaningful objects from life seems like a way to preserve the memories of meaningful objects without retaining the physical objects. Sometimes I hang onto things because they mean something to me or remind me of people or happier times. However, I don’t have space or need the items, and I don’t want them in my life other than to remind me of others.

For instance, I have a small french provincial style buffet that I have had for as long as I can remember. It was important to my parents and reminds me of them. They passed away many years ago. Through objects like this, I connect to my past when they were here. As a consequence, while it is a meaningful object that connects me to my parents, it’s of a style that doesn’t fit into my house, and it’s large and impractical.

In the end, maybe just a photographic record of the furniture, without keeping it, is all I need. I just need to make sure that the images of all the items both large and small are reasonably accessible for those moments I want to remember my parents or uncle Larry.

Feel free to share your comments below.

The post Photographing Small Things – A Personal Voyage appeared first on Digital Photography School. It was authored by Mark C Hughes.


Digital Photography School

 
Comments Off on Photographing Small Things – A Personal Voyage

Posted in Photography


Epson FastFoto FF-680W, world’s fastest personal photo scanner, now available

09 Aug

Epson has launched its new FastFoto FF-680W High-Speed Photo and Document Scanning System, a model it claims is the fastest personal photo scanner currently available. At max speed, the FastFoto FF-680W can scan a photo every second at 300dpi (up to 36 photos per batch).

The FF-680W, which builds upon the existing FF-640 model, supports a variety of media types, including Polaroids, postcards, and panoramic photos, as well as scanning in 300dpi (“easy sharing”), 600dpi TIFF (“archiving”), and 1200dpi (“enlarging”) modes. More than one mode can be used per photo batch. The scanner also supports document scanning with OCR.

Both USB and wireless connectivity is supported. Users can directly share scanned images to Google Drive and Dropbox, capture handwritten notes on the back of an image during a single scan, and perform modest photo restoration and edits using Epson’s ScanSmart software.

The Epson FastFoto FF-680W scanner is available through the company’s website and at select retailers, including Amazon, for $ 599.99 USD.

Articles: Digital Photography Review (dpreview.com)

 
Comments Off on Epson FastFoto FF-680W, world’s fastest personal photo scanner, now available

Posted in Uncategorized


Personal Photo Gifts for Mom from Parabo Press

24 Apr

Turn your photos into amazing Mother’s Day gifts, that will certainly make you the golden child in your mother’s eyes.

With our Parabo Press app, it’s easy to order up the perfect Mom’s Day surprise made with the photos right there on your phone.

Organize your photos on your compy? No sweat. Order up a gift from the Parabo website.

Either way, Mom will love it!

Plus, you’ll save 20% on your gift with the coupon PJMOM, now through Parabo’s standard shipping Mother’s Day order deadline 5/3.
(…)
Read the rest of Personal Photo Gifts for Mom from Parabo Press (22 words)


© laurel for Photojojo, 2017. |
Permalink |
No comment |
Add to
del.icio.us

Post tags:


Photojojo

 
Comments Off on Personal Photo Gifts for Mom from Parabo Press

Posted in Equipment


Now Offering Personal Shoots!

17 Mar

Garnished Studios is now offering simple personal shoots in three flavors! Vanilla – Nothing wrong with a classic. A single studio shoot with as many outfit changes as you can […]
Jake Garn Photography

 
Comments Off on Now Offering Personal Shoots!

Posted in Uncategorized


Tips for Creating a Personal Photography Project

16 Aug

One of the best ways to grow your photography is by working on a personal photography project. As a professional photographer, I am always working on personal projects. It’s a way to keep myself inspired, and to feel challenged to grow. It’s also a great way to keep my portfolio fresh, try out new ideas, and grow my vision as a photographer.

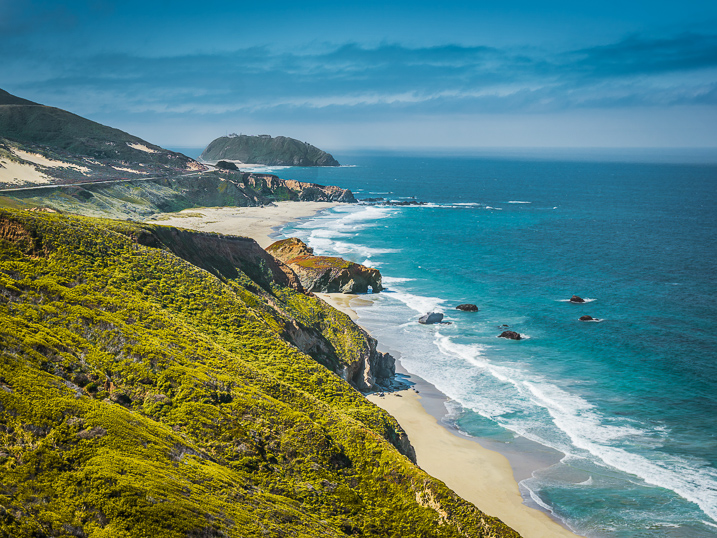
Shooting a place more than one time gives you the opportunity to capture the place in the perfect light. I had visited this part of the Oregon Coast more than a dozen times before the perfect scene appeared.

Shooting a place more than one time gives you the opportunity to capture the place in the perfect light. I had visited this part of the Oregon coast more than a dozen times before the perfect scene appeared.

In this article, I will share with you:

  1. What is a personal photography project?
  2. What’s the value of working on personal projects?
  3. What makes a good project?
  4. How to be successful
  5. Ideas for personal photography projects of your own

What is a personal photography project?

I define a personal photography project as choosing a subject to shoot over and over again over time. It can be as simple as shooting your kid’s sporting event every weekend, photographing an intriguing building near your home six times, or creating a series of portraits of your friends.

Personal-Projects-Oregon-Beach-CBB

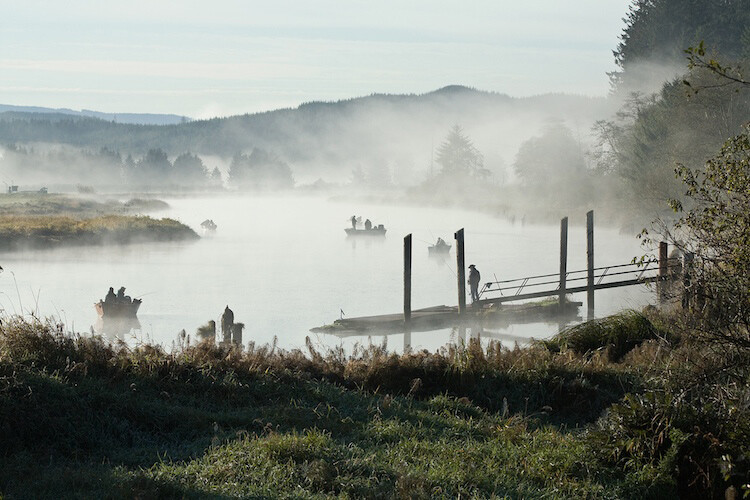
I photographed about 60 miles along the northern Oregon coast over a period of six months. I created a route that I drove whenever I could. By shooting the same place over and over again, I was able to truly capture the personality of the places.

2 – What’s the value of personal projects?

Some photographers are reluctant to shoot the same subject over and over again, but by photographing it more than once, it gives you some great opportunities to grow as a photographer.

  1. It gives you the chance to get it right. Have you ever said, “I wish I would have done X better?” By going back and shooting something more than one time, you create the opportunity to analyze your mistakes, and go back and do it again. In this exercise, you shoot one day, analyze what you can do better, then tweak your shooting until you learn to nail it every time.
  2. It gives you some structure. When you have some free time, you don’t have to wonder what you are going to shoot. If you have committed to photographing the City Hall in your town six times, you can just go shoot it. On the other side of the coin, you can also put your shoots on your calendar weeks, or months, ahead of time.
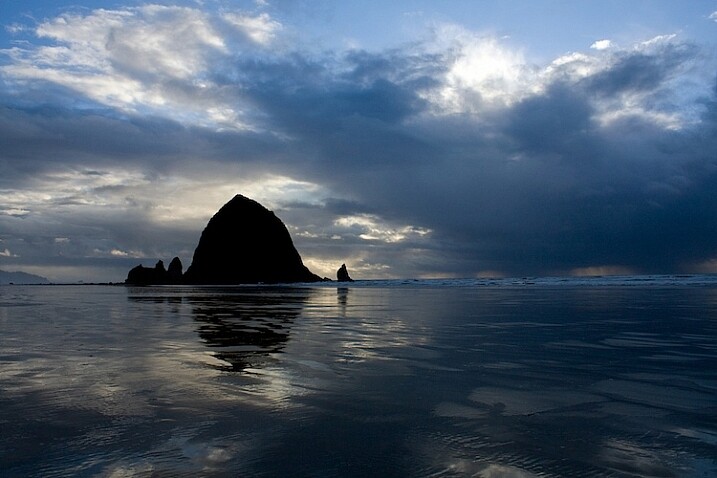
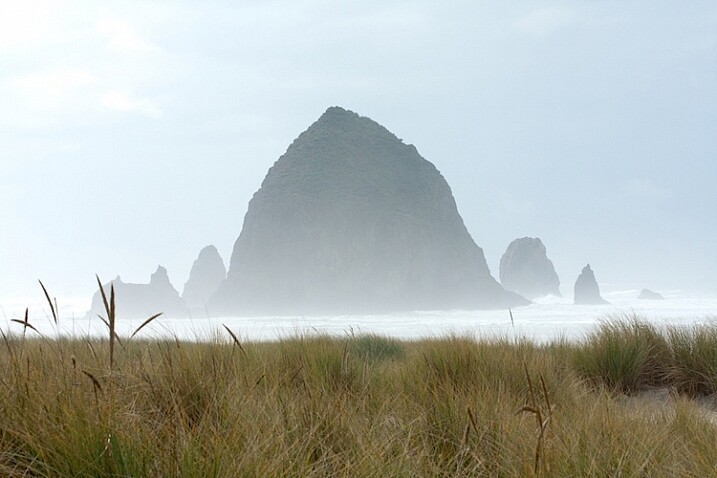
A different mood of Cannon Beach, Oregon.

A different mood of Cannon Beach, Oregon.

A Project could look like this – Shoot City hall at:

  1. Sunrise
  2. Sunset,
  3. Morning light
  4. Afternoon light
  5. Golden hour
  6. Dusk
  7. With the moon
  8. On a sunny day
  9. On a cloudy day
  10. On a rainy day
  11. On a Snowy day
  12. During each of Spring, Winter, Fall, and Summer

Can you begin to see the many opportunities, and how to create different pictures of just one thing?

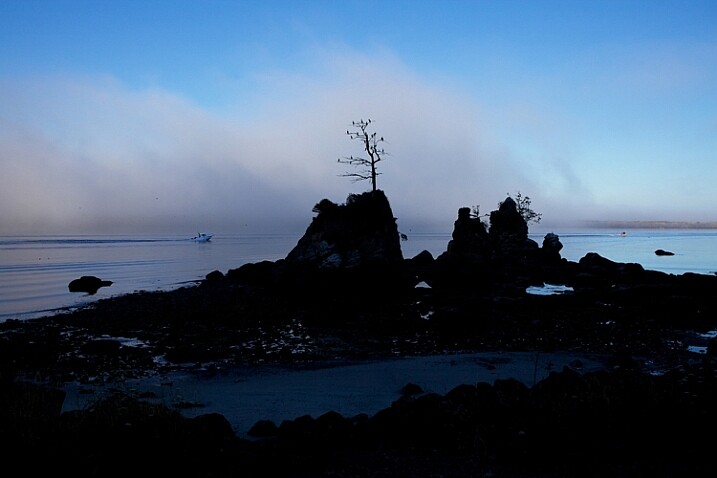
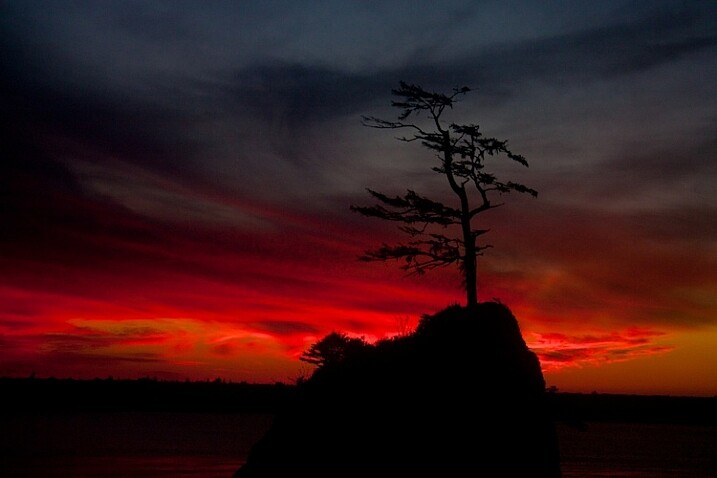
I was fascinated by this lone tree growing out of a huge rock near Garlibaldi, Oregon but I wanted to get it with a beautiful sky.

I was fascinated by this lone tree growing out of a huge rock near Garlibaldi, Oregon, but I wanted to get it with a beautiful sky.

It took many evenings of watching for the perfect sunset, but the photo was well worth it.

It took many evenings of watching for the perfect sunset, but the photo was well worth it.

Once you nail the technical part of a situation, you can challenge yourself to do something really different. This is the point the great photos come in!

The great photos don’t come when you are trying to figure out how to focus your camera, use your flash, or what is the right exposure or camera angle. Once you’ve got all that nailed, the real creativity begins! That’s when the great pictures happen. Here’s an example:

Posey-Personal-Projects

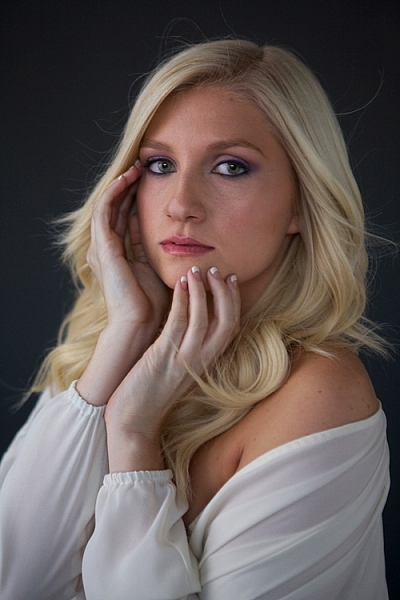
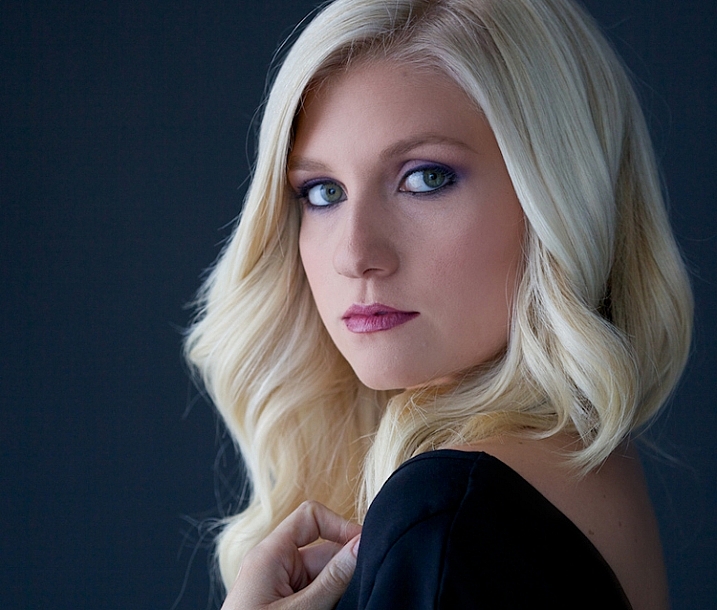
This was my first glamour shoot. I just practiced finding the perfect window light in my studio. And, as a journalistic photographer, I rarely do any retouching, but this subject offered the opportunity to pull out some new retouching tools, and also reminded me to pose the subject in such a way to hide skin imperfections.

I fell in love with the work of a glamour photographer, Sue Bryce. She does beautiful work and doesn’t use studio lighting, she uses window light in a very sophisticated way. I decided to emulate her work by studying her technique. I had never studied glamour photography, so not only would the lighting be a challenge, but the posing would be too. Here’s what I did:

  • I studied her technique, watched some YouTube videos, and took detailed notes.
  • I practiced posing myself in front of the mirror.
  • I did some tests with window light in my studio to find the best times of day to shoot, and to decide what kind of reflectors, props, and backdrops I needed.
  • I found a few make-up artists who wanted to build their portfolio, and offered to work with me for prints.
  • I scheduled several friends for shoots.
Suzanne-personal-projects

This was my second shoot. I practiced using a different kind of light, a little bit harder with more fill.

I also had the chance to work with posing and hands. It felt awkward to me, and I didn’t really get the subject to do what I wanted her to. It was time to go back to the mirror and practice with my own hands, then create language that would help my subject move into those poses.

allie-personal-projects

This shoot went much better. I was learning, developing skills, having fun, and building my confidence in this new world of glamour photography.

Tyler2-personal-projects

By my fourth subject, I had learned how to direct my subject into a pose, and had a great feel for window light.

Tyler-personal-projects

I had a few new pieces for my portfolio, not to mention a few happy friends with prints.

Let’s back up a few steps and review some of the ideas we’ve touched on so far.

3 – What makes a good photo project?

  1. Have an objective, a goal. Be clear on your outcome. It can be to master a new skill, to create a series of prints, or to make a calendar as a gift.
  2. Select a subject that you can return to over and over again.
  3. Choose something you are really interested in, and passionate about. For ideas, think about the activities you and your family are involved in. Would any of your hobbies make a good project? Are there places you love to visit or photograph?
  4. Find something to shoot within 10 or 20 minutes of your home.
  5. Commit to something that either happens on a regular basis at a scheduled time, or a place you can just show up and shoot anytime. For example, a ballet class that happens every week or a favorite park, botanical garden, or lake.
  6. Choose a subject with a variety of visual possibilities.
  7. Choose a subject with a learning goal, or end product in mind. You might want to learn more about light, or shooting in manual mode, or photographing people.
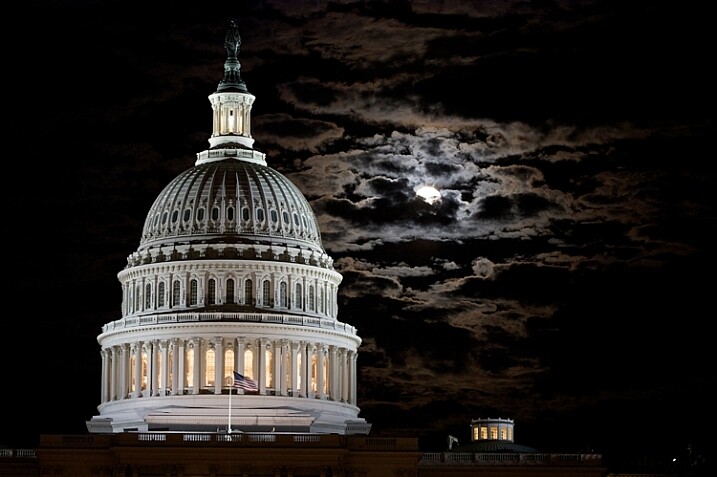
The Capital Building in Washington DC is stunning at night, and I wanted to capture the full moon rising behind it. This was the sixth night I made a trip to the monument. Persistence paid off.

The Capitol Building in Washington, DC is stunning at night, and I wanted to capture the full moon rising behind it. This was the sixth night I made a trip to the monument. Persistence paid off.

Several years ago, while living in Washington, DC, I chose to shoot the monuments with a full moon. Why was this a good project? Let’s look at the checklist above and compare

  1. I love documenting history, enjoy being out in the evenings taking pictures at night, and I always feel a sense of wonder seeing the Washington, DC monuments.
  2. I wanted to create a set of prints that I could share and offer to my corporate clients.
  3. Getting to the monuments was easy for me.
  4. I could write the full moon dates in my calendar months ahead of time and keep my schedule clear. (Although I did get strange looks when I told friends I couldn’t join them for dinner because it was a full moon!)
  5. There are lots of monuments to photograph within walking distance.

I loved having something on my calendar to shoot. It provided some structure, and gave me something to shoot for several months without having to come up with a new idea. And, now I have a beautiful collection of photograph for my portfolio.

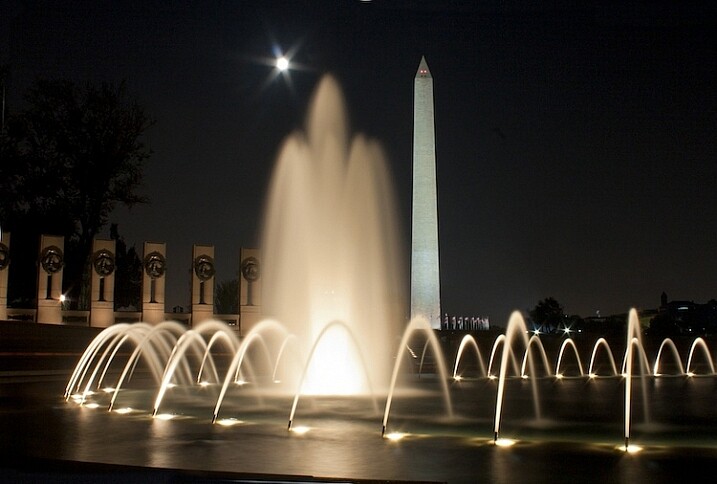
This is the World War II Memorial in Washington DC with the Washington Monument in the background. Committing to shooting a personal project is fun, rewarding and builds your self-confidence.

This is the World War II Memorial in Washington, DC with the Washington Monument in the background. Committing to shoot a personal project is fun, rewarding, and builds your self-confidence.

4 – How to be successful

  1. Make a commitment and write out the whys of doing the project.
  2. Find an accountability partner, a coach, a class, or a photo group, to share your progress.
  3. Put the time commitments on the calendar. Treat this as a new ritual. Plan the time and treat it as sacred.

5 – Ideas for your own personal photography projects

Here are some ideas to get you started on your own personal project.

  • Find a photographer or a style you love and try to mimic that style. I fell in love with Georgia O’Keefe’s paintings and her use of color. Ultimately, studying her art led me to creating these photographs. 
  • Shoot the full moon every month for six months. I chose to shoot the monuments in Washington, DC with a full moon and created a beautiful series of art prints.
  • Photograph a local park 10 different times, at different times of day. This is a simpler version of my Oregon Coast project.
  • Shoot a local landmark at all times of the day. It could be a building, for example the City Hall, a mountain, or a river. This project will give you an opportunity to learn about the quality of light at different times of days, the right angles, and it’s simple! Buildings and mountains are always there for you.
  • Shoot a kid’s sporting event every weekend. This will help you refine your skills with stopping action and learning focus.
  • Make portraits of your relatives and create a beautiful coffee table as a Christmas gift for the family. A great way to take care of that holiday gift list, as well as learn more about photographing people and developing a style of your own.
  • Photograph pets. Pets can be a real challenge. It will be an opportunity to learn about capturing action as well as learning about light.

Shooting projects is an amazing way to grow your portfolio and your self-confidence. Do you have an idea for a project? Share it with me in the comment section below, I’d love to hear about it or see your images.

googletag.cmd.push(function() {
tablet_slots.push( googletag.defineSlot( “/1005424/_dPSv4_tab-all-article-bottom_(300×250)”, [300, 250], “pb-ad-78623” ).addService( googletag.pubads() ) ); } );

googletag.cmd.push(function() {
mobile_slots.push( googletag.defineSlot( “/1005424/_dPSv4_mob-all-article-bottom_(300×250)”, [300, 250], “pb-ad-78158” ).addService( googletag.pubads() ) ); } );

The post Tips for Creating a Personal Photography Project by Vickie Lewis appeared first on Digital Photography School.


Digital Photography School

 
Comments Off on Tips for Creating a Personal Photography Project

Posted in Photography


How to Accelerate the Development of Your Personal Photographic Style with Lightroom

16 Jul

If you want more Lightroom help from Viktor, get 50% OFF his Four Seasons Lightroom Preset Collection, on now at Snapdeals (only until July 19th, 2016)

Over the years, Lightroom has become the most important tool for my photography. I use it for organizing and editing my photos, as well as publishing them to various channels. But, this hasn’t always been the case.

Images Personal Artistic Style in Lightroom 01

When Adobe introduced Lightroom years ago, 100% of my editing was done in Photoshop. But, gradually over the years with every new version or update of Lightroom, it became a one-stop destination for all of my post-processing activities. Today, Lightroom meets 90% of my photography needs with Photoshop meeting only 10%.

Compared to Photoshop, I love Lightroom because of its nondestructive RAW editing and speed. But, if I had to choose my favorite Lightroom feature, it would be the ability to create presets.

Images Personal Artistic Style in Lightroom 02

Notice patterns and make them into presets

Preset functionality drastically changed the way I approach photo editing and helped me accelerate the development of my personal style. Yet, when presets were first introduced in Lightroom 3, I initially overlooked the feature until I decided to put an extra effort toward increasing the efficiency of my editing.

When I started analyzing the way I take and edit photos, I noticed certain patterns. I recognized that the way I take pictures directly affects the way I process photos in Lightroom.

For example, when shooting landscapes and cityscapes, I always set the exposure for the highlights (sky) that results in underexposed foreground shadow areas. Then, as I begin editing, I start by opening up the shadows, recovering details in the highlights and adding a graduated filter to the sky area. I boost contrast and clarity, increase the saturation and vibrance. This usually results in an oversaturated sky so I only desaturate the blue hues. I also ensure that the vegetation in my photos is not electric green by shifting the green hues toward the yellow spectrum. In the final steps, I add vignetting, increase sharpening and reduce noise.

Images Personal Artistic Style in Lightroom 03

Though these steps soon became second nature, it also meant that I performed anywhere from 20 to 30 identical adjustments to every edited photo. When I realized this, it quickly became obvious that if I recorded the common edits and adjustments as a Lightroom preset, then I could reuse them again and again more efficiently.

When I finally saved the edits listed above, my first preset was born. I named it “Natural” because it fully reflected my photography style in achieving a natural and well-balanced look, with rich colors.

Images Personal Artistic Style in Lightroom 04

Create variations

I then created two more presets, based on the first Natural preset. I shifted the color balance toward warm colors (yellow, orange) to emulate the warm hues of the early morning. I called this one “Sunrise.” Another preset I created was “Overcast” in which I decreased saturation and boosted contrast to imitate cloudy and darker days.

These three presets – Natural, Sunrise and Overcast — were the foundation of my Landscape collection.

Images Personal Artistic Style in Lightroom 05

Over the years, I gradually created new presets while making sure each of them reflected my taste and photography style. At some point, I looked back and realized that I was actually defining and perfecting my own artistic style while also exploring different artistic directions and the future of my work.

Today, I have three main preset collections that cover the different aspects of travel photography: Landscape Collection, Cityscape Collection and People Collection.

Experiment and save

I use the preset-based editing approach on a daily basis because it not only saves me an enormous amount of time editing, it also keeps my artistic style consistent. But, at the same time, I am also able to continue experimenting with new approaches that can be saved as new presets that reflect my evolving style.

I highly recommend that you try a similar approach with your photography.

Images Personal Artistic Style in Lightroom 06

Making your own presets

Here are some actionable steps that can help you jumpstart the process of creating your own presets:

If you’ve been using Lightroom and have a decent sized photo collection, select your favorite photos from the archives and create your own presets based on the edits and adjustments of the selected photos. Continue refining your presets over time to make sure that they are generic enough to work with a variety of photos. Also, keep growing your preset collection, and be sure to organize them by topic and/or style.

For photographers who are just starting out and don’t yet have a sizeable archive, I recommend using someone else’s presets as a starting point. It is fairly common that well-established photographers are willing to sell or give away their Lightroom presets to help budding photographers. Simply find a photographer whose style you like, and use his or her Lightroom presets as the foundation for your future collections.

You can even try to reverse engineer them to figure out how certain effects were achieved. Also, don’t be afraid to modify the presets until you come up with something exciting and unique to you.

Images Personal Artistic Style in Lightroom 07

Conclusion

Developing your personal artistic style in photography is a long, and sometimes chaotic and uncontrollable process. By recording your artistic tastes and versions as Lightroom presets, and by using them as the foundation for your preset-based editing routine, you can accelerate, simplify, and streamline an otherwise extremely complex process.

If you want more Lightroom help from Viktor, get 50% OFF his Four Seasons Lightroom Preset Collection, on now at Snapdeals (only until July 19th, 2016)

googletag.cmd.push(function() {
tablet_slots.push( googletag.defineSlot( “/1005424/_dPSv4_tab-all-article-bottom_(300×250)”, [300, 250], “pb-ad-78623” ).addService( googletag.pubads() ) ); } );

googletag.cmd.push(function() {
mobile_slots.push( googletag.defineSlot( “/1005424/_dPSv4_mob-all-article-bottom_(300×250)”, [300, 250], “pb-ad-78158” ).addService( googletag.pubads() ) ); } );

The post How to Accelerate the Development of Your Personal Photographic Style with Lightroom by Viktor Elizarov appeared first on Digital Photography School.


Digital Photography School

 
Comments Off on How to Accelerate the Development of Your Personal Photographic Style with Lightroom

Posted in Photography