RSS
 

Posts Tagged ‘Overcome’

11 Ways to Overcome Creative Blocks as a Photographer

27 Nov

The post 11 Ways to Overcome Creative Blocks as a Photographer appeared first on Digital Photography School. It was authored by Megan Kennedy.

Creative blocks can happen to everyone, including us photographers.

Fortunately, there are numerous ways to combat that dreaded phenomenon.

So here are 11 ways to overcome creative blocks as a photographer!

ways to overcome creative blocks as a photographer
Canon 5D Mark II | Canon EF 100-400mm f/4.5-5.6L IS II USM | 1/4000s | f/4.5 | ISO 200

What is a creative block?

The term creative block describes a condition that ranges from having difficulty coming up with new ideas to being completely unable to produce useable creative work.

Some common triggers for creative blocks include timing, stress, boredom, fatigue, fear, and anxiety.

However, there are many simple methods that can help tackle this beast head-on.

1. Get some rest

The creative process (and daily life in general) can take both a mental and physical toll, and one of the key factors that can trigger a creative block is fatigue.

Making time to recuperate is not only good for the creative process, but for mental health overall.

2. Write

The written word is a powerful tool, and one of the many ways to overcome creative blocks. Actively maintaining a notebook full of creative ideas can come in handy in the event of a creative lull. Keeping a journal, blogging consistently, or even doing creative writing can help remove a creative barrier.

Brainstorming is another written exercise that prompts creative thinking. Select an aspect of photography and write down as many associated ideas and phrases as possible within a short amount of time. Often the results can deliver unique new creative perspectives.

3. Listen to music

It’s been scientifically proven that music can help calm activity in the brain, reducing anxiety and restoring emotional balance.

So whether it’s listening while at work, rest, or play, music can aid in restoring creative flow.

ways to overcome creative blocks music
Canon 5D Mark II | Canon EF 50mm f/1.8 II with extension tubes | 1/40s | f/4.5 | ISO 320

4. Sketch your surroundings

Grab a drawing medium and a sheet of paper (or a tablet, touchscreen computer, etc.) and quickly sketch as much of the surrounding detail as possible for five minutes.

Furniture, cameras, people, shadows, animals, trees, plants, textures…draw anything that makes up the immediate area.

While it may seem simple, making rough sketches encourages mindfulness, utilizes creativity without the pressure of perfection, and reveals the creative possibilities of your surroundings.

5. Have a change of scenery

Even a simple walk in the park has been proven to combat creative block.

After all, new places inspire new thought patterns. A change of scenery is a simple way to get into a more creative mindset.

6. Gear up

One of the ways to overcome creative blocks is to seek out new equipment.

Trying out new gear sounds expensive, but economical accessories like extension tubes, prisms, and filters can have a significant creative influence on photographic practice.

Even old cameras and lenses sourced from thrift stores can present new challenges and opportunities to engage with photography and therefore reinvigorate creativity.

ways to overcome creative blocks as a photographer macro flower
Extension tubes are an economical way to get into macro photography. Canon 5D Mark II | Canon EF 50mm f/1.8 II with extension tubes | 1/125s | f/4.0 | ISO 100

7. Be distracted

Embracing distraction seems a little counterproductive, but putting an uncooperative artistic undertaking to one side for a while can be one of the best ways to combat a creative block.

Taking a break to reset and relax is conducive to a more fluid state of mind. Going for a walk, having a shower, and doing some tidying are all good ways to overcome creative blocks.

8. Seek inspiration

Creative minds feed on inspiration. Reading photography books and magazines, listening to podcasts, and researching artists can all chip away at a stubborn creative block.

Plus, due to the current shutdown, many galleries are creating virtual tours of art spaces online – which is a great opportunity to explore art establishments without leaving the comfort of your own home.

9. Photograph something new

It can be easy to get stuck photographing the same thing all the time. And while there is nothing wrong with specializing, adopting a new subject or technique can help get rid of a creative rut.

Photographing something entirely new not only serves as a refresher but can also build on the skills and habits you’ve previously established. For example, a portrait photographer experimenting with landscape photography can uncover new ways to combine the two in environmental portraiture.

While it can be difficult to take on a new project during a creative rut, doing photography outside your comfort zone can lead to significant artistic breakthroughs. By embracing a new format, photographers can expand their creativity and shift a stubborn creative block.

10. Photograph your favorites

ways to overcome creative blocks as a photographer
Canon 5D Mark II | Canon EF 24-105mm f/4L IS USM | 1/50s | f/10 | ISO 400

It may seem like this point contradicts item nine above. Nevertheless, we often forget to photograph the very subjects that made us love photography in the first place.

A lull is a great opportunity to return to photographing a neglected favorite subject, rekindling that passion for creative image-making.

11. Make a visual diary

In a creative lull, a good source of accessible inspirational material is invaluable. Visual diaries are collections of visual materials compiled in a comprehensive journal. Consisting of images, notes, samples, scribbles, diagrams, photographs, etc., visual diaries are a manifestation of a photographer’s creative thought processes.

One of the most popular visual diary formats is a simple spiral-bound art book (usually A4 or A5 in size). However, there are other ways that artists can maintain a visual record of artistic processes.

For instance, Pinterest, Instagram, and other online venues are great ways to keep track of inspirational artistic material. In the event of a creative lull, visual diaries are a great resource to look back on, and they can help plan your next creative step.

Ways to overcome creative blocks: Conclusion

While frustrating, creative blocks can represent a good opportunity to expand on creative practice.

From resting to listening to music to trying a new technique, there are many ways to overcome creative blocks – while building on personal creative processes at the same time.

Now over to you:

Do you have any tips for getting rid of creative blocks? Share them in the comments!

The post 11 Ways to Overcome Creative Blocks as a Photographer appeared first on Digital Photography School. It was authored by Megan Kennedy.


Digital Photography School

 
Comments Off on 11 Ways to Overcome Creative Blocks as a Photographer

Posted in Photography


How to Overcome Photo Envy and Become a Better Photographer

13 Dec

The post How to Overcome Photo Envy and Become a Better Photographer appeared first on Digital Photography School. It was authored by Mat Coker.

overcome-photo-envy

You’ve got a goal to become a better photographer. Along the way, you’re going to have to confront your weaknesses. Photo envy is one of the greatest weaknesses a photographer can face because it is a weakness that hurts other people.

If you regularly feel jealous when you see another photographer’s good photos then you probably suffer from photo envy.

Photo envy will make you bitter and pessimistic. When envy takes root, it leaves you feeling inferior and resentful at other people’s success.

I’ll show you how to overcome photo envy so that you can get on with becoming a great photographer.

overcome photo envy

The one time I forget all about photo envy at a photo session. That’s because my only concern is for my subject.

How do you know for sure that you have photo envy?

Admiring another photographer’s work and aspiring to be as good as them is not envy. It’s natural to be captivated and inspired by other people who are better than you.

You’ll know photo envy by its tell-tale effect on your emotions.

The test is simple: if you take an immediate emotional turn for the worst when you see other people’s good photography, then you suffer from photo envy.

You probably first noticed your photo envy while scrolling through social media. A really good photo posted by a friend or another photographer took you by surprise. You felt a terrible sinking feeling in your gut and chest. You’re jealous.

Perhaps you regularly have beaten up by thoughts of inferiority, or even felt hopeless or like crying? You wonder how they can be so skilled, and why they’re getting all the attention. You think, “when will I finally get noticed.” What does it take?

The stakes

You’ll be tempted to think that simply becoming a better photographer or getting more business is the solution to your photo envy. But it’s not.

Envy is a weakness within yourself and the only way to cure it is to face it directly. And you must overcome photo envy before you become a good photographer.

If you don’t overcome envy before you become a better photographer, you’ll simply become a good photographer with a harmful weakness. You’ll naturally take out your resentment on other photographers, not to mention your friends and family.

overcome photo envy

Even though I don’t think about photo envy during a session, I know the next time I’m on social media, I’ll see a photographer’s amazing photos and feel envious again. So I employ my regular tactics to defeat photo envy.


How do you overcome photo envy?

You don’t have to be jealous, inferior and resentful forever. Follow this plan, and you will overcome photo envy.

Envy is something that needs to be overcome in the moment. Remember, you’re good at spotting moments as a photographer!

Here is how to overcome photo envy.

The very second you feel envious of somebody’s photography, stop what you’re doing. Stop scrolling, stop clicking and stop thinking about yourself. Now get ready because you’re about to tell the photographer how much you love their photos.

Whether you’re envious of a friend or a competitor, you need to send them a personal message immediately. Do not put it off for later. Simply send them a message letting them know how much you enjoy their photos. After all, the reason you’re envious is that they’re so good.

If you’re not sure what to say then try something like this:

Hi there, I just wanted to tell you how amazing I think your photography is! Your images never fail to wow me. How long have you been into photography?

Overcoming photo envy is that simple.

overcome photo envy

I know that becoming a more skilled photographer isn’t enough to deal with my photo envy. Becoming a better photographer out of spite isn’t a good game plan.

Be a better person and a better photographer

Why does this method work so well? Because you’re retraining yourself to be a good person. Envy has become automatic when your response should have been admiration and encouragement.

When you tell the person how much you love their photography you will notice the feeling of envy leave your body and good feelings will flow in to replace it. Just wait until they write back and compliment you.

Every time you’re scrolling through Instagram, Facebook, Pinterest, etc and you feel envious, send a personal note right away telling them how much you like their photography. Pretty soon you’ll be an encouraging person rather than an envious one.

But you can take all this a step further.

overcome photo envy

With my photo envy under control, I’m free to pursue my goal of becoming a better photographer. When I go to a session, I have a toolbox of creative elements that I use. I’ve memorized them so I don’t have to overthink it. I can focus on my subject and know that I’ll get home with some good photos.

Lead the locker room

Telling the person (especially competitors) how much you love their photography is the key to overcome photo envy.

But you can do better than “not be envious.” You can become a generous leader among photographers.

overcome photo envy

Backlight is one of my favorite creative ingredients.

Let’s think about a locker room for a moment. You likely experienced a locker room or a change room in high school, so you know what a humiliating experience it can be. Inferiority and envy can run wild and then spill out beyond the locker room.

If you follow sports, then you hear about the rivalries in the locker room and how it can bring the whole team down.

But when somebody steps up to lead the locker room in a good direction, everything changes. When somebody is an encourager and a problem solver, then envy and rivalry burn out. If anyone chooses to remain miserable and envious, they quickly lose their place in the locker room, they’re ignored until they’re just gone.

overcome photo envy

I always look for some interesting gesture in the moment.

Now let’s get back to the world you’re a part of. Would you like to be an important part of your photography community rather than just sitting home and feeling jealous about how everyone else is doing? Then step up and lead the locker room.

Be the encourager in online forums and Facebook groups. Start an in-person group to help new photographers or unite photographers that act like competitors.

I don’t mean that you have to be a traditional leader. You just need to bring order to the chaos. Pump out positive energy and watch it chase envy and rivalry away. A simple compliment from you might be what helps another photographer overcome their photo envy.

By this point, there isn’t a shred of envy left in you. You are happy to see others do well. In fact, you even start making others look good.

overcome photo envy

Lower angles make everything look more dramatic.

Make another photographer look good

Be a shameless promoter of others. Look for good photographers and share them with the world.

It could be as simple as showcasing them through a guest post on your blog or social media.

But how can you make your competition look good and expect anyone to remember you? You simply have to trust that when you make others look good you will not be forgotten.

Envy can’t touch you when you do this.

overcome photo envy

Along with backlight and low angles, I love a photograph with texture. This helps your photo to pop.

Up your game every step of the way

We’ve almost forgotten about your real goal, which is to become a great photographer. That’s actually the easy part! You figure out what you wish you could do and learn it!

Find an ebook, course, or mentor who can show you. Learn, practice, refine, celebrate.

I used to be jealous of photographers who had beautiful light in their photos. I had no idea how to achieve that look and didn’t know what to do about it. Eventually, I had an opportunity to learn the skills I was surprised to see that there was no magic involved; all I had to do is learn.

overcome photo envy

When possible, look for a frame within a frame.

You’re on a journey of becoming a better photographer, but pay attention to who you become along the way. Becoming a better photographer will not make you less envious. You can let photo envy take root and bring you down. Or, you can overcome photo envy by being an encouragement to others. Lead the locker room and make a lot of other photographers look good.

Whenever you feel a twinge of jealousy, get in touch with that photographer and tell them how great their photos are. This is how you overcome photo envy.

Do you have any other tips to overcome photo envy? If so, share them with us in the comments!

The post How to Overcome Photo Envy and Become a Better Photographer appeared first on Digital Photography School. It was authored by Mat Coker.


Digital Photography School

 
Comments Off on How to Overcome Photo Envy and Become a Better Photographer

Posted in Photography


4 Tips to Help You Overcome the Fear of Photographing People

13 Jul

Are you someone who shies away from photographing people?

I this article, I want to share with you some of my journey and four tips to help you become more confident photographing people. I went from being fearful of photographing people to absolutely loving it.

Portrait of an Asian woman with a Nikkormat FTN film camera - 4 Tips to Help You Overcome the Fear of Photographing People

She’s holding the same camera and lens I used to take the next photo in this article.

The fear is real

Many photographers who join our workshops tell us they find it a real challenge to photograph people. Whether it’s people they know or complete strangers, so many people struggle to photograph others. I think this my be one reason selfies have become so popular.

When I bought my first camera I was 19 years old and very shy. I had a small group of friends and a few places I enjoyed socializing. But beyond that, I preferred not to interact with others. I loved taking photos – landscapes, flowers, still life, but not people. I could not bring myself to do it.

My sister encouraged me. She said she loved my photos, but they would be better if there were people in them. So I started photographing her.

girl on the beach in the morning - 4 Tips to Help You Overcome the Fear of Photographing People

One of my favorite photographs of my sister when we were on a camping trip in 1986. Shot with the Nikkormat camera above.

Build your courage and confidence

She was a reluctant subject, which gave me more of a challenge. We used to hang out a lot together with a few other friends, and I started photographing them as well. Slowly my confidence built.

Sometimes I would sneak candid photos of strangers. I had bought a zoom lens which made this easier. Being separated by the distance the long lens gave me, I was not as uncomfortable.

After a while I packed my camera and bag and headed off. When I traveled overseas I found it easier. Somehow being a tourist changed things. I became more confident. Even so, there were many people I connected with along the way that I did not photograph and now regret that I was not bold enough.

Asian woman with a camera - 4 Tips to Help You Overcome the Fear of Photographing People

The story continues

I returned to New Zealand after only six months. My sister had died suddenly so I went back. Thankfully, I have a number of lovely portraits of her.

Not long after I landed a job at a daily newspaper in the Illustrations Department. No, I wasn’t doing drawings, this was where the editorial photographers worked. The task of an editorial photographer is to illustrate the story. Hence the department name.

man holding a photo of himself - 4 Tips to Help You Overcome the Fear of Photographing People

There I learned many things very quickly. The most challenging thing I learned was that most photos published in newspaper stories include at least one person in the image. If I was going to make the most of this lucky break I needed to overcome my fear, quickly. I knew I would not keep my job long if I returned from an assignment with no photos of people and an excuse that I was too shy.

It has not been easy and it has taken a long time to really be confident photographing people, most of the time. But not all the time. Sometimes I can’t do it, as I am still essentially a shy person.

Young Thai woman in traditional costume - 4 Tips to Help You Overcome the Fear of Photographing People

4 Tips for Overcoming the Fear of Photographing People

1. Find someone who will let you photograph them.

This might be a spouse or sibling, or maybe a good friend. If you can find someone who enjoys being photographed then you have already overcome the biggest hurdle.

Photograph them whenever you can. Build a photographer/model relationship. Be aware of times you and your model have the most fun and replicate the circumstances again in future.

If things work out well, invite some other people to join you. Sharing your photos with them and asking them to post to their social media accounts will help boost your confidence.

young woman lying on the grass - 4 Tips to Help You Overcome the Fear of Photographing People

2. Join a club or group and volunteer to be their photographer.

Maybe you are already a member of an organization you could offer your services to. You might be the official photographer for your church picnic. Or perhaps you could start making a series of portraits of gardeners in their element for the local gardening club.

Think of other ways you can offer your services which will give you a valid reason to take people’s photographs. I found this a great confidence boost when I started at the newspaper.

Studio portrait of a mud covered woman holding clay - 4 Tips to Help You Overcome the Fear of Photographing People

3. Offer to cover events for your local newspaper or community website.

Put yourself on the spot. Commit yourself to a task. Make a reason that you have to come up with pictures. You can’t offer to cover an event and then only supply photos with no people in them.

Woman being kissed by an elephant - 4 Tips to Help You Overcome the Fear of Photographing People

4. Practice being bold enough without appearing to be rude or pushy.

Practice this without being self-effacing. Having your camera in your hand will help.

People will respond to you very differently if you display confidence when you ask them to take their photo. If you come across apprehensive they may doubt your ability as a photographer and respond with reluctance.

So much of creating a good portrait is in how you present yourself. If your subject is comfortable when they are being photographed you will get better pictures of them. They are also more likely to appreciate the portrait you have made.

Portrait of a rice vendor at Muang Mai Market - 4 Tips to Help You Overcome the Fear of Photographing People

Start Today

If you have been wanting to start photographing people and have not – today is the day to start. You never know how much you might truly bless someone by taking their photo.

Here’s a video story of how I was able to share a special portrait I had initially been reluctant to make.

?

The post 4 Tips to Help You Overcome the Fear of Photographing People appeared first on Digital Photography School.


Digital Photography School

 
Comments Off on 4 Tips to Help You Overcome the Fear of Photographing People

Posted in Photography


How to Overcome Intimidation and Learn from the Experts – Adorama Inspire Conference

14 Jun

Disclaimer: Adorama is a paid partner of dPS.

As a photographer have you ever suffered from Imposter Syndrome?

Do you look at your social media feed and scroll through fabulous snaps that make your heart sink? Instead of being inspired by ethereal lighting and fantastic depth of emotion, do you find yourself intimidated and second-guessing your work?

We have all been there.

The Adorama INSPIRE Conference seeks to challenge that response. The event (more details below) places emphasis on collaboration and creativity that will allow you to learn from respected experts without feeling intimidated. Instead, you will feel invigorated. Which is why I wanted to share some of my own tips for getting the most out of attending events like Adorama INSPIRE.

Art of Visuals - Adorama Inspire Event

Get rid of the pedestal

So how can you learn if you find looking at other photographers’ great images intimidating? If the instructors at workshops or conferences are top experts, how can you relate to them and get over your own fears?

Speaking from my own experience, the best thing I can recommend is to try and think of the teachers and instructors as equals and take them off the pedestals on which you’ve placed them. Consider the fact that once upon a time they were sitting exactly where you are now, with the same insecurities and fears. They are only human too, and the only difference is they have more experience than you do.

Ask questions and don’t be afraid to make mistakes

Don’t be afraid of asking questions. I tell my students all the time that the only stupid questions are the ones you don’t ask because then you’ll never learn. So ask away.

Gavin Hoey Portrait Kit

Image by Gavin Hoey

Try things and make mistakes as you learn – that too is normal. Take the newfound knowledge you get from any photography educator, whether it be live in-person or an online class, and apply it. Don’t expect it to all work out perfectly the first time. You need to do things a few times to “get” it. Rome wasn’t built in a day, be patient with yourself.

There are many ways to learn photography nowadays.

Read: Should you Study Photography at College or are There Better Options Now?

Image by Jose “@tutes” TUTIVEN – Storm King Art Center

Get inspired and learn

That’s why if you only attend one photography conference and festival this year, you should make it Adorama INSPIRE. Adorama INSPIRE combines guidance from top photographers and influencers from around the world with hands-on learning in a supportive community so you are able to expand and enhance your skills in a no-pressure, friendly space that is accessible to all.

NOTE: There are many workshops which are free to attend, you just have to register. 

Tracie Maglosky Maternity Photography

Image by Tracie Maglosky – Maternity Photography

Adorama INSPIRE runs from June 25th to July 1st, 2018 in New York City where you can attend the in-person workshops and classes, many of which are free or really low cost. Either way, you will benefit tremendously from the advice of some of the photography world’s most esteemed professionals in an environment that allows your own skills to blossom.

What you get

Inspire Met preview - Adorama Inspire Event

Use Adorama INSPIRE as a springboard for your next creative breakthrough and soak in inspiration from cinematography, music, social influence and photography in all its many shapes and forms. Fine-tune your technical skills and enjoy fresh inspiration and motivation to create your next masterwork.

Digital photographers who live in or can travel to New York City will benefit from Adorama INSPIRE’s free events, including visits to local art galleries and photo walks.

Statue of Liberty - Adorama Inspire Event

Since Adorama INSPIRE is unique in the photography conference sphere, it is well worth making a special trip to attend their conference and festival. Consider it an investment in your future career, and a way to get your creative juices newly flowing. Additionally, you will be able to check out New York City, which is vibrant and inspirational all on its own!

Tamara Lackey Children s Portraits

Image by Tamara Lackey – Children’s Portraits

You can register for any number of workshops, hands-on experimental events, and panel discussions at Adorama INSPIRE. Please note that this event is expected to be very popular, so advanced registration is strongly suggested, even for workshops or discussions that are free. We do not want you to miss out! For a full calendar of events click here.

Highlights not to miss

SLR Lounge Wedding Photog Workshop - Adorama Inspire Event

Image by Vanessa Joy – Wedding Workshop

Highlights that you absolutely do not want to miss include a State of the Industry panel moderated by Barry Litwin, CEO of Adorama, and the Adorama INSPIRE Expo. The Expo is particularly intriguing because you will get a glimpse into what is fresh and on the horizon in the photography community. With technology evolving at light-speed it’s important to keep apprised of all the new tools you have at your fingertips.

Adorama is a trusted source for new and exciting products. Since its inception it has evolved from a New York City camera store to one of the biggest authorities in the photography world, exploring new techniques, technologies and expanding its bandwidth to include popular YouTube channels and tutorials. As such, Adorama is in a unique position to have their finger firmly on the pulse of what is next for the industry, so their expo is well worth checking out.

Learn from industry leaders and instructors

Stan Honda Night Shooting - Adorama Inspire Event

Image by Stan Honda – Night Shooting.

Attendees will get a once-in-a-lifetime chance to join Lumix Global Ambassador Kevin Gilbert on a nighttime shoot of the epic New York City skyline. Participants will learn from the best while honing their skills in real-time and creating some memorable images.

Or join fashion photography icon Emily Soto live or through video-stream as she walks you through tips and tricks of creating the most fabulous fashion editorial; from conceptual design to how to polish your final images. Soto has been featured in several high-end magazines and is considered an unparalleled authority on the subject.

Eric Pare Light Painting - Adorama Inspire Event

Image by Eric Pare – Light Painting

Participants can also learn how to find their unique voices as street photographers with guidance from Street Dreams Magazine’s key photographers. They will explain how they found their creative groove and mentor you on how to discover your unique perspective and visual story.

Learn from other attendees

Something else to keep in mind is the opportunity to interact and learn from other conference attendees. Even during online classes, there is often a chance to communicate with others, share images, and get feedback on your photos.

At most workshops, there are many people of various skill levels. So help those with less experience than yourself, and ask advice of those with more.

Read more tips on attending a conference here: 5 Tips to Getting the Most out of a Photography Conference

Dave Black Belmont

Image by Dave Black – Belmont

Sign up now

Adorama INSPIRE strives to accomplish a mission that has yet to be realized by any other photography conference or festival; intertwining valuable technical workshops, artistic inspiration and a supportive community of photographers and mentors. This week-long event will jumpstart your motivation and give you fresh tools to take your photographs to the next level.

Click here to register now.

The post How to Overcome Intimidation and Learn from the Experts – Adorama Inspire Conference appeared first on Digital Photography School.


Digital Photography School

 
Comments Off on How to Overcome Intimidation and Learn from the Experts – Adorama Inspire Conference

Posted in Photography


How to Overcome Difficult Lighting Scenarios at Weddings

21 Apr

A wedding photographer has to be prepared for pretty much anything. Big belly laughs, impromptu outbursts of song and bear hugs can happen at any moment. Not to mention that the light is constantly changing and you’ve got yourself a schedule to keep. Let’s just say weddings keep you on your toes.

That’s why it’s always worth planning ahead and being prepared. Weddings rarely take place in just one location and moving from indoors to outside, or from sunshine to shade can cause a huge change in exposure. When not competing with the sun, indoor lighting poses new problems. Tungsten bulbs mixed with daylight causes all sorts of white balance issues. But this is why we love weddings, they keep us sharp.

Being prepared and practice is key to achieving consistent results. Here are three top tips on how to make the most of difficult lighting situations.

Couple portraits – How to find good light on a dull day

Believe it or not, it is raining at the point of capture in the image below. This photograph was taken in July in Surrey, UK. The British weather was doing all it could to play up to the stereotype it would seem.

Couple portrait weddings

Not every wedding takes place on a gorgeous sunny day and it’s not always feasible to shoot at sunset to capture the golden hour of light. What can you do to create images that your clients will love and to which you’re proud to put your name? Especially when the heavens decide to play against you. Here is the process I use when assessing lighting conditions and how this photograph was taken.

Understanding the principles of lighting is fundamental in any photographer’s quest to a beautifully lit photograph. Fortunately, these principles are consistent regardless of where you are located in the world or how expensive your equipment is. Whether you’re using the latest Canon or a generation old Smartphone, light can be manipulated to your advantage.

Approaching every scenario with the same set of questions can radically change how you see light and ultimately how you take pictures. Where is the light coming from, where is the even light and where are the greatest differences in the light?

Place the subjects in shade

Shade weddings

Here you can see the scene exposed to what the human eye sees. The background is correctly exposed which throws the foreground into darkness. What we want is to do is correctly expose the foreground to create a clean canvas with an overexposed background. In this scenario, there is about three stops difference in exposure, which is perfect.

Shade overexposed weddings

By placing the couple under the branches of the tree they are instantly evenly lit. There are no stray light rays coming through branches or dappled light on faces, and the pebbles on the driveway aid in reflecting light back onto the subjects. By exposing for the skin tones the background will be overexposed, providing a clean canvas.

A few tweaks in Lightroom to warm the skin and recover some of the highlights and voila! An evenly lit portrait on a rainy day. The added benefit of the tree branches is that they, of course, provide shelter from the wind and rain. This technique of using trees as shelter can also be employed on dry days that are windy. Even if the sun is shining, a venue on a hill can increase the risk of a veil blowing away!

Confetti

Why is this difficult? Depending on the location of the venue or church, you may be competing with changing light that the couple will walk through as they process down the confetti line. This is problematic as you are going to be walking backward, trying to capture the action, as well as tracking the changing light.

It is quite common in the UK for churches to have tree lined pathways, this creates a lighting issue as a break in the trees will cause the couple to walk from light to shade to light, etc. This can mean a dramatic jump in exposure.

Confetti lighting weddings

Take pictures of your hand

This is probably the easiest method to test the exposure of skin tones which can and should be used to test all of the techniques in this article. Take a photograph of your hand, inspect the screen and adjust accordingly. The wedding guests may look at you in an odd way, but when you’re working at a fast pace this can be a life saver.

Take images of your hand in both the light and the shade and note the difference in exposure before the bride and groom appear. Depending on how you shoot, it makes sense to only change one setting as you will be multi-tasking. The control for shutter speed on Canon cameras is located where the index finger naturally rests, and logically is the easiest of the settings to change.

Pay attention as the couple moves from light to shade, remembering the readings of your hand. The camera settings are displayed in the viewfinder and alternate between the two as the light changes. Where possible, pre-plan your shots, performing a mental run through of where people are likely to be and what lighting difficulties you may encounter.

Confetti lighting 2 weddings

First dance

Who knows what kind of lighting setup the DJ will have. Will they make a beautiful white spotlight for the first dance, or will they bust out some crazy laser snowflakes? Anything could happen. One method to overcome this is to shoot into the DJ’s lights and use them as compositional features rather than compete with them.

This isn’t the only option, sometimes shooting with the lights are beneficial as it gives you scope to capture the guest’s reactions. To create this shot, one flashgun at both corners of the stage (pointing at the center of the dance floor), elevated on tripods, and attached to Yongnuo wireless triggers were used.

First dance weddings

This setup offers two things. Firstly, by backlighting the subject even exposure on the skin can be achieved with no unwanted shadows. Secondly, you don’t have to worry about what the DJ is doing with their lighting setup.

It pays to ask the DJ before any dancing commences, what they plan to do and work with them. You would certainly be unlucky should you encounter anyone who wasn’t amiable in having a discussion. However, the point remains that they have a job to do. If they feel the song warrants a change in lighting then they will adapt it for the benefit of the wedding, not for your advantage. This is completely understandable, however, lighting surprises aren’t often welcome. This is why it makes sense to pre-plan and take control of the lighting.

Lens chimping technique

A caveat to shooting in this way is that it is possible to end up with equipment or the DJ themselves in the background. For this reason, an interesting tactic to employ is Sam Hurd’s lens chimping technique. By placing a convex lens element in front of your lens it creates cool flares and throws the background out of focus.

First dance 2 lens chimping technique

Practice is certainly recommended as an incorrect application of this technique can result in the lens element focussing all lights onto your sensor and completely blowing out the shot. The first dance is often a tricky one to shoot, it would be interesting to hear about your ideas and innovations below. Happy shooting!

Conclusion

Hopefully, these quick tips will help you deal with challenging lighting situations at weddings or any other photography opportunities. Do you have any others you want to share? Please do so in the comments below.

The post How to Overcome Difficult Lighting Scenarios at Weddings by Liam Smith appeared first on Digital Photography School.


Digital Photography School

 
Comments Off on How to Overcome Difficult Lighting Scenarios at Weddings

Posted in Photography


10 Common Photography Mistakes and How to Overcome Them

25 Feb

You’ve got your DSLR and you are excited to test it out. You might have gone out for the first few days or perhaps weeks and then all of a sudden the excitement wears out. Why?

Because you don’t seem to get what you want out of your mighty DSLR, right? You may have spent countless hours in your college, office, or at home in search of a best DSLR that can take the best photographs you want. All your efforts have gone in vein and you have a frustrating backlog of your actual work.

Next time you feel such frustration about your photography remember this quote:

“You will only fail to learn if you do not learn from failing.” – Stella Adler, The Art of Acting

So, get ready to learn about the 10 common photography mistakes that you may have committed and how to overcome them.

1. Wrong White Balance (WB)

The first and foremost mistake is setting the wrong White Balance. We see white as white under all lighting conditions, but the camera doesn’t. You have to guide the camera to know the light source of the current scene you are photographing.

Say you are shooting in daylight; if you set the camera’s White Balance to Cloudy then the scene will have orange cast. On the other hand if you are shooting in cloudy light and the camera White Balance is set to Daylight then the scene will have blue cast.

Here’s an easy way to remember this:

  • White Balance Temperature (K) setting = Actual light source = No Cast
  • White Balance Temperature (K) setting < Actual light source = Blue Cast
  • White Balance Temperature (K) setting > Actual light source = Orange Cast

Solution: Set the correct White Balance in the field or shoot in RAW mode. If you shoot RAW, you have a choice to set the correct White Balance in post-processing.

1 Common Kingfisher blue bird Bokeh Effect Bharatpur Bird Sanctuary Keoladeo National Park Nature Wildlife Bird Photography by Prathap

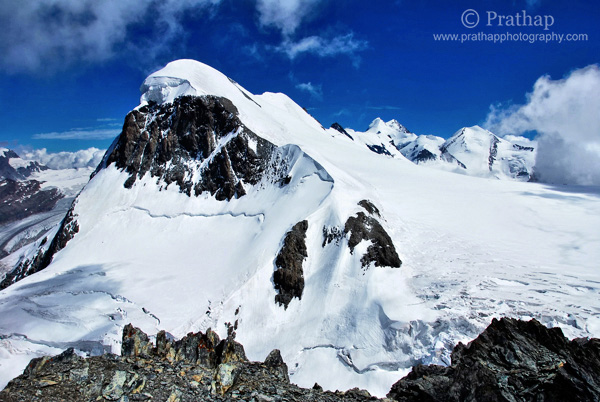
2. Overexposed Highlights

Remember that the dynamic range of your eyes is far greater than the camera’s dynamic range. Dynamic range is the ratio between the brightest elements to the darkest elements in the scene.

You might see the details in both brighter as well as darker regions, but the camera wouldn’t be able to record those details. As a photographer, it is your responsibility to make an exposure that is pleasing to the viewer’s eyes.

Humans are more sensitive to the highlights than the shadows. Overexposed highlights (white patches in a photograph) are more unacceptable to our eyes than underexposed shadows (black patches).

Solution: Expose for the highlights so that nothing gets overexposed, unless you are doing it intentionally. Almost every DSLR will have a blinking indicator (highlight warning, also simply called The Blinkies) that shows overexposed regions in your photograph on the LCD monitor during image playback.

2 Magnificent Swiss Alps Switzerland Mountains Nature Landscape Wildlife Bird Photography by Prathap

If there are blinkies, then go ahead make exposure compensation (underexpose the scene by the required amount) to get that right.

3. Subject in the Center

It is a common tendency of a beginner photographer to keep the subject in center of the frame, which yields a boring, static composition. The viewer has nothing else to look for his/her eye goes straight to the subject and is stuck there.

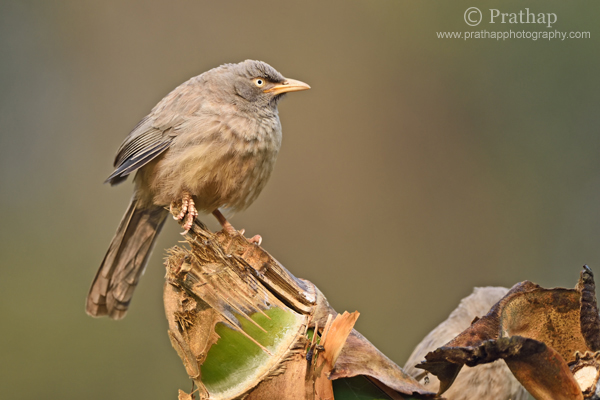
Solution: Use the Rule of Thirds and keep the subject out of the middle of the frame. An off-centered subject makes the photograph dynamic and uneven negative space creates interest.

3 Jungle Babbler Shallow Depth of Field Bharatpur Bird Sanctuary Keoladeo National Park Nature Wildlife Bird Photography Prathap

4. Wrong Focus

No matter how good your photograph is technically, if the focus is not sharp enough, then your photograph doesn’t work. The main subject of interest needs to be in sharp focus, otherwise viewers will get distracted and will not find a point to rest on in the image.

We see objects sharp in reality so we expect them (at least one) to be in sharp focus to make any sense.

Solution: Make sure you check the focus by zooming in on your subject after you take a photograph (zoom feature in playback mode). Make sure there is enough light or color contrast between the subject and the background so that autofocus is able to lock the focus properly.

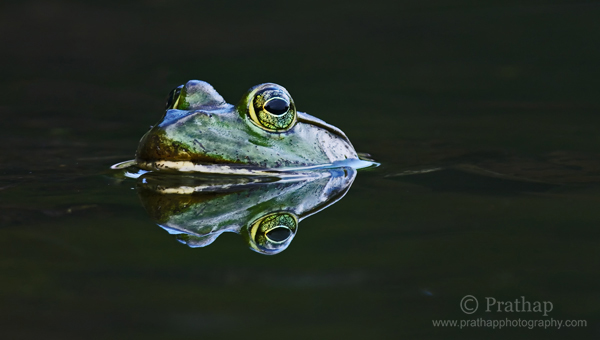
4 Perfect Reflection of Frog submerged in Water Nature Wildlife Bird Photography by Prathap

If you are making a portrait, then focus on the eyes of the person (or bird or mammal), because the viewer needs to make eye contact.

5. Breathing Space

It is quite common to fill the frame with your favorite subject so that it looks big in the frame. But how often does it feel that they are squeezed in the frame? They look suffocated because there is no place to move, forget about the movement there is no place to breathe!

Sometimes there will be enough space around the subject, but in the wrong direction – which is no good either.

Solution: Rule of Thirds is the best composition technique that helps you to give enough space around the subject. Think about the image border as a concealed box where there is no ventilation, you don’t want your favorite subject to suffocate.

5 White tailed Kite Taking Off in Bharatpur Bird Sanctuary Keoladeo National Park Best Bird Sanctuary Rajasthan Nature Wildlife Bird Photography by Prathap

6. Cluttered Background

This is probably the most common mistake of all. Why? Because, it’s a common tendency to take photograph the moment you see something beautiful or interesting. So, what’s wrong with that you may ask.

Nothing. But have you paid attention to the background? Probably not. You are so overwhelmed by the subject, that you hardly notice anything around it.

A cluttered or distracting background plays the major role in ruining photographs.

Solution: The real photography starts after you choose your subject. Once you’ve done that, forget about it. Pay attention to the rest of the scene; include only those things that complement your subject and exclude everything else.

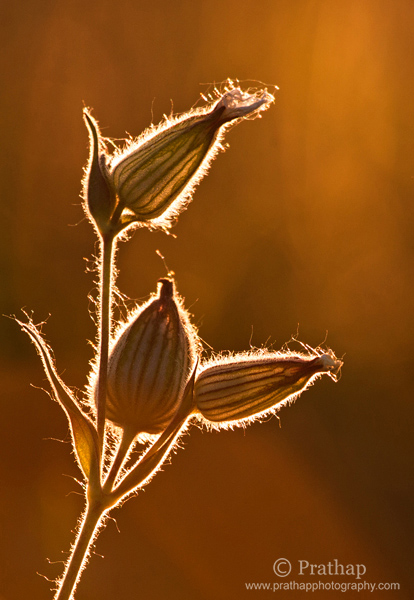
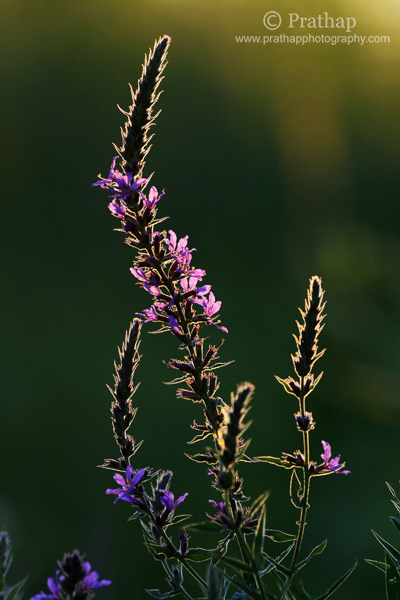
6 Painting with Light Art in Nature Backlit flowers in Golden Hours of Sunset Nature Wildlife Bird Photography by Prathap

The background makes the picture. Cleaner background makes the subject stand out making it the primary focus for a viewer.

7. Skewed Horizon

Another mistake that I see quite often is that horizon is not perfect. This is such a simple thing to notice but still a whole load of photographs have skewed horizons.

How can you miss that? Viewers feel uneasy when the horizon is skewed. It also indicates that the vertical subjects should be perpendicular to the ground. A person, building, bird, or tree tilted to one side makes them vulnerable to fall (unless of course they are tilted in reality like the Leaning Tower of Pisa).

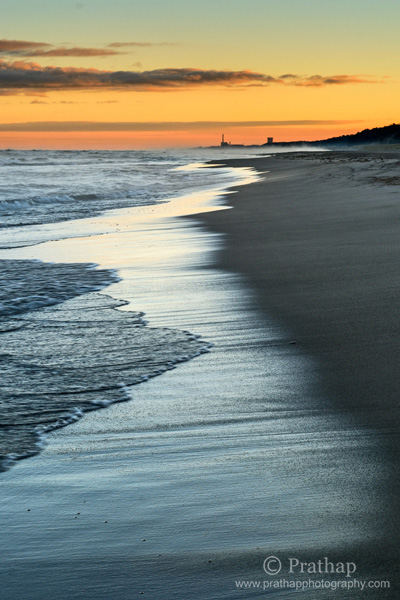
Solution: Use the grid overlay while composing in the field, or correct the horizon using the Crop and Straighten Tool in the post-processing stage. Find a subject in the scene/photograph that should be horizontal or vertical in reality, and use it as a reference when you straighten the image.

7 Beautiful Sunrise in Indiana Dunes State Park Beach in Golden Hours Nature Landscape Seascape Wildlife Bird Photography by Prathap

8. Lack of Depth

Remember, Photography is two dimensional medium but we see everything in three dimensions. Photographers often miss the depth that is inherent in photography.

You saw that most beautiful scene in 3D and you captured it, but you wonder what went wrong as you stare at your monitor, right? Something is missing. This is not what you saw.

Why? You didn’t realize that you are capturing a 3-Dimensional scene in a 2-Dimensional photograph.

Solution: There are lots of ways to create depth – include a foreground object, use leading lines, use perspective distortion, change the point of view, and so on. But the most important thing to remember when you are out in the field is that a photograph is 2-Dimensional.

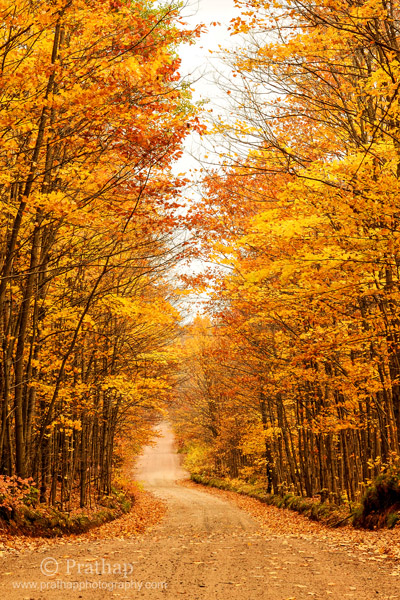
8 Beautiful Fall Foliage on the way to Agate Falls in Upper Peninsula Michigan Autumn Colors Nature Landscape Wildlife Bird Photography by Prathap

9. Too Much in the Photograph

Too much of anything is bad. When you see a scene, you see it as whole, which is natural. But if you try to include everything that you saw in one image then you end up with a photograph that has too much.

When you looked at the scene, were you really looking at the entire scene at once? Think about it. If you do this exercise of how you actually consume a scene you will know a whole lot more.

Solution: Try simple compositions. Instead of making one photo of the entire scene, ask yourself what interests you the most? Then pick that subject and make a photograph that emphasizes only that subject.

9 Backlit Flowers in Golden Hours in Sunset Rollins Savannas Forest Preserve Gryaslake IL Nature Macro Wildlife Bird Photography by Prathap

What is in a photograph is just as important as what is not in there. Once you master these simpler compositions you will be able to take grand landscapes in a much simpler, but more interesting ways.

10. Bad Light

Photography is all about Light. No light means no photography. But light has quality and direction. The best photographs are normally done in the golden hours and just few hours before and after sunrise and sunset when the light is at its best.

Many photographers don’t seem to care about the direction and the quality of light at all. Either the light is so harsh that there are multiple patches of light and shadows in the scene, or the subject’s eyes are in dark shadows, or light is just flat making the photograph 2-Dimensional, and so on.

Solution: Remember that photography is all about Light. More you learn to see the light better photographer you will become.

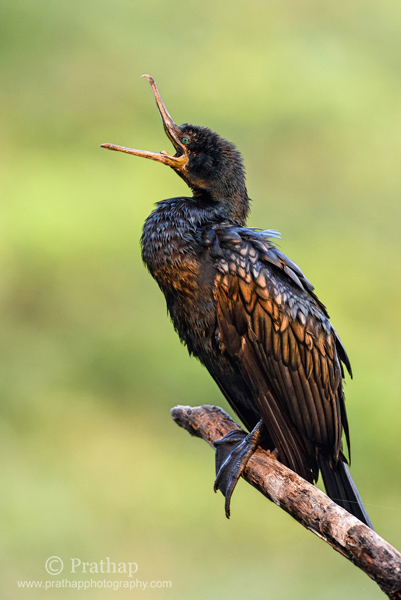
10 Double Crested Cormorant Golden Hours Sunset Bharatpur Bird Sanctuary Keoladeo National Park Best Bird Sanctuary Nature Wildlife Bird Photography by Prathap

The best way to appreciate light and its amazing qualities to transform a scene, is to go to the scene before sunrise and stay beyond sunset.

Final Thoughts

Still waiting to hear more?

Go ahead and correct the mistakes now. You will see yourself becoming a better photographer when you take control over these common mistakes.

Good luck!

googletag.cmd.push(function() {
tablet_slots.push( googletag.defineSlot( “/1005424/_dPSv4_tab-all-article-bottom_(300×250)”, [300, 250], “pb-ad-78623” ).addService( googletag.pubads() ) ); } );

googletag.cmd.push(function() {
mobile_slots.push( googletag.defineSlot( “/1005424/_dPSv4_mob-all-article-bottom_(300×250)”, [300, 250], “pb-ad-78158” ).addService( googletag.pubads() ) ); } );

The post 10 Common Photography Mistakes and How to Overcome Them by Prathap DK appeared first on Digital Photography School.


Digital Photography School

 
Comments Off on 10 Common Photography Mistakes and How to Overcome Them

Posted in Photography


5 Fears to Overcome When Starting a Photography Business

31 Oct

As you enter the field of professional photography, there is one thing that will become immediately clear. One of your biggest obstacles will be fear. You will worry that you are not prepared for a job, that you are not experienced enough, that something will go wrong, or that they will not like your images.

Business Portrait

Business Portrait.  Each photography job will have a different makeup and you should create a game plan going in.

This is normal and I have bad news for you; the fear will never fully go away. It will get easier however, and you will become better at pushing through it. As time progresses you will find yourself confidently going into jobs that you used to make you petrified. But even then, a whole new set of fears will arise as you move into more advanced jobs.

This can paralyze you, especially as you are starting out. It is the biggest obstacle that will stand in your way towards becoming successful. But fear not, because you are not alone. Even the more experienced photographers stay up sleepless the night before jobs.

The key is to harness that fear and understand that it is normal. It is good in fact, because it means that you are progressing and trying new things. It means you are doing something interesting that you will be proud about afterwards. As you learn, you will make mistakes, but it is how you deal with those mistakes, how you learn from them, and how you push through the fear that will be the impetus for your success.

Here is a list of my toughest fears to push through as a professional starting a photography business, and how I deal with them.

1. Is my work good enough? What if I’m not experienced enough for a job?

When you begin to think about starting a business the scariest question is whether your work and your abilities are good enough. You may have heard you are talented or that you have a gift for image making, but the reality is that being a good photographer is based on your experience and the amount of effort, thought, and study that you put into your work. Anyone can take a good photograph, but professionals learn to do it day in and day out in a variety of circumstances.

If you are starting out, no matter how good you are, you will have a lot to learn. It is important to know this. Everyone started somewhere. Spend time researching people who do the type of work that you want to do and figure out how they do it. Learn from them. Read about photography and settings and situations. Use websites like dPS to improve your skills. Before you do a job research what you want the photographs to look like and plan out how you will pull them off. Go into the job with a plan.

Portraiture

Environmental Portrait. If you are an introvert like me, interacting with subjects to get them in the right mindset will make you nervous. This will improve with experience and you should study other photographers to pick up tips on how to best interact with subjects.

If you treat your image making like this and put the work into it, even if you are not currently ready, you will be soon. The more prepared you are, the more confident you will be when going into jobs and marketing yourself. All of the information is out there for you to prepare yourself, it is just a matter of doing it.

You will most likely look back on your work two years from now and see how much better you have become, and that is the point. Everyone had to start from somewhere and it is the prepared and thoughtful photographers who ultimately become successful.

2. Am I charging the right amount of money?

Pricing is an artform based on experience. At first it can be scary because you will not have any experience with it. Also, if you are not confident in your work or your ability, then how can you be confident in pricing your work?

If you are entering the professional world you have to understand that you are starting a business. You need a business plan. You have to charge enough to make a living. If you are making the commitment to do this, even if you are not fully comfortable yet, you still have to make a living.

Research other photographers in your area or field and figure out what they are charging. Put yourself in the customer’s shoes and think about what they might be willing to pay. Create a pricing structure based on this and raise your prices as you become more experienced. Some jobs you will lose because you are too expensive. No matter what you charge, there are always people who will think you are too expensive. Do not let these people affect your opinion of what you charge. Other customers will pass you by because you are not expensive enough! That happens.

Portraiture

Environmental Portrait. Some jobs will be much easier than others but always plan for the worst.

Imagine you are hiring a wedding photographer with a budget of $ 5,000 and you like two photographers who seem like they have fairly similar experience, but one charges $ 2,000 and the other charges $ 4,500.  Which one will you hire? Some might hire the $ 2,000 photographer but many would hire the $ 4,500 photographer because they would assume that this photographer was more experienced solely based on the price they command. They would not want to risk hiring the cheaper photographer for the most important day of their lives.

Also, if people tell you your prices are too high, educate them on why you charge what you do. Many people who hire you will not understand photography. There are a lot of people out there who think photography is just about getting a camera, showing up for an hour, going home, and sending the photos. That is so, so far from the truth. Explain what you will be doing for them, the time and knowledge that goes into the job, and why it is priced where it is. Some people will understand, be happy that you explained it to them, and will then hire you. Some will not, but then you don’t want to work with those people in the first place.

Do not be afraid to lose a job because of price. That will inevitably happen and it should not dictate your pricing strategy.

3. Will my equipment break?

This one scares the heck out of me. What if something breaks while I am on a shoot? If you are creating a photography business, you need to have backups in place. A photographer plans based on contingencies. This is not only a vital business practice, but very important for your peace of mind and confidence.

Have an organized system for your equipment and bags and a consistent way of packing them for jobs. Have a backup of everything. If you do the same job regularly, then it is worth it to purchase two of everything that you use regularly. You can consider renting equipment for jobs that you do not do as frequently.

5-engagement

4. The neverending job and difficult clients

I used to have a big problem taking jobs that I shouldn’t have gotten involved in. I would be flattered that someone wanted to hire me and I hated to turn down income, particularly during the lean times. This became a huge problem, especially with the difficult clients who kept changing the job parameters and asking for more. This mistake cost me a lot of time and ultimately money.

Your time is valuable and certain jobs, particularly when you are starting, will not be worth your time. If you are starting a photography business you need to build up a steady stream of clients and having one take up an inordinate amount of your time, particularly if they are not paying you well, is just not worth it. You could be spending that valuable time marketing yourself and building your knowledge and business.

Always get all of the information up front from the client before you quote a price and size them up. It can be obvious, sometimes right away, when a client will be difficult. When you get all of the details stated up front, if the parameters of the job happen to change later in the process, then you will have the grounds to ask for more money for the extra work they are asking you to do. This will keep clients from taking advantage of your time and asking for more than what was agreed upon. Sometimes they will not even remember what they had asked for at the beginning.

An engagement portrait. Some clients will prefer more posed portraiture that looks like it came out of a magazine. Some will want both. The better you know your clients the better you can anticipate what the will want.

An engagement portrait. Some clients will prefer more posed portraiture that looks like it came out of a magazine. Some will want both. The better you know your clients the better you can anticipate what the will want.

5. Will the client like my work?

I have been doing photography jobs for a decade now and I still get nervous every single time I have to press the send button for the final images. No matter how confident I am in them, that fear is never going to go away for me. It might be the same for some of you.

However, it used to be more debilitating than it is now. At the beginning it would cause me to procrastinate and it would cause me to take so much longer editing the images than it should have. I notice that this happens to a lot of photographers. Newer photographers often spend much more time on the editing than the more experienced photographers. Some of this is based on speed and experience, but I find that the biggest factor is that the experienced photographers have their editing process down to a science. There is a structure to the way they do things that makes everything more efficient and having this structure also helps reduce the fear.

Create a consistent structure for how you edit jobs. Here is mine:

  • I first start by choosing my final selection of RAW negatives that I will send to the client. I go through all of the images in Adobe Lightroom and star everything that I think is decent as three stars.
  • I then take a break to clear my head and eyes and go through the three star images and make the best of that bunch four stars.
  • The four starred images will be the ones that I will send the client.
  • I do a second and sometimes a third round through, moving some of the four starred images back to three stars and making the best images five stars. The five starred images are in case I want to send a small edit of the top photos or if I want to access them later for my portfolio.

    Business Portrait

    Friendly and natural business portraits. When you need to create images that feel natural you need a game plan for how you are going to make the subjects feel relaxed. Think ahead of time about what you can say or do to achieve this relaxed environment.

Once I have this done, the path to the finished product is laid out before me. I then go through all of the negatives and get them to the exact crop that I want. I do this because I want to see the whole sequence of images that I will be sending to the client before I start editing the final look of them.

Finally, I go through and edit the images. The hardest aspects for me are getting the color balance, contrast, and exposure to be perfect. Also, one of the toughest things to do is to make all of the photos feel consistent. This is why I like to have the final edit of negatives chosen and cropped before I begin to work on the aesthetics. It gives me a clear path to get to this endpoint.

Do you see how an efficient system can cut out hours and even days of editing time? It keeps you organized and this organization is meant to break through any procrastination and worry about the final photographs. Then, all you have to do is stand up for a second, take a deep breath, close your eyes, and hit the send button.

Take yourself seriously, especially when you are starting out. If you are starting a photography business, commit to it. You are a photographer, you don’t do photography. You have a product that takes a lot of effort, knowledge, and skill. Your product has a lot of value and not everyone with a DSLR can do what you do.

Need more help with business? Try these other dPS articles:

  • 30 Things you Should Know to Help you Start a Photography Business
  • 36 of the Best Online Tools to Boost Your Photography Business
  • 5 Things to Consider Before Starting Your Photography Business
  • 5 Tips to Expand your Photography Business Skills
  • 5 Ways to Dip your Toe into the Business of Photography
  • The Ultimate Guide to Going Pro as a Photographer

The post 5 Fears to Overcome When Starting a Photography Business by James Maher appeared first on Digital Photography School.


Digital Photography School

 
Comments Off on 5 Fears to Overcome When Starting a Photography Business

Posted in Photography


High Speed Sync Versus a Neutral Density Filter to Overcome Bright Sunlight in Portraits

11 Sep

ND3

For several years now I have used high speed sync (HSS) in order to light portraits in full sunlight at a wide aperture. If you’re unfamiliar with HSS, it allows you to shoot at shutter speeds that are higher than the native sync speed of your camera (usually 1/200 or 1/250 of a second, read your camera and flash manual to find yours) while still using speedlights. The reason this ability is so enticing is that you can shoot flash-lit images at wide open apertures in full sunlight, allowing for a shallow depth of field. Normally if you were using a flash, your maximum shutter speed would be at 1/200 or slower, meaning that you would need to close your aperture down in order to get a proper exposure in the sun.

ApertureOnly

Raw image shot at f/29

How HSS works is that the flash will begin pulsing light, just before the shutter opens, since the exposure is so short. The problem with this is that much of the output of the light is lost in the pulsing process, meaning that you need more flash units to achieve a decent output. For example, when I am shooting at 1/8000th of a second, I need to combine four flashes, on one stand, in order to light a subject that is about five feet away. And that is without any modifiers, like an umbrella or soft box. The other issue with HSS is that not just any flash and trigger system will do the trick. You need to have gear that will communicate information from the camera to the flash.

A couple systems that can do that are the PocketWizard Flex TT5 and Mini TT1, or the RadioPopper PX system. Since most photographers don’t already own one of these triggers systems, this means starting from scratch, which isn’t cheap. I personally opted for the RadioPopper system, since the PocketWizard Flex system for Canon was super glitchy. The RadioPopper system wasn’t perfect either. Just the amount of batteries alone, for four Canon Speedlites with triggers, including a ST-E2 transmitter for the camera, required 27 batteries. Even though they were mostly all rechargeable (the ST-E2 required the hard to find 2CR5 battery), imagine trying to troubleshoot a misfire. Did the batteries need changed in one of the transceivers or was the speedlite misaligned, obscuring the sensor? Or imagine that one of the speedlites’ batteries may be slightly more drained than another, causing only three of four lights to fire. This made the overall exposure fluctuate with every frame.

HSS1

Raw image unlit

HSS2

Raw image, 1/8000 @ f/2.8

I recently decided to compare HSS against using a variable neutral density (ND) filter. ND filters screw on to your lens and cut down the light that hits the sensor, thus allowing for a wider aperture in bright light. This allowed my shutter speed to stay at or below the sync speed cutoff, allowing the full strength of the Speedlite to light my subject. This meant that I wouldn’t need to transmit ETTL information (sell the RadioPoppers) and it meant that I would need fewer Speedlites (less batteries).

After setting my ISO as low as it would go (50), my shutter speed as high as was allowed (1/200th on the Canon 5D MarkII), and my Speedlites at their full output, I dialled down the variable ND until the ambient light perfectly balanced with the light from the flash.

ND1

Raw image unlit

ND2

Raw image, 1/200 @ f/4

Some people have pointed out that there could be the issue of a color cast with certain brands of ND filters. I have not experienced any issues with the ProMaster brand. However, it’s important to keep in mind that if you are shooting directly in to the sun, there will likely be glare in your image, causing a possible color cast or the image to appear washed out.

Note that this experiment was done using Canon 430EX Speedlites with RadioPopper PX triggers. I’ve since sold them all, opting for the cheaper, sturdier and more powerful LumoPro LP180 with PocketWizard PlusX triggers. Now with one bare bulb flash, and a variable ND filter, I can effectively cut the ambient light while fully lighting a subject at f/1.4 in full sunlight.

The post High Speed Sync Versus a Neutral Density Filter to Overcome Bright Sunlight in Portraits by Nick Fancher appeared first on Digital Photography School.


Digital Photography School

 
Comments Off on High Speed Sync Versus a Neutral Density Filter to Overcome Bright Sunlight in Portraits

Posted in Photography


5 Street Portrait Tips to Overcome Your Fear of Approaching Strangers

21 Feb

It can be scary to start taking street portraits, especially if you’re an introvert. You like being quiet, people are busy and you don’t want to bother anyone. But you’re a photographer, so you see all of these “decisive moments,” and every time they slip away, it hurts a little. With practice and a few tips, though, you can shoot Continue Reading

The post 5 Street Portrait Tips to Overcome Your Fear of Approaching Strangers appeared first on Photodoto.


Photodoto

 
Comments Off on 5 Street Portrait Tips to Overcome Your Fear of Approaching Strangers

Posted in Photography


10 Most Common Mistakes in Landscape Photography – and How to Overcome Them

04 Feb

If you’re serious about landscape photography, it won’t take you very long to realize the fundamental problem of the craft: not every landscape that catches your eye will easily translate into a compelling photograph.

When we experience a place, the smells, sounds, the warmth or chill in the air, and our own emotions combine to give us an overall impression. Our job as photographers is translate that overall impression into a photograph.

Every landscape photo needs to be carefully crafted with the final image in mind.

Devil's Cornfield, Death Valley National Park, California, by Anne McKinnell

There are many problems we run into along the way that can prevent our overall impression of a scene from shining through in the final image. The following are the most common traps to expect, and how you can avoid them.

1. Crooked Horizons

Most landscape photos will feature the horizon – a dead giveaway to the picture’s overall perspective. That means that if the line dividing land and sky is not perfectly straight across, the whole picture looks totally out of whack. There are a few ways to make sure your horizon squares up right:

  • Grid Overlay
    On most DSLRs (and some compact cameras), you can overlay a grid on either your viewfinder, your live view screen, or both. Align your horizon with one of these lines.
  • Electronic Horizon
    Newer, higher-end cameras often have a built-in electronic level. When turned on, it will gauge the camera’s position in space and tell you when it is evenly aligned.
  • Bubble Levels
    Some cameras have a bubble level attached and some tripods will have one as well. If you don’t have one built into your gear, you can purchase one that affixes onto the camera’s hot shoe. Just like a spirit level in construction, this will help you straighten your camera out.
  • Post-Processing
    If all else fails, every major photo editing software will feature a “straighten” tool which allows you to draw a line tracing the horizon. Using this, the program will automatically crop the image on an angle to make sure that the line is perfectly horizontal.

2. Eye-level Perspective

Most people photograph from an eye-level standing position producing photos that look as you would expect to see things if you were there. For a more interesting composition, try climbing on top of something, or getting close to the ground to achieve a different point of view.

3. Empty Skies

Without clouds, birds, or some other interesting feature, empty skies can turn out pretty flat and boring in a photo. Try to compose your picture with something interesting in the sky. If there is nothing interesting to show, raise your horizon line to the top third of the image to minimize how much space the sky occupies in the frame.

Pine Glades Lake, Everglades National Park, Florida, by Anne McKinnell

4. Hand Shake Blur

A blurry photograph loses almost all of its impact. Either use a tripod or use a fast shutter speed combined with image stabilization.

When it comes to landscapes, securing your camera onto a sturdy tripod will always yield better results. Even if you’re using short exposures, a tripod will allow you to compose your shot more precisely and lock its position into place while you shoot.

5. No Focal Point

Skies and mountains are lovely, but a picture can’t be all background. Your photo needs a focal point to hold the viewer’s interest. This can be anything – an interesting tree, a boat, a pier, a log – but no landscape photo is complete without a main subject.

Fisherman at Fort DeSoto, Florida, by Anne McKinnell

6. Cluttered Backgrounds

The opposite also applies – be careful not to focus too much on the subject and forget about how the background comes together. Pay attention to what is behind your main subject. If the background elements don’t add to the composition remove them if possible. Be careful that you have separation between each element, and don’t let them visually blend together (ie. two or more trees merging into a greenish blob). This is especially problematic when the objects are backlit or silhouetted.

7. Poor Lighting

When you rely on the sun to light your shots, you’ll find that some days the weather just doesn’t cooperate. Grey, cloudy days will give you muted, washed-out colours and not much in the way of shadows or contrast. Extremely sunny days might do just the opposite. Carefully consider the lighting conditions on your scene before you decide how to approach it.

  • If the sun is out, position it to one side of the camera to take advantage of the shadows and textures created by sidelight.
  • If the sun is in front of the lens, your scene will be backlit and you can make some dramatic silhouettes.
  • If the sun is behind you photographing the scene will be more difficult because the direct light will make the scene appear flat. Consider changing direction.
  • If there is no sun and the sky is white, use the soft lighting conditions to make close-ups.

Rainbow Rock, Valley of Fire, Nevada, by Anne McKinnell

8. Underexposing

If the sky is overly bright (say, in the middle of the day), it can confuse the camera’s light meter, which will try to compensate by underexposing the rest of the image, resulting in a dark foreground. If this happens, use the exposure compensation to turn up the brightness, but not so much that the sky becomes blown out (turns white).

If you’re having this problem, try re-composing your image to include a darker area of the sky. This type of scene is a good time to use a graduated neutral density filter. These filters are dark on the top and clear on the bottom. You place it in front of your lens to darken the top half of the image and even out the exposure.

9. Hot Spots and Blown Out Highlights

It’s not just the sky that can blow out, though – a hot sun can cause glare on many surfaces. Watch your scene for bright spots caused by reflections or excess sunlight. Most cameras have a “highlight warning” viewing mode on the image preview which will show any pixels that have turned pure white. If you have blown out highlights, use the exposure compensation to reduce the exposure slightly until they are gone.

10. Lack of Dimension

Even though a photo is a two-dimensional image, a strong landscape composition gives the illusion of depth. When you’re setting up your shot, make sure to populate the frame in the foreground, mid-ground, and background.

Lake McDonald, Glacier National Park, Montana, by Anne McKinnell

When you are learning photography it can be hard to critique your own work and understand how to improve. After your next photo shoot, examine your images for these problems so you can avoid them next time. Looking at each of your images with a critical eye and considering how they could be improved will quickly improve your artistic eye and make you a better photographer.

The post 10 Most Common Mistakes in Landscape Photography – and How to Overcome Them by Anne McKinnell appeared first on Digital Photography School.


Digital Photography School

 
Comments Off on 10 Most Common Mistakes in Landscape Photography – and How to Overcome Them

Posted in Photography