RSS
 

Posts Tagged ‘Motion’

How to Capture Motion Blur in Photography (6 Tips)

19 May

The post How to Capture Motion Blur in Photography (6 Tips) appeared first on Digital Photography School. It was authored by Darren Rowse.

capture motion blur in photography

Are you looking to capture motion blur in your photography?

While photographing motion blur might seem difficult, it’s actually pretty easy; with a bit of camera know-how, you’ll be taking stunning photos like a pro.

capture motion blur photography

And that’s what this article is all about: giving you the tools and techniques you need to get beautiful results!

Note that motion blur can look great in any photography genre, so don’t try to limit yourself. Instead, embrace the power of the blur!

1. Slow down your shutter speed

Here’s the fundamental motion blur tip:

Use a slow shutter speed.

You see, the reason for motion blur is simply that your camera’s shutter remains open for a significant period of time. In other words: you get motion blur when your shutter speed is long, whereas you freeze the action when your shutter speed is short.

So the number one tip for capturing movement is to select a longer shutter speed.

motion blur in front of buildings

If your shutter speed is too fast (e.g., 1/4000s), you’re not going to capture much movement. But if you dial in a lengthy shutter speed (e.g., five seconds) you won’t need your subject to move much at all before you start to see blur.

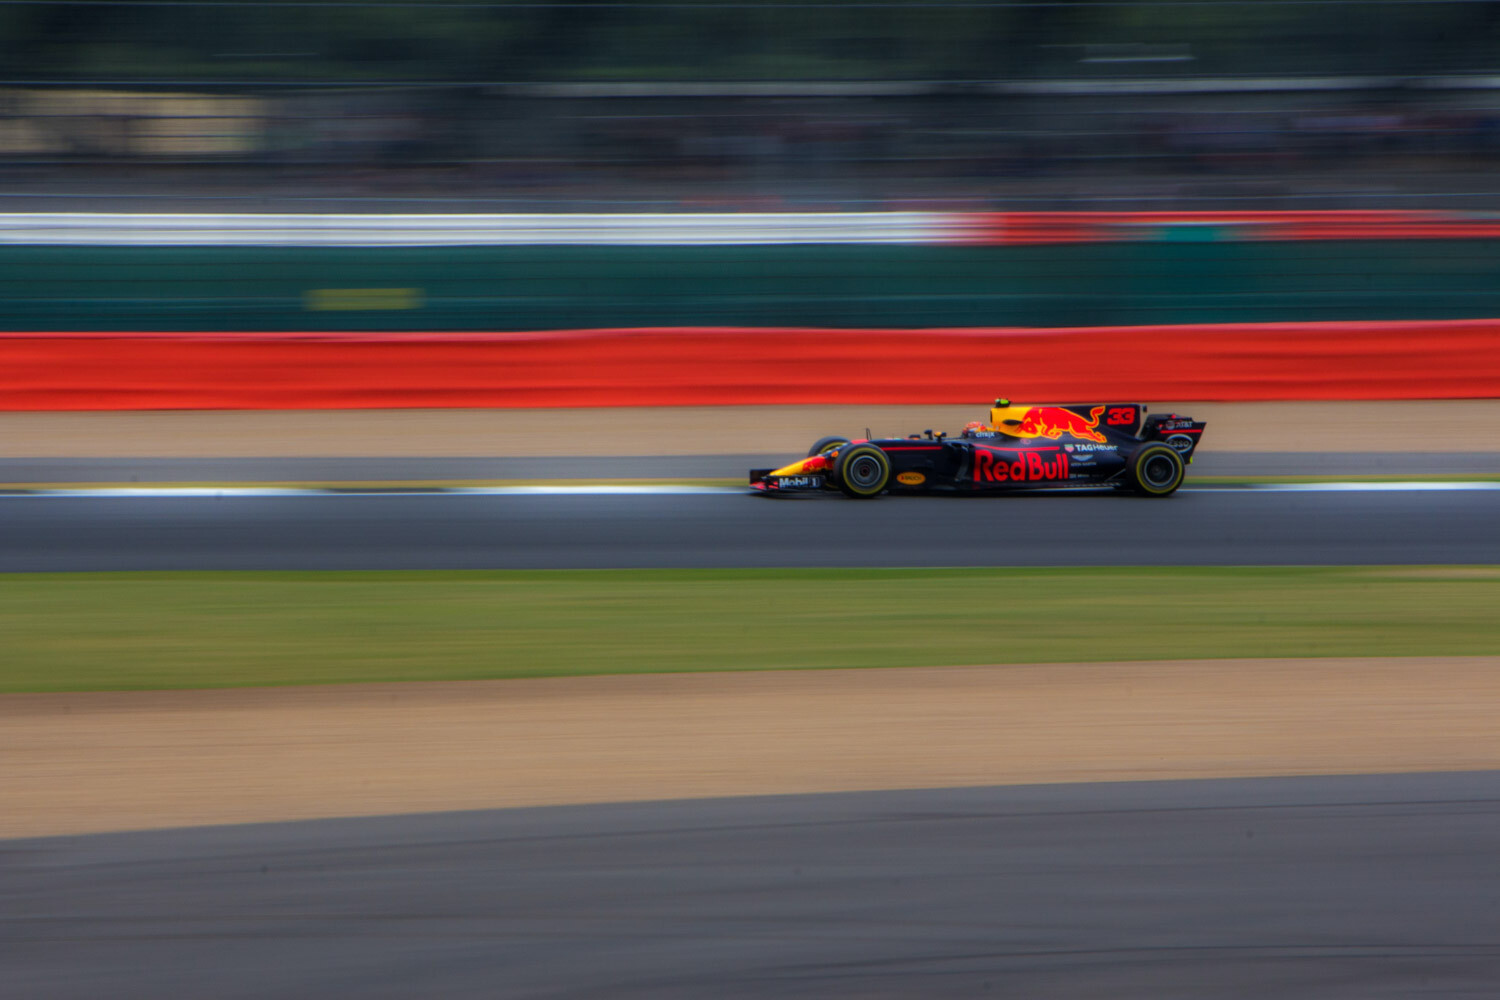
How long should your shutter speed be? Here, the speed of your subject comes into play. A moving snail and a moving racecar will give you very different results at the same shutter speed. The slower your subject, the slower the shutter speed needs to be to create blur.

The other factor that comes into play when determining shutter speed is how much light exists in the scene. A longer shutter speed lets more light into your camera and runs the risk of blowing out or overexposing your image. Below, we’ll cover some ways to let less light in (so you can use long shutter speeds without overexposure concerns).

Bottom line:

There’s no one-size-fits-all shutter speed for motion blur. It’ll depend on the speed of your subject, the brightness of the scene, and how much motion blur you want to capture. The key is to experiment!

2. Stabilize your camera

There are two ways to get a feeling of motion in your images:

  1. Have your subject move.
  2. Have your camera move.

But for the type of photo we’re after today, it’ll be the subject that’s moving. In such cases, you need to do everything you can to keep your camera perfectly still. Otherwise, you’ll capture a blurry subject – but you’ll also end up with a blurry background.

How do you stabilize your camera?

boats in the water

A tripod is ideal, but you can also place your camera on some other steady object (e.g., a table or a bench). I’d recommend using a remote shutter release or a self-timer mechanism; that way, you can trigger the shutter without touching your camera (because the more you touch your camera, the more likely it is that you’ll introduce blur).

3. Try Shutter Priority mode

As you know, the shutter speed is crucial to achieving a beautiful blurred look. Even small changes will have a big impact upon your shot – so you should use a camera mode that gives you full control over your camera’s shutter.

You have two options. First, you can switch your camera to full Manual mode. It’ll work well, and it’s a good idea for more experienced photographers – but in Manual mode, you’ll also need to select your aperture and ISO (and you’ll need to make sure that the shutter speed, aperture, and ISO interact to create a perfect exposure). So if you don’t yet feel confident working in Manual mode, you have another option:

Shutter Priority mode.

With Shutter Priority, you set the shutter speed (and the ISO, if you so choose), but your camera will set the aperture to ensure the shot is well exposed. It’s a very handy mode for motion blur photography because it ensures you get the movement effect you’re after while also capturing generally well-exposed images.

motorcyclist motion blur photography

How to compensate for long shutter speeds when there is too much light

Remember what I said about a long shutter speed?

The longer the speed, the more light that will get into your camera, and the brighter your photos will be.

So unless you compensate for this, whenever you try to capture motion blur, you’ll end up with overexposed shots.

Below, I’ll suggest three easy methods for preventing this overexposure.

(Note: A fourth method is to simply wait for the light to change – i.e., for it to get darker. Many shots that incorporate blur are taken at night or at dawn/dusk for this reason.)

1. Use a small aperture

Here’s the first, and simplest, method of preventing overexposure:

Narrow the aperture.

Because the narrower the aperture, the less light that will hit the camera sensor.

If you’re shooting in Shutter Priority, your camera will actually narrow the aperture for you. As soon as it detects a slow shutter speed, it’ll close down the aperture and deliver a well-exposed shot.

But if you’re shooting in Manual mode or Aperture Priority, the aperture can generally be changed via a dial on your camera.

One thing to bear in mind:

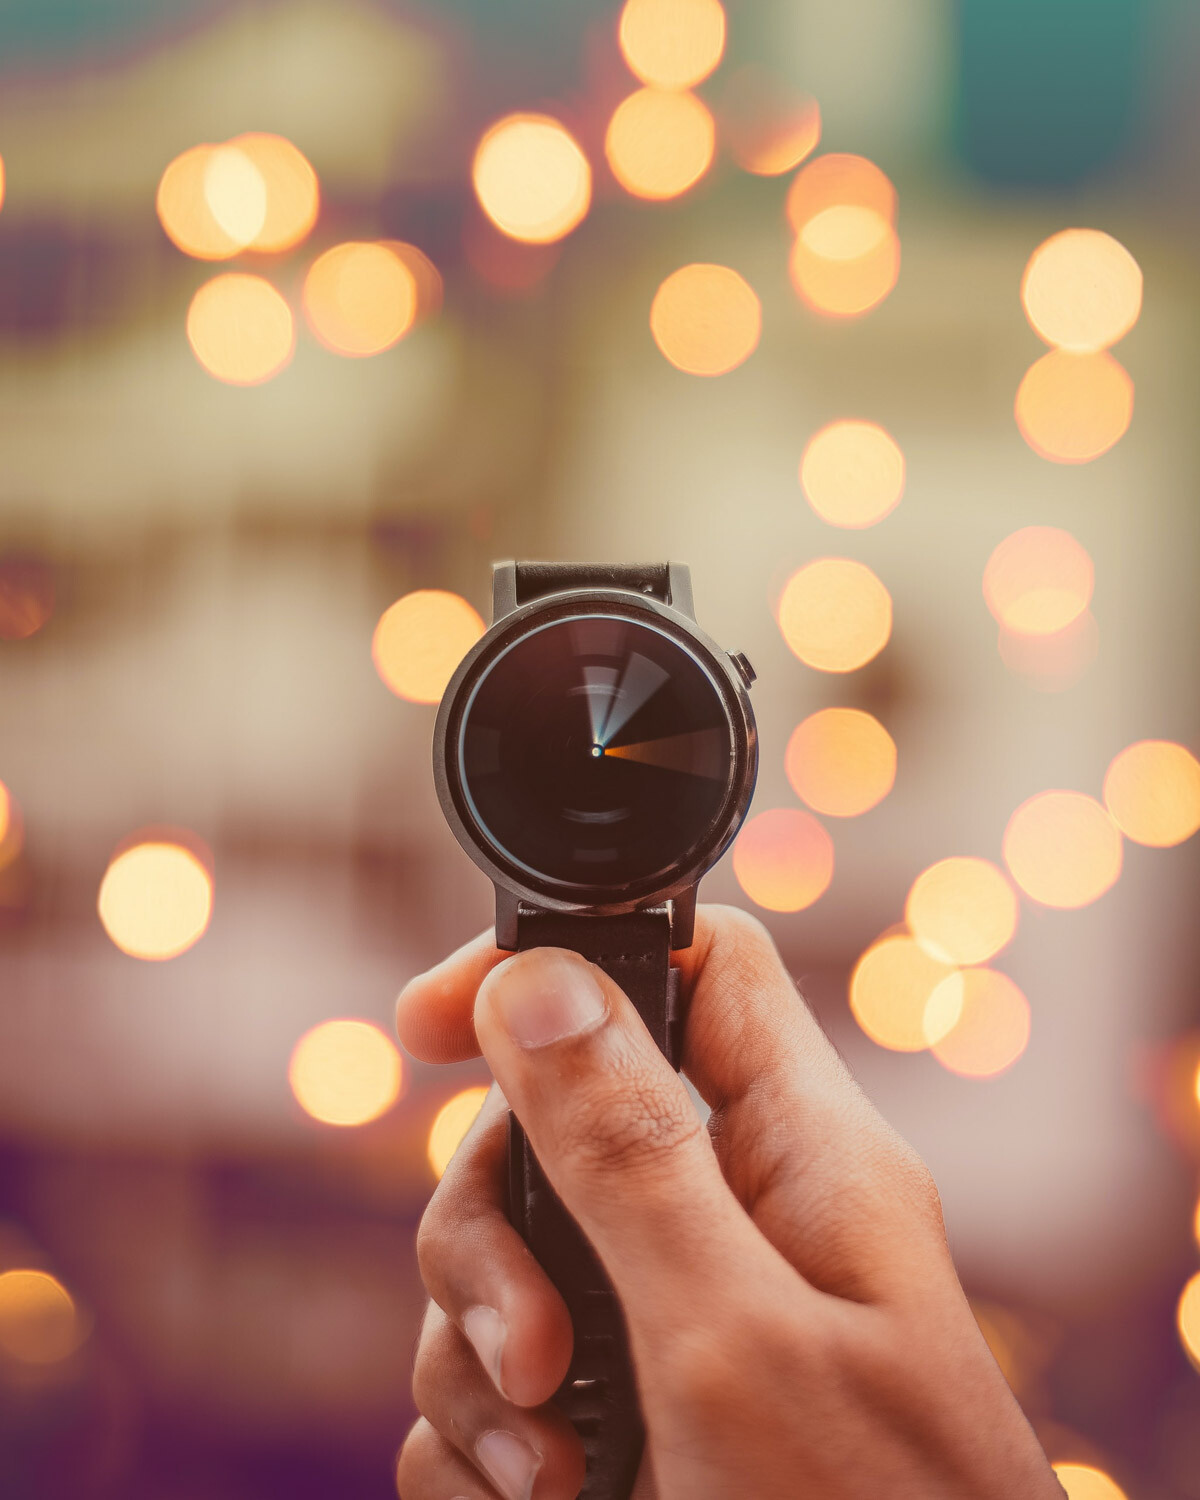
Adjusting the aperture won’t just affect your photo’s exposure. Aperture also affects the depth of field, which refers to the amount of the scene that’s sharp. A wide aperture creates a limited depth of field, like this:
watch with spinning hands capture motion blur photography

Whereas a narrow aperture ensures the entire scene is sharp throughout:

capture motion blur photography car driving

So while it’s easy to combine a deep depth of field with a well-exposed motion blur image, working with a shallow depth of field while also ensuring well-exposed motion blur can be tough. If you’re after a shallow depth of field effect, you’ll need to counteract overexposure another way, as I explain in the next section:

2. Decrease your ISO

If you’ve tried narrowing your aperture and still aren’t getting you the results you need, or if you’re after a shallow depth of field, here’s an alternative method for preventing overexposure:

Drop your ISO.

ISO impacts the sensitivity of your digital camera’s sensor to light, where a higher number will induce greater sensitivity (and therefore a brighter exposure) and a lower number will induce less sensitivity (and therefore a darker exposure).

train moving fast with platform

You can adjust your ISO in Manual mode or Shutter Priority mode, so simply dial in a low ISO (such as 100) and watch as your exposure decreases. Of course, there’s a limit to how low you can drop your ISO; once you get to ISO 100 or ISO 50, your camera won’t allow you to go any further. But it’s always worth checking whether a lower ISO is an option because it’s a simple way to prevent overexposure.

3. Try a neutral density filter

Say you’re after a motion blur photo, but you just can’t get the exposure dark enough. You’ve narrowed the aperture, you’ve dropped the ISO, but your shots keep coming out overexposed.

You still have another, more dedicated option:

A neutral density filter. It’s a piece of glass that blocks light from passing through your lens – sort of like sunglasses – and lets you use a long shutter speed while preventing overexposure.

For example, if you’re shooting a seascape in bright sunlight and you want to blur the water, you’ll end up with a blown-out, overexposed scene – even with a narrow aperture and low ISO. But pop a neutral density filter over your lens, and you can slow the shutter speed right down while keeping a perfect exposure.

long exposure seascape blur

(By the way, a polarizing filter can have a similar effect, though it’ll also impact the look of your images by cutting out reflections.)

Note that neutral density filters come in many strengths. You can get a basic, subtle ND filter, one that’ll slightly darken the scene. Or you can buy an ultra-powerful, 10-stop ND filter, which will allow you to dramatically lengthen your shutter speed in bright sunlight.

A quick note: two more creative techniques to try

If you want to capture images with motion blur but you’re looking to come away with uniquely artistic results, here are two other techniques to consider:

  • Slow sync flash. This lets you capture a relatively sharp subject while creating a moving, blurry background, and it’s a great way to create in-your-face shots.
  • Panning. Here, you simply follow a moving subject with your camera; the subject will generally come out nice and sharp, while the background stretches and blurs.
panning with motorcycle

Motion blur in photography: conclusion

Well, there you have it! Six easy tips to capture motion blur in photography.

So remember these tips. And the next time you’re after some creative motion blur photos, you’ll get stunning results!

Now over to you:

Have you tried taking motion blur photos? Did it go well? Do you have any tricks or tips? Share your thoughts (and images!) in the comments below!
capture motion blur photography racecar

The post How to Capture Motion Blur in Photography (6 Tips) appeared first on Digital Photography School. It was authored by Darren Rowse.


Digital Photography School

 
Comments Off on How to Capture Motion Blur in Photography (6 Tips)

Posted in Photography


A Beginners Guide to Capturing Motion in Your Photography

10 Nov

The post A Beginners Guide to Capturing Motion in Your Photography appeared first on Digital Photography School. It was authored by Darren Rowse.

Emily Hancock, a professional Hampshire Photographer, submitted the following tutorial on capturing motion in photography.

Motion-Photography-Introduction.png

(Image by T.MoE)

Photographs, by definition, capture and immortalize a small slice of life. There isn’t an easy way for the viewer to infer what happens before or after that moment. However, there are images that need to communicate motion.

For example, you may want to capture a dog running, a train barreling down the tracks, or trees blowing in the wind. Each of these scenes can come alive within your photographs if you learn how to convey motion properly.

Today, I’ll describe how you can use different shutter speeds and panning to capture motion in your photography. I’ll also explain a potential issue you might experience when photographing moving subjects – along with tips to resolve it.

Let’s get started!

Reasons to capture motion

Beginning photographers have likely seen captivating photographs that capture motion. There are several ways to achieve these photos, and each has a slightly different goal.

You see, sometimes there is a need to blur certain elements in the image while focusing sharply on a few subjects in the foreground. Other times, you may want to freeze or blur everything. The direction you take depends on your objective for your photograph.

A lot of photographers capture motion simply to convey that an object is moving. But there are also other reasons to do this. Movement can communicate mood. Trees rustling in the wind suggests serenity, while throngs of people on a busy city block implies hurried activity.

You can also use motion to eliminate elements in a scene that may serve as distractions to the viewer. For example, you may want to photograph a person standing on a sidewalk corner as cars move behind them. By blurring everything but your primary subject (i.e., the man on the corner), you can eliminate potential distractions and focus the viewer’s attention.

Two primary techniques for capturing motion in photography

The shutter speed you use while photographing a scene plays a key role in capturing motion in your image.

The faster the shutter speed, the sharper the focus on your subject. On the other hand, a slower shutter speed will blur a moving object. There are two main approaches here (though I’ll discuss a couple of alternatives in a moment).

1. Blurred subject with the background in focus

light trails
Photo by paulaloe

Let’s assume you’re photographing a speeding train against a wall of trees in the background. You can blur the train while leaving the trees in focus. Doing so would instantly communicate to the viewer that the train is moving quickly.

To accomplish this, you would use a slow shutter speed.

(It’s also important to use a tripod. That way, your camera remains steady.)

You’ll often see this technique used in nighttime photographs with car headlights cutting through the image.

2. Blurred background with the subject in focus

This second technique keeps your subject in sharp focus while the background is blurred.

Using our train example, the train would be in focus and the wall of trees would be blurred, thereby conveying the train’s movement.

Similar to the first method, you’ll need to use a slow shutter speed. However, instead of using a tripod, you’ll be panning your camera along the directional path of your subject.

But what actually is panning?

Panning explained

motion in photography biker moving fast
Photo by fabbriciuse

Most beginning photographers are trained to “secure” their cameras. That is, beginners are taught that the camera should remain as still as possible for certain types of shots.

By contrast, panning requires that you move your camera with your subject. Specifically, you’ll be matching your subject’s rate of movement and the direction in which it is traveling.

In our bike example, assume the man on the bike is moving from east to west. In that case, you’ll need to pan your camera in the same east-to-west direction, matching the speed of the bike. The best results occur when you have a clear view of the moving object and ample room to swivel your camera along a parallel axis.

Panning effectively can be difficult. You can practice and perfect your technique by photographing athletes who move quickly (for example, basketball players). Try to capture their facial expressions while blurring everything in the background. It will take some time to get it right, but once you do, the technique can be a valuable addition to your repertoire.

Other techniques to capture motion

Besides the two main techniques described above, you can also freeze the entire scene or blur everything.

Freezing the entire scene can give your photographs a unique look, especially if the objects strongly imply movement. For example, consider a bird flying in front of a waterfall. Both imply motion to the viewer. Freezing the entire scene captures all that motion and can produce a breathtaking image. You should use a shutter speed of at least 1/1000s for that type of shot.

slow shutter speed
Photo by llimllib

Blurring everything produces the best results when the scene offers bright, contrasting colors or varying tones. In most cases, capturing motion in this manner is done purely for artistic purposes.

Another effective method for capturing motion within your images is “chrono photography.”

skateboarder jumping
Photo by monkeyc

Using the continuous shooting feature on your camera, you can capture a series of shots and join them together in the post-processing stage to create the effect shown above. A tripod is essential when attempting to shoot motion using this method.

chrono photography
Image by Jolantis

Determine the proper shutter speed

A lot of novice photographers ask what the proper shutter speed is, given their objective.

But every situation is unique. One speed doesn’t suit all circumstances. To identify the right shutter speed, you’ll need to ask yourself a few questions:

  1. How fast is your subject moving?
  2. How much distance exists between the camera and the subject?
  3. How much motion do you want your photograph to convey to the viewer?

The faster the shutter speed, the more frozen and crisply-defined your subject will be. Most cameras today will allow you to freeze a scene using 1/8000s or faster.

That being said, the numbers only serve as a rough guideline. You’ll need to experiment with different shutter speeds in a variety of situations.

Potential issue: excess light

Here’s a potential issue you may encounter when trying to capture motion in photography:

When you slow your shutter speed to blur elements in your image, there’s a chance that too much light will enter and impact your photograph (which will result in overexposure).

This is a common problem, but there are a couple of ways to resolve it:

First, check the aperture on your camera. The wider it is, the more likely excess light will enter. Try adjusting the settings to reduce its size.

Second, review your ISO setting. When the ISO is high, the image sensor in your camera may be overly sensitive to light. This can create a too-bright image, as well as unwanted noise, so consider dropping your ISO.

Mastering the art of motion capture

Becoming proficient at capturing motion in photography requires practice and experience. You’ll need to spend time learning how different shutter speeds impact the quality of your images. Even if you’re just setting your camera on its tripod, timing a perfect shot of a fast-moving object can be difficult.

In the end, capturing motion in your photography is part technique and part art. Fortunately, with practice, you can master it!

The post A Beginners Guide to Capturing Motion in Your Photography appeared first on Digital Photography School. It was authored by Darren Rowse.


Digital Photography School

 
Comments Off on A Beginners Guide to Capturing Motion in Your Photography

Posted in Photography


RGKit Play is a modular motion control kit that’s already funded on Kickstarter

25 Sep

Argineering has launched a Kickstarter campaign for RGKit Play, ‘the first-ever modular wireless motion control kit that allows creatives to add movement to their design and camera.’ The campaign has already eclipsed its $ 50,000 funding goal by more than $ 25,000 at the time of writing.

RGKit includes motors, accessories, light controllers, sensors and a phone application and aims to simplify the process of creating mechanical motion. Argineering states that RGKit Play can be used for tasks such as videography and stop motion. Using the accompanying application, you can use RGKit Play to perform tasks such as moving your camera and a product while recording product video, rotating your camera around a subject and more.

In order to maintain stable and smooth movement, the RGKit Play has built-in motion stability features. Through the app, the user has precise control over distance, time and speed. The Camera Slider can carry up to 11 lbs. (5kg) and moves at up to 2″ (5cm) per second.

Using RGKit Play appears very simple. You mount the kit’s modules and accessories to your camera and fire up the app. Without needing to code, you can create a customized sequence of movements while adjusting speed, acceleration, duration, delay and more. There is also an automatic mode available. Accessories include a camera slider, pusher, pulleys, rotator, arms, rotator mounting, clamps, adjustable arms and more.

RGKit Play’s price depends upon the selected kit. The beginner kit, which does not include the camera slider, starts at $ 190 USD. The camera slider first appears in the RGKit Play: Videographer kit. This kit starts at $ 740 with early bird pricing. The eventual retail price for the Videographer kit will be $ 999. RGKit Play is scheduled to start shipping to Kickstarter pledgers in June 2021. To learn more about the RGKit Play and get details on each component and available configurations, head to Kickstarter.

Via DIY Photography


Disclaimer: Remember to do your research with any crowdfunding project. DPReview does its best to share only the projects that look legitimate and come from reliable creators, but as with any crowdfunded campaign, there’s always the risk of the product or service never coming to fruition.

Articles: Digital Photography Review (dpreview.com)

 
Comments Off on RGKit Play is a modular motion control kit that’s already funded on Kickstarter

Posted in Uncategorized


DPReview TV: Syrp Genie One motion control and pan head review

18 Jul

The Syrp Genie One is a motion control system for creating automated time-lapse sequences or live-action video. In fact, it could even turn your existing slider into a programable motion control rig.

Subscribe to our YouTube channel to get new episodes of DPReview TV every week.

  • Can Chris pass as a Kiwi from New Zealand?
  • Introduction
  • User interface
  • Time-lapse examples
  • Design and functions
  • Time-lapse functions
  • Live action function
  • Compared to the competition
  • One last time-lapse!

New to time-lapse? Watch our Introduction to time-lapse photography episode!

Watch our introduction to time-lapse photography video

Articles: Digital Photography Review (dpreview.com)

 
Comments Off on DPReview TV: Syrp Genie One motion control and pan head review

Posted in Uncategorized


3 Reasons to Introduce Motion Blur Into Your Photography

20 May

The post 3 Reasons to Introduce Motion Blur Into Your Photography appeared first on Digital Photography School. It was authored by Kav Dadfar.

dps-reasons-to-introduce-motion-blur-in-photography

Making a still image come to life can be a difficult task, especially if you don’t know the full functionality of your camera. When you’re first learning photography, it quickly becomes second nature to keep everything perfectly in focus, so you don’t instantly know how, why, and when to introduce motion blur to your images. But before you introduce motion blur, first, let’s learn what it is and how to do it.

3 Reasons to Introduce Motion Blur Into Your Photography
f/6.3 – ISO 160 – 1/100 sec

What is motion blur?

First and foremost, motion blur is a lot different than a blurry image. If you shake the camera around or your subject starts to move right as you open the shutter, that creates a blurred image, but not necessarily motion blur.

Motion blur is when you purposely create an aspect of movement for your subject, but the rest of the photo is in focus. This is a really important element that makes the difference between motion blur and just a blurred image. Without some part of your photo being sharp, then your foreground and background are going to blend together and the photo won’t work.

Motion blur should also happen to something that the viewer would naturally assume is moving, like a car or a person running. Adding motion blur to something that is typically stationary, like a book or a salt shaker that is on a table, will seem awkward. Even though seeing a salt shaker move at the speed of light is an interesting idea, it won’t really make any sense to the viewer.

Now that we have the basics down, here are 3 reasons why you should introduce motion blur to your photography.

Introduce-motion-blur
f/8 – ISO 400 – 1/40 sec

1. It tells a story

When done correctly, motion blur enhances the storytelling capability of a photo.

Imagine that you’re shooting at a horse racing track. You’re standing at an angle near the finish line, and when the two runners pass you, you compose your shot with them both in the frame and the finish line in the background.

If you introduce motion blur correctly in
your photo, then you’re going to have an awesome shot of the two runners in
motion, slightly blurred as if they are still running despite being frozen in
time. The finish line may even be in focus, along with the spectators.

This brings the viewer into the shot like they are standing right alongside you to see the race to completion. It tells the story of what you witnessed that day.

If done incorrectly, you’ll just get a blurred photo of two blobs running toward another blob. The elements in the photo will blend together and you’ll barely be able to understand what is happening in the first place.

3 Reasons to Introduce Motion Blur Into Your Photography
f/2.8 – ISO 4000 – 1/80 sec

2. It adds action to your photography

Another great reason for adding motion blur to your photos is to convey a sense of “action” or “movement.” This can make your photos seem much more dynamic.

For example, imagine a dirt bike that is roaring around the side of a mountain. Imagine seeing the blurred dirt bike racing along the path while the mountain itself is in perfect focus. It almost makes it look like the dirt bike is rocketing through the frozen image, or that you’re present to witness the moment yourself.

Or, for example, imagine a dancer. If you introduce motion blur, you can show the viewer the movement that is taking place. It could be that he or she is spinning, moving their arms, or even jumping. Having the right amount of motion blur can bring the dancer to life in your photo.

You’ll need to select a slower shutter speed than you would do normally to get this to work properly. The exact settings will depend on the speed that your subject is moving at. For the bike example above, you won’t need a shutter as slow as you would need for someone walking for example.

Introduce-motion-blur
f/4 – ISO 200 – 1/200 sec

3. It can create a wonderful effect

If you set up your camera when the lighting conditions are dark, and set a slow shutter speed so that you have a longer exposure, you can create streaking lights that not only tell a story but also look fantastic.

First, you need to make sure that you have a steady tripod. Without it, you won’t get anything other than a completely blurred picture unless you raise your ISO ridiculously high. The problem with doing that is the amount of unwanted noise that you will end up with being in your photo. So if you want the best photo possible, use a tripod.

The long exposure will mean that any vehicles that drive past will create a streaked-light effect, or the stars above will streak across the frame as the Earth rotates.

Attempting this during the day won’t work unless you use a neutral density filter like a Lee little or big stopper. Without a filter, you will just end up with a completely blown out (white) image. Even if you do get it to work, it would not have the same impact as when it is darker.

Introduce-motion-blur
f/8 – ISO 100 – 5 sec

Getting the hang of motion blur photography isn’t very difficult. But to do it well will require practice. So, experiment a little when you introduce motion blur to your photography and keep these reasons in mind to help push you along in your trials! With experience, you’ll get to learn how and when to best introduce motion blur to your photography.

The post 3 Reasons to Introduce Motion Blur Into Your Photography appeared first on Digital Photography School. It was authored by Kav Dadfar.


Digital Photography School

 
Comments Off on 3 Reasons to Introduce Motion Blur Into Your Photography

Posted in Photography


Edelkrone launches JibONE motion control with mobile app and motorized head support

22 Jan

Edelkrone has launched a new app-controlled jib called JibONE that can be used with the HeadONE and HeadPLUS motorized heads for capturing a variety of shots. The jib supports 50cm (19.6in) of horizontal, vertical and diagonal motion in any direction, including looping motion. Despite its capabilities, Edelkrone says the model is compact enough to store in a backpack.

The JibONE is made from CNC machined aluminum and stainless steel; it measures 61 x 17 x 15cm (24 x 6.7 x 5.9in) when folded and weighs 5.5kg (12lbs) when used with the 1kg (2.2lbs) counterweight. Edelkrone recommends that users keep their setup load to less than 5kg (11lbs). The company says that all DSLR models are compatible with the JibONE.

HeadONE and HeadPLUS motorized heads used with the JibONE.

Operators have two different battery options to choose from for powering the JibONE: LP-E6 and NP-F batteries. Battery life varies based on which are used, but when the JibONE is powered with two Canon LP-E6 14.4Wh batteries (for a total of 28.8Wh), users can expect two hours of continuous operation at full speed or up to 12,000 still images when used in time-lapse mode.

Connectivity comes in the form of Bluetooth LE which enables users to control the jib using an iPhone running iOS 11 or newer or an Android handset running version 5.0 or later. The mobile app offers a simplified interface for recording poses, setting up motion loops, adjusting speed and more. Users can also program camera motions with the jib by manually adjusting the device.

The JibONE is available from Edelkrone now for $ 1000.

Articles: Digital Photography Review (dpreview.com)

 
Comments Off on Edelkrone launches JibONE motion control with mobile app and motorized head support

Posted in Uncategorized


Back to Basics: Deciphering Shutter Speed and Motion

27 Nov

The post Back to Basics: Deciphering Shutter Speed and Motion appeared first on Digital Photography School. It was authored by Adam Welch.

back-to-basics-shutter-speed-and-motion

One of the things I love about photography is its simplicity. Now, I know that might be a contested statement in today’s seemingly endless world of digital photography. There are hundreds of cameras, likely thousands of lenses and virtually limitless combinations of the two. Not only that, but there are so many ways we can use our cameras. Landscapes, portraiture, street photography, architectural, abstract, wildlife, nature…the list continues. And yet, for all it’s technological and creative facets, the basics of photography remain alarmingly simple even today.

shutter-speed-and-motion-beginner-tutorial

The principles of aperture, shutter speed, and ISO constitute something called the “Exposure Triangle” and yes, I know, you’ve probably heard of it before today. The thing is, it is often these most fundamental nuances of photography that present themselves with the most difficulties, especially for beginners (and some pro) in photography.

It’s shutter speed and motion that we will be discussing today in this edition of “Back to Basics”. To be more precise, we’re going to be talking about the ways shutter speed relates to motion so that you will gain a more concrete understanding of how shutter speed affects your photos.

Shutter speed or shutter time?

Many years have passed since then, but I still remember how confused I was the first time I understood that shutter speed had absolutely nothing to do with how fast the shutter of my camera opened and closed.

Up until then, I had intuitively assumed that some cameras were simply made with faster shutters than others. I mean, come on, give me a break! I was new.

Anyway, I finally realized that shutter speed refers to the amount of time the shutter remains open…and not how fast it mechanically opens or shuts. So many concepts about shutter speed seemed to click (pun intended) in my mind.

shutter-speed-and-motion-beginner-tutorial

One of the greatest epiphanies brought about by this sudden revelation was the direct relationship between the time the shutter is open and how apparent subject motion became within my images. In reality, Einstein was right when he put forth that everything is indeed relative.

So, in a way, there are no slow or fast shutter speeds. There are only longer or shorter shutter times relative to the inherent motion of your camera and subject.

Let’s drill down a little deeper on this.

Shutter speed and the effects of motion

For just a moment, let’s pretend you are the fastest runner in the world – absolutely no other human can beat you in a race. That’s great.

But now I want you to picture yourself running next to a cheetah.

Suddenly, your speed doesn’t seem quite so fast, but let’s not stop there. Let’s say that cheetah decides to race the world’s fastest jet plane, and the jet wins every time. Then put that furiously fast jet up against the speed of light, and, well, you get the idea.

The point is, your camera’s shutter speed interacts with motion in the exact same fashion.

Back to Basics: Deciphering Shutter Speed and Motion

A shutter speed (or think shutter time) of 1 second is no problem at all when your camera is mounted securely on a tripod. Take the camera off the tripod and shoot handheld at the same shutter speed, and it becomes difficult not to introduce camera shake into the image.

The same is true for subject movement; we can blur or freeze motion depending on our selected shutter speed.

shutter-speed-and-motion-beginner-tutorial

Perceivable subject motion is due to the relationship between the amount of time the shutter is open and the speed of the subject itself.

Practical examples

Let’s pick a shutter speed randomly; we’ll say it’s 1/60th of a second. If you’re shooting a still object which has absolutely no motion in relation to your camera, like this switched off ceiling fan, then everything appears calm and still.

Back to Basics: Deciphering Shutter Speed and Motion

For the time being, we’re just going to pretend that you love shooting photos of ceiling fans. So you decide to snap another image with the fan now switched on, and the situation changes.

The blades of the fan are now moving through space much faster than 1/60th of a second shutter speed can capture with the result being perceived blurring of the blades.

Image: At 1/60th of a second, the blades have blurred

At 1/60th of a second, the blades have blurred

This is where Einstein sweeps in to save us. All we have to do to take control of the motion of the blades is to make our shutter speed faster than the speed of those ceiling fan blades. Let’s dial it in.

shutter-speed-and-motion-beginner-tutorial

At 1/125th of a second, the motion begins to become less pronounced…

Image: …and 1/500th of a second all but completely freezes the motion of the blades. Another s...

…and 1/500th of a second all but completely freezes the motion of the blades. Another stop faster (1/1000th) and the motion would be completed arrested.

The implications of this are absolutely profound for you and your photography. Once you understand that shutter speed is the deciding factor in controlling the amount of perceived subject motion in your images, you can then control how apparent that motion appears in your photo.

How does shutter speed relate to ISO and aperture?

So how exactly does the shutter speed play into the whole Exposure Triangle thing? I’m glad you asked.

All of the pieces of the Triangle: ISO, aperture, and shutter speed; all of them determine the amount and duration of light that enters your camera. Each of these factors complements each other in that you can achieve similar exposure outcomes by adjusting the variables in relation to one another. In our case, since we’re dealing with shutter speed, we’ll be needing to adjust our aperture and/or ISO to compensate for our shutter speed selection.

shutter-speed-and-motion-beginner-tutorial

Entire articles (and books) here at Digital Photography School have been written on each of these subjects, so I’ll be brief. But be sure to check out this cool cheat sheet on the Exposure Triangle for more info.

Simply put, for every full stop of adjustment in shutter speed you make, you are either doubling or halving the amount of light which enters your camera. This means a shutter speed of 1/250th of a second is twice as fast and lets in half the amount of light as 1/125th of a second.

Alternatively, a shutter speed of 1/60th of a second is approximately twice as slow as 1/125th, and therefore lets in double the amount of light. So, 1/250th of a second is one stop faster than 1/125th of a second with 1/60th of a second being one stop slower.

You still might be saying, “but what does this have to do with aperture and ISO?” We’re about to find out, I promise.

The connection comes into play when you realize that ISO and aperture are also measured in stops, albeit in slightly different ways, but in stops nonetheless. This means that we can directly relate shutter speed to our ISO and aperture by thinking in terms of stops.

shutter-speed-and-motion-beginner-tutorial

Let’s say we are shooting a moving subject at 1/60th of a second at F/5.6 and ISO 100. The image is exposed correctly, but the subject is blurred. We find that a shutter speed of 1/250th of a second (two stops faster) will freeze the motion, but it also leaves our scene underexposed by two stops since we have effectively decreased the amount of light by a factor of four.

To maintain our exposure, we must somehow compensate for the reduced amount of light from the faster shutter speed by either increasing the ISO by two stops or shoot an aperture that is two stops wider than F/5.6. So to maintain the same exposure, our new exposure settings would be either 1/250th of a second at F/2.8 and ISO 100 or 1/250th of a second at F/5.6 and ISO 400.

Some considerations for shutter speed

Here are a few helpful tips that you should keep in mind when it comes to shutter speed. Some of these are simply good everyday practices, and others might be new to you.

  • The longer the focal length of your lens (higher zoom), the more apparent subject motion and camera shake will become. So plan accordingly if you are intending to employ longer shutter speeds by making sure you have a sturdy tripod and even a remote shutter release for your camera.
  • At times there will be situations when you can’t equalize your exposure using your camera settings alone and still achieve the level of motion you want for your final photos. This is where a good quality neutral density filter will truly be worth its weight in gold. I recommend keeping at least one in your bag no matter what sort of photography you shoot.
  • When shooting long exposures of the night sky, make use of the “600 Rule” to approximate the longest shutter time possible before stars begin to streak based upon your lenses’ focal length. The 600 Rule states that 600 dived by your focal length will give you an approximate maximum shutter speed from which you can base your other exposure factors.
  • Reduce camera shake when shooting handheld by implementing what’s known as the “Reciprocity Rule”. Simply put, this guideline states that you should not shoot a shutter speed which is slower than 1 over your focal length. This means that with a full-frame sensor and an 85mm lens, you should never shoot slower than 1/85th of a second. If you’re using a crop sensor camera, then the formula would be 1 over (focal length x sensor crop factor). You can find the crop factors for virtually all digital camera sensors with a quick web search.
  • Use mirror-lockup (if your camera has this feature) when making long exposures. In DSLR/SLR cameras, the mirror mechanism flips out of the way during exposure. This can cause camera shake, especially when using a lightweight camera and lens setup. Mirror-lockup moves the mirror out of the way prior to exposure so that the camera remains as steady as possible.
  • Cover your viewfinder during extremely long exposures. Much like mirror-lockup, DLSR/SLR cameras make use of an optical viewfinder which means light can creep in through the viewfinder during long exposures. It’s a good idea to cover the viewfinder with tape, a lens cloth, or the dedicated viewfinder cover that comes attached to some camera straps should you be shooting ultra-long exposures (upwards of a minute or more) to ensure stray light doesn’t ruin your exposure. Some older film DSLR cameras actually have a build-in viewfinder cover for this exact reason.

Summing up shutter speed

If you’re just getting into photography, I hope this article on deciphering shutter speed and motion helps to demystify some of the enigma surrounding shutter speed (time) and aids you in becoming a more confident photo maker.

If you’re a seasoned photographer, then hopefully the information here will serve as a gentle refresher course on just how simple it is to control your photos using only the most basic of photographic principles.

Shutter speed is directly related to motion and therefore becomes a relative construct based on the inherent motion in our scene (or camera). Depending on the desired outcome, we can control the perception of this motion using our shutter speed.

Shutter speeds that are relatively slower than the motion in the scene will cause blurring. Shutter speeds relatively faster than the motion within the scene will freeze that motion. That is truly priceless knowledge, and once you learn how shutter speed interacts with aperture and ISO, you will be able to have virtually complete control over your photography. Once you understand the basic fundamentals of photo making, everything else becomes almost secondary.


Do you have any other tips on shutter speed and motion that you would like to share? Please do so in the comments!

The post Back to Basics: Deciphering Shutter Speed and Motion appeared first on Digital Photography School. It was authored by Adam Welch.


Digital Photography School

 
Comments Off on Back to Basics: Deciphering Shutter Speed and Motion

Posted in Photography


3 Basic Steps for Photographing Motion, Moving Objects and the Art of Panning

30 Sep

Photography is one of the most powerful arts of all time. It gives time a meaningful value, some might say even more valuable than memories. Photos can express deep emotional features of places, things, people, and objects. They are part of our legacy to the future generation. But it’s not all about the future, or the past. It’s about capturing Continue Reading

The post 3 Basic Steps for Photographing Motion, Moving Objects and the Art of Panning appeared first on Photodoto.


Photodoto

 
Comments Off on 3 Basic Steps for Photographing Motion, Moving Objects and the Art of Panning

Posted in Photography


Elinchrom launches ELM8 portable continuous LED light from Light & Motion

06 Aug

Elinchrom has launched its new ELM8, a continuous LED light that it claims is the ‘most portable, powerful and progressive modular system’ of its kind. The ELM8 was made in partnership with LED light manufacturer Light & Motion and is fully integrated with Elinchrom’s existing lighting system.

The ELM8 is battery-powered and compact, measuring 20.5 x 9.6 x 9.6cm (8 x 3.7 x 3.7in) and weighing only 1.2 kg (2.6 lbs). When fully charged, Elinchrom says the light can run for between 50 and 245 minutes (around 4 hours) before needing recharged, a process that takes two hours.

The ELM8’s specifications include:

  • CRI: 93
  • TLCI: 94
  • Color Temp: 5600 K
  • LUX: 16320 (at 1m w/Fresnel)
  • Light Output: 8000 Lumens
  • Native Beam Angle: 120°
  • Water Resistance: IP54
  • Impact Resistance: 1m (3.2ft)
  • Charge Time: 2hrs
  • Radio Control: Skyport Protocol
  • Distance Range: up to 100m
  • Skyport: 20 Frequencies / 4 Groups
  • Phottix: Phottix Odin II Transmitter

Elinchrom has a number of accessories that work with the ELM8, including multiple reflectors, diffusers, the company’s micro USB charger kit and a remote control. The ELM8 continuous LED light is available now for €1379 ($ 1699 USD).

Articles: Digital Photography Review (dpreview.com)

 
Comments Off on Elinchrom launches ELM8 portable continuous LED light from Light & Motion

Posted in Uncategorized


Syrp’s Genie Mini II portable motion control system adds USB-C and improved connectivity

27 Jun

Syrp has unveiled Genie Mini II, a sequel to the original pocket-sized camera motion controller introduced in 2016. The second generation model retains the same general design and features as the original, but with the inclusion of USB-C instead of micro USB, Bluetooth 4.2 instead of Bluetooth 4.0, and WiFi.

The Genie Mini II offers the same portable panning functionality as the original, enabling filmmakers to capture smooth motion in real time and photographers to capture time-lapses. The motion control system supports multi-row panorama capture, offers Astro Time-Lapse and HDR modes, and offers an Ease In/Ease Out feature.

The device works with Syrp’s Genie 2 app for Android and iOS offering keyframed motion control in addition to various presets for easily initiating shooting sessions. According to Syrp, the new Bluetooth 4.2 support makes it possible for advanced users to ‘advantage of more complex, custom motion control settings and multi-row panoramas to create 360/VR images.’

The Genie Mini II, which has a total load capacity of 3.9kg (8.8lbs), is designed to sandwich between a tripod and camera. The device is powered by an internal lithium-ion battery capable of powering six hours of continuous smooth panning, an increase from the previous version’s five hours, or up to a 15-hour time-lapse, a noticeable decrease from the original’s 24-hour duration. The new model has a max 360-degree capture speed of 33 seconds.

Syrp has launched the Genie Mini II for pre-order at the same $ 249 price as the original model.

Articles: Digital Photography Review (dpreview.com)

 
Comments Off on Syrp’s Genie Mini II portable motion control system adds USB-C and improved connectivity

Posted in Uncategorized