If there is one thing I wish I would have spent more time learning early on in my time with Lightroom, it’s the adjustment brush.
Lightroom is an incredible editing tool, arguably the easiest one to use, and the quickest to learn. The one thing that took me a while to wrap my head around when starting out, was how to use the Adjustment Brush. In this article I’d like to share a quick excerpt from the new Lightroom Mastery course I created for Digital Photography School. I hope you find it helpful.
Why the Adjustment Brush is Great
Lightroom excels at making changes to the entire image (global adjustments) super simple and effective. It really becomes a joy to use Lightroom once you get the hang of it. Need to pull up the shadows in an overly-contrasty image? No problem; just pull up the shadow slider. Need to correct for overexposure? Easy – just drop the exposure slider.
But what do you do when you need to make a change to a very specific area (local adjustments), and you don’t want that to affect the rest of the image? This is exactly when you want to call upon the power of the Adjustment Brush.
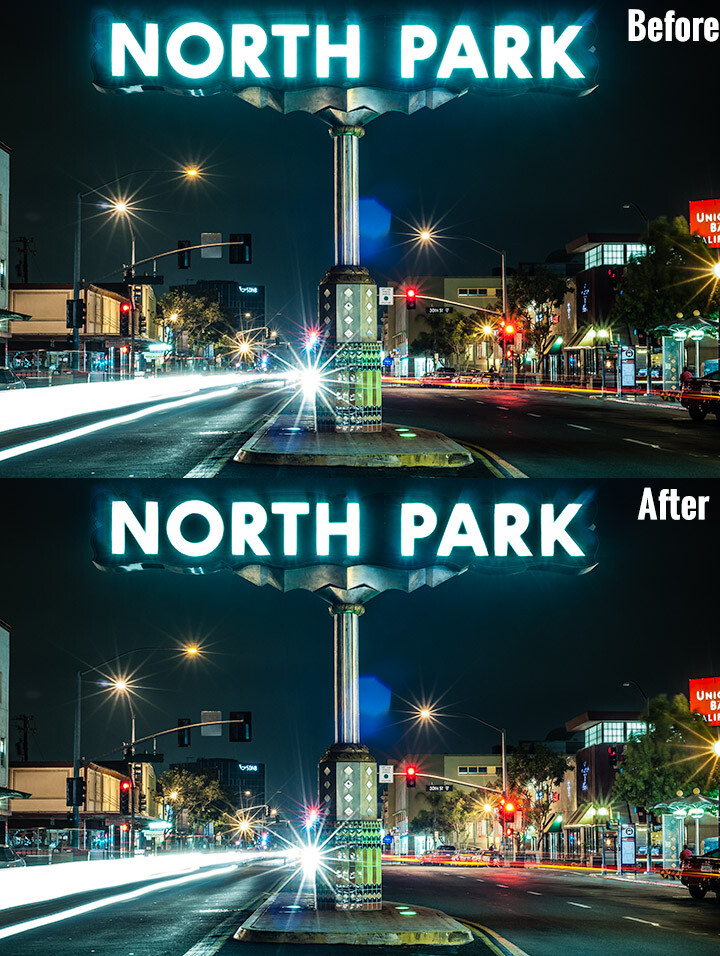
Look at the difference an adjustment brush made in the sign, as well as brightening up the lower right corner of this image.
How the Adjustment Brush Works
Instead of making a global change to the entire canvas, the Adjustment Brush enables you to get very specific and just paint over where you would like to make changes.
This sounds simple, but is incredibly powerful – you now have the ability to affect big change in many different areas of your image, without resorting to bouncing the image over to Photoshop. Hey, I’m all about simplicity, and if I can get all my edits done in one program versus two, I’m all in!
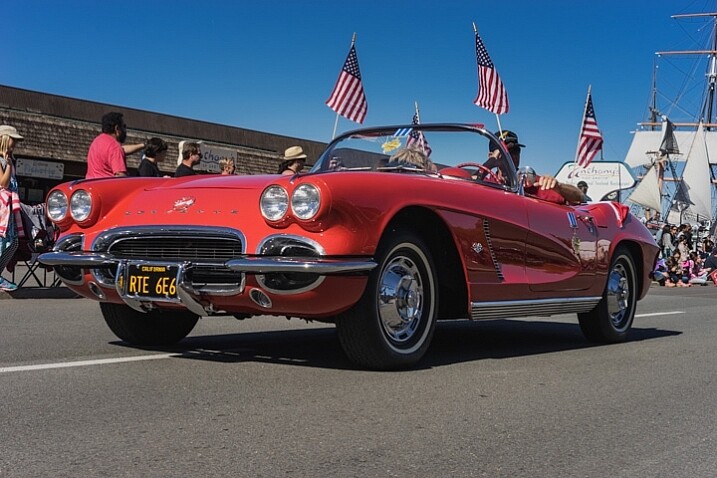
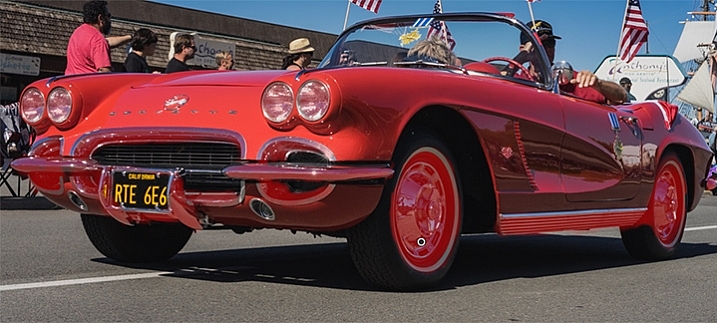
A Perfect Example – Corvettes and Chrome
A good friend had just come to visit me from China, we decided to walk around the neighborhood and managed to catch a parade. It may not look like it, but this was in November in San Diego, one of the benefits of fair weather every day. I caught this image of this beautiful car driving by:

I darkened the sky a bit and applied some more contrast to the ground and ended up with this:
That looks good, but the photo really wasn’t capturing how bright the chrome wheels and bumper accents were. In short, I needed to do some local editing on just those pieces. Adjustment brush to the rescue!
Time to Shine – Creating a Chrome Adjustment Brush
Deciding where to start when creating your custom brush
I knew the key to making this photo pop was getting that chrome to come back to life. I first clicked into my Adjustment Brush window (hit K on your keyboard or select the Brush tool from the top of the right hand panel in the Develop Module) and reset all the sliders back to zero. Since the wheels were not facing the sun, they were underexposed and caught in shadow.
Creating the brush itself
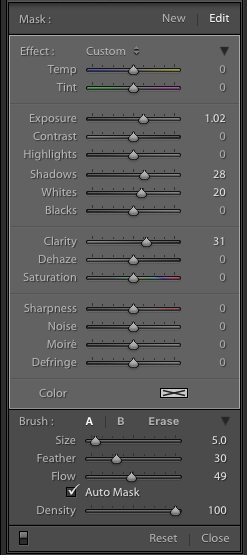 I decided to increase the exposure +1 stop, bump the shadows up to +28 to correct the darkness, and increase the whites to +20 to make the highlights in the chrome pop.
For good measure I increased the clarity to +30 to make sure the edges in that chrome highlights were nice and snappy. Here is what the adjustment window looked like before I started painting (see right)
This was an educated guess as to what I thought would work. If this worked well, I could leave it. If it didn’t, I could always move the sliders after painting, to change it as necessary.
Painting with the Adjustment Brush – best practices
There are a few guidelines I like to follow when painting with the Adjustment Brush. Here a few helpful tips to make this easy:
- Use a brush size that is a bit smaller than the area you are trying to paint. It helps if you don’t “color outside the lines”, although that is an easy fix if you do. A quick tip here: if you use a mouse with a scroll wheel you can change the size of your brush by scrolling up and down. It works the same with my Apple magic mouse.
- Check the box for Auto Mask if you are painting something with fine edges you don’t want to go over. Auto Mask does a good job of keeping your brush inside the lines even if you go outside, which saves time.
- I like to see the mask I’m painting versus the effects of the mask I’m painting. To have the mask show up in red either click Show selected mask overlay or simply click the O key on the keyboard to toggle the mask on and off.
Let’s get painting!
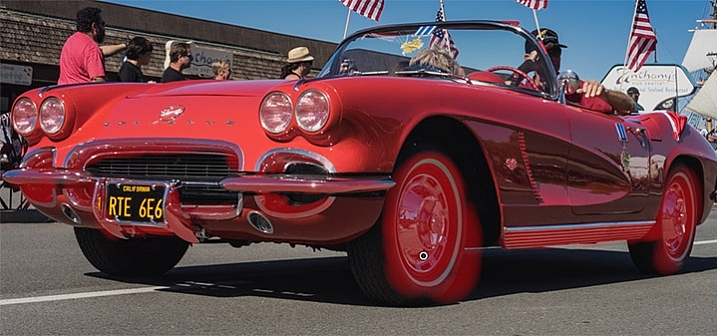
I quickly painted over the wheels, front bumper, headlights, and any other chrome I could find. It’s a bit difficult to see, since the mask is nearly the same color as the car (you can change the mask color by clicking Shift+O repeated times until you find a better color) but here is what the mask looked like after my initial run:
Using the eraser tool to clean up mistakes
Wow, I’m apparently terrible at coloring inside the lines! In all reality, going outside the lines on this image didn’t make a noticeable difference, but we might as well do this right.
To clean up areas where you’ve overpainted all you have to do is click Erase in your Adjustment Brush window. This will pull up a brush that will erase the mask area when you paint over it. This is important: make sure to click click the A or B brush after using the eraser so you don’t forget and start painting over areas with the eraser versus the brush by accident!
After a quick clean-up I ended up with this, which is much better:
Let’s turn off the mask and see how it looks
Remember, to turn off the mask you can simply click the O key on your keyboard. Here you see my image after the adjustment brush has been applied:

Much better! The chrome wheels and bumper are much brighter now, and look a lot better. The only thing I don’t like now, is how dark the drivers-side door is.
It’s a pretty easy fix to create a new brush to bring up the shadows, so I’ll do that.
Starting a new mask in the same image
It’s important to think of masks like layers. The wheels and bumpers are painted with one mask, that has one group of settings.
If I want to make a new adjustment brush with different settings for the door, I need to create a new mask, as opposed to just moving the sliders around. If I move the sliders around without creating a new mask, that will make changes to the current active mask (my wheels and bumpers).
To make a new mask just click New at the top of the mask menu. I only increased the exposure setting to +1 to add a full stop of light to the side, painted over the door and rear of the car, and got this:
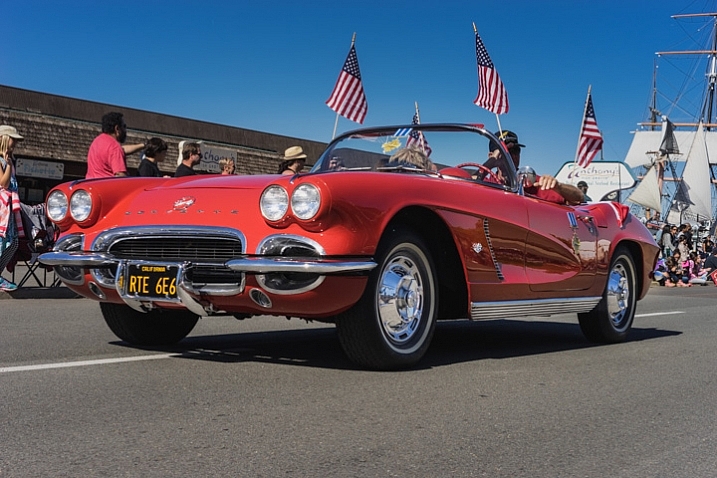
Let’s compare that to the second edit before I used any adjustment brushes:
Before Adjustment Brushes were applied.
Much better!
This is just one simple example, the sky’s the limit!
There are endless possibilities with the adjustment brush. I could have changed the color of this entire car if I wanted to as well.
You can lighten up dark areas of images and vice versa. You can apply sharpening or clarify to individual areas. You can do a whole host of beauty editing like whitening teeth, giving eyes more color, and more.
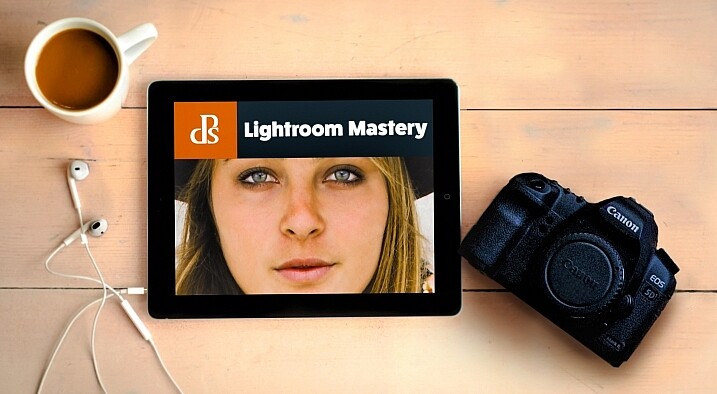
If you found this helpful, you will LOVE the new DPS Lightroom Mastery course!
There are far too many excellent tips to learning how to master Lightroom to include in a blog post, so Digital Photography tasked me with creating the best and most comprehensive Lightroom video course on the web!
In Lightroom Mastery I break down everything in Lightroom and teach you more in three hours, than most photographers learn in years. I cover every module, tool, tip, and trick from my 10 years using Lightroom.
During the initial launch, dPS is doing a huge 50% discount on the course! The price will regularly be $ 99, but during this special launch it’s only $ 49!
Go grab the course before the sale is over
You can click this link to learn more about what is included in the course, watch a preview video, and purchase the course!
googletag.cmd.push(function() {
tablet_slots.push( googletag.defineSlot( “/1005424/_dPSv4_tab-all-article-bottom_(300×250)”, [300, 250], “pb-ad-78623” ).addService( googletag.pubads() ) ); } );
googletag.cmd.push(function() {
mobile_slots.push( googletag.defineSlot( “/1005424/_dPSv4_mob-all-article-bottom_(300×250)”, [300, 250], “pb-ad-78158” ).addService( googletag.pubads() ) ); } );
The post Lightroom Mastery: The Power of the Adjustment Brush by Mike Newton appeared first on Digital Photography School.

Digital Photography School

You must be logged in to post a comment.